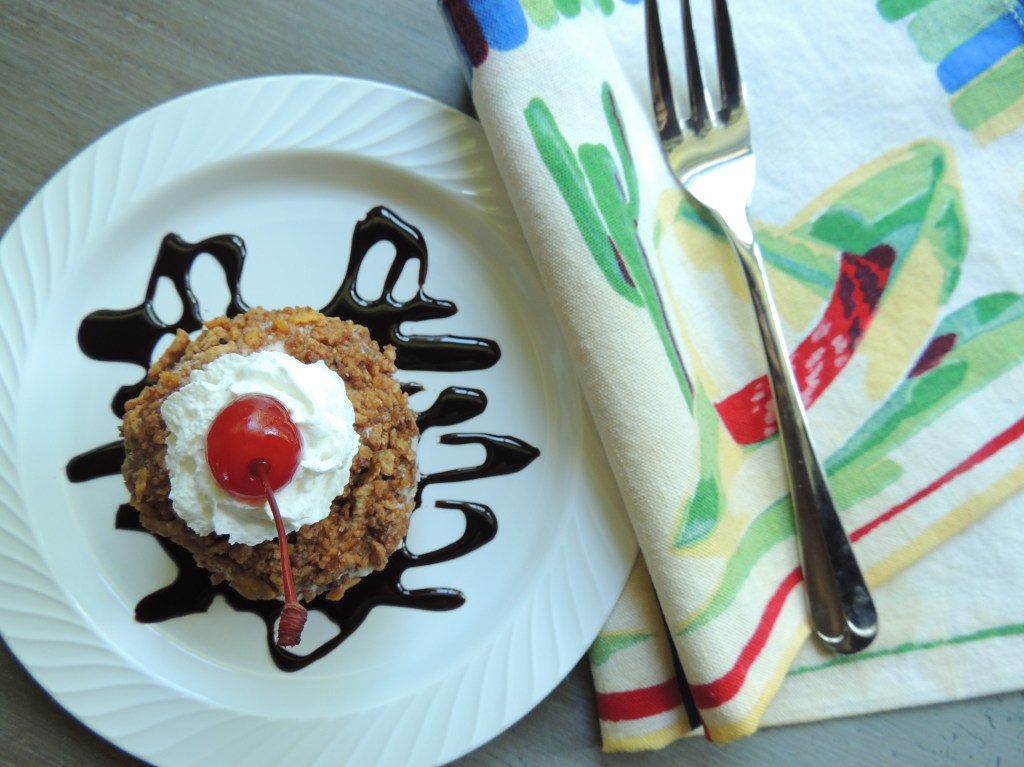
This is an easy version of your favorite Mexican Restaurant dessert! Hooray, right? We all love EASY! This can also be made up ahead of time for an easy dessert for company, or to carry in for a pot luck supper at church. You can serve them all fancied up, or let your guests decorate their own.
Here’s what you’ll need:
1 Half-gallon Vanilla Ice Cream (I like the less sweeter varieties; read the label; my favorite has 11 g sugars under Carbohydrates. Some have 20 g and that is just too sweet for my taste)
6 cups Corn Flakes cereal, crushed
½ cup (1 stick) butter
3 teaspoons cinnamon
¼ cup honey
Chocolate Ice Cream sauce
Whipped Cream (in aerosol can)
Maraschino cherries (with stems)
Large size muffin wrappers (paper)
Latex gloves
5-Step procedure
First, place a muffin tin in your freezer and allow it to get ice cold (about an hour). Use an ice cream scoop to dip ice cream from its container. I use my other hand (with glove on) to heap ice cream up over the ice cream in the scoop and then press it into a ball shape, before ejecting the ball into a well of the muffin tin. Continue until all 12 wells are full, or ice cream is used up. Place muffin tin back in the freezer and allow ice cream balls to set and freeze hard (about an hour or two).
Meanwhile, make the crust: Crush the corn flakes cereal in a gallon size zip lock bag, using a rolling pin. Add the cinnamon and a pinch of salt. Melt the butter in a Dutch oven size pot, toss in the crumbs and cinnamon and stir fry about 2 or 3 minutes until it begins to smell wonderful. Be careful not to let it burn. Drizzle with honey and toss to coat. Remove from heat and let it cool. NOTE: I have substituted other cereals, namely Cinnamon Toast crunch and it worked great, as long as the cereal was ground into fine crumbs in a food processor.
Remove Ice cream balls from freezer. Use a large spoon to remove a ball from its well in the muffin tin. Drop ball into crumb mixture and roll with gloved hands around in the crumbs, pressing crumbs into ice cream with hands until all sides are coated. If you are having trouble getting the crumbs to stick to the ice cream try squeezing a little honey over the crumbs before rolling the ice cream into it. Place balls on paper muffin wrappers and then set them on a cookie sheet or baking pan. Once finished with coating all the balls, return them to the freezer to set and harden. They can remain in the freezer for a day or two if you want to make them ahead.
To serve: Remove an ice cream ball from the muffin wrapper, place on a serving plate. Drizzle chocolate syrup decoratively over the top. Spray a nice size dollop of whipped cream on top, and garnish with a cherry. Pretty as a picture!
* * *
“The house of Israel named it manna, and it was like coriander seed, white, and its taste was like wafers with honey.”Exodus 16:31
I was given the opportunity recently to make a bunch of tissue paper flowers for a school project. I had so much fun with it honestly, and thought, these sure would make a beautiful decoration, or they could be used for head garlands (as pictured here) which are pretty popular in Texas, or Homecoming Mums (another Texas thing), or to decorate Derby hats, or for a garden tea party, or luau, or FiEsTa(which happens to be going on in San Antonio at this very moment), which got me to thinking that somebody else out there might appreciate knowing how to make these. I also sure don’t want to ever forget how I made them, so… that’s as good a reason as any to blog about something, me thinks.
Materials needed: 1 package of multi-colored tissue paper, a good pair of sissors, a stapler, and string (optional).
A large package of multi-colored tissue paper is fairly inexpensive to buy at the big box stores ($10 for 100 sheets). And one of those packages will give you more than enough paper to make 100 flowers that are roughly the size of one of those mesh shower pouf thingies. (If you want to make giant flowers, you could probably squeeze 10 or so out of a package???)
So here is how you make them. First open the package of tissue paper and separate the colors. Straighten up the sheets so that they lay exactly on top of each other. Peel off two sheets of one color of the tissue paper.
Now, I’ve included visual instructions below that will hopefully be easy to follow, but I will also explain…
Gather your materials. It will help to have a large table where you can spread out the tissue paper into individual color piles. (My poor sissors, you’ll notice, have issues, actually just one issue. I don’t know what happened, but they are Fiskers, and the handles have decomposed over the years since I first bought them. They are sticky now, and almost clay-like. The stuff was coming off on my hands and making my hands sticky, so I wrapped the handles in strips of paper towel. Has this happened to anyone else? Or is it just the humidity in the south that has made mine do this?)
Peel off 5 sheets of tissue paper and stack them together neatly. Then starting at the bottom fold up about an inch width and press it flat.
Flip the stack over and fold the other direction, and press flat.
Continue folding in an accordion pattern until you reach the other end.
Press the stack flat.
Fold the stack in half to mark the center place.
Press it flat to make a good crease.
Open and place under the stapler, and place a staple on exactly that center crease line. Option: you can also tie a string around this center part so you will have something to tie the flower, to attach it to whatever you are decorating.
(Photo just shows the staple being present)
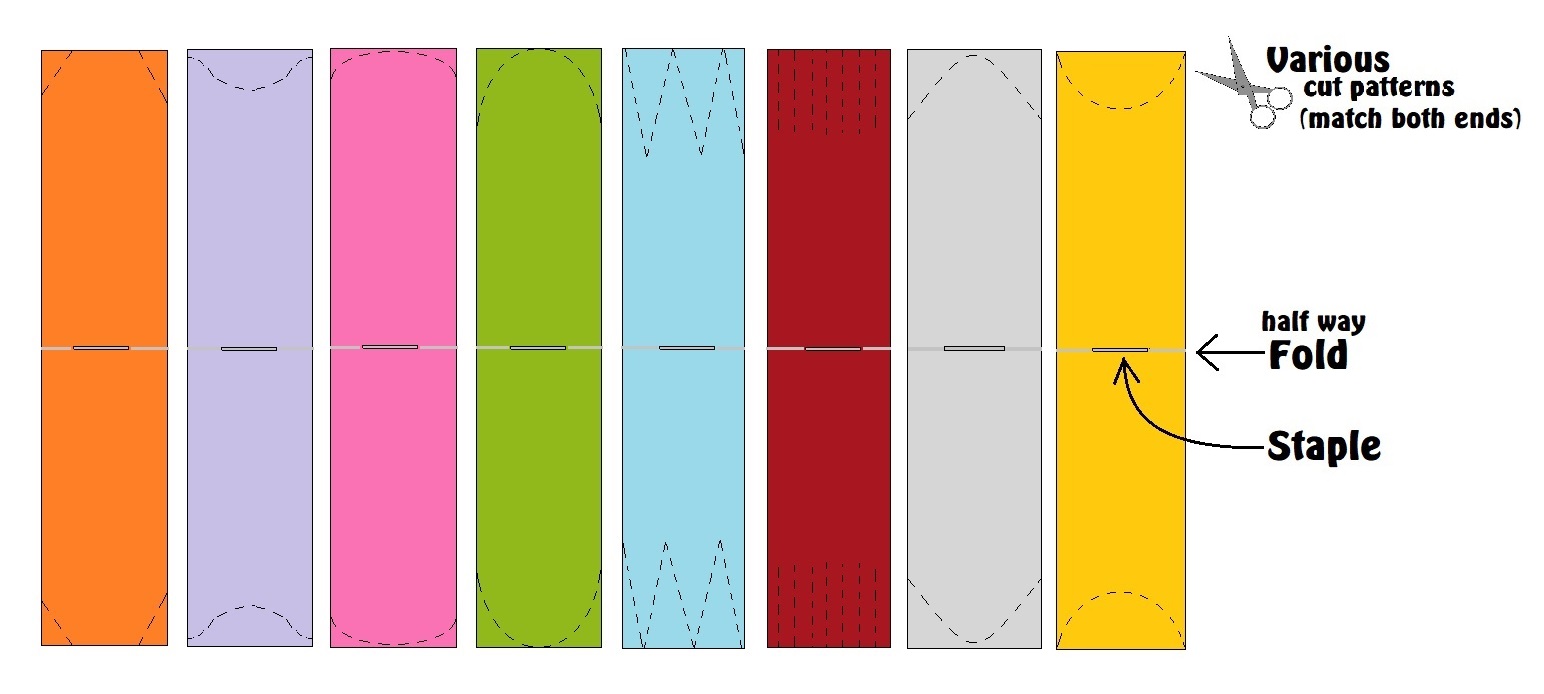
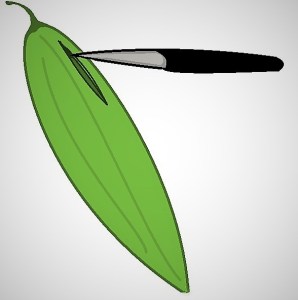
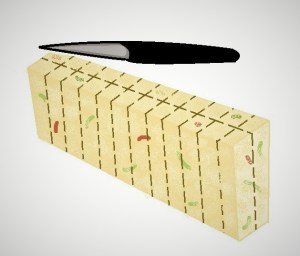
Now cut one end with whatever pattern you wish for the type of flower you wish to make (see diagram below)
Cut the first end and discard the scraps
Then cut the second end to match
Fan out the ends to make it easy to separate the individual sheets
Orange shows a gardenia type flower
Purple shows a hydrangea type flower
Pink shows a peony type flower
Green shows a magnolia type flower
Blue shows a Zinnia type flower
Red shows a Carnation type flower
Gray shows a Dahlia type flower
Yellow shows a Chrysanthemum, or Mum type flower
14. Fan out both ends
15. Carefully peel off the top sheet and pull it away from the others, up towards the center
16 – 18. Continue separating sheets and pulling them up towards the center on both ends, going around in a circle
19. Smooth out the last sheet to flatten out the bottom
20 – 23. Bring the flower around and fluff each peddle to make them all uniform and fill in any gaps.
24 – 26. Set your flower down and admire how pretty it is. Then pick another color and continue making flowers.
The center pom kind of makes a flower that looks like a cactus flower. You can do the same sort of thing with green tissue going out the bottom to look like the bud part of the bloom (just cut it with deep zig zags instead of the fringe). You can also experiment with various cuts, and you can also layer two colors of tissue together to make more interesting options. Here are some samples of the flowers I made. They turned out soooooo pretty?
“Listen, my son, to your father’s instruction and do not forsake your mother’s teaching. They are a garland to grace your head and a chain to adorn your neck.”
Where were you when you first experienced fish tacos? Can you remember the day, the place, and the time? Did the world stop spinning for just a moment as your tongue delighted in their savory goodness? Were yours as life changing for you as mine were for me? LOL!
Well, I first experienced FISH TACOS when we visited our daughter in Seattle. She took us to the Experience Music Project, and during our tour there we decided to eat lunch in the little restaurant downstairs of that massive building. It was a foodie little haven with a modest but eclectic menu.
I was a little sceptical about “fish tacos” when I first heard of them, having only an image of beef tacos in my head – with taco seasonings, lettuce, and cheese, but everyone I knew simply raved about them. So, I decided to put my mommy money where my mommy mouth was and actually taste them before I judged them. Best decision ever!!!! They were out of this world, my new favorite food, and I’ve been just a little bit obsessed about them ever since.
They are easy to make from scratch, but now that I am cooking for two I often make them from doggie-bag catfish from our favorite local restaurant.
Ingredients
For the Fish
Fish, just about any mild white fish works (Cod, Barramundi, Red Fish, Tilapia, etc.) about 1 nice sized piece per taco, so about 12 to 15 pieces (and at 3 tacos apiece, this recipe will feed about 4 or 5 people)
Seasoned Flour (to 1 1/2 cups flour add about 1/2 tsp of each: garlic powder, paprika, ground oregano, onion powder, ground cumin, salt, sugar, and cayenne powder) (or you can cheat and use a preseasoned fish fry coating, or a cajun spice in place of the individual seasonings)
Beer or Dry White Wine (or water will also work in a pinch)
Hot oil to fry the fish in
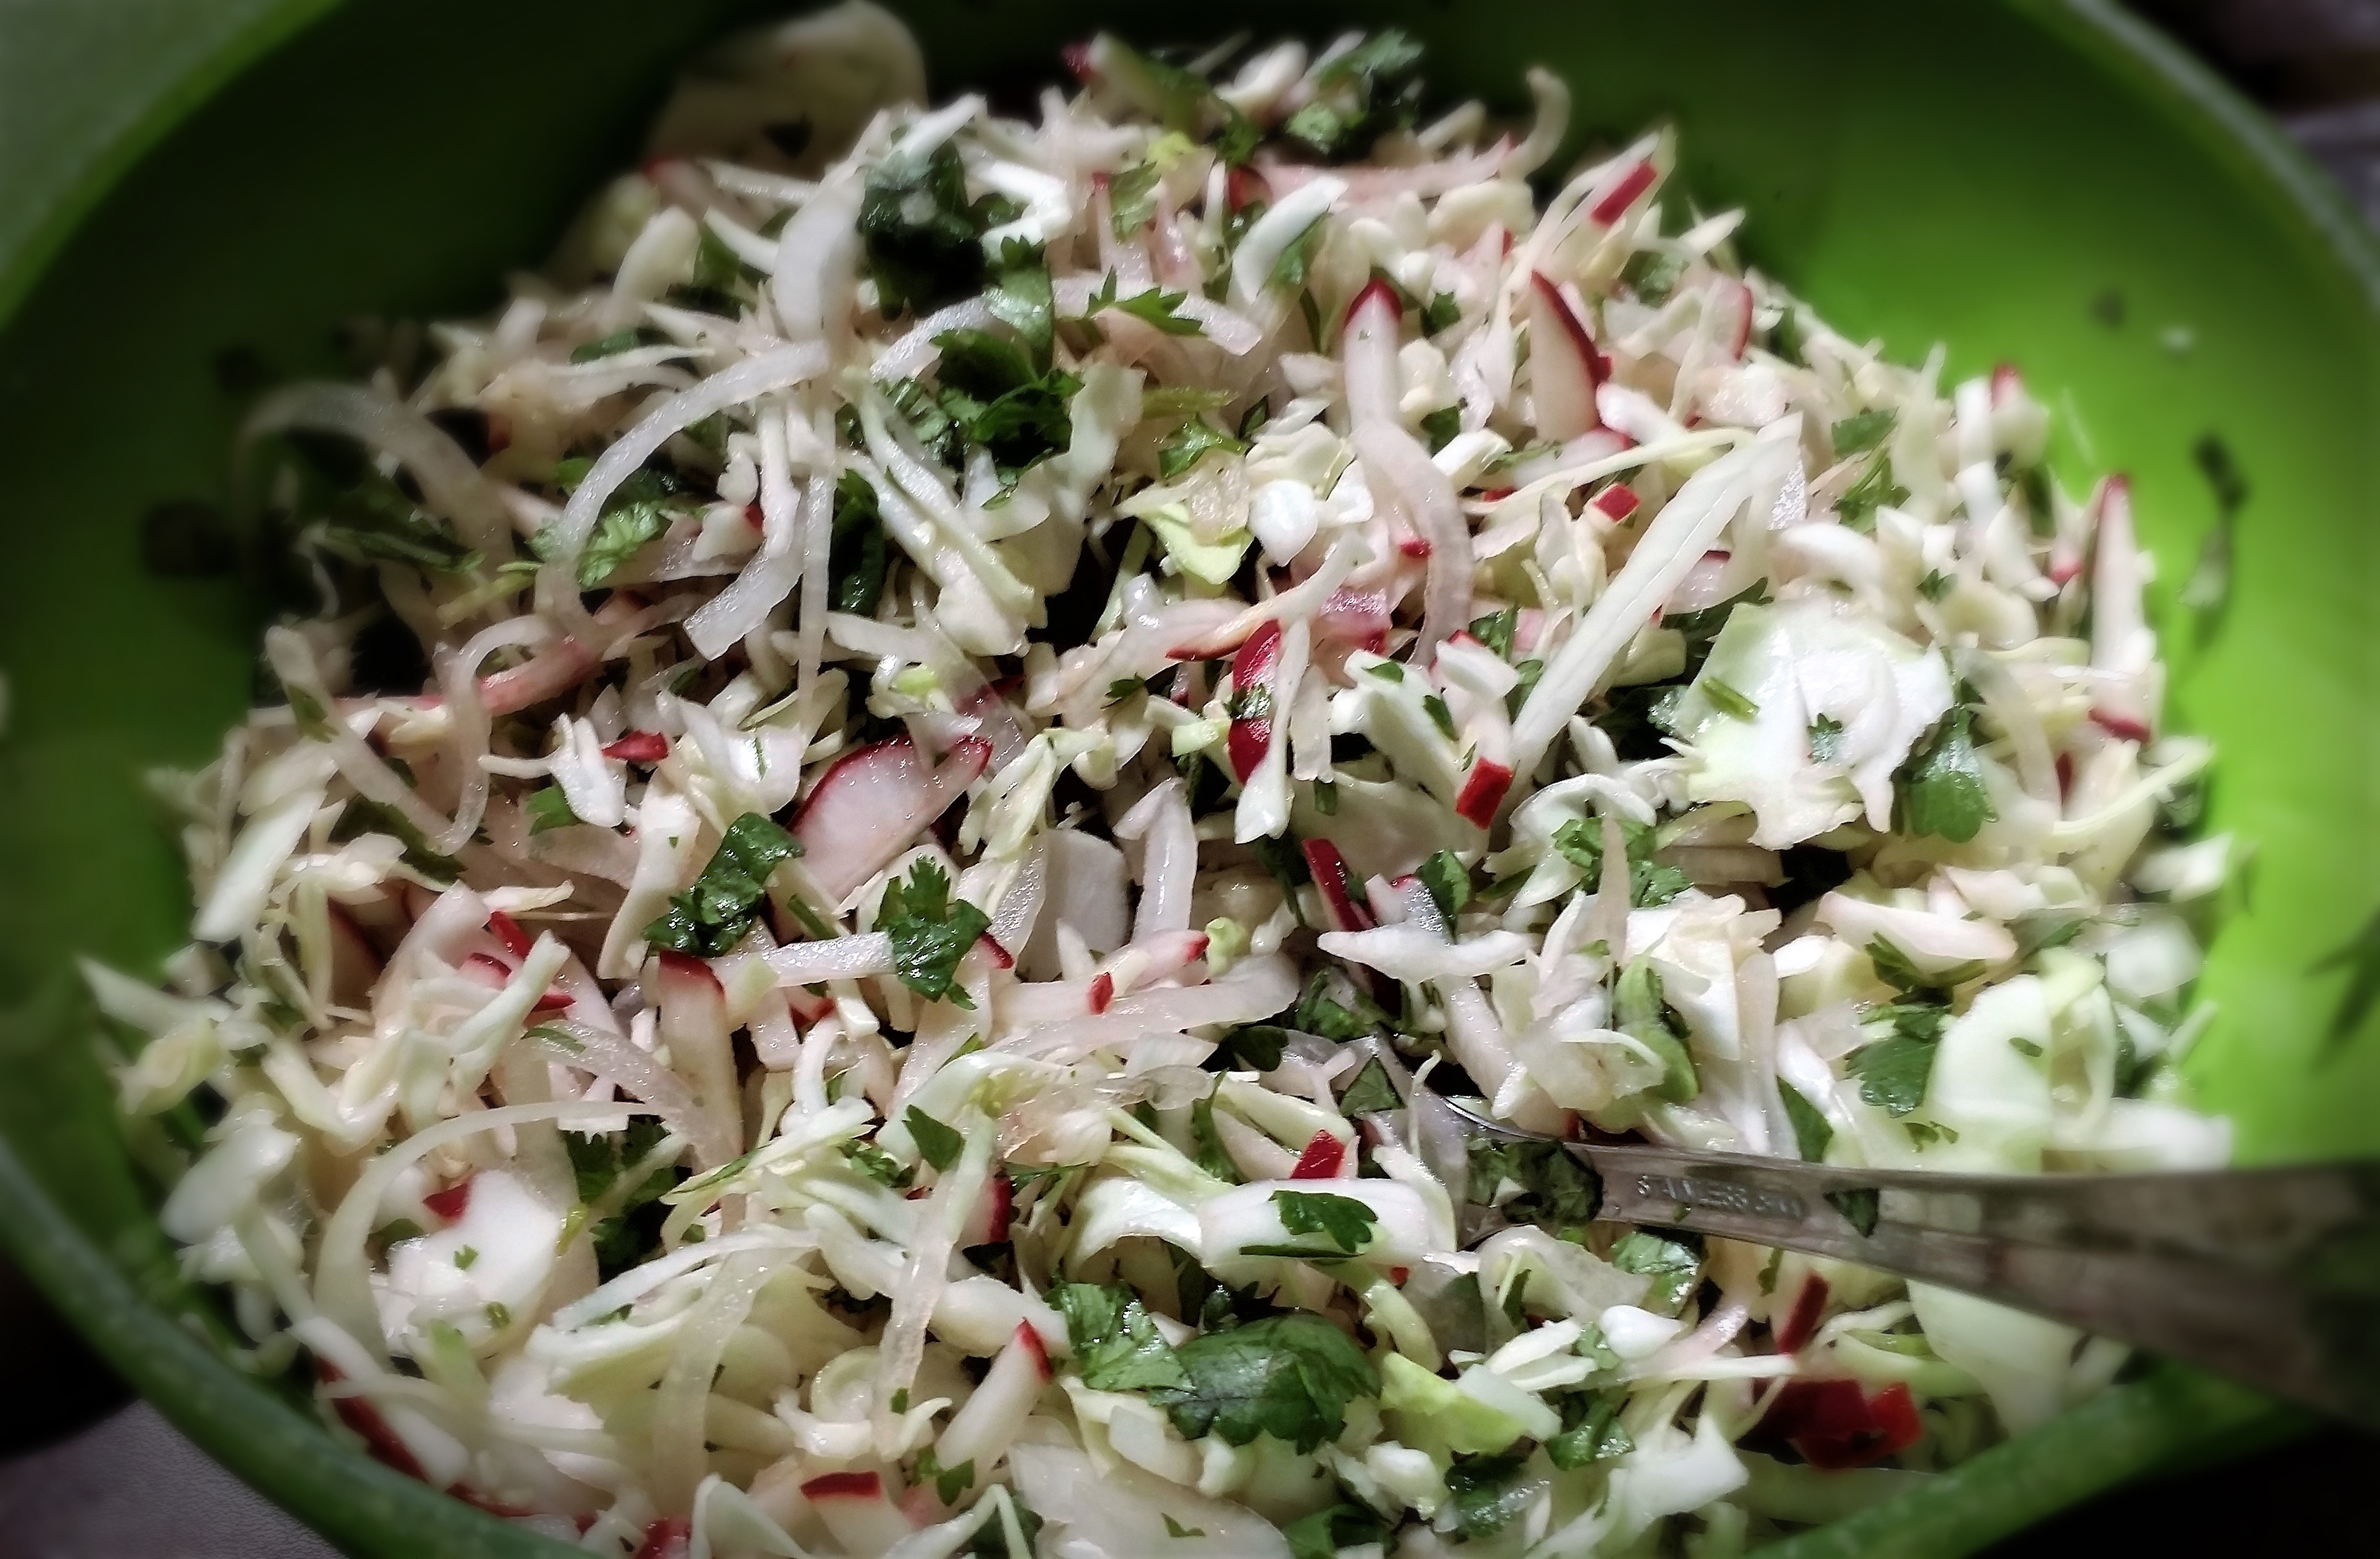
For the Slaw
1/2 of a red cabbage
1/2 of a green cabbage
1/2 of a large white onion
3 red radishes
1/2 cup cilantro
Juice of 1 or 2 limes (2 if they are small)
For the Sauce
2/3 cup sour cream
1/4 cup Mayo
2 ripe avocados
1/2 cup cilantro, very finely minced
1 clove garlic, minced
1 lime
1 jalapeno (or serrano), very finely minced
Dash of Sriracha, to taste
Pinch of Kosher salt, to taste
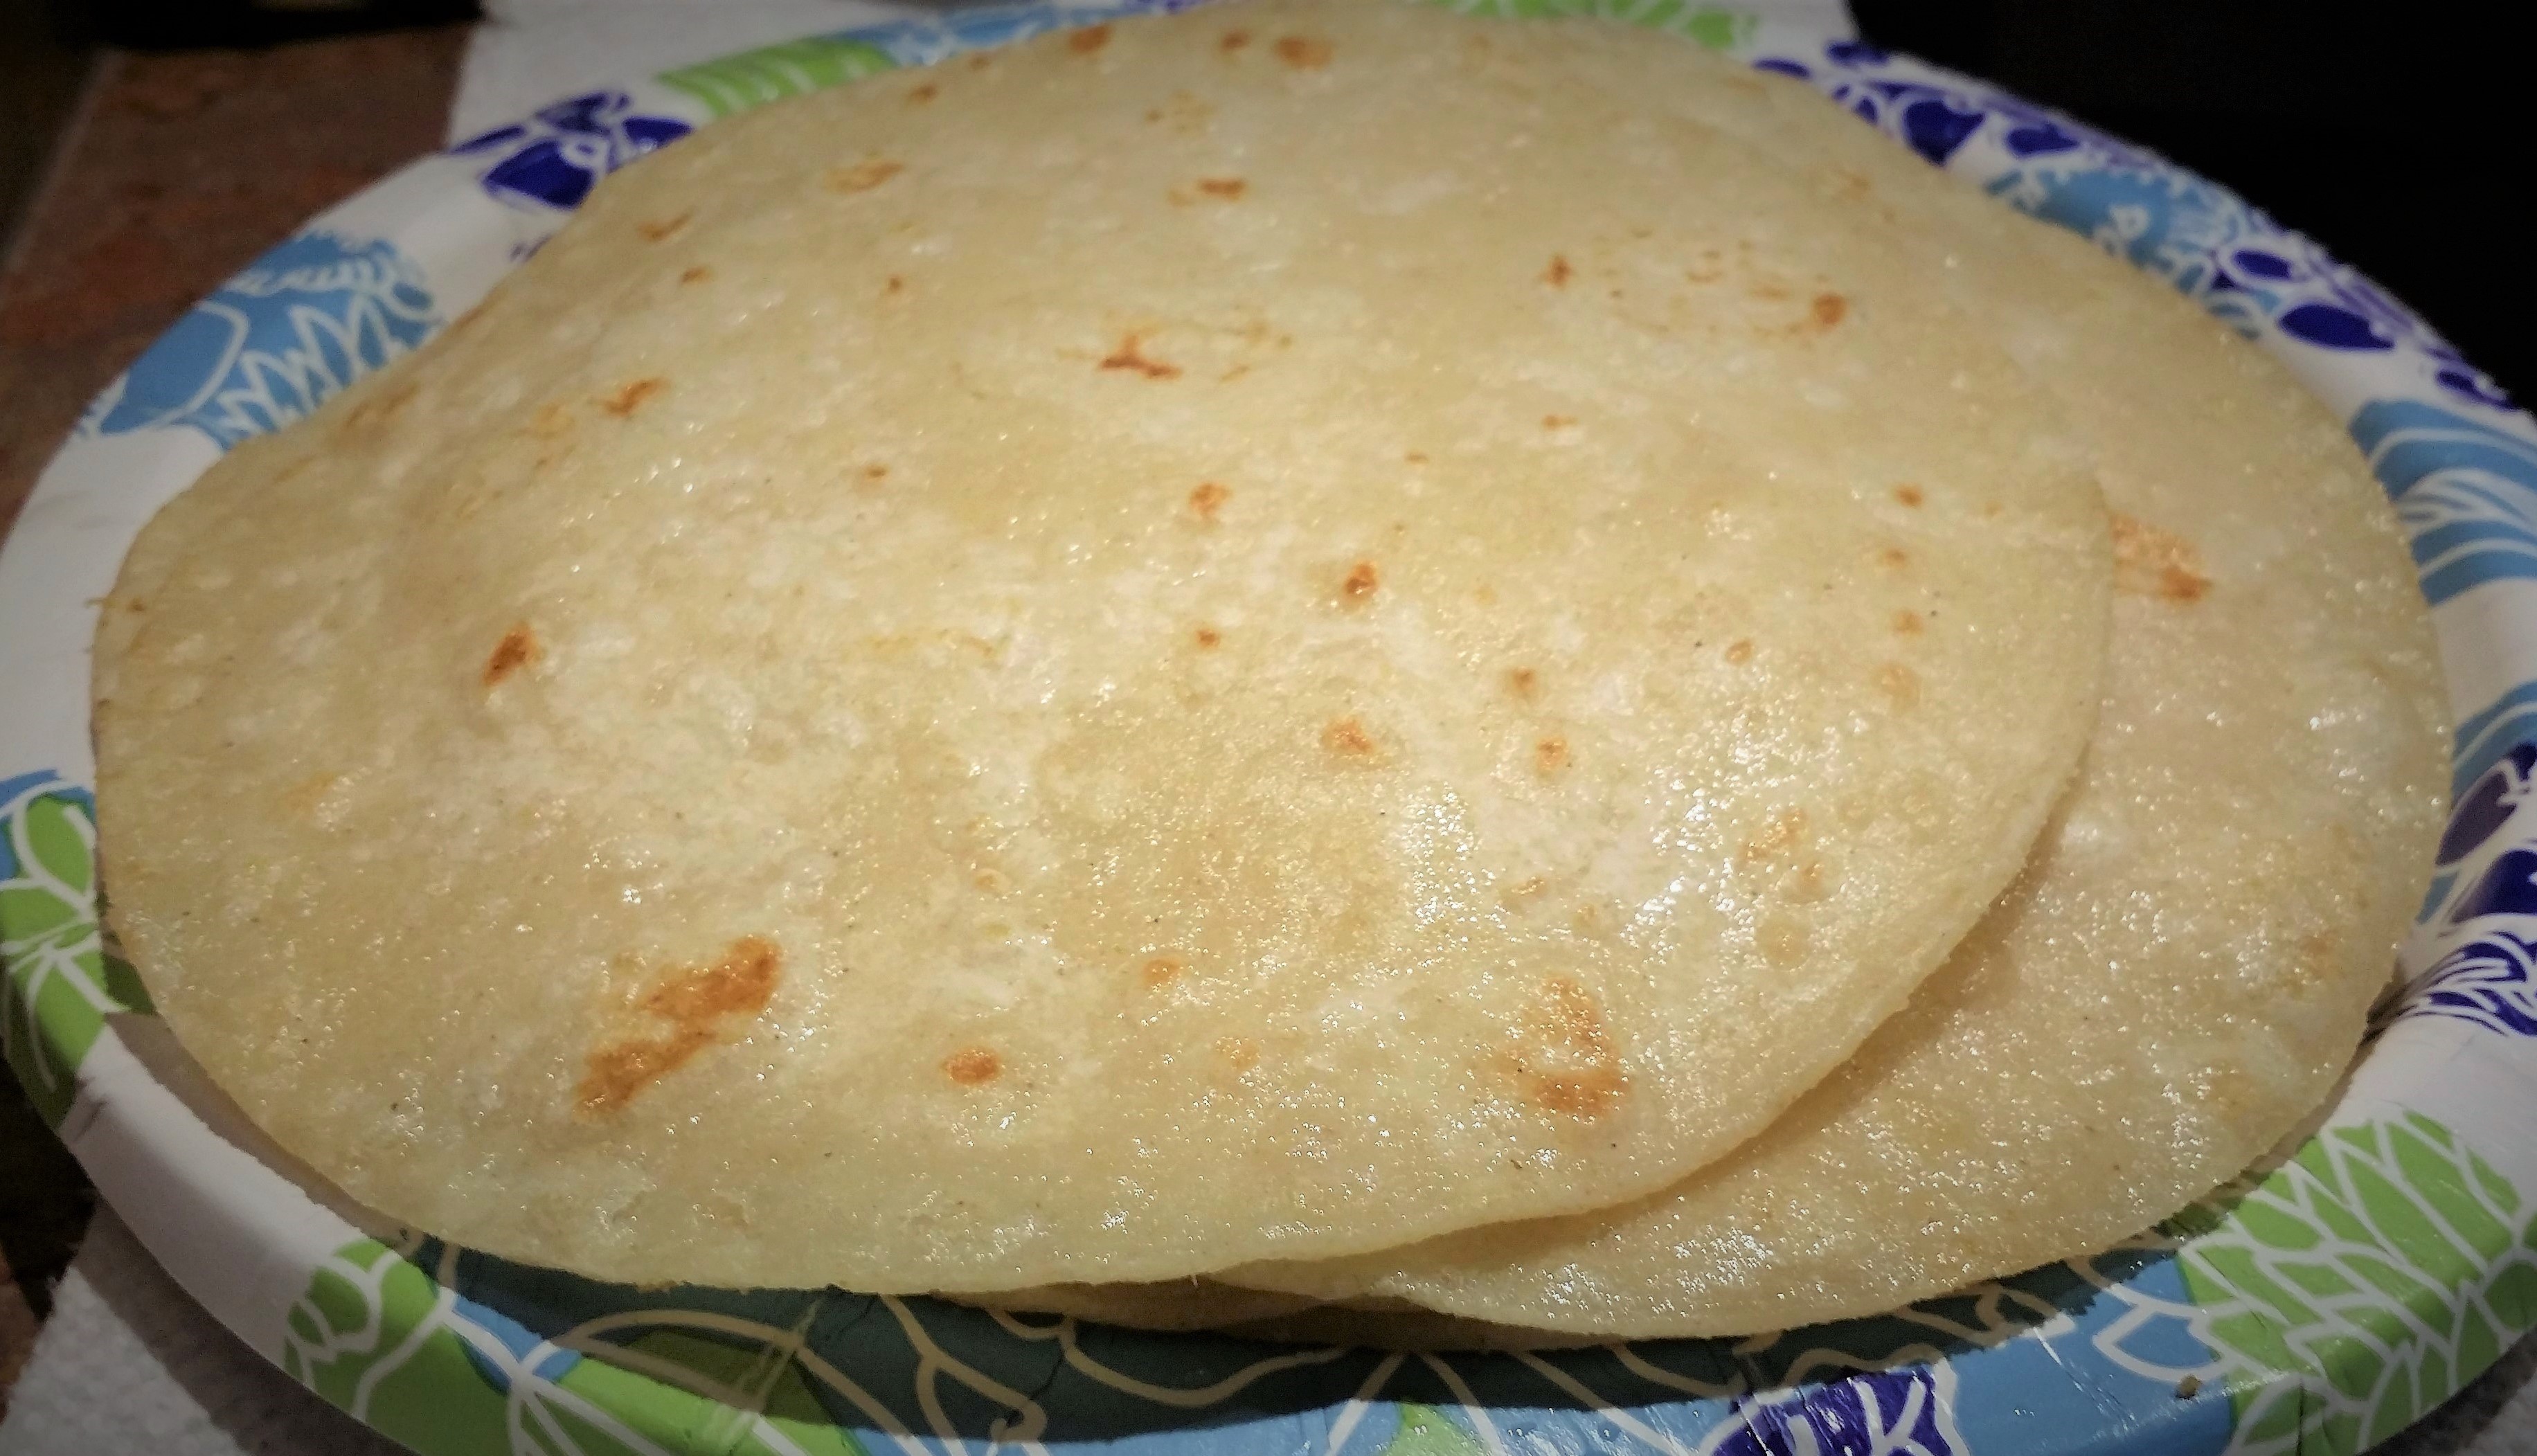
Also need about 12 to 15 white corn tortillas and a little oil to soften them in
Directions
As a time saver, you can make the slaw and the sauce ahead of time – early in the day, and keep them in the fridge until ready to assemble.
Shred the cabbages into thin strips and then give them a rough chop, cut the onion into the same size thin strips, slice the radishes into slices and then cut them into thin strips, and chop the cilantro. Toss all together in a bowl and squeeze lime juice over. Toss again to coat. Cover with plastic wrap and keep in fridge.
For the sauce, mash the avacados with a fork until smooth. Add to sour cream and mayo. Stir in cilantro, garlic, and as much of the jalapeno or serrano as you prefer. Squeeze lime juice in and stir. Add Sriracha and salt to taste. To make it really smooth you can whirl it in a food processor for a few moments. Cover with plastic wrap and keep in fridge until ready to assemble.
Add a little vegetable oil to a skillet and place on medium high heat. Add one tortilla at a time and soften by frying it briefly on each side and then removing to a paper towel lined plate. Add oil to the pan as needed after several tortillas have been fried. Cover tortillas with foil and place in a warm place until ready to assemble.
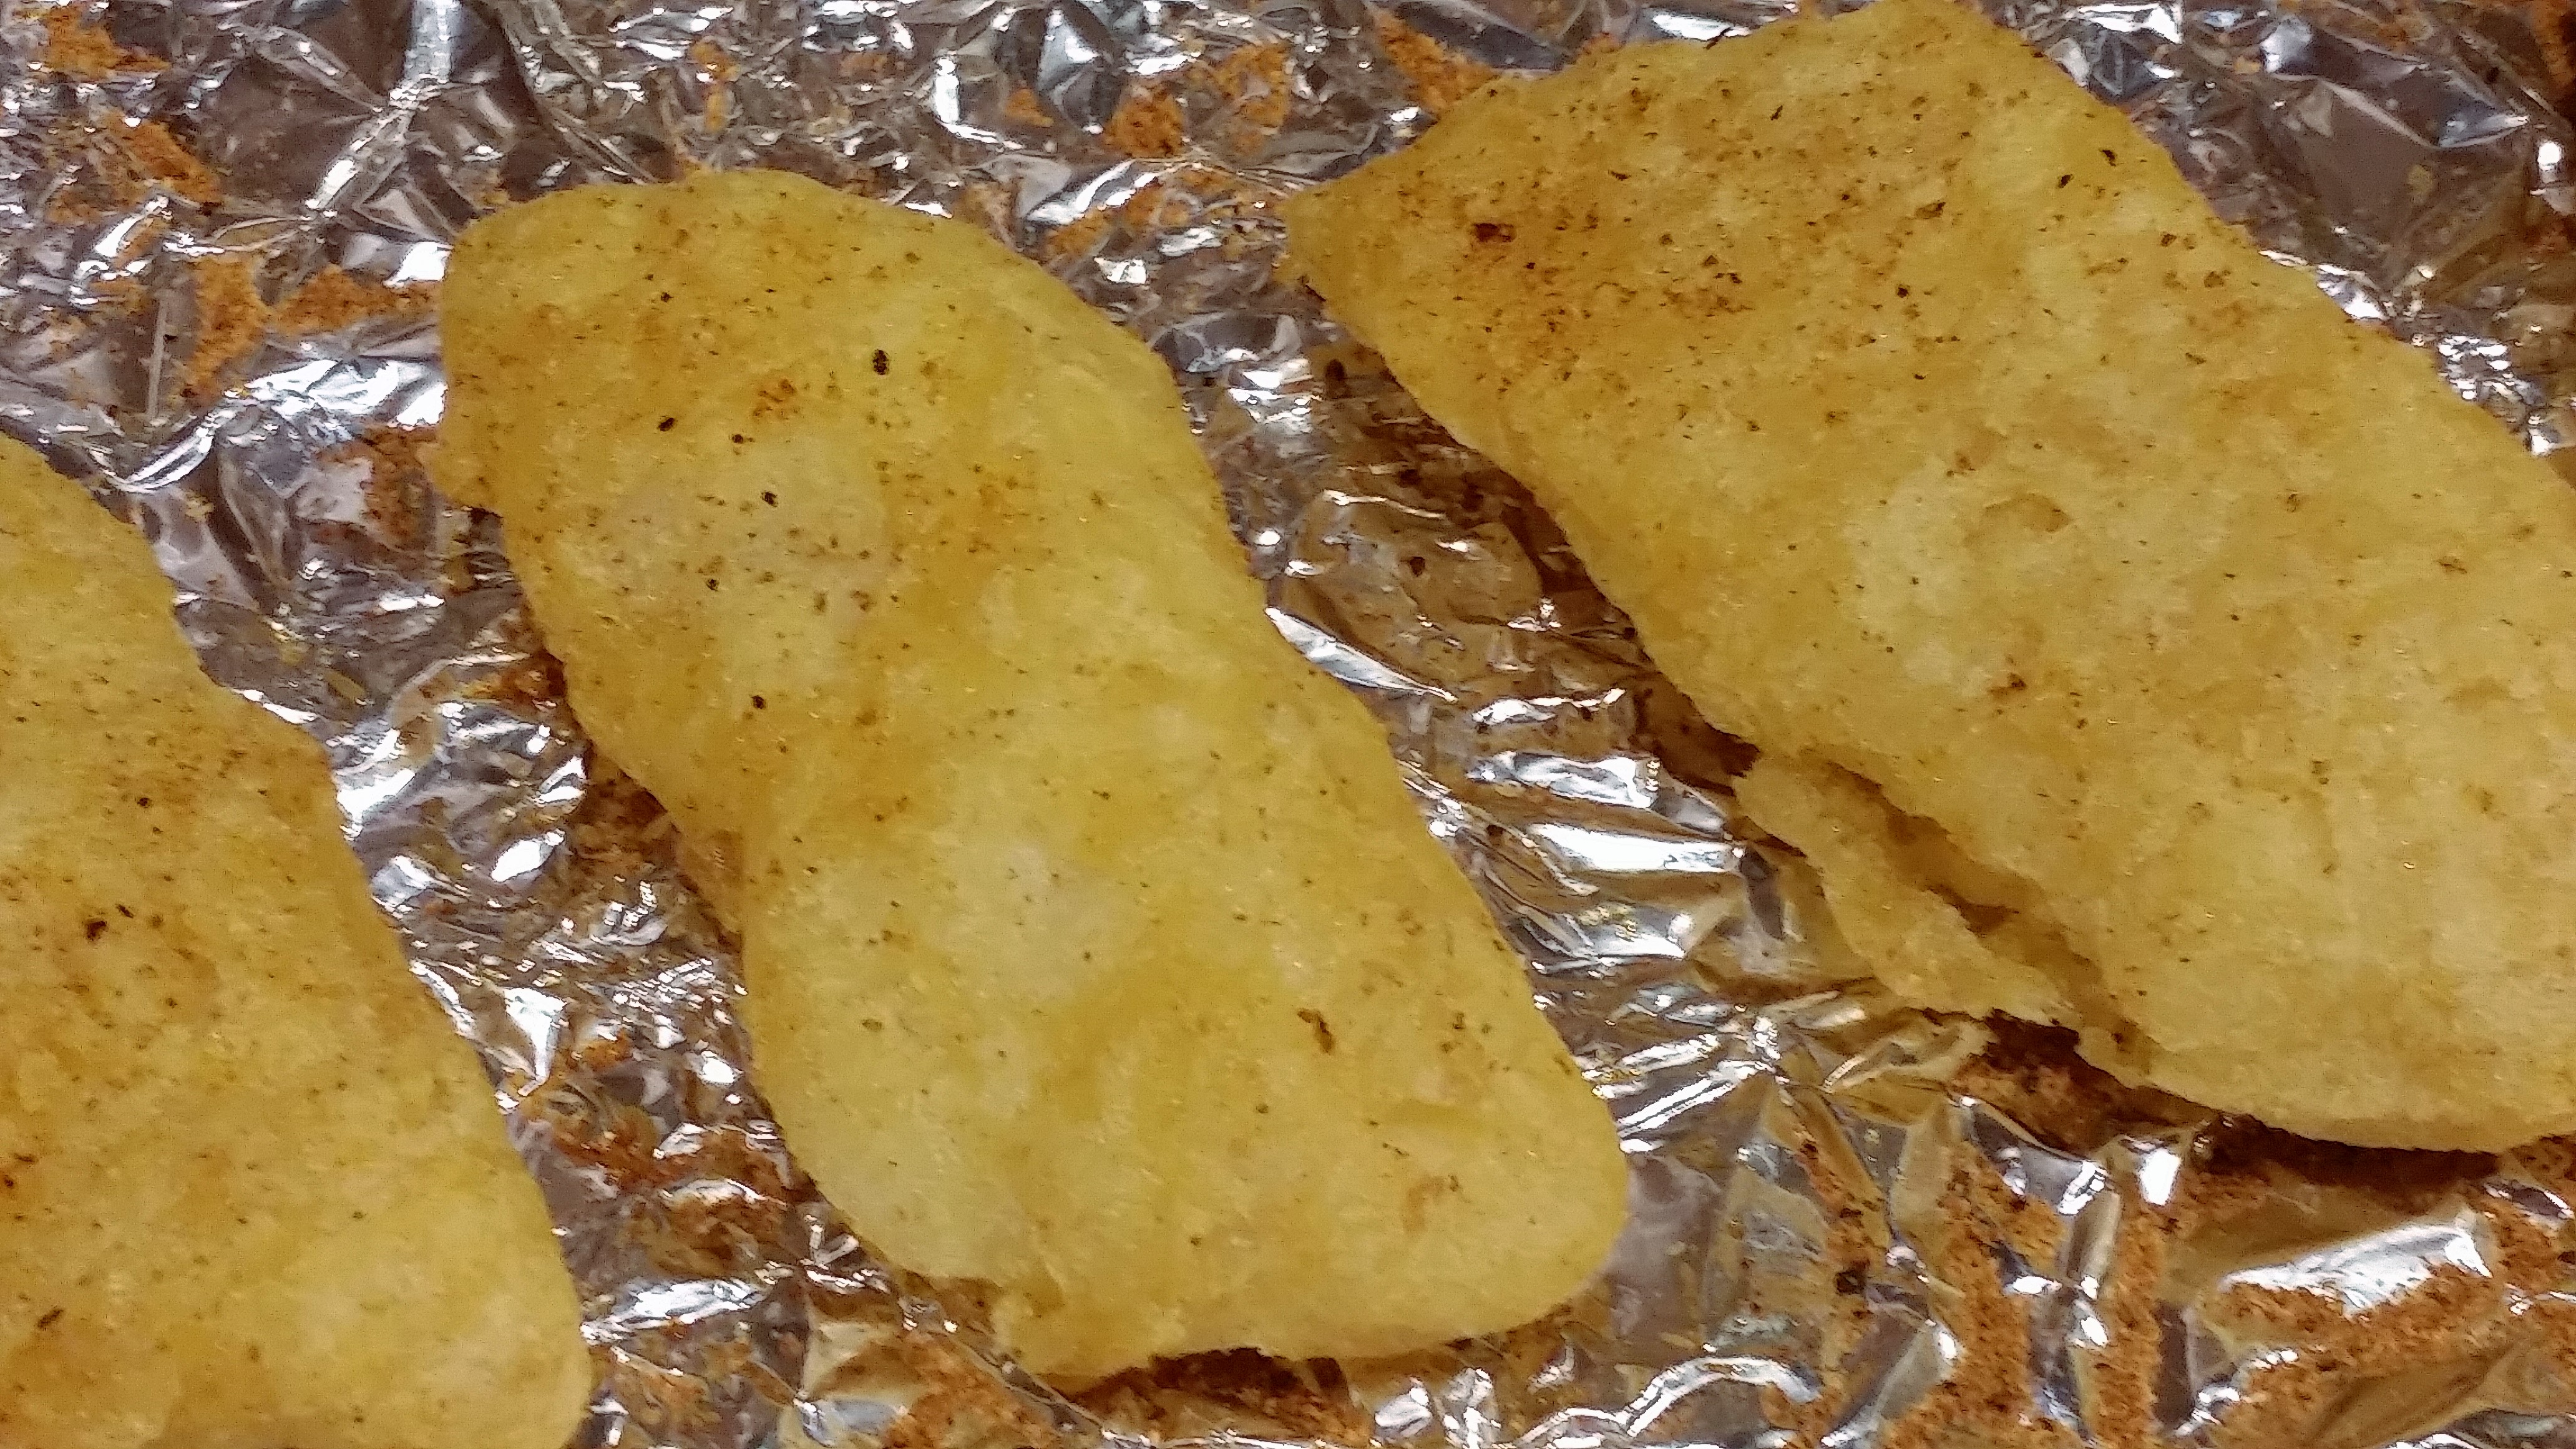
Now, you can prepare the fish however you prefer. If you like it grilled, you can season the pieces with a mixture of the same spices that are listed for the flour, and then just grill each piece a few moments on each side on an outdoor grill or indoor grill until it flakes easily.
If you like it fried, you can rinse the pieces off with cold water and then toss them in the seasoned flour to coat, and then fry them in hot oil (the same frying pan that you used for the tortillas) for a few minutes on each side until when tested they flake easily.
Or, if you like them batter fried (my fav), place peanut oil in a dutch oven or deep fryer enough so that the fish pieces will be completely covered, but make sure your pot is large enough that it won’t boil over when the fish are added a few pieces at a time. Heat and keep the oil temp between 350 to 375 degrees F. You can add beer or white wine to the seasoned flour (about an equal portion 1 to 1) and stir. Add more liquid until it is about the consistency of a thin pancake batter, then dip your rinsed and patted dry pieces of fish in the batter and drop in hot oil and fry until when tested it flakes easily.
Or, if you have a mess of catfish that have been cornmeal battered and fried, the leftovers make excellent tacos. I actually do this quite often.
To Assemble
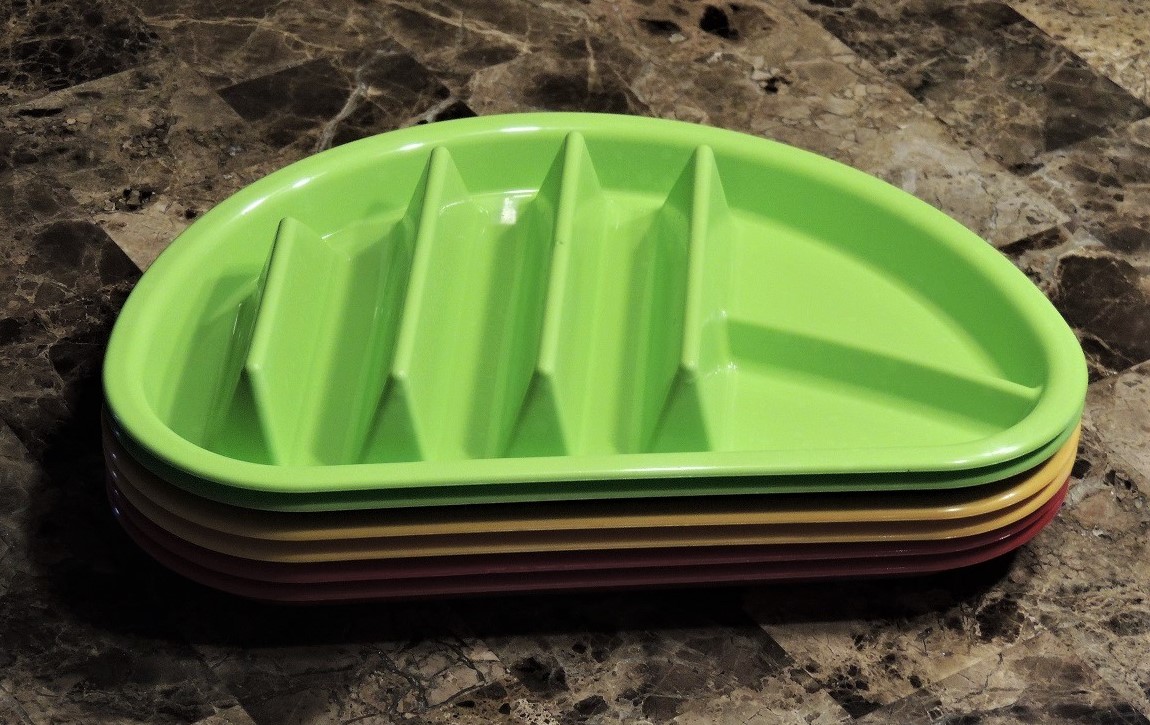
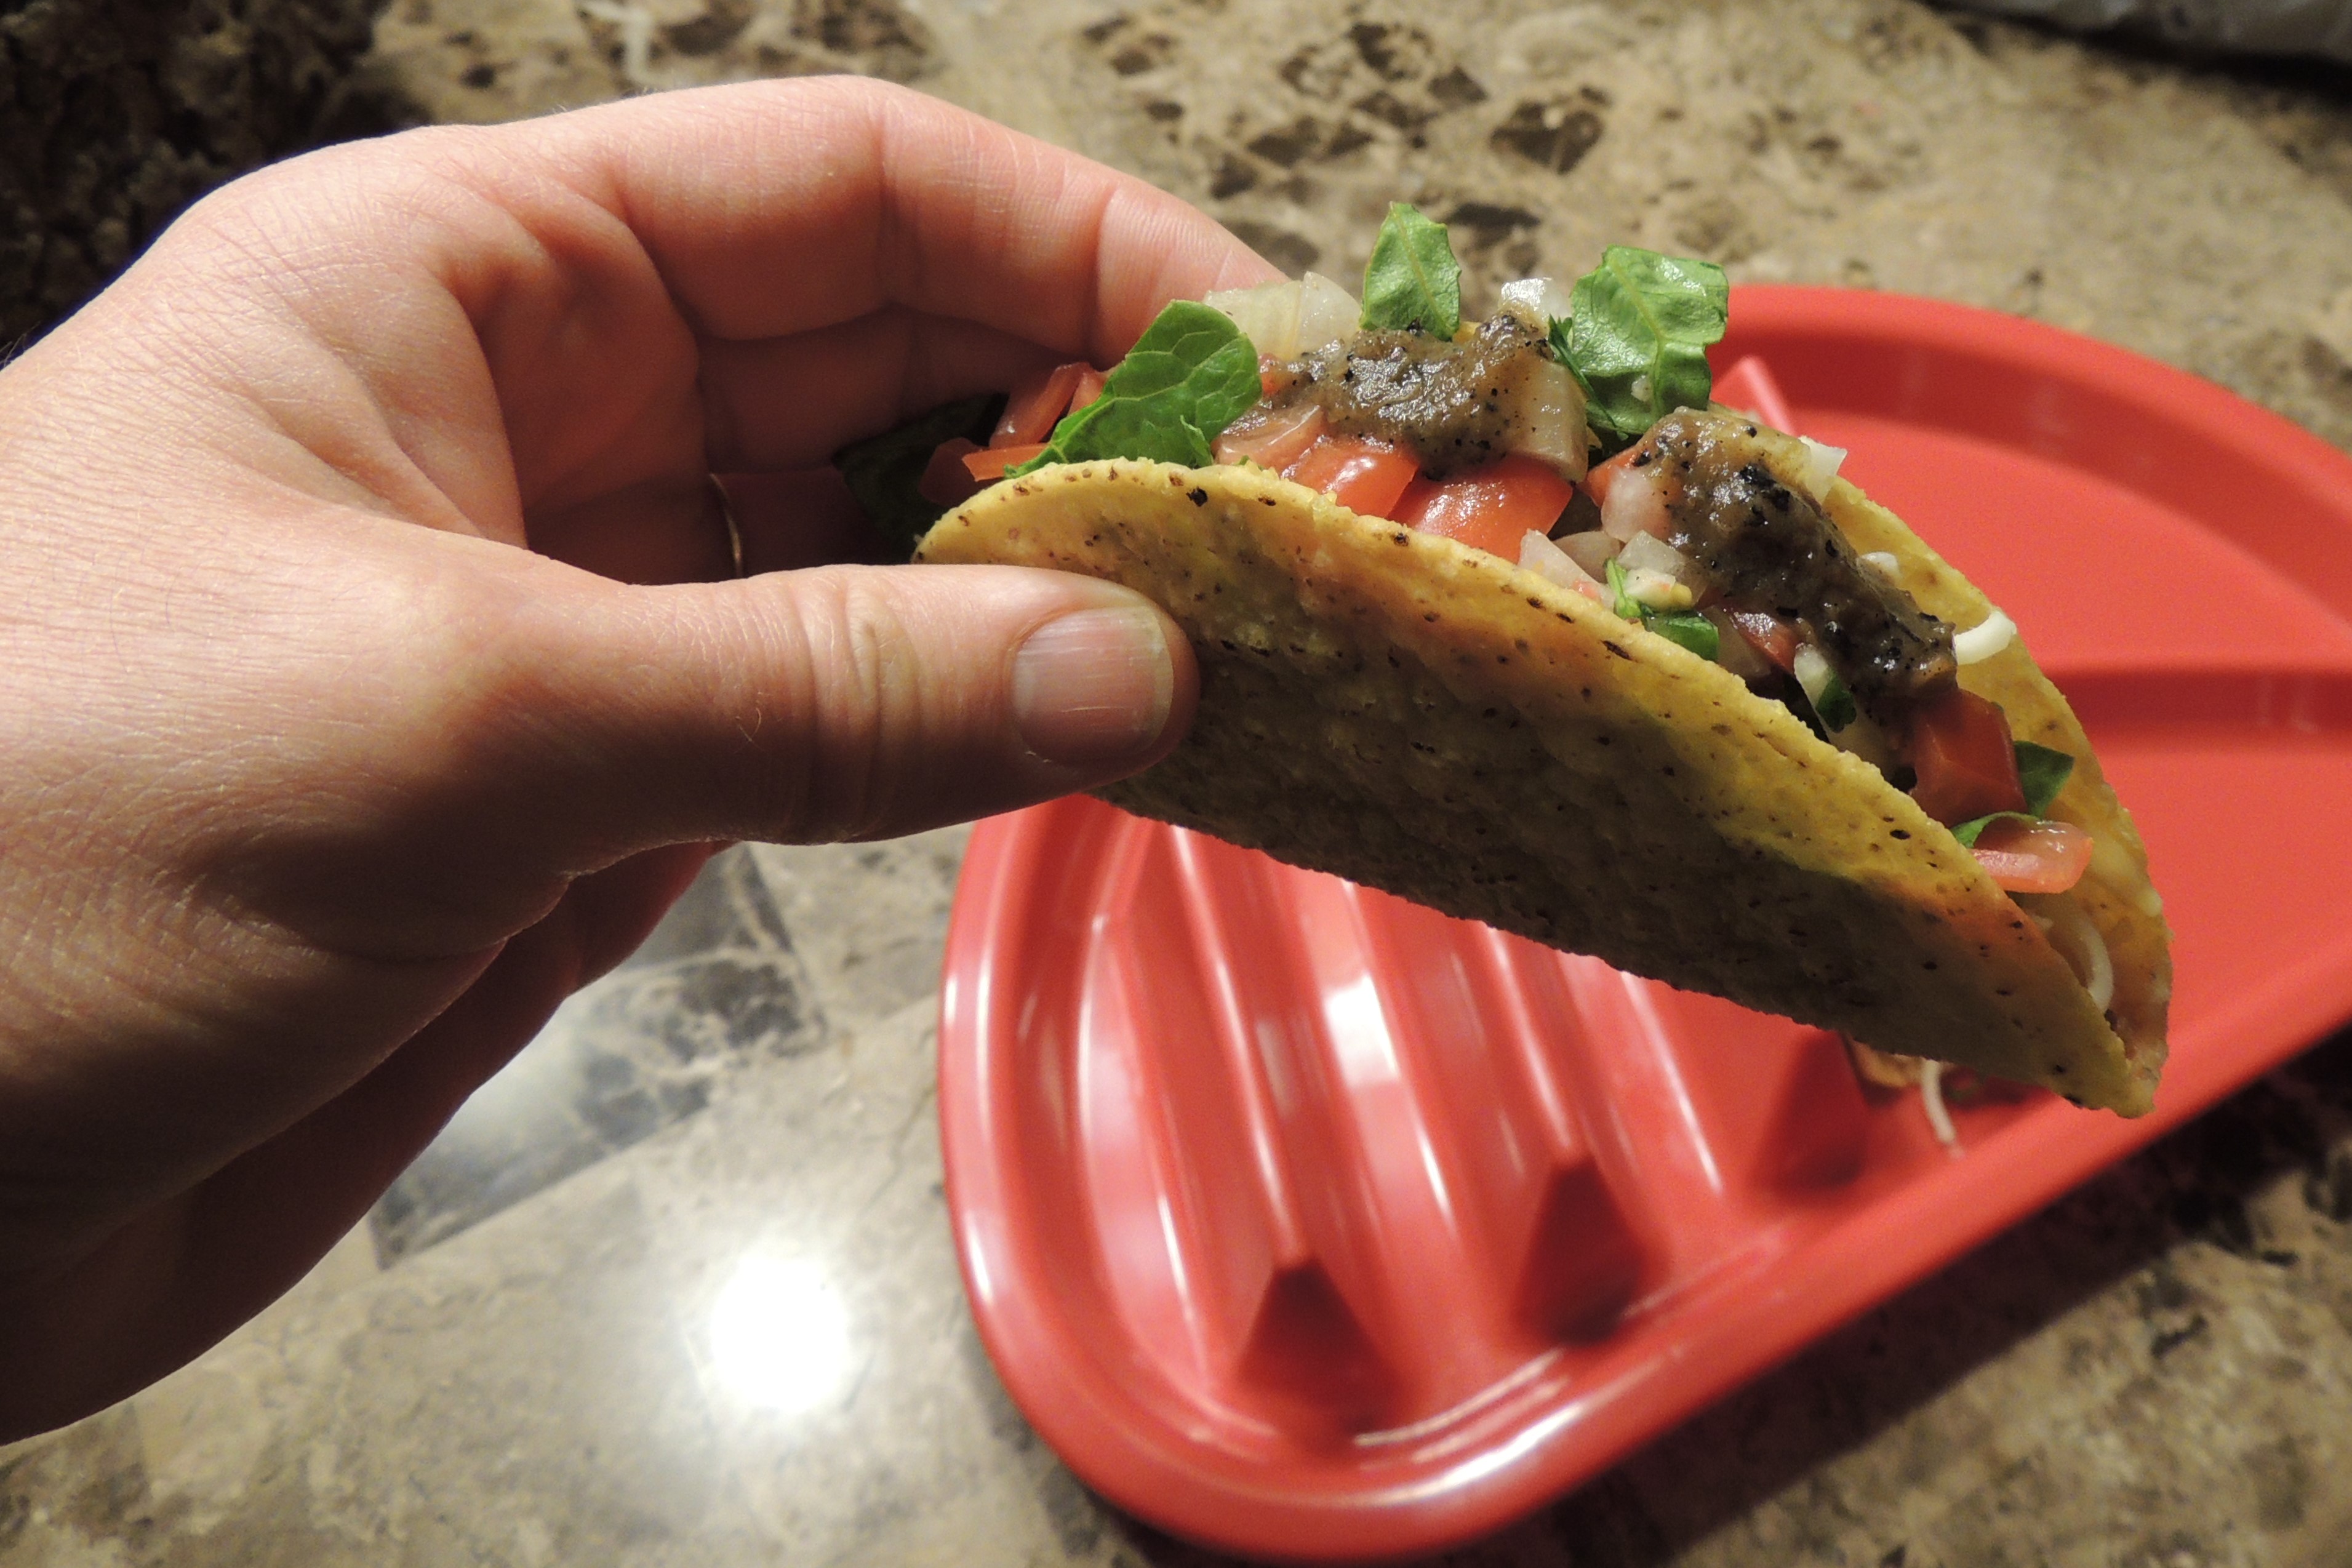
BTW: I have some nifty taco plates that are awesome for taco assembly:
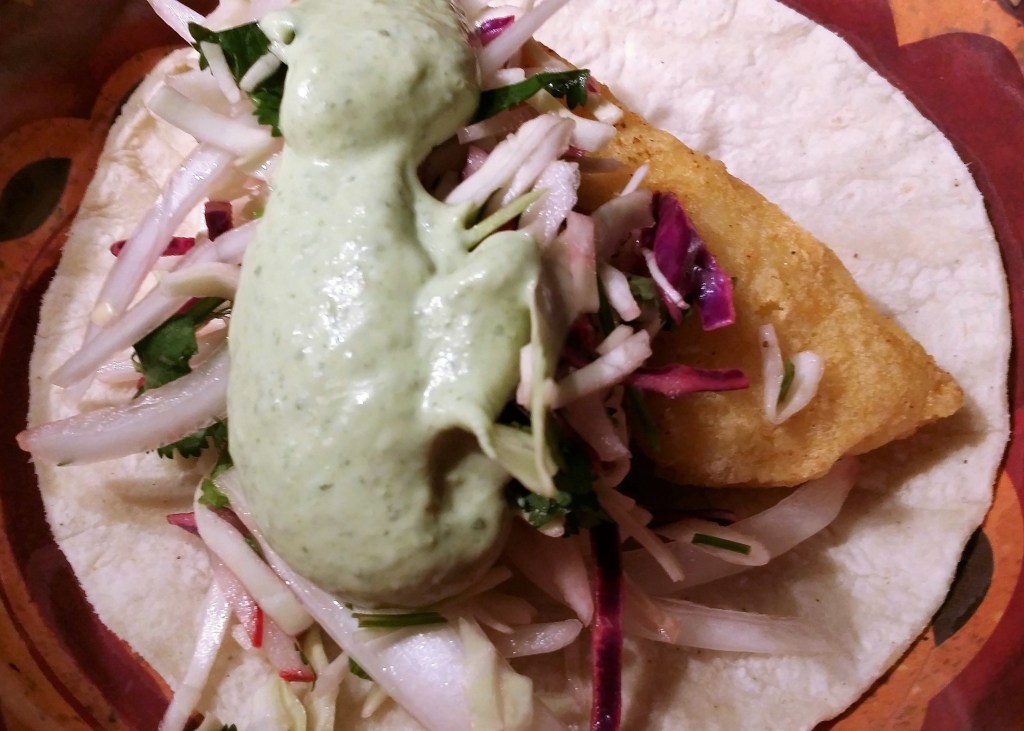
Lay one (or two small) piece(s) of fish in the center of each tortilla, and then add a small mound of slaw, and finally top with a nice dallop of sauce. Fold in half and enjoy. Mmmmmm! Just let your eyes roll back into your head while your tongue finds its happy place. Wipe mouth and repeat, repeat, repeat.
.
“Then Jesus said to them, “Children, have you any food?” They answered Him, “No.”
And He said to them, “Cast the net on the right side of the boat, and you will find some.” So they cast, and now they were not able to draw it in because of the multitude of fish.”John 21:5-6 (NKJV)
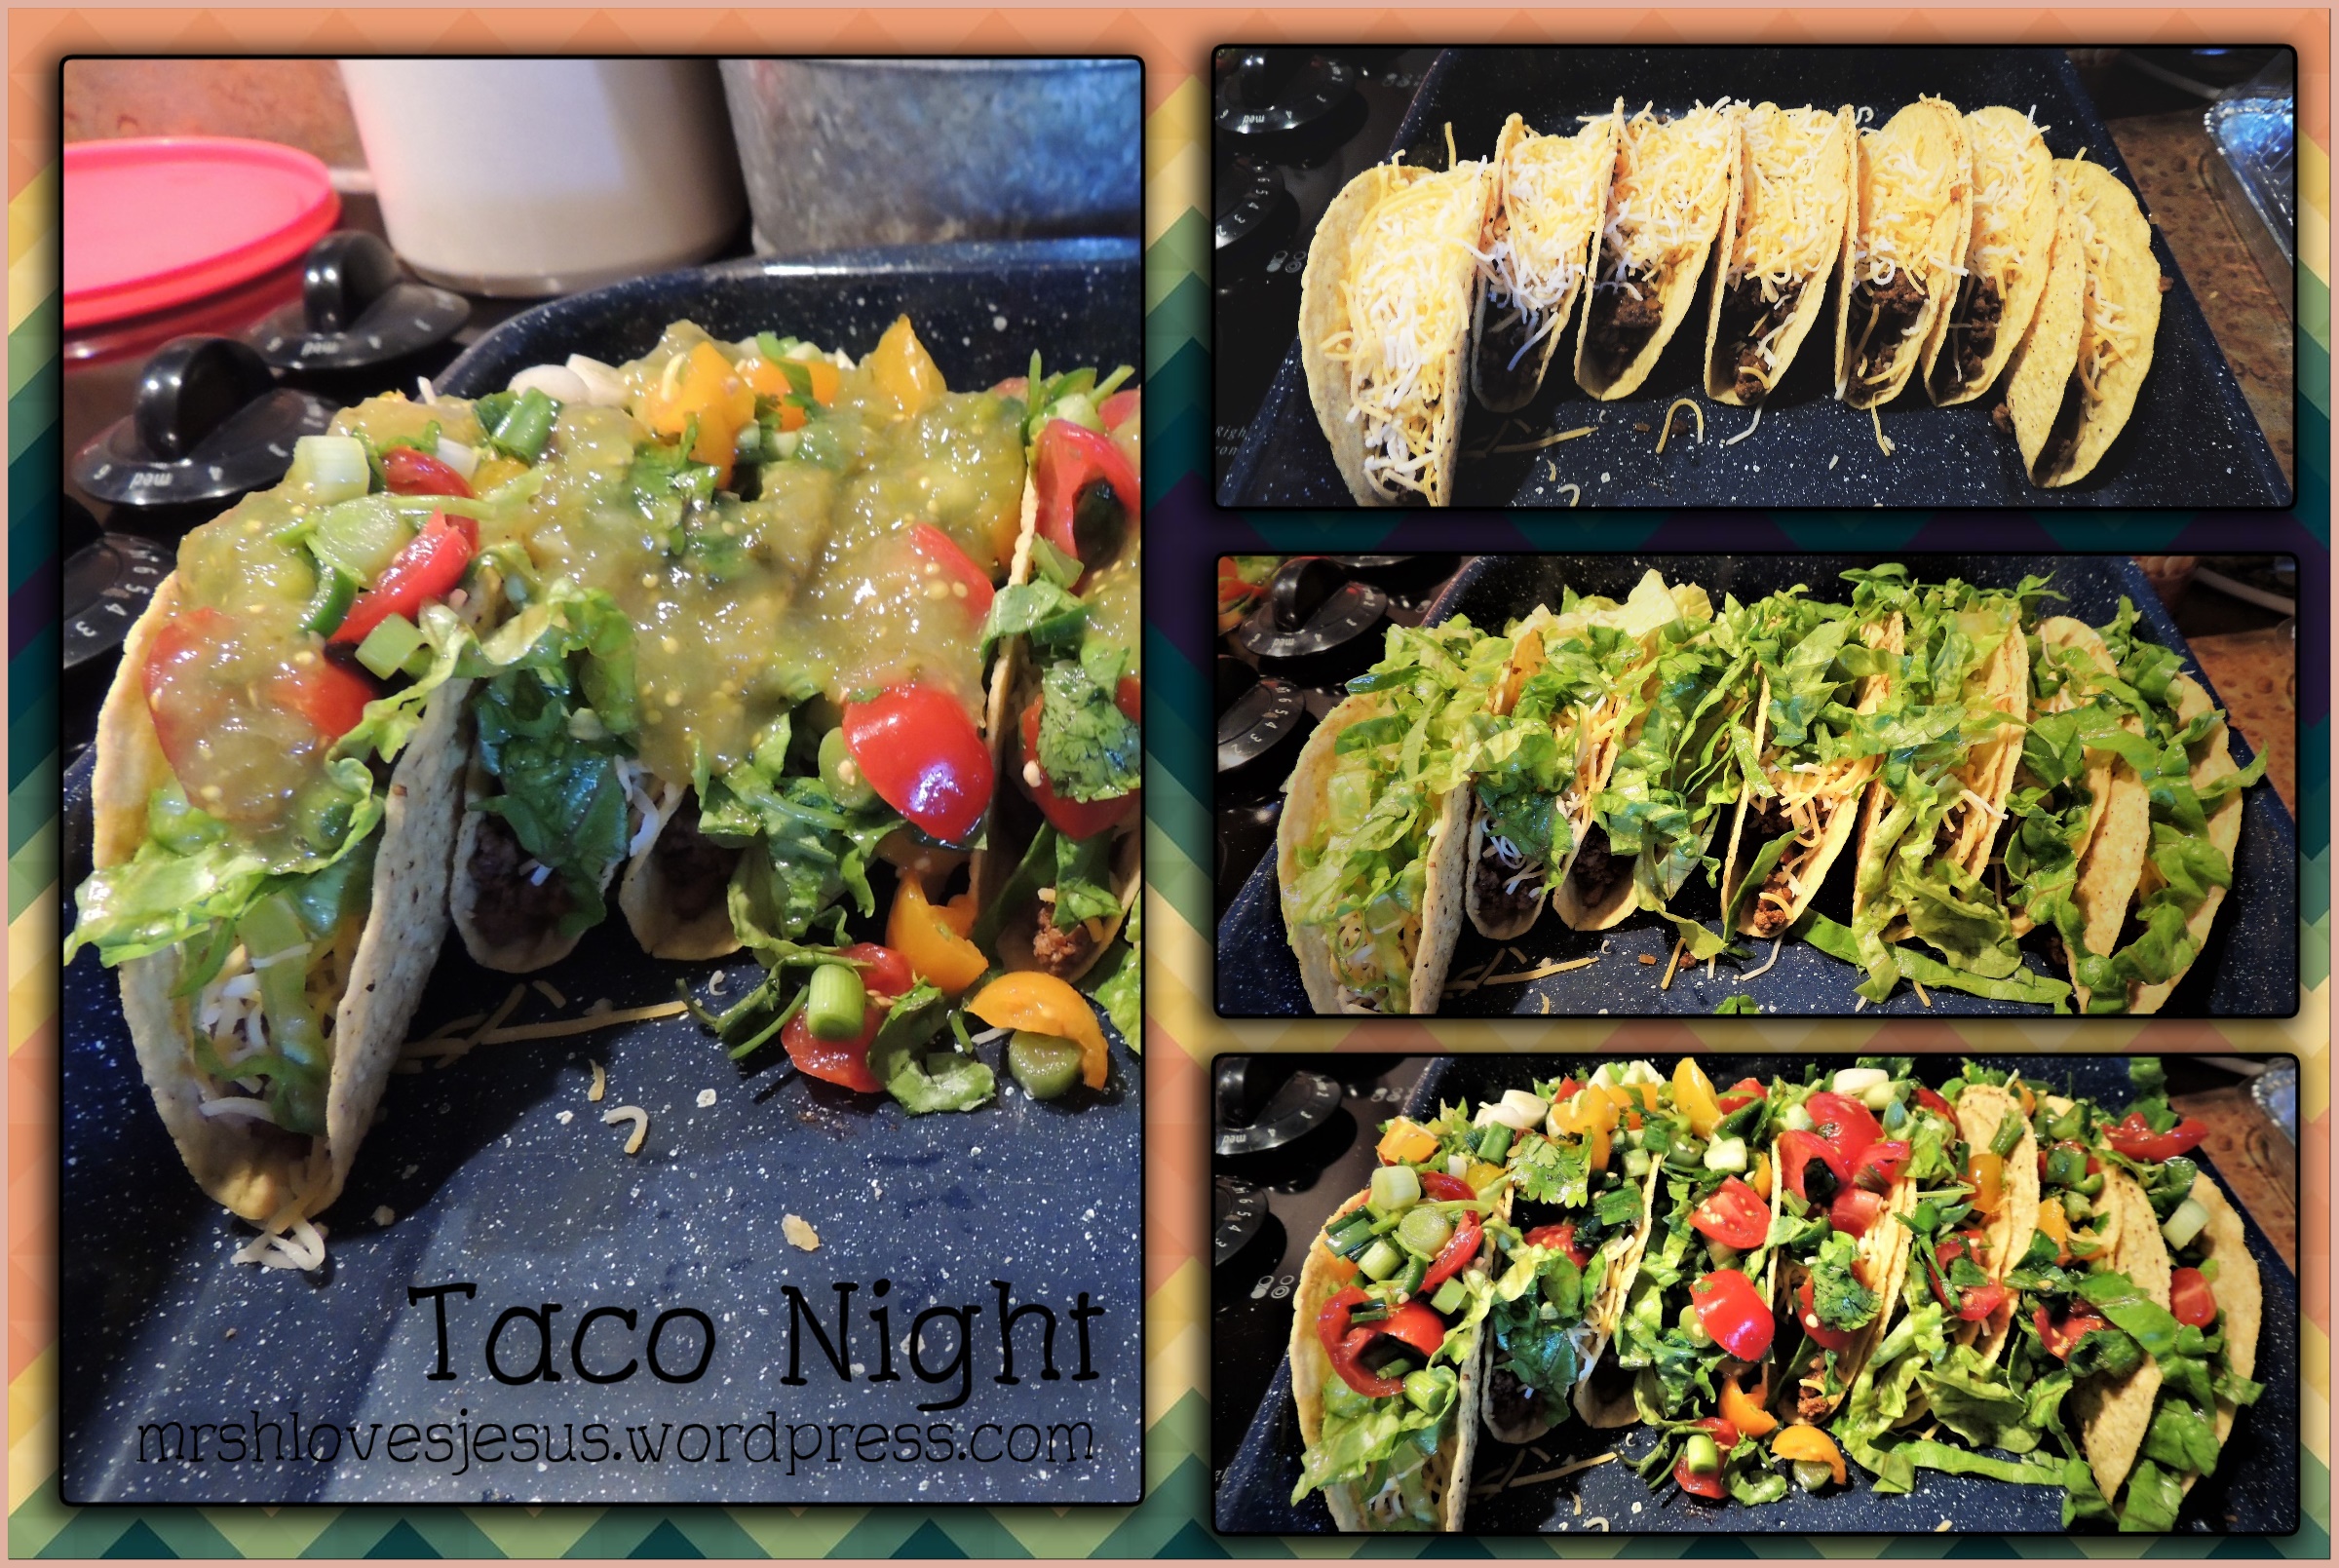
Get ready for TACO TUESDAY!!!!!! This might be one of the more coveted recipes in my collection. I am often asked how I make my tacos. It is also a frequent request for Family Supper night by daughter, son-in-law, and the grandkids. It’s one of my husband’s favorite dinners, and really one of my favorites too!!!! Quick and easy!!!!
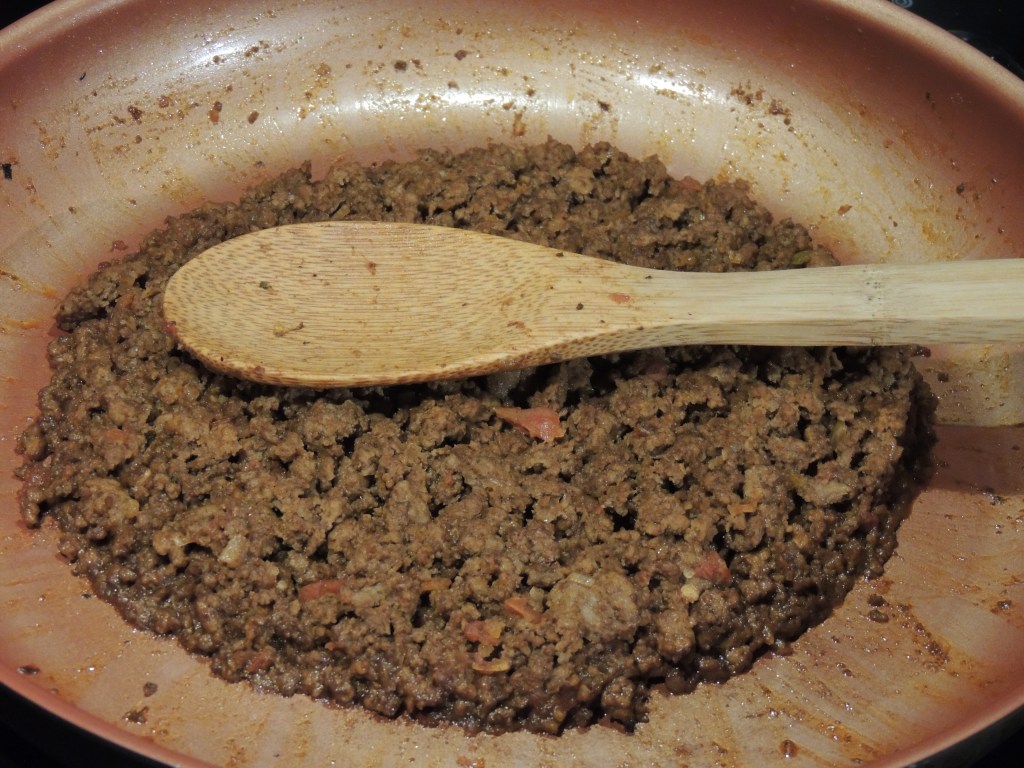
Let’s start with the meat…
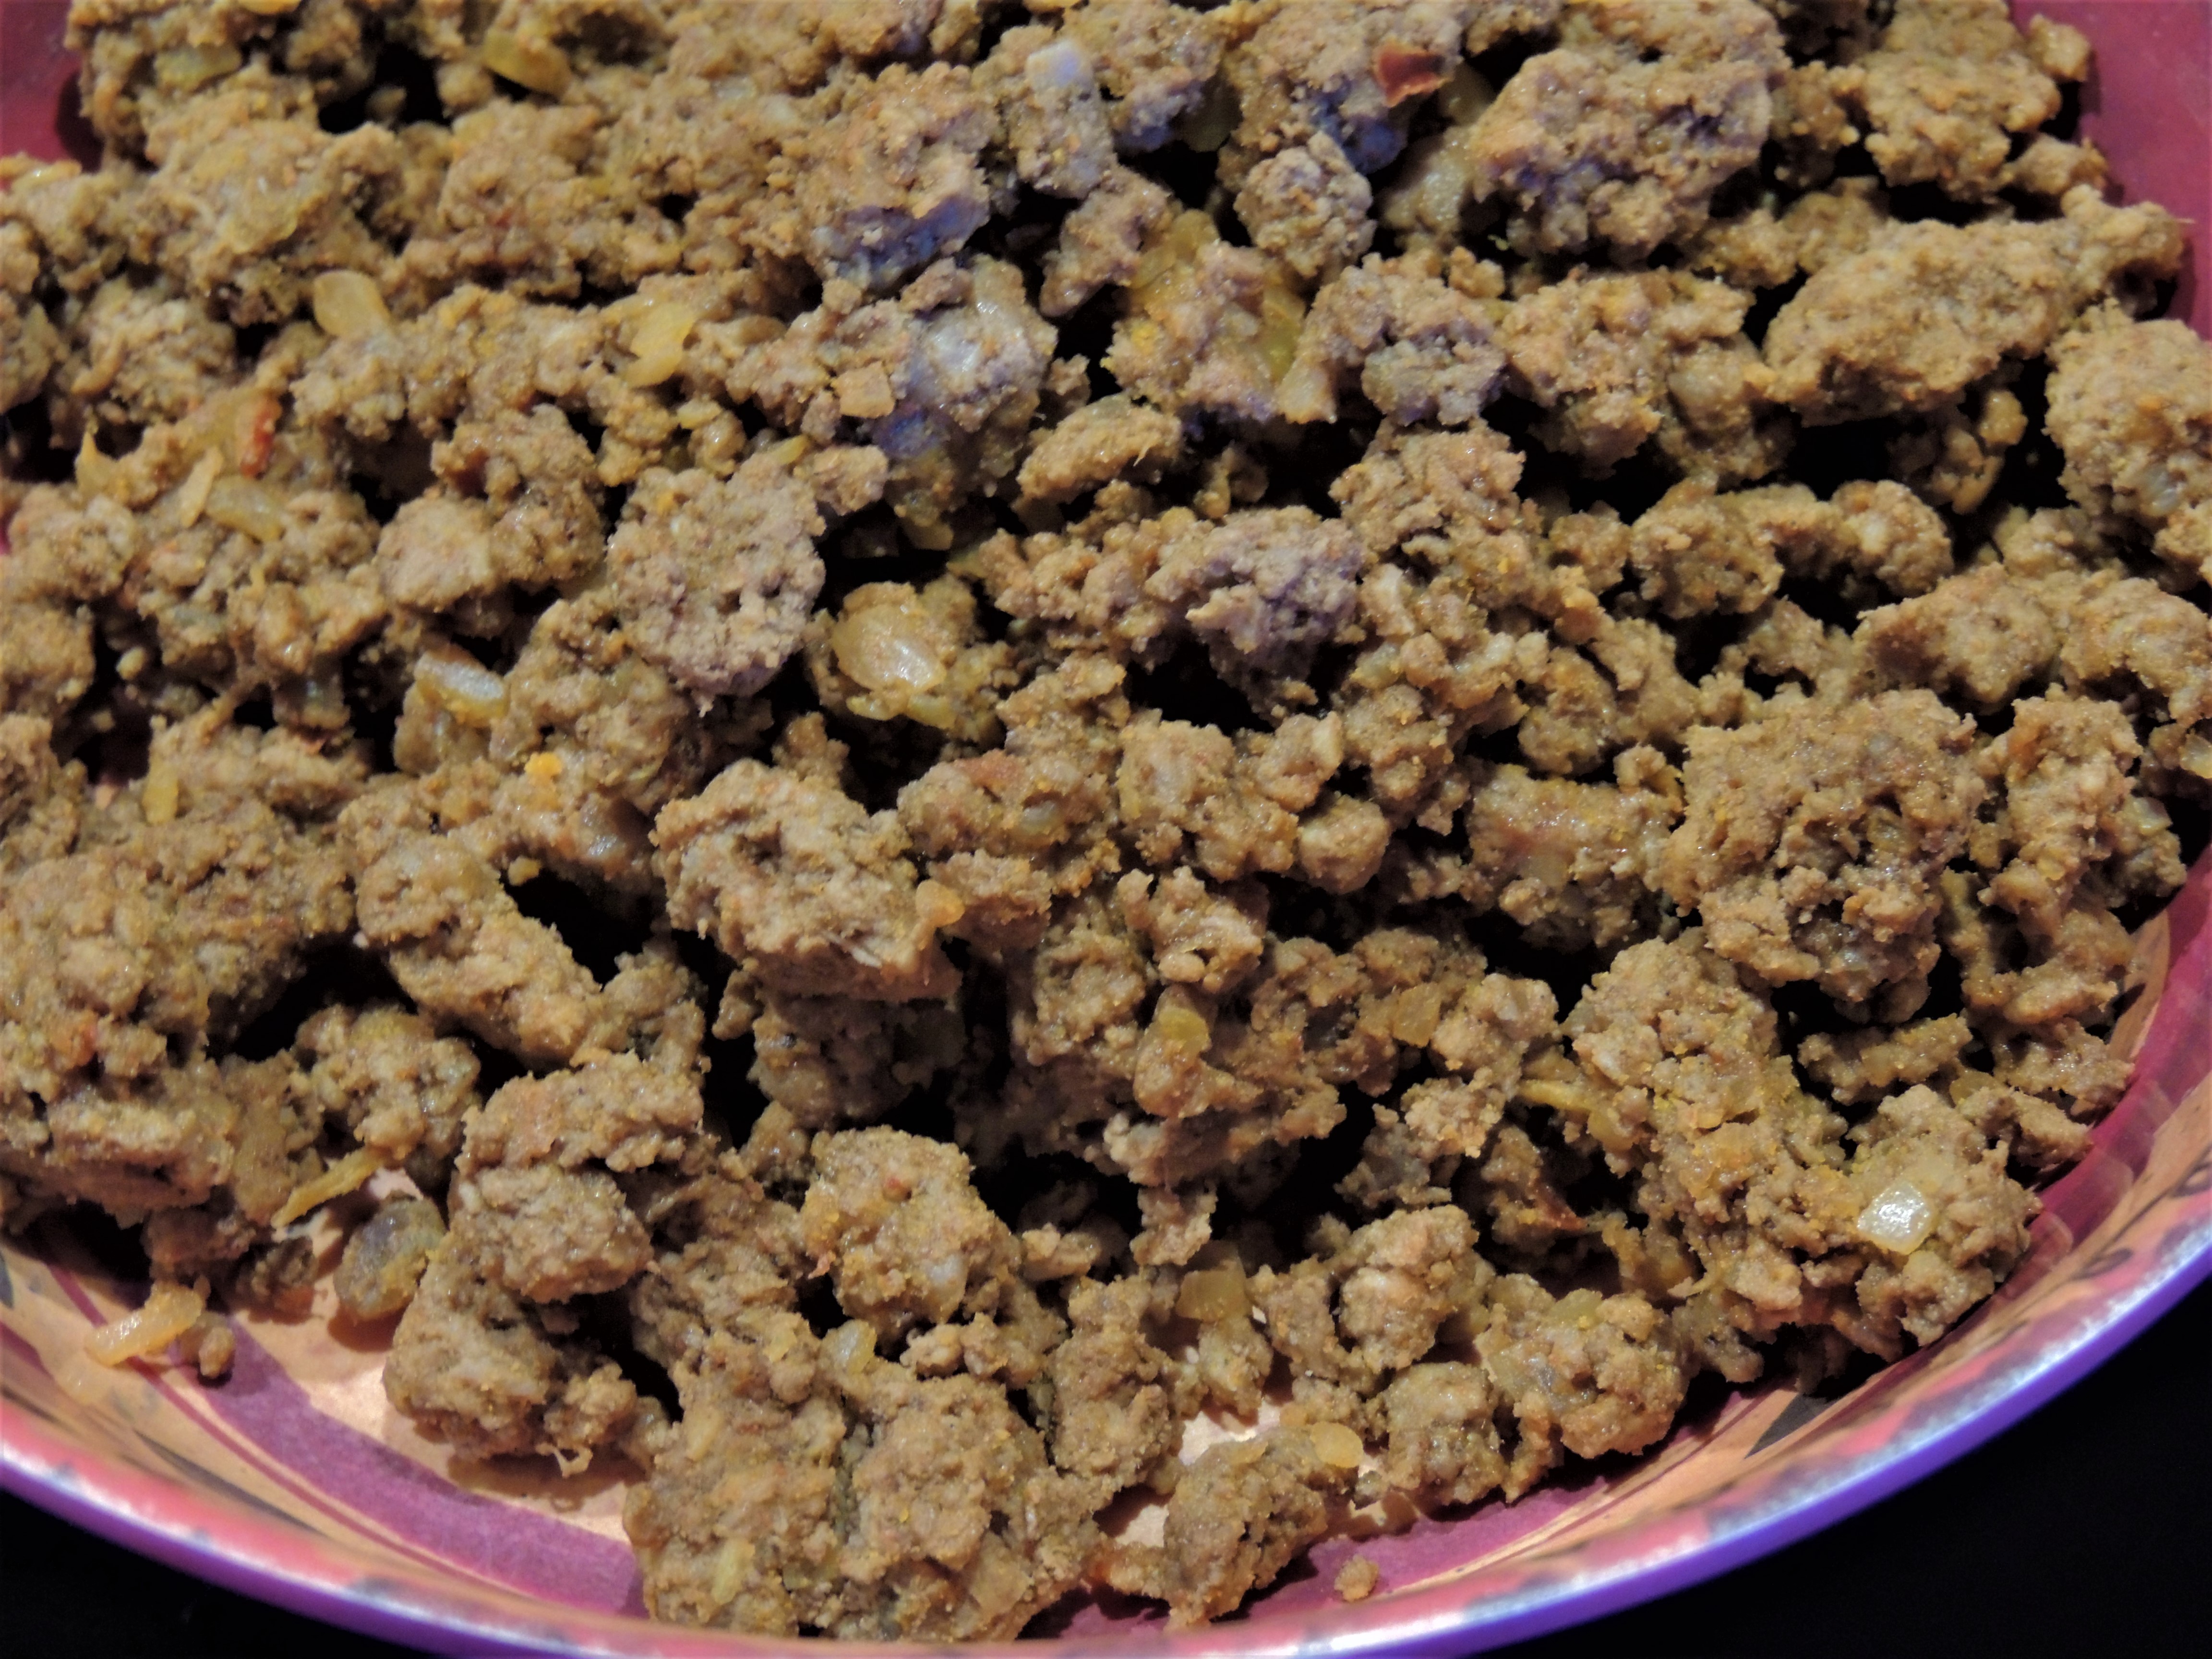
I use 2 lb. of quality ground beef (to feed 4 adults and 2 kids) – a good organic, grass fed, angus beef. I break it apart in a frying pan and toss while cooking over medium high heat until browned. Drain off and discard the fat . I then sprinkle 2 packets of Lawry’s Taco Seasoning Mix over the meat, and then I fill the empty packets with water and pour the water over the seasoning and stir it well into the meat, with the heat turned down to medium low. To this I add about a half cup of salsa (fresh or canned) and stir that altogether. I then let the meat simmer on low heat until the tacos are ready to assemble.
The meat will become drier the longer it simmers. I personally like it dry so that it doesn’t make the bottom of my tacos soggy. I don’t like when they fall apart and all the stuffing falls out.
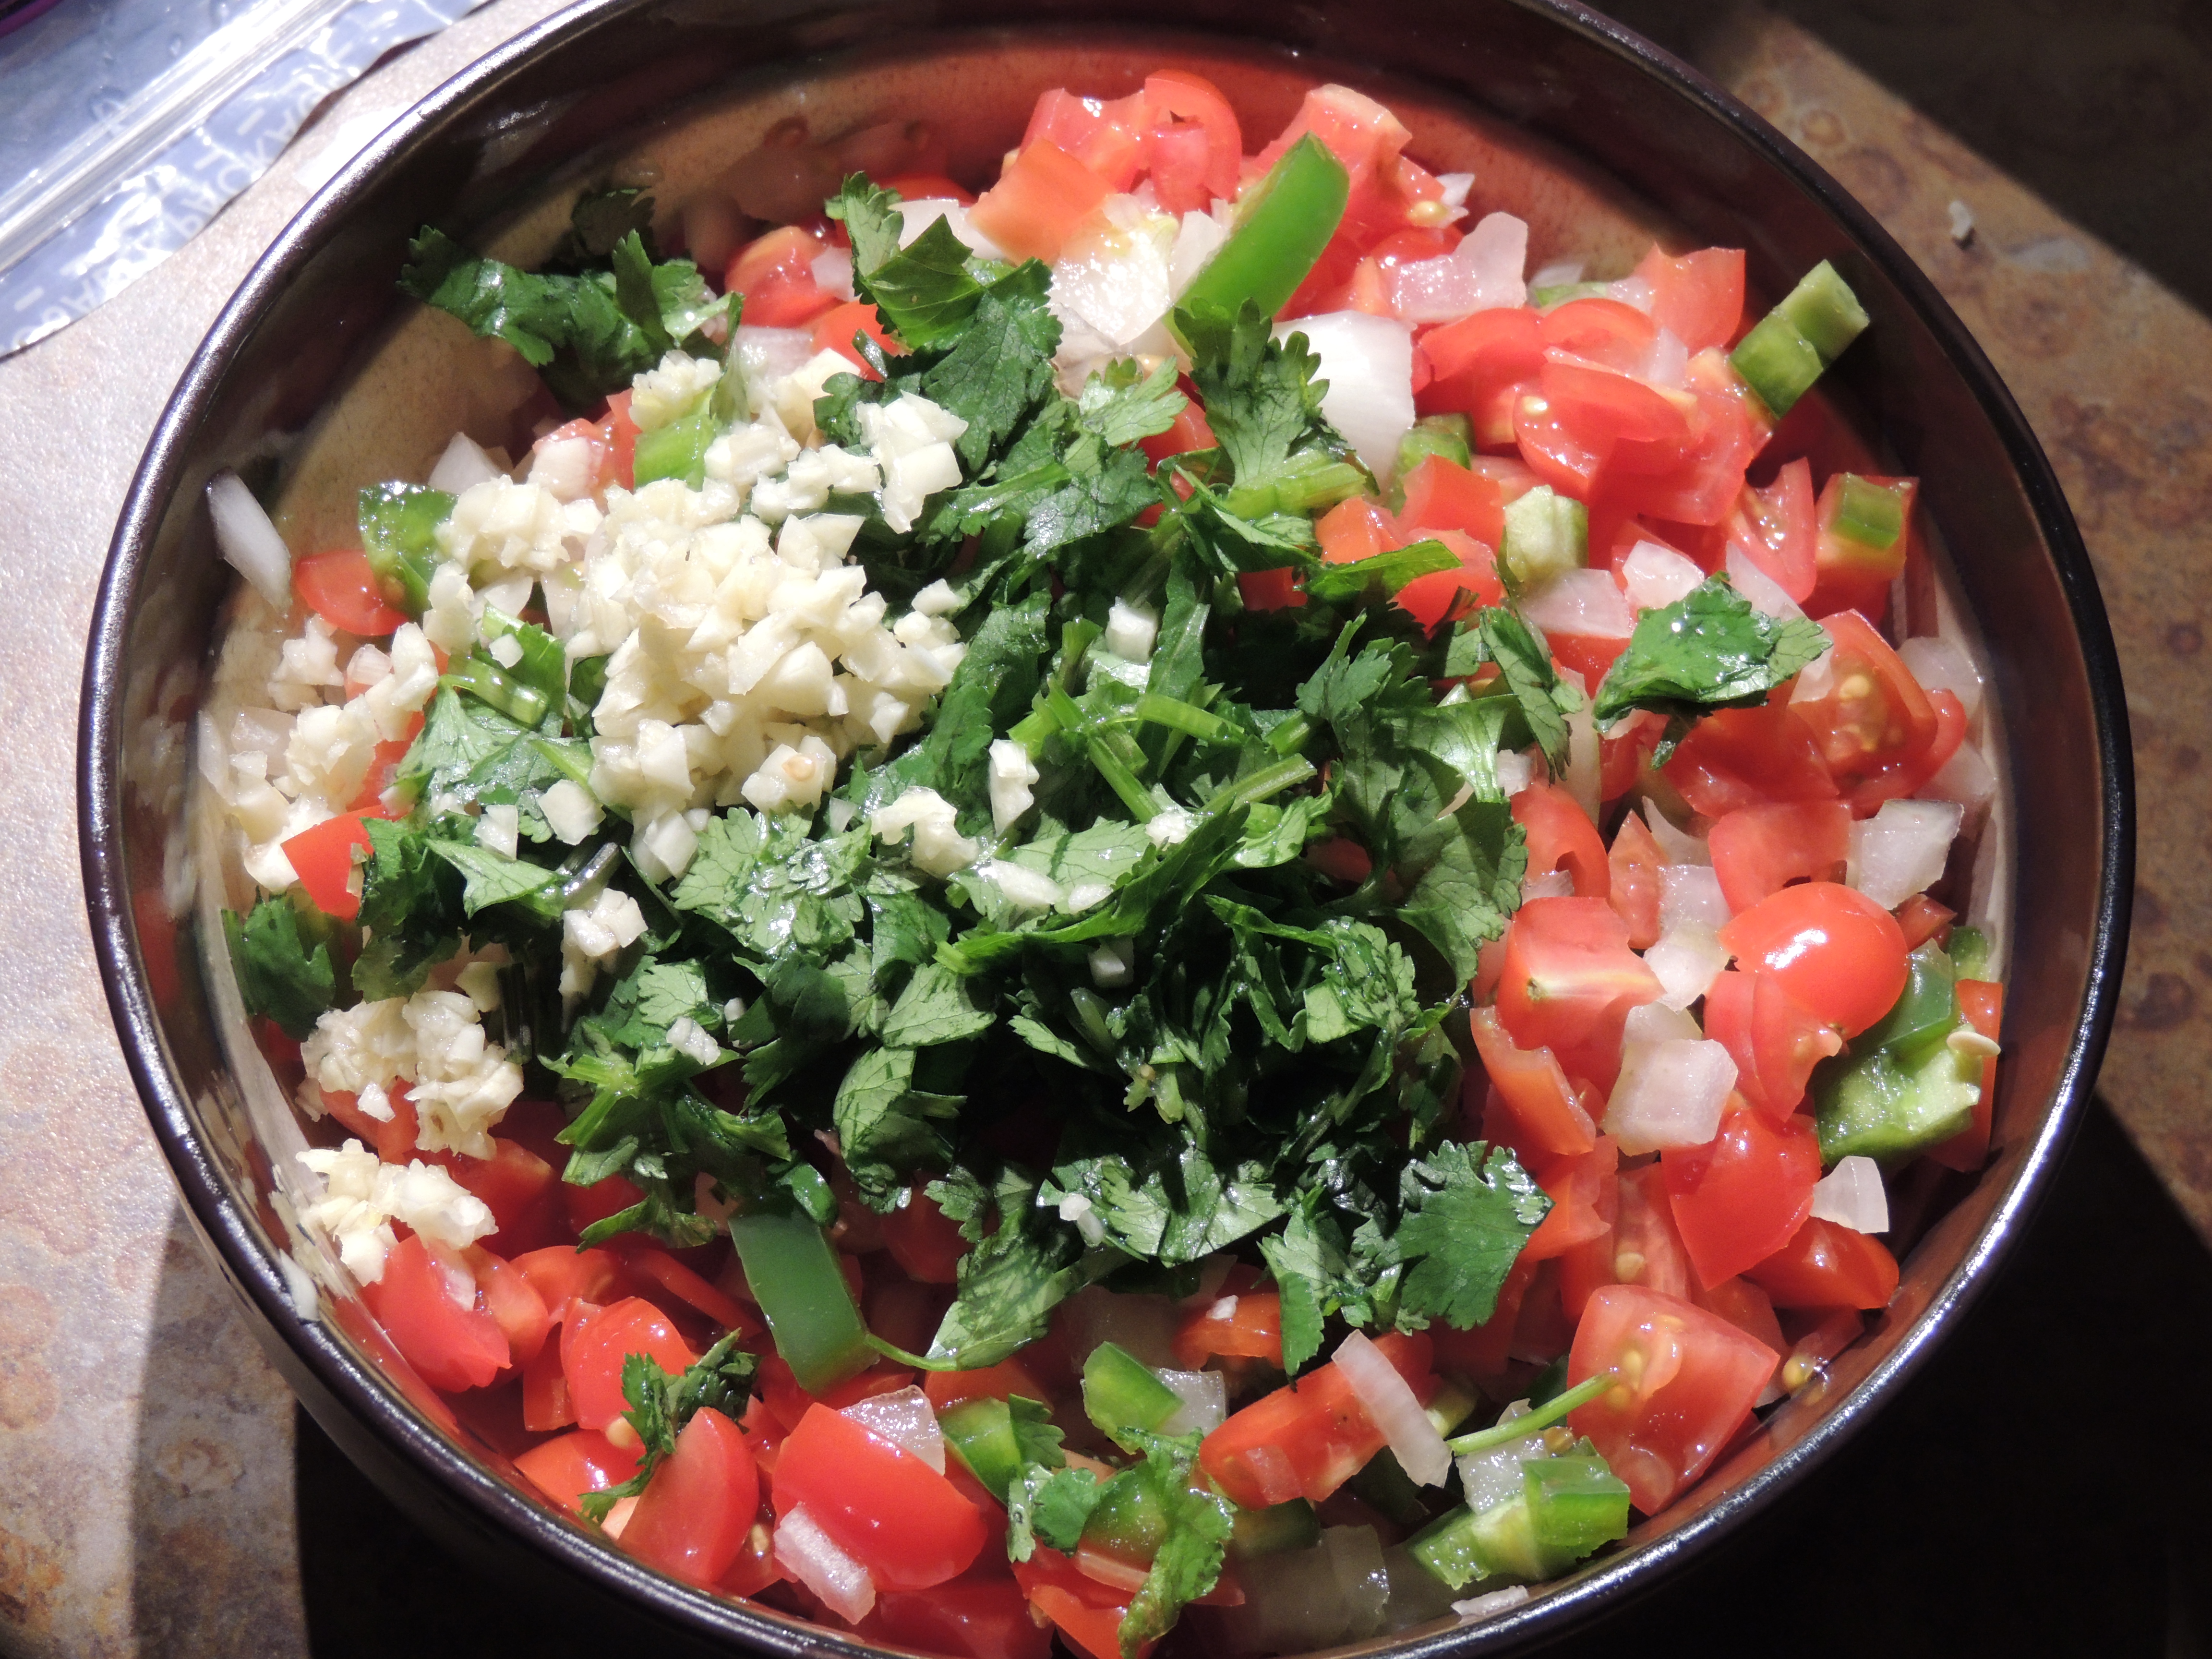
Pico de gallo
I use about 1 1/2 cup of chopped sweet cherry tomatoes, 1/2 cup chopped fresh jalapenos, and 1 cup chopped green onions (or a small sweet white onion if I don’t have green onions on hand), then add about 1/2 cup chopped fresh cilantro, 2 cloves of garlic minced, the juice of two limes, and a sprinkle of salt to taste. If the jalapenos are really mild, I sometimes add a pinch of cayenne for some kick.
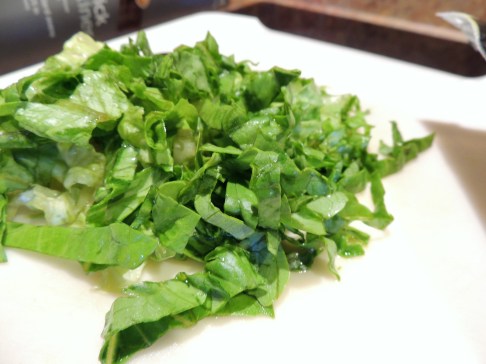
Toppings
I chop one whole bunch of Romaine lettuce into small shreds.
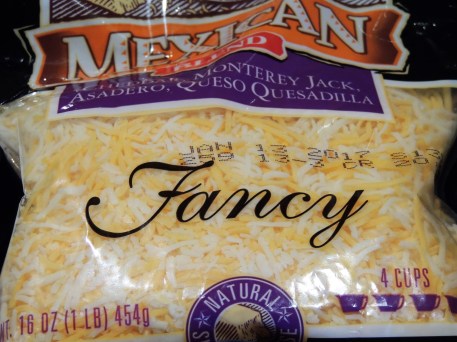
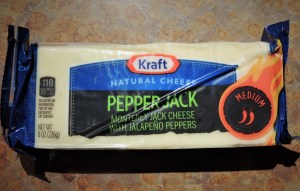
I like to shred my own cheese (pepper jack) when I’m feeling ambitious, but often use a Mexican cheese blend that is pre-shredded already.
Taco Shells
I buy the small Old El Paso brand taco shells (2 pkgs to feed my family of 4 adults and 2 kids because the men will easily eat 6 tacos apiece or more).
I preheat my oven to 360*F, and set the shells in a baking pan. When the oven is ready I pop the pan of shells in for about 6 minutes, or whatever time is recommended on the package. This is an important step because it makes the shells nice and crispy!!!
Taco Sauce
I actually use a variety of sauces. I like to try new ones. The green tomatillo Herdez or La Costena hot sauces (medium) are both really good standbys. I like the Taco Bell hot sauce (Diablo), and the DelPrimo sauces are all good. But my favorite of recent is El Gallo flame roasted Jalapeno. It comes in a bag with a little screw top spout (medium).
To assemble the tacos I remove the shells from the oven and quickly fill them with meat, dispersing it evenly among the shells. I sprinkle cheese over the meat in each shell, and then add the lettuce. They each then get a spoonful of my fresh Pico and a generous pour of tomatillo taco sauce. That’s it! Mmmmmm…. let’s eat!!!!!!
Now some people might like to add chopped black olives, maybe some sour cream, possibly some sliced avacado, and that’s all good, but personally, I can’t bear to mess with perfection.
If you’d like to add a couple of sides, I love charros or refries and Mexican Rice. And you can never go wrong with Sopapilla Cheesecake for dessert!!!!! Hubby washes his meal down with a good Modelo cerveza! I just like iced tea. Gracee will take a Margarita, if I make her one, and the kids like horchata.
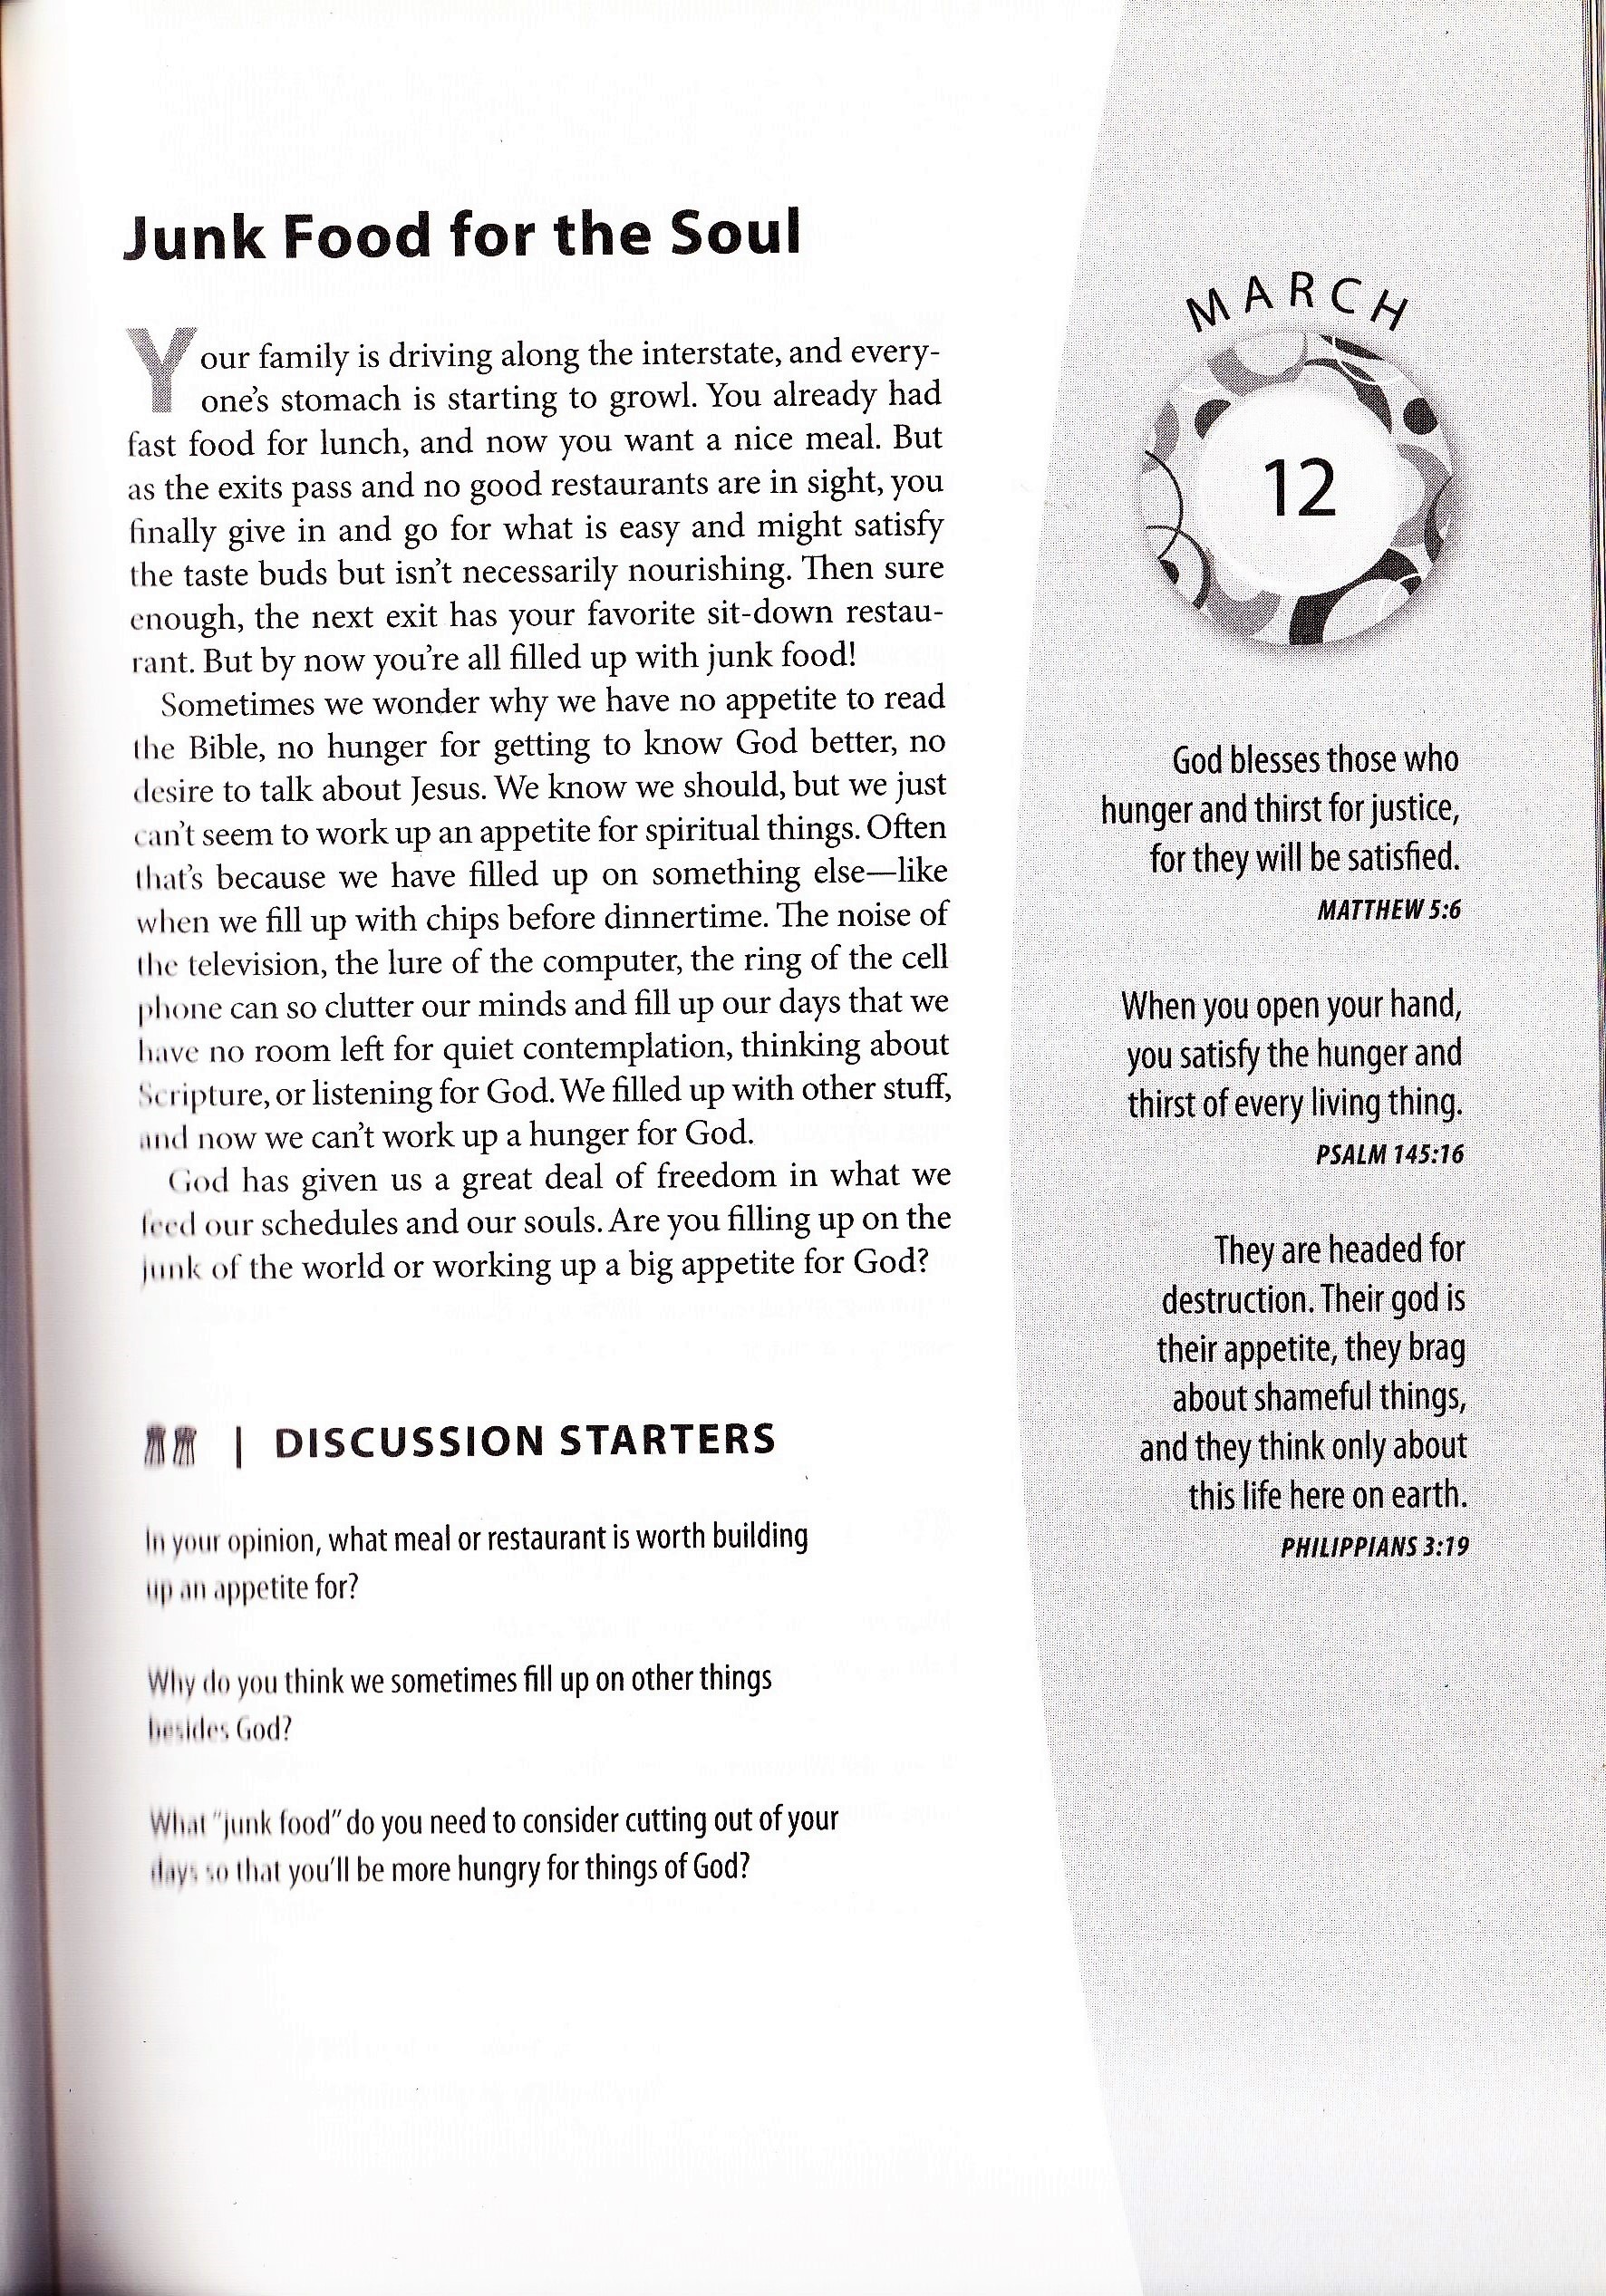
Hey, while we are enjoying our Family Supper, may I share with you from the book One Year of Dinner Table Devotions & Discussion starters by Nancy Guthrie (published by Tyndale)?
While the rest of my fellow “gringos” are having “Ugly Sweater” parties, Cookie Exchanges, and Gift Wrapping/Mulled-Wine drinking parties for Christmas wouldn’t it be fun to host a TAMALADA just to be different?
I recently tried my hand at making Tamales, and to my delight they turned out, and were actually delicious (thank God), but boy howdy were they a ton of work. Took me ALL DAY! I’m absolutely addicted to tamales at Christmas, but I’m thinking if I ever decide to make them again I will want to make a party out of it, because many hands make light work. So here’s what I’m thinking…
Who to invite? Hmmm, well they’ll need to be reliable guests, who promise to make their dish and show up for the assembly process.
I could send them each a recipe card, after they RSVP and volunteer for a portion of the tamale-making they want to do. The host (which will be me, if I manage to muster the courage to actually do this) will provide snacks, and beverages – I’m thinking some fun drink choices would be Sangria; a Hot-Mexican-Chocolate Bar; Horchata Smoothies; and blended Margaritas. I’ll need to remember to find a good Latino Christmas Album or two or three to play for ambiance during the party, and also dig out an entertaining game to go with the party, that we can play while we’re waiting for the first batch of tamales to come out of the steamers. A couple of my favorites are Mexican Train (dominoes) and Canasta (cards)!
Or, if my family/friends want to bring their Christmas cards, stamps, address labels, and stationery we could get our Christmas cards ready to mail out while we wait for tamales, and we can snack and visit while we write and fold and lick and stamp! Make it kind of a working Tamale party! I can offer this on the invitations, and then discuss it with everybody when they RSVP.
Here’s how I’m thinking we can split up the cooking…
Guests #1, 2, & 3 could each make a 3-lb pork roast (half of the recipe listed below) and shred it, discarding any bone or cartilage, and reserving and bringing the strained pork broth to the party.
Printable Recipe Card
.
Guest #4 could make the Chili sauce up to the point of adding the broth and blending it, and bring the cooked chilies with them to the party.
Printable Recipe Card
.
HOST: could prepare corn husks
.
Guest #5 could make the Masa, up to the point of adding the broth and mixing, and bring it to the party
So, I know from experience that it’s going to take at least 4 hours to make the finishing touches on the meat and masa, then assemble, and steam the tamales. So I’ll plan my party accordingly when filling out the details on the invitation. Maybe I should have it on a Saturday or Sunday afternoon?
Once my guests have RSVP’d and volunteered for the dish they want to make, I’ll send them out the recipe card for their items (shown above, in case you missed them).
Buy whatever groceries and beverages I’ll need and give myself time to prepare them before the party.
Set up a station for the final masa preparation. I will need counter space, a large bowl, a mixer, and a cup of warm water to test the masa in.
Set up a work station for the final preparation of the red sauce. I will need a large sauce pot for the stove, and a blender or food processor. Someone will be making a roux in the sauce pot, and another person will be blending the red sauce (softened chilies and broth from pork). The pork and the red sauce will be added to the roux.
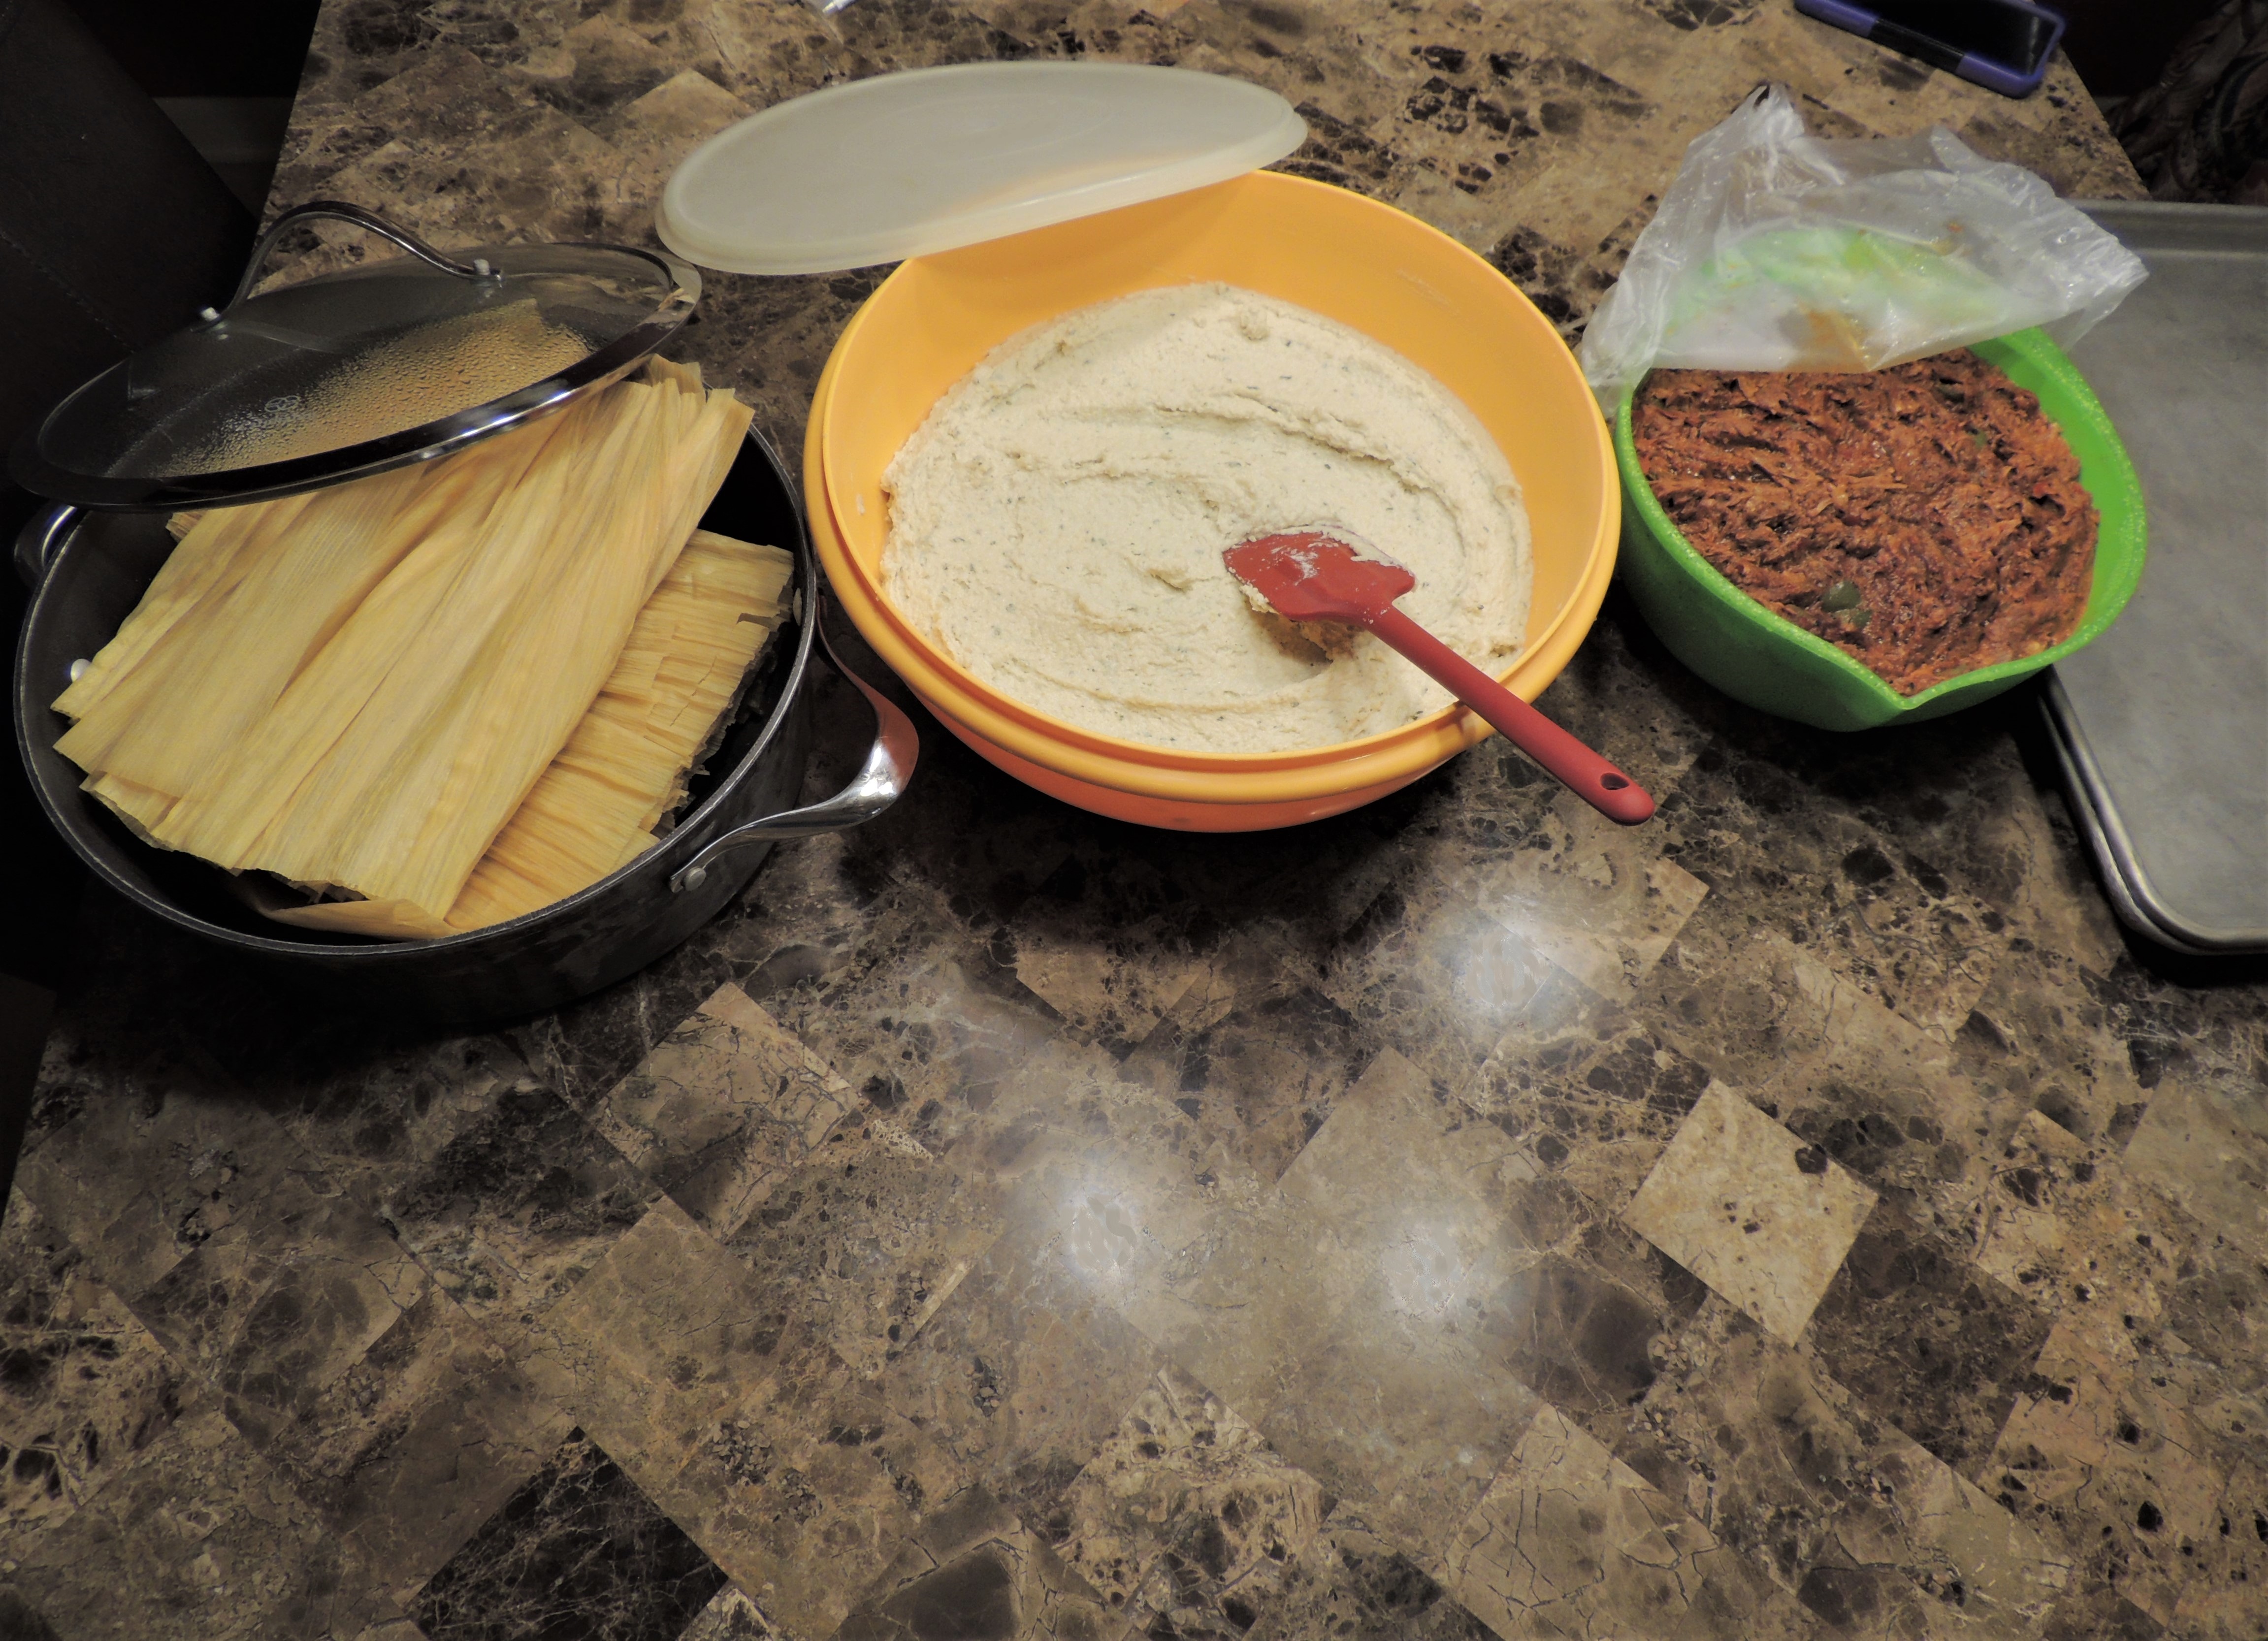
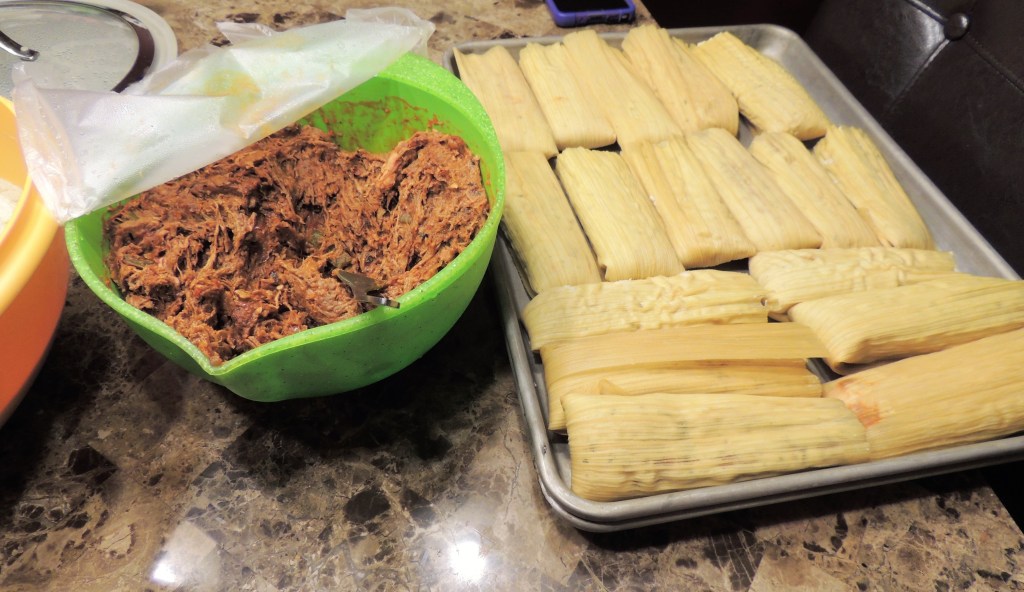
I’ll set up a large table for assembly. Place the ingredients down the center of my table, the husks next to the masa, the masa next to the meat, and finally a cookie sheet at the end to pile the tamales on. I’ll put a person at each ingredient and we’ll pass each tamal along. They’ll go together pretty quick. I will need some clean kitchen towels and possibly a roll of paper towels, also a masa spreader or spatula, a spoon to measure the masa, a spoon to measure the meat, and a large cookie sheet. And afterward some tin foil to wrap the tamales in for sending home or freezing.
Make room in my refrigerator for whatever uncooked tamales, and whatever else needs refrigerated.
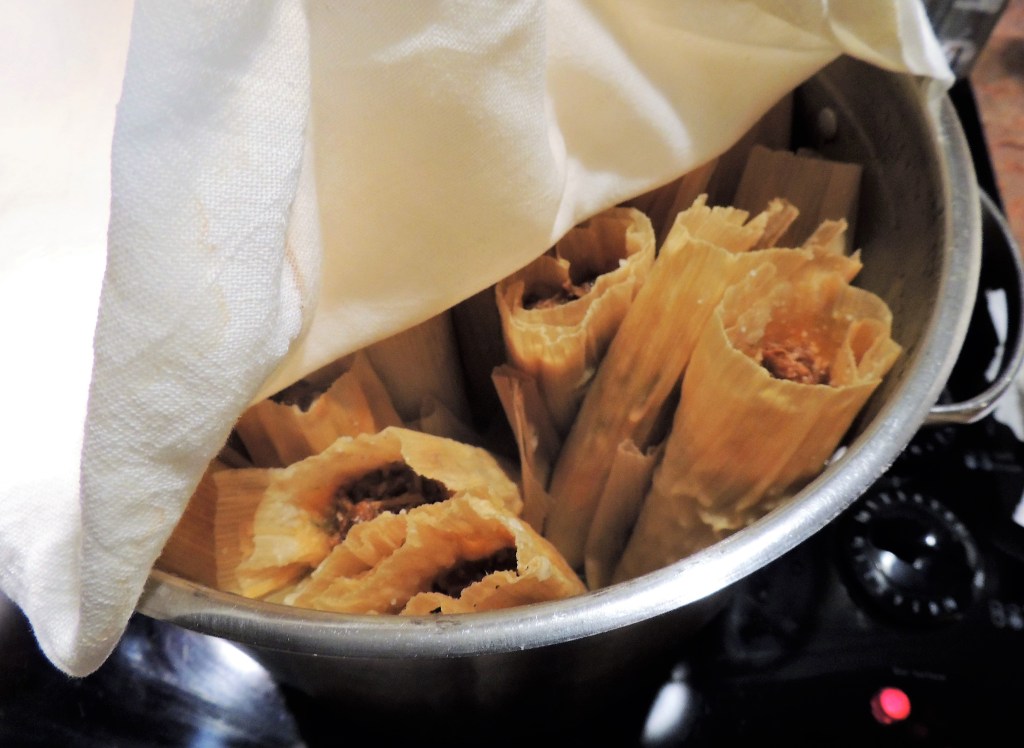
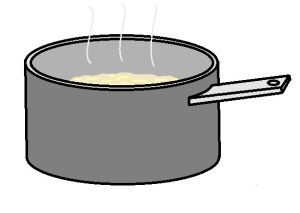
Set up the steamer pots (illustrated below). I will need two large canner size pots with lids and a steamer basket for each inside. I will also need two clean kitchen towels and water for those.
Set up a beverage station with various beverages as mentioned earlier. I can set up a hot cocoa bar, I can also set out a large thermos of blended Margaritas, and a pitcher of Sangria. I might also want to set out some iced tea and water and a cooler of ice, and a variety of glasses and mugs.
Set up an appetizer/snack table where guests can nibble as we wait for the tamales to cook. Decide what appetizers I will serve at my party, and have them ready when guests arrive. I will need serving plates, bowls, spoons, etc. I might want to have a pretty tablecloth for this table, and some festive table decorations.
Set up the music that I will have playing in the background of my party.
Set out a couple of game choices (mentioned earlier), so that once the tamales are all assembled, and the table has been cleared, we can start having some fun. Or if we all prefer doing Christmas cards, I will need to *be sure to note this in my party reminder call, so my guests will know to bring their supplies!
Of course I’ll want a clean house, a spotless kitchen, and a tidy bathroom at least. Ugh! Sometimes this keeps me from throwing parties! My house is truly never clean enough. Oh suck it up girl, get to scrubbin’ it’s gonna be fun!!!!!!!!!
A day or two before the party I can send a reminder via Text/eMail/Phonecall, so my guests will know if we’ll be doing Christmas cards during the party, or just playing games and eating. They might need the prodding for the dish they are making too!
Day of the party designate various ASSEMBLY LINE jobs:
Someone to wash all the dirty dishes and clean counters (my least fav job)
Someone to make the roux, and mix the meat with the sauce
Someone to finish making the red sauce
Someone to finish making the masa
Assembly line Husk Person, who will dry and pass the husks
Assembly line Masa Spreader person
Assembly line Meat person, who will also wrap tamales
Tamale tie person, who will tear off strips of husk to tie around tamales and stack them on a cookie sheet
And finally someone to set up and load steamers, and babysit them with water
Full RECIPES
.
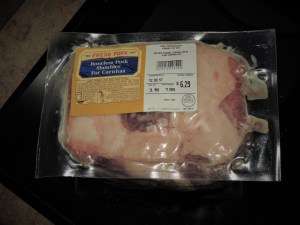
Pork for Tamales
2 3-lb pkgs Pork Carnitas or a shoulder roast
1 large onion, chopped
5 cloves garlic, broken in pieces
3 jalapenos, chopped
1 Tbsp salt
Enough water to cover
DO AT HOME: Place pork roast, onion, garlic, and salt in a large pot. Cover with water. Bring to a boil, then reduce heat to simmer over medium heat until pork is very tender, about 3 hours. Remove pork from water and shred. Store in a Ziploc bag and keep in refrigerator for up to a day, until ready to use. Strain liquid and reserve for use in making the red sauce and the masa. Place in sealed jars in refrigerator for up to a day. Skim the fat off the broth and place it in a separate ziploc bag to use for the roux. Bring the pork, broth, and skimmed fat to the party.
DO AT THE PARTY: Once at the party someone will need to make a roux (see recipe below) and then the pulled pork can be combined with the roux and the red sauce.
.
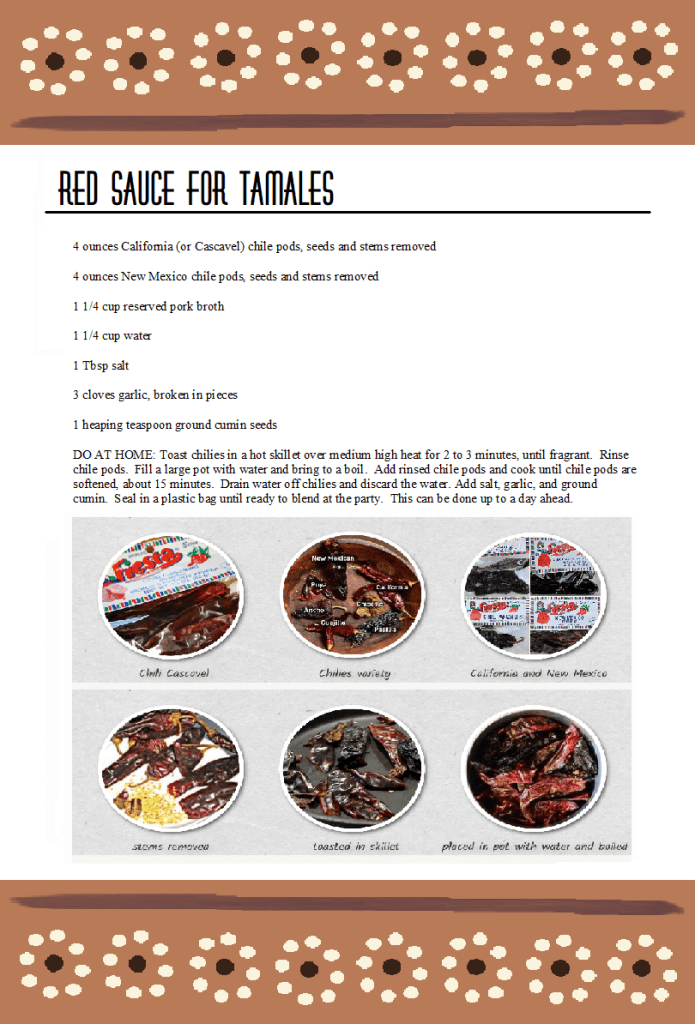
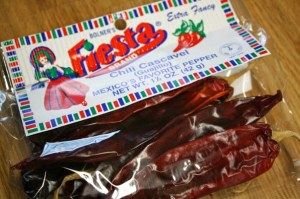
Red Sauce
4 ounces California (or Cascavel) chile pods, seeds and stems removed
4 ounces New Mexico chile pods, seeds and stems removed
1 1/4 cup reserved pork broth
1 1/4 cup water
1 Tbsp salt
3 cloves garlic, broken in pieces
1 heaping teaspoon ground cumin seeds
DO AT HOME: Toast chilies in a hot skillet over medium high heat for 2 to 3 minutes, until fragrant. Rinse chile pods. Fill a large pot with water and bring to a boil. Add rinsed chile pods and cook until chile pods are softened, about 15 minutes. Drain water off chilies and discard the water. Add salt, garlic, and ground cumin. Seal in a plastic bag until ready to blend at the party. This can be done up to a day ahead.
DO AT THE PARTY: Pour chilies, broth, and water into a blender and blend until smooth. Place in large kettle until ready to mix with the pork.
Roux: Someone will need to make a roux using ½ cup lard, reserved from roast, and ½ cup flour. Cook on the stove, stirring continually until peanut butter colored. Toss in the pork and red sauce and mix well. I also like to chop another jalapeno or two to add to the meat. Cover and refrigerate, or if near to being ready to assemble, place on the assembly line.
.
.
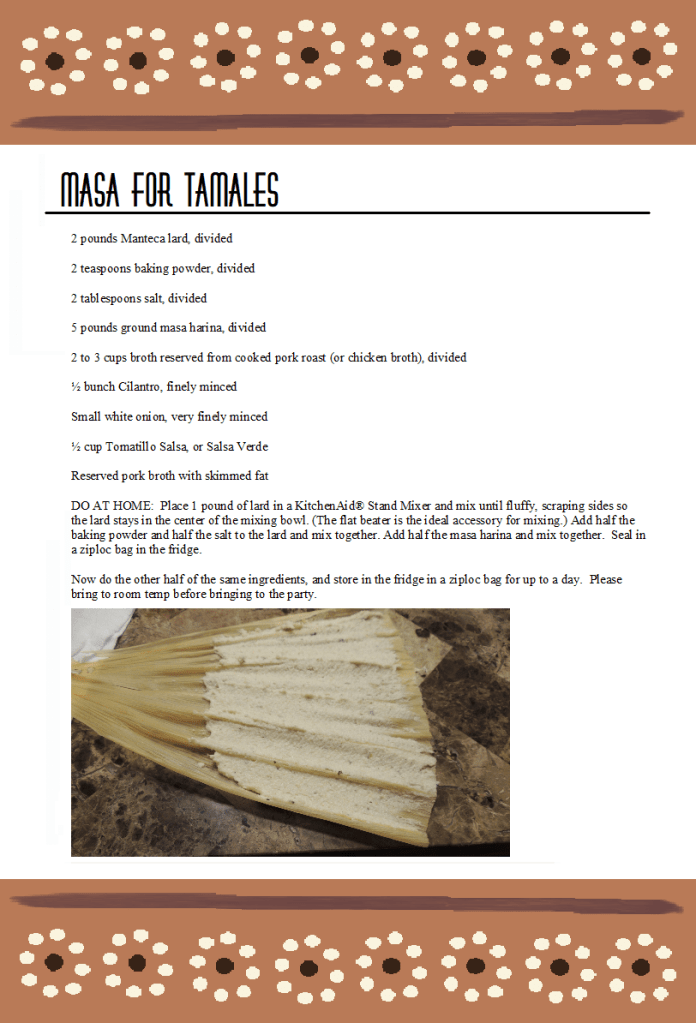
Masa
2 pounds Manteca lard, divided
2 teaspoons baking powder, divided
2 tablespoons salt, divided
5 pounds ground masa harina, divided
2 to 3 cups broth reserved from cooked pork roast (or chicken broth), divided
½ bunch Cilantro, finely minced
Small white onion, very finely minced
½ cup Tomatillo Salsa, or Salsa Verde
Reserved pork broth with skimmed fat
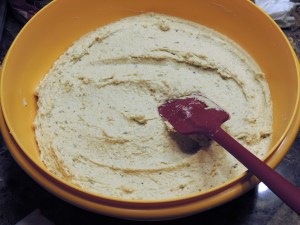
DO AT HOME: Place 1 pound of lard in a KitchenAid® Stand Mixer and mix until fluffy, scraping sides so the lard stays in the center of the mixing bowl. (The flat beater is the ideal accessory for mixing.) Add half the baking powder and half the salt to the lard and mix together. Add half the masa harina and mix together. Seal in a ziploc bag in the fridge.
Now do the other half of the same ingredients, and store in the fridge in a ziploc bag for up to a day. Please bring to room temp before bringing to the party.
DO AT THE PARTY: Place one room temperature batch of the masa in a large bowl. Slowly add half the broth, half the onion and cilantro, and half the salsa verde, to and mix until combined. The mixture should be about the consistency of smooth peanut butter. If not, add more broth as necessary. Test the masa by taking a small piece (1/2 teaspoon) and dropping it into a cup of warm water. If it floats it is ready; if it sinks, add a little more lard, beat for another minute and test it again. Repeat this process until the masa floats. Cover and set on the assembly table.
Repeat the process with the remaining batch of masa.
.
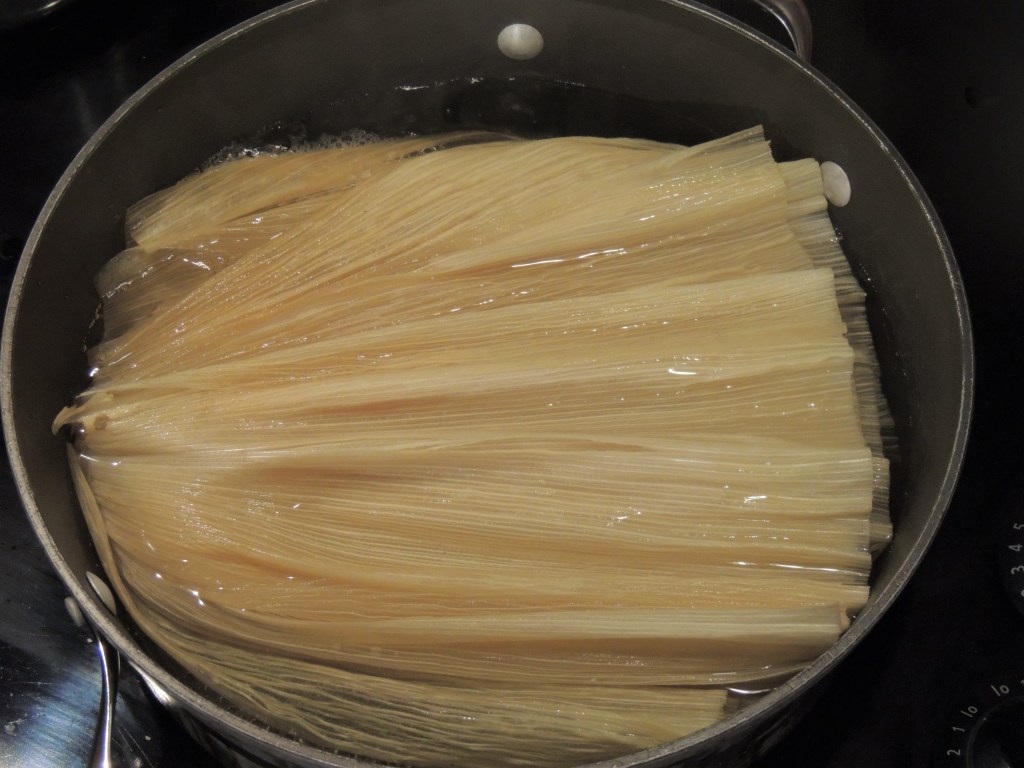
Corn Husks
DO AT HOME: Take husks from package and rinse well in the sink, removing any silks or debris. Fill a large stock pot with water and press the clean husks down to submerge them. Bring water to a boil and soak husks in gently boiling water for about 1 hour. You may need to flip the stack occasionally so the top ones get pliable. Drain water from husks but keep husks in the kettle with the lid on.
DO AT THE PARTY: Set warm, soaked husks, in covered pot on the assembly table. Keep a clean kitchen towel nearby to dry the husks just before spreading them with masa, otherwise the masa won’t stick.
.
ASSEMBLY LINE
Place the husks, masa, meat, and cookie sheet down the center of a table, and seat my guests all around it, except the guest who volunteered to do the mountain of dirty dishes. Assembly will start with corn husks being dried off and passed to the masa person next to them, that person will spread it with masa and pass it to the meat person next to them; that person will top it with meat and wrap it and hand it across to the tie person; that person will tear off a little strip from a boiled husk and use it to tie around the tamal and lay on the cookie sheet. Once the cookie sheet is full and heaping, the last person (ME) will pack the tamales vertically in the steamer with the open end up and start them steaming.
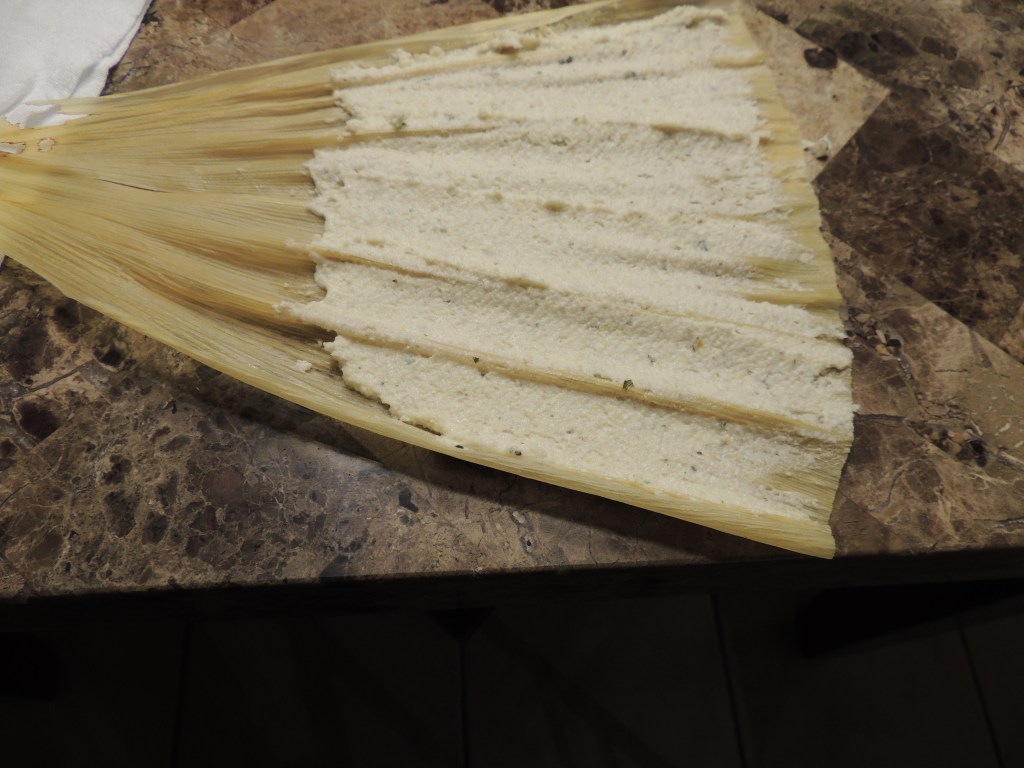
SPREADING THE MASA: Place the wide end of the husk on the palm of your hand (or on the flat work surface), narrow end is at the top. Starting at the middle of the husk spread 2 tablespoons of the masa with a spatula or masa spreader in a rectangle shape, using a downward motion towards the wide-bottom edge. Do not spread the masa to the ends; leave about a 2-inch border on the left and right sides of the husk. Pass to the person with the meat (or other) filling. There is too wide of a swath of masa on this husk shown below, and also it’s not quite thick enough. You only need enough masa to wrap around the meat and a little extra to hold the husk closed.
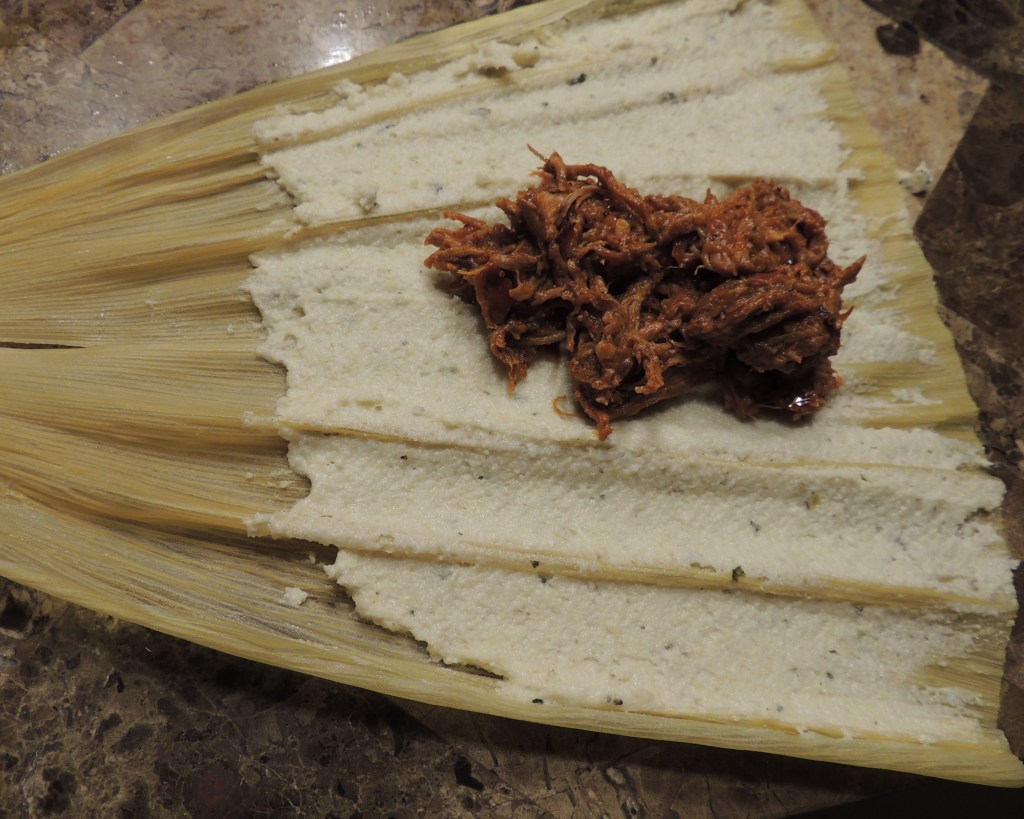
ADDING THE MEAT: Spoon 1 1/2 tablespoons of your chosen filling down the center of the masa. (When I ran out of meat filling and still had masa, I started making Pepper Jack Cheese and Jalapeno filling. Fold both sides of hust to the center over the top of the meat; finish off by bringing the pointed end of the husk toward the filled end. Pass tamale to the person who will tie the tamales closed.
TAMALE TIE PERSON: Make sure each tamal is snuggly closed and will not open during steaming. You can secure by tying a thin strip of corn husk around each tamal. This will keep the tamal from unwrapping during the steaming process, especially if the husk is too thick and will not stay folded. Stack wrapped tamales on a cookie sheet.
HOST: Prepare the steamer pots… (You will also load the steamer pots)
Steamer Pot
This is my tamale steamer. I can only fill water up to the little rack, but not above it, and start it simmering on the stove. The steamer pot needs to be tall enough for our tamales to sit up vertically above the water and still fit the lid on. (If you don’t have a double boiler, you can improvise like I have. All mine is, is a round cooling rack setting on top of a brick, which I’ve washed several times in the dishwasher, or I could also use a small colander placed down into the bottom of my soup kettle and my rack on top. This set up works perfectly. Each steamer will need to have a clean kitchen towel and a lid.
When a cookie sheet of tamales is piled up high, they can be loaded in the steamer…
Fill the top part of the steamer with tamales. Stand the tamales up vertically, open ends up and folded ends at the bottom, and make sure the folded part is either tied up, or held in place with another tamal. Pack the tamales snug enough so that they won’t fall over during cooking, but not so tight that the steam can’t get in around them. In other words, don’t cram and squish them as tight as they will go, but let there be too much space or they will collapse and mush over. If there are not enough tamales to fill the steamer, use canning jars to take up the spaces so the tamales don’t fall over.
Turn heat up on the water until it boils. Cover the tamales with a clean kitchen towel and then the lid of the pot. Turn the heat down to medium so that it stays gently boiling, but not raging boiling. Set timer for 2 hours. Check every 20 to 30 minutes or so to make sure the water is not boiling dry, and add boiling water as necessary. Make sure the tamales are above the water line and that the bottoms are not siting in water at all.
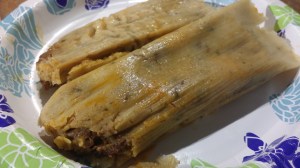
Tamales will need to steam for 2 hours or more. After 2 hours we can test for doneness. Remove one tamale and check if the masa holds together and slips easily off the husk. If so, it is done, if not it needs to steam some more. Check again in 15 minutes when I check the water level.
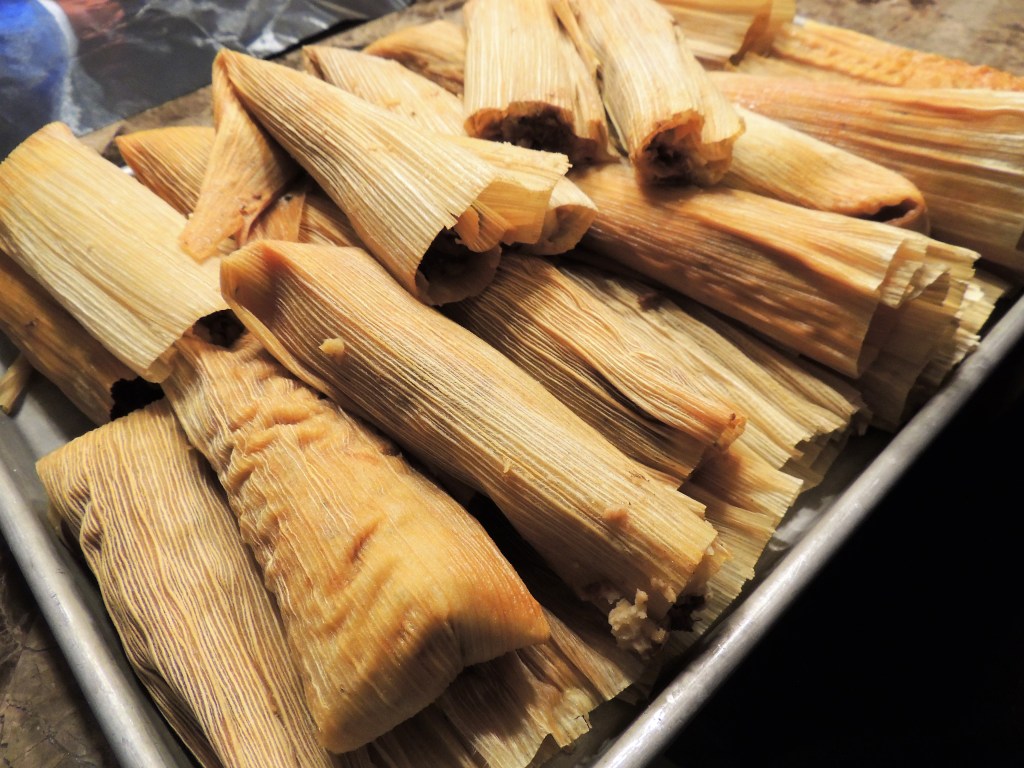
When a batch of tamales is done they can be eaten right away, or wrapped in foil (1 dozen at a time) and refrigerated or frozen for later.
Divide the wrapped dozens of tamales among the guests. There should be about 1-2 dozen per guest.
You will want to eat some at the party!!!! There are lots of ways to eat tamales. Some like them topped with just a little of the red sauce, which you can make another batch of while the tamales are steaming. I like mine all different ways. Straight out of the steamer and burning my fingers and tongue as I shove them into my mouth, or if I have all the toppings on hand for Tortilla Soup or Carnitas tacos, I like all of those (minus the tortilla strips) on top of my tamales. I also like them with salsa verde, chopped onions, cilantro, and jalapenos, and a little dallop of sour cream (as pictured below). And I also like them loaded up with red sauce, pepper-jack cheese, black olives, corn and black bean salsa, shredded lettuce and pico de gallo. There is just about no wrong way to eat a tamale.
So there you have it. Sound like fun to you? I’m pretty sure all my Mexican friends reading this are laughing at my gringo-ness; all having hosted and attended a hundred Tamaladas, so hopefully one of you will take pity on me and invite me to your next one, to show me how it’s done! My hat’s off to whoever invented tamales, for passing on this wonderful food, and to my friends south of the border for keeping going this fun tradition. Feliz Navidad!
.
“The LORD of hosts will prepare a lavish banquet for all peoples on this mountain; a banquet of aged wine, choice pieces with marrow, and refined, aged wine.” Isaiah 25:6
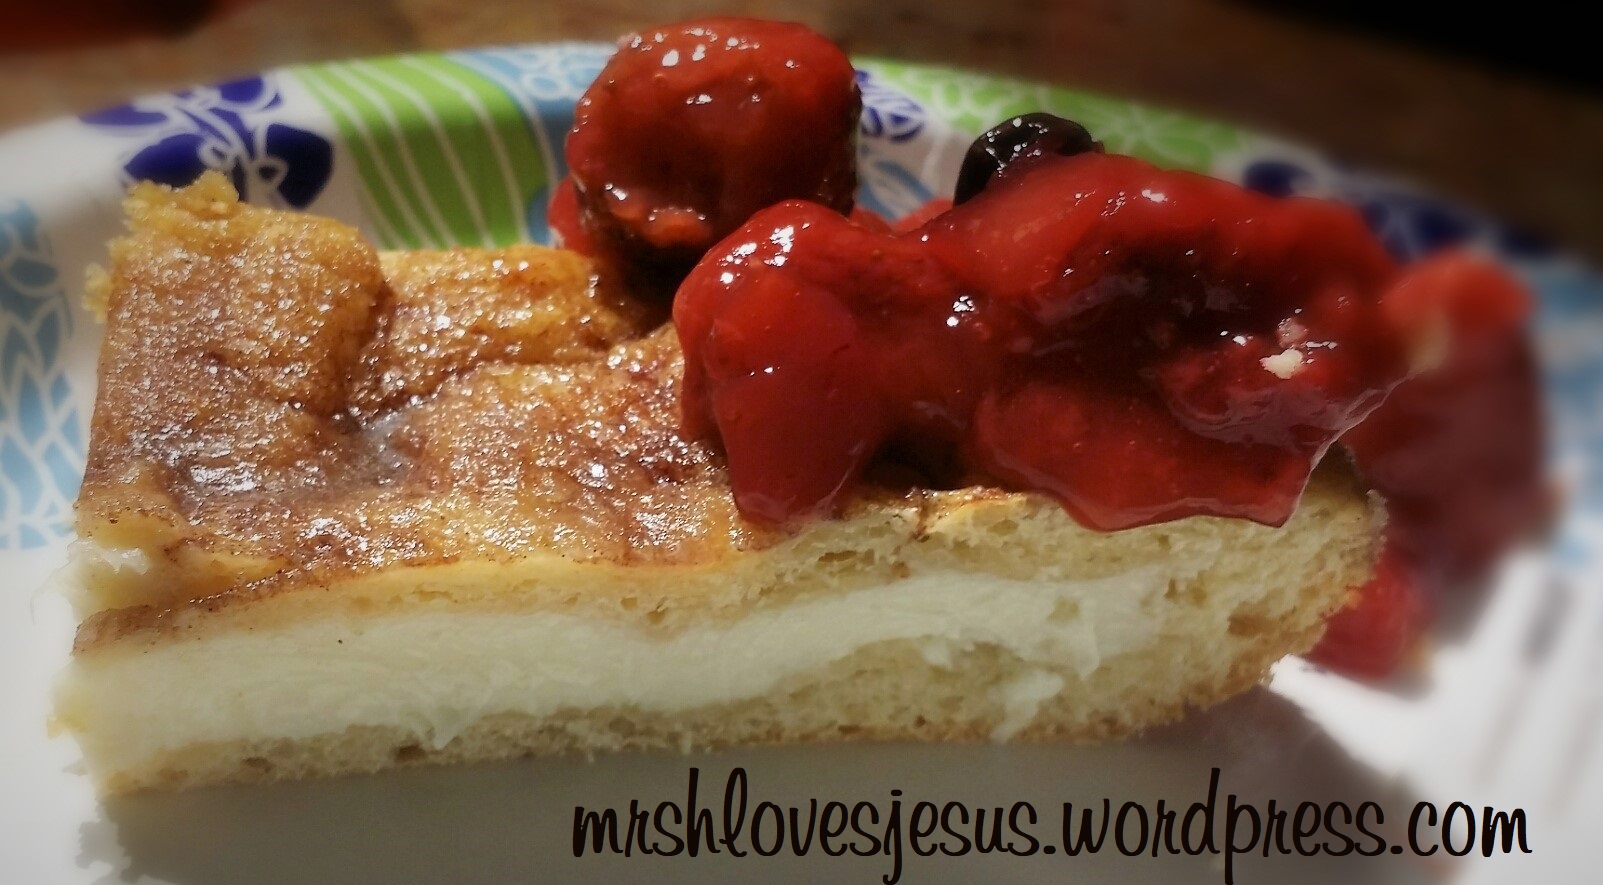
Sopapilla Cheesecake is my go-to, super-fast-and-easy dessert after any Mexican dishes that I serve for supper (like “Taco Tuesday,” Taco Salad, Tamales, Chicken/Cheese/Beef Enchiladas, Chili Rellenos, Asada Street Tacos, Carnitas, Loaded Nachos, Quesadillas, etc.). This year I decided it would be a perfect Red, White, and Blue sweet ending to our Independence Day meal, because of the colors, and because I had all the ingredients in my fridge!
Preheat oven to 350 degrees F
2 (8-oz) pkgs Cream Cheese, softened (room temp)
1 cup sugar
½ tsp Mexican Vanilla (or, if you want to be fancy, you can scrape the seeds from a vanilla bean pod)
Mix together all three ingredients until smooth and thoroughly incorporated. Set aside.
2 (8-oz) tubes Pillsbury Crescent Rolls (or, you can make your own croissant dough)
¾ cup sugar
1 tsp. Cinnamon
½ cup butter, softened (room temp)
¼ cup honey (warm in microwave for about 20 seconds, after baking cheesecake)
Lightly grease a large baking pan (or small high-sided cookie sheet) with a tablespoon of the softened butter. Unroll one tube of crescent rolls and roll out to fit in the bottom of the greased baking pan/sheet, pinching the perforations together. Spread the cream cheese mixture over the dough, leaving a small edge of the dough all the way around uncovered (like a pizza). Unroll the second tube of dough and roll out to fit over the cream cheese layer. Press down slightly around the edges. Mix the sugar, cinnamon, and remaining softened butter together into a paste. Spread over the top layer of dough.
Bake in a preheated 350 degree (F) oven for about 30 minutes, until puffed and golden. Remove from oven and drizzle the entire top of the cheesecake with warmed honey.
Strawberry Blueberry Compote
(This is what gives the dessert the RED and BLUE on WHITE treatment)
¼ cup of cold water
Juice and zest of one lemon
½ cup sugar
2 Tbsp Cornstarch
1 pkg frozen strawberries
½ pkg frozen blueberries
Place water, lemon juice and zest, sugar, and cornstarch in a sauce pot on the stove. Stir to mix the ingredients and then turn heat on medium high. Add strawberries and bring to a boil, stirring until mixture is thick. Remove from heat and add blueberries. Set aside until ready to serve.
Cheesecake may be served warm or cold. My son-in-law loves it warm and gooey. I think it is delish the next morning after being refrigerated overnight, with a hot, creamy cup of coffee – like a cheese danish. Mmmmmmm…don’t you?
“The generous soul will be made rich, And he who waters will also be watered himself.“
Proverbs 11:25 NKJV
“It was for freedom that Christ set us free; therefore keep standing firm and do not be subject again to a yoke of slavery”
The title is kind of a guffaw, actually, and the reason I grin-and-bare that is that when hubby and I first moved to south Texas, and specifically the little town that we’re in, there wasn’t a chili relleno to be had on a single menu; not in a single restaurant in our town. And when I asked for “green chili” on an omelet for the first time I was met with a puzzled look and a question, “Do you mean Tomatillo sauce?” Um, no.
Needless to say, we were terribly disappointed, and bewildered. How could this be? Is it that green chilies only migrated north and west from New Mexico and not east? Maybe they aren’t a Mexican food at all? Perhaps it was my ignorance that green chilies and Tex-Mex were synonymous? 😞
I’m happy to report that just a couple of years later Hatch green chilies started making an appearance in these parts, and when they did, they made a big appearance. There are still no Chili Rellenos on the menus in our town, but at least this girl can get the ingredients in our local grocery to make them now, and that’s really all that matters.
And in all fairness, not all of South Texas is a dry Rellenos area; we’ve had them in a few San Antonio restaurants, even though they only barely resemble the authentic Rellenos that first stole my heart.
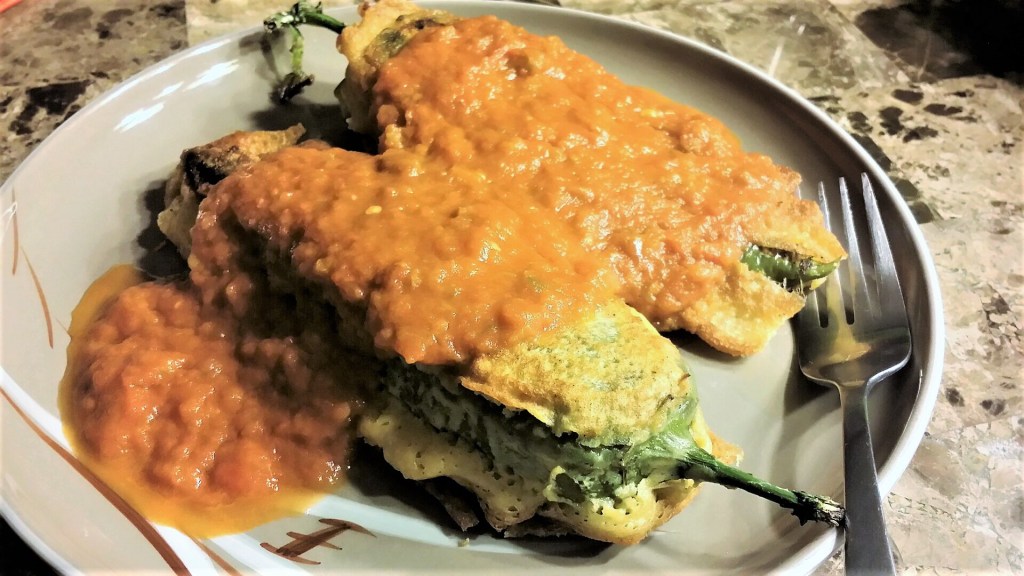
And, please pardon if I don’t make mine like you do. This is the way I personally like them. I’m sure I would love yours, unless you make them with ground beef filling, and then I’ll have to reserve my judgement until I’ve tasted them. Husband likes the beef filled rellenos, but I dream about cheese filled rellenos and am content to eat those for the rest of my days.
I got my Ranchera Sauce recipe from a gal I stopped in the middle of HEB not long back. She works in a local restaurant, so I knew she would steer me straight, at least as much of it as I could remember as she rattled her recipe off to me in the midst of my gathering ingredients. Ha! I hope I’m making it right. It’s sure tasty, so I’m sticking with it. 😆
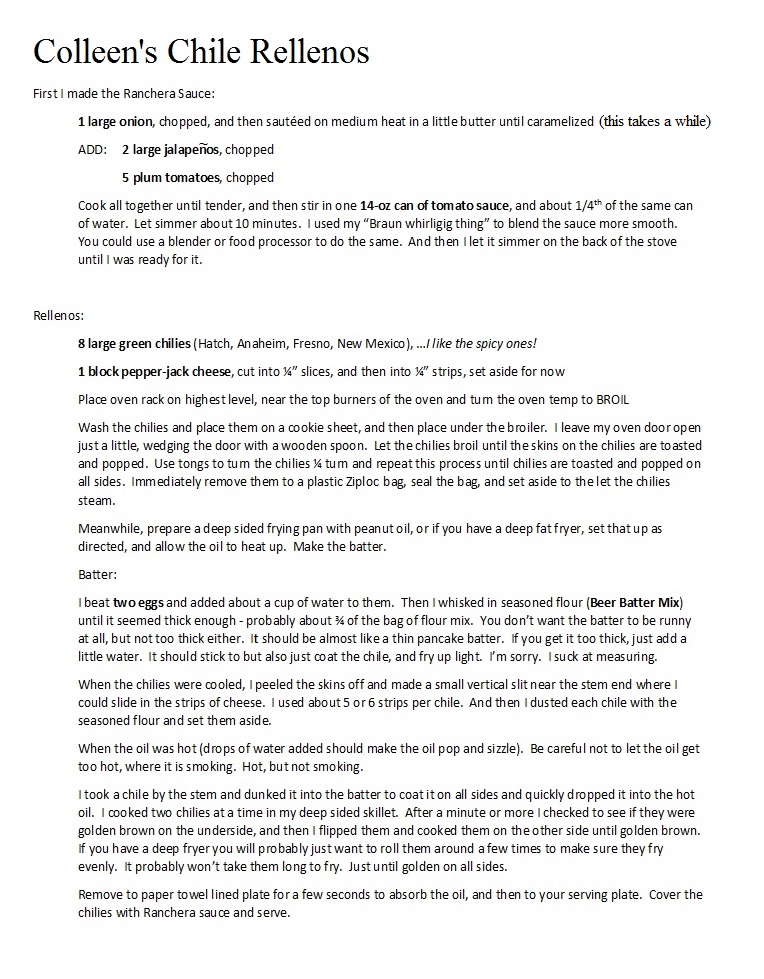
First we start with the Ranchera Sauce
Place a stick of butter into a heavy pan and on medium high heat begin melting. As soon as it is melted add one whole large chopped onion (white or yellow). Saute the onion until it is translucent, turn heat down to medium and continue sautéing until the onions are caramelized. This will take quite a while.
Chop 2 jalapenos (stems discarded), and about 6 large plum tomatoes into chunks. Add them to the caramelized onions and let them cook until softened. Add a 14-oz can of tomato sauce to the mixture, stir, place a lid, reduce heat to simmer, and let cook until you are ready to batter and fry the rellenos. I have had the Ranchera sauce served to me chunky several times, so I presume that is the authentic way, but I use a Braun Wand blender tool to whirl the Ranchera into a smooth sauce with no large chunks.
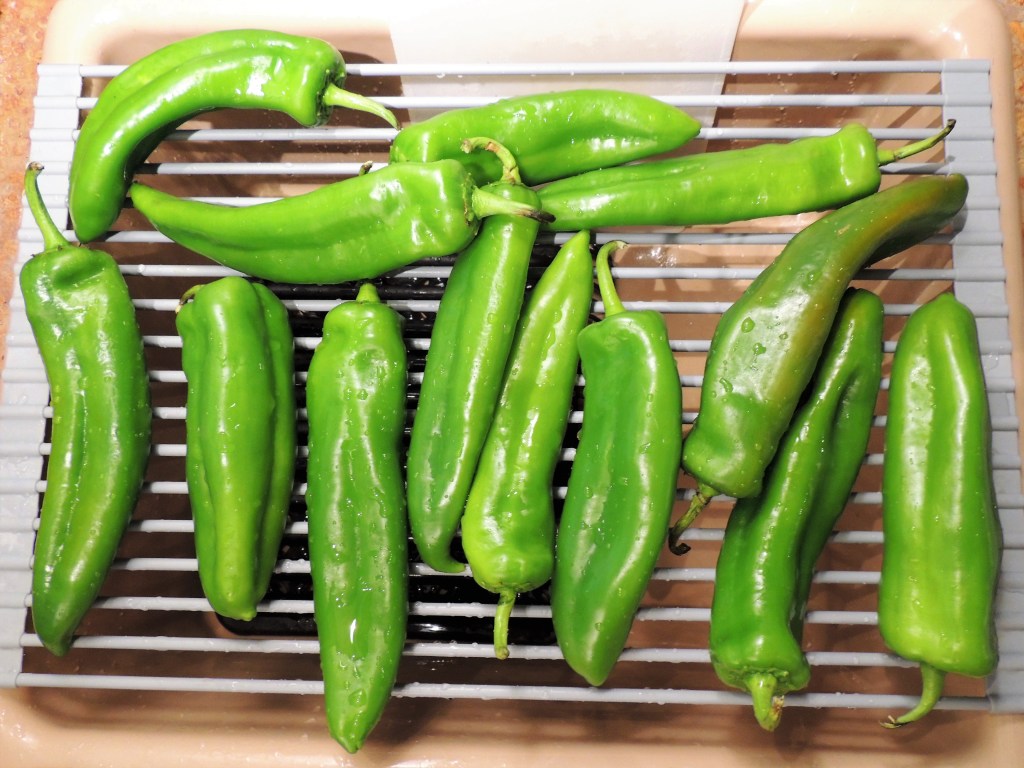
Now, the preparation of the green chilies…
Pick the largest, firmest ones you can find at your grocery. Bring them home and wash them, and then dry them. I like the spicy ones. You might prefer the milder ones.
I have a propane flame torch which works pretty darn slick for roasting chilies. I lay my chilies out on the rack of my outdoor patio firepit, light my torch, and run the flame up and down each chile until they are blistered and black, then I flip the chilies over with tongs and roast the other sides. Once they are all well blistered on all sides I gather them into a plastic zip bag, seal it, and let the chilies steam inside for about half an hour or so.
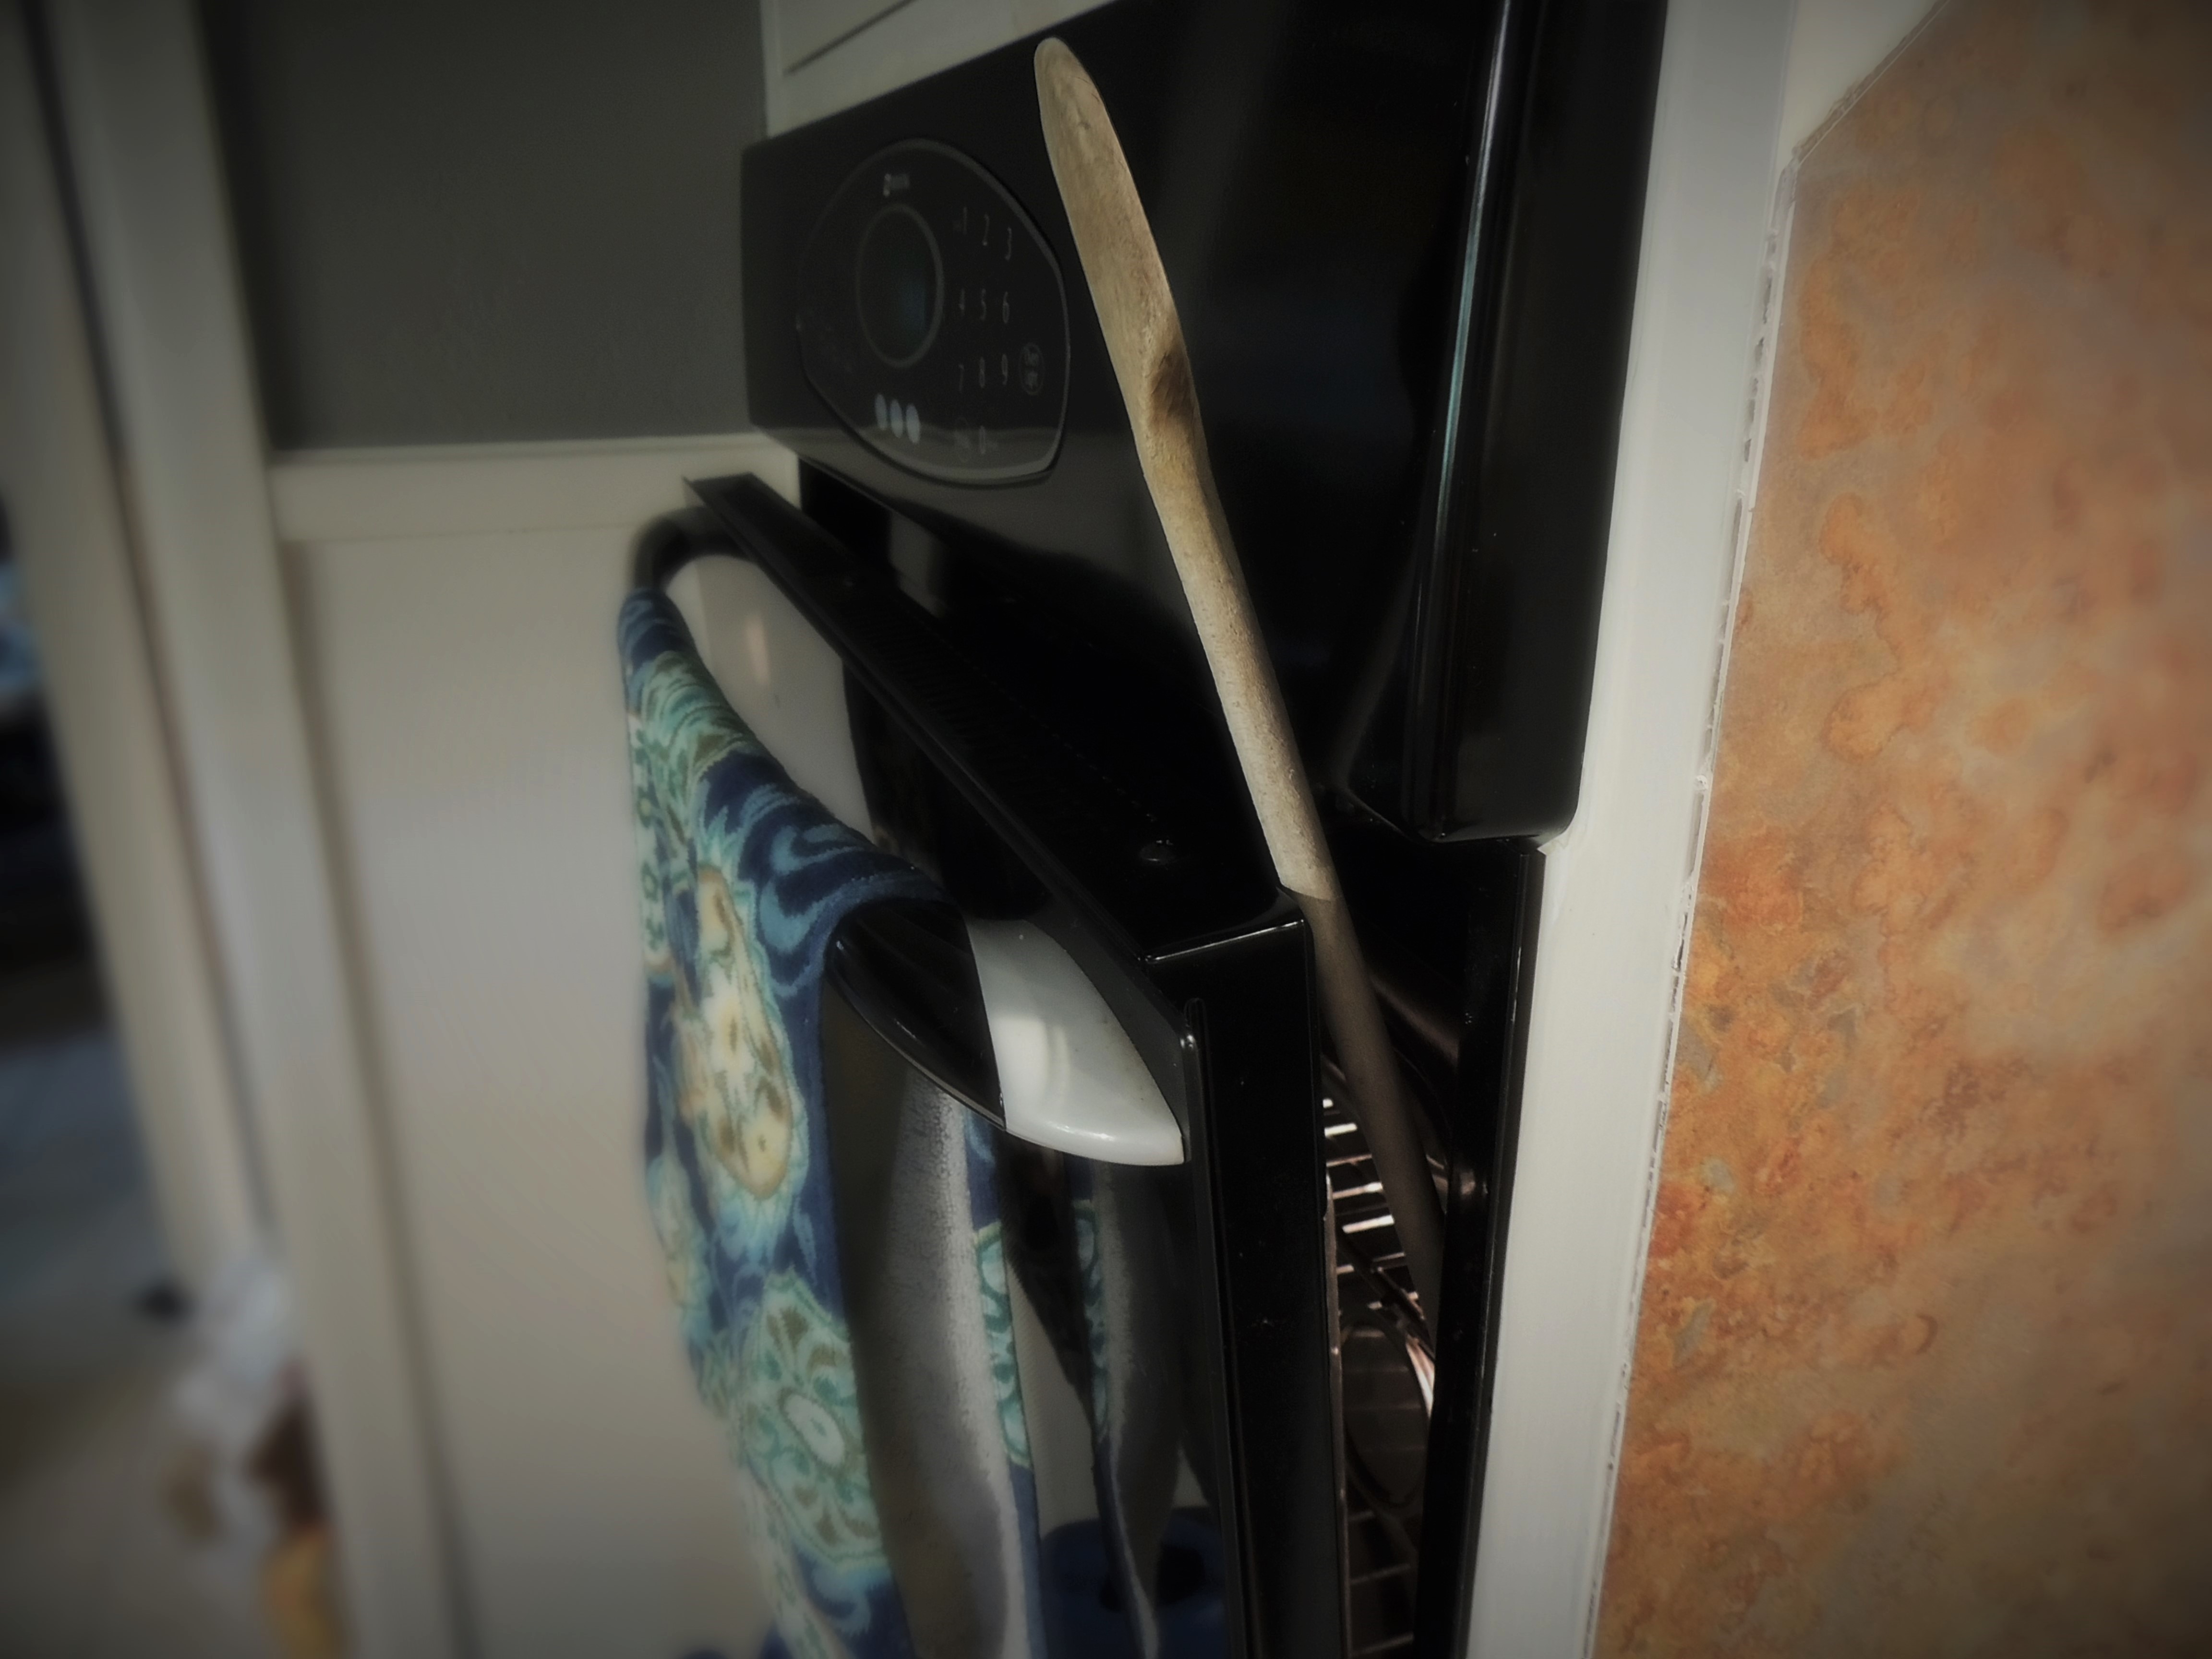
If you don’t have one of these nifty little propane gadgets, the oven will work just fine. Move an oven rack up to the highest level of your oven. Preheat your oven broiler. Place your washed chilies on a cookie sheet and slide them onto that top rack in the oven.
Close the oven door (I prop my door open slightly with a wooden spoon – I like to hear my chilies popping and crackling).
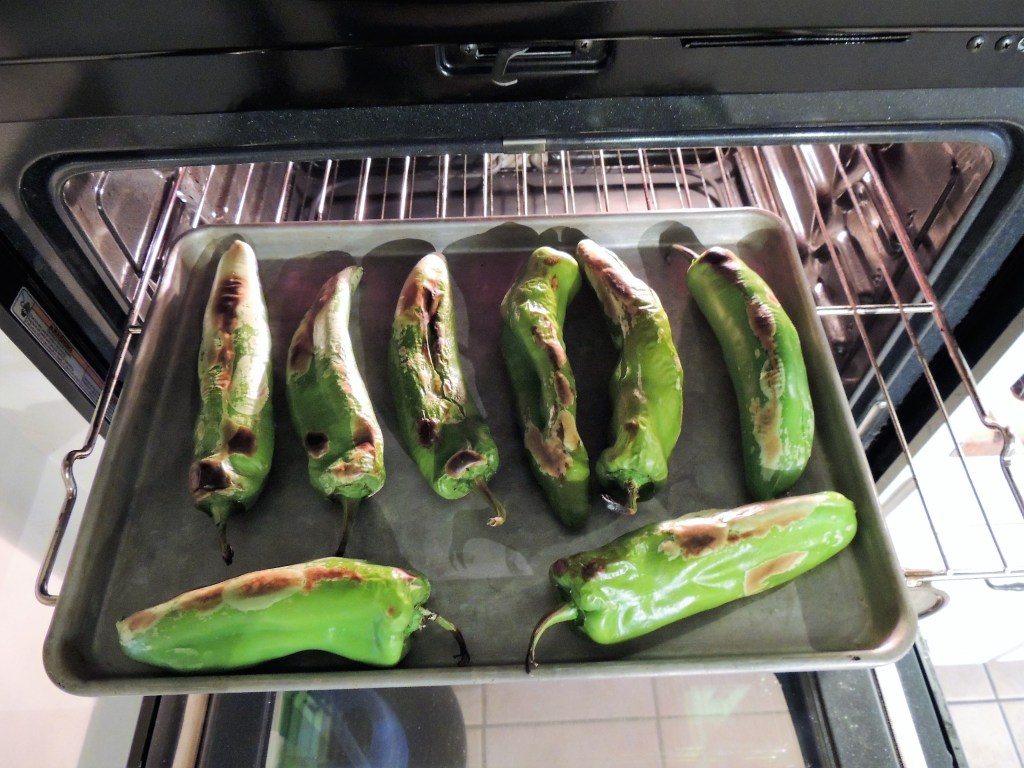
Let the chilies broil on one side long enough for them to become charred and blistered.
Use tongs to roll them a quarter turn and return to broiler. Check them often for doneness. Continue turning and broiling until the chilies skins are blistered and charred all the way around.
Quickly remove them from the cookie sheet and place them into a large Ziploc freezer bag, and seal it.
Allow chilies to steam inside the bag for about half an hour, while you prepare the rest of the meal.
NOTE: I like to serve my Rellenos with homemade refried beans and a cheesy green chili rice. See those recipes below. Hint: this would be a great time to start making them now. This is also a good time to blend your Ranchera sauce and make is smooth. Keep it simmering on a back burner until ready to serve.
Start about 2 inches of oil getting hot in a deep sided frying pan (…just hot enough that a droplet of water makes it pop and fizzle. Not hot enough to be smoking. If you are seeing streaks/waves in your oil, it may be too hot. Either drop your heat, or add a little more oil to cool it down a bit before adding your chilies). The pan you use should be large enough that two chilies will fit without touching the sides or each other.
As soon as the green chilies have cooled enough to handle take them to the sink and begin removing the skins. They should slide right off easily. If not, be careful not to tear the chili, as it will be hard to keep the filling inside while you are battering it.
Once the chilies are skinned, make a slight slit along the side near the top stem of each.
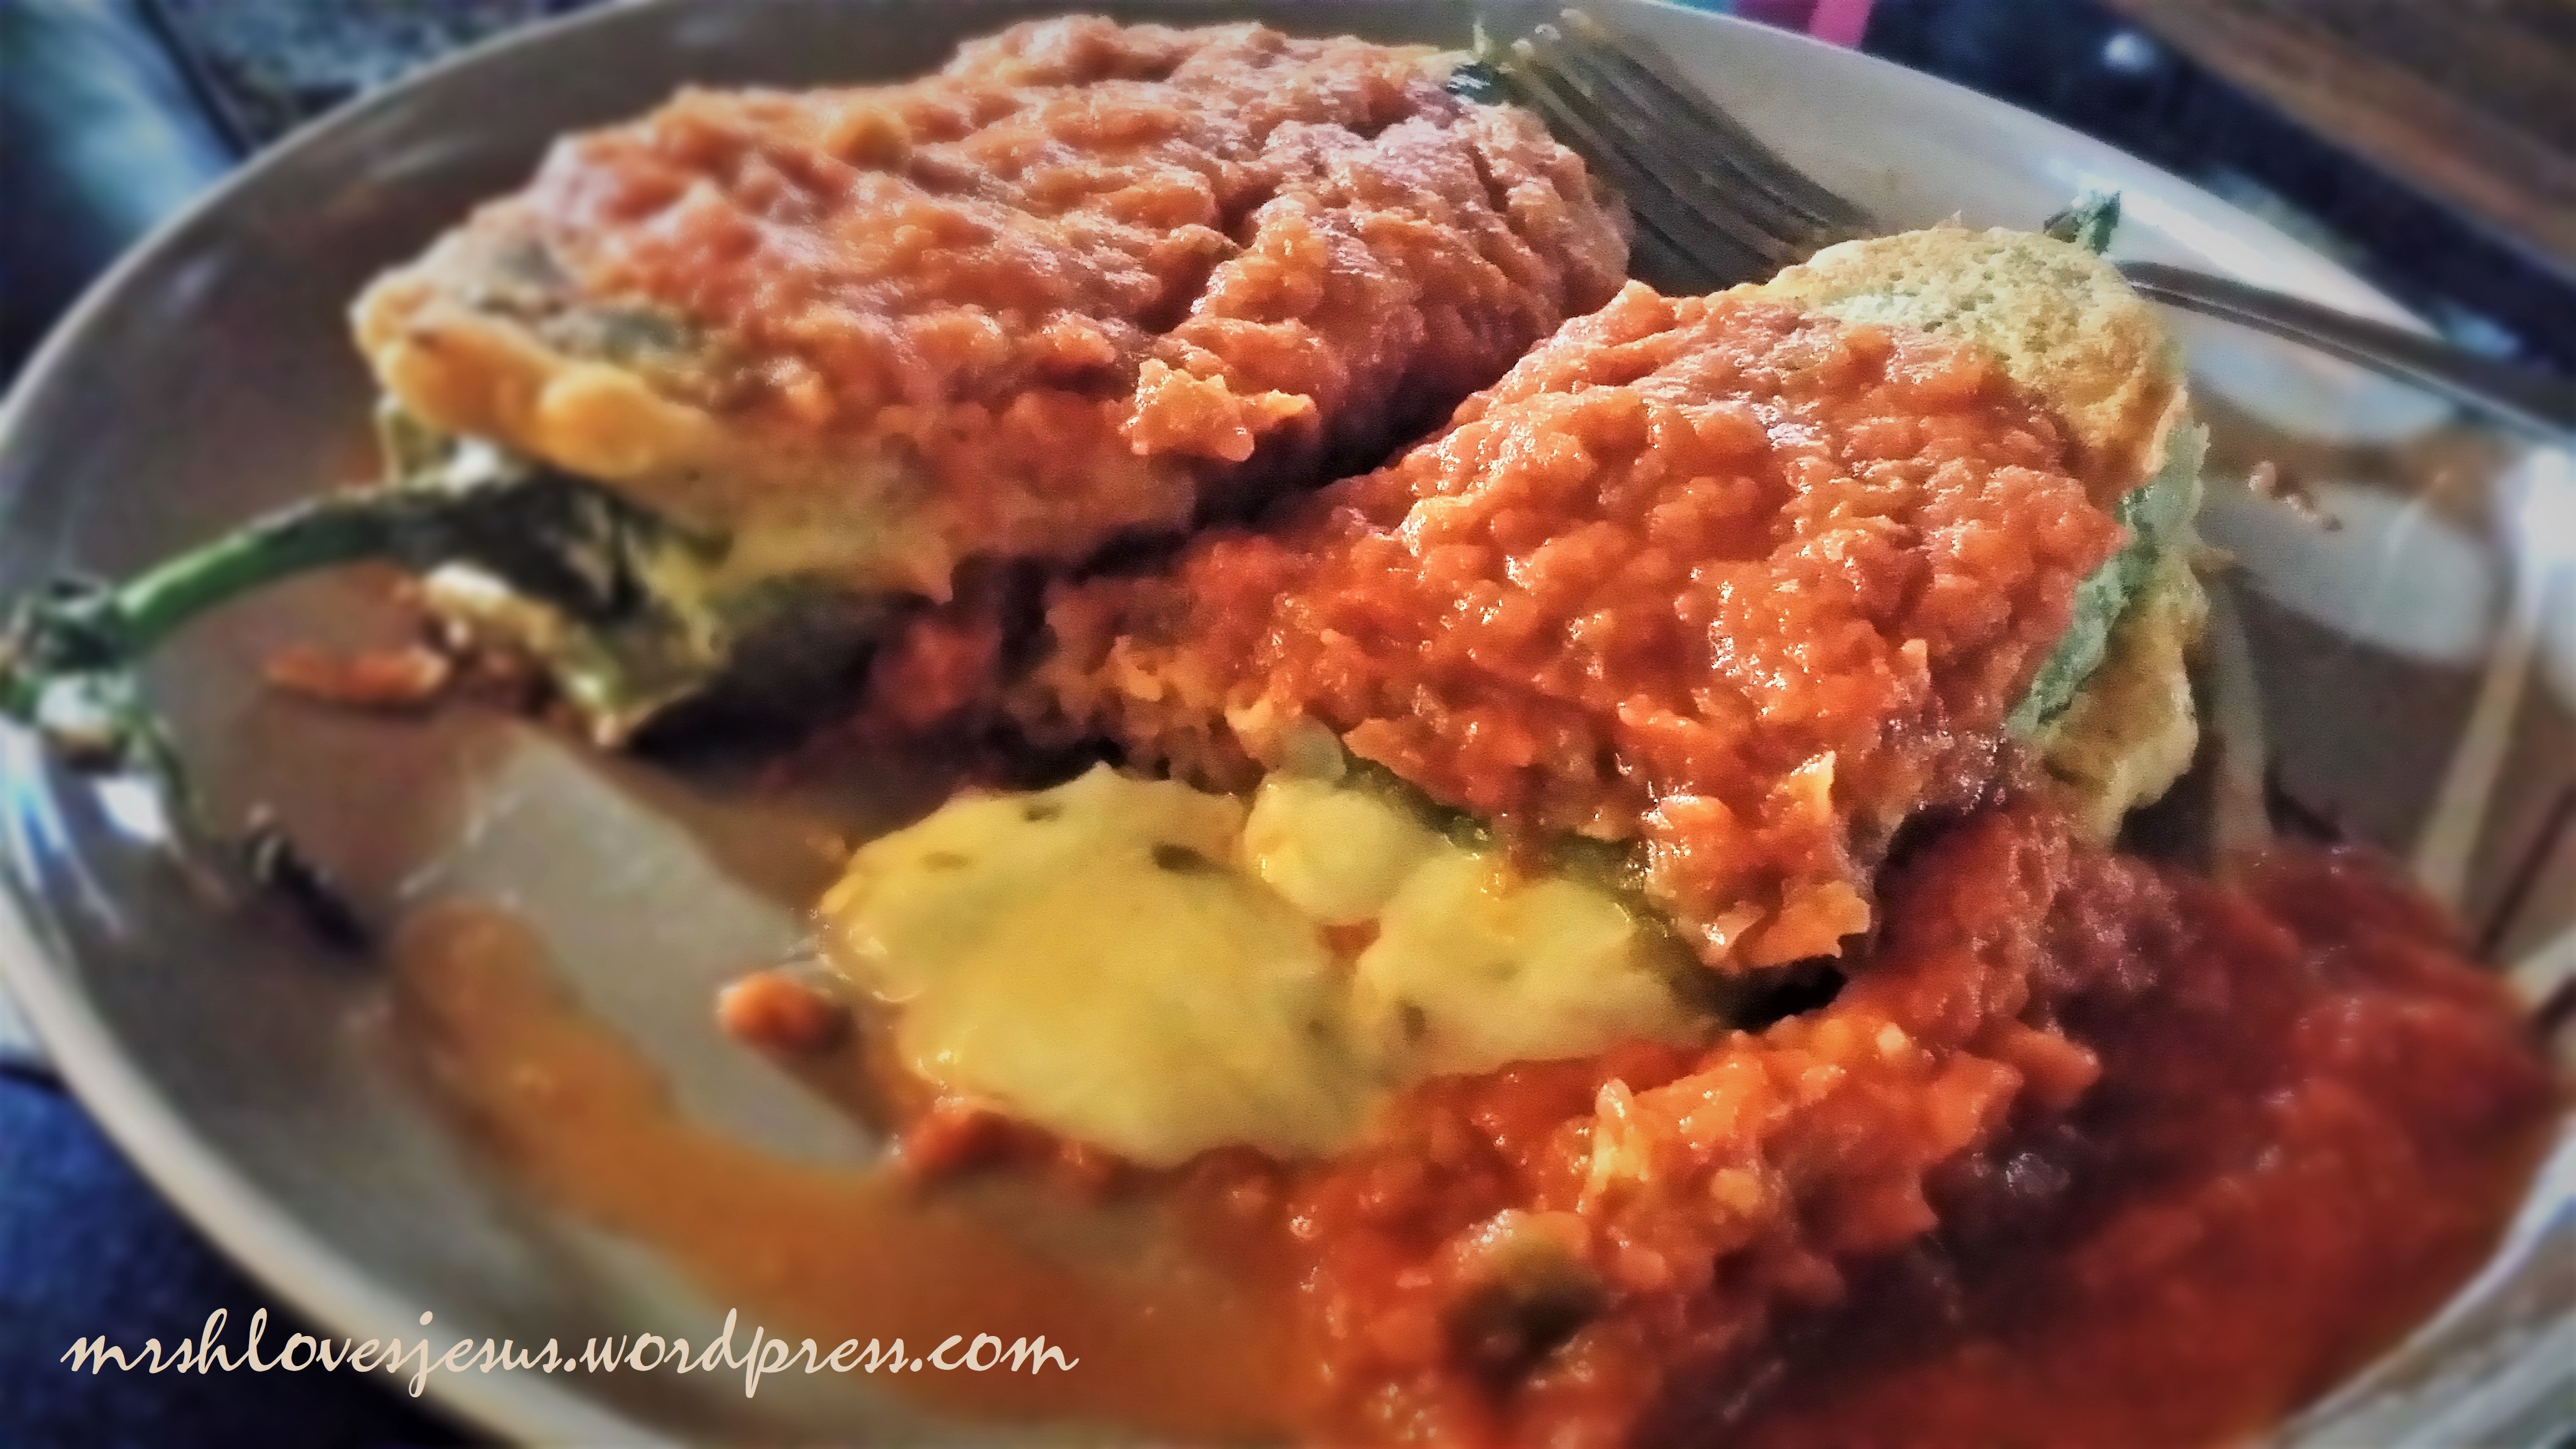
Only make it big enough to slide the pieces of cheese inside. If you wish to remove some of the seeds you may do that also. I push the seeds out through the slit. I don’t mind a few seeds in my rellenos though. I use Pepper-Jack Cheese. For 8 to 10 chilies you will need about 1 1/2 8-oz blocks, which I cut into quarter-inch slices and then into quarter inch strips.
Begin stuffing your chilies with strips of cheese, about 5 or so strips per chili. Dust the outsides with flour and lay them on a paper towel as you prepare them. Once all the chilies have been stuffed and floured, you are ready to make your batter.
I beat two eggs and add about a cup of water to them…
…and then I whisk in some seasoned beer batter mix (part of one bag) until the consistency is about that of thin pancake batter. The batter should stick to your chilies, but just leave a fairly thin film. Hold the chili by the stem and dip it into the batter. Use a fork to sweep batter over the top of the chili and then gently lift the chili out of the batter, with the fork. Slide it into the hot oil and let it begin frying. Add another chili and let the two fry together.
Allow the chilies to fry for a few minutes and then use tongs to turn. The batter should turn a golden color. Scoop the chilies out of the oil and place on paper towels for a moment to absorb the oil. Quickly plate them and cover them with simmering Ranchera Sauce.
Oh my how I love them!!!!! Now if I could figure out how to feed a crowd all at the same time I’d be in business. I only know how to make Rellenos for one person at a time. Hot and fresh.
Mama’s Refried Beans
If you’ve made a pot of pinto beans and have leftovers, by all means use them for this. If not, look for these varieties at your local grocery store. I used 2 cans of Charro and 1 can of Barracho (which means drunken – notice that they use Shiner beer for this).
First I drained my beans of all the liquid (don’t rinse them). I melted about 2 Tablespoons of rendered pork fat (you can use lard, or if you have leftover bacon grease that’s actually preferred) in a sauce pan on the stove, and then I added my beans. I let them just bubble and cook on medium low heat until I was almost ready to serve my meal. Moments before I was ready to serve I took a potato masher and mashed the beans until they were the desired consistence. They may be served with a sprinkle of cheddar cheese and some chopped green onion if you like.
NOTE: This also makes a wonderful bean dip, served with tortilla chips for a snack.
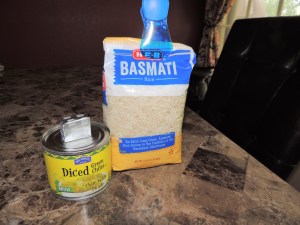
Cheesy Green Chili Rice
First I sautéed my rice (1 cup) in about 1/2 a stick of butter in a small sauce pot, on high heat. After about a minute of continuous stirring, I added 2 cups of hot chicken broth (water and boullion cubes work fine), 1 can of diced green chilies, and a grind of sea salt (you might hold off on this if using boullion). When the liquid boils, place a lid on the pot and turn the heat down to low. Simmer for about 20 minutes. Remove from heat. Lift the lid and lay several thin slices of pepper jack cheese (about 1/3 cup shredded) or cream cheese on top of the rice. Replace the lid and leave covered about 10 minutes or until cheese is melted. Lift lid and fluff rice with a fork, incorporating the cheese throughout. If you like it just a little creamier, you may add a splash of Crema, heavy cream, or sour cream, and a sprinkle of cayenne.
“And day by day, attending the temple together and breaking bread in their homes, they received their food with glad and generous hearts.” Acts 2:46
Well, today is my yard work day. There is grass to mow (like seriously if it doesn’t get done today I’m going to have to get goats), rakes to leaf (wait, did I say that right? You see why editing is such a chore for me), a few gardening tasks, plants to water, and bamboo to chop (that is taking over my river bank), and yet here I sit, drawn to the screen of this infernal contraption again like cats to catnip. All I can think about is writing and telling you (that one dear anonymous person out there who might see this post) all about the Fiesta Party I threw for my sister years ago, believing with all my heart that my experiences will be the cat’s meow, soooo captivating to my audience-of-one that you get right to work planning your own Fiesta Party, for Cinco de Mayo in fact, maybe, which is coming up very soon. Prrrrrr (that was Kitty-soft-paws…from Puss-in-Boots –yeah, was it lost on you? Hey, what can I say, I’m a dork!).
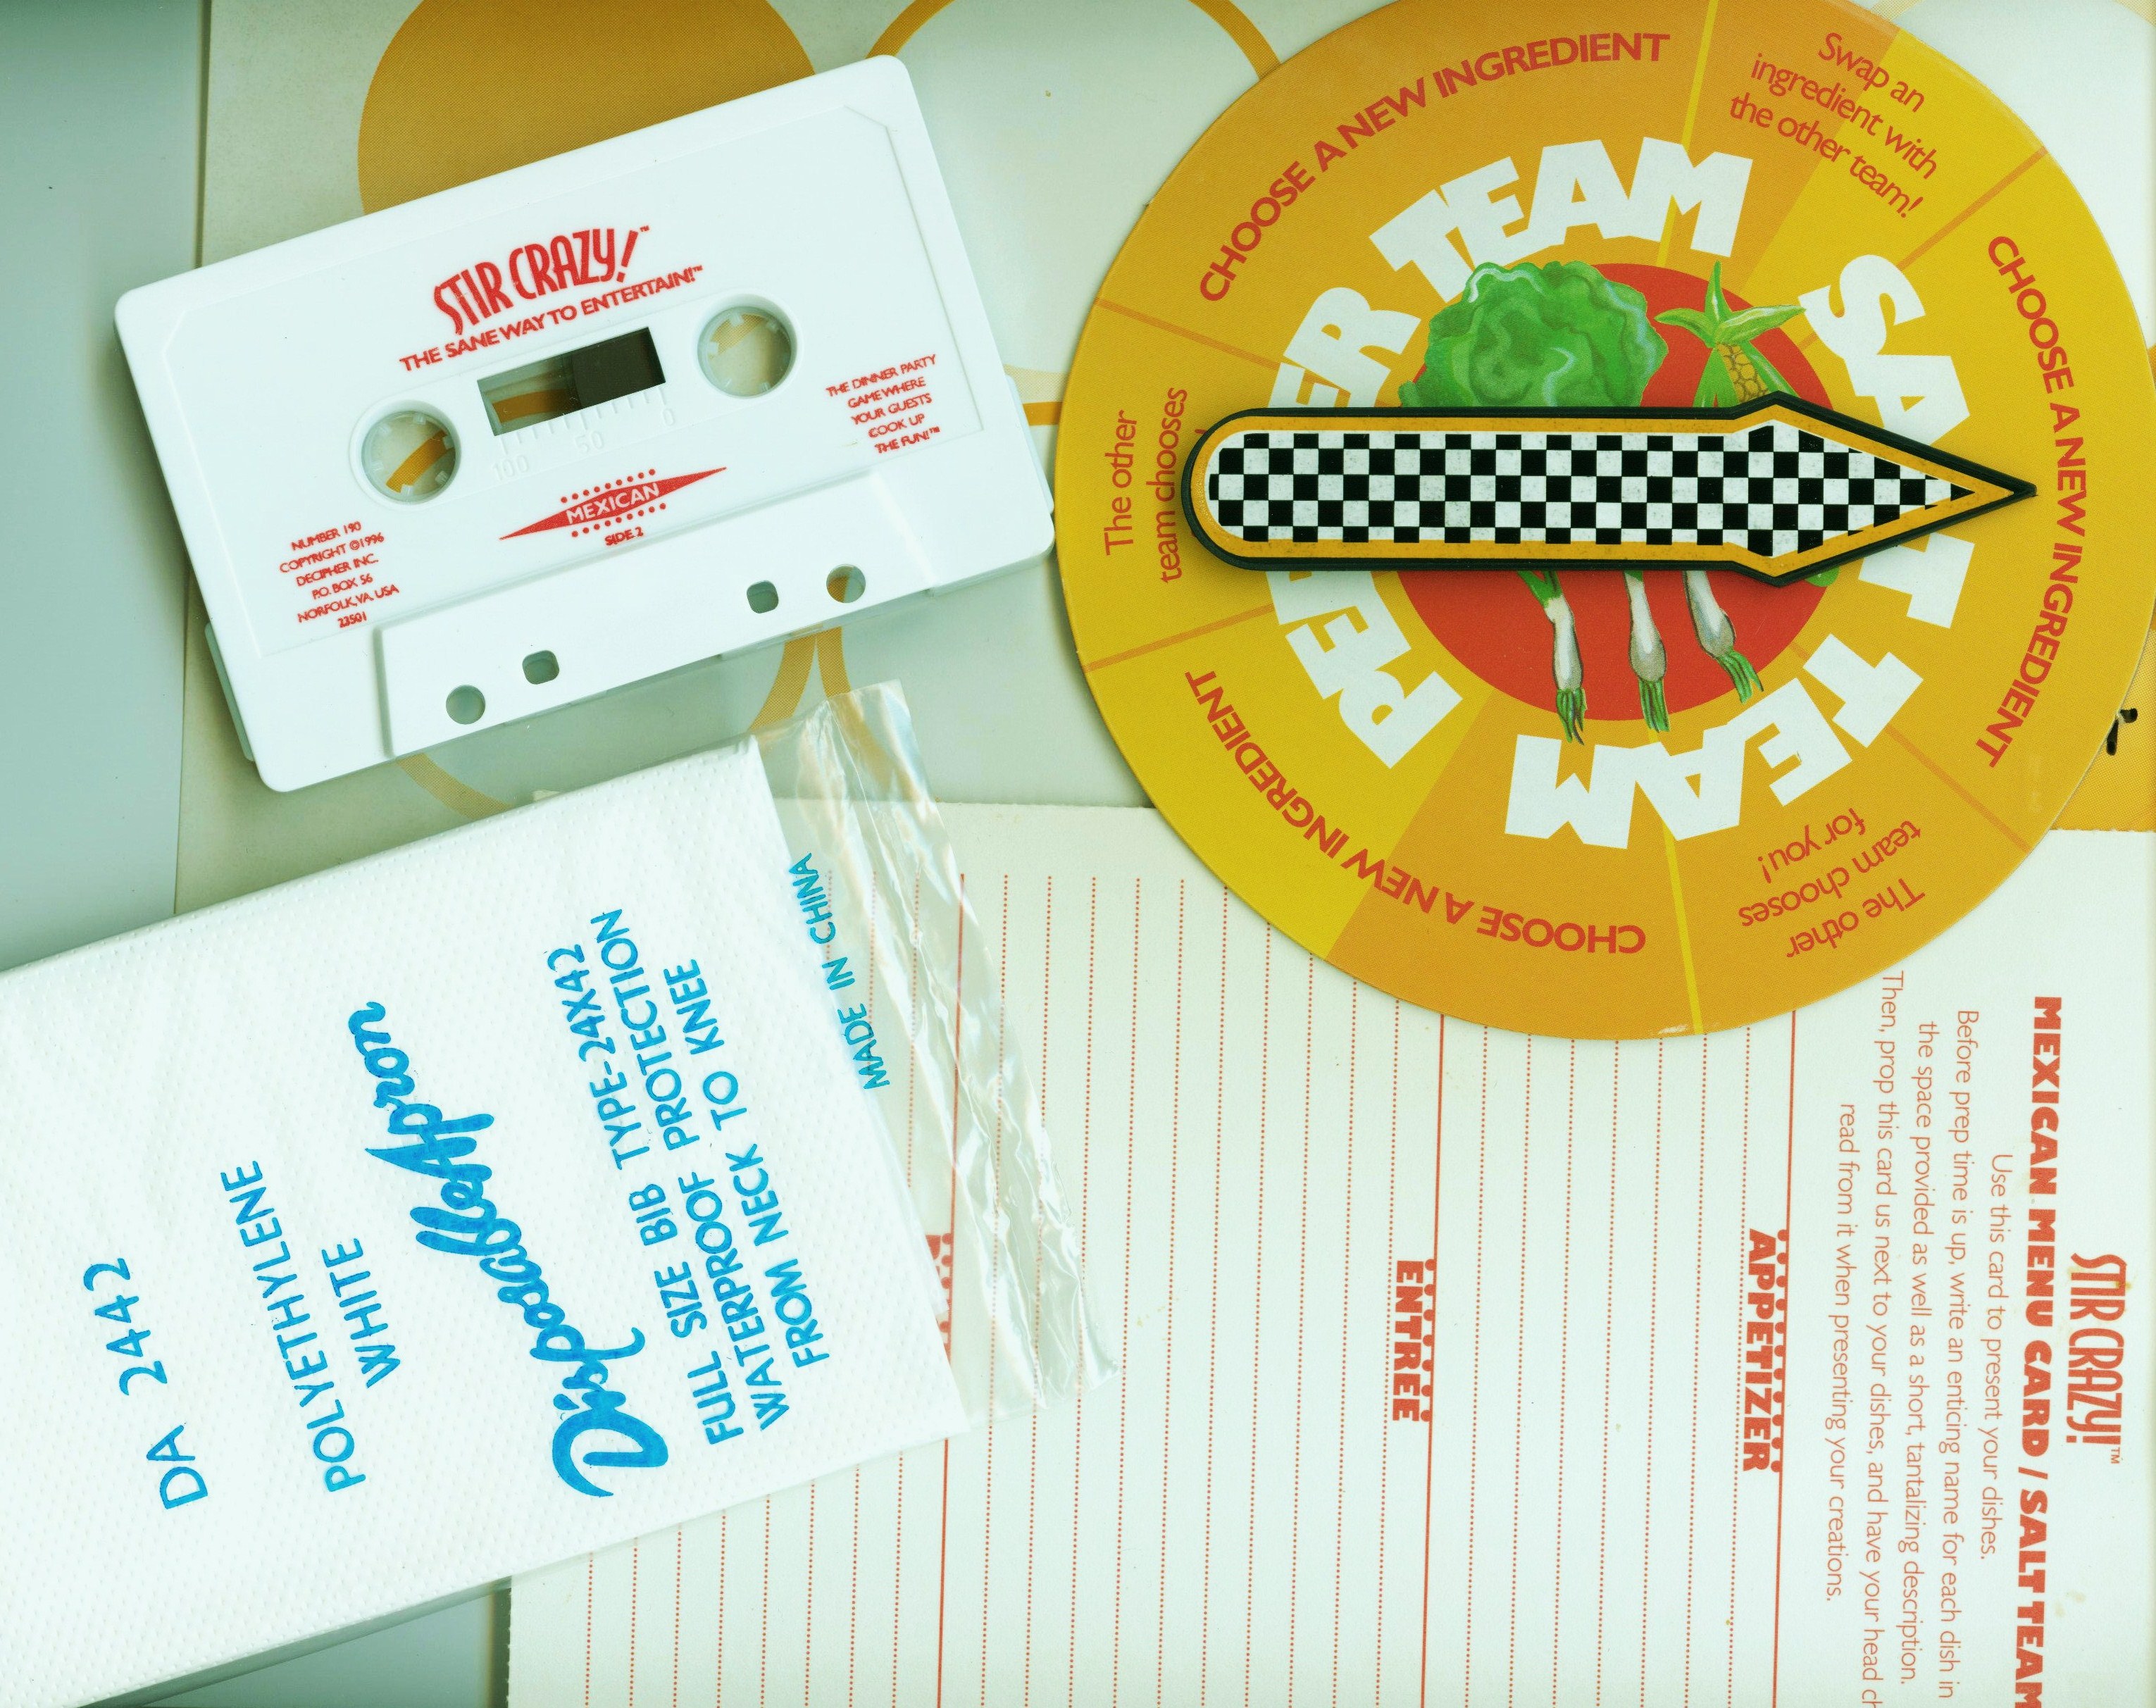
Okay, all kidding aside, this really is a fun way to spend an evening with your friends – your kooky friends who like to cook, and eat, and play games. Since I purchased my game many howling moons ago, Decipher seems to have gone out of business and their games appear to be out-of-print, which is truly unfortunate, however, you might get lucky to find a copy at a thrift shop or online. Until then I will share the contents of my box with you and let you improvise.
HERE IS HOW THE GAME WORKS: Have you seen the Food Network show, Chopped? It is a lot like that. You split your guests into two teams (a SALT team and a PEPPER team). These teams play a game against each other to win ingredients from the pantry of groceries you purchased ahead of time. Each team then has 90 minutes to produce a main dish, side dish, and dessert with the ingredients that they won, and recipes that they have stashed in their memories. At the end of 90 minutes, everyone sits down to partake of the created dishes and judge them. Stir Crazy provides the spinner, grocery lists, chef’s hats, aprons, and a cassette tape with audio instructions, and about an hour or so of perfect fiesta dinner music. I’ve included a picture of this for the visual people out there – me, me, oooo pick me.
“How many cooks can you fit in your kitchen?” I didn’t see any way for two teams to be able to prepare their dishes together in the same kitchen, specifically my itty bitty galley kitchen for sure, so I sat up a 2nd kitchen in our den (just off the kitchen) using a long table and electric skillets, an electric double- burner camp stove, a toaster oven, pans, bowls, and utensils, and paper towels. The BBQ grill in the back yard was also available as a third stove. And may I also suggest a wash station be added to this auxiliary kitchen with a basin of hot soapy water, another with rinse water, and a pitcher of water for cooking. It will keep you from having to constantly invade the other team’s kitchen (possibly catching an elbow to the eye) to get water or wash things. Of course what host would mind the imposition (and possible bruising), since your guests are basically making their own supper? Ha!
At my party I announced the time periodically during the preparation, and retrieved necessities for anxious contestants on an unyielding deadline. I ran for drink refills for everybody, and took several pictures. I had to stop and laugh, yes, nearly pee’d my pants a few times, as the interaction between players got pretty hilarious. I heard a husband shouting sarcasms to his wife on the team in the other room, “Who said this was fun? We’ve got to have a party like this!”
The players not only cook the food, they are also supposed to decorate tables within the time limit. Everything they do is judged, everyone votes by secret ballot and prizes are awarded at the end, even a prize for the dish the dog wouldn’t eat.
Well, I guess I can’t vouch for my guests, but I had so much fun with this party. We didn’t end up with a dish that the dog wouldn’t eat, everything turned out yummy, which was an accomplishment considering that no recipes are used. And after supper we found places to sit all around my tiny little house, and played games.
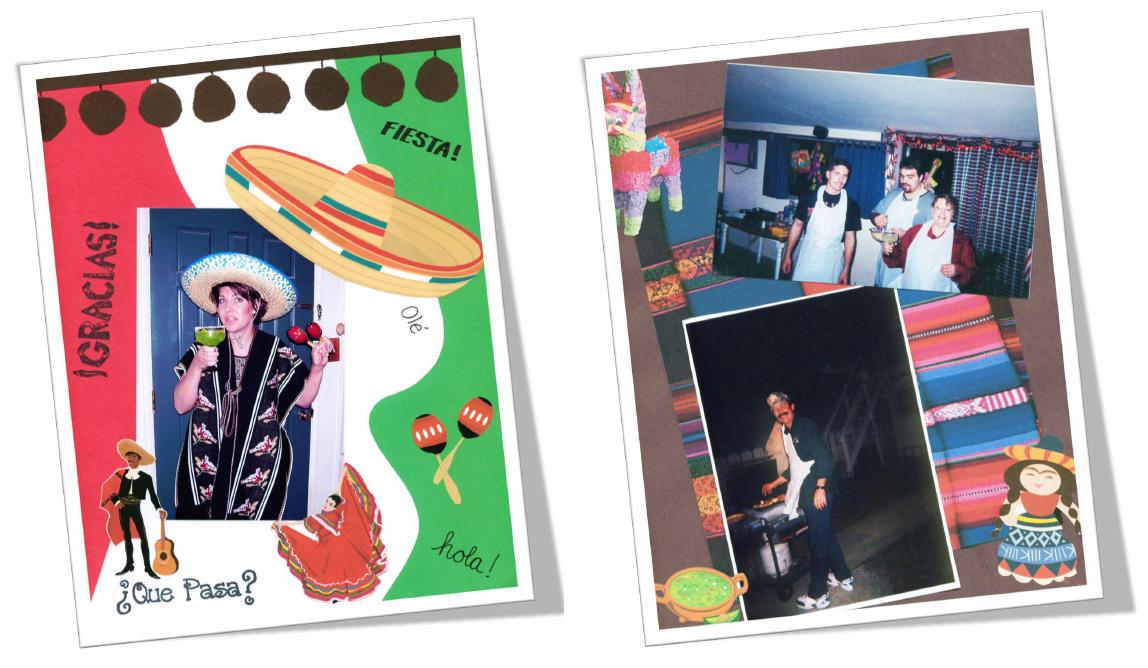
Here are the scrapbook pages from my party:
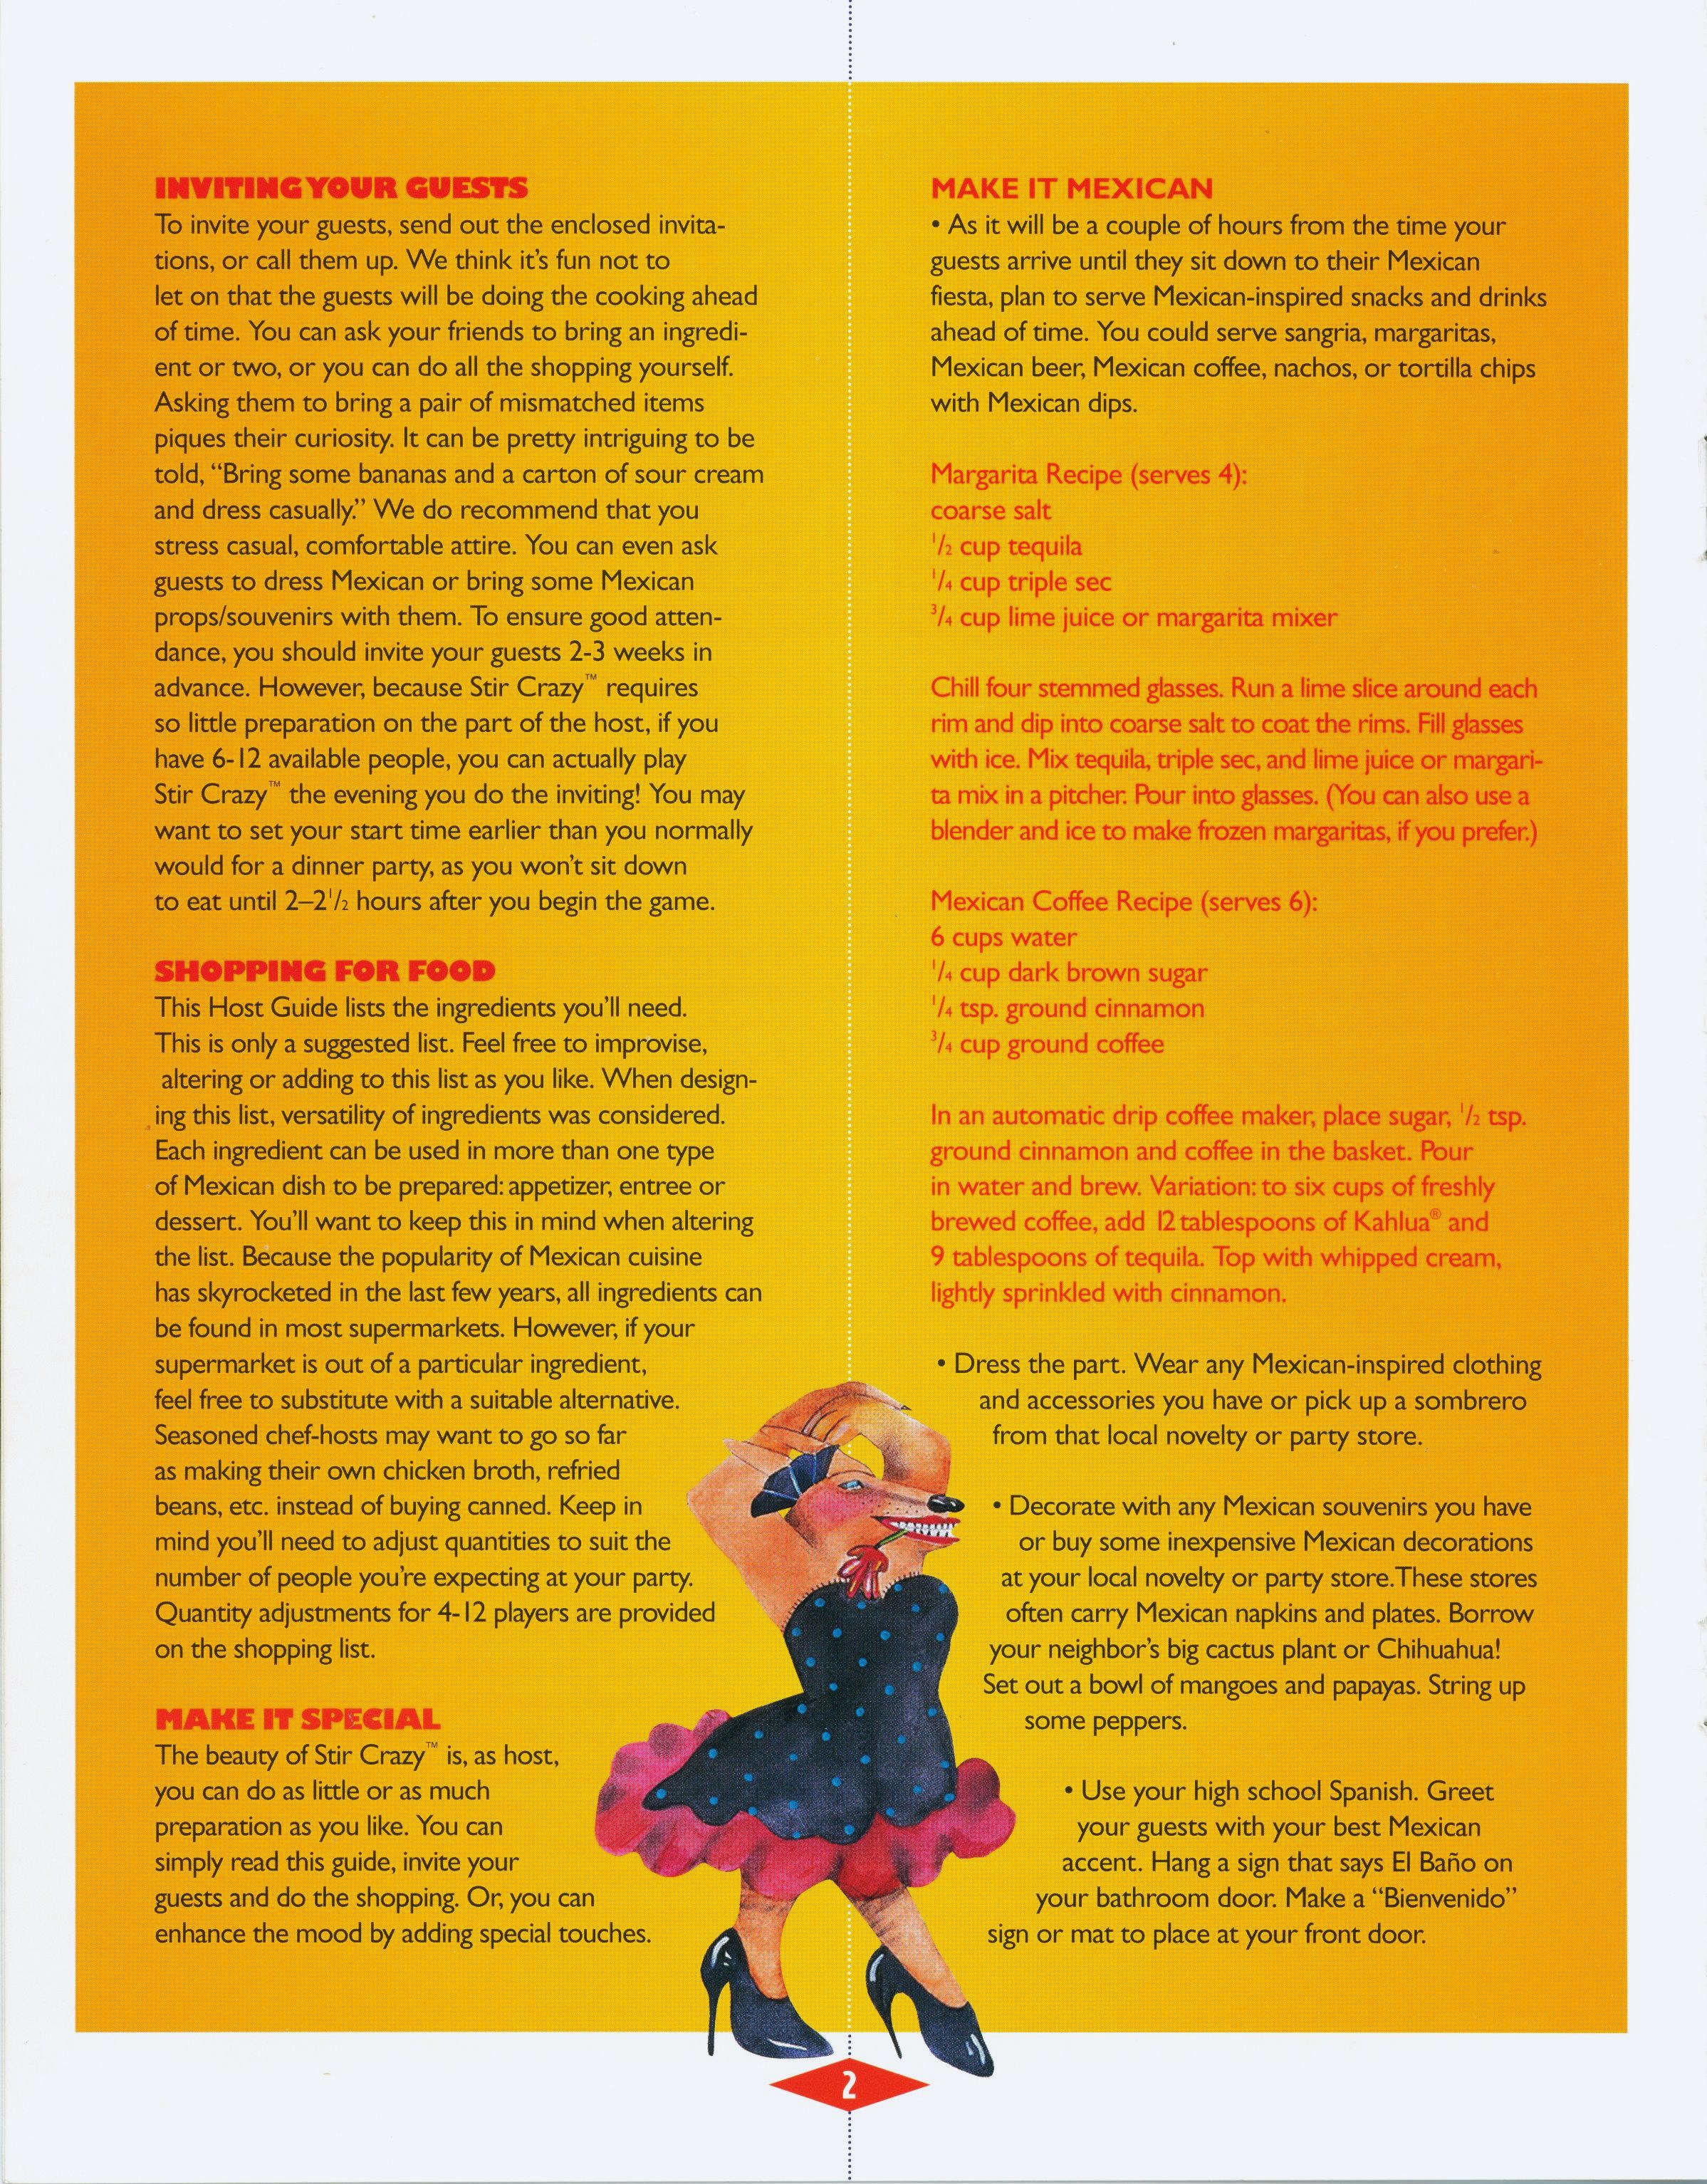
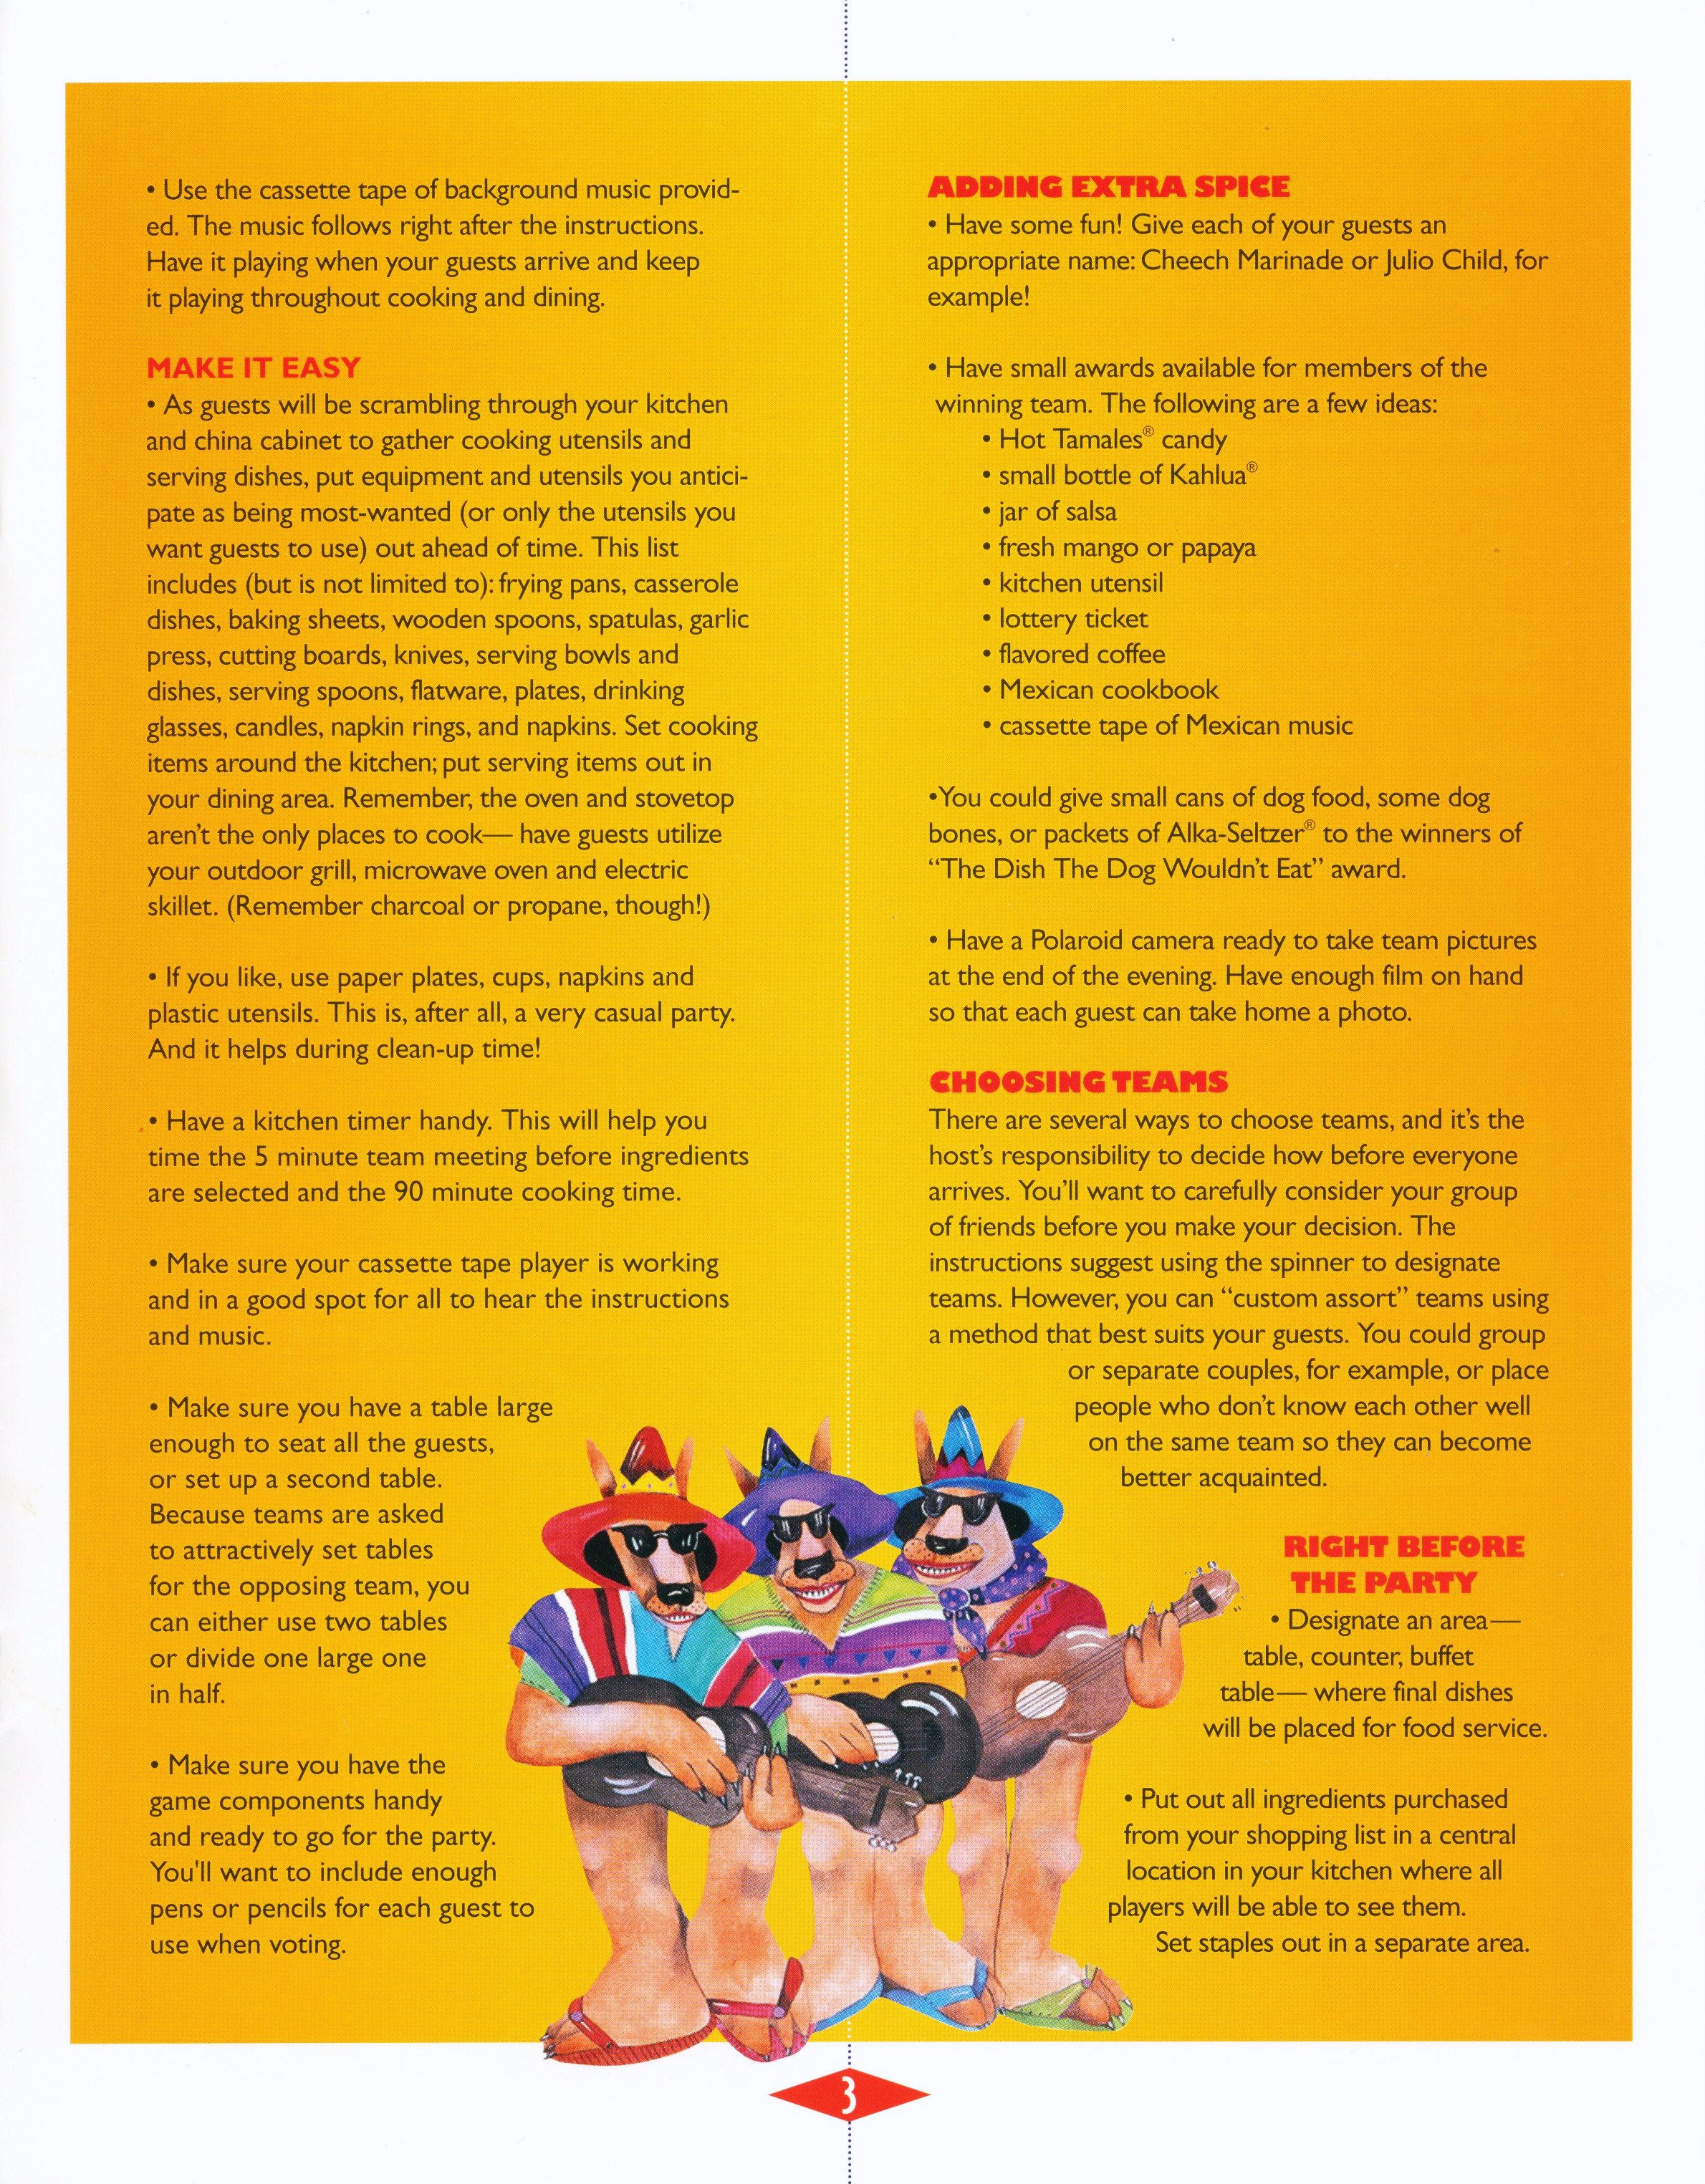
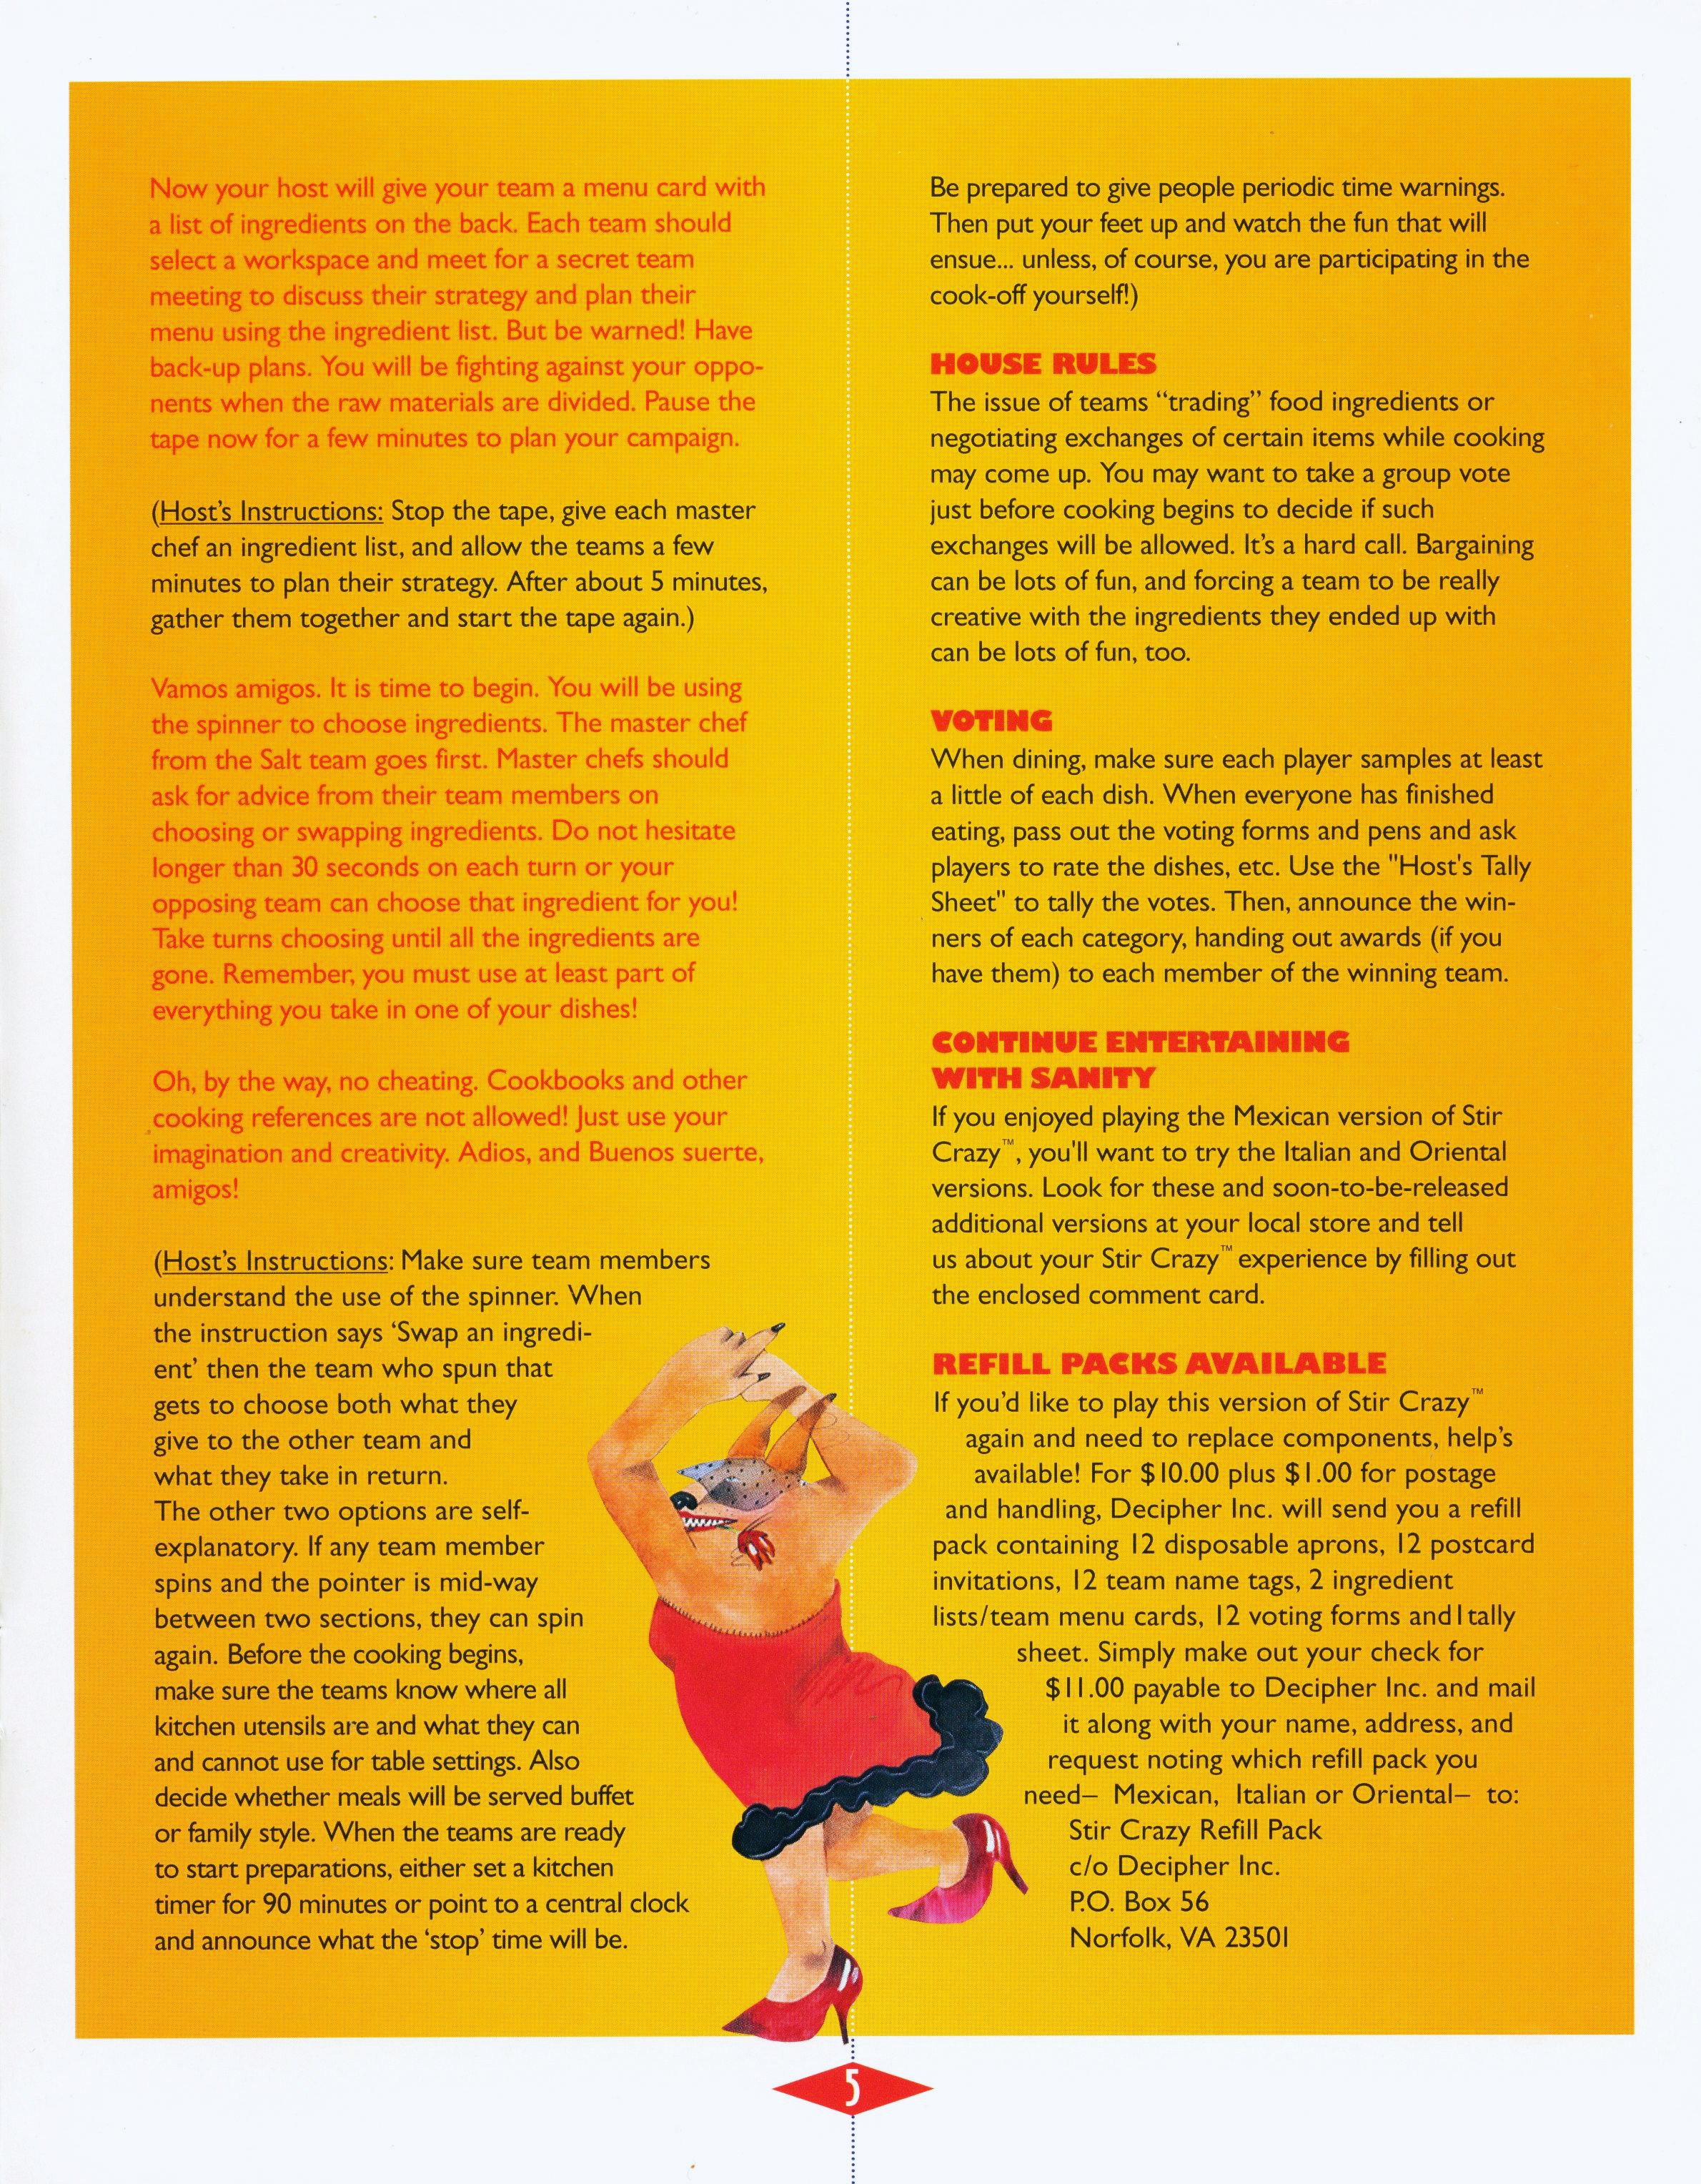
I scanned my copy of the host guide for you and have included those images here. Read through it in planning your own party.
(Front)
(back)
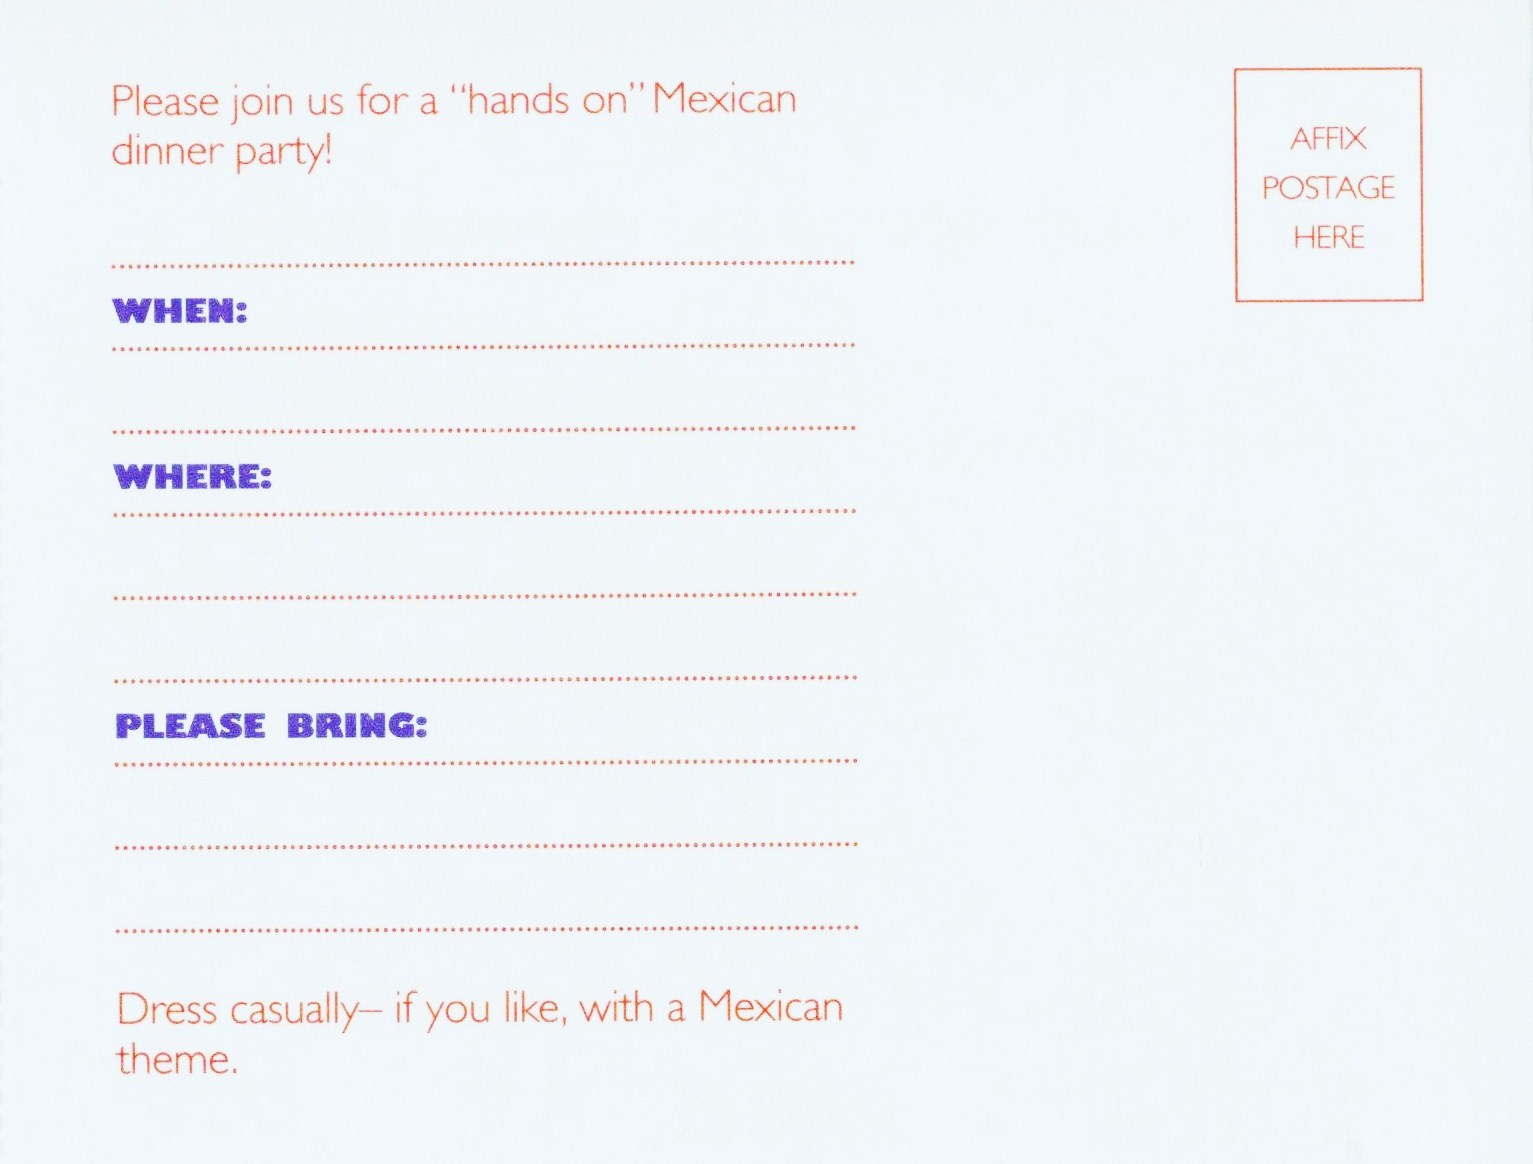
I also have included a copy of the invitations.
Missing of course are the chef hats and aprons, the cassette tape (with the audio instructions for how to play the game, and the wonderful mood-setting music), and name badges (badges? – we don’t need no stinking badges).
Recipes for Snacks and Beverages (provided by the host)
REAL MEXICAN COFFEE
12 cups water
½ cup firmly packed brown sugar
3 whole cloves
1 ½ sticks of cinnamon
12 oz. whipping cream
1 ½ oz. Unsweetened baking chocolate
1 ½ cups coffee beans, ground
1 ½ tsp. Vanilla
In saucepan, boil water. Stir in brown sugar, cloves, and cinnamon stick (broken in half). Reduce heat, simmer 15 minutes. Whip cream into soft peaks – refrigerate. Stir chocolate into brown sugar mixture until melted. Add ground coffee. Cover and let stand 5 minutes. Stir in vanilla. Strain mixture through coffee filter. Pour into cups and garnish with whipped cream and a sprinkle of cinnamon.
COLLEEN’S EASY VERSION OF MEXICAN COFFEE
Add a teaspoon of cinnamon and a pinch of ground cloves to the 4 scoops of coffee grounds that you put in the filter of your coffee maker. Pour in cold water and brew . Add 1 oz. Unsweetened baking chocolate, 1 tsp. Vanilla, and ½ cup brown sugar to the freshly brewed coffee in the pot. Let it sit on the hot plate until chocolate melts. Stir immediately, or keep in a thermal carafe. I serve mine with Coffee mate French Vanilla creamer, canned aerosol whip cream, and a sprinkle of cinnamon to garnish.
HORCHATA (pronounced Or-chaw-ta)
Makes about 5 to 6 cups
Ingredients
1 cup of long grain white rice
1 cup chopped almonds, without skin
5-6 cups of water (to taste)
1 cinnamon stick
1 cup of simple syrup or sugar (more or less to taste)
1 tsp. vanilla extract
Instructions
In a clean coffee grinder (one that does not smell of coffee) or food processor, pulverize the rice into dust. If using a coffee grinder it works best if done in batches.
Combine rice, almonds, cinnamon, and 3 cups of hot tap water in a large glass bowl or pitcher. Let sit covered overnight.
Pour the mixture into a blender and purée several minutes until as smooth as possible. Add the sugar and remaining water and blend again for just a few seconds.
Strain the horchata through a sieve lined with 3 layers of damp cheesecloth, or a tea towel, into a bowl. Pour a little at a time and keep stirring to help the mixture go through the sieve. Once all the liquid has passed through to the bowl, gather the cloth together at the top, give it a twist and squeeze out any additional liquid. Pour the liquid into a clean pitcher. Cover and refrigerate.
The drink should keep several days, refrigerated. Serve in tall glasses over ice. Garnish with ground cinnamon, or some lime zest if desired.
TOMATO SALSA
5 large Plum tomatoes (vine ripe) – diced (skin on)
2 medium Garlic cloves – chopped
1 or 2 *chilies – diced (*Chilies of choice: roasted Anaheim, Chiles de Árbol, Pasilla Chiles, Serrano, Jalapeno, Poblano, or Habañero)
2 slices, ½ inch thick, of white onion – chopped
½ tsp. Dried oregano
¼ tsp. Ground cumin
2 tsp. Olive oil
1 tsp. Rice vinegar
½ tsp. Salt
Fresh Cilantro to taste
Lime juice to taste
Pan roast your chili of choice. Dry the frying pan, peel, seed, and de-vein chilies. Pan roast the garlic until just toasted. Toss in bowl with remaining ingredients. 1 Tbsp. of canned tomato sauce can be added. Serve at room temperature with tortilla chips.
COLLEEN’S MANGO SALSA
2 large ripe mangos, peeled, diced
1 cup finely diced Mexican or Hawaiian papaya
2 Tbsp. finely diced white onion
2 Tbsp. finely diced red bell pepper
2 Serrano chilies, minced with seeds
1/3 cup fresh lime juice
1 Tbsp. chopped fresh Cilantro
1 Tbsp. finely chopped fresh mint
½ tsp. Salt (or to taste)
Toss all ingredients together gently in a glass bowl. Refrigerate and serve cold, within 4 hours for best texture and flavor. Great served with roasted grilled poultry, fish or pork…but I just love it with tortilla chips as a dip.
FROZEN MARGARITAS
I bought a Margarita Bucket from Sam’s Club and to that I added:
Tequila
Margarita salt (for the glasses)
Limes (for garnish)
And you’ll need Margarita glasses for your guests
A day ahead of your party, add desired amount of tequila to the contents in the bucket and place in the freezer. As guests request, dip and swirl a Margarita glass in the slushy liquid in the bucket and then dip in the Margarita salt to coat the whole rim of the glass. Use an ice cream scooper to scoop out the Margarita slush into the glass. Serve with a slice of lime placed on lip of glass for garnish.
SANGRIA
1 Bottle of red wine (Cabernet Sauvignon, Merlot, Rioja, Zinfandel, Shiraz)
1 Lemon cut into wedges
1 Orange cut into wedges
1 Lime cut into wedges
2 Tbsp sugar
Splash of orange juice
2 Shots of gin
1 cup of sliced strawberries or raspberries, grapes, and melons
1 small can of diced pineapples (with juice)
4 cups ginger ale
Pour wine into a large pitcher and squeeze the juice from the lemon, orange and lime wedges into the wine. Toss in the citrus wedges (leaving out seeds if possible). Add pineapple, then sugar, orange juice and gin. Chill overnight. Add ginger ale, berries, grapes, melon and ice just before serving. If you’d like to serve right away, use chilled red wine and serve over lots of ice. The best Sangrias are chilled around 24 hours in the refrigerator which allows the flavors to really marinate into each other.
If you would like to make yours non-alcoholic, use a bottle of sparkling red grape juice in place of wine and replace the gin with 2 Tbsp of instant tea.
After Dinner Entertainment
You can make it a dinner and movie night, in which case I would recommend re-watching something like Zorro (with Antonio Banderas and Selma Heyek), or a spaghetti western like The Magnificent Seven, or The Good, The Bad, and The Ugly, or the cartoons Rango, and/or Puss in Boots.
Game Options
LOTERÍA
In case you are unfamiliar, Lotería is basically a bingo game, except instead of numbers it is pictures. Everyone gets a Lotería card and a handful of pinto beans to mark the spots. Each player antes a dime into the pot for each round. A deck of cards with the same pictures is shuffled and used by a caller for calling the spaces.
And just like Bingo, a vertical, horizontal, or diagonal line is a “Lotería!” The winner collects the dimes wagered for that round. You can increase the ante if you’d like. We were poor.
Everyone clears their cards and pitches in another ante for the next round. It is easy to play, and perfect for mixed-age crowds. The only challenge is keeping up with the caller, who is supposed to keep a fast pace. If you are unfamiliar with Spanish you have to keep watching the caller to flash the card so you can see the picture. It’s a lot like a tennis match (look up, look down, look up…), but it is also enormous fun.
I asked my mom if she would be the caller for our game, since she was the only one that knew Spanish and could pronounce the words correctly.
CANASTA (cards)
I love this game. Lots of fun. Players who are unfamiliar will catch on pretty quick. This is a great game to play for hours, snacking and refilling drinks in between sets.
MEXICAN TRAIN (dominoes)
I love this game too. I especially love to play it with JoAnn, although I am sure she cheats with her constant table talk of how she can’t see the dots and doesn’t know if she has any dominoes to play, and then miraculously has none left to play when everyone else at the table is stuck with our stupid piles of double twelves and such.
If you want to make a night (or day) of it, I have, on other occasions, set up game tables around my house and split my guests into groups of four players, each group starting at a different table, with a different game being played at each table. After an hour or so I ring a bell to signal them to move to the next table for the next game. When all the players have made it through all the games, its goodnight Irene! Or, Jose! Or Maria! Or whatever your party name is.
It is helpful to have at least one person at each table that is very familiar with how to play the games, so they can teach it to the others who may be unfamiliar.
Allllllllrightythen….I guess that about does it. Thanks for reading and have a blast my amigos and amigas!!! Andale, andale, arriba, arriba! (Please trill your R’s and use your Speedy Gonzales voice, I beg you!) 🙂
“And also that every man should eat and drink, and enjoy the good of all his labour, it [is] the gift of God.” Ecclesiastes 3:13


 I was given the opportunity recently to make a bunch of tissue paper flowers for a school project. I had so much fun with it honestly, and thought, these sure would make a beautiful decoration, or they could be used for head garlands (as pictured here) which are pretty popular in Texas, or Homecoming Mums (another Texas thing), or to decorate Derby hats, or for a garden tea party, or luau, or
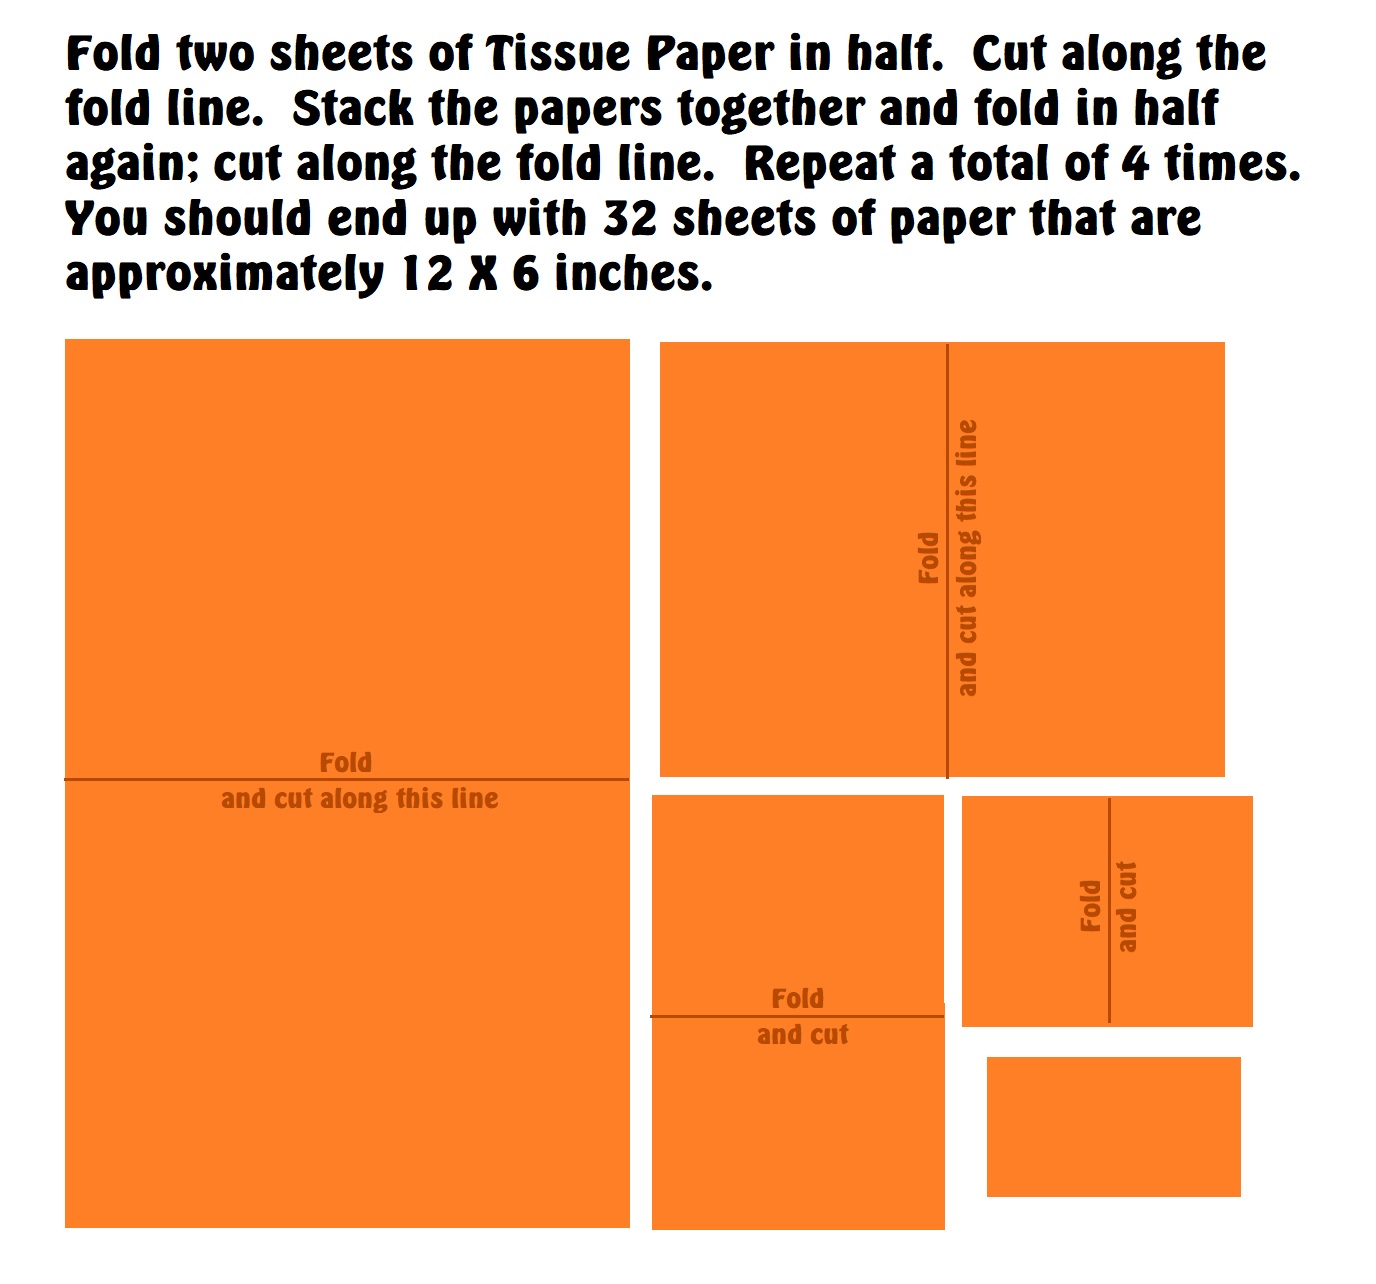


 The center pom kind of makes a flower that looks like a cactus flower. You can do the same sort of thing with green tissue going out the bottom to look like the bud part of the bloom (just cut it with deep zig zags instead of the fringe). You can also experiment with various cuts, and you can also layer two colors of tissue together to make more interesting options. Here are some samples of the flowers I made. They turned out soooooo pretty?
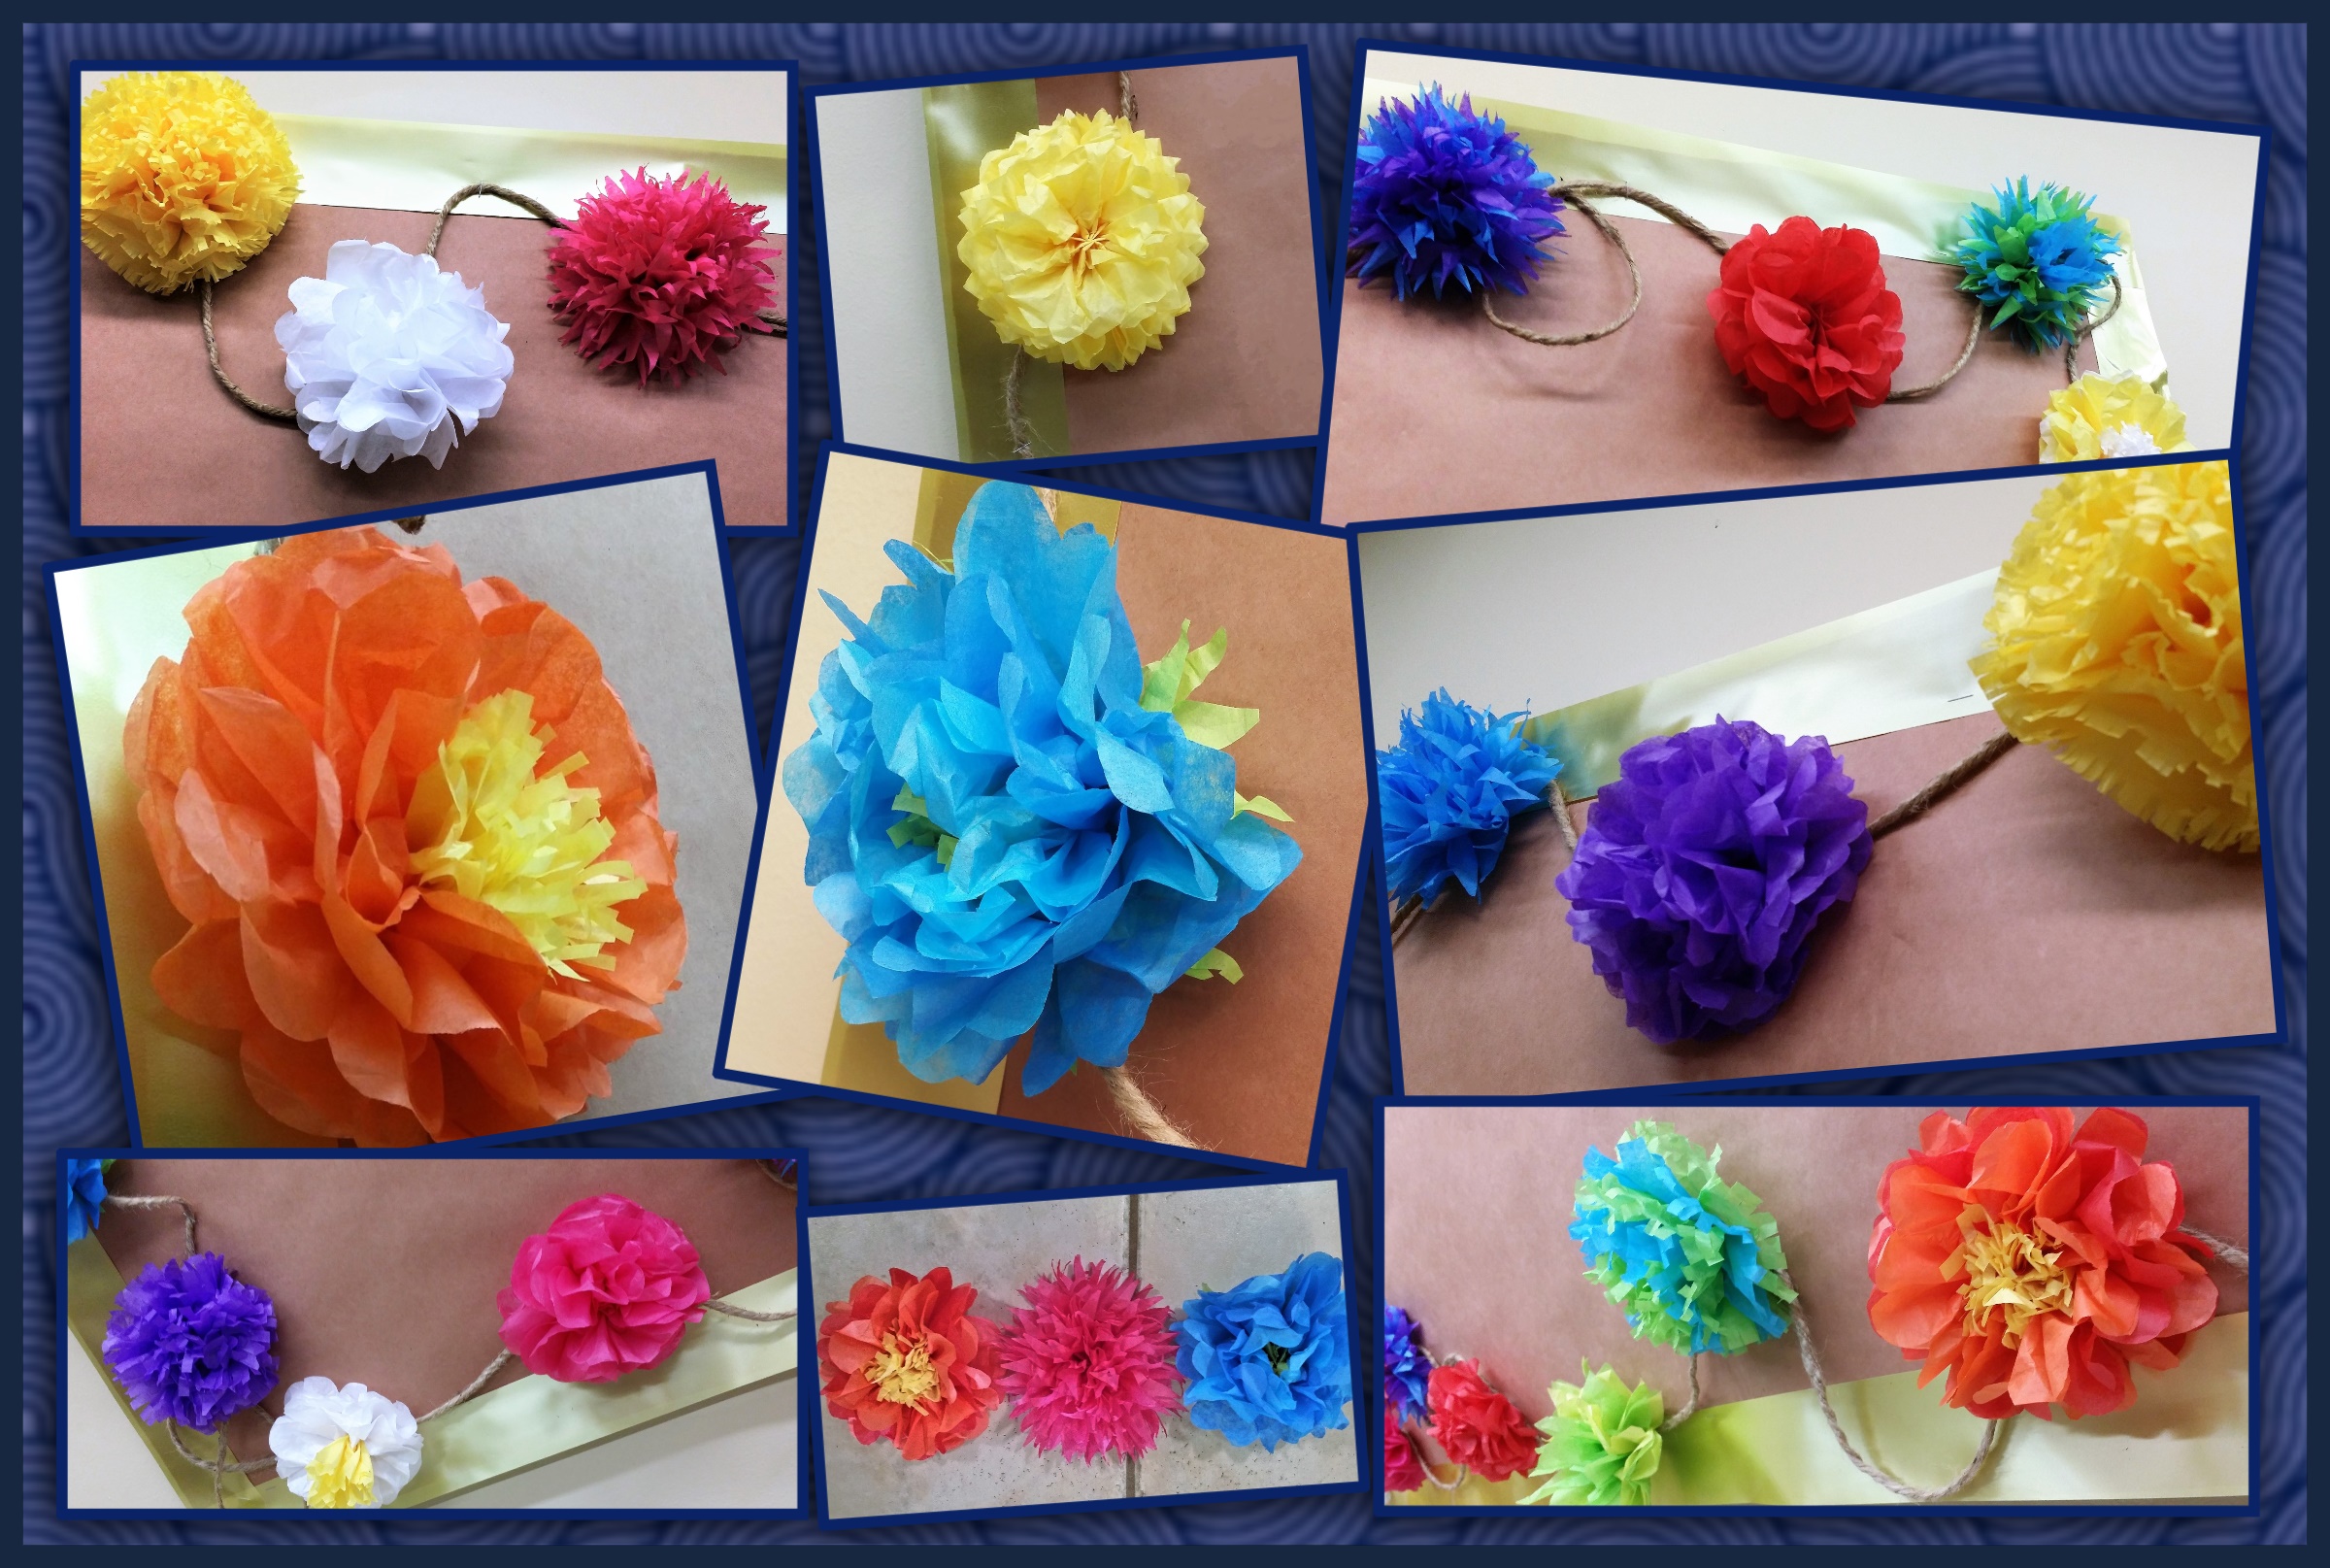


 Cheesy Green Chili Rice