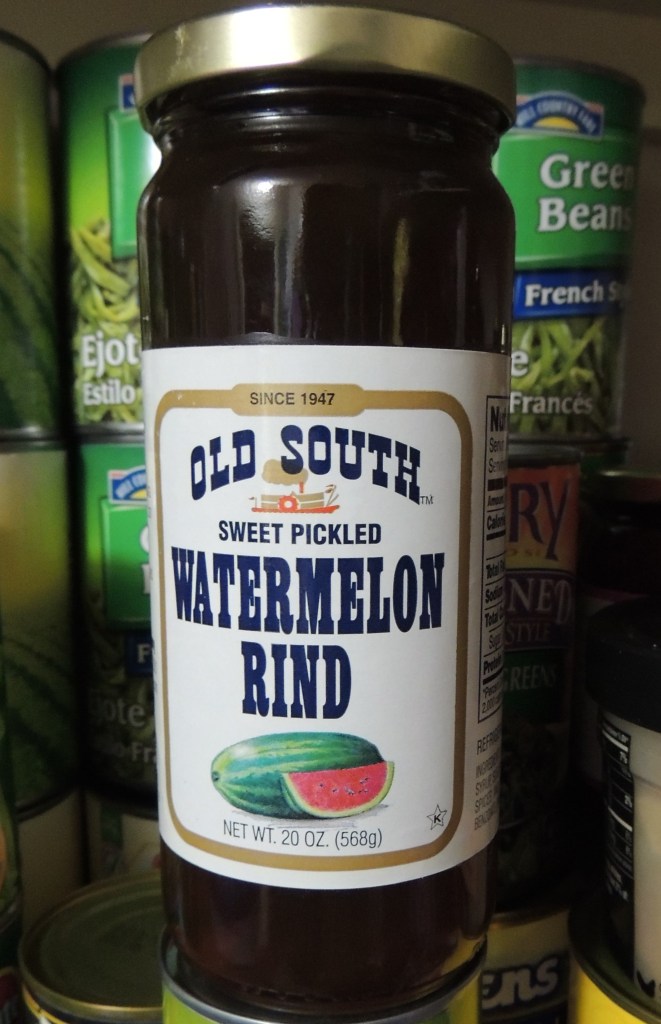
This chicken salad recipe is the favorite dish of my sister’s ever brought to a church fellowship. It was her pastor’s wife (now pastor’s mother) who introduced everyone to this fantabulous salad. The only thing is though, in Wyoming there aren’t ever any watermelon pickles available in the stores, so often times she has to substitute bread and butter pickles, although grapes would probably be a better substitute.
Mrs. Adams is from Texas and apparently, they are a southern thing – watermelon pickles, and since I live in Texas now, I was able to find them at Central Market in San Antonio and send them to my sister, who passed them along to Mrs. Adams, so she could make her famous salad the way it was supposed to be made.
But the crazy thing is, I remember, as a kid, my grandmother making watermelon pickles in the summers. She always wanted us to save our rinds for her so she could make a big batch. She always had a jar of them in her fridge – and she’s not southern at all, although my grandpa was, and so maybe that’s where she got the idea. Maybe his mom (or stepmom) made them? Well, at any rate, a few years ago, I decided to try and make them myself, ‘cause San Antonio is a long ways to drive for a jar of pickles. As far as recipes, all I had was a Ball Blue Book for inspiration, and after trying both types that they had listed, I realized that neither of them remotely resembled the taste or gooey consistency of the ones my grandma used to make.
Then, a few weeks ago, on one of my many visits to Facebook, I saw Brenda Gantt had posted a video of herself making them, and after watching, I decided hers looked a whole lot like the ones my grandma made, very thick and gooey and sticky. So, I thought I’d try her method out and see if it was a match.
Now, if you aren’t familiar with who Brenda Gantt (#BrendaGantt) is, well, let me just say she is this most darling little ol’ cooking grandma lady from Andalusia Alabama who ever put videos on Facebook. They are down-to-earth and practical, charmingly unprofessional, and downright homey. Shot by her using a little ol’ cell phone, in her very user friendly, fully equipped, but dare I say, a little bit old school kitchen, where friends and grandchildren frequently make an appearance. Sometimes Brenda is all done up, make-up on, hair done, cute outfit, and other times she is in her housedress with no makeup and hair going every which way or stuffed under a ball cap. She is a popular lady with lots of friends and a loving grandma and mother. She is a patriotic and Christian lady who shares her faith and love of country often, and has the most adorable personality. She is a widow and retired school teacher, and has a little Bed and Breakfast that she operates called Cottle House. She is so beloved that her videos often get pirated and posted to You Tube (without her permission), but perhaps you have seen her there? Below is the link to the little video she did of the watermelon pickles, which I hope you’ll go and watch here. If you have a cell phone you can aim your camera at this QR code and then click on the link that will pop up on your screen. It will take you right to the video.
This summer I have had such a craving for watermelon, and because of the abundance of watermelon rinds, I decided I would give Brenda’s recipe a whirl. Let me tell you, it turned out exactly like my grandmother’s recipe, except my grandma’s had whole cloves in hers. I thought they might be even better if they were spicy, so I added some garden jalapenos along with a lemon and a few spices just to see how they would turn out. Weeee doggies, they are my absolute new favorite!!!!! I love them soooooo much that I have made two whole watermelons worth now. They make the chicken salad even better than it already was, if I may say so myself. 😉
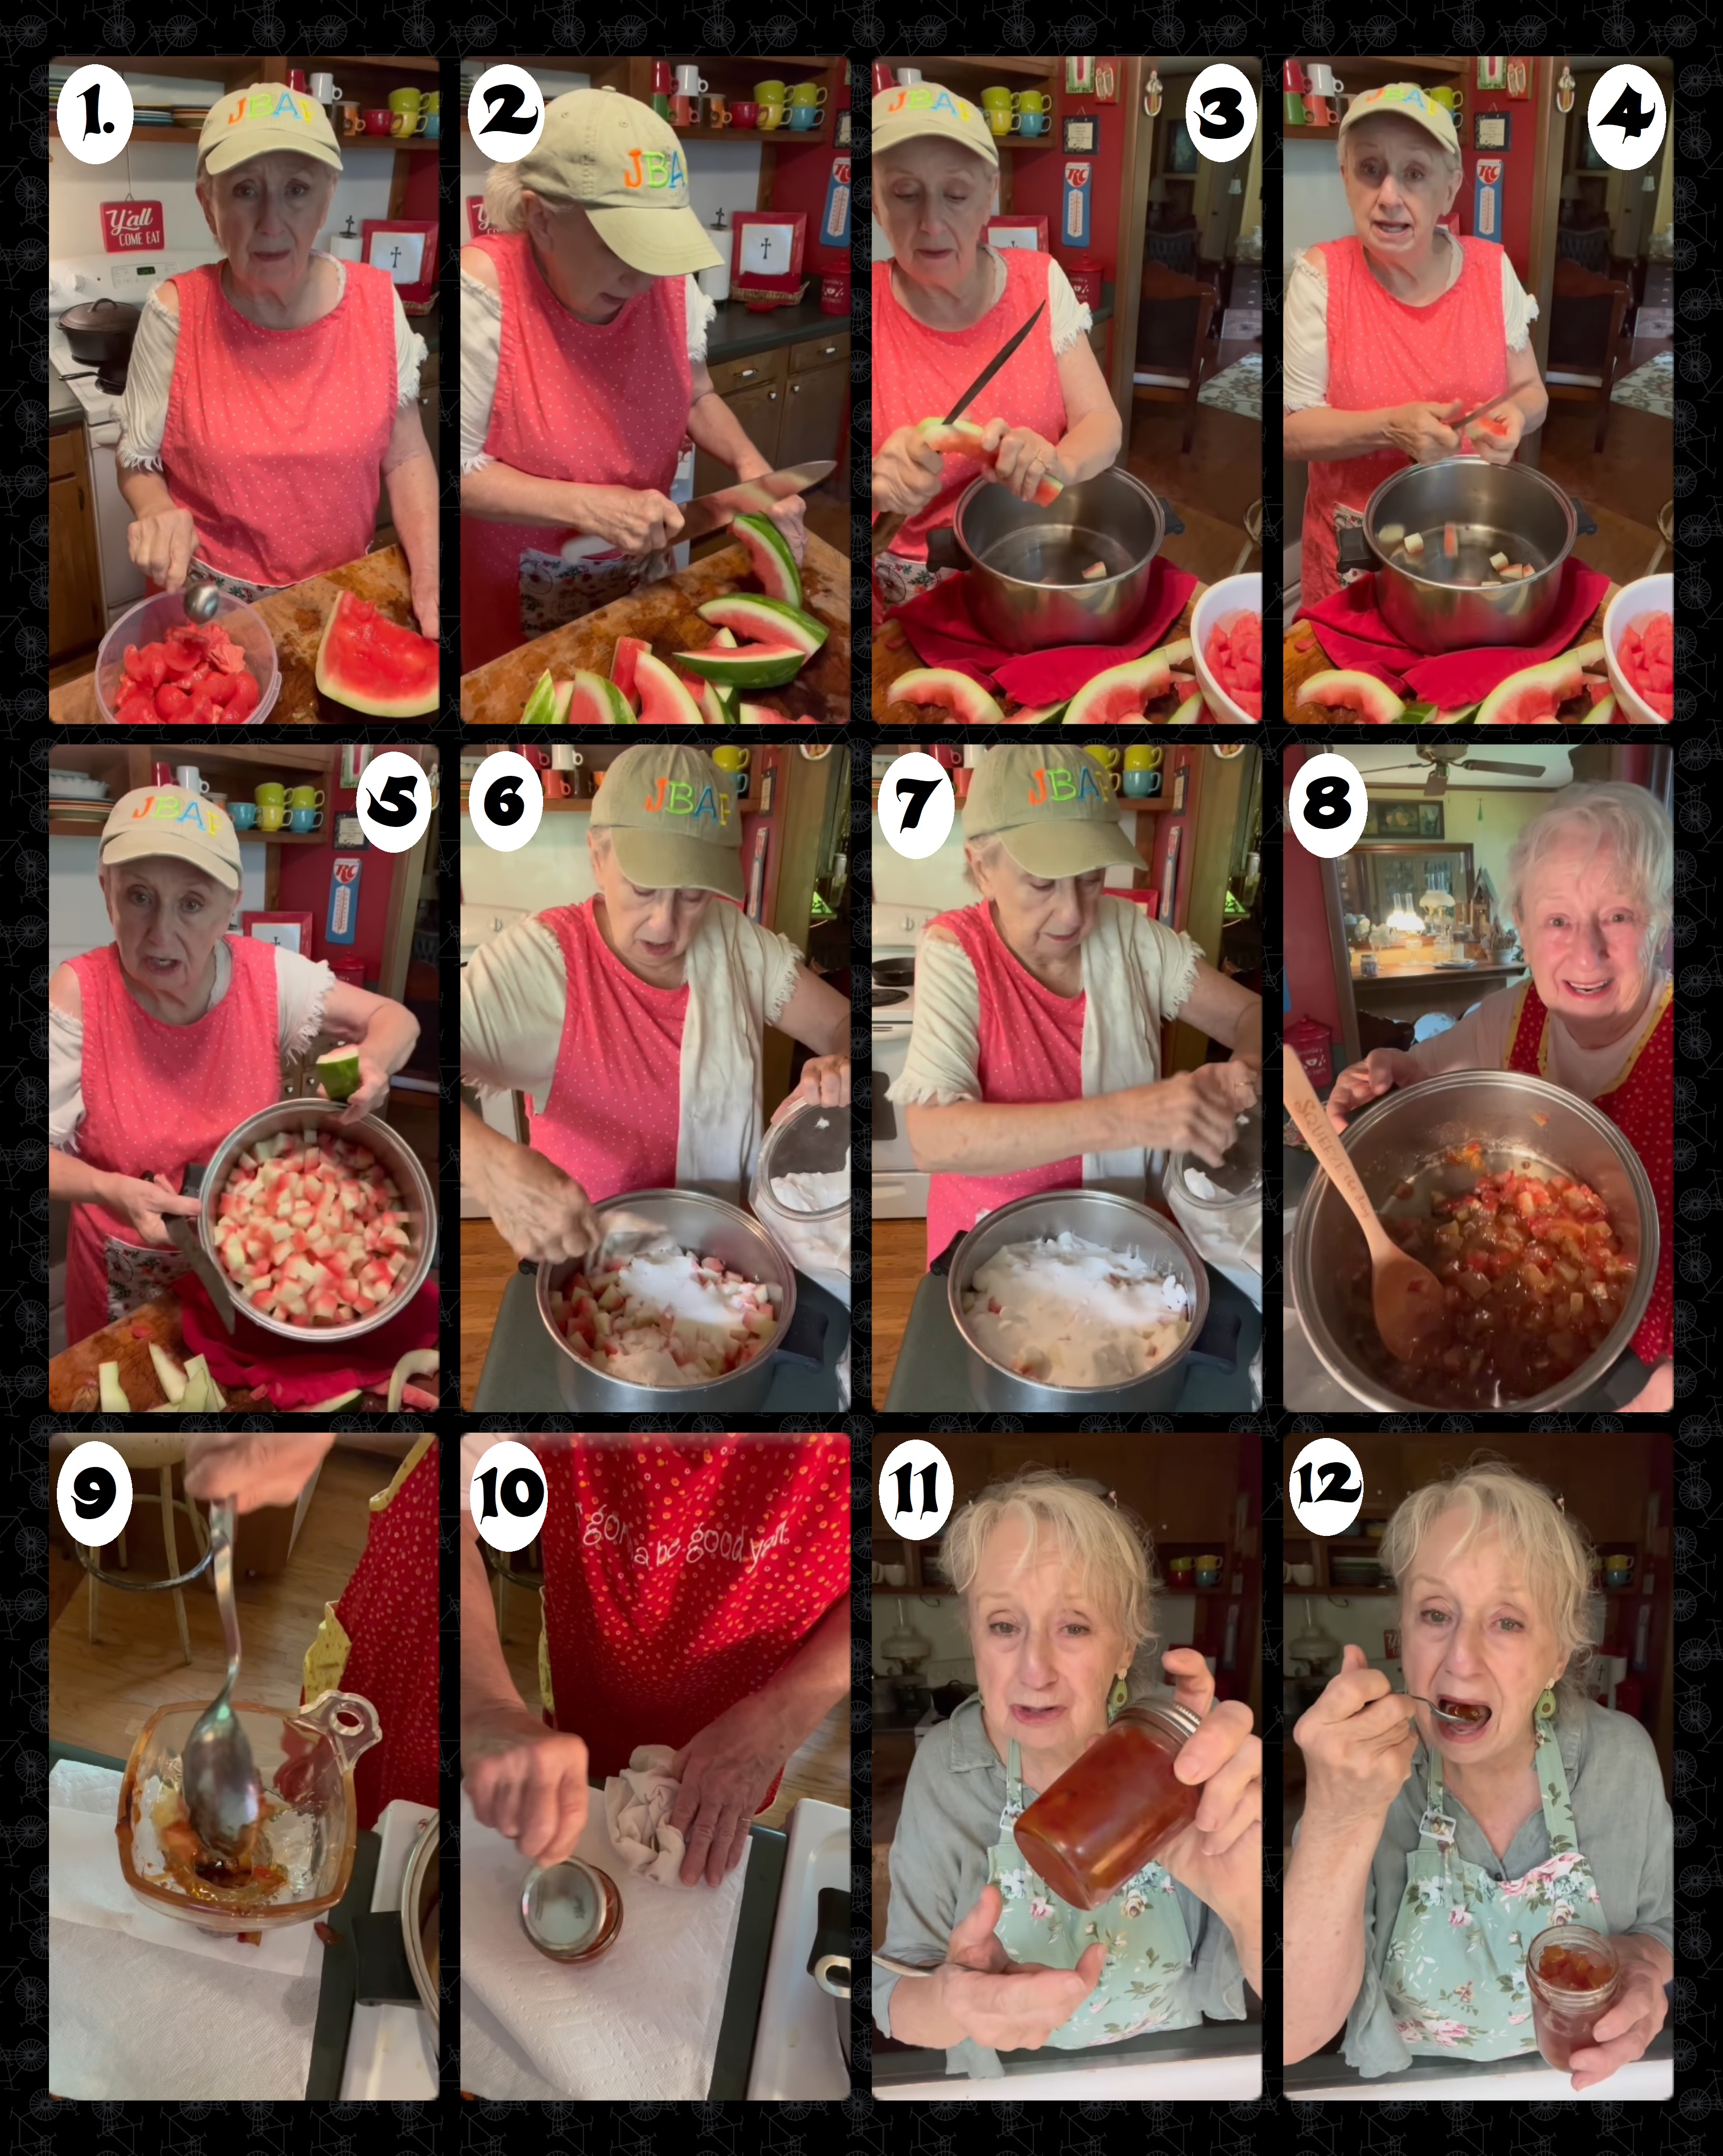
I made a little video capture collage from Brenda’s video. I thought it might be helpful to aid in the instructions for my watermelon pickles. As you can see, it took her a couple of days to put this one together, sometimes she is fixed up and sometimes not, and if you watch the video you will get to meet one of her beautiful granddaughters and a prankster grandson.
MrsH’s Spicy Watermelon Rind Pickles
INSTRUCTIONS: (numbers correspond to the numbered sections of the Brenda collage above)
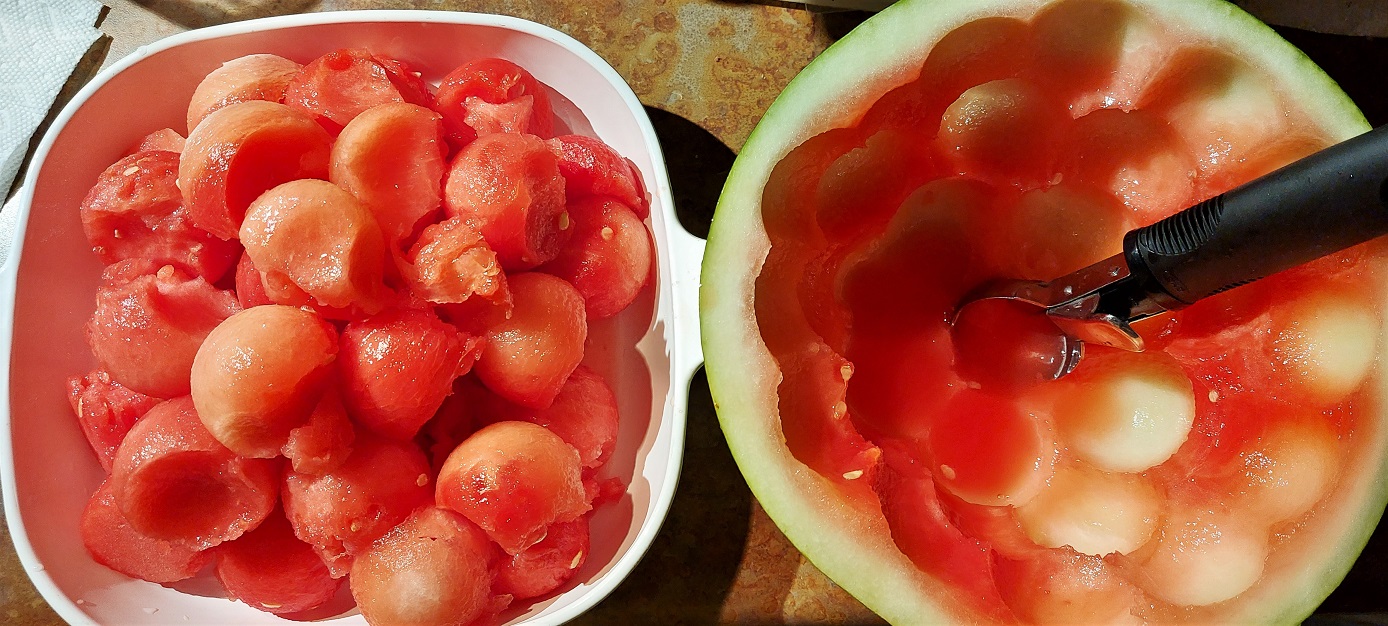
1. Cut watermelon in half. Scoop out the red part
2. Cut the rind into strips about an inch wide
3. Cut the green skin off each piece of rind
4. Cut the rind into bite-size pieces
5. Once the rind is all cut up you should have a pretty good pot full. I actually transferred my rinds into a large ceramic bowl to set overnight instead of leaving them in the metal pot.
6. Cover the rind pieces with sugar (do not stir). Use regular, white, granulated sugar.
7. Make sure the sugar covers every piece. Let the rinds sit, uncovered, on the counter for 8 hours or overnight (do not stir). The next morning you will see that the sugar has leached the liquid out of the rinds and has formed a sort of wet crust on top.
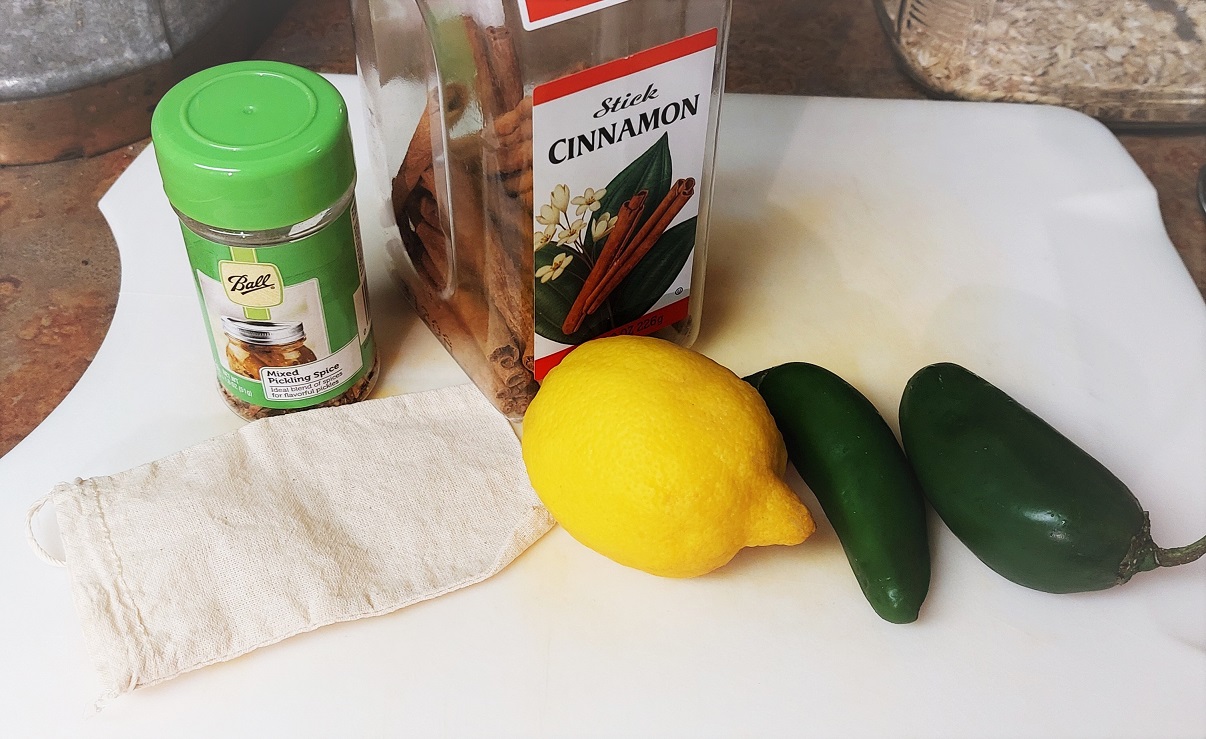
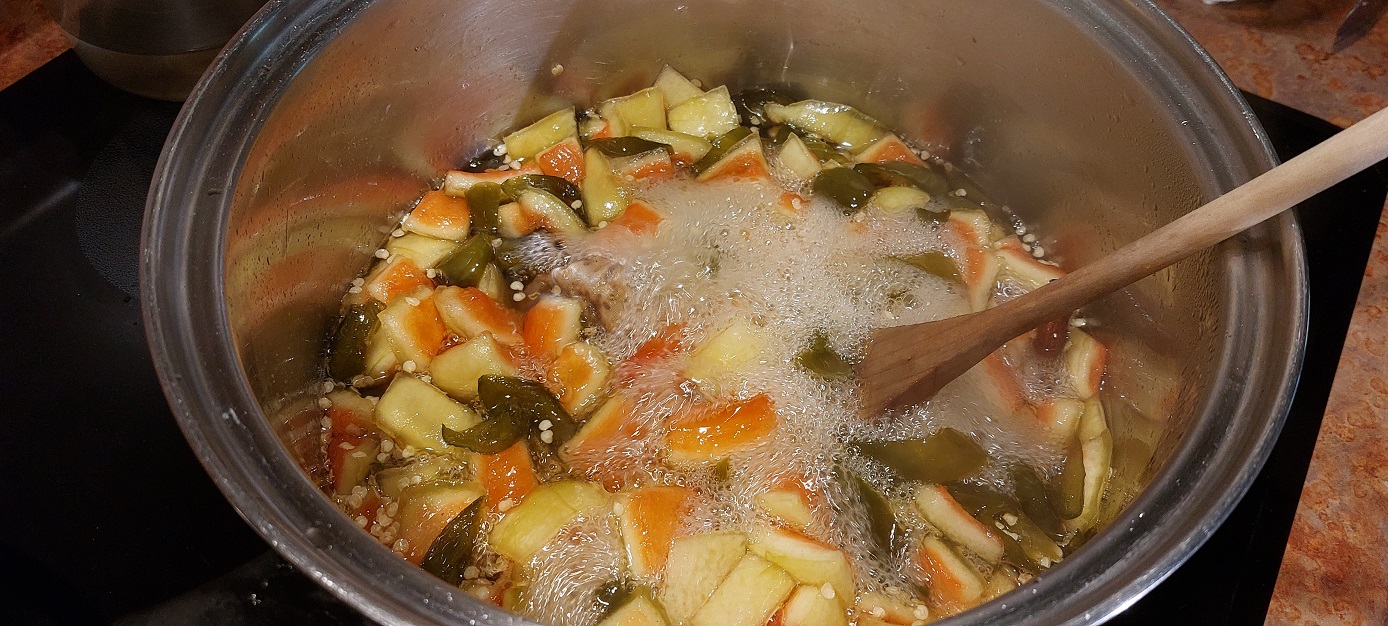
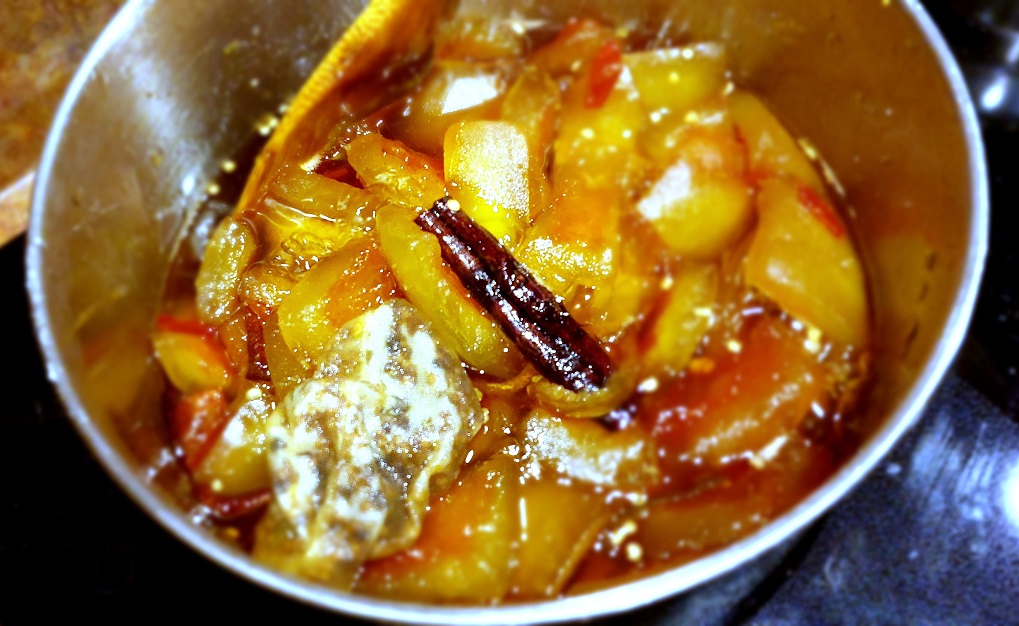
8. Pour the liquid and rinds into a large pot and bring to a boil on the stove. (I added about a dozen small, really spicy jalapenos from my garden (stems removed, chopped up), plus one lemon sliced, two cinnamon sticks, and about a heaping tablespoon of Ball Pickling Spice – which I added to a reusable tea bag, and let it all cook together on a medium boil for about 2 hours or so.
It will cook down quite a bit. The rinds need to cook until they are translucent. Sometimes it is hard to tell if they are translucent while they are boiling, so I remove a piece from the pot and let it cool to see. Once the pickles are translucent, they are ready to be jarred, but in the meantime, while the rinds are still cooking, it’s a perfect time to get the your jars ready.
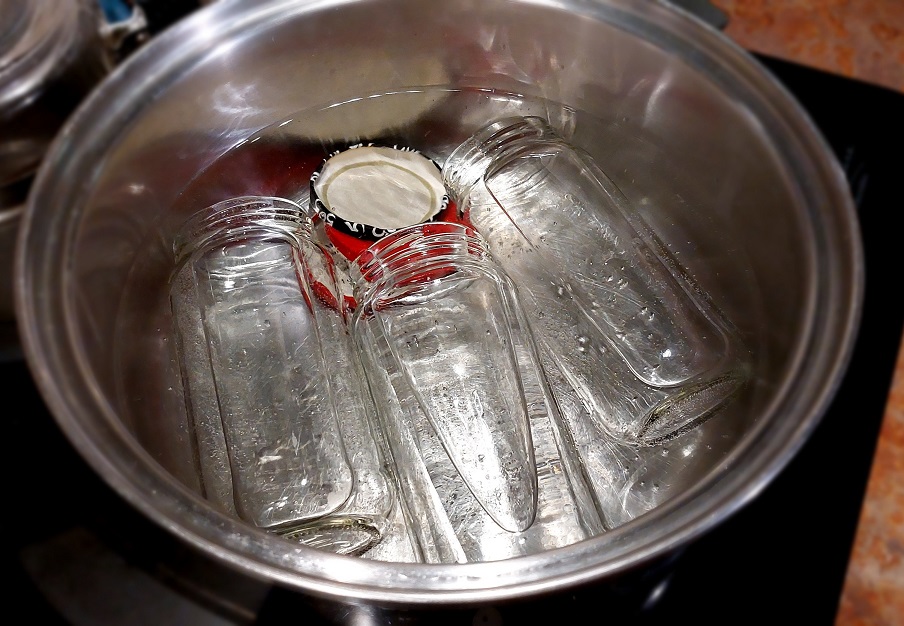
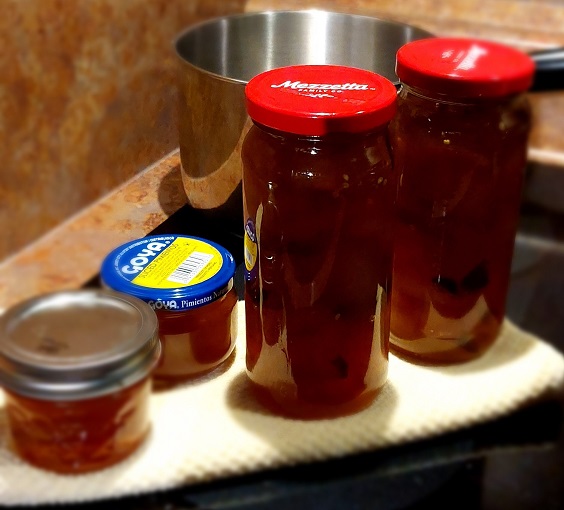
Get a few clean jars with lids and place them in a pot of water. *I used old olive jars that I had saved, and their lids, and to my utter amazement they actually sealed when they cooled.
To prepare the jars, bring water to a boil in a large pot on the stove and keep it at a simmer. Let the jars and lids simmer together while the pickles finish cooking, until you are ready to use them. Use tongs to take one jar at a time out of the boiling water, tip it upside down to drain it well, and then place it upright on a towel near the pot of pickles.
9. Use a canning funnel and ladle to fill the jars with pickles. Fill the jars almost to the rim, but leave about a half inch of headspace. Clean the rim of the jars with a clean, wet paper towel so that there is nothing sticky or any pieces of pickle on it. This will ensure that the lid seals properly so no oxygen gets inside to spoil the contents.
10. Using tongs, take a lid from the boiling water, tap off the water, and place the lid on the jar. Screw the lid on hand tight. Set the jars back away from the heat, or on a wire rack, and allow them to cool until the lids seal.
Since these pickles are not being water-bath canned, and because I used previously used lids instead of brand new canning lids and rings, it is safest to keep the pickles in the refrigerator. If you would like to make some that are guaranteed safe for long term storage, here is the Ball Blue Book recipe:
I would recommend using Brenda’s pickles within a month, which is no problem when the goal for making them is to also make Mrs. Adams’ Chicken Salad (recipe below). These pickles are so delicious just to snack on, as you would any other type of pickled veggies. They are sweet and spicy and I can’t wait for you to try them. Brenda says that she first tried these as preserves spread on a buttered biscuit, accompanying a steak dinner she and her husband dined out on at a restaurant. I tried them that way and they are delicious. My grandmother always had them around as a side for meals and snacks. She always added whole cloves to hers while they were cooking, along with cinnamon sticks. I like the Ball pickling spices, it has all the spices in it. And the cinnamon stick, jalapeno, and lemon rind just makes them perfect.
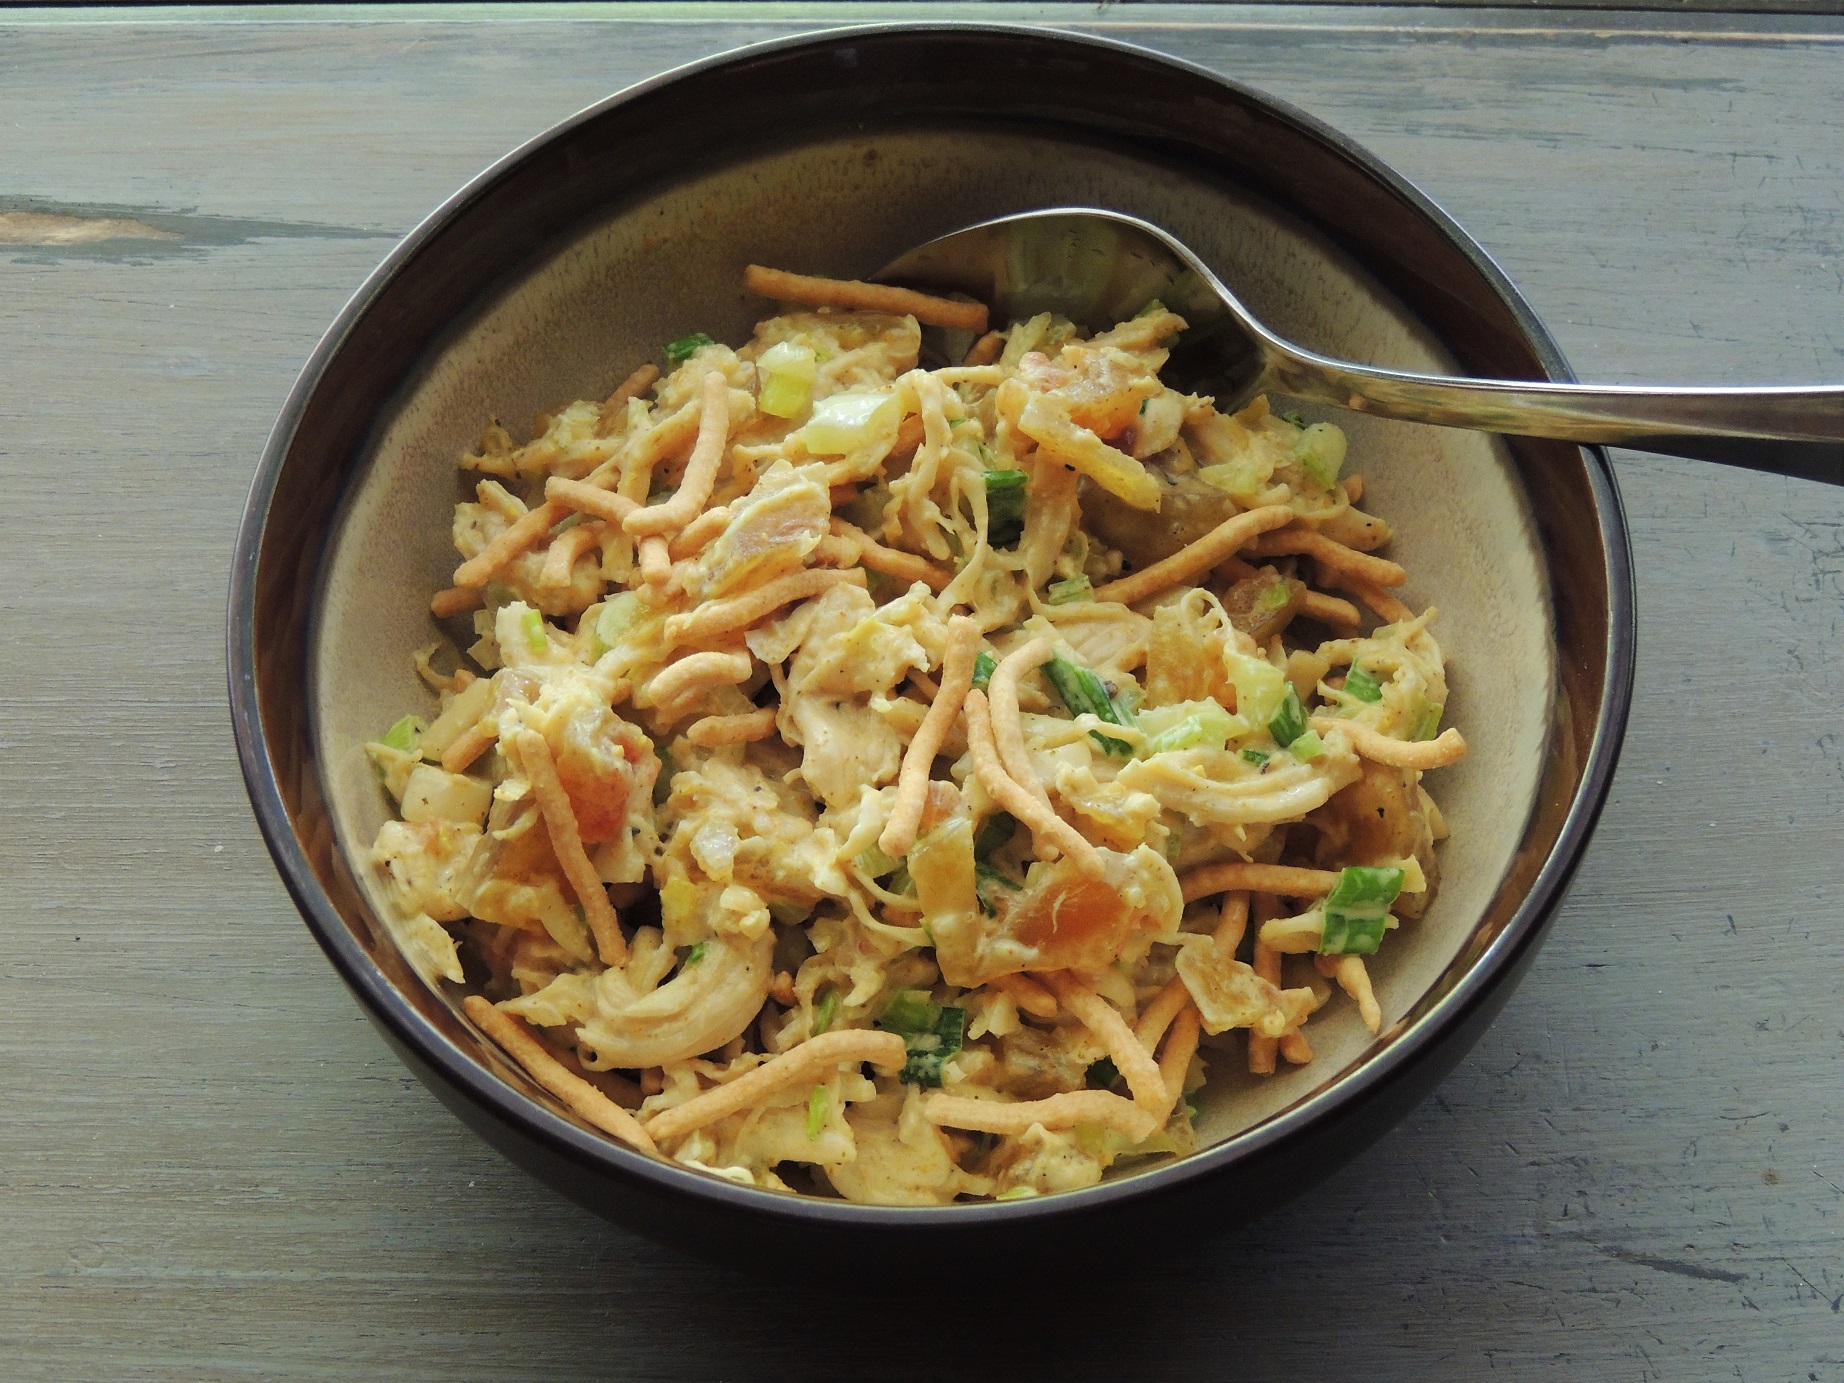
Mrs. Adams’ Crunchy Turkey/Chicken Salad
Original recipe courtesy of the Ladies of Grace Bible Baptist church (Casper, Wyoming), Favorite Recipes cookbook, published 2002 by Morris Press Cookbooks. I modified her recipe slightly to avoid any copyright liabilities.
4 cups cooked turkey or chicken, pulled and chopped into bite-size pieces
1½ cups chopped celery
3/4 cup chopped green onion
1 (20-oz) jar of watermelon rind pickles, drained (if liquidy) and chopped
1 (5-oz) bag slivered almonds
1½ to 2 cups Mayonnaise, as preferred
The juice of 1 lemon (or a Tablespoon of bottled lemon juice)
½ teaspoon freshly ground black pepper
1½ teaspoons salt, or more to taste
2 Tablespoons Curry Powder (I used Hot Madras), more or less to taste
2 cups Chow Mein Noodles (wait to add until just before serving)
Toss turkey/chicken with the next 4 ingredients until well incorporated. Mix the mayo, lemon juice, salt, pepper, and curry powder together and pour over chicken. Mix well. Add more mayo if a creamier texture is desired. Add more salt, pepper, curry powder – if more is desired. Cover tightly and keep refrigerated until ready to serve. Stir in chow mein noodles just before serving. Great dish to bring to a church pot luck, Bowling pot luck, Bunco night, cards, dominoes, or other game night get-togethers. If you are a grandma and live in the same town as your kids and grandkids, take a batch over to them to be a blessing after a long day at work. Can be made up to 12 hours before serving. Add the chow mein noodles just before serving.
“Give us this day our daily bread, and forgive us our trespasses as we forgive those who trespass against us.” Matthew 6:11-12
I was given the opportunity recently to make a bunch of tissue paper flowers for a school project. I had so much fun with it honestly, and thought, these sure would make a beautiful decoration, or they could be used for head garlands (as pictured here) which are pretty popular in Texas, or Homecoming Mums (another Texas thing), or to decorate Derby hats, or for a garden tea party, or luau, or FiEsTa(which happens to be going on in San Antonio at this very moment), which got me to thinking that somebody else out there might appreciate knowing how to make these. I also sure don’t want to ever forget how I made them, so… that’s as good a reason as any to blog about something, me thinks.
Materials needed: 1 package of multi-colored tissue paper, a good pair of sissors, a stapler, and string (optional).
A large package of multi-colored tissue paper is fairly inexpensive to buy at the big box stores ($10 for 100 sheets). And one of those packages will give you more than enough paper to make 100 flowers that are roughly the size of one of those mesh shower pouf thingies. (If you want to make giant flowers, you could probably squeeze 10 or so out of a package???)
So here is how you make them. First open the package of tissue paper and separate the colors. Straighten up the sheets so that they lay exactly on top of each other. Peel off two sheets of one color of the tissue paper.
Now, I’ve included visual instructions below that will hopefully be easy to follow, but I will also explain…
Gather your materials. It will help to have a large table where you can spread out the tissue paper into individual color piles. (My poor sissors, you’ll notice, have issues, actually just one issue. I don’t know what happened, but they are Fiskers, and the handles have decomposed over the years since I first bought them. They are sticky now, and almost clay-like. The stuff was coming off on my hands and making my hands sticky, so I wrapped the handles in strips of paper towel. Has this happened to anyone else? Or is it just the humidity in the south that has made mine do this?)
Peel off 5 sheets of tissue paper and stack them together neatly. Then starting at the bottom fold up about an inch width and press it flat.
Flip the stack over and fold the other direction, and press flat.
Continue folding in an accordion pattern until you reach the other end.
Press the stack flat.
Fold the stack in half to mark the center place.
Press it flat to make a good crease.
Open and place under the stapler, and place a staple on exactly that center crease line. Option: you can also tie a string around this center part so you will have something to tie the flower, to attach it to whatever you are decorating.
(Photo just shows the staple being present)
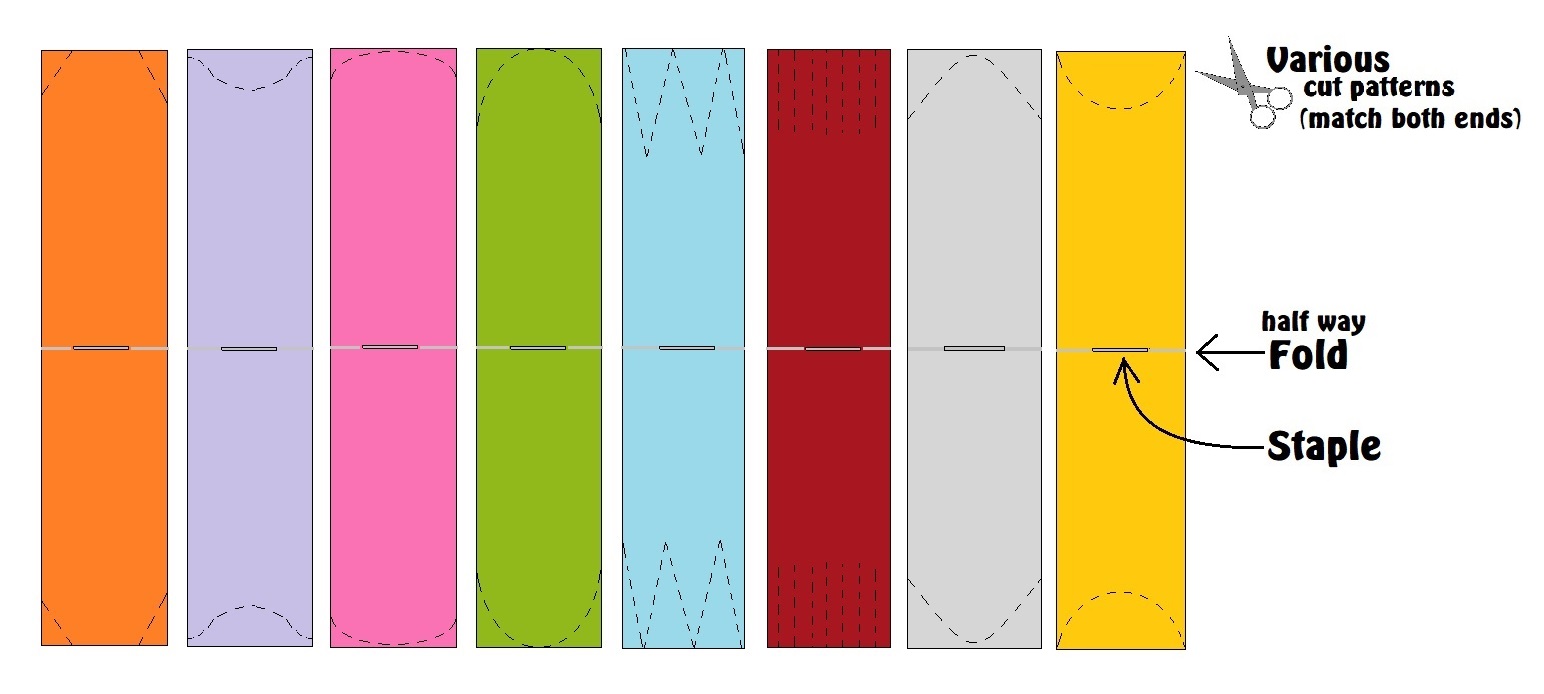
Now cut one end with whatever pattern you wish for the type of flower you wish to make (see diagram below)
Cut the first end and discard the scraps
Then cut the second end to match
Fan out the ends to make it easy to separate the individual sheets
Orange shows a gardenia type flower
Purple shows a hydrangea type flower
Pink shows a peony type flower
Green shows a magnolia type flower
Blue shows a Zinnia type flower
Red shows a Carnation type flower
Gray shows a Dahlia type flower
Yellow shows a Chrysanthemum, or Mum type flower
14. Fan out both ends
15. Carefully peel off the top sheet and pull it away from the others, up towards the center
16 – 18. Continue separating sheets and pulling them up towards the center on both ends, going around in a circle
19. Smooth out the last sheet to flatten out the bottom
20 – 23. Bring the flower around and fluff each peddle to make them all uniform and fill in any gaps.
24 – 26. Set your flower down and admire how pretty it is. Then pick another color and continue making flowers.
The center pom kind of makes a flower that looks like a cactus flower. You can do the same sort of thing with green tissue going out the bottom to look like the bud part of the bloom (just cut it with deep zig zags instead of the fringe). You can also experiment with various cuts, and you can also layer two colors of tissue together to make more interesting options. Here are some samples of the flowers I made. They turned out soooooo pretty?
“Listen, my son, to your father’s instruction and do not forsake your mother’s teaching. They are a garland to grace your head and a chain to adorn your neck.”
My bestie and I live three states apart, but out in the west, and when one of those states is Texas, this adds up to a pretty dang far distance. Too far to get to spend as much time together as we’d like. But we stay close by texting every few days and calling often, we read out of the same Bible devotional every day, we send each other pins on Pinterest, and at least once a year we travel to meet somewhere and spend a few days hanging out.
She came to both my girls’ weddings, my girls both call her Aunt Treva. And I in turn got to go to her son’s wedding, and even take pictures. We are as close as sisters, and I feel so blessed to have her in my life. She’s my people. My home team. My rock. My laughter. And my comfort zone. We go together like peas and carrots.
Her family moved to my little town when we were just four years old, and she and I went through school together, from Kindergarten to graduation, although she got to graduate a year early.
Her mom was the best cook in town. You can string me up if I am lying. Ask anyone who lived there. I cherished every invitation to come to supper. And, I have several of her recipes that I still make to this day. I even found a set of dishes at a yard sale once that are the same ones she had, pattern, color, and everything, and I bought them. Whenever I serve food on them I hope that it is somehow blessed by sweet mama-Agnes as she looks down from heaven. Her own dishes of course passed down to Treva, and so we both have the same dishes in our kitchens. Isn’t that fun?
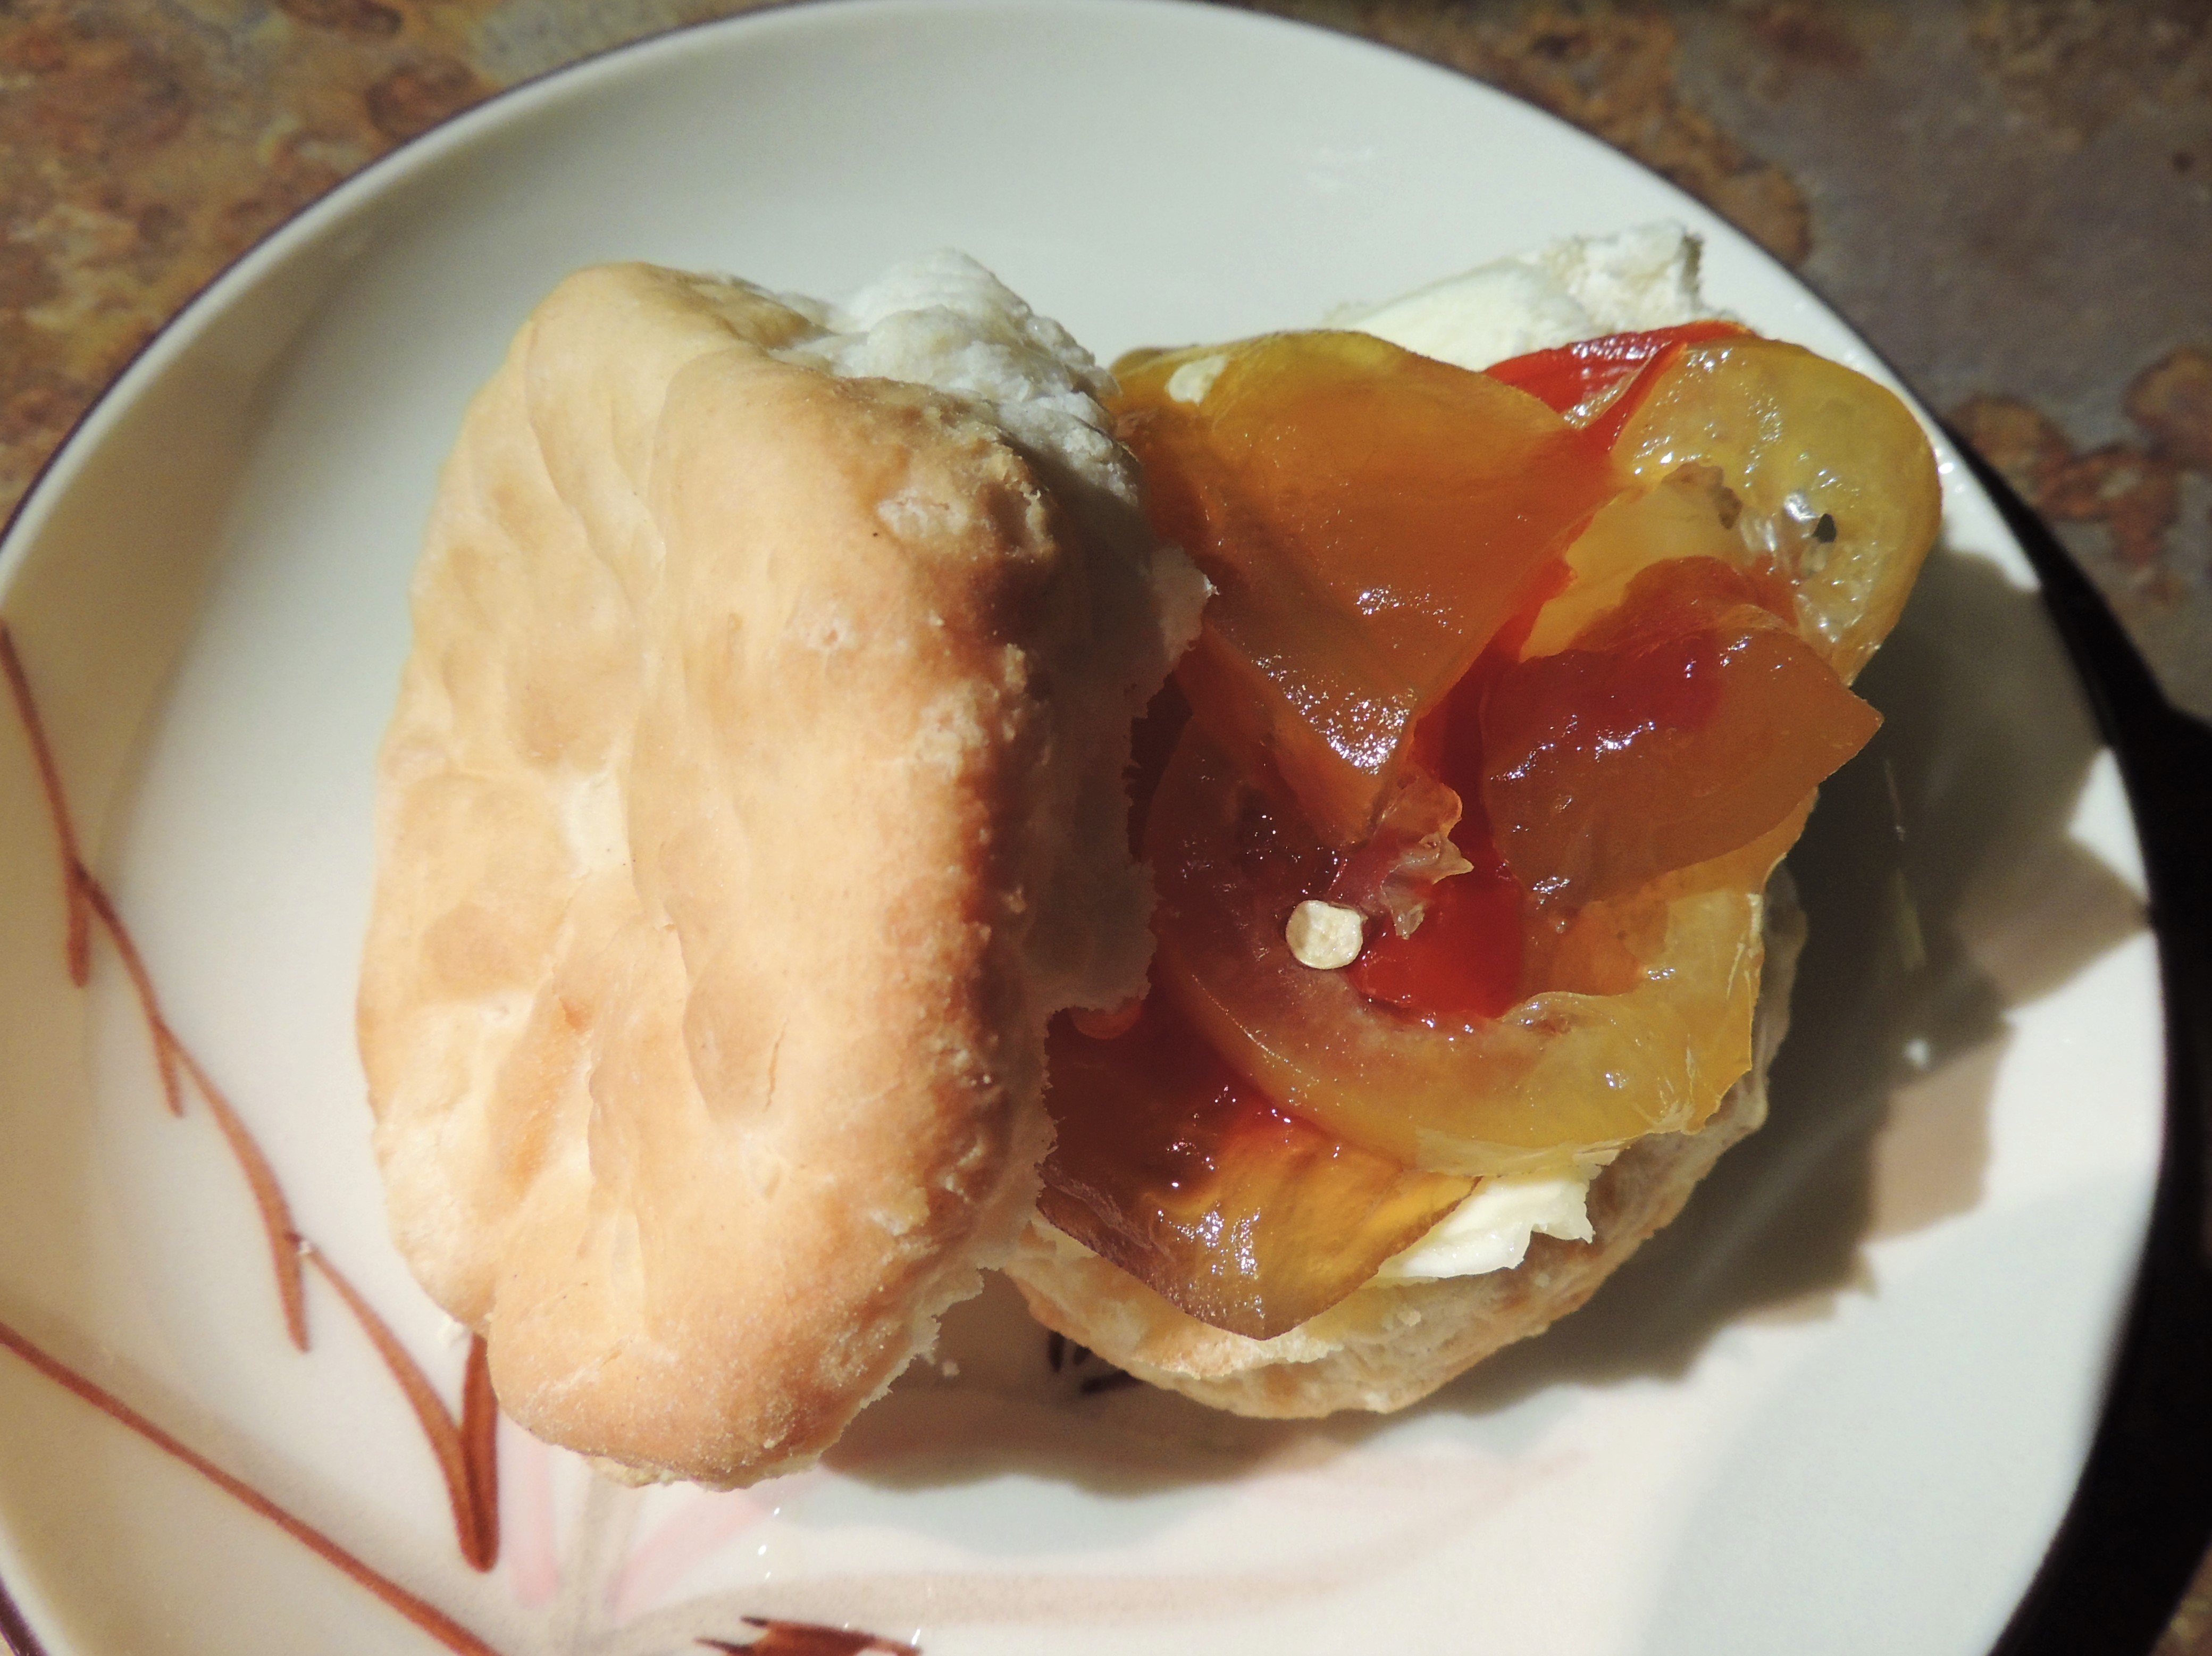
Treva and I were visiting on the phone the other day, asking each other what we were going to make for supper, and when I told her I was thinking of making tuna salad she told me about a tuna salad her mom used to make sometimes when she was going to have girlfriends over. I’m not usually a fan of tuna on a tomato, and what’s funny is neither is my friend, but I will admit, it is much better on a nice fresh ripe garden tomato, one of those magnificent heirloom black tomatoes especially, which I just happen to have today. Treva also suggested trying a halved bell pepper next time. A red one, for looks. She’s a genius … it is a perfect substitute!
.
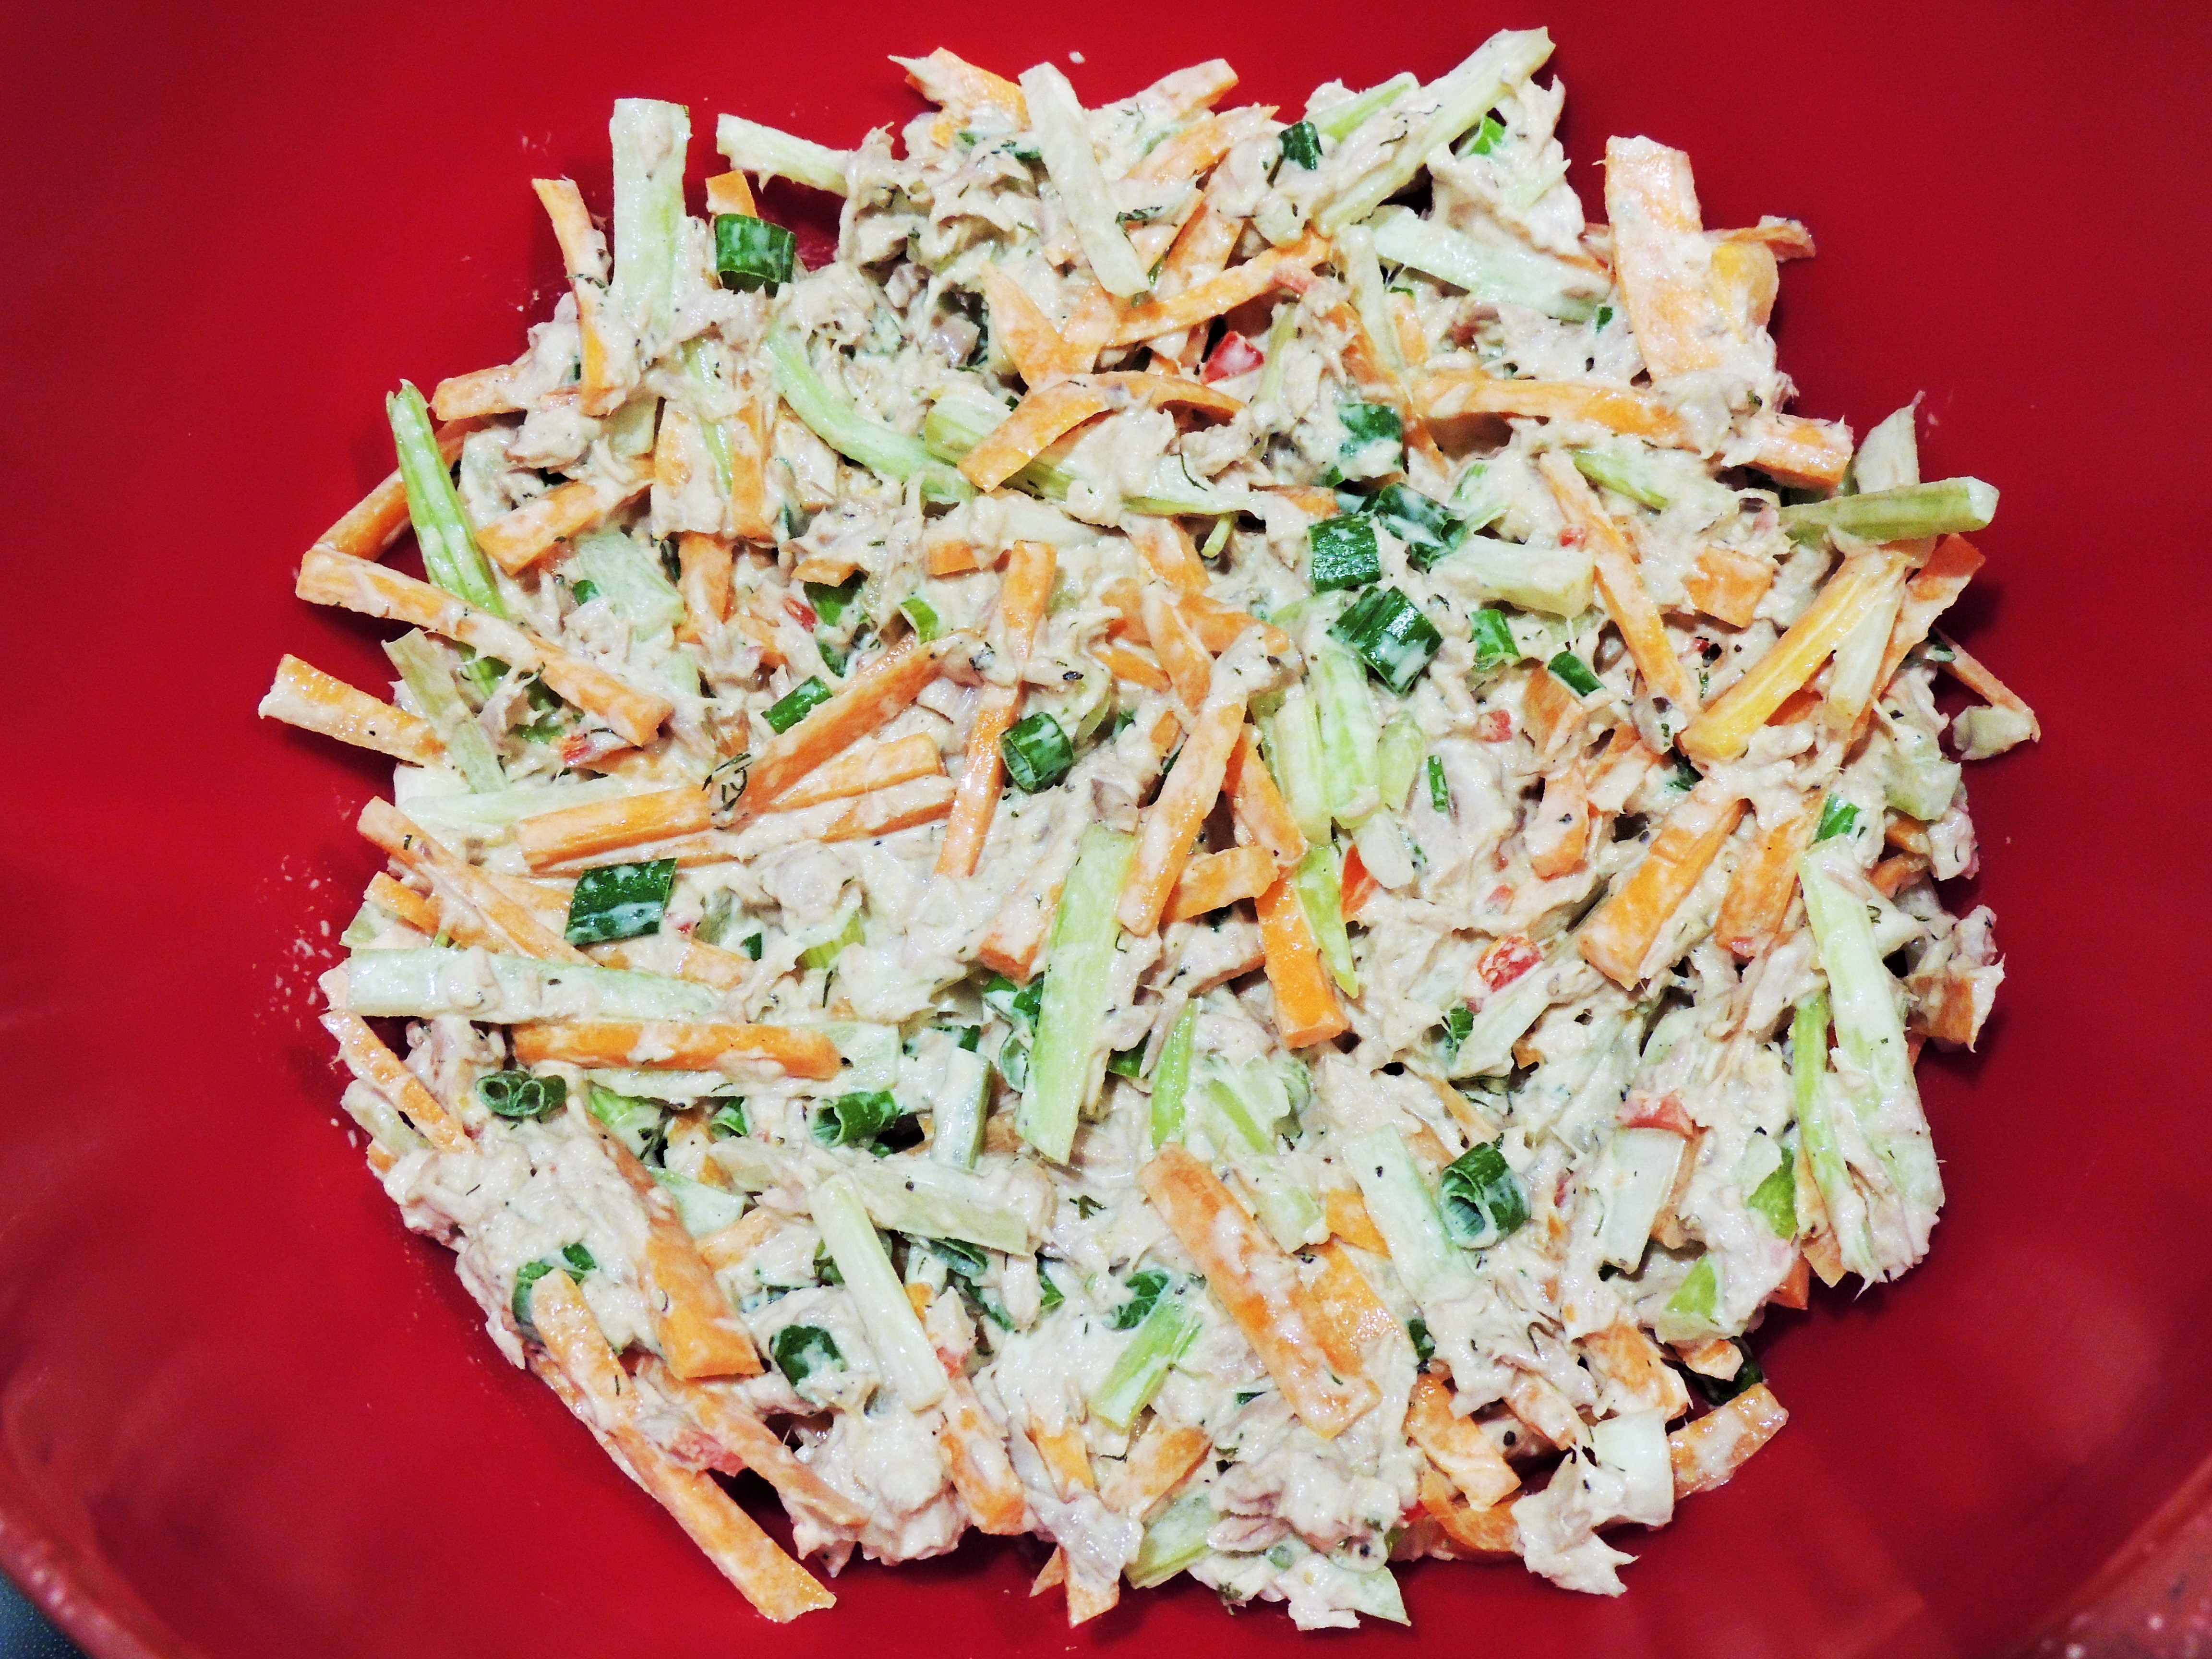
MRS H’s SHOESTRING POTATO TUNA SALAD
1 cup julienned Carrots
1 cup julienned Celery
1/4 cup finely chopped Green Onion
1 can (12 oz) Tuna (I prefer the kind packed in water), drained
Mayo (maybe half to 3/4 cup – I just eyeball it)
1 Tbsp Lemon Juice
1 heaping tsp. fresh or dried Dill Weed
1 serrano chili, seeds, stems, and membranes removed, minced
season to taste with: (start with a little shake of each)
lemon pepper
ground pepper
Montreal steak seaonsing
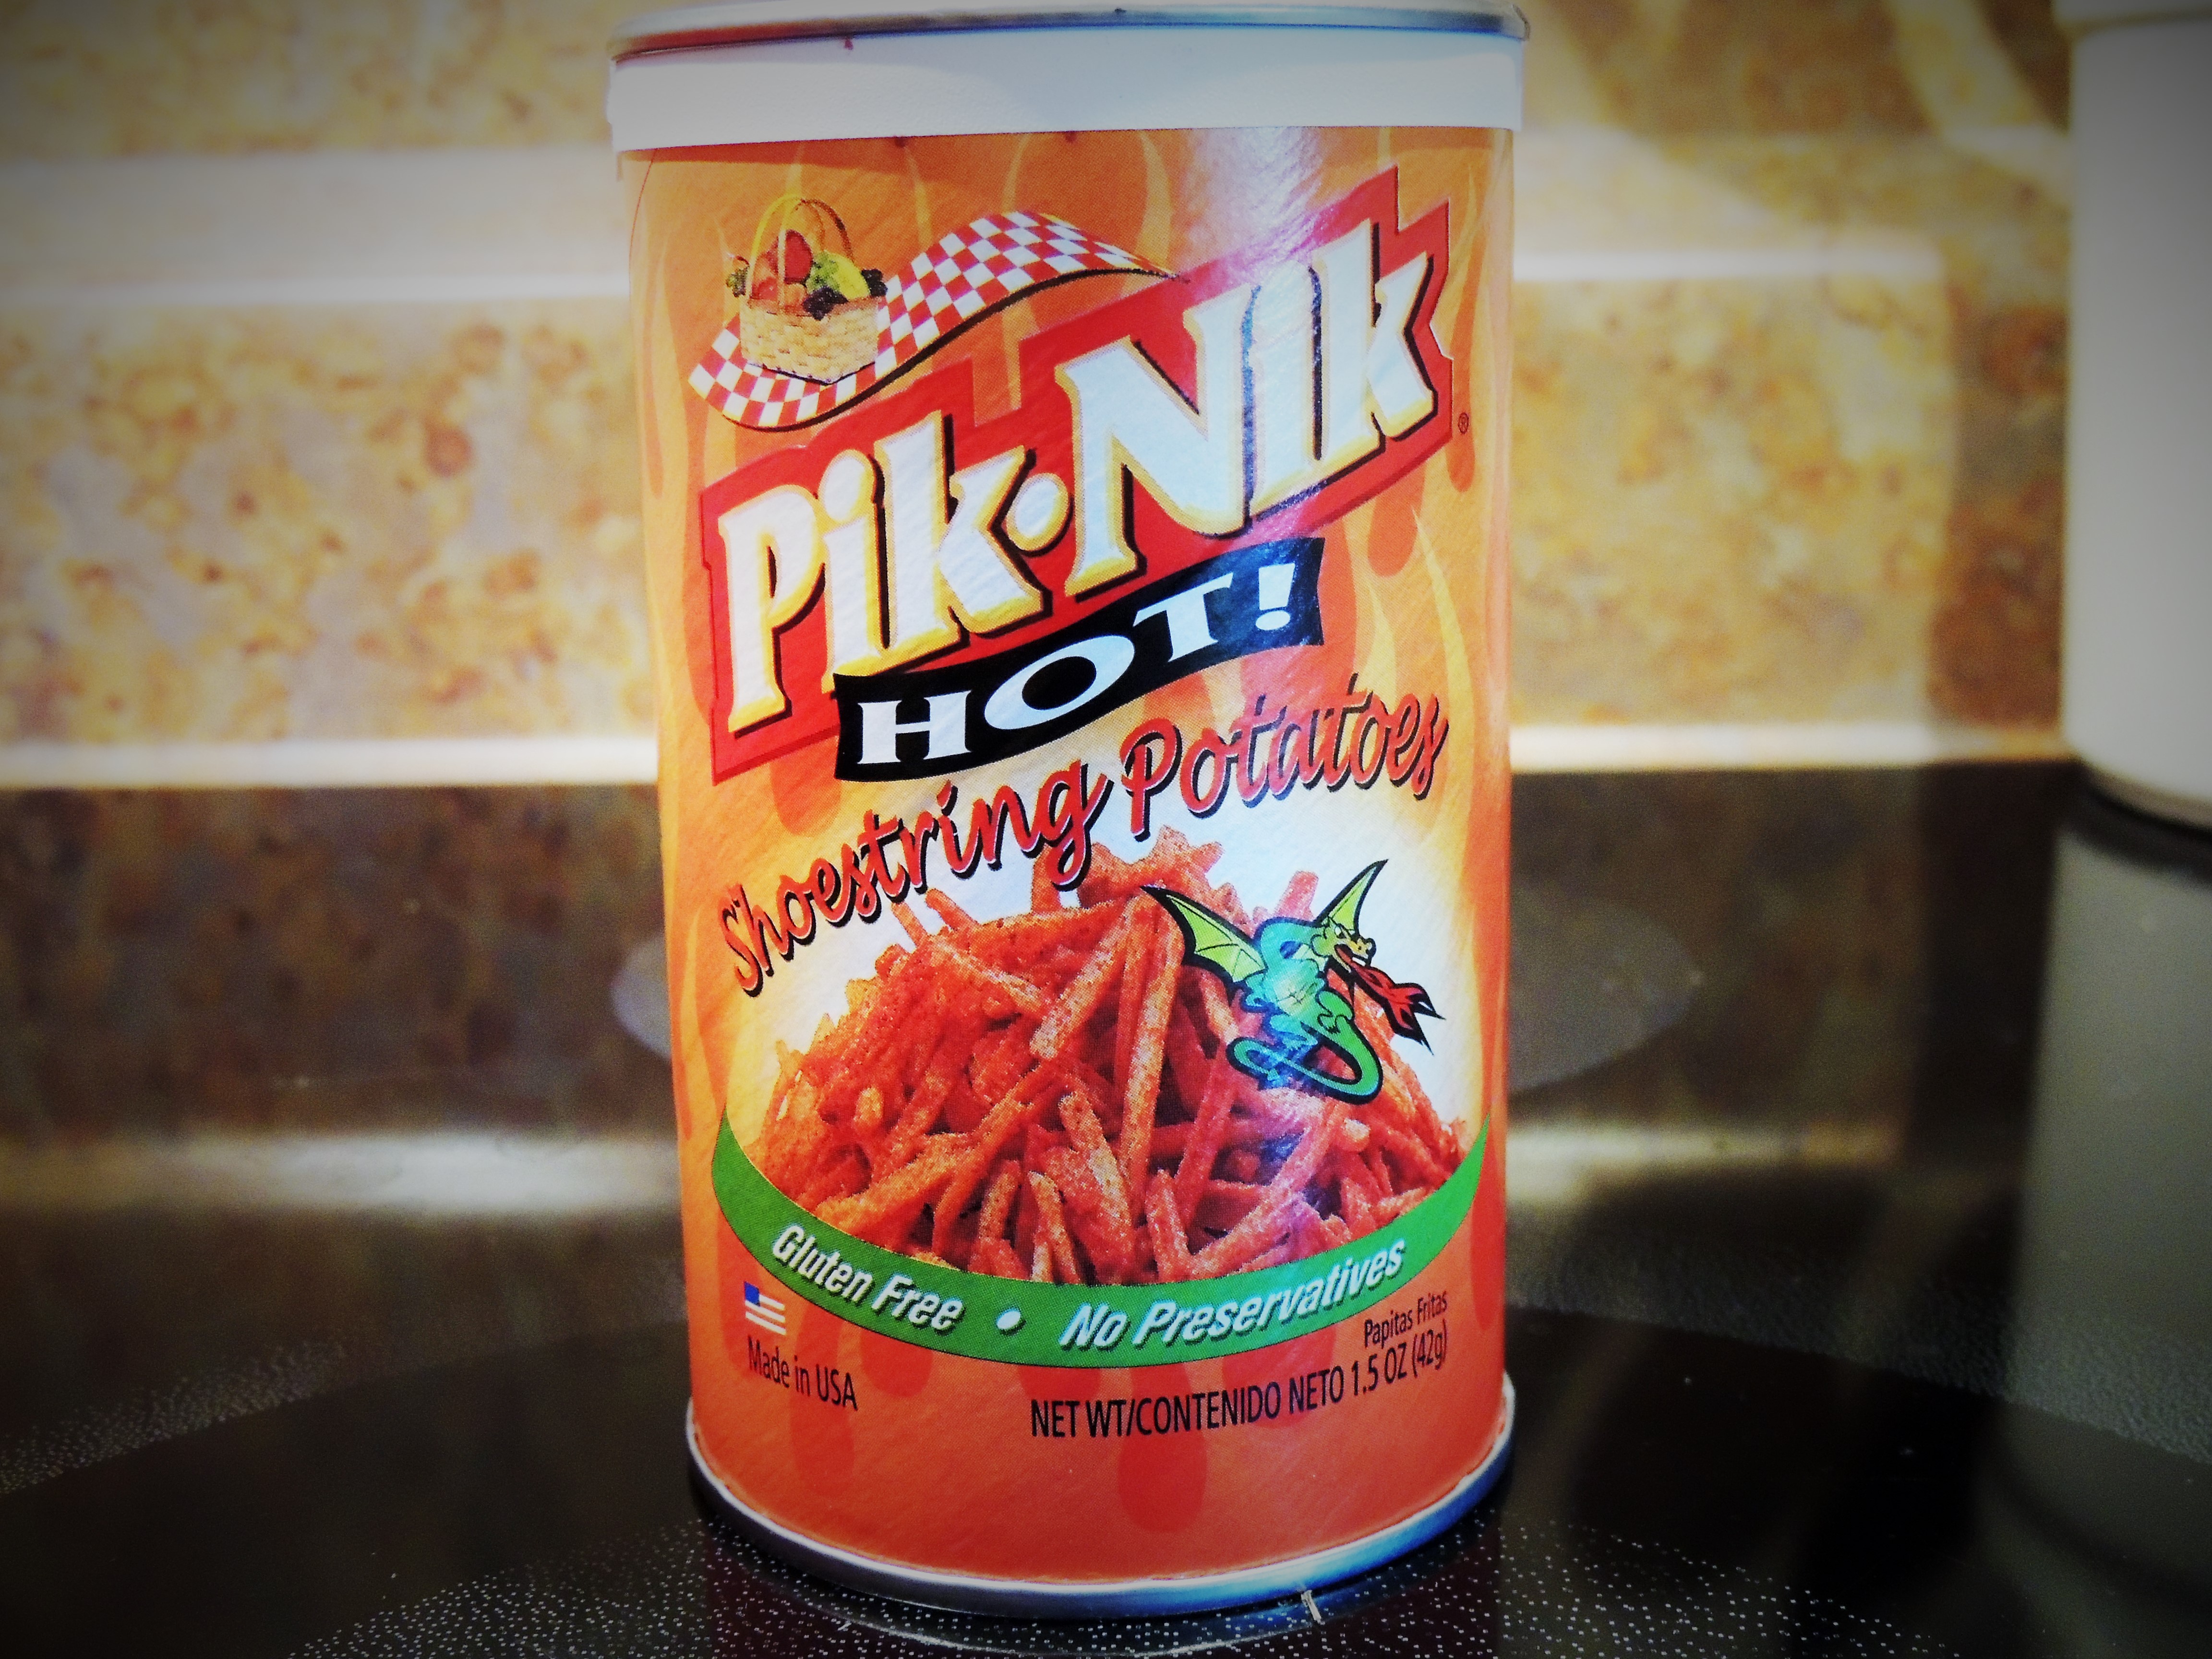
1 (1.5 oz.) can Shoestring Potatoes
Romaine lettuce
2 Fresh, ripe, garden Heirloom Tomatoes (or substitute red bell peppers)
.
Instructions
In a large bowl, combine carrots, celery, onion, tuna, mayo, lemon juice, dill weed, serrano chili (I am hopelessly addicted to heat, so I add the whole thing, but you can add as much or as little as you want, or none if you are sensitive to spicy foods), and seasonings. Add a little kosher salt to taste if desired. Cover and chill for an hour or so in the fridge.
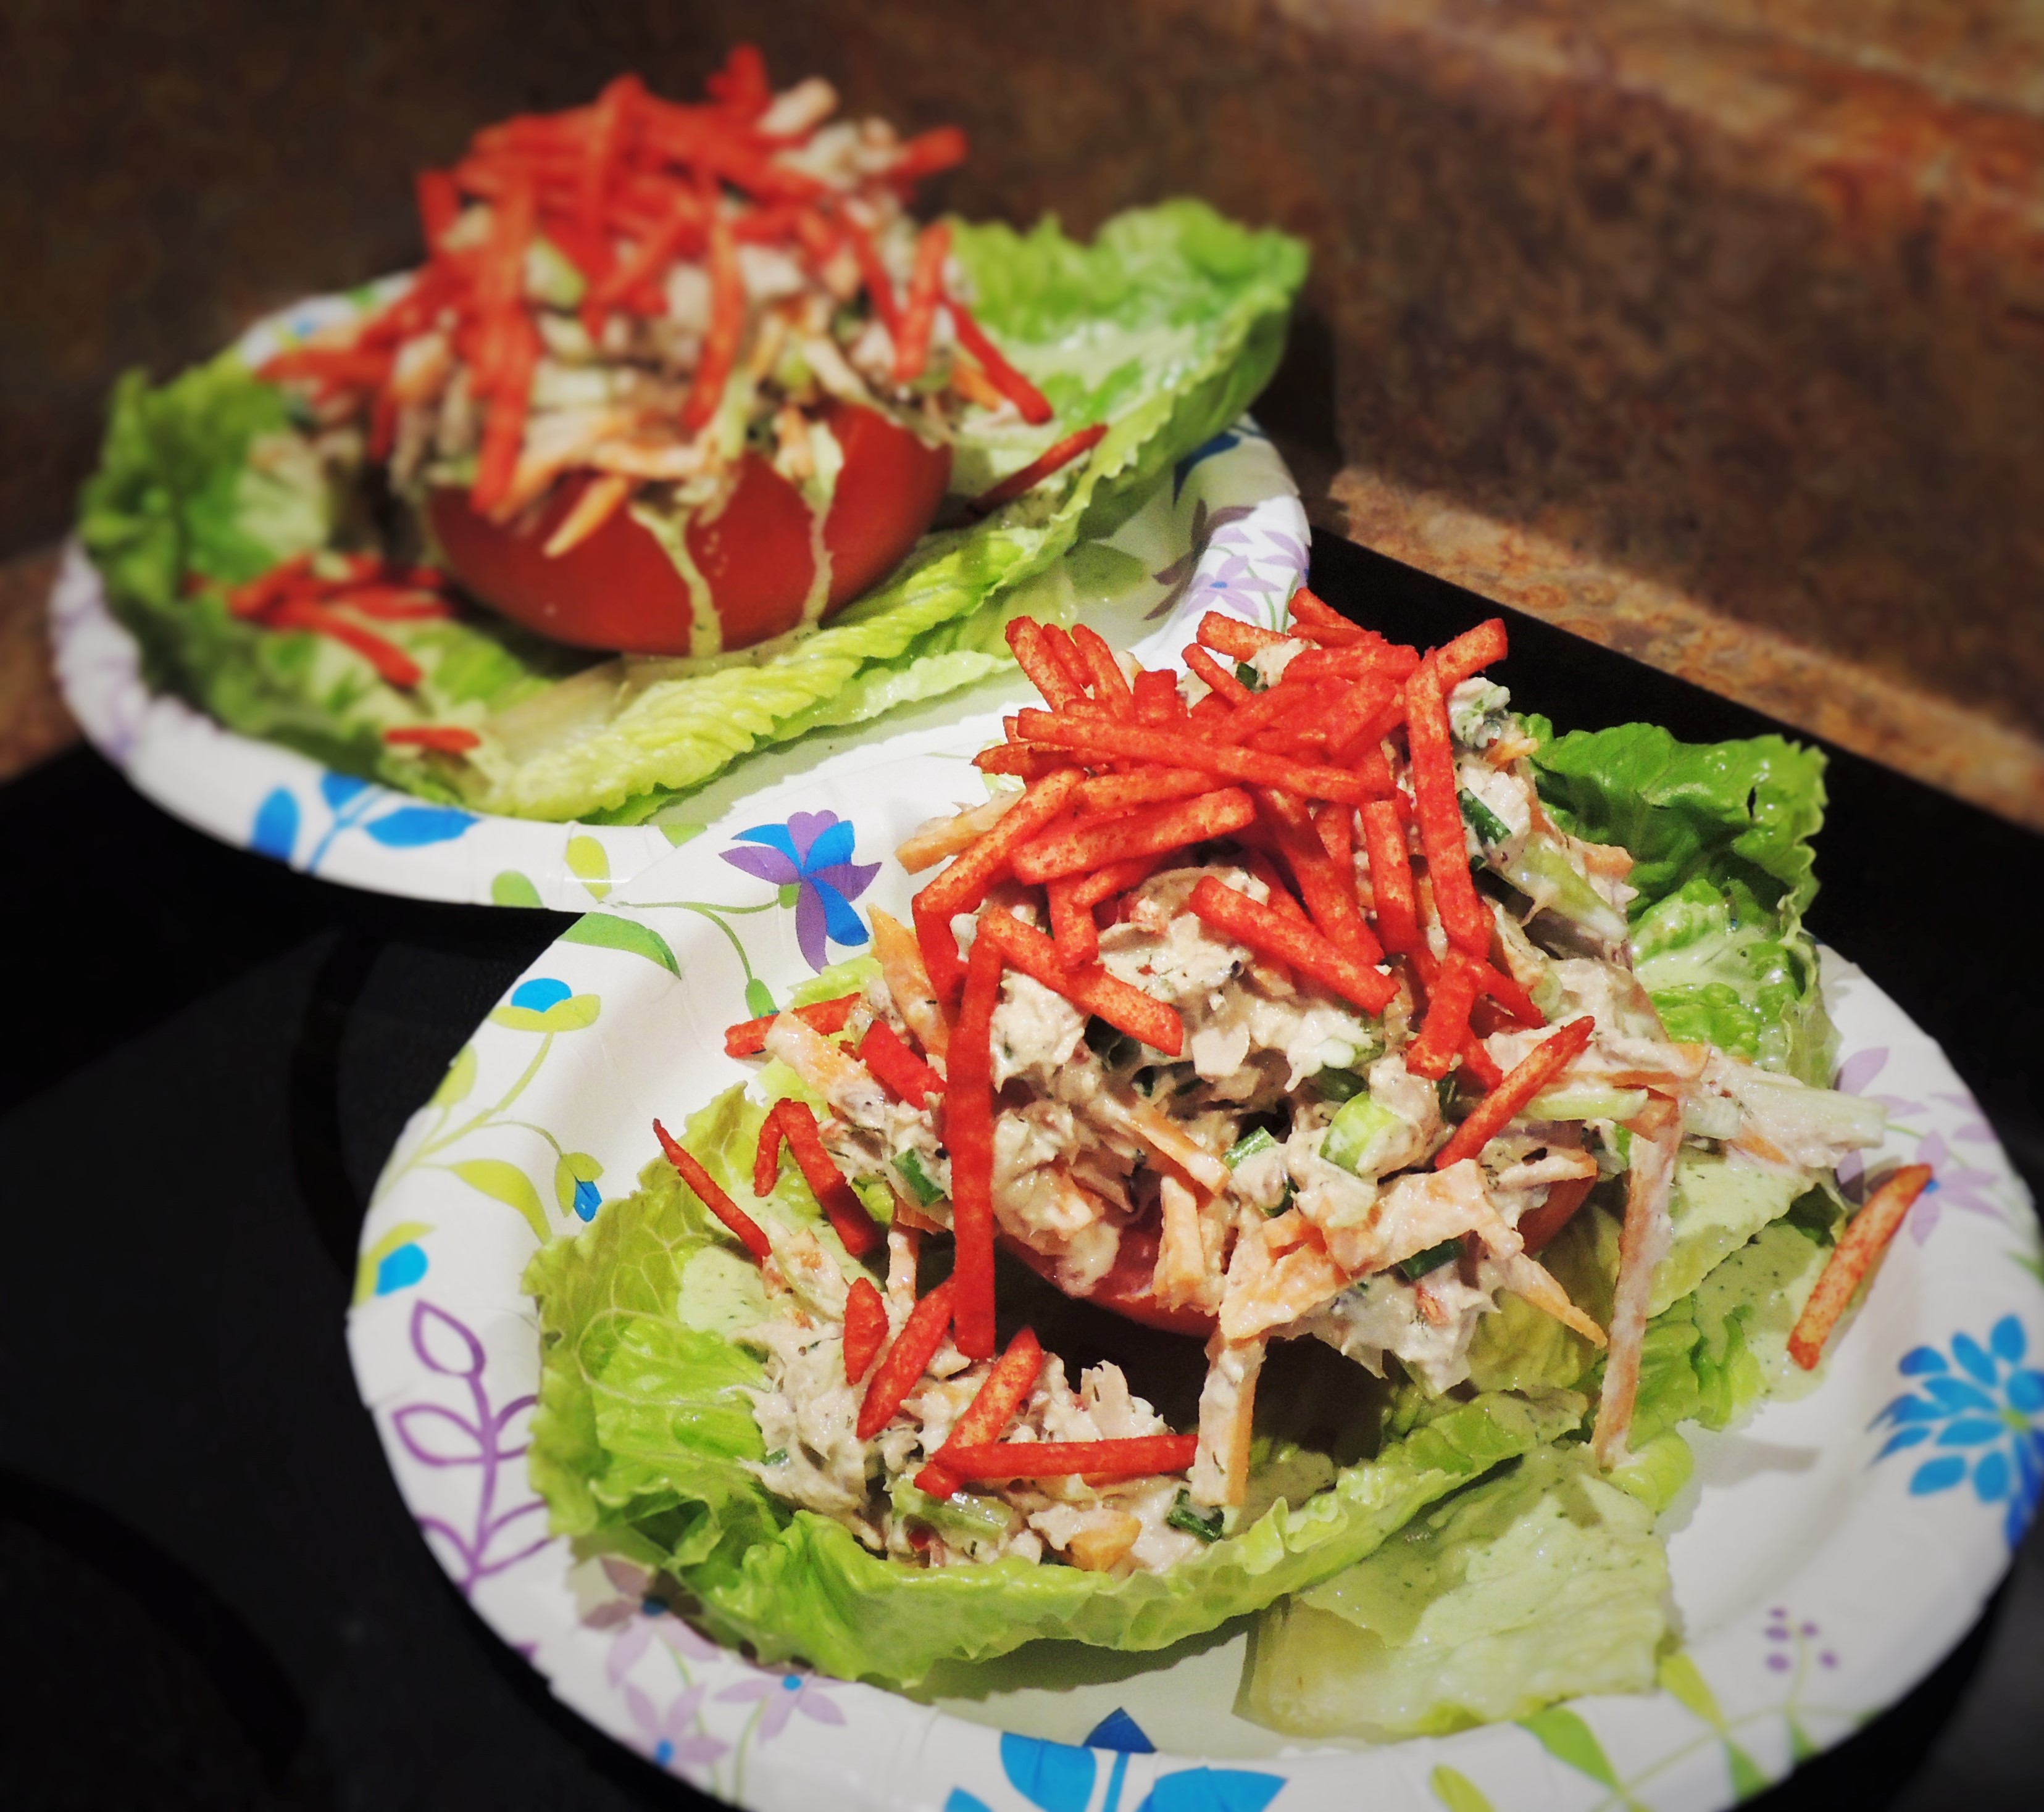
When ready to serve, cut tomatoes in half (be fancy), wash the lettuce and lay a leaf or two down on each plate. Set half of a tomato in the center of the lettuce. Now, at this point I like to drizzle both with dressing, and I happened to have Green Goddess when I took this photo, but my favorite, favorite, favorite is Serrano Ranch!
Stir half of the shoestring potatoes into the tuna… (I like the spicy ones)
…and then pile tuna salad onto each tomato, dividing equally between four servings. Garnish with the remaining shoestrings and serve.
If using bell pepper in place of tomatoes, you can slice it into strips (to make it a little easier to eat) and just tuck a few on the side of your tuna salad. Or, you can cut the bell pepper in half lengthwise and fill it with the salad, just like you would the tomato.
Tuna on a red bell pepper, using the regular shoestring potatoes. Delish!!!
This is how my friend Treva’s mom used to serve hers, with bread-and-butter pickles and a boiled egg. I also like to tuck in a couple cucumber spears, when I have them. YUM!!!!!!!.
Thank you Ms. Treva for sharing another winner with me!!!! Sending hugs to you and to your precious mother, God rest her sweet soul. I’m blowing kisses your way. ❤
.
“We remember the fish which we used to eat free in Egypt, the cucumbers and the melons and the leeks and the onions and the garlic.” Numbers 11:5
Can you hear the birds chirping? And smell the wildflowers in bloom? The pitter-patter of raindrops on the roof? Ahhhh…SPRING!!!! Everything old is new again.
How about having all your gal-pals over for a quick, impromptu lunch, easily prepared on a Sunday afternoon, and served on a manic Monday!!! Do you work outside the home? Text your closest circle of co-workers on Sunday night and tell them not to bring in lunch for themselves, because you’ve got a little surprise for them. Then carry in this little luncheon for your super spoiled little crowd.
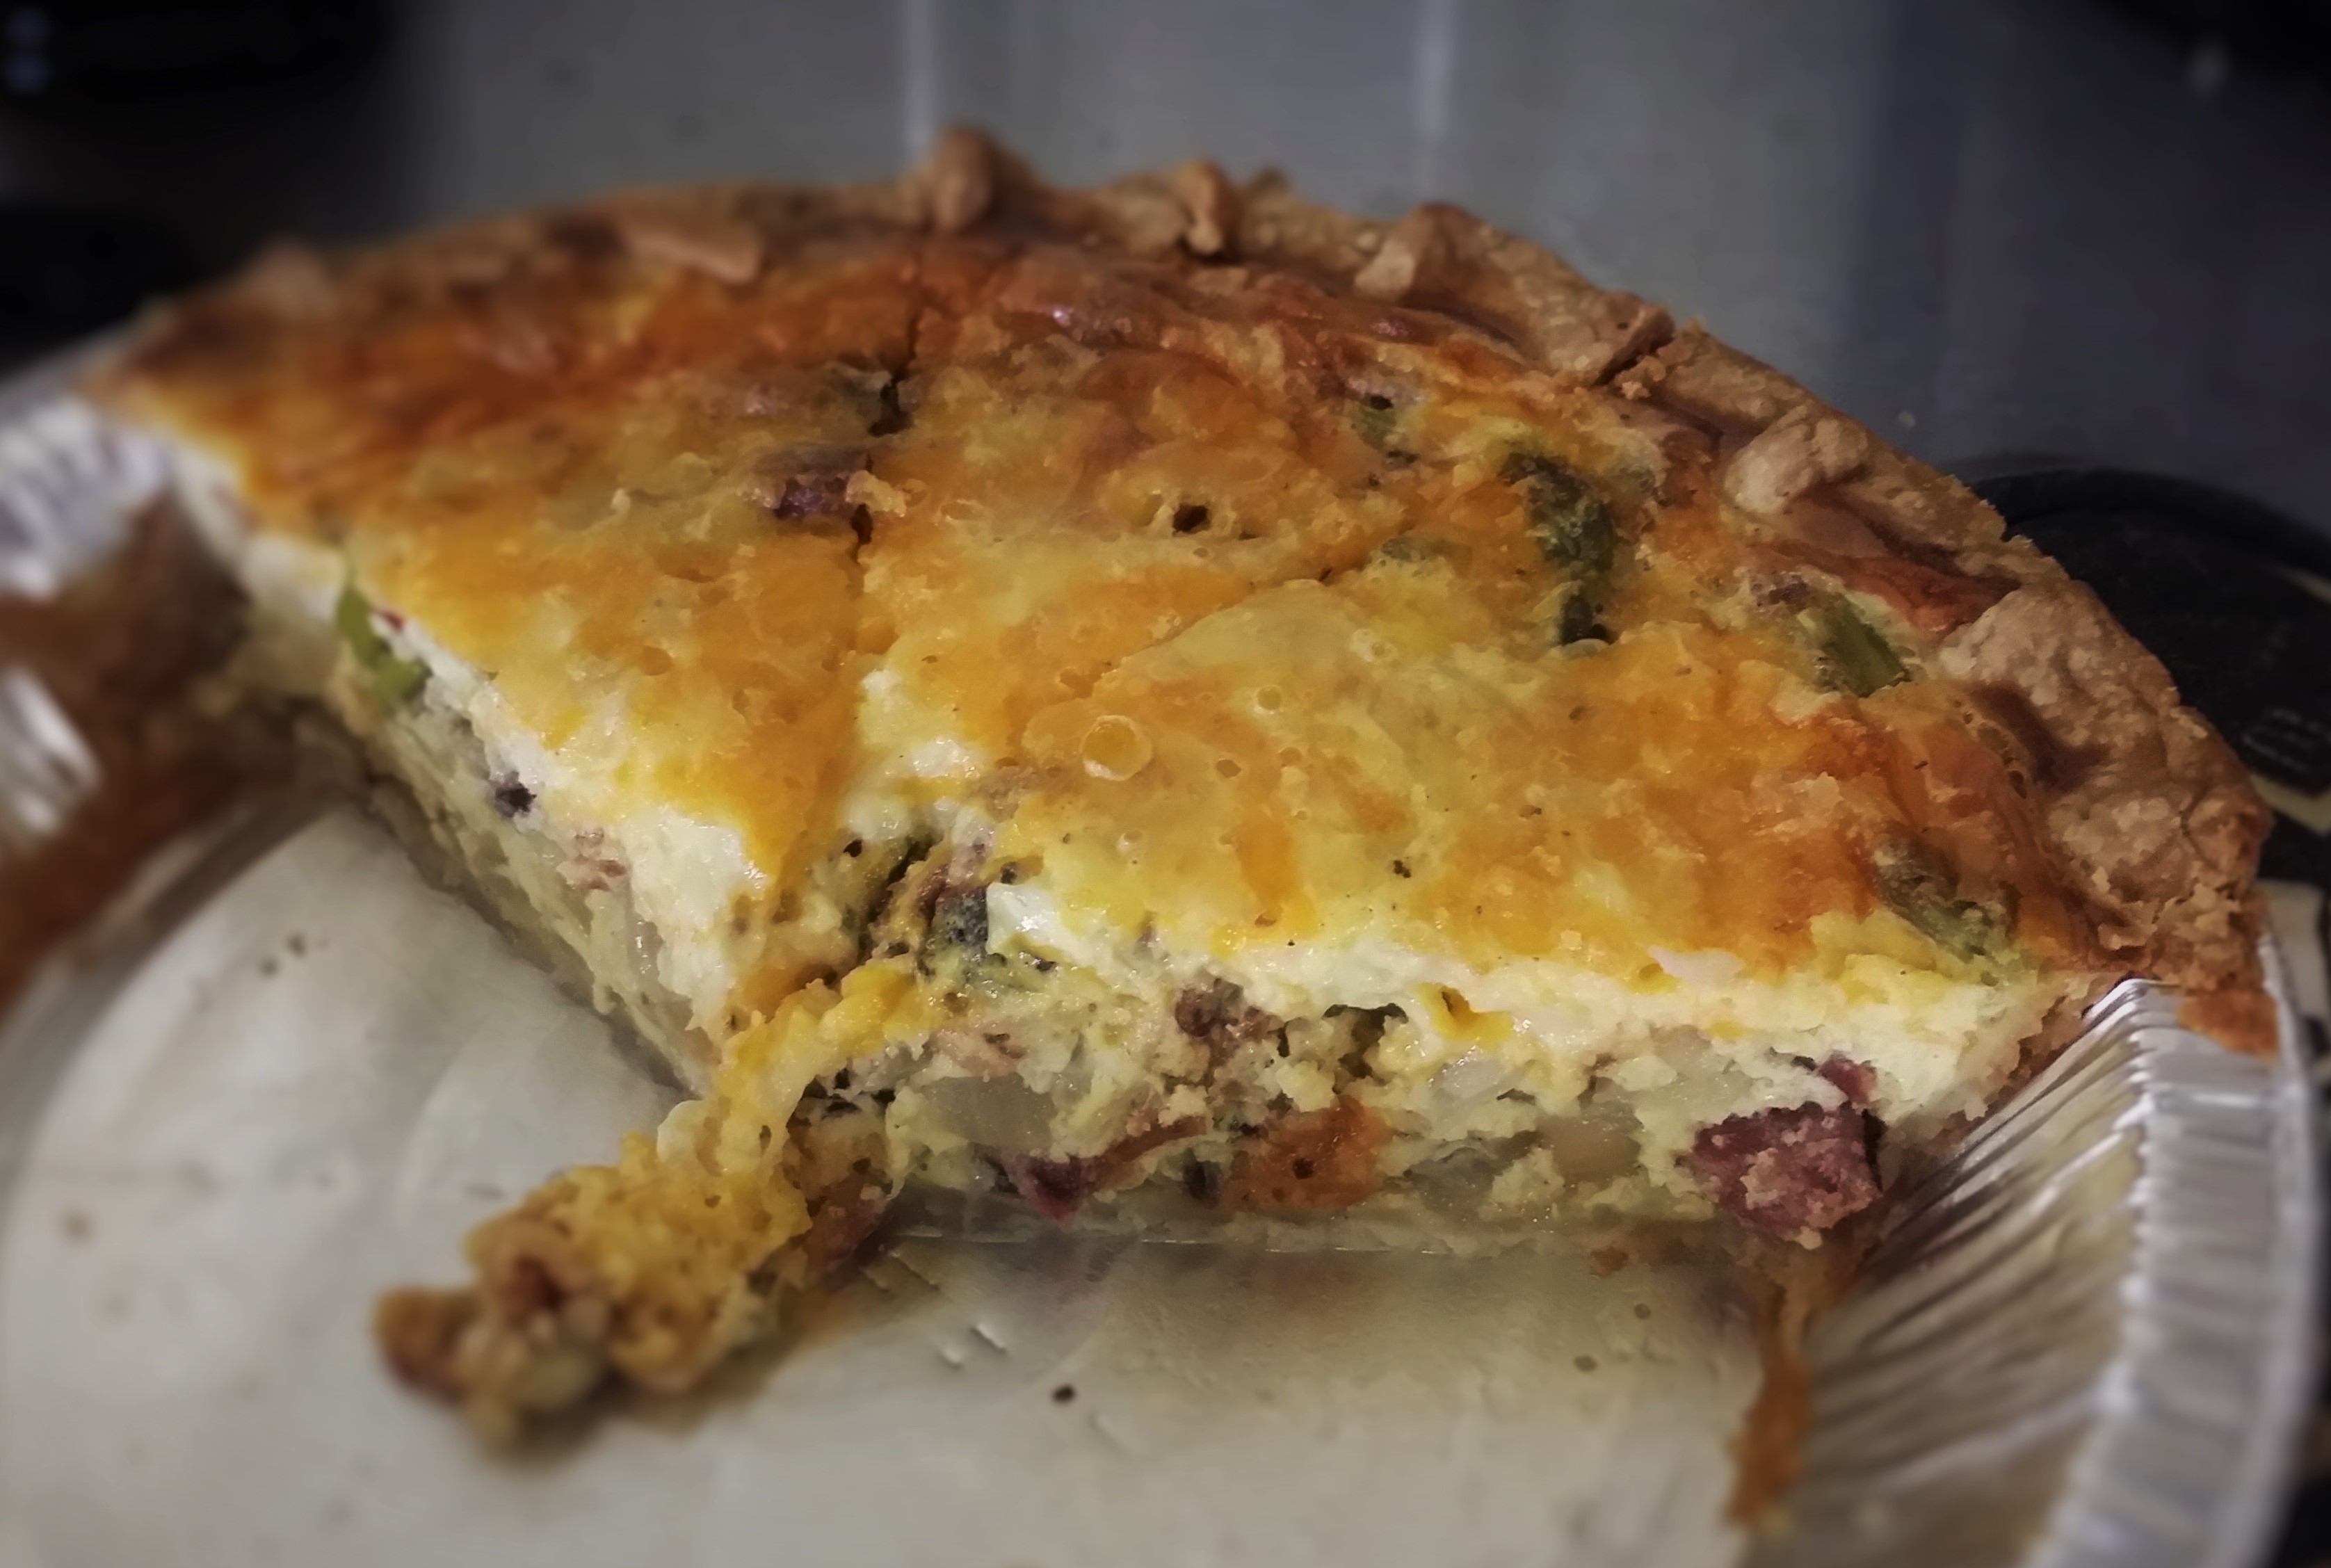
QUICHE
I used Pioneer Woman’s Cowboy Quiche recipe, from her cookbook, Food From My Frontier (one of my absolute FAVS), I cheated though and used a store-bought deep-dish pie crust, two in fact. And, I did it myyyyy waaay, with a couple of special touches (to make it a little more girly without being PW’s “Cowgirl Quiche,” because I didn’t have those ingredients on hand). Here’s how I did mine:
Ingredients
2 whole Unbaked Pie Crusts (from the freezer section, thawed and poked)
1 lb. Bacon, fried until crispy
2 Tablespoons Bacon fat (left over from frying the bacon)
1 whole red Onion, Sliced
8 spears of fresh, raw asparagus (I have it growing in my garden, lucky me)
1 cup of diced smoked sausage (I like the spicy jalapeno variety)
8 whole Large Eggs
1-1/2 cup Heavy Cream Or Half-and-Half
Salt And Pepper, to taste
2 cups Grated Colby-Jack Cheese
Let’s Make it…
Fry the bacon until crisp. Chop into little bite-sized pieces and set aside to cool.
Fry the onions in the bacon fat in a large skillet over medium-low heat for about 10 to 15 minutes (until translucent), stirring occasionally. Set aside to cool.
Preheat the oven to 400 degrees. Fix the edges of your pie crusts, if you want them to look a little less store-bought, and then poke them with a fork around the bottom in a few places. Sprinkle the crumbled bacon, chopped smoked sausage, onion, and raw asparagus around in your pie crusts, of course dividing evenly between the two pies. Cover both with cheese.
Whip the eggs, cream, salt and pepper in a large bowl, and then pour the mixture into the pie crusts. Use a fork to pull the contents around a little and make sure the egg mixture seeps down into it all really good.
Place the pies on a rimmed baking sheet, cover lightly with aluminum foil, and bake for about 35 to 40 minutes. Remove the foil and continue baking for 10 to 15 minutes, or until the quiche doesn’t jiggle easily when moved and the crust is golden brown. (The quiche will still seem slightly loose, but will continue to set once remove from the oven.)
Remove from the oven and allow to sit for 10 to 15 minutes. Cut into slices with a sharp knife, and serve!
You might like to top yours with a little dallop of sour cream, maybe a spoonful of pico de gallo, or torn cilantro leaves. Maybe a drizzle of Shiracha? Or just naked!
.
.
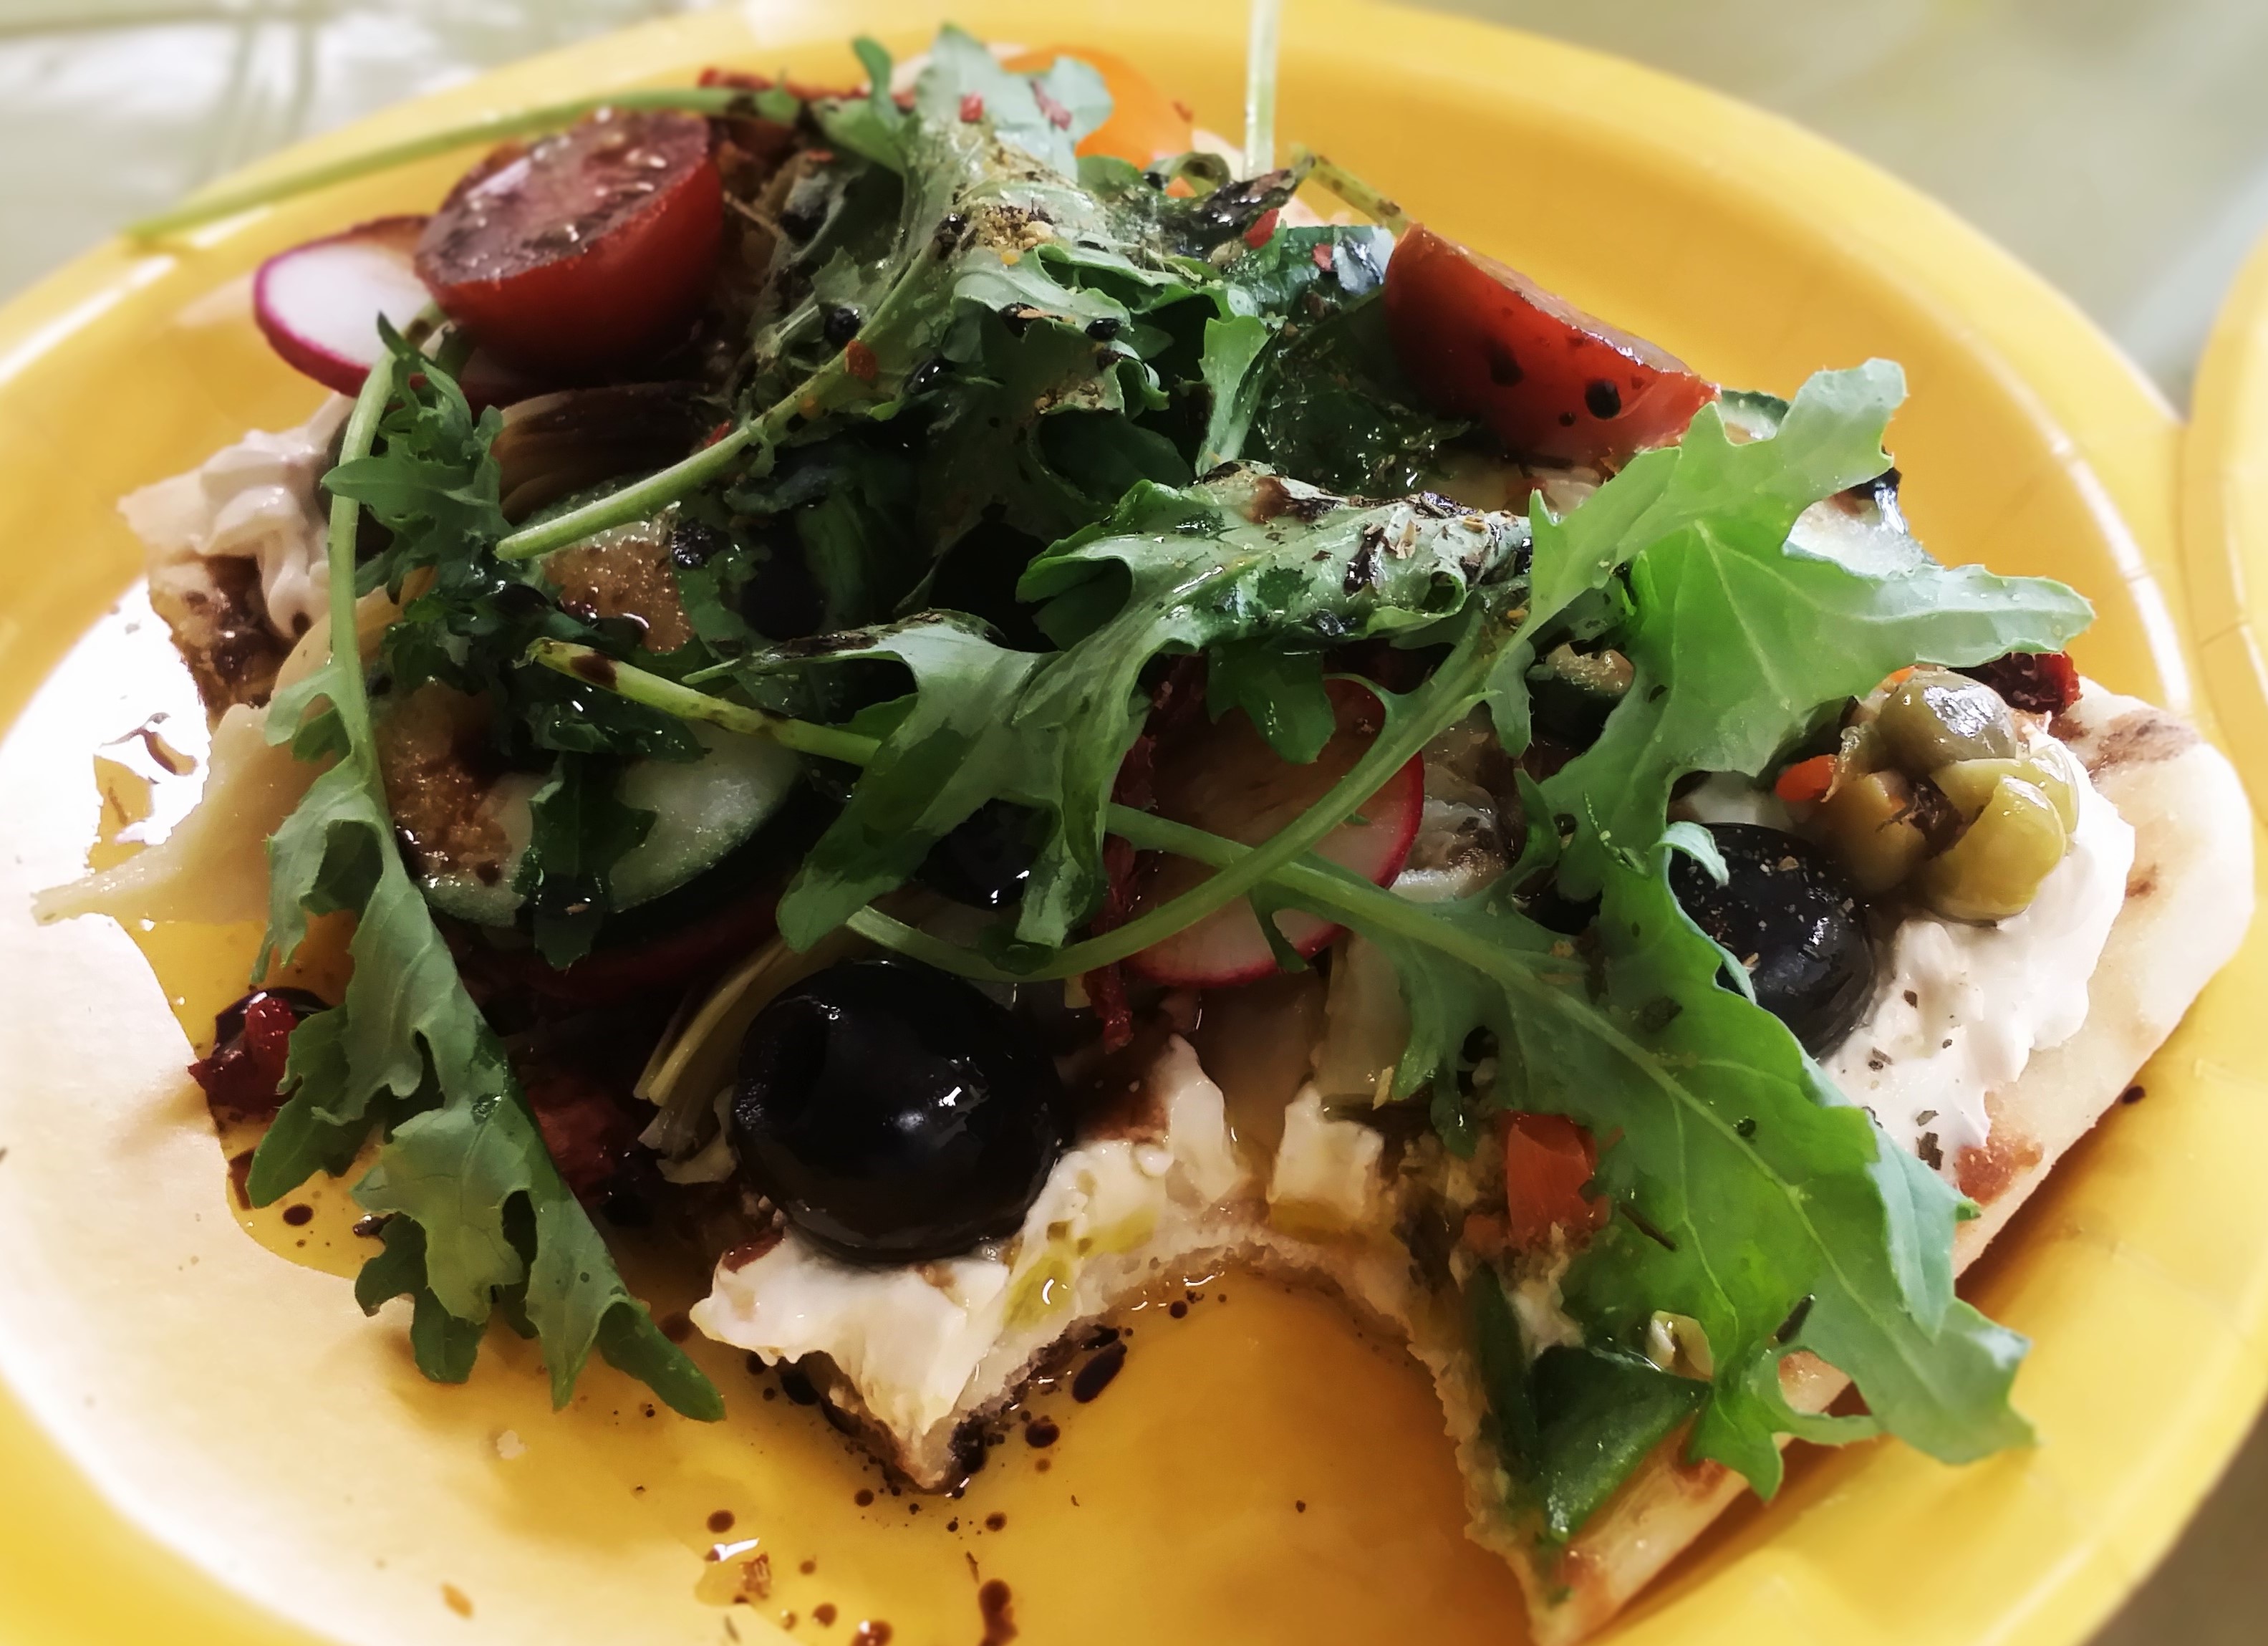
FLATBREAD PIZZAS
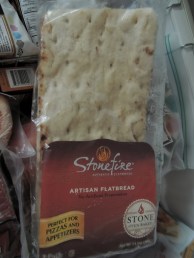
< < < I got the idea for these when I saw this photo on Pinterest, and then made it a reality when I found these flatbreads at my local HEB > > >
I purchased several packages of the flatbreads (and have them in the freezer, because the lady at the deli counter said our store is discontinuing them. Bummer!!!! Why do they do that just when I find something that I like??? Husband even liked. Ugh!!!)
Anyway, I took the thawed flatbread and drizzled it with olive oil on both sides, then grilled it for a few minutes on each side on a hot, preheated grill, which gave the bread the nice grill marks and made it really soft on the inside and crunchy on the outside. I cut each flatbread into thirds and placed on a platter for my guests.
I purchased a tub of Veggie Cream Cheese and a tub of Chive Cream cheese to spread on the warm bread.
And then I had several veggies chopped up for toppings:
Sliced Radishes
Sliced Cherry Tomatoes
Sliced Red Bell Pepper
Sliced Cucumber
Sliced Red Onion
Baby Arugula, Kale, and Spinach mix
Marinated Artichoke Hearts
Olive Salad
Black Olives
And an eater’s choice of seasonings:
Fresh ground Salt & Pepper
Pizza Seasoning
Pesto
Olive Oil
Basalmic Vinegar
I got’ta tell you, these are just darn good pizzas. Even hubbie liked them, like a LOT!!!! Even said I knocked dinner out’ta the park, and that I was back on my game. Which made me blush a little. And now I really want to impress him more!!! Fresh, crunchy, delish!!!!
.
FRUITY LEMONADE
2 or 3 cans of frozen concentrate Lemonade (I like the kind with pulp, pink or regular)
Assorted Fruits:
Lemons
Oranges
Cherries
Watermelon
Strawberries
Blackberries
Limes
Pineapple
Melon
Kiwi
Prepare a large pitcher with lemonade, following package instructions. Fill large glasses with ice and set out a platter of cut-up fruits. Let your guests pile whatever fruits they want on top of their ice, and then fill the glasses with lemonade. When they are done sipping, they’ll have a nice fruit salad to eat!
.
And for dessert…..
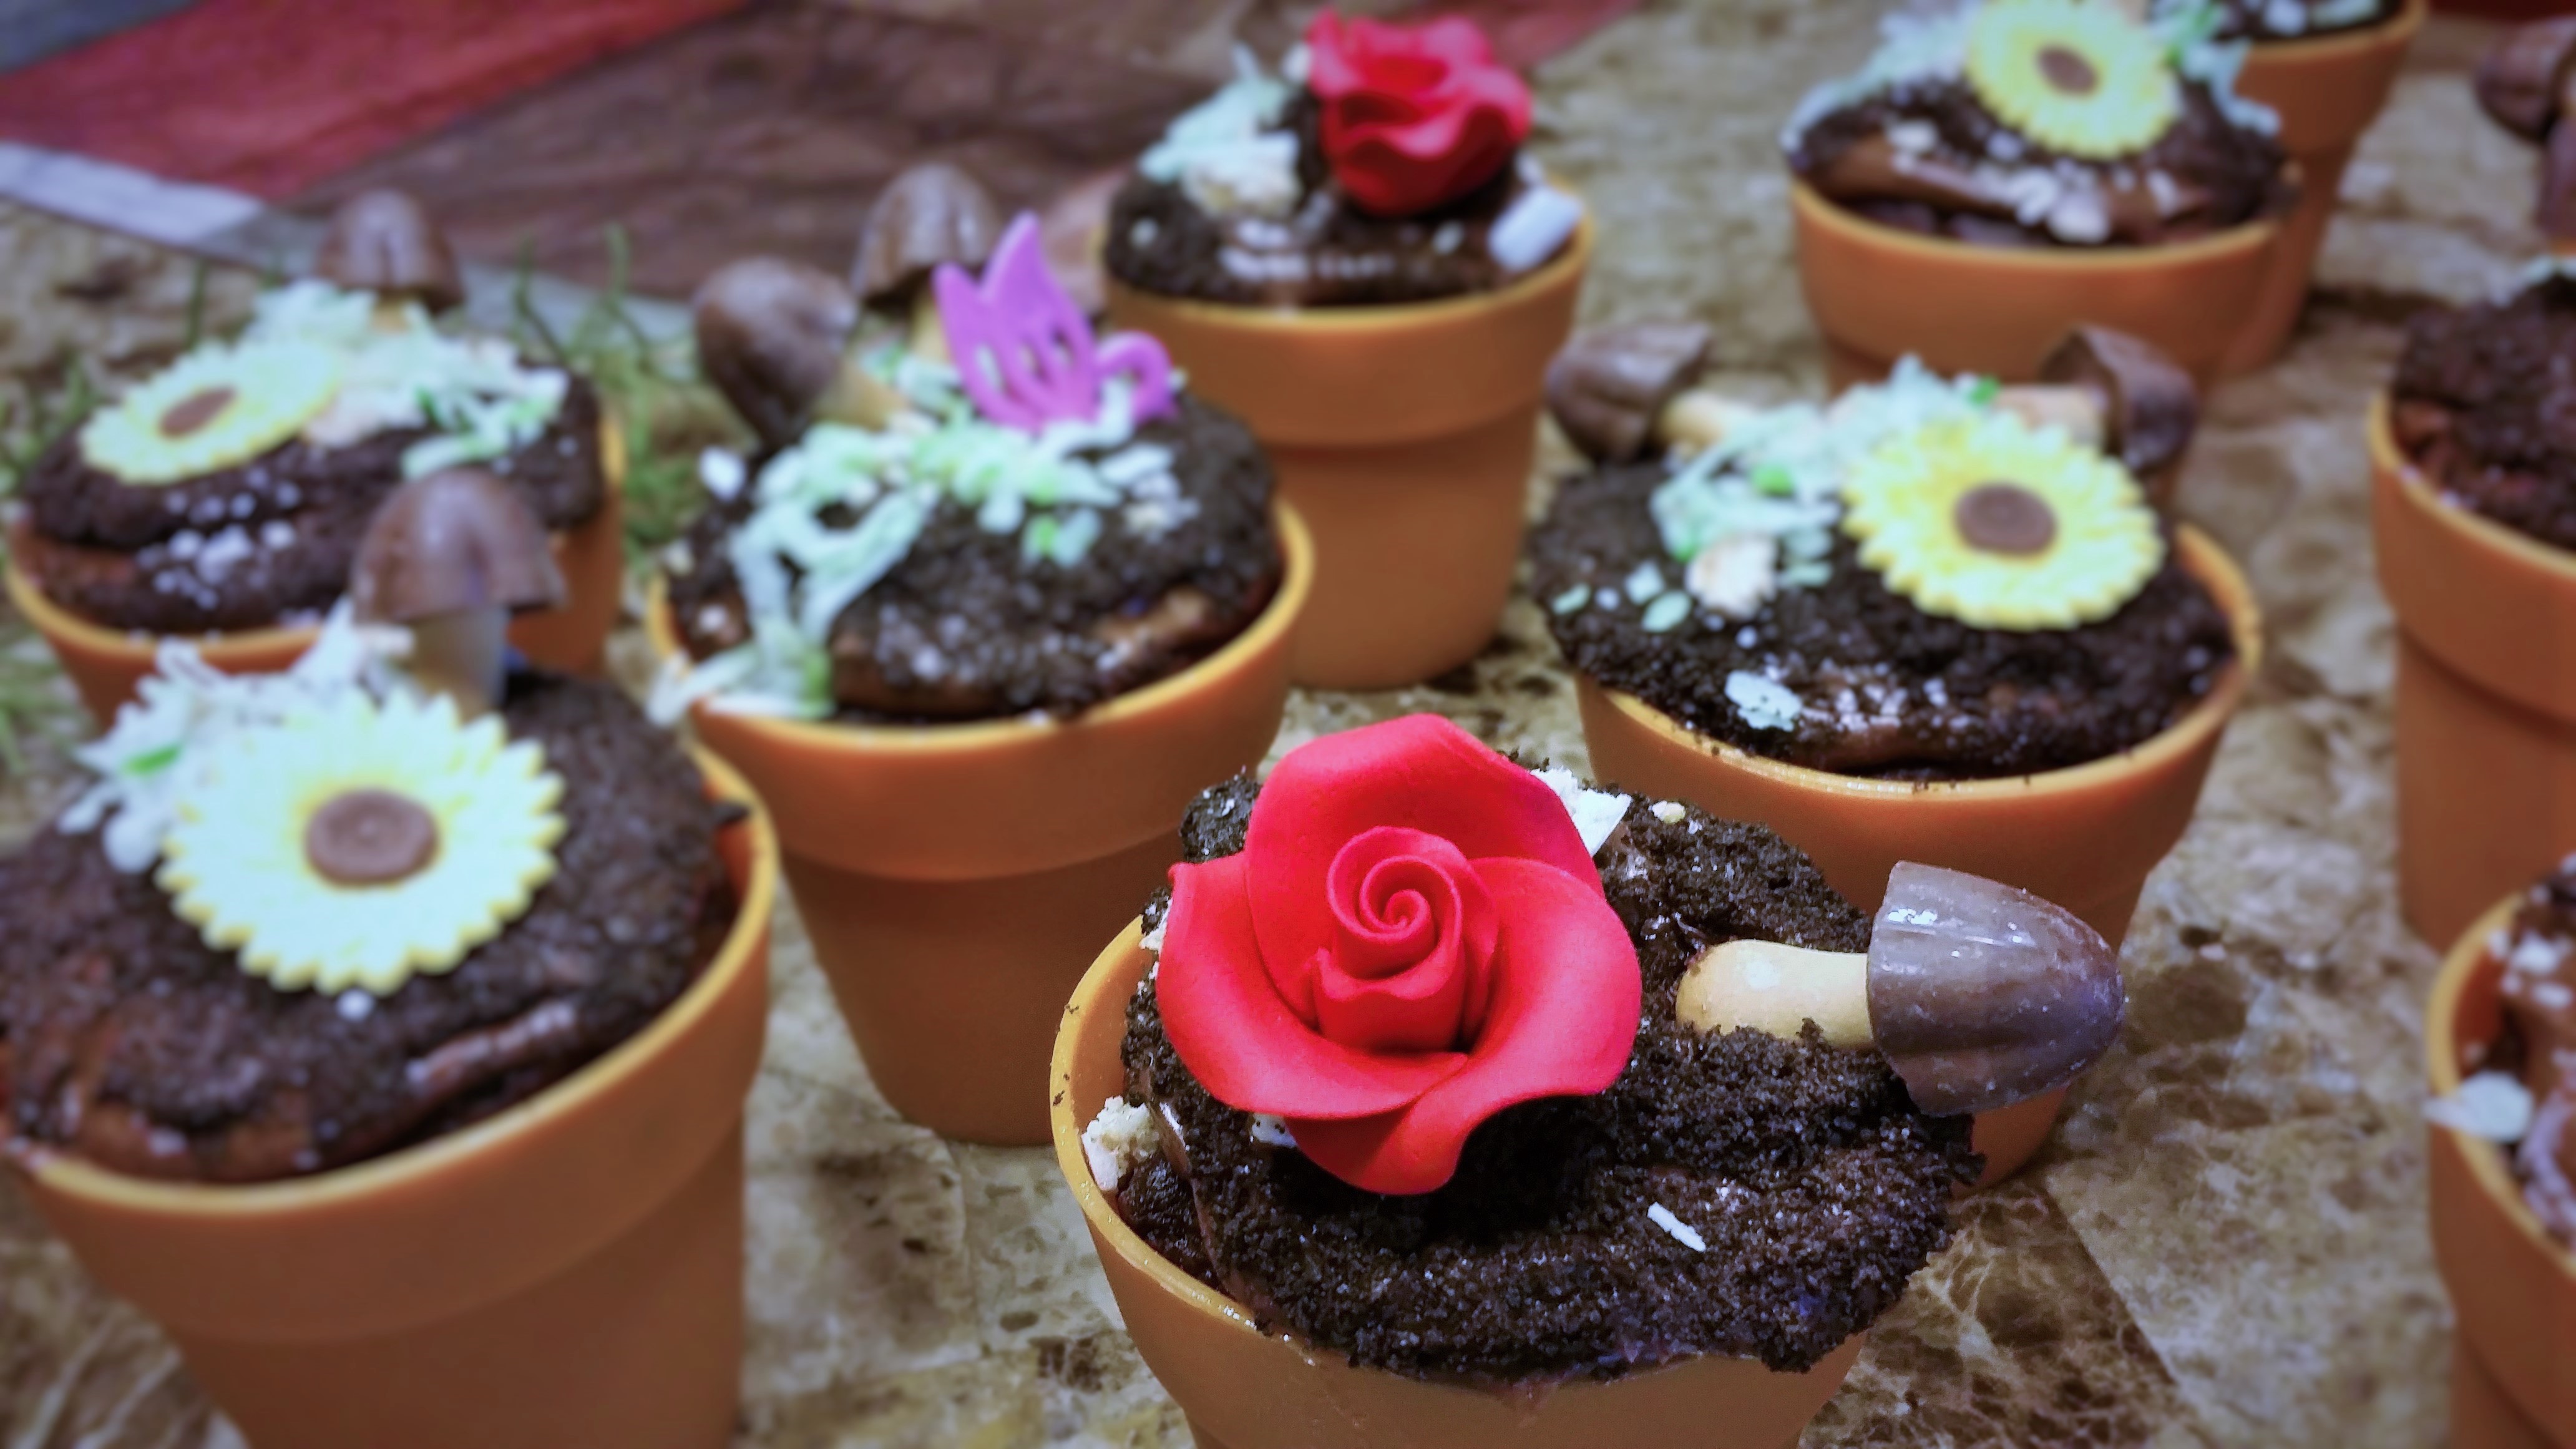
FLOWERPOT CUPCAKES
I found these adorable, tough, reusable, silicone flower pots online, and once they arrived (and I washed and dried them), I used a boxed muffin mix to fill them, and then a canned frosting to frost them. Who says cheaters never prosper? Lol!
I should have purchased the chocolate rocks when I saw them at Amazon too, because there were none to be found in my little town (I’d insert a little sad face here except I don’t have the cute little emoticon stickers on my computer. I guess I can always paste something from Google…….like this……which actually, surprisingly gives me a tiny bit of satisfaction).
At least we have a Wal-mart, and at least our Wal-mart has a cake isle in the hobbies section with a few choices.
And I found Chocolate mushrooms at FIVE BELOW:
And I had an abundance of MINT growing in my garden!!!! So, I did the Martha Stewart thing! Which was to poke a sprig of mint into each little cupcake after they were all decorated with the other stuff.
After frosting each cupcake, I sprinkled them with crushed Oreos (I whirled a handful of the cookies in my food processor until they turned into dirt), and tinted coconut flakes. I really could have done a better job with the tinting! Made it more green. I’m a dork!
Just look at these chocolate rocks! Gosh, they would have just been sooooo cute to put on top of the oreo dirt! (I’m still sore about it!)
Oh well, “Be content with such things as you have!” Nobody likes a whiner.
(((UPDATE: I found chocolate rocks at Cracker Barrel!!! $2.99 for a 3 oz. tube!!!! And I also found these cute cute cute Gummy Lightning Bugs!!!! Gosh, now I want to toally remake my cupcakes!!!)))
This is what mine looked like….before I poked in my mint leaves!
.
After my little luncheon that I hosted I thought of another way to make flowerpot cupcakes that you may like better…
.
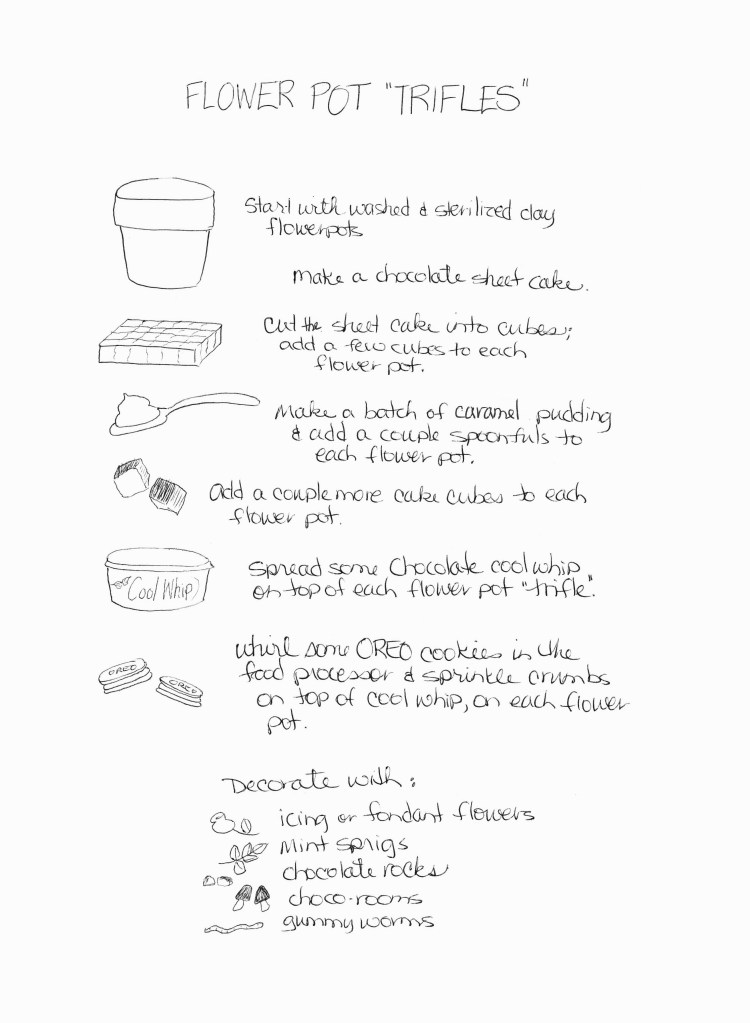
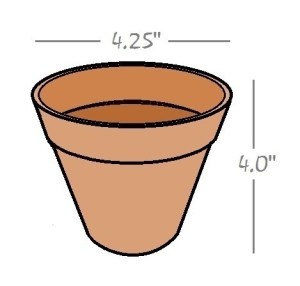
You can use real terra cotta pots for the trifles, which come in larger-than-cupcake sizes. And since the cake is not being baked in the terra cotta you won’t have to worry about dyes or other toxic elements leaching into your batter in the oven. I soaked my pots in the sink to get the price stickers off, then I put my pots in the dishwasher and ran them through a full sterilizing wash cycle. When they were done I put them in the oven on warm (170*F) to dry them out completely before using.
You can also decorate your pots all pretty before filling them with the trifle ingredients – just something simple that wouldn’t compete with the cuteness of the cakes themselves. Something like this, I was thinking..
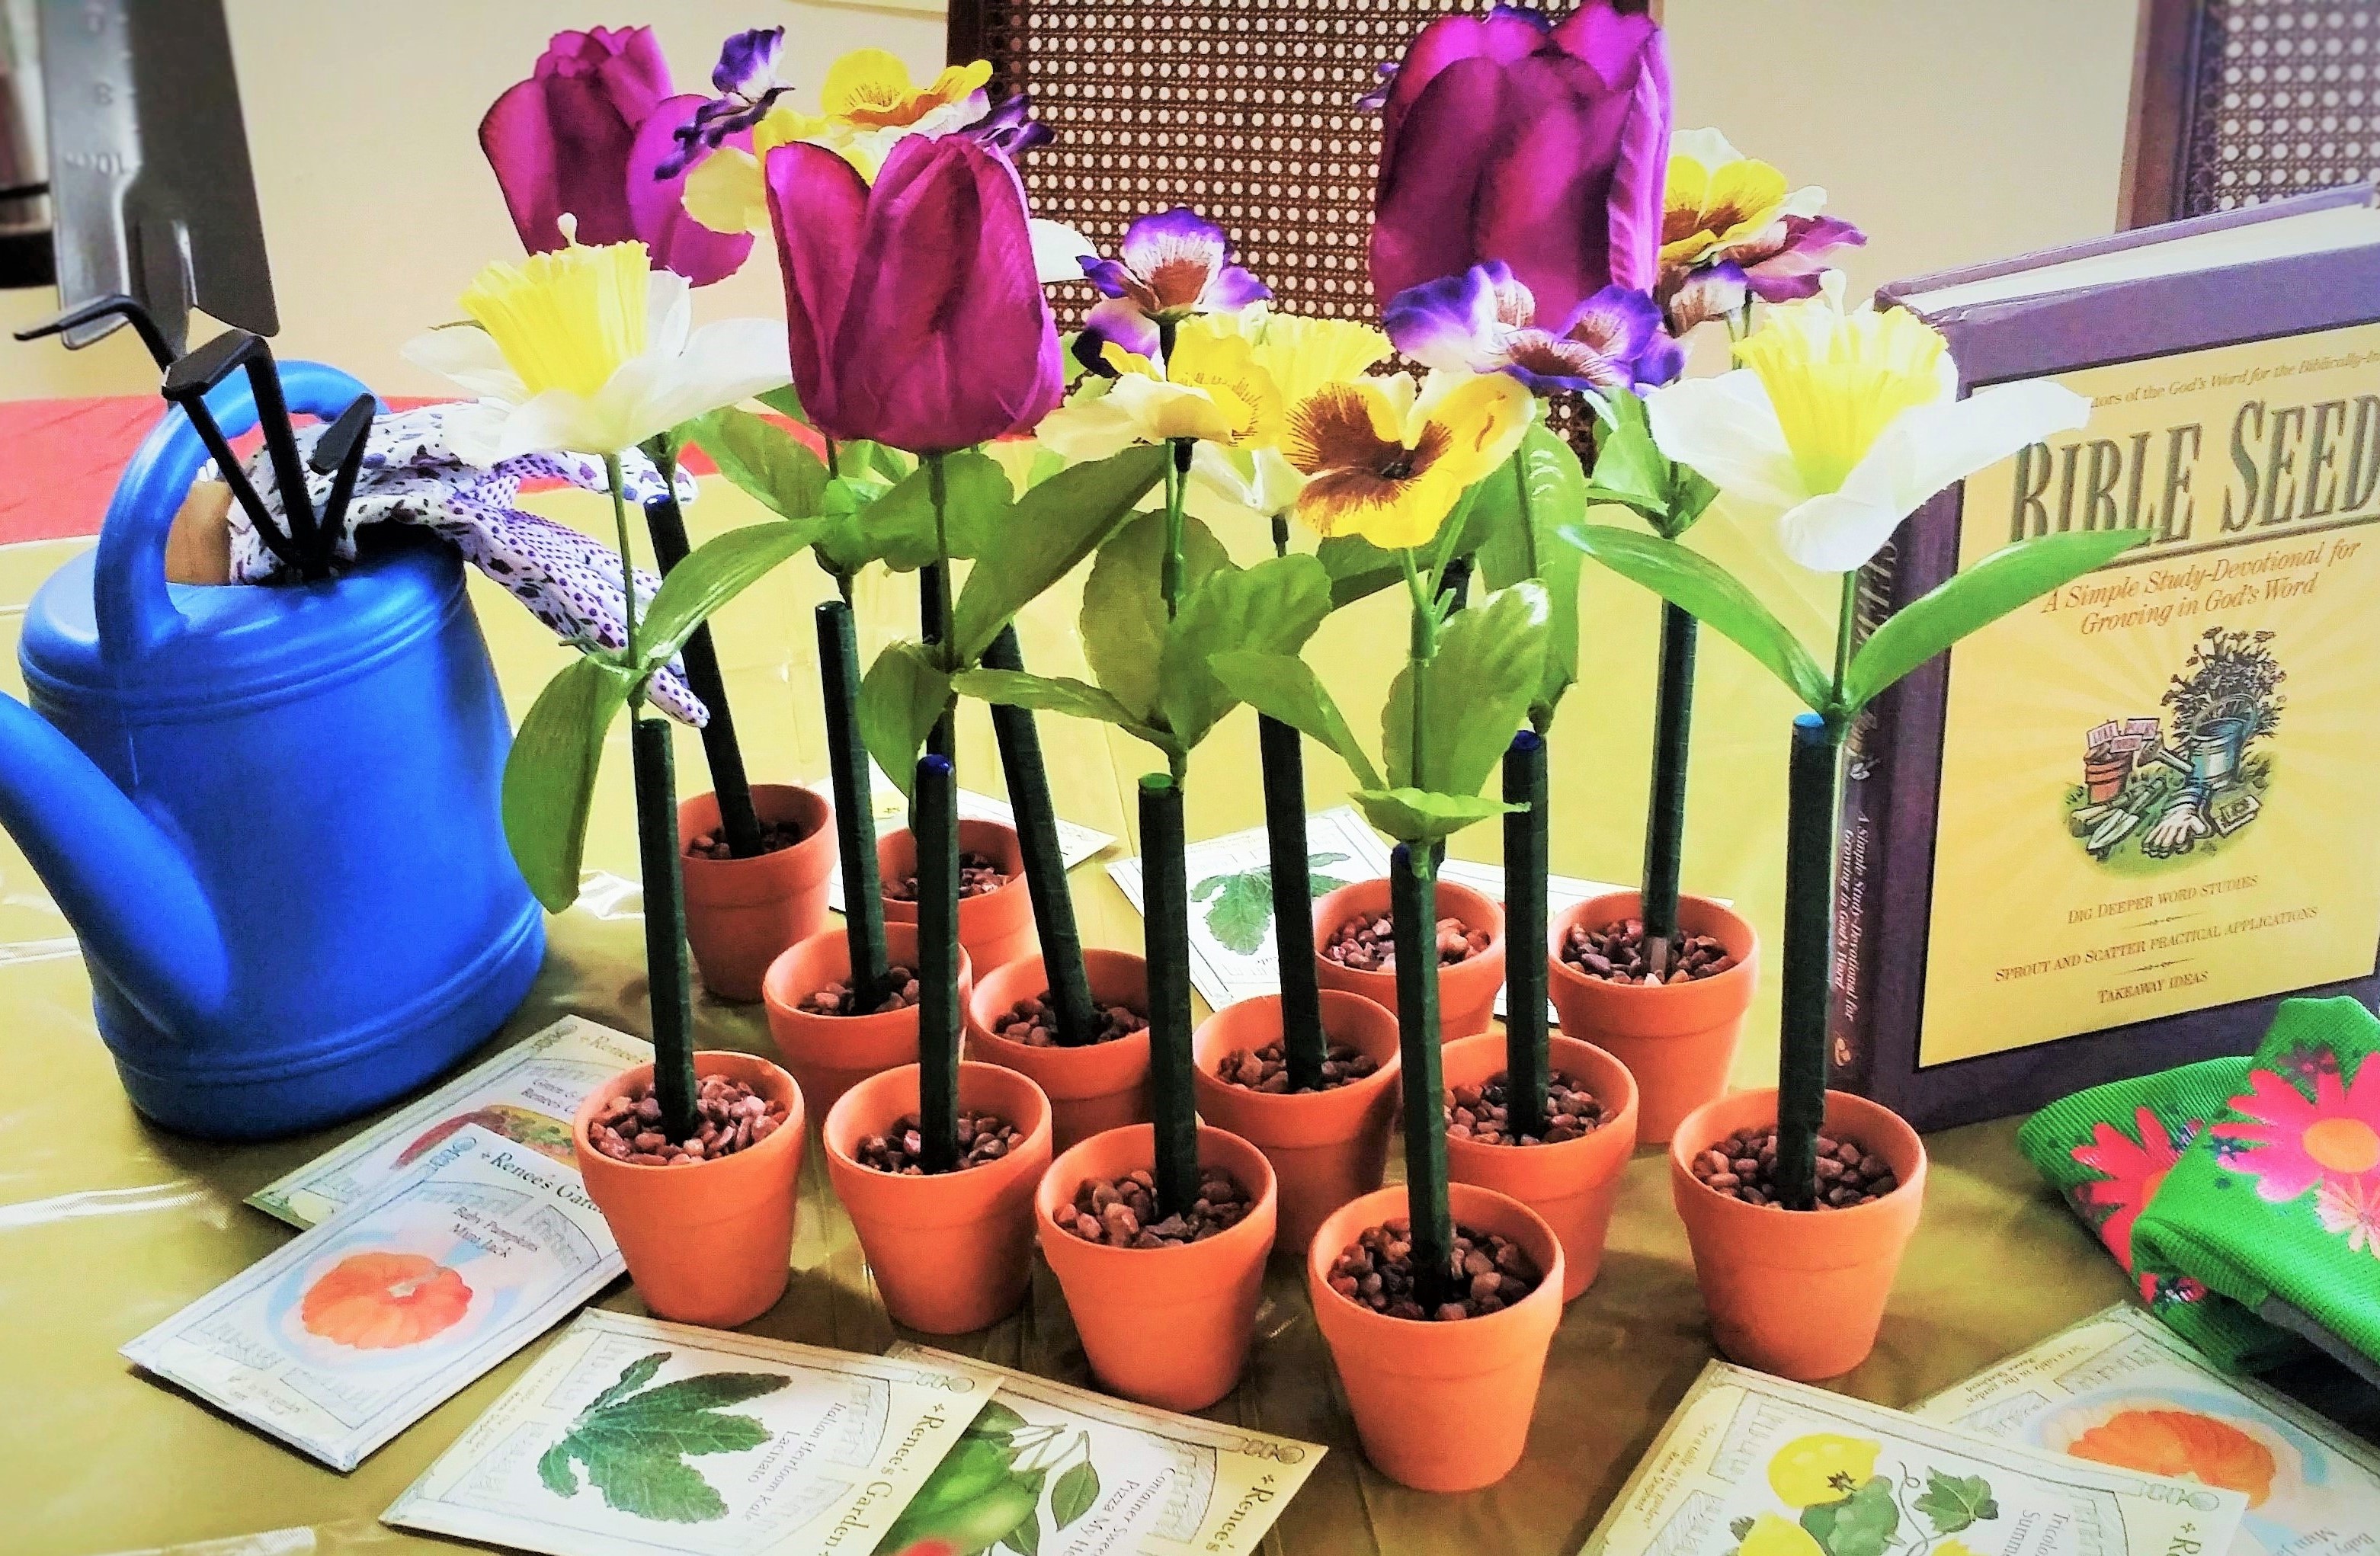
Aaaaand…. if you’re feeling especially ambitious, as I was, you can make some cute little flower pot pens to give as gifts for your gal-pals desks, or home offices. Or, even better, let your gal-pals make their own… after lunch. OOOO fun…cRaFt PaRtY!!!!!! 🙂
I found all the stuff for mine at Wal-mart (because seriously, that’s all we have), and when I got my little pots home I soaked them in hot sudsy water to help get the price stickers off. I filled them with aquarium rocks. Then I took a spring assortment of flower bouquets that I found in the floral section, cut them apart, and used floral tape to attach them to my pens. I even found colored ink pens (Bic Cristal).
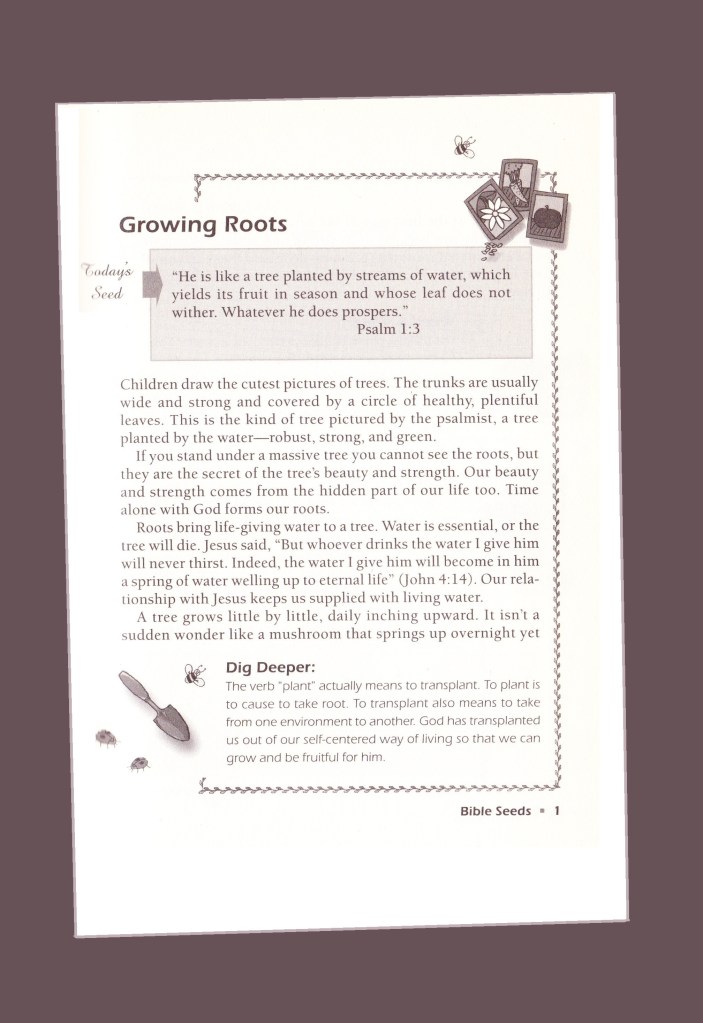
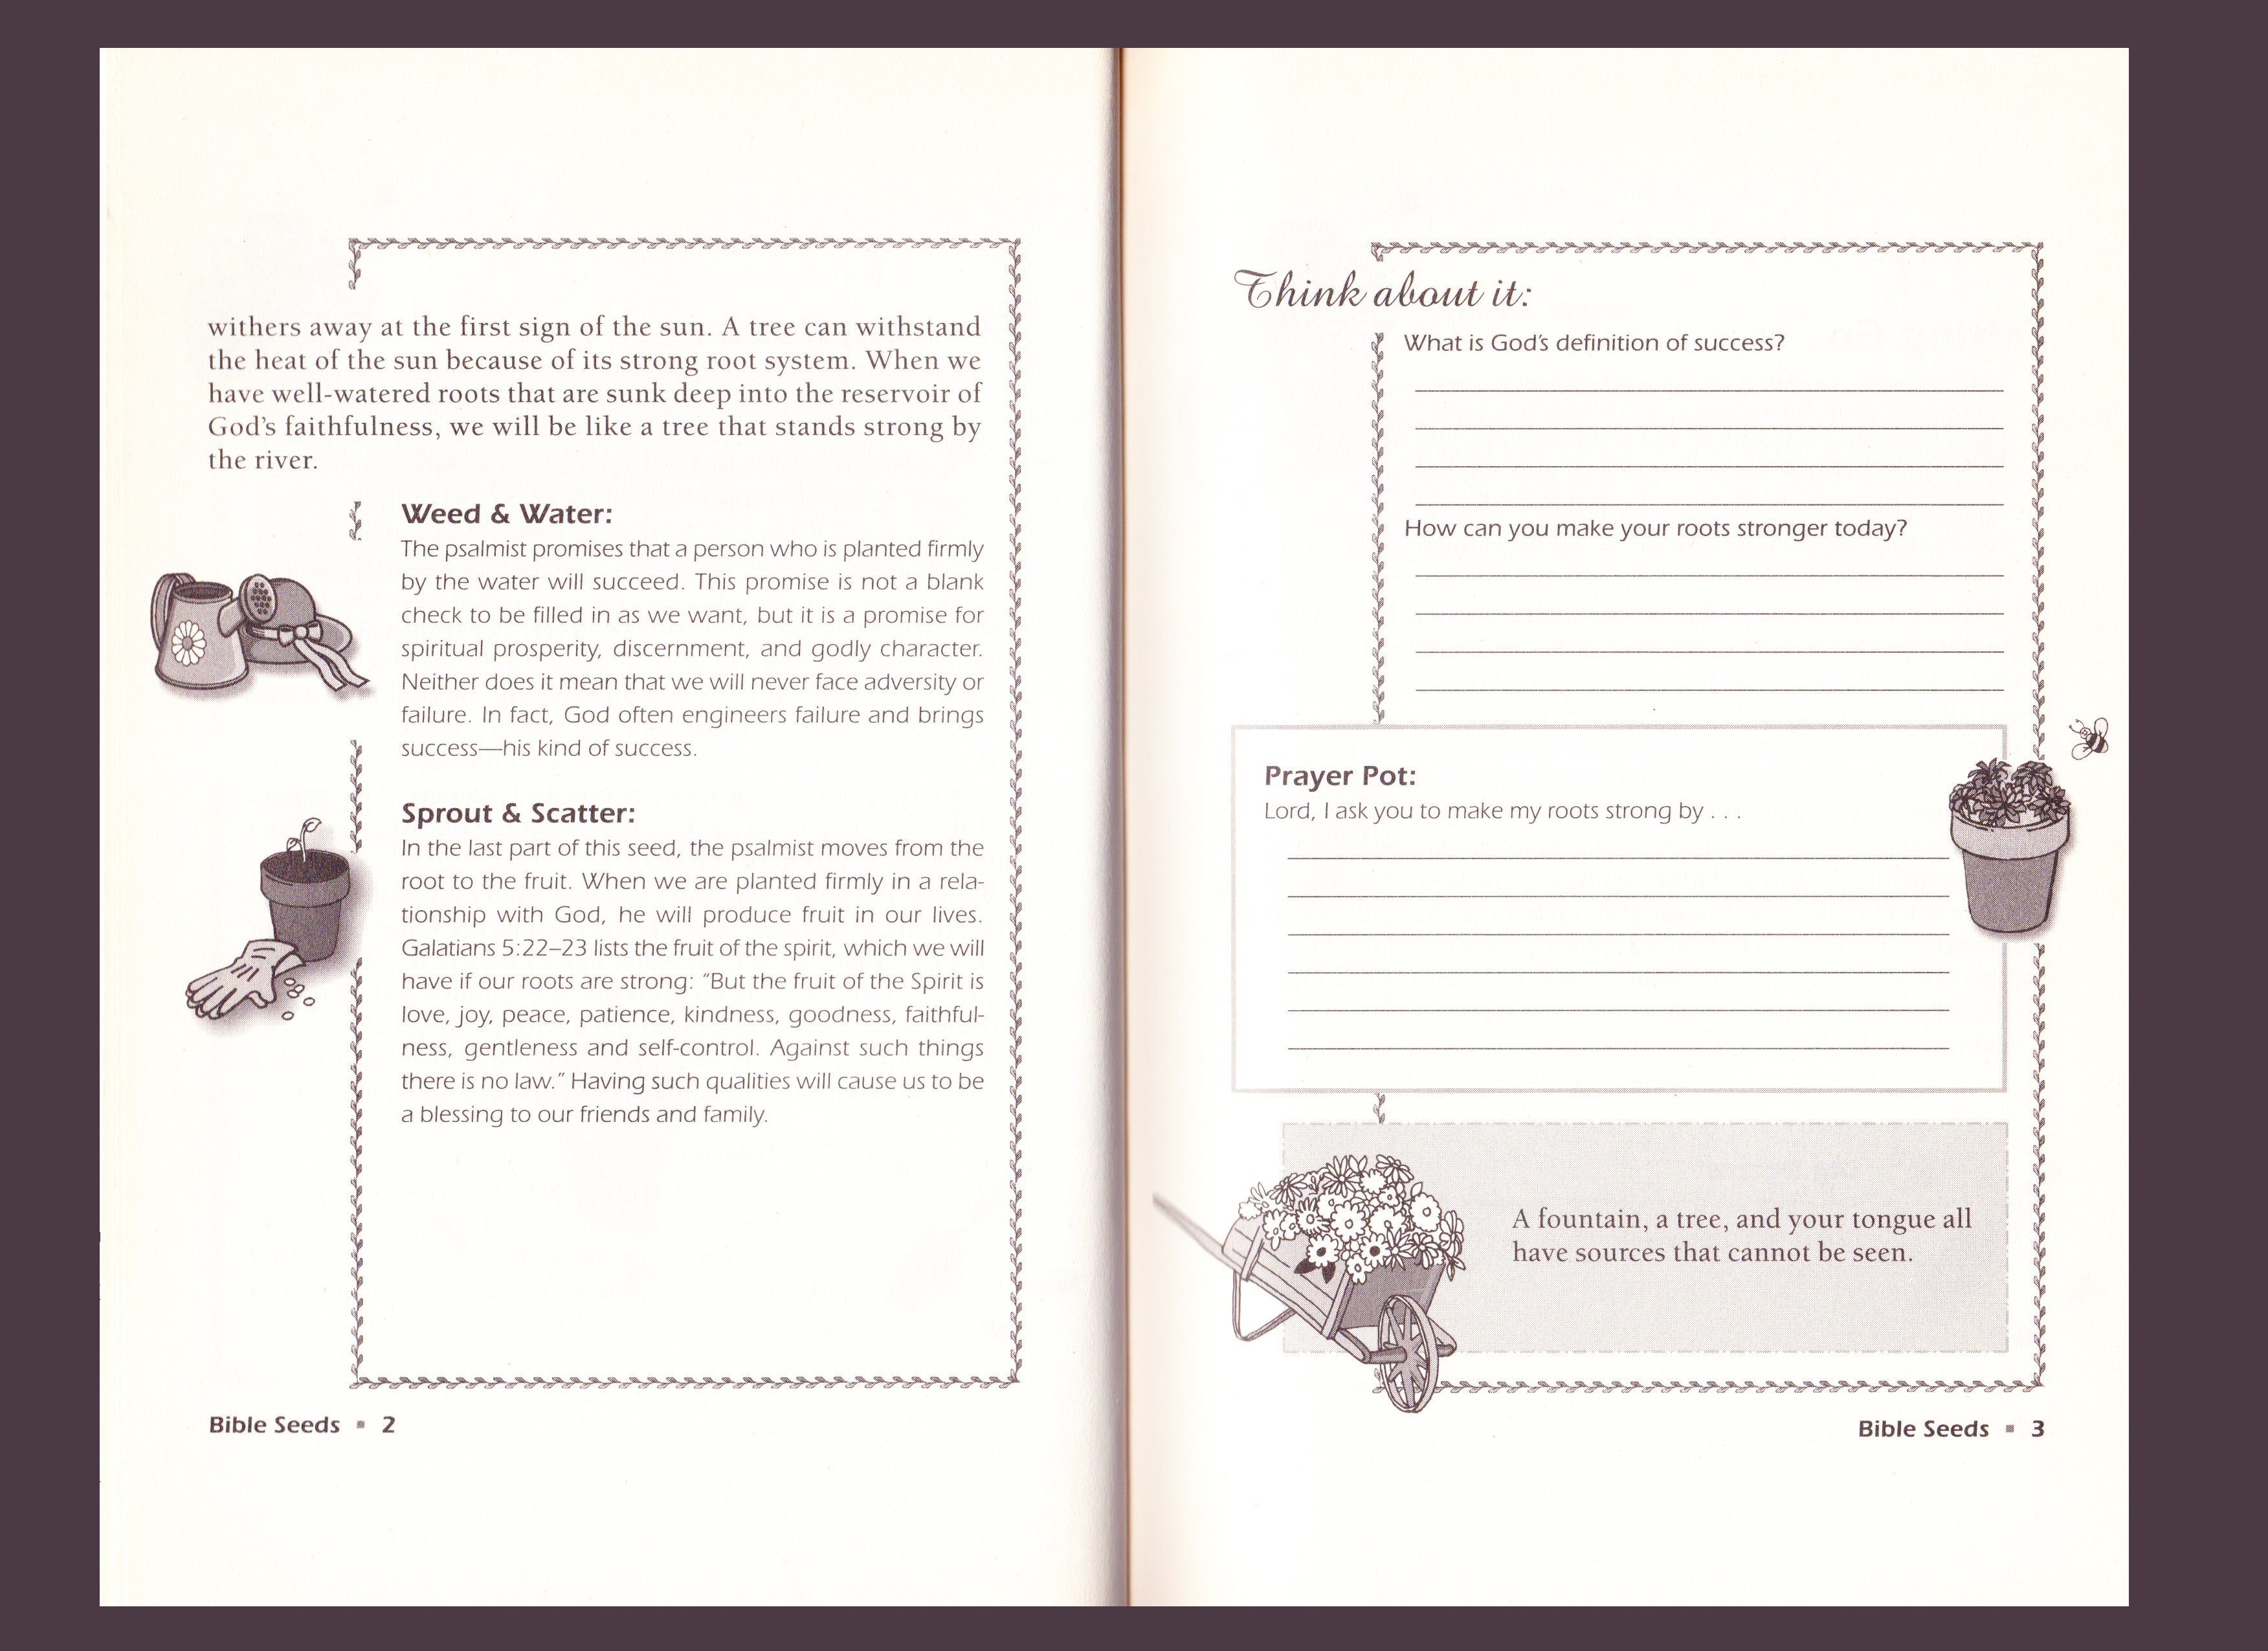
If you’d like, you can even have a nice little devotion while your eating your lunch!!! Check out this one that I thought was really sweet:
(NOTE: Bible Seeds devotional is now out-of-print, but you can find used copies online.)
“Oh taste and see that the Lord is good; blessed is the man that trusts in Him.”
When I lived in the Rockies I used to spend pretty much every weekend in April and May (and even some years in June) sipping my morning coffee by my front windows and gazing outside at the dead, gray landscape, wishing (oh so desperately wishing) for spring, as winter relentlessly lingered. All I could think about was busting outside to push the lawnmower around in my yard, dig out the rotting leaves that had blown in around my porch, plant and fertilize my spring bulbs, and tidy up my dormant yard. I could almost hear thunder and lightning in my mind, and with feverish delirium I built castles in the clouds for the return of the robins and squirrels games, and the mommy & daddy birds fluffing their feathers, gathering twigs, and chirping their springtime songs. I swooned over what to grow in my gardens, my mouth still salivating at the evaporating memory of last year’s harvest.
Being in south Texas, I now whence at how overwrought I was for the scent of fresh washed anything to be hanging on my clotheslines. I haven’t forgotten though how badly I wanted to crank those frozen windowsills open, throw back the curtains, air out the dust and cobwebs, and let a little sunshine in. If only by my shear will I could have held back winter and coaxed those leaves to bud out on the trees, or tantalized my daffodils to bloom, or tempted the grass to creep up out of the earth, lush and green.
Almost anything was better than shoveling snow AGAIN, or sloshing in slush, or looking out at barren trees, or being cooped up inside torturing myself with the fallen mercury on the outdoor thermometer. “Oh hurry up spring,” was my daily mantra.
And then finally it was here.
Well, my dear, north-country friends, I know you are suffering now, but come sit on my south Texas porch swing (I wish this was my porch and my porch swing) for a bit, kick your sandals off, and have a slushy lemonade with me? I’m just reminiscing over my garden parties of yesterday and would love your company!
It’s a funny thing, but as soon as the words “garden party” roll off my tongue I am humming the song by Ricky Nelson…“Come to a Garden Party; reminisce with my old friends….” Hee hee, I can see you do too! Shall we hold hands and sway and sing it together?
I went to a garden party to reminisce with my old friends A chance to share old memories and play our songs again When I got to the garden party, they all knew my name No one recognized me, I didn’t look the same
CHORUS: But it’s all right now, I learned my lesson well. You see, ya can’t please everyone, so ya got to please yourself
People came from miles around, everyone was there Yoko brought her walrus, there was magic in the air ‘n’ over in the corner, much to my surprise Mr. Hughes hid in Dylan’s shoes wearing his disguise
CHORUS
lot-in-dah-dah-dah, lot-in-dah-dah-dah
Played them all the old songs, thought that’s why they came No one heard the music, we didn’t look the same I said hello to “Mary Lou”, she belongs to me When I sang a song about a honky-tonk, it was time to leave
Someone opened up a closet door and out stepped Johnny B. Goode Playing guitar like a-ringin’ a bell and lookin’ like he should If you got’ta play at garden parties, I wish you a lot’ta luck But if memories were all I sang, I rather drive a truck
‘n’ it’s all right now, learned my lesson well You see, ya can’t please everyone, so you got to please yourself
Wow…I didn’t mean to sing the whole dang song…. Sorry. The lyrics are kind of odd, aren’t they? Hee hee! 🙂
.
I recently finished a Bible study of the book of Esther, written by Beth Moore and since it is so fresh in my mind I thought to share with you a garden party on steroids:
KING AHASHURAS’ GARDEN PARTY
“…The king made a feast lasting seven days for all the people who were present in Shushan…in the court of the garden of the king’s palace.” — Esther 1:5
A seven-day feast. Holy cow! (…Possible pun intended). My, oh my, he sure knows how to arrange things! This is how King Ahashuras decorated for his party: “There were white and blue linen curtains fastened with cords of fine linen and purple on silver rods and marble pillars; and the couches were of gold and silver on a mosaic pavement of alabaster, turquoise, and white and black marble. And they served drinks in golden vessels, each vessel being different from the other, with royal wine in abundance, according to the generosity of the king.” (Esther 1:6-7). The drinking was not compulsory, but according to each man’s pleasure…soooooo, I’m guessing, since the booze was free, that it was each man’s pleasure TO DRINK!
After the king’s “garden party” came another feast. It was for his officials and servants – the powers of Persia and Media, the nobles, and the princes of the 127 provinces over which he now ruled. This feast lasted 180 days, (holy smokes – did you catch that? 180 DAYS!!!). I can’t even imagine how much food and wine he dished out for a 180-day party! My goodness, that’s almost six months. How does one entertain guests for that long? What do you suppose they talked about? How many bedrooms do you imagine he must have had in his house to make the princes and nobles of 127 provinces comfortable, not to mention the sheer volume of bath towels they must have gone through!
Being a hot-shot, he entertained by giving his guests the grand tour of his sprawling estate, showing off his riches, splendor, and majesty, as if the food, booze, and decorations weren’t enough of a brag.
It all reminds me a little of Oprah’s Garden Party, which you perhaps caught on television some years back? The Queen of daytime talk TV wanted to pay homage to some special ladies in her life whom she admired, but in the process couldn’t help showing off a little of her great wealth, lavishing them with an exquisite menu, costly gifts, and luxuriant preparations. You can read all about it at Oprah.com.
The term “garden party” does tend to stir up in my head notions of big Queen Mumm hats, lush flower gardens, and dainty little porcelain teacups brimming with exotic teas, accompanied with a myriad of condiments to add to them, like pure white, sparkling sugar cubes, dew covered mint leaves, juicy lemon slices, and fresh, succulent raspberries.
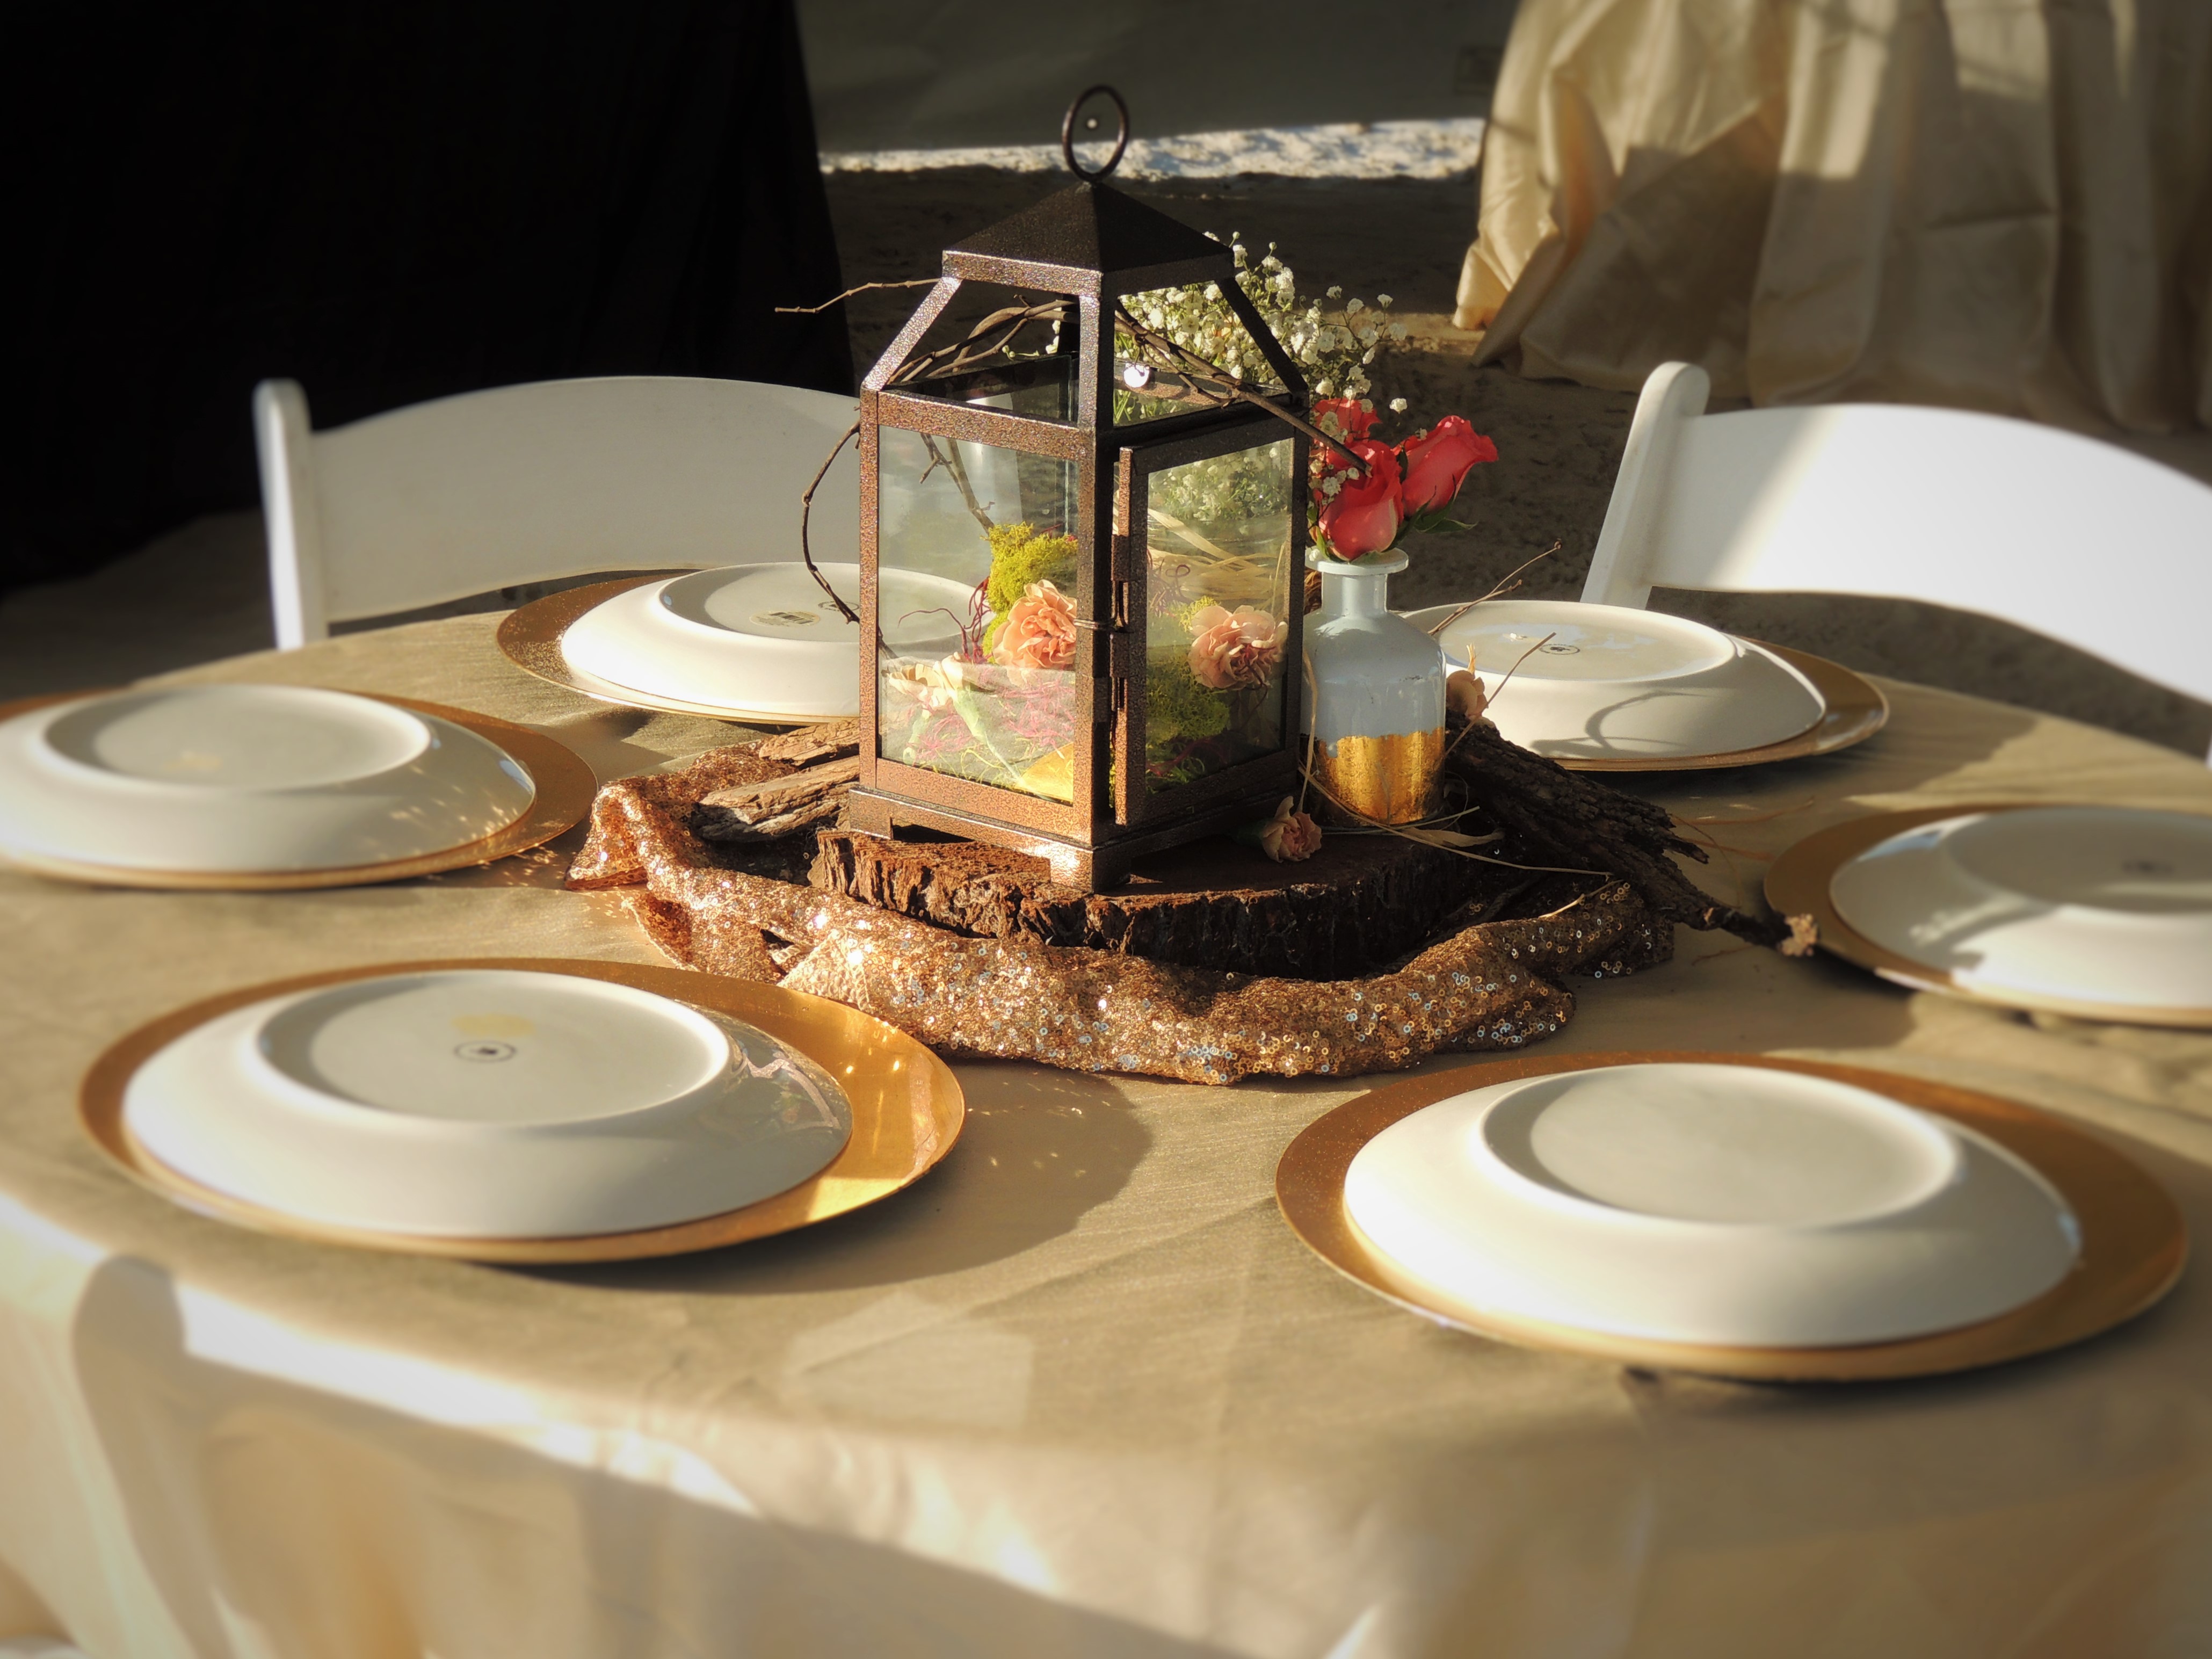
In my dreams my tables are covered with layers of lace and floral patterned tablecloths. Bouquets of flowers, topiaries and ivy centerpieces. The chairs all around are covered in cloth and ribbon. And there are twinkling lights and lanterns hanging from the trees.
Marlene Allan – Garden Party Online has some fun ideas too. I really liked the idea of spreading picnic blankets on the lawn and resting a large umbrella at each. The edges of the umbrellas are also decked out with flowers.
I found these garden party themes and ideas at Evite.com:
Garden of Eden—It doesn’t have to be clothing optional to evoke the spirit of Adam and Eve’s home. Serve a bounty of fresh fruits and vegetables, and decorate with snakes and apples.
Plant Swap—Celebrate your garden by asking guests to bring a flower arrangement or potted plant to swap with another guest. Guests can either fight over the foliage or pick names out of a hat to see who gets what.
Flower Arranging—Ask guests to bring blooms and vases, and invite a floral expert or a friend with very green thumbs to show you different ways of putting them together.
“Seeds of Kindness” Garden Party – was another terrific discovery. Visit this website for all the details: http://www.juliabettencourt.com/themes/kindnesstheme.html.
This is a garden theme that revolves around our planting seeds of kindness. Her emphasis is on being kinder and more caring Christian women. I won’t spill the beans, but hope you will check out all her swell ideas.
Unlike the garden parties of the rich and famous, mine have all been either merriments of Mother’s Day, or low-budget baby/wedding showers, so don’t be intimidated. You can afford this!
.
Garden Party 2007
Decorations: I hung plastic/silk flower strands that I found at the dollar store in swags along the patio eves. I did the same along the edges of the patio umbrella and table. I set out a few flower arrangements in baskets. I spent a decent block of time mowing and trimming and grooming my back yard so it would resemble the ritzy landscapes in the rich parts of town. There is no way it could possibly compare, but it looked its personal best anyway. I pulled all the weeds and watered until the grass was green green green. I planted the flower boxes with colorful blooms and foliage and piled them up with mulch just like the gardeners on TV. I wished I’d had a pretty gazebo that I could have lavished with tulle and silk flowers, or a lovely little pond and waterfall that would have drawn our eyes and trickled in our ears. Even a heavy cast bird bath would have been great. But I had to be content with such things as I had.
GRILLED PORTOBELLO SANDWICHES
Ingredients
Ciabata bread, drizzled with olive oil and lightly toasted
Portobello Mushroom caps, grilled and placed on top of the bread
Red onion slices, grilled and placed on top of the portobello
Fontina cheese, melted on top of the onion in the broiler
Fresh Basil leaves, arranged on top of the cheese
Tomato slices, drizzled with a balsamic/garlic/olive oil/black pepper dressing
VEGGIE PLATTER
Red, Yellow, and Green Bell Peppers sliced into wedges
Radish halves
Ranch dip
FRUIT KABOBS
Watermelon
Cantaloupe
Honeydew
Pineapple
Banana
Grapes
Cut fruit into wedges and skewer on wooden spears. Arrange kabobs on a pretty platter
SUN CHIPS
BEVERAGES
Iced Tea
Sodas
Lemonade
SUGAR COOKIES cut and frosted to look like pansies, arranged on a pretty doily covered platter. OR…those flowerpot cakes that are made with Oreo crumbs and the gummy worms on top would also have made a clever dessert for this soirée. (Click here for a how-to video for Pansy Sugar Cookies)
MUSIC: I ended up being a little too pinched for time to give the music selection a proper scavenge. So we started with a peaceful classical guitar CD and ended up with golden oldies music on satellite radio. I’ve since had a little more time to look and here’s the thoughtful lineup I found:
At a Garden Party, Ed Bickert
Garden Party, Rick Nelson
The Last Dance, Music for a Vanishing Era
Radiance, Music for a Garden Party (Mozart, Bach, Beethoven, Dvorak, etc.)
And Dan Gibson’s Solitudes Classical Garden, featuring the sounds of nature with music
Or… we could make a homemade CD or create an i-tunes playlist to play at the party. If the garden party is to celebrate Mother’s Day, you could give the music mix to Mom afterward. Buy MP3 singles from Amazon.com and burn them onto one CD. Here are a few suggestions:
Anita Renfroe, The Mom Song (Momisms)
Boyz II Men, a Song for Mama
Chris Young , Voices
Carry Underwood, Mama’s Song
Brad Paisley, She’s Everything
Carry Underwood, Don’t Forget to Remember Me
Dolly Pardon, Coat of Many Colors
Jamie O’Neal, Somebody’s Hero
LeAnn Womack, I Hope You Dance
Rascal Flats, My Wish
Martina McBride, In My Daughter’s Eyes
Merle Haggard, Mama Tried
Taylor Swift, The Best Day
Trace Adkins, One Hot Mama
Trace Adkins, You’re Gonna Miss This
Trace Adkins, She Thinks We’re Just Fishin’
Beyonce, Halo
Celine Dion, A New Day Has Come
Loudon Wainwright III, Daughter
Lonestar, Mr. Mom
Martina McBride, Blessed
Edwin McCain, I Could Not Ask for More Sara Evans, Always Be My Baby LeAnn Rimes, How Do I Live Carrie Underwood (feat. Randy Travis), I Told You So Guns n Roses, Sweet Child of Mine
Alicia Keys, Superwoman
Aerosmith, Don’t Want to Miss a Thing
CRAFT: After our luncheon I gathered the girls up and moved our party to the far side of the yard where I had a craft project set up – making garden stepping-stones. I laid out all the decorations (small stones, marbles, jewels, beads, mosaic tiles, sea shells, tools, etc.) and the cement forms, one for each person. I mixed up cement in a wheelbarrow with water and mixed in a little cement dye to give our stones a kind of adobe look.
After I poured the cement into each form (pizza boxes) we got busy decorating. We started with pressing our handprints (footprints) into the center, and then we started arranging little decorations around it and carving designs into the wet concrete.
We all pitched in to make a stone for my sister who died the April before. We also made one for my other sister who lives far far away. With hers I asked if she could send a paper tracing of her hand that we could use to press into the cement, and also if she could send some decorations for us to use in her stone, and if possible draw us a pattern of how she would like us to decorate it. The finished products needed to set-up and then dry without being moved for at least 24 hours, so my guests left their creations with me for delivery on another day. I later delivered all of them to my mom’s yard and we set them along a lazy path in her beautiful gardens.
GIFTS: I paired a devotional book with a little watering can and filled it with garden tools, gloves, and seeds, for a hip little gift set. I found my small inexpensive watering cans at Big Lots, along with the low-cost garden utensils, gloves, and packets of seeds. I put the tools down into the watering cans, squeezed in the pair of gloves, and tucked two seed packets in the top. I tied a THANK YOU card to the handles with macramé twine. Then I gave them to my mom and sister. I also placed one on my neighbor’s door step, and made another for a girlfriend. And while I was at it, I thought they would make nice end-of-the-year gifts for each of the teachers I worked with in an elementary school, so I made three more.
The devotional books I purchased several years ago were from Crossings and are unfortunately no longer in print, but they can be found used sometimes on eBay or Amazon.com, or other out-of-print, or used book stores. They paired really well with the watering cans to make a thoughtful gift.
Bible Seeds, A Simple Study-Devotional for Growing in God’s Word
From the Creators of the God’s Word for the Biblically-Inept ™ Series
Starburst Publishers, ISBN 0-7394-2142-5
Bible Seeds for Enriching Your Character,
A Simple Study-Devotional for Growing in God’s Word
From the Creators of the God’s Word for the Biblically-Inept ™ Series
Starburst Publishers, ISBN 0-7394-3048-3
Isn’t this a neat idea? A Fruit Pizza Bar!!!! Love it!
.
Garden Party 2008
This Mother’s Day I invited my mom, sister, her daughter, my other three nieces, my grand-niece, my sister’s mother-in-law, and my nephew’s wife. It was a full house.
And for this year’s garden party I planned a “kiddie pool pedicure party” where all my guests would sit in lawn chairs in a circle outside around our kiddie pool filled with hot sudsy water and perfumed bath salts and floating flower pedals. The sun would be shining and the birds would be chirping. We’d be wearing our capris and peddle-pushers. We would take off our shoes and soak our footies in the warm water while we nibbled on a modest buffet of brunch items. I thought it would bring back memories of when my sisters and I were young. In the summers our Grandma Gen’s would fill tubs with water and we’d all sit around in her yard and dangle our feet in the tubs. It is one of my fondest childhood memories.
Once our feet had soaked we would give ourselves PEDICURES and paint our toenails with our choice of nail polish, all the while chit-chatting about this and that. Afterwards, since our feet would be so pretty we would need some way to show them off, so I planned a CRAFT of decorating flip-flops. Our local Hobby Lobby store had everything I needed from the glue to the flip-flops and all the cutsie adornments to decorate them.
Well, you know how plans go sometimes – right out the window! That Saturday morning we had cold drizzle, and I mean blue-lips, can’t-feel-my-fingers, it’s-raining-it’s-pouring-the-old-man-is-snoring, COLD drizzle. Ugh. So we had to move our little soirée indoors to my cramped man-cave.
I phoned last-minute and begged everyone to bring a foot tub. I had also asked in the invitations for everyone to bring their own pedicure kits, and a few bottles of nail polish to share.
We didn’t let the inclement weather, or all the other little mishaps dampen our spirits. My guests seemed to have a blast and thankfully found humor in my severe lack of hostess skills that day.
Karen was my first guest to arrive and helped me put together the mimosas. While she poured orange juice I finished assembling the breakfast pizzas and that’s when the smoke alarm went off. Oh dear, someone – I’m not mentioning any names, but her initials are Lindee (sorry Sis) – placed a stack of paper plates out-of-the-way and over on the stove… on a lit burner that she didn’t realize was lit (whoops)! Thanks to Karen’s keen sniffer and quick reflexes, she grabbed and tossed the stack in the sink and ran water to put the flames out. Woo hoo… disaster averted! It all just added to our zany fun that day.
I don’t know whether the weather put me off or what, but I just didn’t have my feet under me with this get-together. Have you ever had a party like that? I felt scattered and rushed, and just helter-skelter, all over the place with my mood and my time management – just everything. In spite of that though we spent a sweet morning together listening to silly music, eating, being crafty and otherwise enjoying each other’s company. I ended up with enough stuff for everyone to make two pairs of flip-flops each, and I had gathered enough decorations and idea sheets to give us all plenty of inspiration.
BREAKFAST PIZZA
1 tube Pillsbury Pizza dough (refrigerated) (or you could use a Boboli ready-made crust)
2 Ripe Avacados, mashed (or a ready-made spicy guacamole)
6 strips of crispy fried bacon, crumbled
Grape tomatoes sliced in half
Handful of Arugula (or spinach) leaves
Dash of Tabasco
Pop the dough out of the tube and press out onto a large greased pizza pan. Bake until just turning golden, or use a Boboli crust. Remove from oven and allow to cool. Mix a few drops of Tabasco in with the mashed avocados and spread onto pizza crust. Sprinkle with crumbled bacon, arugula leaves, and grape tomato halves. Cut into wedges and serve. I tripled this recipe because of our number of guests and we had left-overs.
PEACH COBBLER
2 (1-lb) bags frozen peaches
1 tsp. lemon juice
½ cup sugar
2 Tbsp Cornstarch
1 tsp. Mace (or nutmeg)
1 Tbsp Vanilla
1 cup sugar
1 cup flour
1 cup milk
1 stick of butter, melted
Cinnamon and sugar
Toss 1 bag of peaches with next 5 ingredients and then layer in bottom of a buttered casserole dish. If you want to be fancy you can split it among ramekins (one for each guest).
Place sugar, flour, and milk in a bowl and whisk until blended. Whisk in the melted butter. Pour the batter over the peaches. Sprinkle with Cinnamon and sugar. Bake for 1 hour, or until the peaches are bubbling and the crust is golden. Check a little earlier if doing ramekins.
PEACHY MIMOSAS
½ gallon organic orange juice with pulp
2 small cans of peach nectar
1 small bottle of champagne (or sparkling cider, or ginger ale)
Mix all together in a large pitcher and pour into wine or champagne flutes. Decorate with orange slices dropped into the glass and a sprig of mint on top.
Flip-Flops Craft
For this craft you need at least one pair of flip-flops per guest. Hobby Lobby had a whole section dedicated to this craft. I picked up all the supplies there. At home I had material scraps that could be torn into strips and tied onto the straps of the flip-flops. I also had double-sided tape to adhere bead strips and fur strips and other decorations to the top of the sandals. If you can’t find craft flip-flops, just have each of your guests bring a pair from home to bling out.
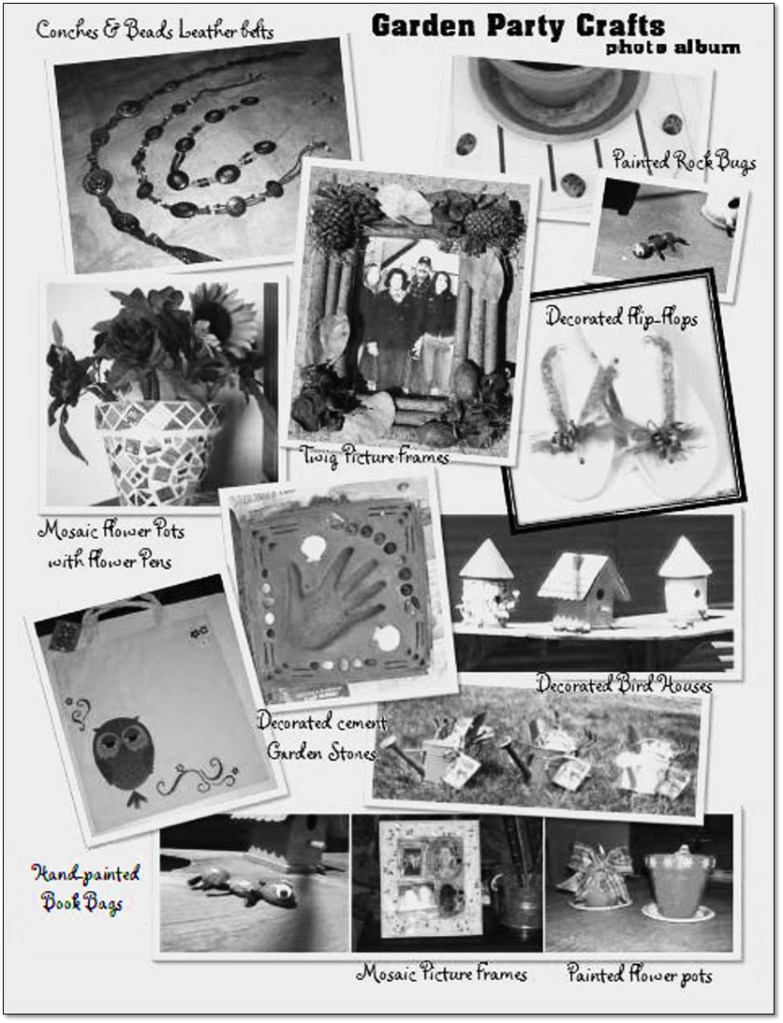
Other Craft Ideas from Parties Past (pictured below):
Broken dish mosaic picture frames. Mosaic pieces can be glued to picture frames or clay pots and finished with grout to make a very nice looking product. Look at yard sales and second-hand stores for pretty dishes that are inexpensive; or use one of the dishes from your own cupboard. If you have a child who has gotten engaged, this would make a neat “break the dish” (Jewish engagement custom) activity for a mother to do with the fiancé’s mother, and would make a neat wedding gift for the couple to place their wedding photo in. Wrap the dishes in several sheets of newspaper and whack them several times with a hammer until there are just quarter-sized pieces. Use a fast drying mosaic glue (available at hobby stores) to adhere the pieces to the picture frame or clay pot. Keep the pieces fairly close together. Let the glue dry.
Follow package directions and mix up a batch of grout. Purchase any color sanded grout powder (available from Home Depot) that will compliment your china. Smooth it in between the tiles being sure to fill all the gaps and air spaces. Let it dry for as long as is recommended on the package, and then use a damp sponge to gently wipe the grout off the tiles. Keep rinsing the sponge and squeezing the water out of it in between wipes.
Once all the tiles are clean, let the project sit and dry for a day or two.
Paint Clay pots with acrylic paint. My family and I have done this at Christmas time and then planted narcissus bulbs in the pots after they were decorated. We’ve also done them for Mother’s day with summertime themes. Dani did hers with sunflowers. I did mine with dragonflies and other bugs. Gracee painted hers with stripes, and our other guests did designs that unfortunately escape my memory. Buy whatever size terra-cotta pots suit your fancy and some containers of water-based acrylic paint. You’ll also need an assortment of different sized and shaped paintbrushes. Remember to get the little plates that go underneath the pots and paint them too.
Paint and decorate birdhouses. A few years back I found some little wooden birdhouses at the craft store. I drug them out on Mother’s Day and we painted and decorated them. I glued rocks and sticks to mine after painting the little roof. My mom and daughters just painted theirs with pretty designs.
Rock Bugs: Hunt for rocks that are all different shapes and sizes. Glue small round ones together to make caterpillars or ants. Use small round ones and paint to look like ladybugs, bees, spiders, or beetles. Use long skinny ones and paint them to look like grasshoppers or hornets, or lizards. Use your imagination and have fun. These look especially cute when placed in the soil of a potted plant or scattered around on a window ledge with potted plants.
.
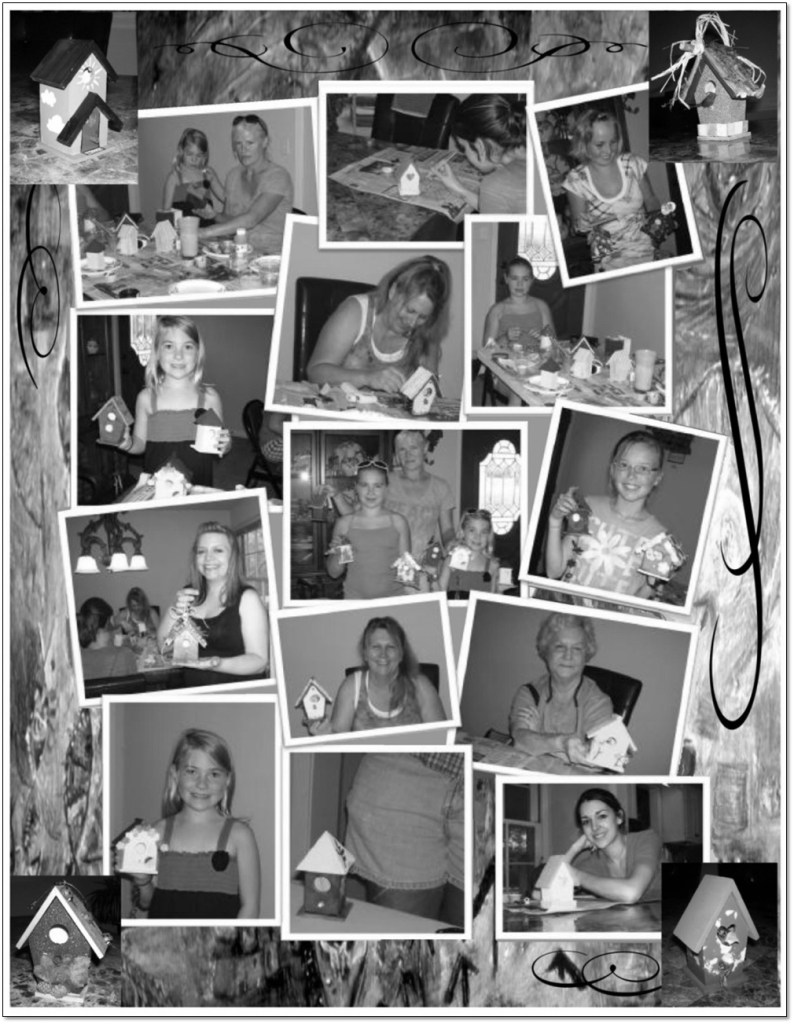
Craft Party 2011
My first year in Texas I decided to celebrate mother’s day with all my girlfriends and their daughters/grand-daughters. They all came over for a craft party. I served food and had music playing, of course. JoAnn’s Fabrics and Crafts had little wooden birdhouses on sale for $1 each so I picked up about $30 worth. I also picked up some cheap wind chimes to attach to the bottoms of the birdhouses, and hardware to put some heavy string through to hang them on our porches. I asked my friends to bring paints, brushes, glue guns, and whatever other things they might want to use to decorate a bird house with. They all did and we had hours of fun with each other.
COWBOY CAVIAR (and tortilla chips)
Ingredients
1 can Black Eyed Peas, drained
1 can White Shoe peg Corn, drained
4 ripe tomatoes, diced
2 ripe Avocados. Diced
2 fresh Jalapeños, seeded and diced
2 cloves garlic, minced
1 bunch green onions, chopped
¼ cup Olive Oil
¼ cup Red Wine Vinegar
1 tsp. Cumin
¾ tsp each Salt & Pepper
¼ tsp Cayenne Pepper
Family Size Package of Tortilla Chips, Scoops
Directions
Mix all ingredients, except for chips, in a bowl. Toss well to distribute flavors. Cover with plastic wrap and place in refrigerator until party time. Serve with tortilla chips, like you would salsa and chips or guacamole and chips.
EGG SALAD SANDWICHES
Ingredients
1 dozen hard-boiled eggs, peeled and chopped
1 small white onion minced
¼ cup sweet pickle relish
½ cup Mayo
1 Tablespoon Spicy Brown Mustard
Dash Cayenne powder
¼ tsp Salt & Pepper
5 leaves of Romaine Lettuce, shredded
2 Loaves of White Bread from the Bakery, sliced thin, crusts removed
Directions
Mix first 7 ingredients in a bowl, cover and chill overnight. The day of the party, lay out the bottom slices of white bread on a flat surface and spread egg salad over them in a thin layer. Layer several shreds of lettuce over, and then cover with the other slices of white bread. Cut each in half from corner to corner and then in quarters from the other corners. Arrange on a platter, cover with plastic wrap and refrigerate until party time.
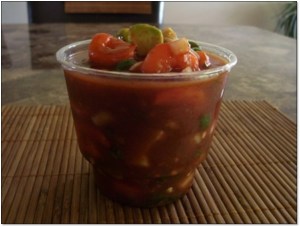
SOUTH TEXAS SHRIMP COCKTAILS
Ingredients
2 lb frozen cooked shrimp, tail off, thawed, rinsed and patted dry
3 Large Ripe Avocados, cut into small chunks
6 Large Jalapeños, stems removed, chopped with seeds
1 Small White Onion, chopped
Half a bunch of Cilantro torn apart and chopped
2 12-oz bottles Louisiana brand Seafood Sauce, Spicy
3 Lemons cut into wedges
Clear plastic tumblers
Directions
In a large bowl combine shrimp, avocado, jalapenos, onion, cilantro, and sauce. Toss to combine. Spoon into clear plastic tumblers, top with a lemon wedge and sprig of parsley if desired, cover and refrigerate until ready to serve.
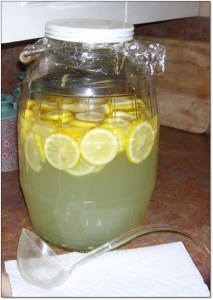
HOMEMADE LEMONADE
Ingredients
2 gallons drinking water, reserve 3 cups
10 Lemons, sliced
1 can frozen concentrate lemonade
4 cups sugar
2 gallon container with lid
Directions
Place 2 gallons of fresh cold drinking water in a 2 gallon glass container, reserving 3 cups to be used in a moment. Add lemons and frozen concentrate. Stir well. Place the 3 cups of reserved water in a bowl and microwave on high for 3 minutes until boiling. Add the 4 cups of sugar to the boiling water and stir until dissolved. Allow to cool, and then add to the lemonade. Stir well, chill until ready to serve.
Variation: Add a variety of chopped up chilled fruits (e.g. thin watermelon wedges with rind on, strawberries halved, green melon chunks, raspberries, blueberries, red grapes, orange slices, lime slices, and maraschino cherries) to the lemonade just before serving, or place fruits in large beverage glasses and fill each with lemonade. Serve with a straw.
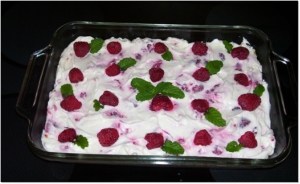
RASPBERRY CREAM CHEESE DELIGHT
Graham Cracker Crust:
1 1/2 cups crushed graham crackers
1/4 cup sugar
1/3 cup butter, melted
In a small bowl, combine the crumbs and sugar; add butter and blend well. Press onto the bottom and up the sides of an ungreased 9-in. pie plate. Bake at 375 degrees *F for 8-10 minutes or until crust is lightly browned. Refrigerate for 30 minutes before filling.
Filling
1 pkg of cream cheese, warmed to room temp
1 small container of marshmallow cream
1 tsp lemon juice
1 small container cool whip
1 package fresh or frozen raspberries
Mint leaves and lemon slices for garnish
Directions
Mix cream cheese, marshmallow cream, lemon juice, and cool whip in a bowl. Carefully fold in half the raspberries. Spread over cooled graham cracker crust. Place the other half of the raspberries on top and garnish with mint leaves and lemon slices. Cover with plastic wrap and refrigerate until ready to serve.
.
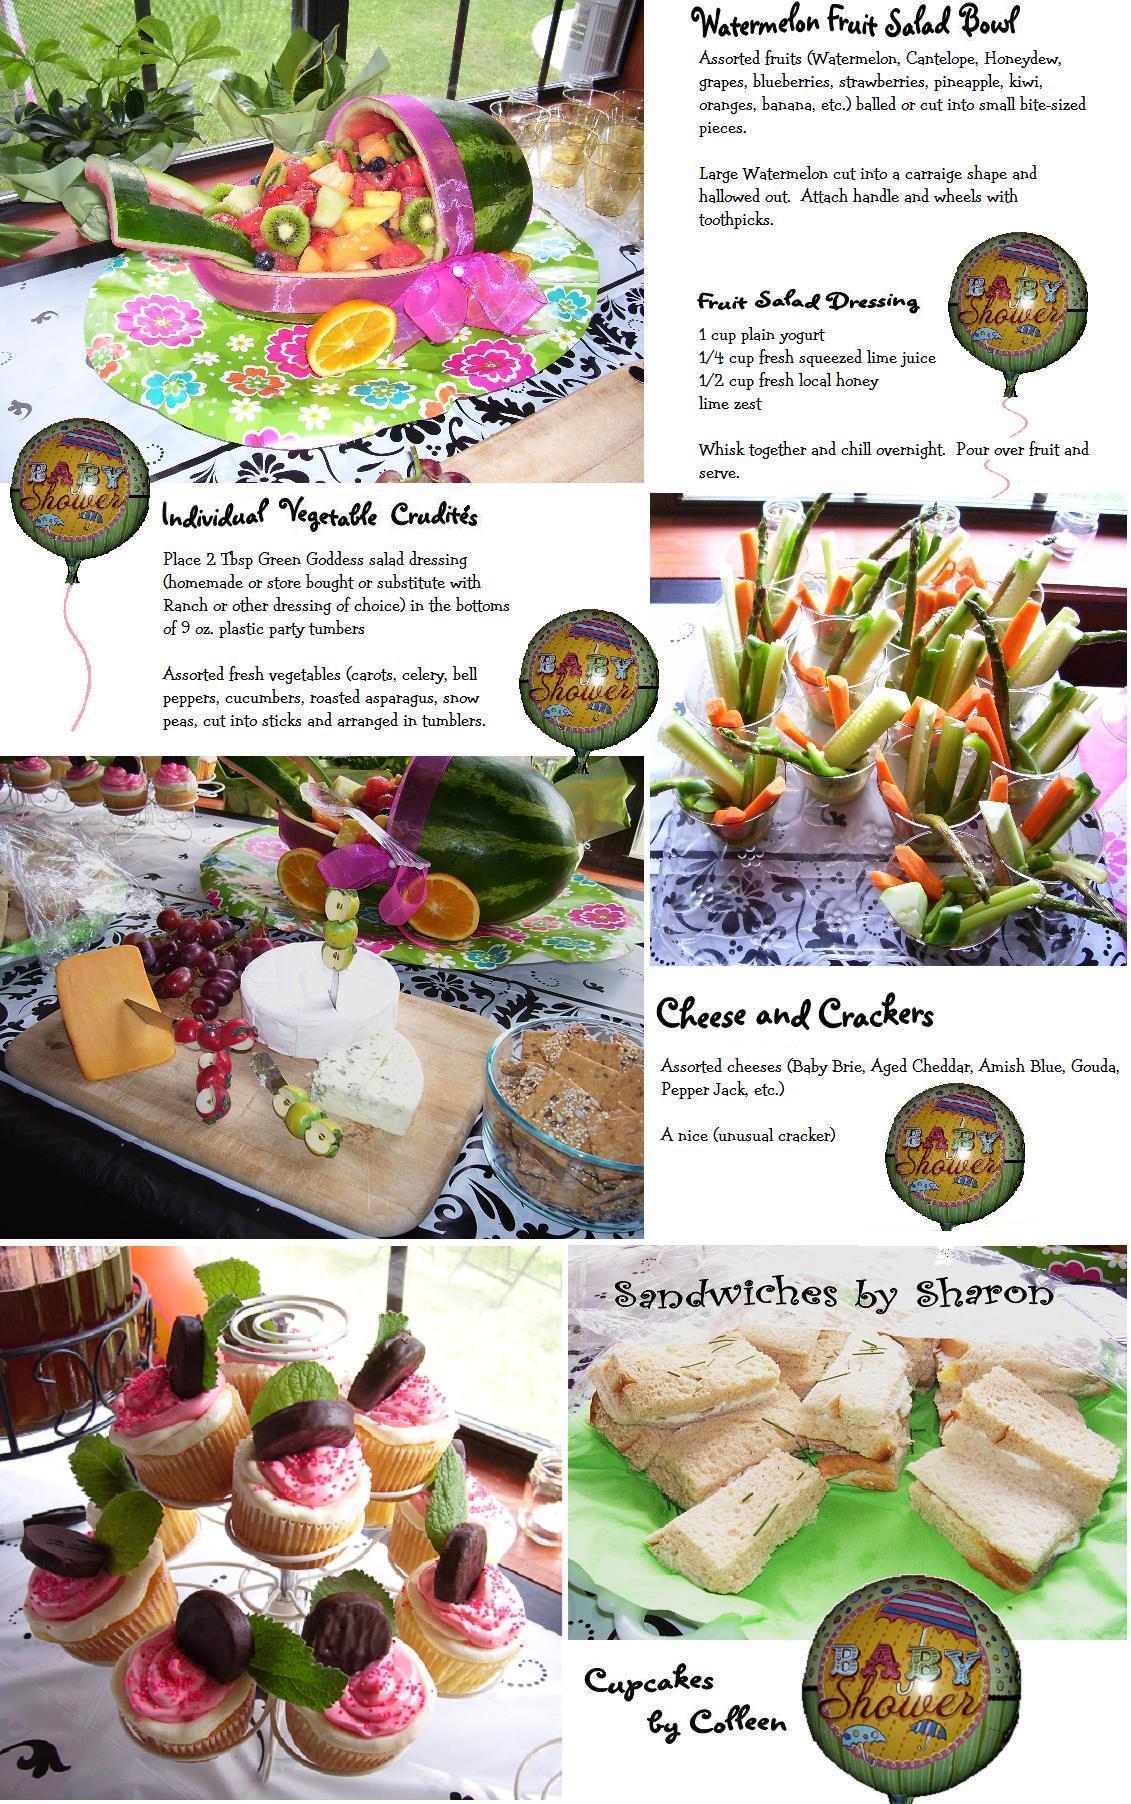
And here’s a menu I put together for a Baby Shower garden party for my daughter:
“And when these days were completed, the king made a feast…for all the people…great to small, in the court of the garden of the king’s palace.”


 I was given the opportunity recently to make a bunch of tissue paper flowers for a school project. I had so much fun with it honestly, and thought, these sure would make a beautiful decoration, or they could be used for head garlands (as pictured here) which are pretty popular in Texas, or Homecoming Mums (another Texas thing), or to decorate Derby hats, or for a garden tea party, or luau, or
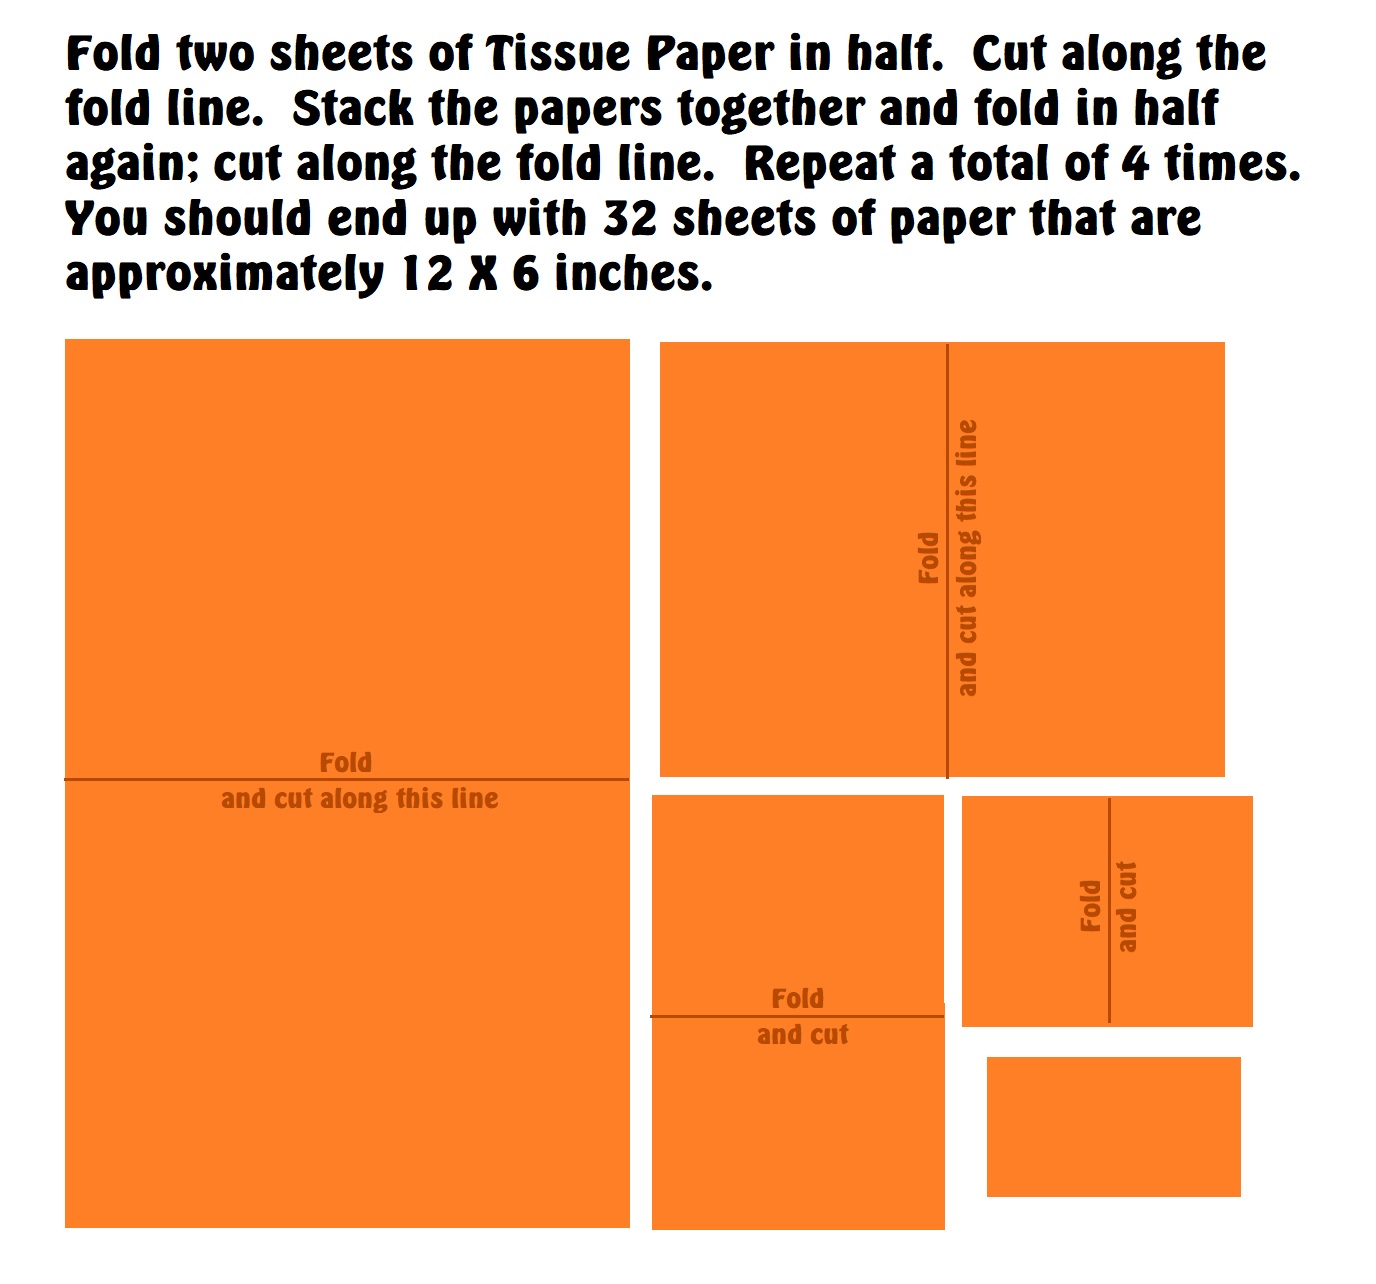


 The center pom kind of makes a flower that looks like a cactus flower. You can do the same sort of thing with green tissue going out the bottom to look like the bud part of the bloom (just cut it with deep zig zags instead of the fringe). You can also experiment with various cuts, and you can also layer two colors of tissue together to make more interesting options. Here are some samples of the flowers I made. They turned out soooooo pretty?
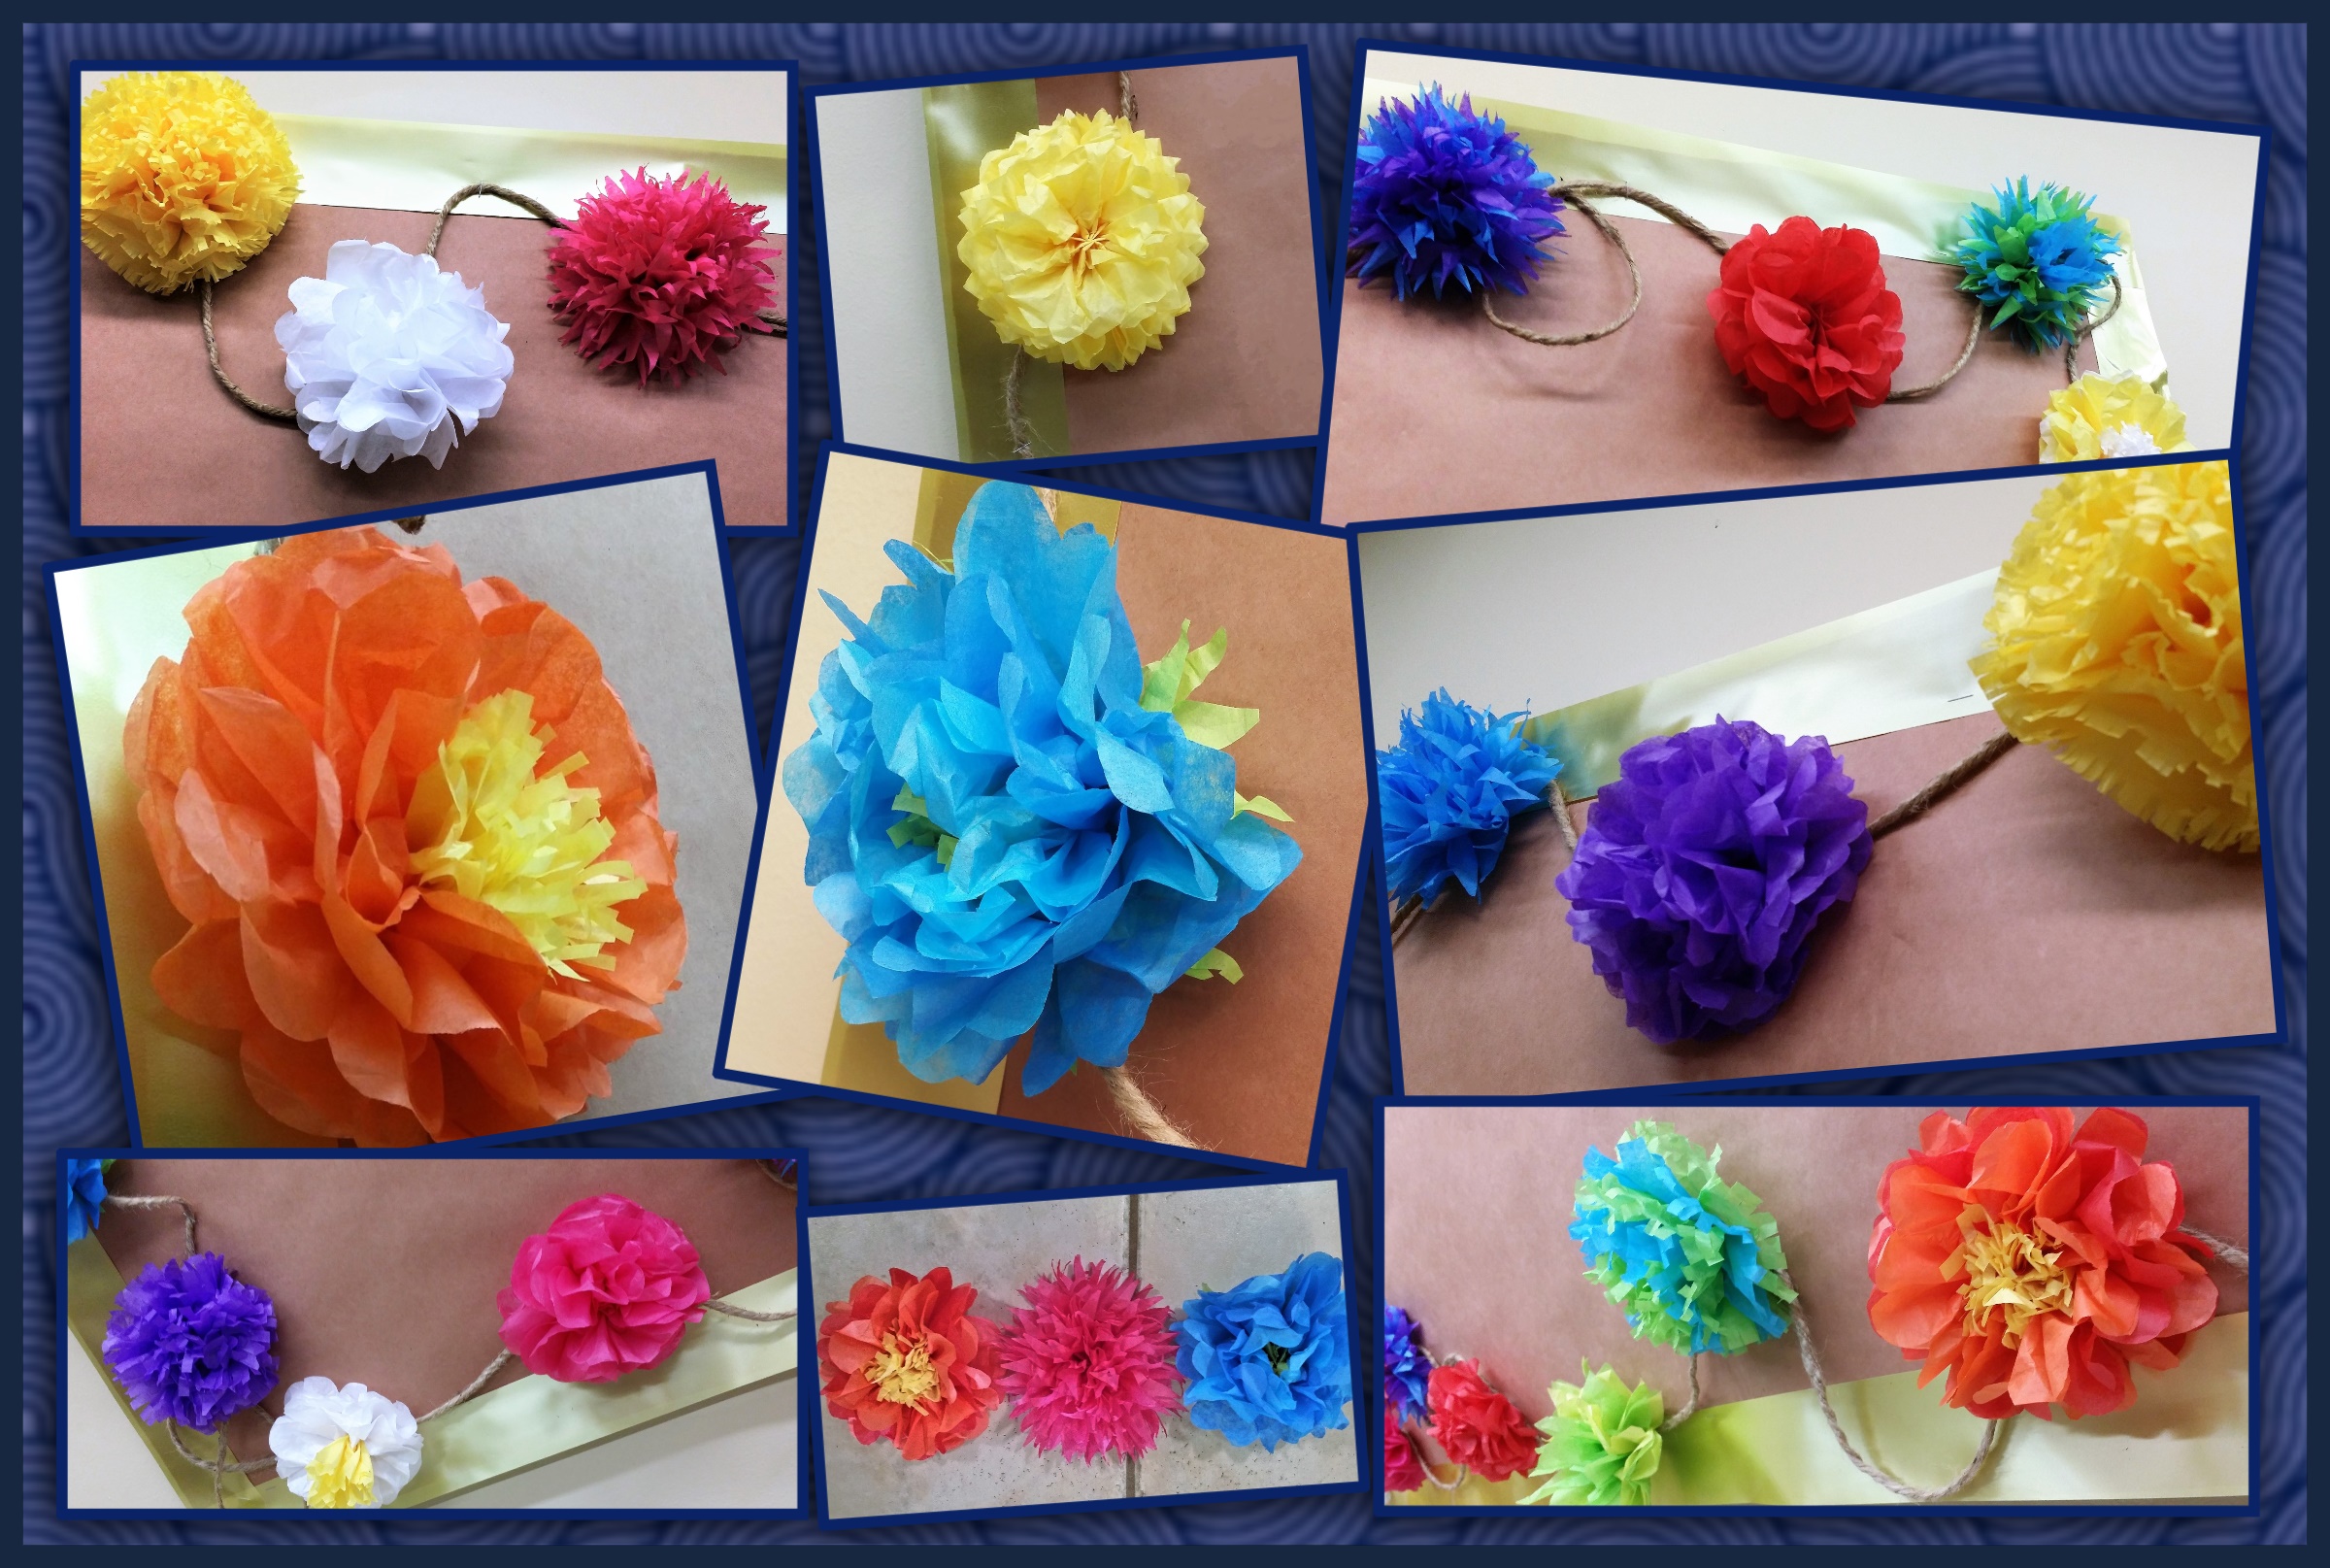


 My bestie and I live three states apart, but out in the west, and when one of those states is Texas, this adds up to a pretty dang far distance. Too far to get to spend as much time together as we’d like. But we stay close by texting every few days and calling often, we read out of the same Bible devotional every day, we send each other pins on Pinterest, and at least once a year we travel to meet somewhere and spend a few days hanging out.


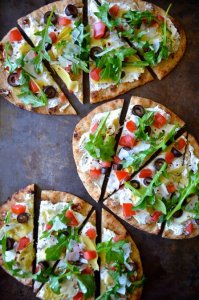
 Pinterest, and then made it a reality when I found these flatbreads at my local HEB > > >
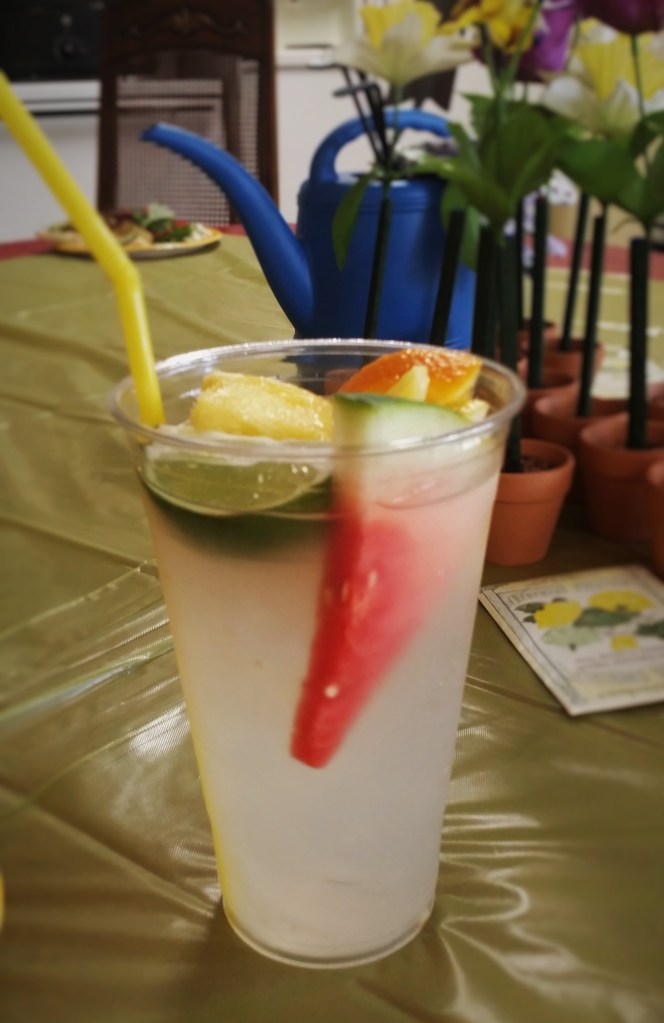


 You can use real terra cotta pots for the trifles, which come in larger-than-cupcake sizes. And since the cake is not being baked in the terra cotta you won’t have to worry about dyes or other toxic elements leaching into your batter in the oven. I soaked my pots in the sink to get the price stickers off, then I put my pots in the dishwasher and ran them through a full sterilizing wash cycle. When they were done I put them in the oven on warm (170*F) to dry them out completely before using.
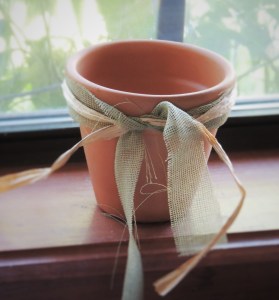


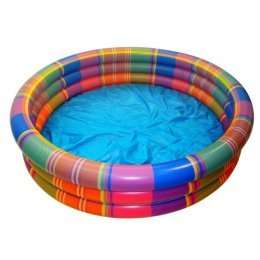 And for this year’s garden party I planned a “kiddie pool pedicure party” where all my guests would sit in lawn chairs in a circle outside around our kiddie pool filled with hot sudsy water and perfumed bath salts and floating flower pedals. The sun would be shining and the birds would be chirping. We’d be wearing our capris and peddle-pushers. We would take off our shoes and soak our footies in the warm water while we nibbled on a modest buffet of brunch items. I thought it would bring back memories of when my sisters and I were young. In the summers our Grandma Gen’s would fill tubs with water and we’d all sit around in her yard and dangle our feet in the tubs. It is one of my fondest childhood memories.
 feet would be so pretty we would need some way to show them off, so I planned a CRAFT of decorating flip-flops. Our local Hobby Lobby store had everything I needed from the glue to the flip-flops and all the cutsie adornments to decorate them.
 I phoned last-minute and begged everyone to bring a foot tub. I had also asked in the invitations for everyone to bring their own pedicure kits, and a few bottles of nail polish to share.


 EGG SALAD SANDWICHES