I want to preface this post by saying if you live near one of these restaurants you absolutely MUST go and have the chocolate cake (and the margaritas, and the guacamole, and….), but if, like me, you live hours away, then I hope to help delight our tastebuds with my less-than-perfect take on their fantabulous desert!!! They serve their cake freshly warm from the oven with a ganache-like frosting oozing over the sides, a scoop of cinnamon ice cream and a dalop of whipped cream on the side, and the whole mess sprinkled with a dusting of cinnamon. Oh my gosh!!!! To die for!
INGREDIENTS
1 ¾ cup granulated sugar
1 ¾ cup all-purpose flour
¾ cup Dutch process, unsweetened cocoa powder
1 Tablespoon ground Saigon Cinnamon
1 ½ teaspoons baking powder
1 ½ teaspoons baking soda
1 tsp finely ground pink Himalayan salt
1 cup whole milk
1 ¾ sticks salted butter, softened
2 eggs
2 tsp Mexican vanilla (I always splash a little over the measurement)
¾ cup boiling water
INSTRUCTIONS
Preheat oven to 350*F. Grease the bottoms of two 8 or 9 inch round cake pans, and line with parchment paper. In a large mixing bowl, combine the dry ingredients. Add milk and butter. Beat on medium speed to 2 minutes. Add the eggs and vanilla. Mix until incorporated. Stir in boiling water.
Divide the batter evenly between two prepared pans. Bake for 30 to 45 minutes, or until the tester comes out clean when inserted into the cake’s center.
Cool on a wire rack for 10-15 minutes. Removed cakes from pans, discard the parchment paper, and transfer them to a wired rack to cool completely.
Now they are ready to be frosted. And this is my favorite ganache recipe. Make yours with bittersweet chocolate, add a teaspoon of cinnamon, and up your ratio of chocolate a little more to make your ganache thicker, since it will be spread on warm cake and you don’t want it to just soak in and disappear.
I know there really is no duplicating the deliciousness of Tiago’s original, but this is a dynamite stand-in for when you are just craving it like no other and live 2 hours (or more) away from the closest restaurant.
And now to the second part of this post… A HAPPY BIRTHDAY cake!!!!!
So… it’s August. It’s my granddaughter’s birthday, and her day fell on a school night this year. Her parents are both full time employed and I wanted to be a blessing, so I volunteered to make the birthday dinner and cake. I am a decent cook, I guess, or at least that’s what my family says, but I am NOT a baker, not by any stretch of the imagination, and so perhaps this is what inspired me to blog about this cake, because it is the ONE baking attempt I’ve made that actually turned out, miracle of miracles, and I figure this to be the greatest reason to save it for posterity, i.e. my grandchildren, if indeed we are all still around and we haven’t been raptured by the time they are grown bakers. (Come Lord Jesus). Anyway, the birthday girl wanted “grammie’s tacos” for supper and sooooo that’s what inspired me to go with the Tiago’s cake for her birthday cake. Her special request was for a 2-layer cake, one layer being chocolate, the other layer being vanilla, and she wanted it frosted with a vanilla frosting. Each cake recipe makes 2 rounds, so I ended up with 4 total rounds of cake, and decided her cake would just have to be a 4-layer cake instead. I didn’t think anyone would mind, unless of course it didn’t turn out, but it did, so yay! 😉
My Vanilla Cake recipe:
INGREDIENTS
2 cups granulated sugar (I use just a little less)
3 cups all-purpose flour
1 teaspoon baking powder
1/2 teaspoon salt
1/2 cup milk
1/2 cup water
3/4 cup (1 1/2 sticks) butter, softened
3 small eggs (or 2 large)
1 teaspoon vanilla (I always let it dribble a little over)
1 teaspoon cinnamon
INSTRUCTIONS
Preheat oven to 350*F. Grease the bottoms of two 8 or 9 inch round cake pans, and line with parchment paper. In a large mixing bowl, combine the dry ingredients. Add milk, water, and butter. Beat on medium speed to 2 minutes. Add the eggs, vanilla, and cinnamon. Mix until incorporated.
Once both of my cakes (chocolate and vanilla) were baked and completely cooled, I wrapped them tightly in two layers of cling wrap/plastic wrap and then tucked each individual layer in a gallon size zip-loc bag, pressing out all the air, and then put them all into the freezer overnight. Tip: Baking the cakes the day before makes for less work on the day of the party, plus the cakes are easier to frost when they are frozen, and they stay super moist and fresh for up to 3 months (so I was told by my cake decorating friends).
The next day I whipped up my frosting. I didn’t have enough cream cheese to make enough frosting to frost the whole 4 layers, so I whipped up a batch of chocolate buttercream as well as a batch of cream cheese frosting.
Chocolate Buttercream Frosting
INGREDIENTS
12 Tablespoons butter, softened
5 (and up to another 1/2) cup confectioner’s sugar (depending on how sweet you want it
1 cup Dutch process, unsweetened cocoa powder
1 teaspoon ground Saigon cinnamon
2/3 cup milk
1 teaspoon Mexican vanilla (I always splash a little over the measurement)
Pinch of salt
INSTRUCTIONS
In a bowl, beat butter until light and fluffy. In a separate bowl, mix confectioner’s sugar with cinnamon and cocoa. Blend sugar mixture with butter, alternating with milk, beating well after each addition. Beat until smooth. Blend in vanilla.
Cream Cheese Frosting
1 stick Butter, softened
8-oz. Cream Cheese, softened
1 (10-oz.) package Confectioners (powdered) sugar
2 teaspoons vanilla
splash of Half-and-Half
Combine butter and cream cheese in a bowl and beat until light. Add confectioner’s sugar and vanilla and beat until fluffy. Add milk only if needed for the desired consistency, beating until smooth. If you want to add a sprinkle of cinnamon also, do it!!!!
About two hours before the party I took the frozen cakes out of the freezer, unwrapped the first chocolate layer, placed it on my cake plate and slathered it with chocolate frosting on top. I unwrapped a white layer, carefully placed it on top of the chocolate one, and frosted it on top with chocolate frosting. Repeated with the last two layers, leaving the very top layer unfrosted on top. I spread my cream cheese frosting all around the sides of the cake first, and then I did the top last. As you can see I am NOT a skilled decorator either, and I won’t even play one on the Internet. But I am happy to report that the cake was delicious, and a hit with the grateful birthday girl.
This cake was so moist and delicious. I wanted to send it home with the birthday girl (no, I didn’t), but her mother wouldn’t let me (say it ain’t so), saying they already had a bunch of leftover cupcakes from the school party at their house (I’m crying on the inside), plus they are trying to eat healthier (and then there’s that). Oh my. Maybe the 4-layer cake wasn’t such a great idea after all. Soooo, in order to keep me from eating it for breakfast, lunch, dinner, and snacks, for the next two days, because I also am trying to eat healthy (I know, so boring right), I decided to wrap it up and tuck it back into the freezer for the next time the girlies come over for a sleepover. I’ll have to let you know if it stays good frozen with the frosting on it.
The balloons pictured were a Balloon Arch kit ($7 at the grocery store) that I put together and then wrapped around my hanging dining room light. I had a few of the long bubbly balloons leftover from a previous party (green, red, orange) that I tucked in for a party effect. I would have added more if I’d had them. These kits come with the various sized balloons, and the ribbon (with the holes in it) that is used for holding the balloons in place. I didn’t know how to do this so I spooled up a You Tube video which was very helpful. You basically put all the bigger balloons into the tape, and save the little ones to fill in the spaces afterward, using glue dots, or I used invisible scotch tape. Unfortunately one kit won’t make an arch. Mine only ended up to be about 4 feet long, so I decided to do this with it instead.
And you know what? I was just thinking… (yes, that’s what that awful noise was) …as far as freezing cakes go, if you are an empty-nester and only cooking for two now-a-days… if it is true that naked cake keeps for up to 3 months in the freezer wrapped up correctly, why not bake a couple of cakes and freeze them for those nights when you want dessert, but don’t want to go to a lot of fuss. Cut each cooled round into 4 pieces, wrapping and freezing as described above, then tuck the wrapped pieces into a gallon size zip-loc freezer bag and press all of the air that you can out of the bag. Finally, mark the outside of the bag with the expiration date (so you’ll know it’s still good when you find it 2 months from now and have long forgotten that you did this). Also make up a batch or two of frosting and portion it out into little snack size cups (with lids). Make sure to fill the cups completely so that the lid smashes down on the frosting when snapped on, so there is no air space. Place those cups in a zip-loc bag and into the freezer also, next to the cake. The next time you and hubs are craving something sweet after supper, all you have to do is pull out a piece of cake from the freezer, and a frosting cup, let them thaw on the countertop together. Maybe you’d rather whip up a small batch of ganache instead of the frosting? Cut the cake in half, pop it into the microwave for 30 seconds (if you want it warm), and slather each with thawed frosting or warm ganache. Can be served with a scoop of ice cream (cinnamon, if you can find it), a squirt of canned whipped cream, and a dusting of cinnamon on top, if desired. And there you go… Tiagos (almost) in an instant. Make some coffee to go with your cake and curl up in front of a good movie or go outside and sit by the firepit and enjoy a cool fall evening together.
“For I know that my Redeemer lives, and He shall stand at last on the earth; and after my skin is cast off, this I know, that in my flesh I shall see God. Whom I shall see for myself, and my eyes shall behold, and not another. How my heart yearns within me!” Job 19:25-27
He is risen, risen indeed! And before He departed He raised His hands and blessed His apostles and all those who were with them, and gave them (and us) a GREAT COMMISSION…
“Go therefore and make disciples of all the nations, baptizing them in the name of the Father and of the Son and of the Holy Spirit, teaching them to observe all things that I have commanded you; and lo, I am with you always, even to the end of the age. Amen.” Matthew 28:17
“Go into all the world and preach the gospel to every creature. He who believes and is baptized will be saved…” Mark 16:15-16
This is the theme I felt compelled to share with my grandchildren this year.
Easter Sunday Morning I made our sort-of traditional dinner (Lamb Chops, Ritz Chicken casserole, Asparagus and Brussels Sprouts in Hollandaise Sauce with bacon and toasted slivered almonds, Sweet Pea salad, Hot Cross Buns, Garlic Butter Smash Potatoes – loaded with onions, cheese, bacon, and sour cream, and for dessert…a Strawberry Cobbler). I had the hot dishes warming in the oven when family arrived, so that the kids could do the Egg Hunt part of it all right away, because I knew they were really excited about it, and then we sat down to dinner to satisfy our hungry bellies before we continued with the rest of the fun.
Oh my goodness, I could hardly wait for them to arrive that morning. I had spent weeks preparing for this moment. I was nervous though too, hoping it would all work out as planned.
When I heard the car doors closing out front, I ran to greet them at the door, and welcomed all their super-tight, I’ve-missed-you-sooooo-much grandma hugs and kisses. “Are you ready for some fun?” I asked. Oh yes, for sure, they seemed just as excited as I was. So, I led them through the house to where I had their plastic buckets waiting for them by the back door. As we arrived there I pointed to my wall hanging and asked them if they liked my pretty “CHURCH.” I wanted to make sure they saw it. I think they liked it, but honestly they were so distracted with hunting for eggs I was slightly worried that they were going to miss an important clue. Oh well. I supposed that if I had to help trigger their memory later that would be fine. We stepped outside the door to gasps and squeals as they caught glimpses of all the colorful eggs strewn to kingdom come all over the lawn. There in front of them was the lawn sign that said, “You’ve been egged…”
We read the sign together and then the girls, pausing for permission, got the green flag to GO! Like racecars lined up at the starting line, engines revving, grandma waved them off and there they went as quickly as their little legs would carry them. One girl ran right, the other ran left, like two little humming birds buzzing around, literally just blurs against the green lawn. I had to put my camera into “sports” mode so the pictures wouldn’t all be just a blur. I barely got a handful of shots before the eggs were completely gathered. Lol! The girls sat down in the lawn and dumped out their buckets wanting to see what was inside all the eggs.
But at this point we pushed the pause button on the hunt so we could partake of our feast. All our tummies were growling. The girls left their buckets and eggs lie, and we all washed up. I swiftly set our hot dishes on the table and asked Jo to set out napkins and silverware for everyone. We all sat down, bowed our heads, and thanked our precious Jesus for giving His life for us, and for blessing our fellowship this beautiful day.
The next part of the fun was to open all the eggs and see what was inside. The eggs were filled with candy mints (Testamints), Resurrection buttons, and paper items.
I instructed the girls to set their candy aside and put all their paper items back in their buckets. They pinned all their Resurrection buttons onto their shirts. Jo was the winner of the empty egg. I asked them if they had found a paper heart with their name on it. Yes, they both had. Perfect! These hearts had scriptures written on the other side – Proverbs 23:26/Matthew 22:37-38 /Romans 10:9. Their dad pulled the scriptures up on his cell phone Bible app and the girls read them out loud together.
“My [daughter], give me yourheart, and let your eyes observe my ways.” Proverbs 23:26
“You shall love the Lord your God with all yourheart, with all your soul, and with all your mind. This is the first and great commandment.” Matthew 22:37, 38
“If you confess with your mouth the Lord Jesus and believe in yourheart that God has raised Him from the dead you will be saved.” Romans 10:9
Will you give your hearts to Jesus, your whole hearts, I asked? Then I handed them a note. On the back was a clue where to look for Jesus.
The girls tore off in that direction, with granny hot on their heels. Lol, no, I was nowhere near their heels. I was miles behind them panting and yelling for them to wait for me as I hobbled at top granny speed. Ha! I could hear them screaming in the distance, “We found Him! We found Him! We found Jesus! I got there just in time to snap a photo of them reading the note from Jesus’ right hand. It said: Read John 21:12-17/Matthew 25:31-40 …
“Jesus said to them, “Come and eat breakfast.” Yet none of the disciples dared ask Him, “Who are You?”—knowing that it was the Lord. Jesus then came and took the bread and gave it to them, and likewise the fish. This is now the third time Jesus showed Himself to His disciples after He was raised from the dead. So when they had eaten breakfast, Jesus said to Simon Peter, “Simon, son of Jonah, do you love Me more than these?” He said to Him, “Yes, Lord; You know that love You.” He said to him, “Feed My lambs.” He said to him again a second time, “Simon, son of Jonah, do you love Me?” He said to Him, “Yes, Lord; You know that I love You.” He said to him, “Tend My sheep.” He said to him the third time, “Simon, son of Jonah, do you love Me?” Peter was grieved because He said to him the third time, “Do you love Me?” And he said to Him, “Lord, You know all things; You know that I love You.” Jesus said to him, “Feed My sheep.” John 21:12-17
I asked the girls, “Do you know what Jesus meant by “feed my sheep?” Who are Jesus’ sheep? And what do we feed them?
“When the Son of Man comes in His glory, and all the holy angels with Him, then He will sit on the throne of His glory. All the nations will be gathered before Him, and He will separate them one from another, as a shepherd divides his sheep from the goats. And He will set the sheep on His right hand, but the goats on the left. Then the King will say to those on His right hand, ‘Come, you blessed of My Father, inherit the kingdom prepared for you from the foundation of the world: for I was hungry and you gave Me food; I was thirsty and you gave Me drink; I was a stranger and you took Me in; I was naked and you clothed Me; I was sick and you visited Me; I was in prison and you came to Me.’
“Then the righteous will answer Him, saying, ‘Lord, when did we see You hungry and feed You, or thirsty and give You drink? When did we see You a stranger and take You in, or naked and clothe You? Or when did we see You sick, or in prison, and come to You?’ And the King will answer and say to them, ‘Assuredly, I say to you, inasmuch as you did it to one of the least of these My brethren, you did it to Me.’” Matthew 25:31-40
… and then the note said to “Go and look for the “least of these,” the lost people, who are everywhere, and bring them to Jesus, and give them what they need. Then open the note in Jesus’ left hand.
So the girls began looking around for the lost people (the paper people) and finally spotted one pinned to the backside of a tree. They found them all pinned to the backsides of the trees, lots of trees, hiding basically behind every tree. Some high, some low. The girls kept looking and finding…Red people, white people, brown people, black people, yellow people. And all of the people had needs written on them. The girls brought them all to the feet of Jesus and laid them out, and then began going through the paper items in their buckets to see if they had the things the paper people needed. They helped each other meet the needs until all the food and clothes, etc. had been given away.
Then the girls opened the note in Jesus left hand. It instructed them to take the people to church. To my delight the girls remembered exactly where the church was. They grabbed up all the paper people and took them to church, with all of us (parents and grandparents) gasping for air and trailing along after. We brought Jesus with us and left him just outside the back door. When the girls arrived at the church there was a bag of jewels beside it, with a note on it that said to read James 1:12.
“Blessed is the man who endures temptation; for when he has been approved, he will receive the crown of life which the Lord has promised to those who love Him.” James 1:12
I told the girls that each one could take one jewel (from the bag of jewels) for each person they brought to Jesus, helped, and brought to church. So they counted out their jewels, and as they did I got out crowns for them and let them pick which color they wanted, and told them to use the jewels to decorate their crowns. So they sat down at the coffee table and stuck their jewels to their crowns while I read 1 Corinthians 3:11-15.
“For no other foundation can anyone lay than that which is laid, which is Jesus Christ. Now if anyone builds on this foundation with gold, silver, precious stones, wood, hay, straw, each one’s work will become clear; for the Day will declare it, because it will be revealed by fire; and the fire will test each one’s work, of what sort it is. If anyone’s work which he has built on it endures, he will receive a reward. If anyone’s work is burned, he will suffer loss; but he himself will be saved, yet so as through fire.” 1 Corinthians 3:11-15
We talked about how the only works that will survive the fire are the ones we did out of love (1 Corinthians 12:1-4) and true love comes only from Jesus. “Greater love has no man than this, that He lay down His life for his friends.” It is the love of Jesus in us that compels us to do His good works and we should always listen to that still small voice that lays things on our hearts to do. Remember the story of the Good Samaritan? How the religious people were on their way to do religious things, but passed on by the person in front of them who had a need. Only one person helped that person – the good Samaritan.
When the girls were finished, I took a picture of the two of them wearing their beautiful crowns and then asked them to read the scripture written on the inside of the crowns, and to do what it says.
“the twenty-four elders fall down before Him who sits on the throne and worship Him who lives forever and ever, and cast their crowns before the throne, saying: “You are worthy, O Lord, To receive glory and honor and power; For You created all things, And by Your will they exist and were created.” Revelation 4:10-11
They took their crowns outside and tossed them at the feet of Jesus. Then I told them about there being one last note on the back of Jesus. They opened this note. It said, “I’ve seen your good works. Behold, your reward is under your bed!”
Now, if I was a truly Godly old woman it would have ended there, but I’m ornery, and didn’t want the fun to end. So, when they went to go get their rewards they found only empty boxes with a note taped to each that said, “Oooops, I lied, you might try looking [in another spot] for your reward.” I heard the littlest one say, “Graaaammmaaaaw!” as they stood to their feet and headed to that other location, and there they both again found another empty box and another note attached to it that said, “Oooops, I lied…” Those notes mercifully led them to the right spots, and soon they appeared with their Easter Baskets in hand, excited to tear into them and see what they got.
Grandpa had gotten them a huge egg with Easter crafts inside. I had gotten them each a game – one an Easter finger puppet game and the other an Easter Match-it game. There were a couple of other goodies too. Another little note in the bottom of their bags said, “Happy Easter darling! It gave them a list of more things they could do now that their hunt was over:
Go “egg” someone’s house
Do their Easter crafts
Play the Match-it game with sister
Put on an Easter Finger-Puppet play for the grown-ups
Play the Jesus Ring-toss game outside (it’s what I had used as our JESUS for the hunt)
Watch a movie*
Eat dessert
*Our choices of movies were: The Chosen season 1 (DVD), Risen (Pure Flix), Drive Thru History 3-episode Easter Special (TBN/dvr), The History of Easter (TBN/dvr).
The girls did their crafts, put on their finger-puppet play, had several competitions of Jesus ring-toss, and played Match-it while I got dessert together. We all ate dessert and then watched Risen. Welllllllllll, the girls actually only watched part of Risen, and then one fell asleep, and the other disappeared to the mancave where the men were watching something else waaaaaaay more entertaining. Probably Dude Perfect or something. At one point I do think they meandered to their bedroom to watch the animated movie, Lion of Judah – The Lamb That Saved The World.
I took a dish of our cobbler over to my elderly neighbors, and when I got back my son-in-law was saying his goodbye’s. He had to get up early for work the next morning so he bid farewell and made his exit . I drove my daughter and grandchildren home a couple hours later, after we had watched The History of Easter on the TV. It was the best day! The girls said it was their favorite Easter ever, buuuuuuttttt they say that every year. I’m so blessed to have them. What great, and grateful kids they are. Easy to love and easy to spoil.
If our Easter celebration sounds like something you’d like to do with your kiddos next year, here are some of my helps:
Preparations
• About 3 weeks before Easter, after I had worked out what I was going to do, I placed an order with Oriental Trading Company. They ship quickly, but it’s nice to have things well in advance.
• I already had a bunch of plastic Easter eggs that I keep in a plastic tub and use from year to year, but if you don’t have any, you’ll need to purchase those – about 40 per child, various sizes and colors. And if you want to fill yours with goodies (other than mints and buttons), go grab that stuff as well.
• Make Paper people: Need construction paper, 2 sheets each of red, yellow, black, brown, & white. I folded my various colored construction papers, accordion style, and then cut paper doll shapes out of them (see diagram below). On each person I wrote a need (shirt, shoes, pants, dress, Bible, medicine, food, etc.). Save these “least-of-these people” to hide near the area where you place the Jesus ring-toss figure.
• Make paper items: Need various colors of construction paper. Cut out the shapes of one heart for each child, shirts, dresses, pants, medicine, food, etc. and also include the tiny Bibles. You’ll need enough paper items for each paper doll (see diagram above) to have one item. On each heart write a child’s name so that if one kid finds both hearts they can give it to the one that it belongs to. Write the scriptures on the back of each heart.
• Put Jesus together. I used packing tape to hold the footings of the Jesus ring-toss figure in place. I clipped a clothespin to Him to hold the hearts that the girls gave Him. I taped the notes, in envelopes, to His right and left hand, and His backside.
• I hung my church wall cling near my back door, where our Easter Egg Hunt would begin. I placed the kids’ Easter buckets in front of the “church” so they would take notice of it.
• Beside the church I placed a bag of jewels. On the bag of jewels I put a note that read (take your pick) 2 Timothy 4:8; Revelation 2:10 & 3:11; James 1:12; and 1 Peter 5:4.
• Write “Revelation 4:4, 10-11 on the inside of each crown.
• Put up the “You’ve Been Egged” yard sign just outside the back door (or wherever you plan to hide your eggs). Remember to leave one egg empty. You can have a special prize for the kid who gets the empty egg. And, you can decide later if you want to “Egg” somebody else’s house. If you decide to, have the kids fill 11 of 12 eggs with little prizes (buttons, mints, or anything you choose – in fact, you could even decide to bless someone (in the spirit of all we’ve learned today) by stuffing the eggs with money and “egging” a house where you know the people and children are very poor, and provide them little trinkets to put in the eggs to keep the game going.
• Fill the eggs. Fill with all the paper items first, and then with the buttons and the mints, and if you have more eggs, fill them with whatever other items you would like (candy, small toys, coins, etc.). Remember to leave one egg empty.
• Put together the final prize baskets (my daughter doesn’t like her girls to have too much candy, and since it is for their health I try to behave myself as grandma, which is really really hard, but I understand so I try to honor her wishes. Grandpa and I fill the prize baskets with toys and minimal sweet things. A chocolate cross and a package of peeps is about all I am able to get away with. Grandpa tucks in a few toys and I try to find a small game or two that I think they will enjoy.
I pray you have a happy Resurrection celebration with your family and are able to make use of my plans. May we all be watching for the LORD to return and busy about the Lord’s business until that day, especially in these dark LAST DAYS!!!! God bless you my friends.
Ms Treva, since this was totally your idea and I had never heard of such a thing, I wanted to share with you how it all turned out. Please bask in all your craftsmanship my dear friend…
I am a big fan of Saint Patrick’s Day. I suppose it could be the corned beef and cabbage simmering in the crock pot and the family gathered around the table to share in its deliciousness, or the multitude of Irish blessings being passed around and spoken in a make-believe Irish accent all day, of course. Maybe it’s the promise of spring just starting to round that corner from the long cold winter, or the warm, lavish rains that promise to bring forth life in the plants and trees. It might be the colorful rainbows and puffy white clouds that decorate the blue skies above. Perhaps its the hope that I’ll finally find a 4-leaf clover in spite of my life-long futile search (I’m convinced they don’t exist), but I love that our lawns are begining to turn green again and I don’t care if it’s mostly clover and weeds so long as it’s green! And what can be more visually appealing than the beautiful wildflowers that clothe the meadows as chirping birds and mischievous squirrels hail that it’s time to reset our clocks (gosh what a stupid practice – I’m so bloody tired).
So, my Bestie and I were chatting by phone a few days ago and she suggested a fun something to do with the grandkids this Saint Patrick’s Day —– Leprechan Traps. Have you heard of them? I never had. She told me all about them and I decided it would be a fun, not a lot of hassle, way to bring some fun to the holiday and pass the hours bonding with my two favorite people out in the beautiful sunshine.
First we goobled some dinner…
…And then the girls and I sat down to make our Leprechaun traps. We used some old shoe boxes I found out in my garage, plus some construction paper, glitter paint, and wooden kabob skewers. We sure could have made them a whole LOT cuter, but we were in a bit of a hurry, anxious to hopefully catch one of these little creatures. So once the girls had hastily constructed two traps each, we were ready to go find some good places in the yard to set them up, hopefully some places with clusters of lush, green clover.
We hoped to make up for our lack of decorating panache by dusting the grass and shamrocks with lots of glitter, as Leprechauns are attracted to things that sparkle (so I am told). The girls decided they would fill their empty glitter tubes with water and leave them under the traps to draw the Leprechaun’s attention. We tried to be very quiet and sneaky in case the Leprechauns were watching us and listening.
Since a watched trap never catches anything we went back in the house and granny Googled to see if anyone had ever gotten a picture of a Leprechaun, so we could see what they looked like. Alas, we were pleasantly surprised to find someone had. They sure must have been sneaky, and had a really really nice camera with a big telephoto lens to catch this little guy taking a siesta on a tree branch. Isn’t he cute? How lucky for us to get to see what one looks like!
To pass the time we decided to watch a movie and give the leprechauns some time to be lured to our traps. About halfway through the movie we checked outside the window and found one of our traps had been sprung (thanks to grandpa who was secretly in on the charade ;)). Oh how exciting!!! The girls and I could barely get outside fast enough, and when we did we found all four of our traps were sprung. We were a little bit nervous at first to lift the boxes, sure that one of the little guys would dash out and maybe kick us or try to bite us as they ran away. But we mustered some bravado and carefully lifted each box (in retrospect a person standing back with a fishing net would have been good for effect) hoping to have caught a leprechaun, but darnit, not a one. Shucky darns!!!
But, to our utter delight, our sweet little guy must have appreciated the clover in our yard, or the glitter we sprinkled all over, or perhaps felt sorry for us for our shabby looking traps, because there were little presents under each box. The leprechauns must have left them. Each had a small black kettle filled with either gold nuggets gum, or gold foil covered chocolate coins. We gathered up all the little gifts and as we were walking back to the house, we spotted a big black kettle by the well house with even more little surprises inside. The girls squealed! How awesome was this? Our sweet little leprechaun had left the girls some fun little craft projects to do, along with some hair ties, and candy necklaces. He must have liked their giggles as he spied us setting those traps.
We spent the rest of the day doing our little crafts, eating second helpings of dinner, making an Irish whiskey cake with whipped cream and sliced strawberries on top, using the freshly picked strawberries we picked the day before from a farm outside of Poteet. It was all very delicious.
Gosh, what a fun Saint Patrick’s Day! Who knew you could catch leprechauns in south Texas?
Of course, everybody knows there’s no such thing as leprechauns, right?
* * *
“But have nothing to do with worldly fables fit only for old women. On the other hand, discipline yourself toward godliness.” 1 Timothy 4:7
Whether you are looking for a fun dinner party for Mardi Gras, or just LOVE hot and spicy Cajun food in the middle of the winter, these recipes will have you smacking your lips for more. This is a collection of my most favorite Cajun recipes. Good luck choosing which dishes to make first. If you are like me, you’ll want to just celebrate NOLA for the whole month of February with a different Cajun dinner each weekend!
This was one of my favorite meals I did with my family one year for my dad’s birthday, and also on another occasion with my cooking club friends. It’s a ton of fun! Be careful though, it’s a little bit of a choke-fest if you do the crab boil indoors. Plan to have some sort of good ventilation, or else cook that dish outdoors.
One the Menu:
SHRIMP & CRAB BOIL
SAUSAGE & CHICKEN GUMBO
BANANAS FOSTER
SHRIMP ETOUFFEE
If you buy an Etouffee mix and add shrimp or crawfish to it, you’ll end up with something that resembles brown gravy over rice with crawfish in it. It has a good flavor, but nothing beats homemade! I like mine on the spicy side, so I am fairly generous with the cayenne! The trick to getting just the right spice is to add some in the beginning, some during cooking, and some at the end.
2 lb Good Quality Shrimp, Peeled and Deveined (Use the shells to make a shrimp stock – recipe below)
2 Tbsp Creole Seasoning Make your own: 2 Tbsp Paprika, 1 Tbsp Cayenne powder, 2 Tbsp garlic powder, 1 Tbsp onion powder, 1 Tbsp freshly ground black pepper, 1 Tbsp kosher salt, 1 tsp packed brown sugar, 1 tsp each freeze-dried chive, thyme, oregano, and cilantro. Whirl in a coffee grinder or Bullet until blended and a fine powder. Store in a tightly sealed container. Use within 1 year.
4 Tbsp Butter
½ Cup Onion, Chopped
¼ Cup Celery, Chopped
¼ Cup Bell Pepper, Chopped
¼ Cup Flour
1 ½ Cups Shrimp Stock
¾ Cup fresh Tomatoes, diced
2 Tbsp minced Garlic
I bundle of Fresh Thyme
2 tsp Worcestershire Sauce
1 tsp Hot Sauce (Crystal or Louisiana Gold)
Also: salt, black pepper, and cayenne to taste
½ Cup Green Onions, thinly sliced
3 Tbsp minced Italian Parsley
3 Tbsp Unsalted Butter
Rice (I like Comet Long Grain Rice, prepared as directed on the package)
Place shrimp in a Ziploc bag. Season with 1 Tbsp of the Creole Seasoning and shake to coat on all sides. Store in refrigerator until later.
Make the shrimp stock now, recipe follows. Cook the rice. I usually cook mine and then set it off the burner without lifting the lid and let it rest for a while (maybe 20 to 30 minutes) to let it dry out a little. These three things can be done the day before and stored in the fridge.
Melt the butter in a large skillet; add the onions, celery, and bell pepper. Sauté until translucent. Whisk in the flour to make a blonde roux, stirring constantly, about 3-5 minutes. Stir in the remaining 1 Tbsp Creole Seasoning.
Add a small amount of the shrimp stock, stir well to form a paste, add the remaining stock gradually, whisking constantly. Bring to a boil, then reduce to a simmer. You may need a little more stock, but the end result should be the consistency of a gravy, not too thick, not too thin.
Add the tomatoes, garlic, thyme, Worcestershire, and hot sauce, salt to taste (yes, taste it), black pepper, and cayenne. Simmer for 20-30 minutes.
Add the seasoned shrimp that’s been holding in the fridge, green onions, and parsley, simmer for 10 minutes more or until the shrimp are cooked through. Stir in the 3 Tbsp butter, and adjust the seasonings to taste.
Serve over hot cooked Rice. If the rice was prepared the day before it can be reheated in the microwave for a minute or two. Serves 4 as an appetizer or 2 as a main dish.
Shrimp Stock Recipe
The Shells and tails from 2 lb. of Shrimp
½ Cup chopped Onion
¼ Cup chopped Celery
2 Garlic Cloves
1 Lemon sliced
2 Fresh Bay Leaves
3 Sprigs Fresh Thyme
1 tsp. Black Peppercorns
Add all ingredients to a 2 qt. saucepan. Cover this with cold water, it should be about 6-8 Cups. You’ll need 1 ½ Cups for the Etouffee. Bring almost to a boil, reduce the heat to a low simmer. Simmer for about 45 minutes to an hour. Strain.
Tip: When adding fresh Thyme to a simmered dish like this, I always bundle the Thyme tightly with butchers twine. The leaves will remove themselves while cooking, and you will get all of the flavor from the stems. When ready to serve just remove the bundle of stems along with your bay leaves.
CAJUN SEAFOOD GUMBO (or Chicken and Sausage Gumbo)
Ingredients
12 ounces fresh or frozen peeled and deveined shrimp (or 2 chicken breasts)
6 ounces fresh or frozen crabmeat (or Andouille sausage)
1/3 cup all-purpose flour
¼ cup cooking oil
½ cup chopped onion
½ cup chopped red sweet pepper
½ cup chopped green sweet pepper, &/or 2 jalapenos
4 cloves garlic, minced
¼ teaspoon salt
¼ teaspoon black pepper
½ teaspoon ground red pepper, more to taste
3 cups chicken broth, heated
1 14-1/2-ounce can tomatoes, cut up
1-1/2 cups sliced okra or one 10-ounce package frozen cut okra
2 bay leaves
3 cups hot cooked rice
Directions:
1. Thaw shrimp and crab, if frozen (or cut chicken into bite-size pieces and brown in butter in a frying pan).
For roux, in a large heavy saucepan or Dutch oven combine flour and oil until smooth. Cook over medium-high heat for 5 minutes, stirring constantly. Reduce heat to medium. Cook and stir about 10 minutes more or until roux is light peanut-butter-brown.
2. Stir in onion, red sweet pepper, green sweet pepper, garlic, salt, black pepper, and ground red pepper. Cook over medium heat for 3 to 5 minutes or until vegetables are just crisp-tender, stirring often.
3. Gradually stir in hot chicken broth. Stir in undrained tomatoes, okra, and bay leaves. Bring to boiling. Reduce heat and simmer, covered, for 30 minutes.
4. Stir in shrimp, and crabmeat (or andouille). Simmer, covered, about 5 minutes more or until shrimp turn opaque and oysters curl around the edges. Discard bay leaves. Serve in bowls with rice. Makes 6 servings. For extra heat add Creole seasoning, cayenne, or Louisiana Hot Sauce.
JAMBALAYA
I like the boxed Zatarains mix, and usually add leftover cooked chicken, andouille sausage, and shrimp (or crawfish) to it. Easy-peasy!
CRAB BOIL
1 box Zatarains Crab Boil
1 whole Dungeness crab, or 1 pound king or snow crab legs
1 pound crawfish
2 pounds shrimp (whole, or shell on)
1 bag small red or fingerling potatoes
1 pound Andouille sausage
4 cobs of corn on the cob, broken into 2 inch pieces
Cajun seasoning (like Slap Yo Mama)
Garlic butter (3 cloves of garlic, smashed and minced, and added to 3 sticks melted butter)
Instructions
Using either a large soup pot with a lid or electric turkey fryer, fill with 3 quarts water. Bring to boil and add salt, plus 1 bag of Zatarain’s Crab Boil (if doing this indoors you will want all the windows and doors open because of the fumes – best done outdoors), 1 lemon quartered, and cayenne pepper to taste. Place the basket inside your fryer. If you are using a soup pot you will just have to pour the liquid out at the end and catch your pot contents with the lid or in a colander. Drop in crab and boil vigorously for 5 minutes (unless you are using precooked frozen, in which case you will add it with the shrimp at the end). Add potatoes and broken cobs of corn to the pot and boil vigorously for 10 minutes. Add the crawfish, chunks of andouille, and shrimp. Boil for 2 minutes. Remove from heat and allow seafood to remain in water for 5 minutes after boiling.
Lift contents from water or drain water off (save, strain, and freeze for use in other dishes). Drizzle seafood with melted butter and sprinkle with Cajun seasoning. Toss to coat. Cover your table with a plastic tablecloth; lay a beach towel or two over that and then lay butcher paper over the whole top. Dump the pot contents out on the butcher paper, in the center of the table. Place lemon wedges and extra cups of garlic butter around. Let everyone help themselves, eating with their fingers. You will want to have plenty of paper towels nearby and possibly bibs. Be sure to have some crab crackers and forks available too.
Photo by Sarah Gaitan
.
Sandwiches (for a luncheon):
Poor Boy(<<< click the link for a great recipe, and little story about how the Poor Boy originated)
Shrimp Po’ Boy(<<< click this link for a killer recipe for this sandwich)
.
Muffaletta
I got super lucky one day and found little bundles in my grocery store’s (HEB) lunchmeat counter of the three meats for this sandwich. The packages were nestled in among the shredded cheeses, near the Lunchables section. The bundles contained the three meats grouped on top of each other and laid on parchment paper, and then stacked on top of each other, enough for four sandwiches. I bought two packages feeling very lucky, because it is impossible to find mortadella or cappicola in my town. And to my chagrin I’ve never seen them again. My HEB carries foccacia, but doesn’t carry the bread boules or the Olive Salad, so I’m sure the meat was a mistake purchase, but Walmart carries the Olive salad, and often has bread boules, the clam chowder size ones.
So, this is a link to Emeril’s recipe (simple) for the sandwich. And this is another little bit more involved recipe I found in a recent search.
Beverages:
COFFEE AU LAIT
6 rounded tablespoons dark roast New Orleans coffee with chicory (Café Du Monde or Community Coffee)
6 cups water
6 cups milk
Brew your coffee in a drip coffeemaker and serve with half coffee and half scalded (not steamed!) milk.
Scald, do NOT boil, the milk. Pour coffee into warmed large mugs, then add the milk. If you like yours sweet, add two teaspoons of sugar to the cup. YIELD: 12 cups
Iced Tea
Make a gallon of sun tea using a family size tea bag (black and orange pekoe tea) and fresh, filtered, cool water. Set your glass container in the sun and let it brew until a rich brown color, about an hour or so on a hot summer day. Remove tea bag and chill in the refrigerator. I am a big fan of the cold brew tea bags! Just fill your container, add tea bags, and put in fridge. It brews in no time, is never cloudy, and tastes pretty darn close to the sun brewed.
In the south they love their tea sweet. It is easy to serve both sweet and unsweet by making a simple syrup that will dissolve quickly in iced liquids. You can make a quart of simple syrup by dissolving 5-6 cups of sugar in 3 cups of cold water in a saucepan over medium-high heat. Once it’s dissolved and clear, cool and pour into a bottle with a lid. Store in the refrigerator – writing the date that you made it on the jar. If you notice it starts to turn cloudy or get moldy, toss it and make some fresh. Use for sweetening tea, coffee and cocktails. If you’re not going to use it right away, dilute it with 6 more cups of water and fill your hummingbird feeders.
Abita Amber beer
Cocktails:
SAZERAC
1 teaspoon of simple syrup (see recipe above) 3 – 4 dashes Peychaud’s bitters 2 ounces rye whiskey (most New Orleans bars use Old Overholt) ¼ teaspoon Herbsaint, a New Orleans brand of anise liqueur (You may use Pernod, or some other pastis or absinthe substitute) Strip of lemon peel
The traditional method: Pack a 3-1/2 ounce old-fashioned glass with ice. In a cocktail shaker, moisten a sugar cube with just enough water to saturate it, then crush. Blend with the whiskey and bitters. Add a few cubes of ice and stir to chill. Discard the ice from the first glass and pour in the Herbsaint. Coat the inside of the entire glass, pouring out the excess. Strain the whiskey into the Herbsaint coated glass. Twist the lemon peel over the glass so that the lemon oil cascades into the drink, then rub the peel over the rim of the glass; do not put the twist in the drink).
HURRICANE(It’s 5 o’clock somewhere!)
1 ounces light rum
1 ounces dark rum (151 proof)
1.5 ounce orange juice
1.5 ounce fresh lime juice (NOT Rose’s or RealLime)
1/3 cup passion fruit juice or 1 tablespoon passion fruit syrup
1 teaspoon superfine sugar
1 teaspoon grenadine
Cherries with stems, and orange slice to garnish
Ice cubes
In a cocktail shaker, mix the rum, passion fruit juice or syrup, the other juices and the sugar until sugar is dissolved. Add the grenadine, and stir to combine, then add ice and shake. Half-fill a hurricane glass with ice, then strain drink into glass; add ice to fill. Garnish with orange slice and cherries.
Option: If you’d like something easier, look at your local liquor mart for packets of Pat O’Brien’s Hurricane Mix and follow directions.
Desserts:
.
COLLEEN’S BANANAS FOSTER
This photo was taken at a cooking club gathering, by the host. We were joking that she was getting evidence photos to explain to her insurance agent how we burned her house down. Ha! This is not entirely the traditional way of making true Bananas Foster, because I am not a huge fan of mushy bananas, plus I like lots of sauce. I’ve made this a few times and this is the way I personally like it best. It’s sooooo easy, but your guests will oooo and ahhhh (or take fear photos) at your flame-boyant cooking panache. You’ll want to make this where your guests can see you.
INGREDIENTS
1 stick butter
2 cups dark brown sugar
2 teaspoons cinnamon
½ cup banana liqueur
½ cup of dark rum
4 bananas, cut in slices (I like mine still with a hint of green & no brown spots)
1 carton vanilla ice cream (1 large scoop per guest)
INSTRUCTIONS
Melt butter in a deep-sided skillet. Add brown sugar and cinnamon, and let cook until sugar is melted and sauce is bubbly. Slowly add banana liquor and gently stir until just warmed. Slowly add dark rum and gently stir until just warmed. Remove pan from heat and ignite with a long-stemmed BBQ lighter. Carefully stir with a long-handled spoon until flames subside. Place pan back on the stove with the burner off. Add the banana slices and gently toss with warm sauce (I don’t like mushy bananas, so that’s why I only add them at the end).
Place ice cream in serving dishes and top with several banana slices from the pan. Spoon warm sauce over ice cream and serve immediately.
.
MISSISSIPPI MUD PIE
Ingredients
1 Oreo cookie pie crust
2 pints coffee ice cream, softened slightly
1/3 cup chocolate fudge topping
1 cup whipped cream
¼ cup slivered almonds, toasted
Directions: Spoon softened ice cream evenly into chilled crust. Drizzle fudge topping over ice cream then return pie to freezer for at least 1 hour. When ready to serve, decorate with whipped cream and sprinkle with almonds. Makes one 9-inch pie.
.
BEIGNETS
These are heavenly little donuts that go spectacularly with Coffee au lait. I recommend the cooking class recipe offered at Southern Living . My HEB carries the box mixes.
.
.
KING CAKE
A King Cake is basically the same recipe as a giant cinnamon roll made into a “crown” shape (Monkey Bread in a Bundt pan would work fine), and the icing is covered in purple, yellow, and green colored sugar, and heaped on top. It is sometimes decorated with glitter sprinkles, mardi gras beads, or masks. Also, a tiny plastic baby is hidden in the dough before the cake is baked. When the cake is served at a Mardi Gras party, the guest who ends up with the baby in their serving must host the next soiree!
.
~ DURING & AFTER DINNER ENTERTAINMENT ~
Background Music: Zydeco Stomp CD, or a New Orleans Jazz CD, some Hank Williams Jr., or a good Harry Connick Jr. album.
Play a game: Gambling is a big thing in New Orleans on the river boats. Decorate a room of your house to look like a Riverboat. Play card, dice, and domino games, or the game Wits & Wagers. Another game with a NOLA theme is Party Gras (which is a game played all night during other activities using Mardi gras beads – similar to the clothes pin game played at baby showers).
Watch a movie: Mark Twain – A Film Directed by Ken Burns (2002) would be a good choice for documentary watchers. Streetcar named Desire (an oldie). The Frog Prince (for families with kids). Double Jeopardy with Ashley Judd, is set partially in New Orleans. Ghost Rider, with Nicholas Cage.
You could also use this meal as a great starter for a video Bible study (the one I am thinking of is Breaking Free, by Beth Moore, as it was filmed entirely on location in New Orleans, both the original and the revised versions, and is an excellent small-group Bible study) to get started in your home with your friends, neighbors, coworkers, etc. After dinner you could play the introductory video, pass out the workbooks, and get it started.
~ A Reluctant Hostess’s Bag of Parlor Tricks for Social Occasions ~
Conversation Starters for the Table
Okay, the day of my party has arrived. The food is cooked. The table is set. My guests are beginning to arrive. I’ve shown each where to stash their coats and purses, and pointed them to the beverage station. I have a few things to finish up in the kitchen, but also want to warmly greet each person who arrives, never-the-less in my flushed and busy chaos I can’t forget what it feels like to be the guest. I’ve been a guest. I know very well the inevitable awkward little spaces of time when introverted people start to sweat a little. I know what it feels like to be out of my comfort zone. If I don’t know the host very well, or any of the other invited guests, it is easy for me to feel a little bit ruffled. I’m not sure where to sit or stand, or who to go and mingle with. I wonder if it would be rude to sit at the table, or okay to hang with the ladies in the kitchen.
Life is so much easier for Sanguines and extroverts. I appreciate having them in my life. I am honestly sooooo much better at coming up with ideas for parties: food, decorations, music, and games, than I am at the social aspects. It’s probably my biggest hurdle to being hospitable. I’m not so much worried about my house being clean enough, or putting on airs with a lot of nice things. It’s the social part that gives me a heart attack. I usually won’t go out on a limb to invite people over unless I know them really well (family), or I have an accomplice who is funny and outgoing, and with a real gift of gab. Without my security blanket I’m pretty much a basket case.
This is where a nice set of Conversation cards really comes in handy for those awkward lulls during dinner when I can’t think of anything to talk about, and God forbid am surrounded also by introverts. They rescue me. Conversation is what draws us all out of our shells and helps us all to get comfortable with each other, and engaged – as long as we’re not put on the spot in front of everybody.
Sometimes, it’s hard to share our most personal thoughts, ideas, and opinions (unless we know where those around us stand), or without a glass of wine to loosen us up first – ha!, so a set of conversation cards can be a good way to get things going. There are a ton of sets out there (Amazon). Food for Talk by Julienne Smith is one of my favorites.
I have found that the best way to get past being uncomfortable and vulnerable in conversations with new people is by practicing treating them the way I want to be treated, and in my limited experience I have found that sometimes when I took that leap of faith and shared my heart with someone, it actually, occasionally landed in safe hands, and it very often was the catalyst to a beautiful friendship.
I have worked pretty hard to be a safe place for other people’s conversations as well. Gossips are not good friends! Experience has taught me, that it is okay to be observant, cautious, and protective. It is like looking both ways before crossing a road. But when it looks as if the coast is clear, I encourage you (and deal a pep talk to myself as well) to try putting just a little of ourselves out there. And in return, also be a “safe place” for other people’s thoughts and dreams and ideas.
Another thing I struggle with is ADD. When my mind is racing with self-conciousness, it is hard to pay attention, but we all appreciate a good listener. Weep with those that weep. Rejoice with those who rejoice.
I will pray for you, and for myself as well, that we learn to relax and just have fun. And I pray that our minds don’t batter us too badly later as we lay in bed replaying every careless word we spoke and every clumsy gesture. Please say I’m not the only one who does this! Well, if I have a witness, at least you know you are not alone.
.
“Be kindly affectioned one to another with brotherly love; in honour preferring one another;
While the rest of my fellow “gringos” are having “Ugly Sweater” parties, Cookie Exchanges, and Gift Wrapping/Mulled-Wine drinking parties for Christmas wouldn’t it be fun to host a TAMALADA just to be different?
I recently tried my hand at making Tamales, and to my delight they turned out, and were actually delicious (thank God), but boy howdy were they a ton of work. Took me ALL DAY! I’m absolutely addicted to tamales at Christmas, but I’m thinking if I ever decide to make them again I will want to make a party out of it, because many hands make light work. So here’s what I’m thinking…
Who to invite? Hmmm, well they’ll need to be reliable guests, who promise to make their dish and show up for the assembly process.
I could send them each a recipe card, after they RSVP and volunteer for a portion of the tamale-making they want to do. The host (which will be me, if I manage to muster the courage to actually do this) will provide snacks, and beverages – I’m thinking some fun drink choices would be Sangria; a Hot-Mexican-Chocolate Bar; Horchata Smoothies; and blended Margaritas. I’ll need to remember to find a good Latino Christmas Album or two or three to play for ambiance during the party, and also dig out an entertaining game to go with the party, that we can play while we’re waiting for the first batch of tamales to come out of the steamers. A couple of my favorites are Mexican Train (dominoes) and Canasta (cards)!
Or, if my family/friends want to bring their Christmas cards, stamps, address labels, and stationery we could get our Christmas cards ready to mail out while we wait for tamales, and we can snack and visit while we write and fold and lick and stamp! Make it kind of a working Tamale party! I can offer this on the invitations, and then discuss it with everybody when they RSVP.
Here’s how I’m thinking we can split up the cooking…
Guests #1, 2, & 3 could each make a 3-lb pork roast (half of the recipe listed below) and shred it, discarding any bone or cartilage, and reserving and bringing the strained pork broth to the party.
Printable Recipe Card
.
Guest #4 could make the Chili sauce up to the point of adding the broth and blending it, and bring the cooked chilies with them to the party.
Printable Recipe Card
.
HOST: could prepare corn husks
.
Guest #5 could make the Masa, up to the point of adding the broth and mixing, and bring it to the party
So, I know from experience that it’s going to take at least 4 hours to make the finishing touches on the meat and masa, then assemble, and steam the tamales. So I’ll plan my party accordingly when filling out the details on the invitation. Maybe I should have it on a Saturday or Sunday afternoon?
Once my guests have RSVP’d and volunteered for the dish they want to make, I’ll send them out the recipe card for their items (shown above, in case you missed them).
Buy whatever groceries and beverages I’ll need and give myself time to prepare them before the party.
Set up a station for the final masa preparation. I will need counter space, a large bowl, a mixer, and a cup of warm water to test the masa in.
Set up a work station for the final preparation of the red sauce. I will need a large sauce pot for the stove, and a blender or food processor. Someone will be making a roux in the sauce pot, and another person will be blending the red sauce (softened chilies and broth from pork). The pork and the red sauce will be added to the roux.
I’ll set up a large table for assembly. Place the ingredients down the center of my table, the husks next to the masa, the masa next to the meat, and finally a cookie sheet at the end to pile the tamales on. I’ll put a person at each ingredient and we’ll pass each tamal along. They’ll go together pretty quick. I will need some clean kitchen towels and possibly a roll of paper towels, also a masa spreader or spatula, a spoon to measure the masa, a spoon to measure the meat, and a large cookie sheet. And afterward some tin foil to wrap the tamales in for sending home or freezing.
Make room in my refrigerator for whatever uncooked tamales, and whatever else needs refrigerated.
Set up the steamer pots (illustrated below). I will need two large canner size pots with lids and a steamer basket for each inside. I will also need two clean kitchen towels and water for those.
Set up a beverage station with various beverages as mentioned earlier. I can set up a hot cocoa bar, I can also set out a large thermos of blended Margaritas, and a pitcher of Sangria. I might also want to set out some iced tea and water and a cooler of ice, and a variety of glasses and mugs.
Set up an appetizer/snack table where guests can nibble as we wait for the tamales to cook. Decide what appetizers I will serve at my party, and have them ready when guests arrive. I will need serving plates, bowls, spoons, etc. I might want to have a pretty tablecloth for this table, and some festive table decorations.
Set up the music that I will have playing in the background of my party.
Set out a couple of game choices (mentioned earlier), so that once the tamales are all assembled, and the table has been cleared, we can start having some fun. Or if we all prefer doing Christmas cards, I will need to *be sure to note this in my party reminder call, so my guests will know to bring their supplies!
Of course I’ll want a clean house, a spotless kitchen, and a tidy bathroom at least. Ugh! Sometimes this keeps me from throwing parties! My house is truly never clean enough. Oh suck it up girl, get to scrubbin’ it’s gonna be fun!!!!!!!!!
A day or two before the party I can send a reminder via Text/eMail/Phonecall, so my guests will know if we’ll be doing Christmas cards during the party, or just playing games and eating. They might need the prodding for the dish they are making too!
Day of the party designate various ASSEMBLY LINE jobs:
Someone to wash all the dirty dishes and clean counters (my least fav job)
Someone to make the roux, and mix the meat with the sauce
Someone to finish making the red sauce
Someone to finish making the masa
Assembly line Husk Person, who will dry and pass the husks
Assembly line Masa Spreader person
Assembly line Meat person, who will also wrap tamales
Tamale tie person, who will tear off strips of husk to tie around tamales and stack them on a cookie sheet
And finally someone to set up and load steamers, and babysit them with water
Full RECIPES
.
Pork for Tamales
2 3-lb pkgs Pork Carnitas or a shoulder roast
1 large onion, chopped
5 cloves garlic, broken in pieces
3 jalapenos, chopped
1 Tbsp salt
Enough water to cover
DO AT HOME: Place pork roast, onion, garlic, and salt in a large pot. Cover with water. Bring to a boil, then reduce heat to simmer over medium heat until pork is very tender, about 3 hours. Remove pork from water and shred. Store in a Ziploc bag and keep in refrigerator for up to a day, until ready to use. Strain liquid and reserve for use in making the red sauce and the masa. Place in sealed jars in refrigerator for up to a day. Skim the fat off the broth and place it in a separate ziploc bag to use for the roux. Bring the pork, broth, and skimmed fat to the party.
DO AT THE PARTY: Once at the party someone will need to make a roux (see recipe below) and then the pulled pork can be combined with the roux and the red sauce.
.
Red Sauce
4 ounces California (or Cascavel) chile pods, seeds and stems removed
4 ounces New Mexico chile pods, seeds and stems removed
1 1/4 cup reserved pork broth
1 1/4 cup water
1 Tbsp salt
3 cloves garlic, broken in pieces
1 heaping teaspoon ground cumin seeds
DO AT HOME: Toast chilies in a hot skillet over medium high heat for 2 to 3 minutes, until fragrant. Rinse chile pods. Fill a large pot with water and bring to a boil. Add rinsed chile pods and cook until chile pods are softened, about 15 minutes. Drain water off chilies and discard the water. Add salt, garlic, and ground cumin. Seal in a plastic bag until ready to blend at the party. This can be done up to a day ahead.
DO AT THE PARTY: Pour chilies, broth, and water into a blender and blend until smooth. Place in large kettle until ready to mix with the pork.
Roux: Someone will need to make a roux using ½ cup lard, reserved from roast, and ½ cup flour. Cook on the stove, stirring continually until peanut butter colored. Toss in the pork and red sauce and mix well. I also like to chop another jalapeno or two to add to the meat. Cover and refrigerate, or if near to being ready to assemble, place on the assembly line.
.
.
Masa
2 pounds Manteca lard, divided
2 teaspoons baking powder, divided
2 tablespoons salt, divided
5 pounds ground masa harina, divided
2 to 3 cups broth reserved from cooked pork roast (or chicken broth), divided
½ bunch Cilantro, finely minced
Small white onion, very finely minced
½ cup Tomatillo Salsa, or Salsa Verde
Reserved pork broth with skimmed fat
DO AT HOME: Place 1 pound of lard in a KitchenAid® Stand Mixer and mix until fluffy, scraping sides so the lard stays in the center of the mixing bowl. (The flat beater is the ideal accessory for mixing.) Add half the baking powder and half the salt to the lard and mix together. Add half the masa harina and mix together. Seal in a ziploc bag in the fridge.
Now do the other half of the same ingredients, and store in the fridge in a ziploc bag for up to a day. Please bring to room temp before bringing to the party.
DO AT THE PARTY: Place one room temperature batch of the masa in a large bowl. Slowly add half the broth, half the onion and cilantro, and half the salsa verde, to and mix until combined. The mixture should be about the consistency of smooth peanut butter. If not, add more broth as necessary. Test the masa by taking a small piece (1/2 teaspoon) and dropping it into a cup of warm water. If it floats it is ready; if it sinks, add a little more lard, beat for another minute and test it again. Repeat this process until the masa floats. Cover and set on the assembly table.
Repeat the process with the remaining batch of masa.
.
Corn Husks
DO AT HOME: Take husks from package and rinse well in the sink, removing any silks or debris. Fill a large stock pot with water and press the clean husks down to submerge them. Bring water to a boil and soak husks in gently boiling water for about 1 hour. You may need to flip the stack occasionally so the top ones get pliable. Drain water from husks but keep husks in the kettle with the lid on.
DO AT THE PARTY: Set warm, soaked husks, in covered pot on the assembly table. Keep a clean kitchen towel nearby to dry the husks just before spreading them with masa, otherwise the masa won’t stick.
.
ASSEMBLY LINE
Place the husks, masa, meat, and cookie sheet down the center of a table, and seat my guests all around it, except the guest who volunteered to do the mountain of dirty dishes. Assembly will start with corn husks being dried off and passed to the masa person next to them, that person will spread it with masa and pass it to the meat person next to them; that person will top it with meat and wrap it and hand it across to the tie person; that person will tear off a little strip from a boiled husk and use it to tie around the tamal and lay on the cookie sheet. Once the cookie sheet is full and heaping, the last person (ME) will pack the tamales vertically in the steamer with the open end up and start them steaming.
SPREADING THE MASA: Place the wide end of the husk on the palm of your hand (or on the flat work surface), narrow end is at the top. Starting at the middle of the husk spread 2 tablespoons of the masa with a spatula or masa spreader in a rectangle shape, using a downward motion towards the wide-bottom edge. Do not spread the masa to the ends; leave about a 2-inch border on the left and right sides of the husk. Pass to the person with the meat (or other) filling. There is too wide of a swath of masa on this husk shown below, and also it’s not quite thick enough. You only need enough masa to wrap around the meat and a little extra to hold the husk closed.
ADDING THE MEAT: Spoon 1 1/2 tablespoons of your chosen filling down the center of the masa. (When I ran out of meat filling and still had masa, I started making Pepper Jack Cheese and Jalapeno filling. Fold both sides of hust to the center over the top of the meat; finish off by bringing the pointed end of the husk toward the filled end. Pass tamale to the person who will tie the tamales closed.
TAMALE TIE PERSON: Make sure each tamal is snuggly closed and will not open during steaming. You can secure by tying a thin strip of corn husk around each tamal. This will keep the tamal from unwrapping during the steaming process, especially if the husk is too thick and will not stay folded. Stack wrapped tamales on a cookie sheet.
HOST: Prepare the steamer pots… (You will also load the steamer pots)
Steamer Pot
This is my tamale steamer. I can only fill water up to the little rack, but not above it, and start it simmering on the stove. The steamer pot needs to be tall enough for our tamales to sit up vertically above the water and still fit the lid on. (If you don’t have a double boiler, you can improvise like I have. All mine is, is a round cooling rack setting on top of a brick, which I’ve washed several times in the dishwasher, or I could also use a small colander placed down into the bottom of my soup kettle and my rack on top. This set up works perfectly. Each steamer will need to have a clean kitchen towel and a lid.
When a cookie sheet of tamales is piled up high, they can be loaded in the steamer…
Fill the top part of the steamer with tamales. Stand the tamales up vertically, open ends up and folded ends at the bottom, and make sure the folded part is either tied up, or held in place with another tamal. Pack the tamales snug enough so that they won’t fall over during cooking, but not so tight that the steam can’t get in around them. In other words, don’t cram and squish them as tight as they will go, but let there be too much space or they will collapse and mush over. If there are not enough tamales to fill the steamer, use canning jars to take up the spaces so the tamales don’t fall over.
Turn heat up on the water until it boils. Cover the tamales with a clean kitchen towel and then the lid of the pot. Turn the heat down to medium so that it stays gently boiling, but not raging boiling. Set timer for 2 hours. Check every 20 to 30 minutes or so to make sure the water is not boiling dry, and add boiling water as necessary. Make sure the tamales are above the water line and that the bottoms are not siting in water at all.
Tamales will need to steam for 2 hours or more. After 2 hours we can test for doneness. Remove one tamale and check if the masa holds together and slips easily off the husk. If so, it is done, if not it needs to steam some more. Check again in 15 minutes when I check the water level.
When a batch of tamales is done they can be eaten right away, or wrapped in foil (1 dozen at a time) and refrigerated or frozen for later.
Divide the wrapped dozens of tamales among the guests. There should be about 1-2 dozen per guest.
You will want to eat some at the party!!!! There are lots of ways to eat tamales. Some like them topped with just a little of the red sauce, which you can make another batch of while the tamales are steaming. I like mine all different ways. Straight out of the steamer and burning my fingers and tongue as I shove them into my mouth, or if I have all the toppings on hand for Tortilla Soup or Carnitas tacos, I like all of those (minus the tortilla strips) on top of my tamales. I also like them with salsa verde, chopped onions, cilantro, and jalapenos, and a little dallop of sour cream (as pictured below). And I also like them loaded up with red sauce, pepper-jack cheese, black olives, corn and black bean salsa, shredded lettuce and pico de gallo. There is just about no wrong way to eat a tamale.
So there you have it. Sound like fun to you? I’m pretty sure all my Mexican friends reading this are laughing at my gringo-ness; all having hosted and attended a hundred Tamaladas, so hopefully one of you will take pity on me and invite me to your next one, to show me how it’s done! My hat’s off to whoever invented tamales, for passing on this wonderful food, and to my friends south of the border for keeping going this fun tradition. Feliz Navidad!
.
“The LORD of hosts will prepare a lavish banquet for all peoples on this mountain; a banquet of aged wine, choice pieces with marrow, and refined, aged wine.” Isaiah 25:6
I did this as a Christmas craft with the students at my granddaughter’s school (pre-K through 8th grade). We had all just recently experienced snow in our town, a RARE and exciting event in south Texas, so this craft commemorated that very memorable event with a little keepsake. I also wrote a poem to go with our keepsake craft, so they could be kept forever in a memory book, if anyone wanted.
.
You might like to do this craft with your kids during the Christmas break from school. Here is an idea of something you could do with the snowflakes (besides just hang them in your tree).
.
“For as the rain comes down, and the snow from heaven, And do not return there, but water the earth, and make it bring forth and bud, that it may give seed to the sower and bread to the eater, So shall My word be that goes forth from My mouth; It shall not return to Me void, but it shall accomplish what I please, and it shall prosper in the thing for which I sent it.”
Originally featured in my book, Come for Supper, the memoirs of a reluctant hostess, this is one of my very favorite meals. Not because it is top shelf gourmet, for in fact it is probably closer to just being sustenance on that scale; mostly made with government commodities, or what can be scavenged in the wild, using few and extremely inexpensive ingredients. Not to say these aren’t all very yummy dishes though, don’t be scared, just probably not cheffy food, if that’s what you were looking for. The beauty of this meal for me is in savoring the foods of another people. Cultural differences can sometimes separate us, but I am enchanted by the brotherhood of the table and the fellowship of food. Eating modest foods also makes me very thankful for the things that I have, and the extravagant meals I have been blessed to enjoy. In a world where some have the luxury of living-to-eat, this is a great reminder that many many people on this planet eat-to-live, and even with the little that they have, are incredibly generous.
I am drawn to and have a deep affection for the American Indians. I think we all do. Most of us played cowboys and Indians when we were kids. Many of our grandparents told tall tales about having native blood in our lineage. It is the raw deal, and unfair treatment of our native people by our government, that gives us (me, at least) a huge mistrust of the federal government. And although they’ve been tucked away, they have never been forgotten. We admire their courage and bravery, so much so that many of our sports teams have been given names like, “Chiefs” “Braves” “Redskins” and “Indians.” Many towns (and counties) in my native state have Indian names: Sundance, Shoshoni, Meeteetse, Ten Sleep, Crowheart, Chugwater, Arapahoe, Wapiti, Cheyenne, Osage, etc. Movies like Dances With Wolves, Son of the Morning, and Windtalkers reinforce the love affair. Even so, how many of us truly know our native brethren? Or, know anything about what their life is like today (myself included)? Most likely the closest we ever come is visiting a local gambling casino, or reading about some misfortune in the newspaper. By bringing us to a table to celebrate some of their best dishes, I hope to change that a little. This is an interesting articlethat I really wanted to save for myself, and share with you, as we consider honoring these interesting people with a Native fall feast for our family and friends.
1 lb Commodity flour (about 3 cups of all-purpose flour)
Powdered milk and water to equal about 2/3 cup liquid
1 Tbsp Vegetable shortening
1 tsp Baking soda
1 tsp Salt
Directions:
Mix all ingredients except powdered milk together. Add milk to other ingredients to form a dough and beat it up. If the dough is too sticky to roll out, add a little more flour. Roll it very thin on a flour dusted cutting surface, cut it into pieces with a pizza cutter, lay the pieces on a parchment lined cookie sheet, prick each piece with a fork, and bake it quickly in a 350 degree oven until toasted golden. Try these crackers the traditional way first, but the next time you make them you might wish to substitute fresh whole milk for the powdered milk, 2 Tbsp butter for the shortening and a splash of olive oil, and perhaps sprinkle the dough with a mixture of seeds, or some parmesan cheese, or some finely chopped italian herbs before cutting and baking. These are also nice served with an assortment of cheeses.
.
THREE SISTERS SOUP (the 3 sisters are beans, corn, and squash)
Ingredients
1 lb beef stew meat
8 cups water
3 spring onions with tops
1 tsp minced garlic
1 can kidney beans and liquid
Half gallon size bag of fresh green beans, sliced (may substitute frozen or canned)
3 ears fresh corn (may substitute frozen or canned)
3 summer squash, cubed
½ tsp oregano (or 3 mint leaves)
2 tsp salt
5 lg squash blossoms
Black Pepper
Directions:
Cook the stew meat in water until tender. Cut corn from cob, chop spring onions, and add all vegetables to water and simmer until tender. Add seasonings, and squash blossoms; simmer 15 minutes. (For vegetarian version omit meat).
This is a mostly authentic recipe, and doesn’t have much flavor, especially if canned vegetables are used, which are most likely. The next time you make it you will want to use beef broth in place of the water, and leftover beef roast, pulled apart. I always prefer fresh vegetables. I also added 1 packet of beef gravy mix and 1 packet of Lipton Onion Soup Mix to my pot. I also added a small can of Rotel Tomatoes, 1 large potato diced, 1 large carrot chopped, a handful of frozen peas, 2 tsp. minced garlic, to the other vegetables, and about a ¼ tsp. of Cayenne powder. Salt and pepper to taste. Delish!
.
WILD GREENS AND FLOWERS SALAD
Serves 4 to 6
Salads were much liked in the spring when new, tender greens appeared. A great variety of mixtures was used. Since salt was uncommon or not used at all, salads were flavored by herbs, oil pressed from seeds, and especially with vinegar made from fermented, evaporated, uncooked maple sap (which we can’t make or get). So this is an approximation of the spring tonic salads beloved by all woodland people after the long winters.
Ingredients
1 cup watercress leaves and (only) tender stems
1 cup lamb’s ears, quarter new leaves (or use small spinach leaves)
1 cup arugula lettuce torn (not cut) to bite-size pieces;
can also use Bibb or less expensive leafy (not iceberg) lettuces
1 cup Dandelion leaves
1/2 cup tender nasturtium and violet leaves torn up
1/2 cup nasturtium and violet flowers (in season)
1 Tbsp honey
1/4 cup cider vinegar
1/3 cup salad oil
As much tender mint leaves as you like in the salad
2 tsp fresh mint chopped fine and bruised
2 tsp chopped tarragon (fresh) or 1 tsp dried if necessary
optional: salt and pepper to taste
Directions:
Combine honey and vinegar, whisk in oil and crushed mint. Season to taste with small amount of salt. Pour over greens and flowers in large bowl, and toss for about 3 minutes to coat everything with dressing. Serve immediately.
If you cannot find the greens and flowers listed, you can use a “spring mix” salad from the produce department and add to that whatever edible flowers and greens that you can find, perhaps look at your local garden center, nursery, or fresh herb store.
.
SQUASH OR PUMPKIN BLOSSOM FRITTERS (Pueblo style)
serves 4 – 6
Ingredients
2 dozen large squash blossoms
(4 dozen of the smaller pumpkin blossoms)
4 eggs
1/2 cup milk
1 tsp chili powder
1 tsp salt
1/4 tsp cumin powder
2 – 3 cups finely ground cornmeal (masa harina)
Oil for deep frying
Directions:
If you’re a gardener or truck farmer, you can make this dish easy; otherwise you’ll need to visit with a farmer at a Farmer’s Market about getting some blossoms. During the growing season farmers thin the blossoms of their vines, because the vine can’t support but only a couple of pumpkins or a few squash. At season’s end there will be an abundance of flowers, as the fruit will not have time to finish before winter.
Rinse and pat blossoms dry. In a shallow bowl, beat eggs with milk, chili, salt, and cumin. Dip blossoms in egg mix, and then roll gentle in cornmeal. Refrigerate for at least 10 minutes to set coating. Heat 2 inches of oil in a deep saucepan to about 375°, hot but not smoking. Fry blossoms a few at a time until golden, drain on paper towels. Keep warm in 250° oven until ready to serve.
Only in the southwest are the blossoms of squash and pumpkin important as a religious symbol, as well as food. They appear as sacred symbols in many Pueblo ceremonies, and gave rise to a popular design worked in silver.
There is a Hopi Squash Kachina (Patung). He is Chief Kachina (wuya) for the Hopi Pumpkin Clan. He runs with men of a village in spring ceremonial dances to attract rain clouds.
The Hopis and Pueblo farmers gather large quantities of squash and pumpkin flowers at the end of the growing season, when these flowers cannot make fruit; that’s the time white farmers harvest their curcurbitae and pull up or plow under the still-flowering vines.
OR, you may like to try this stuffed blossom recipe….
.
STUFFED SQUASH BLOSSOMS
Ingredients
2 doz. squash blossoms
Filling:
8 oz. block cream cheese
1 cup shredded Monterey Jack Cheese
1 Tbsp chopped green onion
Batter:
1½ c. flour
½ tsp salt
¾ to 1 cup dry white wine
cooking oil for frying
Directions:
The authentic way is not to stuff the blossoms, but simply to batter and fry them, or just fry them naked in melted shortening. This is a recipe I stumbled across recently and enjoyed. Pick large squash blossoms in early morning just before they open. (I used my garden zucchini blossoms that had opened already and they turned out okay). Heat 1-2” oil in heavy Dutch oven. Meanwhile, stuff blossoms with a tablespoon of filling. Smooth peddles over filling, and make batter. When oil is ready (pops and crackles when a drop of water is added), drop each blossom into batter, turning to coat evenly, and then immediately into hot oil. Turn while frying to cook evenly on all sides, and remove with a slotted spoon when they have turned golden-brown. Drain on paper towels, and serve hot as an accompaniment for soup. Or, they also make a great appetizer with a spicy marinara sauce to dip them in.
FRYBREAD
This recipe makes 8-10 small ones or 5 big flat ones
Ingredients
2 cups flour
3 tsp baking powder
1 tsp salt
1 cup milk
Deep hot fat in fry pan or fryer
Directions:
Sift dry ingredients. Lightly stir in milk. Add more flour as necessary to make a dough you can handle. Kneed and work the dough on a floured board with floured hands until smooth. Pinch off fist-sized lumps and shape into slightly twisted ropes — everyone has their own characteristic shapes.(Shape affects the taste, by the way because of how it fries). For Indian tacos, shape dough into a rather flat disk shape, with a depression — almost a hole — in the center of both sides. Make it that way if the fry bread is going to have some sauce over it. Smaller, round ones are made to put on a plate. Fry in deep fat (about 375°) until golden and done on both sides, about 5 minutes. Drain on absorbent paper. (My grandmother made what she called, “Squaw Bread” at least once a month when I was growing up. Her’s was made from regular yeast dough. It was one of my favorite things on earth!!!!)
MODERN WOJAPE
Wojape (Wo-zha-pee), a pudding, a dessert. Wojape is traditional to the Sioux and other Northern Plains Nations and predates most of us living now. This is a berry pudding to eat with fry bread. It was made with fresh wild berries collected during that season and also dried berries, preserved for use through the winter. The berries were mixed with sugar when it became available, and also flour for thickener. Today is a different time and Wojape, like many other things, has adapted to the easy access of ingredients. However, it is just as delicious. It can be eaten after a meal as a dessert or as many “out there” know, as a main course maybe with a hot cup of coffee. She calls it modern because of using any kind of frozen berries, “We moderns often use government commodities gallon cans.” This recipe makes enough for about 20-30 people who have 1-2 fry breads.
Many thanks for this recipe go to: Ms. Stacy Winter of Crow Creek, Rapid City, South Dakota.
Ingredients
1 Bag (5 lb) frozen berries (blueberry, raspberry, cherry or a mix)
8 cup Water
2 cup Sugar
Cornstarch or Arrowroot
Directions:
To a 5 quart pot (enamel or stainless steel) add all the berries and smash them with a potato masher. (If you are fortunate enough to have a food processor this would work fine also. However, stop just short of puree, you want fine pieces throughout.) To the smashed berries add the water and sugar. Boil (lightly) this mixture (Approximately 15 to 20 minutes) until everything is cooked. Thicken to desired thickness with cornstarch that has been dissolved in cold water. Serve warm and eat with Indian Fry Bread. Dip the bread into the Wojape and eat in this manner.
Wojape is also outstanding on French Toast, Pancakes, plain Cheesecake, over ice cream, and is excellent served over Angel Food Cake with a dallop of whipped cream.
INDIAN FRYBREAD TACOS
6 servings
Frybread tacos are very much like the Elephant Ear tacos that we used to get at the carnival when the rodeo was in town. Very easy and one of my favorite things to eat. If I have leftover homemade chili I use it in place of the meat recipe here. And when I can’t find Anasazi beans, and I’m in a hurry, I just substitute canned pintos.
Ingredients
6 pieces Indian Frybread — about 6” in diameter
1 lb hamburger
1 large onion minced
2 small cans tomato paste
1 big can tomatoes
1/2 tsp oregano
1 Tbsp chile powder
salt, pepper to taste
Fry onion and hamburger broken up loose. Sprinkle some salt and chile powder over it. Add tomato paste and 4 cans of water and the canned tomatoes and their juice — break up tomatoes and stir it around. Add basil and oregano. Taste for seasoning. If you want, you can use a taco seasoning packet in place of seasonings, and a mild tomato salsa in place of tomato paste and tomatoes. Simmer till meat and onions are done and sauce is thick, 30 – 40 minutes.
Toppings:
1/2 lb cheese grated coarse
1 1/2 c Dried anasazi beans, cooked
1 1/2 c Mache or arugula, washed & stemmed (I’ve often substituted Cilantro, chopped)
1 lg Red ripe tomato, sliced
2 ea Ripe avocados, halved & sliced
1 ea Red onion, thinly sliced
1 ea Bunch red radishes, sliced
24 ea Golden yellow plum tomatoes halved
6 ea Green Anaheim (New Mexico) chiles, prepared (I’ve sometimes substituted Poblanos when Anaheims are out of season or unavailable)
1 lg Red bell pepper
Directions:
To prepare the anasazi beans, soak overnight in water to cover. The next day, drain the beans and place them in a saucepan with fresh water to cover. Bring to a boil, reduce the heat, and let the beans simmer until the skins break, about 3 hours. It may be necessary to add water as the beans cook to prevent them from burning and sticking. After the beans are cooked, remove from the heat and set aside. You should have about 3 cups cooked beans. While the beans are cooking, roast, seed, and de-vein the chiles and the bell pepper. Leave chiles whole; slice pepper lengthwise into six strips.
To Assemble the tacos, place a layer of meat mixture, cheese, and 1/2 cup cooked beans on each piece of frybread. Add 1/4 cup greens per taco, followed by a red tomato slice. Add slices avocado and 1 thin slice red onion, separated into rings. Follow with radishes and 4 golden yellow plum tomatoes per taco, and top with 1 roasted green chile and 2 slices roasted red pepper. You can vary the toppings and the order in which the taco is built, and for a vegetarian version omit the meat sauce and cheese.
You may also wish to offer Sour Cream (I like the Mexican Crema) and salsa (favorite jarred, or refrigerated varieties).
NAPOLIAS (Cactus)
Ingredients
1 servings
1 lb Pork
2 Cloves garlic, minced
1 lg Onion, diced
3 c Water
2 can (8 oz) tomato sauce
1 can (6 oz) tomato paste
1 lg can stewed tomatoes
1 lb Green cactus, peeled & diced
Salt
Pepper
1/4 t. Cumin
Seasoning salt
Directions:
Cube the pork; fry in a skillet with onion and garlic. In a large Dutch oven, add all ingredients, salt and pepper to taste and 1/4 tsp. cumin and seasoned salt. Cook until meat is tender. You might like to season this with an assortment of dried ground up chili peppers, like New Mexico red chilies, green chilies, chipotle chilies, and little chili pequine, to make it like a Chili Colorado. Very good with corn cakes, or the pinion squash bread featured below!
Cactus (fresh, small, thick pads): Remove spines with knife and peel, or purchase at market in a jar, diced and packed in its own juices. You can usually find it at Mexican markets; the cactus referred to is generally prickly-pear cactus. The juice from the prickly pear cactus is also useful in Native American craftwork, specifically painting with earth paints.
.
PUEBLO PUMPKIN/SQUASH PIÑON NUT SWEETBREAD
Makes One loaf, serves 6 – 8
Rio Grande Pueblo peoples traditionally served a variant of this sweetbread to parties of nut-pickers in September when piñon nuts were being picked from the mountain slope trees. Families would (and some still do) camp for many weeks in traditional areas reserved to clans. In the recipe you can use either cooking-type pumpkin (these have necks and thick, meaty bodies, not like jack o’ lantern pumpkins) or a sweet bright orange squash, like butternut.
Ingredients
1 1/2 cups unbleached flour
1 cup finely mashed or pureed pumpkin/squash
3/4 cup brown sugar
1/2 cup melted butter (1 stick)
2 eggs beaten foamy
1 tsp baking powder
1 tsp cinnamon
1 tsp grated nutmeg
1/2 tsp salt
3/4 cup pine nuts
Directions:
Preheat oven to 350. In a mixing bowl, combine flour, salt, baking powder, sugar, spices. Stir in pumpkin, eggs, butter. Stir pine nuts into thick batter. Scrape into a greased 6 x 9 loaf pan. Bake for 1 hour or until knife inserted in bread comes out clean.
This sweetish, spicy bread goes well with soups, stews, and can also be a dessert, especially if you cut it apart and put yogurt or applesauce over it.
.
OR, this is a sweeter, less cinnamony version that lets the pumpkin shine through…
PUMPKIN PINE-NUT BREAD
Makes 2 loaves
Ingredients
2 c Flour
1/2 c Oil
3 Eggs, beaten
1 1/2 c Sugar
1 teaspoons Baking soda
1 teaspoons Vanilla
3/4 c Milk
2 c Cooked pumpkin
1/2 tsp Salt
1 1/2 c Pine nuts, roasted
Directions:
Heat oven to 350 degrees. Mix dry ingredients in a large bowl. In a medium size bowl, mix eggs, milk, oil and vanilla. Mix well, then add pumpkin. Mix well and folk into dry ingredients. Add pine nuts. Pour batter into 2 greased 5×9-inch loaf pans and bake for 45 minutes.
The pine nuts generally taste better if, before they’re added to the mix, you put them on an ungreased cookie sheet in the oven for about 10 minutes at about 350-400 degrees. It roasts them a little. But watch them carefully to make sure they don’t burn.
,
MAPLE-PUMPKIN CHEESECAKE
Ingredients
1 Graham cracker crust in 8″ spring form pie pan
1 lb low-fat cottage cheese
1/2 cup plain low-fat yogurt
3/4 cup pumpkin puree (or 1 can)
1/4 cup flour
3 eggs
1 tsp vanilla
1/4 cup maple syrup
1/2 tsp pumpkin pie spice
Directions:
Preheat oven to 325°. Put all ingredients into blender, a little at a time, alternating wet and dry. Process until smooth, then pour into crust and spread evenly. Bake for about 50 minutes. Let cool before serving. May be topped with yogurt, flavored with 2 Tbsp maple syrup. Take it up a notch drizzled over with caramel sauce, and sprinkled with chopped pecans.
.
.
A TASTE OF CULTURE…
If you have kiddos, you can make this supper a lot of fun for them. This is also a great get-together for church, or a Senior Center, or a classroom if you are a teacher, or homeschooler? Below are the cornucopia of ideas I’ve collected over the years for either a dinner party, or you can use them as activities during a weekend or weeklong festival.
Background Music: Tribal Winds, Music from Native American Flutes; also cd Good Medicine by John Two-Hawks – American Indian Lakota flute player & musician. I actually have several CD’s that I love, shown below. (Not shown: Gathering of Shamen – Native Flute Ensemble, Medicine Man – Pete “Wyoming” Bender, The Stories of Red Feather Woman – also featuring the music of Andrew Vasquez, with special guest Rodney Grant – Windriver).
Host a Pow-Wow: American Indians, at least those I am familiar with (Northern Arapaho, Eastern Shoshoni, Lakota Sioux, and Utah Navajo ) have an annual party called a Pow-Wow. They set up teepees, do dances, trade and sell craft items, share food, pray, play games, pass the peace pipe, and tell stories. Thermopolis Wyoming is home to the annual Pow-wow of the Windriver tribes, the Gift of the Waters Pageant, and they tell the history/stories of the giving of the healing waters (see clip on Facebook).
Here’s a fun idea: ask your guests to bring “trade items” (things they have outgrown, don’t use, or don’t want any more) to trade with each other. All unwanted items can be donated to a local charity thrift store after the get-together.
Hoop and Pole Game
Natives of different groups have their own special ways to play the Hoop and Pole game, but in all the games a person tosses a long dart of some kind at a circular hoop. In this version of the game the hoop is rolled along the ground, set into motion by a third player, while the two other players throw their pole as the hoop rolls in front of them. The score depends on how or if the pole falls on or through the hoop. Netted hoops are made by the Arapaho of Wyoming and other tribes.
Navajo tribes play a stick and dice game, and also a shoe game. Google them to see how they are played.
.
The Sun Dance, usually conducted once a year, is a custom of the Arapaho people. The Sun Dance is a sort of prayer ceremony. See more about it here.
.
Navajo Blanket (given to me by my father-in-law) collage
.
PEACE PIPE
As the sun sets, gather everyone around to sit “Indian style” in a circle in the center of the yard around a fire pit. Pass around a “peace pipe” with imaginary tobacco in it and let everyone take a puff. This ritual in Arapaho belief is supposed to bond friendships. Encourage the oldest men of the group to pass on some of their wisdom to the younger by telling interesting stories of their boyhood, what games they played, things they did with their parents, faith experiences, etc. Some can share lessons they learned from mistakes they made. Maybe dad or grandpa or Uncle Jerry has a “vision” for the family (or church, or group) or a weird dream that they had that they would like to share.
CRAFTS
Make Bead Chokers
Make a loom and weave pot holders
Make Beaded Moccasins
Make a Dream Catcher
The following are items I made for my granddaughter’s teacher to use for a center in her Kindergarten classroom this year.
Make a “Pretend Garden” using an old wooden box covered in burlap, pantyhose filled with black beans for the rows of soil, and hand-stitched felt veggies. Let the littles enjoy hours of play planting and replanting veggies.
Dollar Store bows, with homemade quivers for the arrows, plastic Bowie knives in homemade sheaths, and and assortment of primative instruments – they look cooler with feathers tied to them! Set up deer silhouettes and various parts of the yard and let the littles go hunting for food. Also let them make music for dancing.
Homemade Bamboo “Cane Poles” with string and child-safe hooks, and little fishes that they can catch with them. Make a “pretend pond” and let the littles catch fish for supper.
When you were born, you cried
and the world rejoiced.
Live your life
so that when you die,
the world cries and you rejoice. — White Elk
We do not want schools…. they will teach us to have churches. We do not want churches…. they will teach us to quarrel about God. We do not want to learn that. We may quarrel with men sometimes about things on this earth, but we never quarrel about God. We do not want to learn that.
Sopapilla Cheesecake is my go-to, super-fast-and-easy dessert after any Mexican dishes that I serve for supper (like “Taco Tuesday,” Taco Salad, Tamales, Chicken/Cheese/Beef Enchiladas, Chili Rellenos, Asada Street Tacos, Carnitas, Loaded Nachos, Quesadillas, etc.). This year I decided it would be a perfect Red, White, and Blue sweet ending to our Independence Day meal, because of the colors, and because I had all the ingredients in my fridge!
Preheat oven to 350 degrees F
2 (8-oz) pkgs Cream Cheese, softened (room temp)
1 cup sugar
½ tsp Mexican Vanilla (or, if you want to be fancy, you can scrape the seeds from a vanilla bean pod)
Mix together all three ingredients until smooth and thoroughly incorporated. Set aside.
2 (8-oz) tubes Pillsbury Crescent Rolls (or, you can make your own croissant dough)
¾ cup sugar
1 tsp. Cinnamon
½ cup butter, softened (room temp)
¼ cup honey (warm in microwave for about 20 seconds, after baking cheesecake)
Lightly grease a large baking pan (or small high-sided cookie sheet) with a tablespoon of the softened butter. Unroll one tube of crescent rolls and roll out to fit in the bottom of the greased baking pan/sheet, pinching the perforations together. Spread the cream cheese mixture over the dough, leaving a small edge of the dough all the way around uncovered (like a pizza). Unroll the second tube of dough and roll out to fit over the cream cheese layer. Press down slightly around the edges. Mix the sugar, cinnamon, and remaining softened butter together into a paste. Spread over the top layer of dough.
Bake in a preheated 350 degree (F) oven for about 30 minutes, until puffed and golden. Remove from oven and drizzle the entire top of the cheesecake with warmed honey.
Strawberry Blueberry Compote
(This is what gives the dessert the RED and BLUE on WHITE treatment)
¼ cup of cold water
Juice and zest of one lemon
½ cup sugar
2 Tbsp Cornstarch
1 pkg frozen strawberries
½ pkg frozen blueberries
Place water, lemon juice and zest, sugar, and cornstarch in a sauce pot on the stove. Stir to mix the ingredients and then turn heat on medium high. Add strawberries and bring to a boil, stirring until mixture is thick. Remove from heat and add blueberries. Set aside until ready to serve.
Cheesecake may be served warm or cold. My son-in-law loves it warm and gooey. I think it is delish the next morning after being refrigerated overnight, with a hot, creamy cup of coffee – like a cheese danish. Mmmmmmm…don’t you?
“The generous soul will be made rich, And he who waters will also be watered himself.“
Proverbs 11:25 NKJV
“It was for freedom that Christ set us free; therefore keep standing firm and do not be subject again to a yoke of slavery”
My husband and I discovered a little burger joint soon after moving to south Texas. It’s not a fancy place. In fact it’s kind of grimey looking on the outside. A regular person might even drive right past it and not think twice about it. It’s just a little dive of a place really, along the side of the road in Hondo, TX, but one day the old man and I cowboyed up and gave it a try … and I tell you … we absolutely fell in love with the Santa Fe burger that we ordered that first day. We love it so much it’s all we can ever think about when we drive by. We stop in regularly, on our way through town, just to indulge in its deliciousness. We love it so much we haven’t even ever tried anything else on the menu. You ever find a restaurant like that? They are real sweet about adding a few extra things to our burgers, which is what puts the Santa Fe right over the top. The next thing we know we’ve got it dripping down our arms, not saying a word, chewing as fast as we can to make our nagging tongues happy.
So, because of the couple of little extras I always ask for, I feel like its okay to give you my take on Billy Bobs lovely little sandwich of deliciousness. My version by no means replaces theirs, but it’s a nice little appetizer between trips. I’ll warn you up front that It’s a little bit of work to make, but baby it’s worth it!!!! At least in my book.
Prepare the Green Chilies
For this recipe you’ll need about two green chilies per person, so about eight should do. I pick out the biggest and most firm Anaheim (Hatch, Fresno, New Mexico) green chilies available at the market (I also grow them in my garden).
Wash them and dry them off, and then lay them out on a cookie sheet.
Raise one of the oven racks to its highest position in the oven and turn the oven on to BROIL. Allow the oven to warm up, and then put the cookie sheet of chilies in, just under the top heating element.
I usually prop a wooden spoon in the door to hold it open a tad, so I can hear the chilies popping and crackling.
I keep an eye on them, as it doesn’t take long. When I see that they are pretty popped and blistered, and burned on that top side, I open the oven, slide the rack out, and use tongs to turn the chilies a quarter of a turn, and then put them back under the heat. I continue broiling and turning until the chilies are popped and blistered, and charred on all sides.
Quickly remove the chilies from the oven with tongs and immediately place them into a plastic Ziploc freezer back. As soon as all the chilies are inside the bag, zip it up, and then let them sit and steam for several minutes, while you work on the rest of your meal.
.
Back in Wyoming there was a certain time in the summer when the green chile trucks would show up in parking lots around town with heaping baskets full of green chilies and a barrel-type roaster that rotated over an open fire. We could buy the amount of chilies we wanted and they would roast them, and then package them up for us to take home. I often bought large amounts of those chilies, took them home and repackaged them (about six chilies to a bag) into plastic zip bags, with their blistered skins left on, but all the air squeezed out, and put them straight into my freezer. Whenever I wanted to make something with green chilies I’d grab a bag and let it thaw for a little bit on the kitchen counter, peel the skins off in the sink, and sometimes remove the seeds and stems (depending upon what I was making), and either use them whole or chop them into pieces for whatever recipe I was doing. SOooooo many ways to use green chilies!!!!
Its unfortunate, but we don’t get those trucks in the little Texas town where I live now, and perhaps not where you live either. The BBQ grill works, but I’m not a fan of standing over a hot grill to babysit chilies on a hot south Texas day. But, in this instance, you’ll be grilling burgers out there anyways, so you may prefer just to do it all on the grill. And maybe you have a hubby who is all about the grill and happy to do them for you! Knuckle bump!!!!
.
UPDATE: Since first posting this blog I got myself a neat little propane weed burner torch for burning those dadgum, infernal sticker burr weeds that grow up in the lawn down here in south Texas around labor day and Valentine’s Day, and I tell you what, it works pretty darn good for that, but it works slicker than snot for roasting chilies outside on the patio firepit on a gorgeous fall afternoon.
The Beef Patties
1 (1-pound) pkg of high quality ground beef plus 1 (1-pound) pkg of ground bison
1 jalapeno, stem removed, seeds and flesh chopped finely
1/2 of a small red onion, chopped finely
1 tsp Salt Lick dry rub seasoning (this is mostly just cayenne and ground black pepper)
Sliced Pepper Jack cheese – to be placed on burgers at the end of grilling
Hamburger buns of choice (Sometimes all I can find are the regular, sesame seed buns, but when I can find a good, soft, ciabatta-type bun, I use that).
Mix together gently and form into four or five good-sized patties. Set aside while you prepare the following ingredients, and then grill the burgers over hot coals on the BBQ. Add the cheese during the last minute or so of grilling.
.
Toppings
Bacon (2 slices per burger), the best is the thicker sliced applewood bacon, fried crispy…
(but if I’m in a hurry and don’t have leftover bacon from breakfast, I’ll use the precooked bacon available at the grocery store and go with 3 or 4 slices per burger)
Peel the skins off the green chilies, and remove seeds and stems, but leave whole
Sliced jalapeno
Sliced red onion
Sliced heirloom tomatoes
Romaine lettuce leaves, washed and dried
Dill pickle slices
Garlic Mayonaise (mash 1 clove of garlic and mix into 2/3 cup of mayo, I often add a sprinkle of chili powder and a squeeze of lime, and sometimes some minced cilantro)
Dijon mustard
.
To Assemble the Burger
Some like their buns toasted
Spread some mayo over the bun halves
Squirt on some mustard
Lay a whole slice of red onion down
Place a few slices of jalapeno on top of the onion
Then a freshly cooked beef pattie with melted cheese
Layer on two Green Chilies, two slices of cooked bacon, a slice of tomato, a folded leaf of lettuce, (and a couple slices of dill pickle if desired)
Place the top of bun in place
Mash down so you can fit it in your mouth and ENJOY!!!!!
.
For this Memorial Day,
… I made these burgers and served them with my Jalapeno Potato Salad (from Cowboy Backyard BBQ), plus my latest favorite food: Mexican Street Corn, and sliced watermelon for dessert.
.
Mama’s POTATO SALAD
Ingredients
6 large red potatoes cooked until tender and cubed, skins on or off as preferred
4 hard boiled eggs, cooled and chopped
1/2 large red onion diced
3 stalks of celery chopped
2 Tbsp sweet pickle relish
1 small sprig of dill weed, chopped
1 bunch of green onions chopped
1 or 2 large jalapenos, seeds and stems removed, diced
Sauce Ingredients:
1 cups Mayonnaise (plus more or less, as you like it)
3 Tbsp red wine vinegar
1 tsp Sea Salt (plus more as desired)
2 Tbsp sugar
1 tsp ground pepper
Directions:
Put first eight ingredients in a very large bowl. Mix up sauce ingredients and pour over the ingredients in the bowl. Toss to coat. Cover and refrigerate until ready to serve.
Optional additions:
Add a half-cup of blue cheese crumbles and a quarter cup of crispy crumbled bacon as a garnish on top of potato salad.
.
Colleen’s Mexican Street Corn
8 ears fresh sweet corn (leave the husks and stems on)
1/2 cup mayonnaise
1 Tbsp Mexican crema (my grocer carries two types, a sweet cream type,which tastes like heavy whipping cream, and a sour cream kind. Both have a slightly thicker consistency than whipping cream)
1/2 cup finely crumbled cotija or Queso Fresco cheese
1/2 teaspoon chili powder (I make my own blend, see recipe below)
1 medium clove garlic, mashed and finely minced
1/4 cup finely chopped fresh cilantro leaves
4 or 5 limes, cut into wedges
I grilled my corn in the husks on the grill, turning about every 5 minutes until charred on all sides, and then I pulled the husks down over the stems (using oven mitt to protect my hands from burning) and returned the corn to the grill for a short time (about 3 minutes) to give the kernels that charred effect. What works even better though is that nifty little propane torch I told you about above. I left the husks attached for a decorative effect, but now as I look at these photos I’m thinking they might have been even cuter if I had tied something around each husk, like a piece of raffia or something, to bundle them together and anchor them to the stems, turning them into decorative “handles.” NOTE: The corn can also be shucked and “grilled” in the oven at 425 degrees F, turning about every 7 minutes or so until cooked all the way around. Once it is cooked on all sides and has some charred spots it’s time to dress it up.
While the corn is grilling, mix together the mayo (please don’t use the fat-free stuff. I know it may be healthier for you, but really, you must live a little!!! At this just this one meal in your lifetime!), crema, garlic, and add about 1/4 tsp of the chili powder. Juice and zest a couple of the limes and then add the juice and zest to the mayo mixture. Toss in about half of the crumbled cotija (Queso Fresco). Mix well and keep in fridge until ready to use. Cut the remaining limes into wedges and save for serving.
As soon as the corn is grilled, spread each cob with a generous amount of the mayo mix on all sides. Don’t be chincy. Follow with a sprinkling all around of chili powder, and then cheese crumbles. Sprinkle some cilantro on top, and a few extra sprinkles of the cheese. Serve immediately with a wedge of lime for each cob!
You’ve died and gone to heaven, right? I’m there with ya!!!!!!
Colleen’s Homemade Chili Powder
3 Ancho Chiles (dried), stemmed, seeded, and sliced
3 Cascabel/Guajillo chiles (dried), stemmed, seeded, and sliced
4 Arbol/Cayenne chiles (dried), stemmed, seeded, and sliced
2 Pasilla chiles (dried), stemmed, seeded, and sliced
2 New Mexico Red chiles (dried), stemmed, seeded, and sliced
1 Tablespoon Cumin seeds
1 Tablespoon dried Mexican Oregano
1 Tablespoon hot Paprika
Chili Pequin to taste (I sometimes crush these little guys separately and only add it to single portions, as it really brings the heat)
Place the chiles and cumin seeds in a saute pan or cast iron skillet and toast over medium heat about 3 minutes. Remove from heat and place in a glass bowl to cool completely. Once cool, place in a blender, along with the other ingredients and process until a fine powder. Allow the powder to settle for several minutes before lifting the lid. Store in an airtight container for up to 6 months. Use for making chili, to season corn, or in BBQ sauces and dry rubs.
.
“Prepare the table, watch in the watchtower, eat, drink: arise, ye princes, [and] anoint the shield…” Isaiah 21:5
I always start the Easter celebration the night before. I have my little kiddos come just before dusk and plant “PROMISE SEEDS” all over in my yard. I usually just use jelly beans as the seeds, but this year I found this crazy perfect candy:
I give each kid several little bags of this candy, and as they “plant” it all over my back yard, I tell them the Bible story about how God wants us to sow gospel seeds (tell people about Jesus and the Easter story). When we do, some of those seeds will fall on rocky soil, some on the wayside, some among thorns and thistles, and some on good soil (Matthew 13:3-8). We talk about how those soils are heart conditions and how willing people are to hear about Jesus. If the seed falls on good soil, the Bible says we will reap a harvest. We always have to be careful with our words, because some of our words are life-giving and some kill. If we sow the wind (which would be slander and gossip), the Bible says we shall reap the whirlwind (which is the same wind returning back on us with fury and without mercy). We shall always reap what we sow.
Once they’ve planted their seeds I let them take around a watering can and water each other’s seeds. This is a good object lesson for the scripture that says, “One plants, another waters, but God gives the increase” (1 Corinthians 3:6-8).
The next day when the grandchildren arrive after church, this is what they find:
Their little promise seeds have grown into Easter eggs strewn everywhere. Eggs are a great object lesson for Easter, because just as little chicks burst forth from their eggs in the spring and leave an empty shell behind, so did Jesus burst forth from the grave, leaving it empty. Eggs are the perfect symbol to demonstrate the resurrection of Christ. (Of course grandma and grandpa transformed those eggs, and we’ll tell them this someday – but isn’t that just like what Jesus does? He transforms the seeds we sow into new souls for the kingdom).
After the kids have gathered up all the Easter eggs from the yard, we all go inside and sit down to Sunday dinner. The harvested plastic eggs have to sit and wait for us to eat before we get to see what’s in them. Perhaps that is the way it will be in heaven too? Perhaps we shall feast with our Lord first, and then we will get to go and do stuff?
* * *
Just in case you are dying to know …. this is the meal we always eat at Easter (click here: Easter Traditions). I always make plenty so we can pull out leftovers for later in the day. And I always have snacks, like chips and dip, chicken salad and rolls, a veggie tray, and something sweet.
* * *
As our meal sits steaming before us, the grandchildren say the blessing, they also sing it, and it is always precious to behold.
“Verily I say unto you, Whosoever shall not receive the kingdom of God as a little child, he shall not enter therein.” Mark 10:15 KJV
After Dinner … Time for FUN!
Inside each of the plastic eggs are either little slips of paper, pictures, trinkets, puzzle pieces, or other objects, and each is part of a game/activity for the kids and grown-ups to participate in. It will take up most of the afternoon for the kids to do everything.
With all of us gathered outside on the patio (a luxury of living in south Texas) we let the youngest child draw out an egg from her basket to open. Whatever her little slip of paper inside instructs her to do, she/we do. And then it is the next kid’s turn to pick an egg from their basket and do what it says to do. The kids take turns back and forth opening eggs. Sometimes the slips instruct them to do an activity alone, other times it involves all the kids, and often times it involves the whole family.
I-SPY Token Hunt
These slips of paper are actually pictures that I’ve snapped around my house and yard. The pictures are close ups of things familiar to the children, but not immediately recognizable. The children have to think about them. It’s kind of a puzzle for them to figure out.
(The week before Easter I go around with my camera and take close-up shots of various items, kid’s eye level, and then arrange them into an 8 X 10″ collage that I send to Walgreens to have printed. I then cut the pictures apart and tuck each picture into a plastic egg.)
2018 outdoor & garage images
2018 indoor images
(First collage Left to right and top to bottom: Grandpa’s mud boots, fire pit, ziggle seat, wagon, garbage can, large plastic watering can, chicken coop fence, flower pots, small medal watering can, chiminea, sandbox, rock wishing well, large rock, hollow tree branch, knot in tree, outdoor box, property marker, garden bricks, welcome mat, trail to wood lot, V in tree, new sprout leaves, tree stump in yard, tree lot. Second collage l to r, t to b: Shower, bathroom dresser brush drawer, window sill, washing machine, cat food, chair cushion, another chair cushion, ash bucket, nut basket, old record player, tiny wagon, wood stove, long curtains, book basket, moonshine jug, blanket, shower mat, treddle, window sill, fan, wine rack, bed foot board, stepping stool, pillow on bed, kid’s book)
Once the child figures out what the picture is of, they dash off to find the token that’s hidden in that location. The child then gets to use that token like Monopoly money, to buy a prize from Grandma’s secret prize bin. (*My secret prize bin is a big blue tub filled with candy, small toys, small games, cookies, coloring books, story books, stuffed animals, jewelry, hair things, etc. Mostly things from the Easter isles at the stores).
.
Resurrection Eggs
These come in a set of twelve plastic colored eggs, with a little story book. Each egg contains a little trinket inside that corresponds to a part of the Easter story. They sell these egg sets at Christian stores, and you can find them online.
Whenever one of these eggs is opened, I read aloud the story from the book that corresponds to the trinket.
*This year, just to change things up a bit, I substituted this book for the Resurrection Eggs. I divided it into three parts and hid three small tree-shapes in three eggs. Whenever one of these eggs was opened, I read a part of the story.
.
Binoculars I-Spy
The kids love to play with grandma’s binoculars, so last year I made this game knowing they would have a lot of fun with it. Inside four eggs were tiny plastic binoculars and a sticker of an object (dove, cross, empty tomb, Jesus fish). When a child got one of these, they had to use grandma’s binoculars to find the match for that object somewhere in the far reaches of the yard. I had the large-sized matching objects tacked up around the yard – a cardboard dove was tacked to a tree trunk in the far end of the yard, a Jesus cross was pinned to the fence on the far other end of the yard, a tomb cut-out was sitting on top of a big stone I have around in my front yard, and a Jesus fish was dangling from a fishing pole down by the river. If they were having a tough time finding an item I gave them a hint: Where would you find a bird? Where would you find a fish? What was rolled away from the tomb? What was the cross made out of? They had so much fun with this. Once the child spotted the object, they had to run and get it. On the backside of each was a little message that told them what their special prize was for finding it. Two of them had coupons for lunch with granny at their school that week, and the other two had coupons for an ice cream treat to keep or give away.
This year I substituted this game for the following Pencil Puzzle Secret Code game.
.
Pencil puzzle Secret Code
Depending upon the ages of your children these can be easy to hard secret codes, word searches, Jr. Jumble, connect the dots, etc. I printed mine out on 8 1/2 X 11″ copy paper, folded the sheets in half and in half again, and then tucked them inside objects that I hid in the yard (an old hat, a tattered glove, a disposable drinking cup, and taped to the bottom of one of my bird feeders). Four of the plastic eggs had slips of paper that directed the children to look for these objects (hat, glove, cup, and bird feeder).
The secret code puzzles that I cam up with were perfect for my 2nd grade granddaughter to figure out on her own, and when her Kindergarten sister got one, she helped her do it.
This slideshow requires JavaScript.
FREE PRINTABLES>>>>click on photos below:
The solved puzzles led them to special surprises hidden in four different locations. In each location I had a wrapped gift for each child (new swimsuits, new bedtime story book, giant activity books, and a stuffed animal each.
.
Puzzle Pieces
Last year I made two, four-piece puzzles, and placed the eight pieces in the eggs. When a child opened one of these eggs, they set the pieces aside until they found all of them, and then when all the pieces were found, they taped the pieces together to complete a picture. On the other side of the picture was a clue about the picture and what might be hidden there. (For example, one puzzle was a photograph of the rear tire of my automobile, and the clue on the back of the completed puzzle told the kids they were looking for a key for a lock in that location. Sure enough hidden behind the tire of my car was a box, with a key inside. When they wondered what the key was for, I told them the other puzzle held that clue, and indeed the other puzzle when put together showed a treasure chest at the base of a tree. The kids had to hunt to find the tree with the treasure chest, and then use the key to undo the lock to find out what was inside.
.
I-Pad Pictures
The kids also LOVE grandma’s I-pad. They call it “my app thing.” I have some kid’s Bible apps downloaded onto it, Netflix, and some educational games. Inside some of the plastic eggs were slips of paper that directed the kids to use the tablet camera to take pictures of specific things. For example one slip asked them to take a picture of grandma and grandpa kissing one of the children on the cheeks. Another slip asked the child to take a picture of mom and dad making silly faces at each other. Another asked the child to take a picture of all the grownups blowing bubbles. Other photo poses included: trying to do the splits in the yard, making grass angels, showing our muscles, jumping really high all at once, taking a close up of someone’s eye, and so on. These pictures are treasured keepsakes of our day, and the girls love to look through them when they come stay the night.
.
Silly Dares
These slips of paper instructed the kids, or often times the whole group, to do some silly task, like doing six somersaults in the yard, or patting our heads and rubbing our tummies at the same time, or breaking a confetti egg on someone’s head, or eating a cracker and trying to whistle, or singing a song in a circle with each person singing just one word of it – we did Jesus Loves Me one year, and Mary Had a Little Lamb another. Some of the other silly tasks were: doing a one-minute crazy dance in the yard, running around to the front to wave at a car passing by on the road, have a water spraying contest, having a rolling race with sister in the yard, laughing as loud as we could for 30 seconds and then all stopping suddenly, snapping our fingers as fast as we could, and so on.
.
Minute to Win It Games
In four of the plastic eggs were slips of paper that simply said, “Cookie Face,” “Penny Stack,” “Suck it Up,” and “Nut Stacker.” When a child got one of these we all participated. There were no prizes for these, except for the good feeling of winning. They each had to be done in under a minute.
Cookie Face: each contestant is given a cookie, which they place on their forehead, and then must move to their mouth using only their facial muscles – no hands!
Penny Stack: must stack 25 pennies, one at a time, on top of each other using only one hand.
Suck It Up: Use a smoothie straw to suck up transfer 25 Skittles from one paper plate to another. The paper plates are side by side.
Nut Stacker: place 5 nuts onto a wooden skewer, and slip the nuts off the skewer one at a time into a stack without touching them
.
Other Games
I also had a couple of other competition games. One was “Cup Shoot.” The kid that drew that egg picked someone to go against them. I had disposable drinking cups on strings between trees, and at the sound of the whistle they had to use a squirty bottle to move the cups along the strings from the start to the finish. Whoever won got to choose a new opponent and compete. We played until everyone was ready to quit.
Another game was to use smoothie straws to putt marshmallows across the lawn from a starting point to a finishing line. Of course, the lowest putts won.
And another game was to use one foot with a pencil between toes to draw an outline of the other foot on paper. To make it even more fun have partners face each other and draw each other’s foot with their foot.
Other game options to add next year: Rodeo games: broom pole bending, rake barrels, shovel bucking bronc… Dart throwing, around the world basketball, bean bag toss, ladder ball, tire run, hula hoop contest, could even to make an obstable course of several of these.
.
Here are the 2017 FREE PRINTABLE paper slips that go inside of the eggs. Just print them out and cut them apart:.
These are my 2018 paper slips:
***Click on slips images and save to your device***
.
Below are the pictures I took for the Guess the Picture game 2017. They are of objects around my house, so of course they wont work for you, but I thought you might like to see them to give you ideas of what you could photograph around your house. Some, you’ll notice, were indoors, some were outdoors, and some were in my garage. I got the page of them printed at Walgreens for sharp, clear, best quality.
(L to R starting at top left: shower wall, bath mat, cow rug, wood stove, ash bucket by fireplace, inside dryer, bedside table, elliptical step, houseplant, water dispenser, fire pit, truck bumper, car wheel, garbage can, mailbox, spitoon, outside rock wishing well, target pallet, big rock, outside hosebib faucet, rock pile, oak tree, fig tree, flower-pot, and chiminea).
.
GREAT IDEA: My neighbor shared with me a neat idea of something she did with her boys when they were young. She gave them each a basket of eggs. The eggs had slips of paper inside each that gave them chores to do (they lived in the country on a farm). When the boys went to do their chores, they found she had hidden little surprises for them at each place.
Movie Time!
After we were all done with the plastic eggs and all those little activities, we refilled our beverages and the kids had their choice of either doing crafts or watching a movie. They opted for the movie, which was nice. It gave us grown-ups a chance to relax for a bit. Let me clean up the kitchen and get a beverage. The movie choice for the kids was Lion of Judah animated movie (I’ve included the trailer below, in case you’ve never seen it).
It was my son-in-law’s childhood tradition to watch Charlton Heston’s Moses – The Ten Commandments every year at Easter, and since it is always on the TV at Easter, I think it’s a great choice! Of course there are others, like, The Passion of the Christ, Son of God, and Ben Hur.
.
Crafts
Marshmallows & Toothpicks: After our movie last year, I dumped a big bag of colored miniature marshmallows and a box of toothpicks out on the dining room table and just let the kids create whatever they wanted. We made crosses, and houses, and weird little hooked together things. Ha! We got more snacks and beverages, and this kept us entertained for a good long time. This is also a great craft for large school groups.
Decorating Eggs: We pushed the marshmallows aside and pulled out the eggs. Wal-Mart had faux eggs in their Easter section that were perfect for decorating. They were white and felt just like real eggs, without being real. They even sold them by the dozen in paper egg cartons. All the egg decorating kits worked perfectly on them, and colored Sharpie markers are an awesome, non-messy alternative.
Nail Cross Necklaces: This craft was a little too difficult for the little kids to do by themselves, but their mother and I helped, and we had a lot of fun with it. Using regular construction nails and thin colored jute, we made “God’s Eye” crosses, and then attached a long string for a decoration to hang in the window or on a wall.
.
This is another fun craft we did, cactus and succulent terrariums, that we hung on strings in the window:
.
.
These are the things you will need to purchase for this celebration:
Large bag of Jelly Beans
2 dozen Colorful Confetti Eggs (these are colored eggs shells with confetti inside)
1 or 2 dozen faux eggs, plus some decorating kits of your choice
About 50 plastic Easter Eggs (unless you have them leftover from a previous year)
1 Resurrection Eggs kit with booklet
Prizes, approximately 25 small somethings per child (candy, toys, games, cookies, story books, stuffed animals, kid jewelry, hair clips, nail polish, lip balm, etc.) and then four bigger somethings for the grand prizes per child
Nails (one longer type and two shorter type for each cross)
Yarn or colored string/jute
colored mini marshmallows (1 or 2 large bags)
toothpicks (a couple boxes)
Bubbles for each adult
groceries for the feast
movies (if you don’t already have them)
These are the things you will probably find around the house, to use for this celebration:
An I-pad or other Tablet that can take pictures with
binoculars
tape
crackers
bubble gum
smoothie straw
Skittles or M&Ms
Paper plates
Cookies
Pennies
String
drinking cups
squirty bottles
Skewers
large nuts (not the kind you eat, but the kind that go on bolts)
a tool or tackle box to use as a treasure chest
a pad lock or combination lock, and chain
And these are the things you will need to make:
Cardboard cutouts of a dove, a cross, a tomb, and a fish
.
.
I hope you have as much fun with this celebration as I and my family did.
.
The Lord liveth, and blessed be the Rock, and let the God of our Salvation be exhaulted!!!
I’m a little late posting this for THIS year, or maybe I’m just waaaay early for next year? Ha. But, here are some ways I thought would be nice to celebrate Grandparent’s Day. But, in all honesty, please don’t save them up for that one special day a year. If you have grandparents living close, do some of these with them as soon and as often as you can. Time passes so quickly. Memories fade. The breath of life evaporates before we know it. Don’t let it get away from you. Our elders are a special treasure!
“Cast me not off in the time of old age; forsake me not when my strength faileth.” – Psalms 71:9
Family Tree
If your family doesn’t already have one, let the kids start a family pedigree chart with their grandparent. Let them do as much of the investigative work as they can to fill it in. First let them fill in their name in the center bottom space, and then just above it let them fill in the names of their dad and mom. Above those spaces are spaces for grandparents on the paternal and maternal sides. Spend a day or at least an afternoon with grandparents collecting information: names, birthplaces, careers, military, where family died and are buried. Ask for obituaries, photographs, family Bible notes, newspaper clippings and stories. It’s actually a lot of fun seeing where your family came from, not just ethnicity, but travels, both foreign and domestic. It’s also a great way to learn history. It means so much more and is so much more interesting when you find out you had actual family living in those times and places and events.
If you would like the electronic file for this chart so that you can print one for your personal use, please send your request to mrshlovesjesus@gmail.com, and write “Pedigree Poster” in the subject line.
This is a Pedigree chart I created as a Christmas gift to my family last year. I took the digital file of the pedigree chart above to my local print shop (also Staples, Copy Max, Walgreens, and even Walmart can print them) and had it printed on poster-size paper. I printed mine in color on plain paper, but they can also be printed on photo paper, and then framed in poster size frames.
“Children’s children are the crown of old men; and the glory of children are their fathers.” – Proverbs 17:6
Beside the pedigree poster hanging on my wall I have a decorative tree with photos of hubby & me, our parents, and our grandparents, three generations.
Video Interview
On one of our visits to my husband’s folks’ house, we were blessed to have his uncle stop by for a visit. He was in town to speak at a local high school about his experiences as a soldier in WWII (Europe). He was often asked to speak at schools about his personal experiences, because he was such a gifted story-teller. He wrote a book as well, which we treasure having a copy of. We of course were very interested to hear his stories and so asked if he would share some with us, which he happily did. We all sat around in the living room listening intently as he told of being on the boat and being soooo sea sick and all the other men being soooo very sea sick also, and then being dropped on the battlefield, and of his experiences as a Forward Observer, which was very dangerous. I could kick myself a thousand times that we didn’t get video of that visit (which is why I make the suggestion to you now). It is just so moving to hear a personal relative tell of historical events from their own personal experience, and see their facial expressions, and watch their body language. It is just so much more captivating than a book in history class. So I encourage you, if you have a grandparent, ask them to tell you a story about some important time in their life and video tape it.
“Thou shalt rise up before the hoary head, and honour the face of the old man, and fear thy God: I am the LORD.” – Leviticus 19:32
Something our family DOES have, and I can tell you is an enormous treasure, is a compilation of my husband’s folks old home movies that they took on an old 8mm recorder. They had the movies transferred to VHS when that was the most modern thing, and gave us a copy. But as hubby and I were watching these silent movies, we realized that much of those people and places were unknown to us. So the next time his parents visited us we asked them to sit down and watch it with us and tell us where all those places were and who the people are. I set up a cassette recorder to record their narration. Many years later I took the old silent VHS and the narration on the cassettes and put them together on DVD. Then I made several copies and gave them as Christmas gifts for our family. It was the very next Christmas after grandpa had died and you can’t image what a treasure it was to the whole family to get to hear grandpa’s voice again, and laugh at his sense of humor, especially since the family had no idea we’d ever gotten that sound tract.
Also, if you have been to a funeral recently, most funeral homes ask the family to bring them old photos for a video slide show, set to music, to play during the service. Why wait until a person dies for this? Ask your grandparents now if you can borrow their old photographs, and then scan them into digital form and make a slide show of their lives from birth to old age. You can add captions to the photos that say where the photos were taken and who the people are, and you can also add a favorite song or songs of theirs to go along with it. Most computers have the software for making photo slide show DVD’s on them. I used Movie Maker to make DVD’s of our family vacations, weddings, and a memorial of our dad. It would be a nice trip down memory lane for them to get to see their lives laid out in such a way, and a special thing to share with them while they are living.
“And he shall be unto thee a restorer of thy life, and a nourisher of thine old age: for thy daughter in law, which loveth thee, which is better to thee than seven sons, hath born him.” – Ruth 4:15
Old Letters and Great Books
My husband’s dad served in Korea, and wrote letters home to his parents a couple times a week. We found the letters a while back, along with a bunch of pictures he took while in boot camp and on the front lines. We also were fortunate to get to inherit his army coat, a hat, and medals, maps, and various other personal objects from the war, along with the flag that was presented to the family at his funeral, and the bullet casings from the 21 gun salute. Altogether the letters and photos, and photos of the objects made a wonderful book that is and shall forever be a cherished keepsake for generations.
I also collected all our family history, stories, pedigrees, photos, birth, marriage, and death certificates, newspaper clippings, obituaries, maps, military histories and pension papers, pioneer stories, censuses, etc. and made it all into a book (first a ring binder, and then a printed, spiral bound book with a hard cover) to share with my sisters. I made scrapbook pages of the old photos and scanned those pages, and made separate chapters for each person, telling each person’s individual stories. I visited courthouses, libraries, and museums in the towns where they lived (the ones that were closeby) and collected as much information as I could about them and the history of those areas (marriage, divorce, land records, court records, if they played on baseball teams, delivered mail, or worked in local factories, or acted, sang, or danced in theatre, etc.). I visited cemetaries and churches and found headstones and church records. I visited newspaper offices and got old newspaper stories and obituaries. I will confess, it is a lot of work, but truly it is fun and rewarding work, and I sooooo encourage you to gather as much of this kind of information as you can from living relatives, while you can. Honor your parents and your grandparents by preserving their legacy in words and pictures. They will be delighted and honored to see all your efforts as well.
“The glory of young men is their strength: and the beauty of old men is the gray head.” – Proverbs 20:29
Grandma’s Recipes
What is your favorite thing that grandma makes? Why not make a date to make it with her, and for heaven sakes get her recipe! Get ALL her recipes, and make them into a cookbook. My husband’s family actually collected recipes from everyone in the family one year and made a family cookbook for all of us. We all contributed, and we all paid for our own copies of the book, and it is very much a prized possession of mine to this day. Each person that contributed recipes also told a story to go with it, like if it was the first meal they made for their husband, or if it was their mother’s favorite thing that they made, etc.
I have myself very fond memories of having picnics with my grandmother. She always made her standard cucumber sandwiches, hard boiled eggs with salt and pepper, and a thermos of iced tea. When’s the last time you went on a picnic with your grandma? Or soaked your feet in a tub of hose water in the back yard? …And listened to her tell stories about a time she got in trouble as a kid. …Or what it was like as a teenager going to school. …Or her first boyfriend, or first date. …Or what she and her brothers/sisters did for fun.
“Now also when I am old and grayheaded, O God, forsake me not; until I have shewed thy strength unto this generation, and thy power to every one that is to come.” – Psalms 71:18
Play a Game
My husband has fond memories of playing Yatzee with his grandmother. It was her favorite game to play, and if he could beat her he felt like it was a real accomplishment. Grandma was apparently very good at Yatzee. My grandma liked to play cards, and her game of choice to play with us kids was Rummy. She also showed us how to play Solitaire and let us play at the table while she cooked and baked. I also remember making card houses in the living room, using the carpet to help hold the cards in place. My sisters and I made elaborate card houses, some more fragile than others. Does your grandma or grandpa have a favorite game they like to play. Ask if you can come play it with them one afternoon. Or, take them to play Bingo, or Pinochle or Bridge at the Senior Center, dominoes, Cribbage, or take them bowling, or to play miniature golf, or darts. You might find out they’re pretty darn good at it.
“With the ancient is wisdom; and in length of days understanding.”
– Job 12:12
Other Ideas
Go for a walk
Go fishing
Do some gardening (plant an herb garden in pots)
Go to church with them
Visit them and read them letters that they’ve gotten in the mail
Take grandma to get her hair and nails done
Take them to their doctor visits
Take them to the store to do their shopping, or run a few errands
Take them to a veterans memorial (if there is one with a spouse or loved one memorialized there)
Take them to a cemetery to put flowers on someone’s grave (for a loved one’s birthday rememberance, or veterans/memorial day)
Take them to a class reunion, or a small town annual get-together
Take them for a drive in the country
Play old records
Watch an old movie
Take them out for lunch
Invite them to your house for coffee (and devotions)
Take them to visit an old friend they haven’t seen in a while
Take them out for ice cream
Sit on a park bench and feed the birds, or the ducks (pond)
Take them for a boat ride (a little row boat across a pond or lake) and bring an umbrella for shade
Take them to a grandchild’s school event, or track meet, or soccer game
Take them to a rodeo, a fair, a car or horse race, or baseball game
Take them to lookout point after dark to look at the city lights
Ask them to teach you how to knit, crochet, sew, quilt, or tie a fly (fishing), etc.
Take them to the shooting range for some target practice
Rent a golf cart and take a drive through a scenic golf course
Take them for a drive to new parts of the city
Take them something you’ve baked or made and visit for an afternoon
Take a pizza and cokes and sit on the porch and eat it with them
Do something for them that is too hard for them to do themselves, but needs done, like vacuum, trim a tree, re-attach a rain gutter, paint, mow, move a hose, shovel a sidewalk, take mail out to the mailbox, light a pilot light, replace a lightbulb, put a heavy dish back up in the cupboard, put laundry away, etc.
Call and check on them at least once a week
Always tell them you love them, as often as you can
Send them cards and letters, with pictures
Pray with them and for them, for their health needs, and other needs
“The hoary head is a crown of glory, if it be found in the way of righteousness.”
I’m a grandma! <I say, with a huge grin on my face> Can I just say that so far in life being a grandma is just about as good as I could have ever imagined. I am completely smitten with these little granddaughters of ours! Completely and utterly smitten! And I’ve decided that getting to be a grandma must be God’s way of saying, I forgive you for all the mistakes you made with your own kids, and I’m giving you a second chance with grandchildren. Don’t screw it up!
I don’t know that I have any more patience with them than I had with my own kids. And I can’t say that I let them get away with murder at my house, because I honestly couldn’t live with them expecting to get things all the time. But after grandpa and I have loved on them, and spoiled them just a little, and are pretty much give-out chasing after them for a day or a night, we can send them back to their parents and then go take a nap. And that’s the beauty of grandparenting. 🙂
As far as throwing a baby shower, I take my ques from my oldest daughter Dani. She threw the first baby shower for her sister, and had so much energy and charisma through the whole process. She is just gosh darn good at everything she puts her hand to. She tossed an amazing, fun party together in about an hour (including the decorating), and even between gadding about with her friends, whom she hadn’t seen since high school, and her party turned out so magnificently I can’t even tell you. I’m such a poser!
But, in the shadow of her genius, I tossed a Texas version together – in a bigger house, and a bigger yard, and a slightly plumper guest list!
Decorations
The party I threw was half indoors and half outdoors on what turned out to be a beautiful south Texas spring evening! Indoors was the food (to keep it cool and away from the bugs), and outdoors were the games. I used old baby food jars, placed tea-lite candles in each, lit them, and scattered them around on the buffet table inside, and the tables outside. The tables outside sat under an Easy-up portable gazebo which was decorated with balloons and streamers and pretty pink ribbon. I covered the outdoor tables with little baby blankets (from when my babies were little – quilted ones, knit ones, crocheted ones, tied ones, store bought and homemade) and used rolled up baby diapers tied with ribbon and Baby Bottle vases for centerpieces, along with some of the little baby food jar tea-lites. Indoors I layered a black and white tablecloth over a solid pink tablecloth for the serving table, and placed a few potted plants and a bouquet of roses around with the baby food jar tea-lites.
I hung up a small “clothesline” across the yard here and there and hung some cloth diapers, onesies, baby blankets, and little bibs on it, with old fashioned clothespins tied with pink ribbon and bows?
I set up a CD player outside that had *lullaby music playing softly and continuously in the background during the party. (*I used the Rock-a-bye Baby and Hush-a-bye Baby CDs. If you’ve not heard of them, they are the songs of country and rock musicians remade into lovely little xylophone lullaby melodies. So sweet for a Baby Shower party, and after the party they make a great parting gift for the mother!)
Refreshments
GOURMET CUPCAKES: I cheated and used a cake mix and baked up 24 cupcakes. Then I swirled store-bought frosting on them in two colors, white and pink, using a zip-lock bag with the corner snipped off. I sprinkled them with pink sprinkles and decorated them with mini York peppermint patties and fresh mint leaves from my garden. Then displayed them in cute little swirly cupcake stands that made a perfect presentation and centerpiece for the buffet.
FINGER SANDWICHES: my neighbor and friend Sharon made some finger sandwiches with cream cheese and green olives, and I don’t know what else, but they were delish.
FRUIT SALAD: I cut a baby carriage shape out of a watermelon, decorated it with pink ribbon, then filled it with chunks of fresh seasonal fruits (melon, grapes, pineapple, berries, kiwi, etc.). I made a fresh yogurt, honey, and lime dressing to drizzle on top.
VEGGIES: I did little individual crudités using little see-thru plastic tumblers, placing a small amount of dip in the bottom, and then arranging cut vegetables (carrot, celery, snow peas, asparagus, bell pepper, etc.) vertically in each.
PUNCH: tea, lemonade, and lots of ice.
Games
These first four games below began right away as guests arrived, but did not have a winner until the end of the party. Each game was set up at a seperate station in my house, and a little pink footprint trail led the guests from first station near the front door (diaper name tags), to the next (Mommy Measure Game), and the next (Pacifier Necklaces), through my house, and ended at the food table near the back door, where a little sign welcomed them to help themselves to the refreshments, and asked them to place one frozen baby ice cube in their drink.
This was the best way I could come up with to be in all places at the same time – greeting guests as they arrived, hugging and welcoming them, pinning a name tag on each one, and then sending them on to some entertainment while we waited for everyone to arrive. By the time the last guests arrived, everyone would have had things to do, food and beverages to nibble and sip, time to mingle with each other, and would be ready for the games to begin.
Dirty Diaper Name Tags: I made little diapers out of white felt or flannel and pinned them closed with a diaper safety pin. Before I pinned the last one shut I smeared a little streak of brown marker in it Then I mixed the marked one in with the others so I wouldn’t know which one it was. As the guests arrived, I pinned the little diapers on each (you can jot their names on them if your guests don’t know each other). At the end of the party I asked my guests to look inside their name tags. The one with the dirty diaper won a prize.
Mommy Measure Game: Using ribbon, string, or a store-bought game, each guest sections off however much length of the material as they think will take to wrap around the mommy’s belly. They’ll cut their piece and then label it with their name, and leave it in the designated place. At the end of the evening, whoever’s piece comes closest to the actual measurement is the winner.
Pacifier necklace Game: This game is played by giving each guest a necklace and announcing that the forbidden word is “baby.” Anyone caught by another player using the forbidden word loses their necklace to the player who caught them. No one is ever out, because even if you lose your necklace, you can gain a necklace back by catching someone saying the forbidden word. The person with the most necklaces at the end of the party wins.
My Water Broke: The day before the party place little plastic babies in ice cube trays, and then fill the trays with water and freeze. Once everyone has helped themselves to cold beverages, have them drop one of the frozen baby ice cubes into their drink, but don’t tell them why yet. (The first person whose baby melts free is the winner).
Once all of my guests had gotten name tags, measured off a length of ribbon for the mommy measure game, gotten themselves a necklace and a plate of food, and dropped a baby ice cube into each of their drinks, I came and explained the rules for the necklaces and the baby ice cubes. These games played in the background of all the other games for the duration of the evening.
These next several games will have winners right away. Try to keep things moving along so no one gets bored, but be somewhat flexible for those players that are a little slower.
What is it?: You will need 10 brown paper lunch bags (numbered 1-10) and 10 random baby items (diaper pins, pacifier, diaper ointment, baby bottle, teething ring, rattle, mittens, nail clipper, thermometer, disposable diaper, baby powder, baby lotion, receiving blanket, onesie, etc. all removed from their packaging), and a sheet of paper for each guest with 1-10 numbered along the left side, and a pens for each. Make sure each bag has only one item in it and is sealed (taped, stapled, and fastened with a pretty ribbon). Pass the bags around and allow the guests to try to figure out what is in the bag. After 30 seconds shake a baby rattle for the guests to pass the bags. When everyone has written their guesses down, Set a nice basket beside the mom-to-be and have her open each bag to reveal what’s in it, placing the items in the basket. Give a gift to the person with the most correct guesses, and mom gets to keep the basket contents.
Nursery Rhyme Fill-in: Make up a sheet of lines from nursery rhymes (get a book from Wal-mart if you need one) leaving out a word or line for your guests to complete. You can either hand out game sheets to each guest and give them time to complete them, then read the nursery rhymes out loud and ask if anyone had something different…OR…you can play this game like a game show where players are seated and the first to stand must give an answer. You can either read the title of a rhyme and let your guests see if they can recite the rhyme, or read part of the rhyme and have them fill in the missing word or line. The first guest to stand up must give an answer. If they are right, you tally them a point. If they are wrong they sit down and the others race to stand up and answer. When you are out of rhymes, the person who answered the most correctly wins a prize.
Baby Food Tasting: With as much class and sophistication as a wine tasting, you will offer this game. Take the labels off a variety of baby foods (12 is good – 3 of each food-group: veggie, fruit, cereal, dessert) and replace with a number. (Make yourself a master sheet as you are doing this, so you remember which is which and can show it to the guests at the end). Give each guest a sheet of paper with 1-12 listed along the left side, and pen, and 12 plastic tasting spoons per person (ask them to not reuse spoons). Pass the baby food jars and give everyone time to make their guesses. They may taste, smell, look at, jiggle, stir, or use whatever way they want to distinguish what food it is. You can provide a list of multiple choices if you want to help them out a little, just make sure some of the choices on the list are different from the foods so it’s not too easy. The person who gets the most right wins.
The Hen Party Game: Perhaps you’ve seen it on YouTube? It is the plunger and toilet paper game. Need two rolls of toilet paper and two brand new toilet plungers. Split guests into two teams. Each team sends a player to the other side of the yard with a roll of toilet paper. She then places the toilet paper between her thighs/knees. The remaining members of the teams line up behind a leader and the person at the front of the line places the toilet plunger between their thighs with the handle sticking out in front of them. At the sound of the baby rattle the two plunger people must run down to their teammate without losing the plunger and attempt to poke the plunger handle into the hole of the toilet paper roll. Once they are successful, the plunger person takes the toilet paper and the toilet paper person runs the plunger back to the team for the next person to relay down the track. The first team to finish wins.
Baby Bottle Game: Fill baby bottles (one for each guest) with cranberry juice or tea. If you want, you could use the previous game’s winning team as contestants for this game to compete in this chugging contest in front of everyone. Just to be ornery, plug up the tip on one of the baby bottles with super glue prior to the party. At the sound of baby rattle players begin chugging from the baby bottles. The one who finishes first is the winner. See also how creative the person is who got stuck with the plugged bottle, and give them an award for being a good sport.
Sniff-a- Poo game: You’ll need 6 clean disposable diapers labeled 1-6 and 6 different snack size candy bars (Mounds, Baby Ruth, Snickers, Reeses Peanut Butter Cups, Milky Way, York Peppermint Patty, Three Musketeers, etc.). Place one candy bar in each diaper and microwave each diaper for 20 seconds. Stir the candy around and microwave another 10 seconds. Give each player a slip of paper numbered 1 to 6 down the left side, a pen, and 6 plastic tasting spoons per person (ask them to not reuse spoons).. Set the six diapers in front of the guests and allow them to look, smell, taste, and touch each “poopy” diaper in an attempt to identify the contents. Take lots of pictures! The person with the most correct answers wins a prize.
.
After the outdoor games, I invited everyone back inside and asked them to please refill their drinks and plates at the buffet, and then asked them to take a chair (bean bags, rocker, couch, ottoman, kitchen chairs, etc.) in a big circle around my living room to watch the mom-to-be open her gifts. One of the guests graciously offered to make a list of each gift and who gave it, so I gratefully provided the notebook paper and pen. Once all the gifts were opened, and the food and drinks were devoured, I awarded the prizes for the name tags, measuring game, and necklace game, and also gave out the little parting gifts (babyfood jars with jellybeans in them). Then I asked if we could all stand and hold hands and close by saying a prayer for the mom-to-be. I led the prayer but also left it open for anyone else who felt led to pray. One by one each guest hugged the mom-to-be, and started making their departures. It really was a fun party, and I was so blessed by all the compliments… which is why I decided to share it with you.
.
Prizes (need at least eight)
Little Bathroom soaps in a basket
Chap sticks and Lotions
Small Cookbook
A Gift Certificate for a specialty coffee (Starbucks or another local place)
A Women’s Magazine
A pretty necklace
Small bouquet of flowers
Scented Candle
Assortment of tea bags
.
Party Favors (as many as you have guests)
Send each guest home with a baby food jar filled with jelly beans and ask them to say a prayer for the momma and baby every time they eat a bean.
.
Be Prepared
Purchase everything you will need for the games. Read through each game carefully and make a list. Purchase all the prizes and party favors – or make the party favors. Purchase all your groceries and try to make everything the day before, if possible. Purchase everything you will need to decorate or make decorations, and make the decorations. Give yourself time to groom the yard (the day before), clean the house (the day before), and do all the decorating (early in the day). Purchase paper plates, napkins, cups, plastic utensils, ice, serving pieces, flowers, balloons, etc. Set up all the games the night before. Set up the food table right before guests arrive, keeping things covered and cold, and in the shade, or keep the food inside (which is what I did to avoid flies). Set out all the table service and place a paper weight on the napkins and plates – or tie them up in pretty bundles.
.
PARTY SCHEDULE (plan for the party to last about 2 hours)
Guests arrive: pin a diaper name tag on each and encourage them to mingle pointing them to the little pink footprint trail (like a yellow brick road – follow the yellow brick road!).
Make sure each guest gets something to drink and helps themselves to the sandwiches and snacks that have been set out.
Ice Breaker: Introduce everyone if your guests don’t know each other, and maybe tell how they each know the mother-to-be.
Play the games in the order listed on the previous pages. Keep a fairly quick pace with the games and activities, so there is no time for boredom. I tried to alternate sitting games with active games and quiet games with loud and fun games to keep it interesting. And also tried to find games that would be amusing.
Invite guests to help themselves to more food if desired, and make sure everyone’s beverage is full as often as possible.
Award prizes at the end, if they weren’t awarded at the end of each game, and give each guest a small party favor.
Let Mom-to-be open gifts.
Gather around the Mom-to-be to pray for her and the little one, for a safe delivery and a healthy, perfect baby. Allow guests to hang and visit as long as they wish. Hug everyone goodbye and thank them so much for coming. Put away the foods that need refrigeration. Pass out from exhaustion!
* * *
Alternative Games for your party
Baby items scavenger hunt: Hide several Baby items in and around the house. Create a scavenger hunt for guests to find these items. Guests may compete against everyone individually, or you can pair people off in 2-person or 3-person teams. First person/team to find all of the items wins.
Memory game: First guest says a word or phrase, second guest says the first word/phrase and then their word/phrase, the third guest says both previous words/phrases and then adds theirs. Play continues around the table until someone forgets a word/phrase, then they are out. Play continues until one person is left having memorized the whole thing.
Itty Bitty Baby Parts Baby Shower Game: Baby shower games step into the 21st century with this high tech, offbeat Ultrasound picture challenge. You will find that people say the darndest things when they try to identify the itty bitty baby parts in this contemporary baby shower game. Identifying these parts isn’t as easy as it may seem and your friends will be chuckling for days afterwards at some of the oddball responses! People say the darndest things! Itty Bitty Baby Parts baby shower game brings those sometimes hilarious answers out into the open. Your friends and family will enjoy hearing the responses of the other players while they try to identify the images.
Entertaining and affordable. Itty Bitty Baby Parts baby shower game can be purchased from http://www.bigdotofhappiness.com and comes complete with 12 ultrasound picture cards, word lists(25 player sheets for 25 guests), directions and answer page. Itty Bitty Baby Parts (Ultrasound Picture Game) $13.99
Baby Bingo Baby Shower Game: Yea! Finally! A bingo baby shower game with Pizazz! With Pep! With, with… spunkatudinality! In this 20 card version, guests are handed colorful cards with baby themed pictures: a crib, a birth certificate, stroller, baby blocks, etc. The first person to get five in a row and yell “Baby Bingo” wins. If a picture is worth a thousand words, then this baby shower game has got to be worth Millions!
There are 2 squares on each card which allow each guest to write in the name of the mom-to-be and her (expectant) due date. The mom will beam with pride and joy every time she hears her name and baby’s due date called during each game.
20 Card Baby Bingo comes complete with:
20 unique bingo cards
80 perforated caller chips
390 heart markers
Master call sheet
Instructions
Cards measure 5-1/4″ x 6-1/2″ h each.
Diaper raffles are the hot new baby shower activity! Use our baby raffle tickets – baby shower game to ensure your diaper raffle goes off without a hitch! Hand out raffle tickets to each guest who brings a pack of diapers. You could give one ticket per every 5, 10, or 20 diapers they bring. Have them write their name on the tickets and collect them. At some point during the celebration, draw tickets to give away special prizes. Guests will love their odds when they arrive with the all-important diapers! You could pass out tickets for other items as well – bibs, onesies, blankets, and much more!
Baby Raffle Tickets – Baby Shower Game ~ $8.99 each game
(150 tickets per package in six designs) available from http://www.bigdotofhappiness.com.
Raffle Methods
There are a few different ways to set up a raffle at a baby shower. Tickets for the event can be “sold” based on the basic baby-care items that guests bring, or can be given to everyone who arrives in a manner similar to door prize drawings. One commonly used option is the holding of a “diaper raffle,” where an extra ticket is given for every five, 10 or 20 diapers given. The same could be done with single bottles, onesies, pacifiers or even common goods such as soaps, shampoos and lotions. A winning ticket will be drawn toward the end of the baby shower, though some planners may decide to have multiple drawings and give away smaller prizes leading up to the “Grand Prize.”
Tummy Measure Gameby Factory Card and Party Outlet
An immeasurably fun shower game! Our Tummy Measure Game features 150ft – 2 1/2” W plastic yellow measuring tape (number are not printed on tape) with the words “What Size is the New Mommy’s Tummy?” Simply have guests cut a length of the tape by guessing the mommy-to-be’s tummy and the closest fitting tape wins.
Wilton Baby Shower Spin Gameby Wilton
Play this fun game at the baby shower. It’s a great way to break the ice and get the party started. Guests spin the bottle and do as the spot on the card asks. Some of the spaces say: Suggest 10 Baby Names; Give Mom-to-be Baby Advice; Relax and do Nothing; Sing a Lullaby; Whistle a Baby Song; Say the ABC’s Backwards; Recite a Nursery Rhyme; Repeat 5 Times: (a tongue twister).
.
“Lo, children are an heritage of the LORD: and the fruit of the womb is his reward.” Psalm 127:3
When I lived in the Rockies I used to spend pretty much every weekend in April and May (and even some years in June) sipping my morning coffee by my front windows and gazing outside at the dead, gray landscape, wishing (oh so desperately wishing) for spring, as winter relentlessly lingered. All I could think about was busting outside to push the lawnmower around in my yard, dig out the rotting leaves that had blown in around my porch, plant and fertilize my spring bulbs, and tidy up my dormant yard. I could almost hear thunder and lightning in my mind, and with feverish delirium I built castles in the clouds for the return of the robins and squirrels games, and the mommy & daddy birds fluffing their feathers, gathering twigs, and chirping their springtime songs. I swooned over what to grow in my gardens, my mouth still salivating at the evaporating memory of last year’s harvest.
Being in south Texas, I now whence at how overwrought I was for the scent of fresh washed anything to be hanging on my clotheslines. I haven’t forgotten though how badly I wanted to crank those frozen windowsills open, throw back the curtains, air out the dust and cobwebs, and let a little sunshine in. If only by my shear will I could have held back winter and coaxed those leaves to bud out on the trees, or tantalized my daffodils to bloom, or tempted the grass to creep up out of the earth, lush and green.
Almost anything was better than shoveling snow AGAIN, or sloshing in slush, or looking out at barren trees, or being cooped up inside torturing myself with the fallen mercury on the outdoor thermometer. “Oh hurry up spring,” was my daily mantra.
And then finally it was here.
Well, my dear, north-country friends, I know you are suffering now, but come sit on my south Texas porch swing (I wish this was my porch and my porch swing) for a bit, kick your sandals off, and have a slushy lemonade with me? I’m just reminiscing over my garden parties of yesterday and would love your company!
It’s a funny thing, but as soon as the words “garden party” roll off my tongue I am humming the song by Ricky Nelson…“Come to a Garden Party; reminisce with my old friends….” Hee hee, I can see you do too! Shall we hold hands and sway and sing it together?
I went to a garden party to reminisce with my old friends A chance to share old memories and play our songs again When I got to the garden party, they all knew my name No one recognized me, I didn’t look the same
CHORUS: But it’s all right now, I learned my lesson well. You see, ya can’t please everyone, so ya got to please yourself
People came from miles around, everyone was there Yoko brought her walrus, there was magic in the air ‘n’ over in the corner, much to my surprise Mr. Hughes hid in Dylan’s shoes wearing his disguise
CHORUS
lot-in-dah-dah-dah, lot-in-dah-dah-dah
Played them all the old songs, thought that’s why they came No one heard the music, we didn’t look the same I said hello to “Mary Lou”, she belongs to me When I sang a song about a honky-tonk, it was time to leave
Someone opened up a closet door and out stepped Johnny B. Goode Playing guitar like a-ringin’ a bell and lookin’ like he should If you got’ta play at garden parties, I wish you a lot’ta luck But if memories were all I sang, I rather drive a truck
‘n’ it’s all right now, learned my lesson well You see, ya can’t please everyone, so you got to please yourself
Wow…I didn’t mean to sing the whole dang song…. Sorry. The lyrics are kind of odd, aren’t they? Hee hee! 🙂
.
I recently finished a Bible study of the book of Esther, written by Beth Moore and since it is so fresh in my mind I thought to share with you a garden party on steroids:
KING AHASHURAS’ GARDEN PARTY
“…The king made a feast lasting seven days for all the people who were present in Shushan…in the court of the garden of the king’s palace.” — Esther 1:5
A seven-day feast. Holy cow! (…Possible pun intended). My, oh my, he sure knows how to arrange things! This is how King Ahashuras decorated for his party: “There were white and blue linen curtains fastened with cords of fine linen and purple on silver rods and marble pillars; and the couches were of gold and silver on a mosaic pavement of alabaster, turquoise, and white and black marble. And they served drinks in golden vessels, each vessel being different from the other, with royal wine in abundance, according to the generosity of the king.” (Esther 1:6-7). The drinking was not compulsory, but according to each man’s pleasure…soooooo, I’m guessing, since the booze was free, that it was each man’s pleasure TO DRINK!
After the king’s “garden party” came another feast. It was for his officials and servants – the powers of Persia and Media, the nobles, and the princes of the 127 provinces over which he now ruled. This feast lasted 180 days, (holy smokes – did you catch that? 180 DAYS!!!). I can’t even imagine how much food and wine he dished out for a 180-day party! My goodness, that’s almost six months. How does one entertain guests for that long? What do you suppose they talked about? How many bedrooms do you imagine he must have had in his house to make the princes and nobles of 127 provinces comfortable, not to mention the sheer volume of bath towels they must have gone through!
Being a hot-shot, he entertained by giving his guests the grand tour of his sprawling estate, showing off his riches, splendor, and majesty, as if the food, booze, and decorations weren’t enough of a brag.
It all reminds me a little of Oprah’s Garden Party, which you perhaps caught on television some years back? The Queen of daytime talk TV wanted to pay homage to some special ladies in her life whom she admired, but in the process couldn’t help showing off a little of her great wealth, lavishing them with an exquisite menu, costly gifts, and luxuriant preparations. You can read all about it at Oprah.com.
The term “garden party” does tend to stir up in my head notions of big Queen Mumm hats, lush flower gardens, and dainty little porcelain teacups brimming with exotic teas, accompanied with a myriad of condiments to add to them, like pure white, sparkling sugar cubes, dew covered mint leaves, juicy lemon slices, and fresh, succulent raspberries.
In my dreams my tables are covered with layers of lace and floral patterned tablecloths. Bouquets of flowers, topiaries and ivy centerpieces. The chairs all around are covered in cloth and ribbon. And there are twinkling lights and lanterns hanging from the trees.
Marlene Allan – Garden Party Online has some fun ideas too. I really liked the idea of spreading picnic blankets on the lawn and resting a large umbrella at each. The edges of the umbrellas are also decked out with flowers.
I found these garden party themes and ideas at Evite.com:
Garden of Eden—It doesn’t have to be clothing optional to evoke the spirit of Adam and Eve’s home. Serve a bounty of fresh fruits and vegetables, and decorate with snakes and apples.
Plant Swap—Celebrate your garden by asking guests to bring a flower arrangement or potted plant to swap with another guest. Guests can either fight over the foliage or pick names out of a hat to see who gets what.
Flower Arranging—Ask guests to bring blooms and vases, and invite a floral expert or a friend with very green thumbs to show you different ways of putting them together.
“Seeds of Kindness” Garden Party – was another terrific discovery. Visit this website for all the details: http://www.juliabettencourt.com/themes/kindnesstheme.html.
This is a garden theme that revolves around our planting seeds of kindness. Her emphasis is on being kinder and more caring Christian women. I won’t spill the beans, but hope you will check out all her swell ideas.
Unlike the garden parties of the rich and famous, mine have all been either merriments of Mother’s Day, or low-budget baby/wedding showers, so don’t be intimidated. You can afford this!
.
Garden Party 2007
Decorations: I hung plastic/silk flower strands that I found at the dollar store in swags along the patio eves. I did the same along the edges of the patio umbrella and table. I set out a few flower arrangements in baskets. I spent a decent block of time mowing and trimming and grooming my back yard so it would resemble the ritzy landscapes in the rich parts of town. There is no way it could possibly compare, but it looked its personal best anyway. I pulled all the weeds and watered until the grass was green green green. I planted the flower boxes with colorful blooms and foliage and piled them up with mulch just like the gardeners on TV. I wished I’d had a pretty gazebo that I could have lavished with tulle and silk flowers, or a lovely little pond and waterfall that would have drawn our eyes and trickled in our ears. Even a heavy cast bird bath would have been great. But I had to be content with such things as I had.
GRILLED PORTOBELLO SANDWICHES
Ingredients
Ciabata bread, drizzled with olive oil and lightly toasted
Portobello Mushroom caps, grilled and placed on top of the bread
Red onion slices, grilled and placed on top of the portobello
Fontina cheese, melted on top of the onion in the broiler
Fresh Basil leaves, arranged on top of the cheese
Tomato slices, drizzled with a balsamic/garlic/olive oil/black pepper dressing
VEGGIE PLATTER
Red, Yellow, and Green Bell Peppers sliced into wedges
Radish halves
Ranch dip
FRUIT KABOBS
Watermelon
Cantaloupe
Honeydew
Pineapple
Banana
Grapes
Cut fruit into wedges and skewer on wooden spears. Arrange kabobs on a pretty platter
SUN CHIPS
BEVERAGES
Iced Tea
Sodas
Lemonade
SUGAR COOKIES cut and frosted to look like pansies, arranged on a pretty doily covered platter. OR…those flowerpot cakes that are made with Oreo crumbs and the gummy worms on top would also have made a clever dessert for this soirée. (Click here for a how-to video for Pansy Sugar Cookies)
MUSIC: I ended up being a little too pinched for time to give the music selection a proper scavenge. So we started with a peaceful classical guitar CD and ended up with golden oldies music on satellite radio. I’ve since had a little more time to look and here’s the thoughtful lineup I found:
At a Garden Party, Ed Bickert
Garden Party, Rick Nelson
The Last Dance, Music for a Vanishing Era
Radiance, Music for a Garden Party (Mozart, Bach, Beethoven, Dvorak, etc.)
And Dan Gibson’s Solitudes Classical Garden, featuring the sounds of nature with music
Or… we could make a homemade CD or create an i-tunes playlist to play at the party. If the garden party is to celebrate Mother’s Day, you could give the music mix to Mom afterward. Buy MP3 singles from Amazon.com and burn them onto one CD. Here are a few suggestions:
Anita Renfroe, The Mom Song (Momisms)
Boyz II Men, a Song for Mama
Chris Young , Voices
Carry Underwood, Mama’s Song
Brad Paisley, She’s Everything
Carry Underwood, Don’t Forget to Remember Me
Dolly Pardon, Coat of Many Colors
Jamie O’Neal, Somebody’s Hero
LeAnn Womack, I Hope You Dance
Rascal Flats, My Wish
Martina McBride, In My Daughter’s Eyes
Merle Haggard, Mama Tried
Taylor Swift, The Best Day
Trace Adkins, One Hot Mama
Trace Adkins, You’re Gonna Miss This
Trace Adkins, She Thinks We’re Just Fishin’
Beyonce, Halo
Celine Dion, A New Day Has Come
Loudon Wainwright III, Daughter
Lonestar, Mr. Mom
Martina McBride, Blessed
Edwin McCain, I Could Not Ask for More Sara Evans, Always Be My Baby LeAnn Rimes, How Do I Live Carrie Underwood (feat. Randy Travis), I Told You So Guns n Roses, Sweet Child of Mine
Alicia Keys, Superwoman
Aerosmith, Don’t Want to Miss a Thing
CRAFT: After our luncheon I gathered the girls up and moved our party to the far side of the yard where I had a craft project set up – making garden stepping-stones. I laid out all the decorations (small stones, marbles, jewels, beads, mosaic tiles, sea shells, tools, etc.) and the cement forms, one for each person. I mixed up cement in a wheelbarrow with water and mixed in a little cement dye to give our stones a kind of adobe look.
After I poured the cement into each form (pizza boxes) we got busy decorating. We started with pressing our handprints (footprints) into the center, and then we started arranging little decorations around it and carving designs into the wet concrete.
We all pitched in to make a stone for my sister who died the April before. We also made one for my other sister who lives far far away. With hers I asked if she could send a paper tracing of her hand that we could use to press into the cement, and also if she could send some decorations for us to use in her stone, and if possible draw us a pattern of how she would like us to decorate it. The finished products needed to set-up and then dry without being moved for at least 24 hours, so my guests left their creations with me for delivery on another day. I later delivered all of them to my mom’s yard and we set them along a lazy path in her beautiful gardens.
GIFTS: I paired a devotional book with a little watering can and filled it with garden tools, gloves, and seeds, for a hip little gift set. I found my small inexpensive watering cans at Big Lots, along with the low-cost garden utensils, gloves, and packets of seeds. I put the tools down into the watering cans, squeezed in the pair of gloves, and tucked two seed packets in the top. I tied a THANK YOU card to the handles with macramé twine. Then I gave them to my mom and sister. I also placed one on my neighbor’s door step, and made another for a girlfriend. And while I was at it, I thought they would make nice end-of-the-year gifts for each of the teachers I worked with in an elementary school, so I made three more.
The devotional books I purchased several years ago were from Crossings and are unfortunately no longer in print, but they can be found used sometimes on eBay or Amazon.com, or other out-of-print, or used book stores. They paired really well with the watering cans to make a thoughtful gift.
Bible Seeds, A Simple Study-Devotional for Growing in God’s Word
From the Creators of the God’s Word for the Biblically-Inept ™ Series
Starburst Publishers, ISBN 0-7394-2142-5
Bible Seeds for Enriching Your Character,
A Simple Study-Devotional for Growing in God’s Word
From the Creators of the God’s Word for the Biblically-Inept ™ Series
Starburst Publishers, ISBN 0-7394-3048-3
Isn’t this a neat idea? A Fruit Pizza Bar!!!! Love it!
.
Garden Party 2008
This Mother’s Day I invited my mom, sister, her daughter, my other three nieces, my grand-niece, my sister’s mother-in-law, and my nephew’s wife. It was a full house.
And for this year’s garden party I planned a “kiddie pool pedicure party” where all my guests would sit in lawn chairs in a circle outside around our kiddie pool filled with hot sudsy water and perfumed bath salts and floating flower pedals. The sun would be shining and the birds would be chirping. We’d be wearing our capris and peddle-pushers. We would take off our shoes and soak our footies in the warm water while we nibbled on a modest buffet of brunch items. I thought it would bring back memories of when my sisters and I were young. In the summers our Grandma Gen’s would fill tubs with water and we’d all sit around in her yard and dangle our feet in the tubs. It is one of my fondest childhood memories.
Once our feet had soaked we would give ourselves PEDICURES and paint our toenails with our choice of nail polish, all the while chit-chatting about this and that. Afterwards, since our feet would be so pretty we would need some way to show them off, so I planned a CRAFT of decorating flip-flops. Our local Hobby Lobby store had everything I needed from the glue to the flip-flops and all the cutsie adornments to decorate them.
Well, you know how plans go sometimes – right out the window! That Saturday morning we had cold drizzle, and I mean blue-lips, can’t-feel-my-fingers, it’s-raining-it’s-pouring-the-old-man-is-snoring, COLD drizzle. Ugh. So we had to move our little soirée indoors to my cramped man-cave.
I phoned last-minute and begged everyone to bring a foot tub. I had also asked in the invitations for everyone to bring their own pedicure kits, and a few bottles of nail polish to share.
We didn’t let the inclement weather, or all the other little mishaps dampen our spirits. My guests seemed to have a blast and thankfully found humor in my severe lack of hostess skills that day.
Karen was my first guest to arrive and helped me put together the mimosas. While she poured orange juice I finished assembling the breakfast pizzas and that’s when the smoke alarm went off. Oh dear, someone – I’m not mentioning any names, but her initials are Lindee (sorry Sis) – placed a stack of paper plates out-of-the-way and over on the stove… on a lit burner that she didn’t realize was lit (whoops)! Thanks to Karen’s keen sniffer and quick reflexes, she grabbed and tossed the stack in the sink and ran water to put the flames out. Woo hoo… disaster averted! It all just added to our zany fun that day.
I don’t know whether the weather put me off or what, but I just didn’t have my feet under me with this get-together. Have you ever had a party like that? I felt scattered and rushed, and just helter-skelter, all over the place with my mood and my time management – just everything. In spite of that though we spent a sweet morning together listening to silly music, eating, being crafty and otherwise enjoying each other’s company. I ended up with enough stuff for everyone to make two pairs of flip-flops each, and I had gathered enough decorations and idea sheets to give us all plenty of inspiration.
BREAKFAST PIZZA
1 tube Pillsbury Pizza dough (refrigerated) (or you could use a Boboli ready-made crust)
2 Ripe Avacados, mashed (or a ready-made spicy guacamole)
6 strips of crispy fried bacon, crumbled
Grape tomatoes sliced in half
Handful of Arugula (or spinach) leaves
Dash of Tabasco
Pop the dough out of the tube and press out onto a large greased pizza pan. Bake until just turning golden, or use a Boboli crust. Remove from oven and allow to cool. Mix a few drops of Tabasco in with the mashed avocados and spread onto pizza crust. Sprinkle with crumbled bacon, arugula leaves, and grape tomato halves. Cut into wedges and serve. I tripled this recipe because of our number of guests and we had left-overs.
PEACH COBBLER
2 (1-lb) bags frozen peaches
1 tsp. lemon juice
½ cup sugar
2 Tbsp Cornstarch
1 tsp. Mace (or nutmeg)
1 Tbsp Vanilla
1 cup sugar
1 cup flour
1 cup milk
1 stick of butter, melted
Cinnamon and sugar
Toss 1 bag of peaches with next 5 ingredients and then layer in bottom of a buttered casserole dish. If you want to be fancy you can split it among ramekins (one for each guest).
Place sugar, flour, and milk in a bowl and whisk until blended. Whisk in the melted butter. Pour the batter over the peaches. Sprinkle with Cinnamon and sugar. Bake for 1 hour, or until the peaches are bubbling and the crust is golden. Check a little earlier if doing ramekins.
PEACHY MIMOSAS
½ gallon organic orange juice with pulp
2 small cans of peach nectar
1 small bottle of champagne (or sparkling cider, or ginger ale)
Mix all together in a large pitcher and pour into wine or champagne flutes. Decorate with orange slices dropped into the glass and a sprig of mint on top.
Flip-Flops Craft
For this craft you need at least one pair of flip-flops per guest. Hobby Lobby had a whole section dedicated to this craft. I picked up all the supplies there. At home I had material scraps that could be torn into strips and tied onto the straps of the flip-flops. I also had double-sided tape to adhere bead strips and fur strips and other decorations to the top of the sandals. If you can’t find craft flip-flops, just have each of your guests bring a pair from home to bling out.
Other Craft Ideas from Parties Past (pictured below):
Broken dish mosaic picture frames. Mosaic pieces can be glued to picture frames or clay pots and finished with grout to make a very nice looking product. Look at yard sales and second-hand stores for pretty dishes that are inexpensive; or use one of the dishes from your own cupboard. If you have a child who has gotten engaged, this would make a neat “break the dish” (Jewish engagement custom) activity for a mother to do with the fiancé’s mother, and would make a neat wedding gift for the couple to place their wedding photo in. Wrap the dishes in several sheets of newspaper and whack them several times with a hammer until there are just quarter-sized pieces. Use a fast drying mosaic glue (available at hobby stores) to adhere the pieces to the picture frame or clay pot. Keep the pieces fairly close together. Let the glue dry.
Follow package directions and mix up a batch of grout. Purchase any color sanded grout powder (available from Home Depot) that will compliment your china. Smooth it in between the tiles being sure to fill all the gaps and air spaces. Let it dry for as long as is recommended on the package, and then use a damp sponge to gently wipe the grout off the tiles. Keep rinsing the sponge and squeezing the water out of it in between wipes.
Once all the tiles are clean, let the project sit and dry for a day or two.
Paint Clay pots with acrylic paint. My family and I have done this at Christmas time and then planted narcissus bulbs in the pots after they were decorated. We’ve also done them for Mother’s day with summertime themes. Dani did hers with sunflowers. I did mine with dragonflies and other bugs. Gracee painted hers with stripes, and our other guests did designs that unfortunately escape my memory. Buy whatever size terra-cotta pots suit your fancy and some containers of water-based acrylic paint. You’ll also need an assortment of different sized and shaped paintbrushes. Remember to get the little plates that go underneath the pots and paint them too.
Paint and decorate birdhouses. A few years back I found some little wooden birdhouses at the craft store. I drug them out on Mother’s Day and we painted and decorated them. I glued rocks and sticks to mine after painting the little roof. My mom and daughters just painted theirs with pretty designs.
Rock Bugs: Hunt for rocks that are all different shapes and sizes. Glue small round ones together to make caterpillars or ants. Use small round ones and paint to look like ladybugs, bees, spiders, or beetles. Use long skinny ones and paint them to look like grasshoppers or hornets, or lizards. Use your imagination and have fun. These look especially cute when placed in the soil of a potted plant or scattered around on a window ledge with potted plants.
.
Craft Party 2011
My first year in Texas I decided to celebrate mother’s day with all my girlfriends and their daughters/grand-daughters. They all came over for a craft party. I served food and had music playing, of course. JoAnn’s Fabrics and Crafts had little wooden birdhouses on sale for $1 each so I picked up about $30 worth. I also picked up some cheap wind chimes to attach to the bottoms of the birdhouses, and hardware to put some heavy string through to hang them on our porches. I asked my friends to bring paints, brushes, glue guns, and whatever other things they might want to use to decorate a bird house with. They all did and we had hours of fun with each other.
COWBOY CAVIAR (and tortilla chips)
Ingredients
1 can Black Eyed Peas, drained
1 can White Shoe peg Corn, drained
4 ripe tomatoes, diced
2 ripe Avocados. Diced
2 fresh Jalapeños, seeded and diced
2 cloves garlic, minced
1 bunch green onions, chopped
¼ cup Olive Oil
¼ cup Red Wine Vinegar
1 tsp. Cumin
¾ tsp each Salt & Pepper
¼ tsp Cayenne Pepper
Family Size Package of Tortilla Chips, Scoops
Directions
Mix all ingredients, except for chips, in a bowl. Toss well to distribute flavors. Cover with plastic wrap and place in refrigerator until party time. Serve with tortilla chips, like you would salsa and chips or guacamole and chips.
EGG SALAD SANDWICHES
Ingredients
1 dozen hard-boiled eggs, peeled and chopped
1 small white onion minced
¼ cup sweet pickle relish
½ cup Mayo
1 Tablespoon Spicy Brown Mustard
Dash Cayenne powder
¼ tsp Salt & Pepper
5 leaves of Romaine Lettuce, shredded
2 Loaves of White Bread from the Bakery, sliced thin, crusts removed
Directions
Mix first 7 ingredients in a bowl, cover and chill overnight. The day of the party, lay out the bottom slices of white bread on a flat surface and spread egg salad over them in a thin layer. Layer several shreds of lettuce over, and then cover with the other slices of white bread. Cut each in half from corner to corner and then in quarters from the other corners. Arrange on a platter, cover with plastic wrap and refrigerate until party time.
SOUTH TEXAS SHRIMP COCKTAILS
Ingredients
2 lb frozen cooked shrimp, tail off, thawed, rinsed and patted dry
3 Large Ripe Avocados, cut into small chunks
6 Large Jalapeños, stems removed, chopped with seeds
1 Small White Onion, chopped
Half a bunch of Cilantro torn apart and chopped
2 12-oz bottles Louisiana brand Seafood Sauce, Spicy
3 Lemons cut into wedges
Clear plastic tumblers
Directions
In a large bowl combine shrimp, avocado, jalapenos, onion, cilantro, and sauce. Toss to combine. Spoon into clear plastic tumblers, top with a lemon wedge and sprig of parsley if desired, cover and refrigerate until ready to serve.
HOMEMADE LEMONADE
Ingredients
2 gallons drinking water, reserve 3 cups
10 Lemons, sliced
1 can frozen concentrate lemonade
4 cups sugar
2 gallon container with lid
Directions
Place 2 gallons of fresh cold drinking water in a 2 gallon glass container, reserving 3 cups to be used in a moment. Add lemons and frozen concentrate. Stir well. Place the 3 cups of reserved water in a bowl and microwave on high for 3 minutes until boiling. Add the 4 cups of sugar to the boiling water and stir until dissolved. Allow to cool, and then add to the lemonade. Stir well, chill until ready to serve.
Variation: Add a variety of chopped up chilled fruits (e.g. thin watermelon wedges with rind on, strawberries halved, green melon chunks, raspberries, blueberries, red grapes, orange slices, lime slices, and maraschino cherries) to the lemonade just before serving, or place fruits in large beverage glasses and fill each with lemonade. Serve with a straw.
RASPBERRY CREAM CHEESE DELIGHT
Graham Cracker Crust:
1 1/2 cups crushed graham crackers
1/4 cup sugar
1/3 cup butter, melted
In a small bowl, combine the crumbs and sugar; add butter and blend well. Press onto the bottom and up the sides of an ungreased 9-in. pie plate. Bake at 375 degrees *F for 8-10 minutes or until crust is lightly browned. Refrigerate for 30 minutes before filling.
Filling
1 pkg of cream cheese, warmed to room temp
1 small container of marshmallow cream
1 tsp lemon juice
1 small container cool whip
1 package fresh or frozen raspberries
Mint leaves and lemon slices for garnish
Directions
Mix cream cheese, marshmallow cream, lemon juice, and cool whip in a bowl. Carefully fold in half the raspberries. Spread over cooled graham cracker crust. Place the other half of the raspberries on top and garnish with mint leaves and lemon slices. Cover with plastic wrap and refrigerate until ready to serve.
.
And here’s a menu I put together for a Baby Shower garden party for my daughter:
“And when these days were completed, the king made a feast…for all the people…great to small, in the court of the garden of the king’s palace.”
There are two parts to this blog post. First a story and after that the plans for an Adult Halloween Party, complete with recipes.
All Hallows Eve
How do you feel about Halloween? To tell you the truth, it was a cherished part of my childhood memories. When I was a kid growing up in our small town, it was a BIG affair. Every kid in our town participated. The morning before, our mom would drag down her big box of costumes from the attic and always let my sisters and me pick which ones we wanted to wear from it. Some Halloweens were very cold and snowy and our costumes would have to fit over our snow boots and heavy winter coats, lots of them were windy – not that a kid ever really notices such things, and a good handful of them were completely pleasant nights, semi warm, lit up with a big full moon that sometimes hid behind a dark, ominous cloud, and a sky dazzling with glittery stars.
Of course the first houses we headed to were the ones with the really awesome treats, like big, soft popcorn balls and glorious caramel apples.
Those were the good old days of home-made Halloween treats, usually made by the older church ladies. A few of the more affluent families handed out regular size candy bars, and we always made a bee-line to their houses next. And then we spent the remainder of the night collecting pillowcase-fulls of the little stuff. We always made a stop at our grandparents’ house, although they weren’t big on Halloween and usually had the lights off. But they’d answer the door for us, and ALWAYS gave out the same awful orange and black wrapped candy that was sort of like some kind of peanut butter taffy — yuck! Not my favorite. But we were privileged because they only answered the door for us.
When all the porch lights started going out, it was time to call it a night. My sisters and I would shuffle on home, shuck our duds at the back door (poor mom sifted the piles and washed off the mud), and then dash for the living room where we’d dump out our buckets and sacks and compare booty. Sometimes we’d trade if we had something we didn’t like and another sister was willing to deal. Mom would let us eat some of it before it was time to brush our teeth and get ready for bed.
“Well, the fun’s over and she’s gone to church!”
I grew up. Got married. Got saved. Had kids, and found myself wedged inextricably in a sticky little quandary between learning the origins of Halloween and those fond memories of my childhood. The church we belonged to when my kids were little was understandably very much against the whole idea of Halloween. I felt like I might be excommunicated if I turned maverick and rode the fence on this one? So I reached down deep in my soul to find an acceptable, fun, non-observing observance of the holiday that would satisfy all the little guilt-trips I had going on in my psyche. Desperately seeking to come up with something that would get both a stamp of approval from my church, and Jesus, but also my excited, bright-eyed, beaming blonde baby girl with trick-or-treating friends as well.
Halloween Alternatives
I prayed and asked God what He wanted us to do, as salt and light, not to cast judgement on anyone, but to be all things to all people that we might by some miracle save some. God led me with various verses of scripture to go ahead and take my darling little baby girl door to door, but as an angel of light instead of darkness.
I dressed her cute little self in a ghost outfit, but with a halo on her head, and a big round button on her chest that said “HOLY GHOST.” I came up with a little ditty that she dutifully memorized, and then that night we tricky-trotted from door to door in our little neighborhood doing what I felt lead of God to do. Each door that answered her little knock-knock-knock was met NOT with “trick or treat,” but with our little poem that went something like this: “On this night when the spirits are about, we pray that the Holy Spirit dwells with you!”
It was our goal to bring blessings to our neighbors. We handed out tracts to every home and said a prayer over every house and every person we encountered. Basically prayer-walked our neighborhood, singing worship songs quietly to ourselves as we went.
They were all a little puzzled that a kid was there to give THEM something, and of course they offered her candy in return, which she happily accepted (although in retrospect I guess that could have been possibly construed as food offered to idols, eeeks. Oh well, we’ll just have to ask forgiveness for that one). It seemed the perfect solution. My little girl had a great time, and we didn’t hide from the holiday or let it have our neighborhood all to itself.
The next year, and for several years after that, we went to the church’s Fall Festival, held at the Fairgrounds Industrial Bldg, where the kids were not allowed to dress up, but they did get to play a plethora of carnival games that paid out in little dollar-store prizes and bite-sized candies. We ate sloppy joes and hot dogs which the church provided, and sampled all the side dishes that had been carried in. And the adults visited and fellowshipped at the tables in the center of the room until the whole thing drew to a close.
When the kids got older and didn’t want to play the kiddie games any more, they would help me pass out candy to the trick-or-treaters who came to our door. We always gave a Halloween Bible tract to each kid with a handful of whatever the coolest candy was at the time, sometimes we dressed up and played organ music in the CD player, and always blessed them as they went off into that dark night, saying a little prayer for each of their souls.
And then my kids grew up. And it wasn’t long before there came grandkids…
…and the whole thing came full circle again.
The first year the darling little ones came knocking at our door and we lavished them with buckets of healthy snacks – because their mom would have our heads if we gave them candy. The next year we sat up lawn chairs in their yard in town and handed out treats to trick-or-treaters while they took their girls door-to-door. And the next couple years after that we went with them to the church’s Fall Festival, which is remarkably like the Fall Festivals my kids went to — only in Texas it gets to be outdoors because the weather is spectacular!!!!
And so, like sands in the hour glass, so are the days of our lives. I suppose it will go on the same until we’re too old and feeble to participate any more. Maybe they’ll do something fun for us at the nursing home; let us bang our canes on our rockers while the staff bobs for apples or some such nonsense? And then I guess the door of life will just creak to a close, and Saint Peter will pop out from behind the pearly gates and shout “Boo!!!” at us as we are approaching. (I’m kidding of course).
But wait. We’re not dead yet. Stop it. Why should the kids have all the fun? I’ve got an idea. But before I get to that I want to be clear that this is only intended as something fun to do on a night when everybody else is out celebrating a pagan holiday. I don’t observe Halloween, and I am not teaching anyone else to either.
Adult Non-Halloween Party
I’m not always the best at facilitating these things – hence the “reluctant hostess” tag I’ve given to myself, but I’m never lacking in ideas. Maybe you’ve got all the charisma in the world and are just always drawing a blank? We would make SUCH a great team!
Are you an “empty nester,” baby-boomer who wishes she/he had something fun to do on Halloween night? Are you living in an all-adults-neighborhood and want to get to know your neighbors? Even if you live in the same old neighborhood going on decades this party will still be a howling fun thing to do.
PROGRESSIVE DINNER PARTY
A FEW WEEKS AHEAD: Have a meeting with all your neighbors to decide who will be House #1, 2, 3, etc., so that everyone can prepare their part, plus have time to decorate if they want to, and know who else is participating. Each neighbor can totally plan their own part of the meal, or y’all can use this one I am suggesting below.
You can be kids again and wear crazy hats or silly masks, or fully dress up, and after trapsing hither and yawn over rocks and fences, and around bushes, by the light of the moon (and a few trusty flashlights) to get to each other’s house for the courses of your supper, your group could crown the evening with a game of cards, dice, or dominoes, or have a couples pumpkin carving contest, or pop some popcorn ( if you can fit any more into your swollen bellies) and watch a movie on somebody’s big screen TV. Outside. Under the stars. What a scream!
.
House #1
Everyone meets at the first house at dusk. (Remember to bring flashlights and cameras to take lots of pictures – you’ll treasure them later. )
I saw the cutest idea on Pinterest for serving Halloween party appetizers buffet style. Lay out your table with a pair of pants and a flannel shirt as if a person was laying on your table. Tuck the shirt into the pants. You could also tuck some straw into the arm holes and leg holes, or put skeleton hands and feet there instead. Unbutton the shirt and set a tray of goodies in the chest part. Cut the pant legs with a slit up the middle of each leg and place trays of goodies inside.
12 slices of Applewood smoked, thin sliced bacon, halved crosswise
DIRECTIONS
Slice the chorizo crosswise in thirds. Halve each piece lengthwise, then cut each half into 4 lengthwise strips to make a total of 24 small sticks.
Tuck a chorizo stick into each date and pinch the dates closed. Wrap a strip of bacon around each date and secure with a toothpick.
Place the wrapped dates in a large skillet, seam sides down, and sauté, turning, until the bacon is browned on all sides, about 10 minutes. Drain on paper towels and serve hot.
Especially good served with very thin sliced pieces of blue cheese.
1 cup sparkling water if you desire, but you don’t have to if you want a strong wine taste.
DIRECTIONS
Add everything into a pitcher and mix with a large spoon.
Let it sit in the refrigerator for 1 to 2 hours. The longer it sits the darker the plums become. Best to keep sangria in the fridge. Enjoy!!!
House #2
Salad and spicy Bloody Marys. (Remember to take pictures!)
Menu Suggestion:
Classic Nicoise Salad*
INGREDIENTS (4 large or 8 small servings)
1 pound red-skinned potatoes, sliced 1/3 inch thick
Kosher salt
2 tablespoons dry white wine
10 ounces haricots verts or thin green beans, trimmed
4 large eggs
1/4 cup white wine vinegar
1/2 shallot, minced (about 2 tablespoons)
2 tablespoons dijon mustard
1 tablespoon chopped fresh thyme
Freshly ground pepper
3/4 cup extra-virgin olive oil
8 cherry tomatoes or small cocktail tomatoes, halved or quartered
1 head Boston lettuce, leaves separated
6 radishes, trimmed and quartered
2 5 1/2 -ounce cans Italian or Spanish tuna packed in olive oil, drained
1/2 cup nicoise olives
DIRECTIONS
Put the potatoes in a medium saucepan; cover with cold water and season with salt. Bring to a simmer over medium-high heat and cook until fork-tender, about 5 minutes. Drain and transfer to a medium bowl; drizzle with the wine and let cool. Reserve the saucepan.
Meanwhile, bring a separate saucepan of salted water to a boil. Fill a bowl with salted ice water. Add the haricots verts to the boiling water; cook until crisp-tender and bright green, 2 to 4 minutes. Drain and immediately plunge into the ice water to cool; drain and pat dry.
Place the eggs in the reserved saucepan and cover with cold water by about 1 inch. Bring to a simmer over medium-high heat, then cover, remove from the heat and let stand, 10 to 12 minutes. Drain, then run under cold water to cool. Peel under cold running water.
Make the dressing: Whisk the vinegar, shallot, mustard, thyme, 1/2 teaspoon salt, and pepper to taste in a bowl. Whisk in the olive oil in a slow, steady stream until emulsified.
Toss the tomatoes in a small bowl with salt and pepper to taste. Add about 1/4 cup dressing to the potatoes and toss. Quarter the hard-cooked eggs.
Divide the lettuce among 4 plates. Arrange the potatoes, haricots verts, radishes, hard-cooked eggs and tuna on top. Pour any juices from the tomatoes into the dressing, then add the tomatoes to the plates. Drizzle with the dressing and top with the olives.
*Recipe courtesy of Food Network Magazine
Salad could be served with spicy Bloody Marys, decorated for the occasion, or a nice Cotes du Rhône rosé (as suggested by www.matchingfoodandwine.com) with a small stemmed rose (or any crazy party favor) laying across each glass.
House #3
How about a warm dip with bread sticks, a veggie nibble, and a nice white wine?
4 ounces sharp white cheddar cheese, grated on the large holes of a box grater (about 1 3/4 cups)
3 tablespoons freshly squeezed lemon juice
2 teaspoons Worcestershire sauce
10 ounces lump crabmeat, picked over for cartilage
1/2 cup chopped fresh flat-leaf parsley
2 slices white bread, crusts removed, torn into 1/4-inch pieces
1/2 teaspoon paprika
Toast points or bread sticks, for serving
DIRECTIONS
Preheat oven to 400 degrees with a rack in the center. Melt 2 tablespoons butter in a medium saucepan over medium heat. Add shallots and cook until soft, about 2 minutes. Add 1 tablespoon water and simmer for 30 seconds. Stir in the cayenne, Old Bay, and dry mustard until well combined. Pour half-and-half into saucepan and bring to a simmer. Slowly whisk in the cream cheese, a few pieces at a time. When the cream cheese is fully incorporated, whisk in the cheddar cheese, a handful at a time. Stir the mixture for 2 minutes. Remove from heat. Add lemon juice and Worcestershire sauce; stir to combine. Stir in crabmeat and half of the parsley.
Transfer mixture to an ovenproof baking dish and sprinkle with bread pieces. Dot top of bread pieces with remaining tablespoons butter; sprinkle with paprika. Bake until bread pieces are golden and dip is hot, 18 to 22 minutes. Garnish with remaining 1/4 cup parsley and serve with toast points or bread sticks.
***Foodthinkers.comsuggests a light Sauvignon Blanc, specifically Golden Kaan Sauvignon Blanc. (Or you could go with a green “Witch’s Brew” smoothie which you will find recipes in abundance on Pinterest)
House #4
…has the main dish (a meat dish, and small side) and of course a special drink to go with it. And of course more photography.
Menu Suggestion:
Chimichurri Grilled Beef Skewers(with Fruit and Nut Farofa)
INGREDIENTS
1 pound flank steak, trimmed
20 wooden skewers
Soak skewers in warm water, at least 20 minutes. Slice the flank steak against the grain into 20 strips, about 1/8 inch thick. Thread the meat accordion-style onto the skewers and set aside until ready to grill.
Chimichurri:
1 bunch fresh parsley, chopped
6 large cloves garlic, minced
1 small bunch fresh oregano (about half the quantity to parsley)
1 small onion, minced
1 teaspoon salt
1/2 teaspoon ground black pepper
1 Tablespoon Red (Cayenne) Pepper flakes
1 tsp. Spanish Pimenton (smoked Paprika)
3/4 cup olive oil
3 tablespoons lemon juice
3 tablespoons wine vinegar
DIRECTIONS
Puree all ingredients for chimichurri in a blender until just blended. Season the steak with salt and pepper. Brush chimichurri sauce on each side of meat before grilling. Brush the grill with olive oil, then grill the skewers until marked, about 1 minute per side. Serve more chimichurri on the side as a condiment.
Fruit and Nut Farofa
This is a perfect accompaniment to any roasted meat, but especially Brazilian Chimichurri steak! Farofa is made of course ground manioc flour (which can be found in most Latin/South American markets), like farina cereal. If you cannot find it, or don’t want to bother looking, you can go with Quinoa instead, prepared according to package directions. (Also, some yummy looking Quinoa recipes can be found here.
1/3 cup water
2 Manioc Flour
1 Tablespoon butter
1 Tablespoon oil
1 large chopped onion
2 large chopped tomatoes
1 hardboiled egg, chopped
¼ cup golden raisins or currants
¼ cup chopped prunes
¼ cup chopped walnuts
2 Tablespoons of chopped parsley.
INSTRUCTIONS
Place manioc flour in a medium glass bowl. Stir water into manioc flour to moisten and then set aside.
Heat butter and oil in a skillet over medium heat. Add chopped onion and tomatoes. Saute until onion is translucent, about 3 minutes. Add the moistened manioc that you set aside earlier, stir and cook for about 5 minutes. Remove skillet from heat and add 1 hardboiled egg, raisins or currants, chopped prunes, chopped walnuts, and chopped parsley. Serve.
White Wine Smoothie (Palate cleanser)
20 ice cubes
1 cup very cold fruity white wine (unoaked Chardonnay, Moscato)
1 chilled orange, cut into 4 pieces
1 chilled lemon, cut into 4 pieces
2 cups lemon sorbet
½ cup heavy whipping cream or plain Greek Yogurt
1 to 2 Tablespoons powdered sugar (optional)
Place ice, wine, and fruit in a blender. Blend until smooth. Add remaining ingredients and pulse until combined. Pour into tall skinny glasses (flower vases work great) with a sprig of mint and a fancy striped straw. Serves 4
House #5
…hosts dessert and a game of dice or cards, or pumpkin carving contest.
Menu Suggestion: Coffee and Cake
After-dinner game suggestions:
Spinner or Chicken-Foot Dominoes, Rollin’ Bones Pirate Dice game, Liar’s Dice, Pinochle, or dealer’s choice Stud Poker. When’s the last time you played CLUE? Or Monopoly? Or Spoons? As long as we’re reliving our childhood we could even play a game of hide-and-go-seek!!! OR, if you and your pals want to walk off some of that wonderful dinner, y’all could do what my little snookums and I did all those many years ago – dress up like little Holy Ghosts, take encouraging Bible messages to your neighbors, prayer walk your neighborhood, sing songs, hymns and spiritual songs, and bless everyone that passes by.
.
I hope you’ll give this party a whirl. And please, tell me how it turns out!!!!
.
“And if it seems evil to you to serve the Lord, choose for yourselves this day whom you will serve, whether the gods which your fathers served that were on the other side of the River, or the gods of the Amorites, in whose land you dwell. But as for me and my house, we will serve the Lord.”Joshua 24:15
Now, a girl with the name COLLEEN simply must, absolutely recognize Saint Patty’s Day with a dainty feast fit for a leprechaun, don’tcha think? Yes, she simply must!
And this Colleen (Irish Gaelic for “girl”) is a BIG fan of corned beef and cabbage, even though I met an Irish laddy once who said he’d never heard of it until he came to America. Apparently it isn’t an Irish dish at all. Well, I guess my family has been here too long and we’ve forgotten. Anyway, I don’t care. I must have it at least for St. Patty’s Day. And the leftovers make for a right amazing Reuben sandwich (dark rye bread, corned beef, sauerkraut, 1,000 Island dressing, Swiss cheese, and then grilled like a Panini) – YUM, …or… Reuben Cream Cheese Dip on little rye melba toasts.
And this is how I make my Corned Beef…
CORNED BEEF, CABBAGE, AND BABY NEW POTATOES
2 large corned beef, (will shrink in size when cooked)
2 Tbsp Pickling Spices
2 small bags of baby red or yellow Potatoes
2 sticks of butter
1 large green cabbage chopped into bite-size pieces
Seasoned Salt (or Creole Seasoning)
Preheat oven to 325*F. Rinse corned beef well and pat dry with paper towels. Place fat side up in a large crock pot, early in the day. Add clean, cool water until meat is almost totally covered. Sprinkle the fatty tops with the pickling spices that came with the roast, and also an extra Tbsp of pickling spices per portion of meat. Cover with lid and let cook on high setting all day (at least six hours or more). Check for doneness at the sixth hour and if meat falls apart easily it is done. If not, cover and allow to continue cooking another hour. Check and repeat as necessary. When meat is tender, turn the temp to warm and proceed making the rest of the meal.
Place potatoes (whole and unpeeled) in a pot of salted water and bring to a boil (you can use the broth from the meat if you desire, but if you do, then do NOT add salt). Boil gently for 20 minutes.
Meanwhile, as the potatoes are nearing done, in a large frying pan, melt a stick of butter until it has separated and clarified. With the heat on medium high, place chopped cabbage in the butter and stir fry it until just tender and slightly translucent — just a minute or two. Turn heat down to low, add another stick of butter, and the cooked potatoes (cutting them in quarters as you add them). Toss both together until completely coated in melted butter. Taste to see if it needs salt and add Creole Seasoning as necessary.
Remove meat from crock pot to a serving dish, slice the meat with a sharp knife, and drizzle with reserve liquid (make sure pickling spices have been filtered out). You can whip up a quick batch of horseradish sauce for those who desire it (my husband must have it). To make this sauce I add about a teaspoon of prepared horseradish to about half a cup of dairy sour cream and stir.
TO SERVE: Pile slices of meat on plates and spoon cabbage and potatoes on the side. Serve while piping hot, with a little prepared horseradish sauce dalloped on top of the meat, if desired.
EASY IRISH SODA BREAD RECIPE
Ingredients:
4 cups all-purpose flour
4 tablespoons white sugar
1 teaspoon baking soda
1 tablespoon baking powder
1/2 teaspoon salt
1/2 cup margarine, softened
1 cup buttermilk
1 egg
1/4 cup butter, melted
1/4 cup buttermilk
Directions:
Preheat oven to 375° F. Lightly grease a large baking sheet. In a large bowl, mix together flour, sugar, baking soda, baking powder, salt and margarine. Stir in 1 cup of buttermilk and egg.
Turn dough out onto a lightly floured surface and knead slightly. Form dough into a round ball and place on prepared baking sheet. In a small bowl, combine melted butter with 1/4 cup buttermilk; brush loaf with this mixture. HINT: To give a real authentic look, before baking any Irish bread recipe use a knife to cut a cross in the top of the loaf. According to old Irish folklore, the cross will ward off the devil. The Irish are a quirky superstitious people! Don’t you love us?
Bake in preheated oven for 45 to 50 minutes, or until a toothpick inserted into the center of the loaf comes out clean, about 40 to 50 minutes. You may continue to brush the loaf with the butter mixture while it bakes.
This Irish bread recipe makes 1 (1 1/2 pound) loaf, 15 servings.
IRISH BEEF STEW WITH GUINNESS® STOUT
Ingredients: (may want to double or triple for a large crowd)
2 tablespoons canola oil
3 bay leaves
2 pounds beef stew meat cut in 2 inch cubes
1 large white onion, peeled and sliced
2 cloves garlic, peeled and chopped
1 teaspoon fresh thyme, whole
1 teaspoon fresh rosemary
2-3 tablespoons all-purpose flour (mixed with a little cold water)
2 14-oz cans beef stock
1/2 cup Guinness® stout
1 tablespoon chopped fresh parsley
1/2 pound carrots, sliced
Salt and pepper to taste
Directions:
Heat a 6-quart Dutch oven. Add the oil and the bay leaves. Cook the bay leaves for a moment, toss the meat in flour and then add to pot. Brown the meat on both sides on high heat. Add the sliced onion and cook for a few minutes until it is clear. Reduce the heat to low and add the garlic, thyme, rosemary and flour, and stir well until smooth. Add the beef stock and stout; simmer, stirring, until the stew thickens a bit. Add the remaining ingredients and cover. (No potatoes? This must have been a recipe from the potato famine era – you may add a couple large Yukon gold potatoes if you wish).
Place the pot in a 275° F oven for about 2 hours, stirring a couple of times. Season with salt and pepper to taste before serving. Serves 4. Delicious served with a big GREEN SALAD with GREEN GODDESS dressing!!!
And for Dessert… EASY IRISH WHISKEY CAKE
Ingredients:
Cake:
1 yellow cake mix
1 small package instant vanilla pudding mix
4 eggs
1/3 cup Irish whiskey
1/2 cup vegetable or canola oil
1/2 cup cold water
3/4 cup chopped nuts (optional)
Glaze:
1 stick butter
1/4 cup water
1-1/2 cup granulated sugar
1/2 to 1 cup Irish whiskey (to your taste)
Strawberries and whipped cream
Directions:
Preheat oven to 325° F. Grease and flour a Bundt or tube pan. Sprinkle nuts over bottom of pan. Combine remaining ingredients and mix well. Pour batter into pan. Bake for 1 hour. Cool; invert onto plate. Prick holes in cake with wooded kabob skewer. Melt butter in saucepan. Add water and sugar. Boil for 3 minutes, stirring constantly. Remove from heat; slowly stir in whiskey. Drizzle over top and sides of cake, allowing it to be absorbed into cake. Continue until all glaze is used. Serve with fresh sliced strawberries and a dollop of whipped cream on top.
HINT: The secret to success with this Irish dessert recipe is that it tastes best when it has been made the day before serving. And, what’s really special is to find fresh, ripe strawberries growing on your strawberry plants for a garnish!!!
Cocktails:
CHEF SHERIDAN’S ORIGINAL IRISH COFFEE RECIPE:
• Heat up a stemmed whiskey goblet, or coffee mug.
• Pour in one shot of Irish whiskey.
• Drop in three white sugar cubes.
• Fill nearly to the top of the goblet with strong black coffee (stop about an inch from the rim).
• Stir gently.
• Pouring it over the back of a spoon, gently add heavy cream to fill the goblet, floating it on top of the coffee.
• Do not stir – the full flavor as intended is achieved by sipping this drink through the cream.
Hint: If at all possible, use fresh cream with no additives for the best effect. Most heavy cream for sale in stores in the United States contains additives, which can actually make it difficult to float the cream on the coffee. If you find that you’re having this trouble, try beating the cream only until thickened, not fully whipped and carefully sliding a dollop on top.
Now what about the table?
I like to scatter my table with little paper shamrocks (I’ve written little Irish blessings on all of mine and laminated them so I can use them year after year), and gold foil chocolate coins.
Now we can’t just have supper all by itself. That would be boring. It has to also SOUND Irish while we are eating and so while you are out shopping for groceries, grab yourself a CD of Irish music and have it playing while you make your supper, and also while your guests arrive to help you eat it. One of my favorite CD’s is Celtic Tribute Players, Tribute to Flogging Molly. It is just instrumental. But you can look for another Celtic CD selection at Wal-mart. There is always something Irish in their line up of mood music, usually near the candle section.
Here’s a fun song from The Celtic Tribute Players tribute to Flogging Molly:
And after supper, cuddle everybody up on the couch and watch a movie. I happen to like Far and Away, because even though my family did not come across an ocean or build the railroad tracks that brought them there, my beloved family did come all the way across the country to do the Oklahoma Land run, featured in this movie. And even more than that, the cannon used to signal the start of the race (in the movie) was borrowed from old Fort Casper (or was it Old Fort Laramie?) in Wyoming. So, it is a wonderful little tradition to watch it every Saint Patrick’s Day. 🙂
I’ll leave you with some of my most favorite Irish Blessings…
May the blessing of the five loaves and the two fishes which God divided among the five thousand be ours; and may the King who made the division put luck in our food and in our portion.
Bless, O Lord, this food we are about to eat; and we pray You, O God, that it may be good for our body and soul; and if there be any poor creature hungry or thirsty walking along the road, send them into us that we can share the food with them, just as You share your gifts with us.
May this food restore our strength, giving new energy to tired limbs, new thoughts to weary minds. May this drink restore our souls, giving new vision to dry spirits, new warmth to cold hearts. And once refreshed, may we give new pleasure to You, who gives us all.
The grace of God and the favor of St. Patrick on all that we see and all that we do. The blessing that God put on the five loaves and the two fishes, may He put on this food.
OTHER GRACES
From the orchards of Armagh
to the fields of Wicklow,
May God bless the farmer’s work
and help his crops to grow.
And St. Swithin intercede for him
that weather rain or shine
his labors are rewarded
this coming harvest time.
Like the gold of the sun, like the light of the day, may the luck of the Irish shine bright on your way. Like the glow of a star, and the lilt of a song may these be your joys all your life long.
Bless the house
and bless the hearth,
bless the work
and bless all here.
May your faith be strong
May your heart be true
and the devil n’er
make a liar of you.
May you be blessed with
warmth in your home,
love in your heart,
peace in your soul
and joy in your life.
May you always have walls for the winds,
a roof for the rain, tea beside the fire,
laughter to cheer you, those you love near you,
and all your heart might desire.
May the road rise to meet you,
May the wind be always at your back,
May the sun shine warm upon your face,
The rains fall soft upon your fields and,
Until we meet again,
May God hold you in the palm of His hand.
May God grant you always…
A sunbeam to warm you,
A moonbeam to charm you,
A sheltering angel, so nothing can harm you.
May your pockets be heavy and your heart be light.
May good luck pursue you each morning and night.
May you always have work for your hands to do.
May your pockets hold always a coin or two.
May the sun shine bright on your windowpane.
May the rainbow be certain to follow each rain.
May the hand of a friend always be near you.
And may God fill your heart with gladness to cheer you.
May your blessings outnumber
The Shamrocks that grow.
And may trouble avoid you
Wherever you go.
May your troubles be less,
And your blessing be more.
And nothing but happiness,
Come through your door.
He who loses money, loses much;
He who loses a friend, loses more;
He who loses faith, loses all.
IRISH TOASTS
May you live as long as you want,
and never want as long as you live.
May the grass grow long
on the road to hell for want of use.
As you slide down the banisters of life
may the splinters never point the wrong way.
May your troubles be as few and as far apart
as my Grandmothers teeth.
May the roof above us never fall in,
and may we friends gathered below never fall out.
May the Lord keep you in His hand
and never close His fist too tight.
May your neighbors respect you,
Trouble neglect you, The angels protect you,
And heaven accept you.
May I see you grey and combing your children’s hair.
May your doctor never earn a dollar out of you
and may your heart never give out.
May the ten toes of your feet steer you clear
of all misfortune, and before you’re much older,
may you hear much better toasts than this.
May you have the hindsight to know where you’ve been,
the foresight to know where you’re going
and the insight to know when you’re going too far.
May you be poor in misfortune, rich in blessings,
slow to make enemies, quick to make friends.
But rich or poor, quick or slow,
may you know nothing but happiness from this day forward.
May the frost never afflict your spuds.
May the outside leaves of your cabbage
always be free from worms.
May the crow never pick your haystack,
and may your donkey always be in foal.
Here’s to you and yours, and to mine and ours.
And if mine and ours ever come across to you and yours,
I hope you and yours will do as much for mine and ours,
As mine and ours have done for you and yours!
May you live to be a hundred years,
With one extra year to repent!
May those who love us love us.
And those that don’t love us,
May God turn their hearts.
And if He doesn’t turn their hearts,
May he turn their ankles,
So we’ll know them by their limping.
“So he brought him into his house and gave fodder to the donkeys. And they washed their feet, and ate and drank.” Judges 19:21
*This entry taken from the book Come for Supper? the memoirs of a reluctant hostess, by Colleen Hill Hoffman. If you enjoyed it you might also enjoy my Asian Hot Pot party, Polynesian luau supper, Cajun crab boil for a crowd, or Brazilian steak house home feast. Look for my book at Amazon.com, Barnes & Noble.com, and lulu.com. or search for it in Google Books. Thanks for reading and God bless you. 🙂


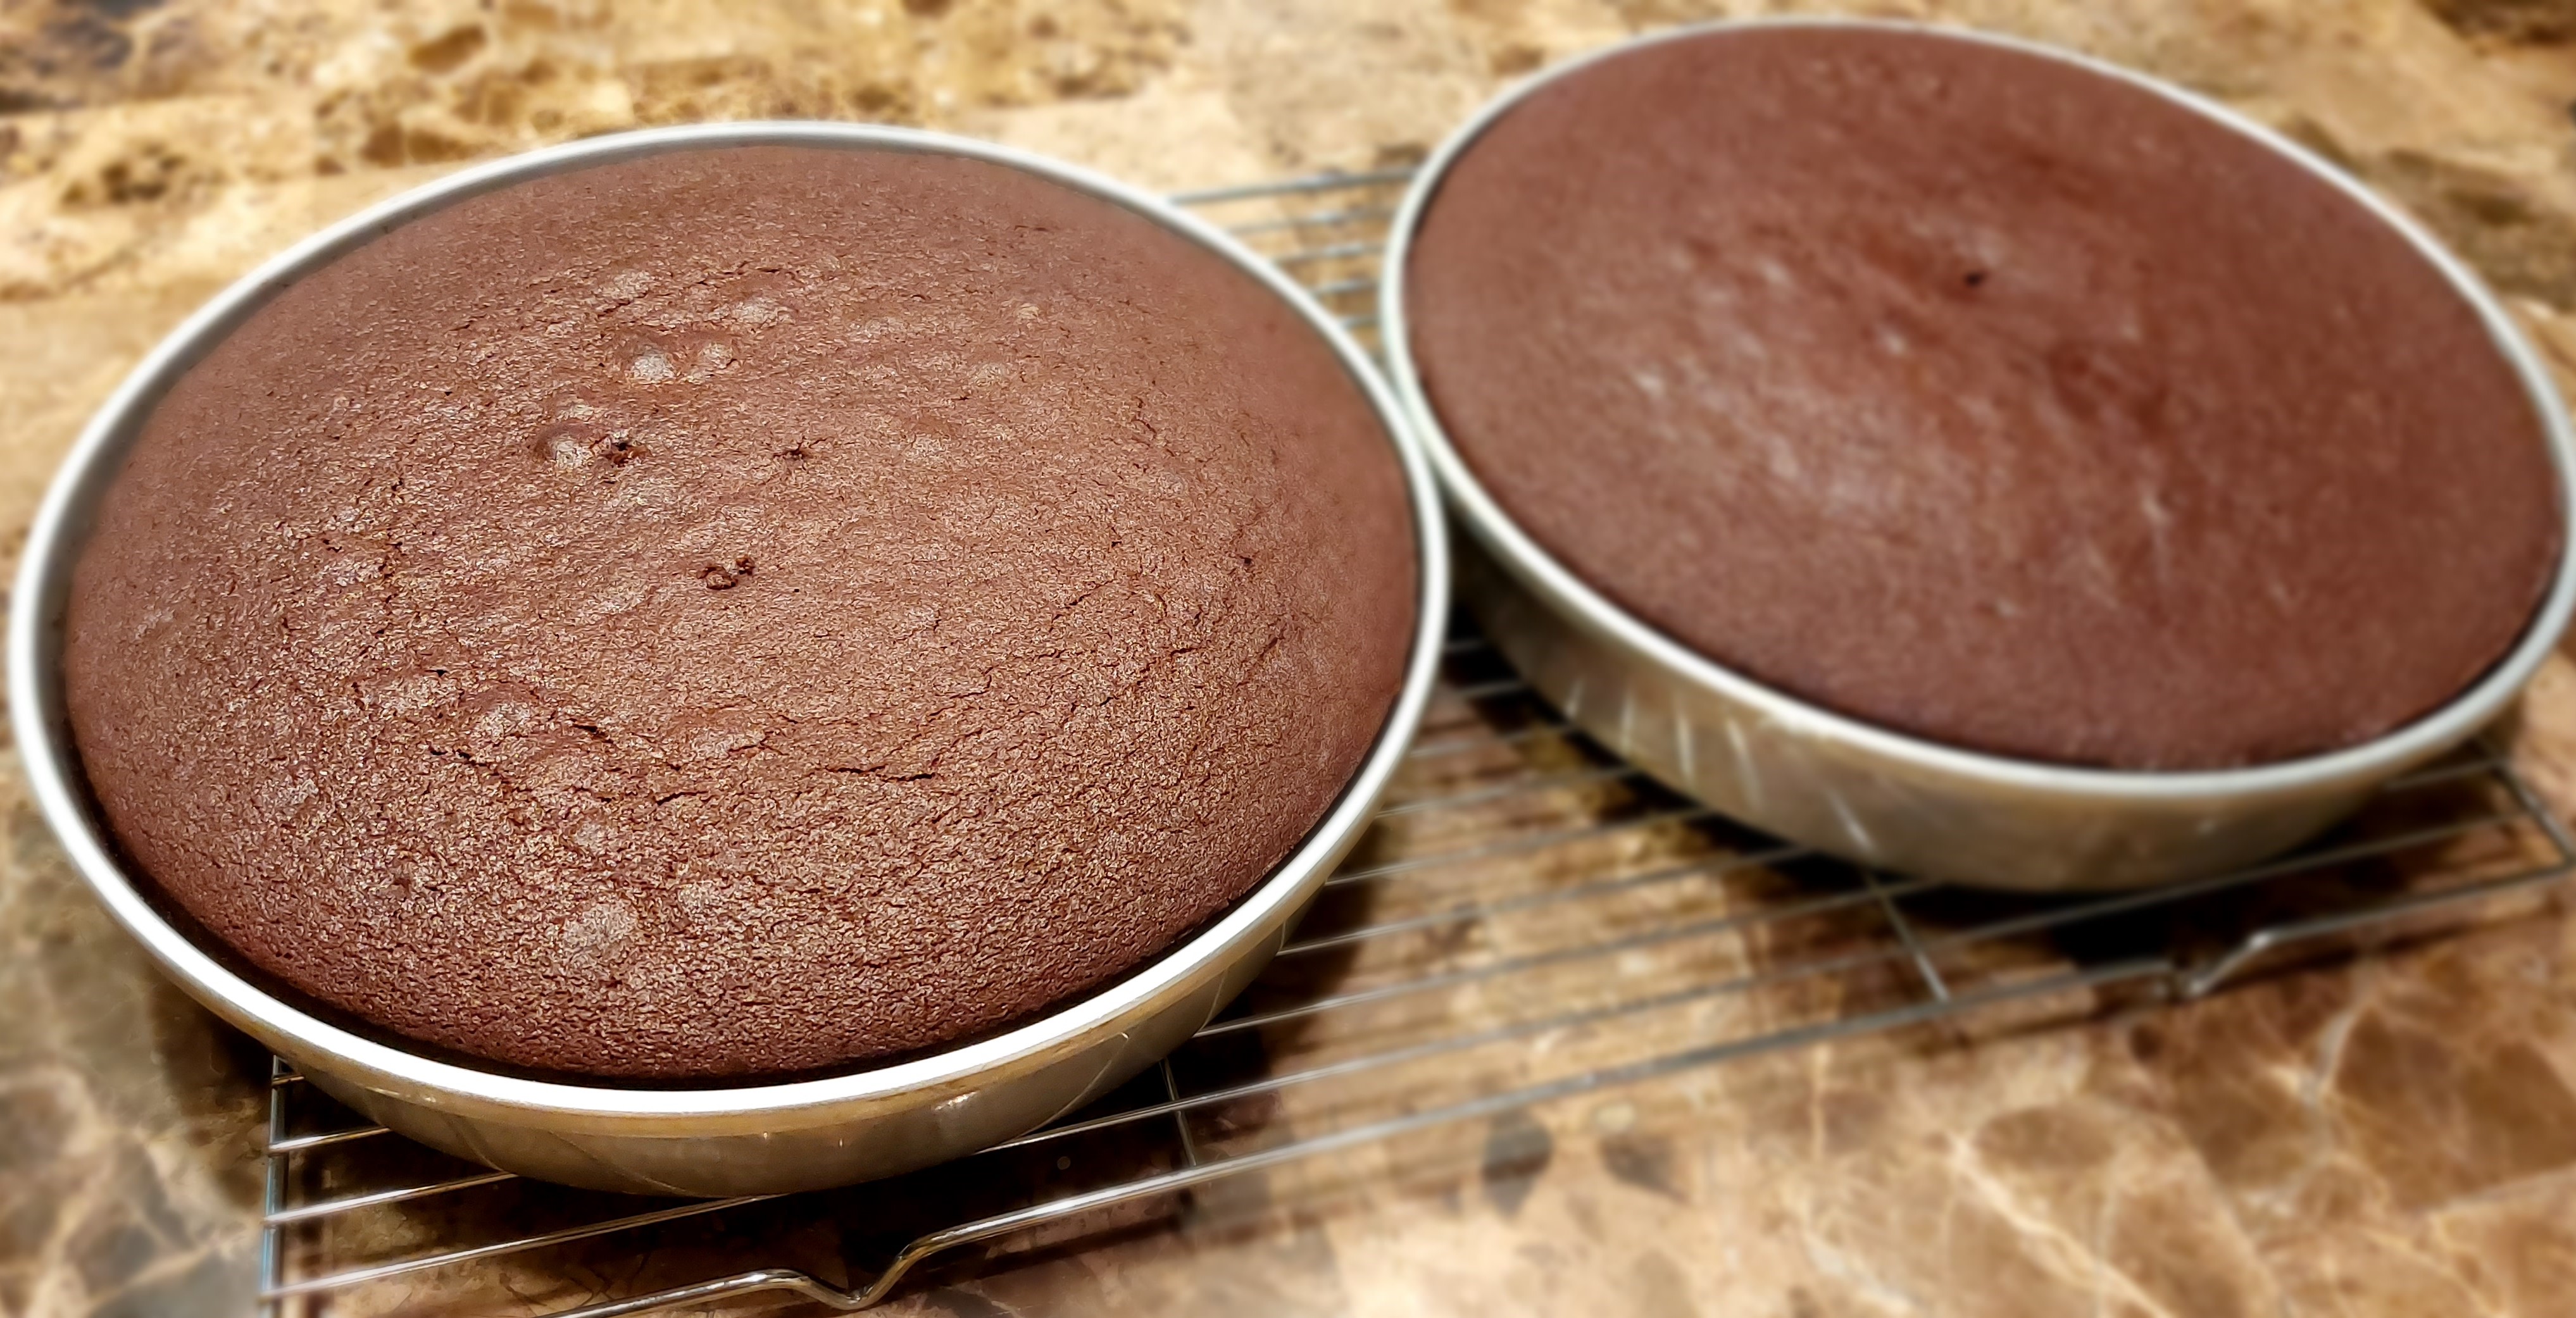
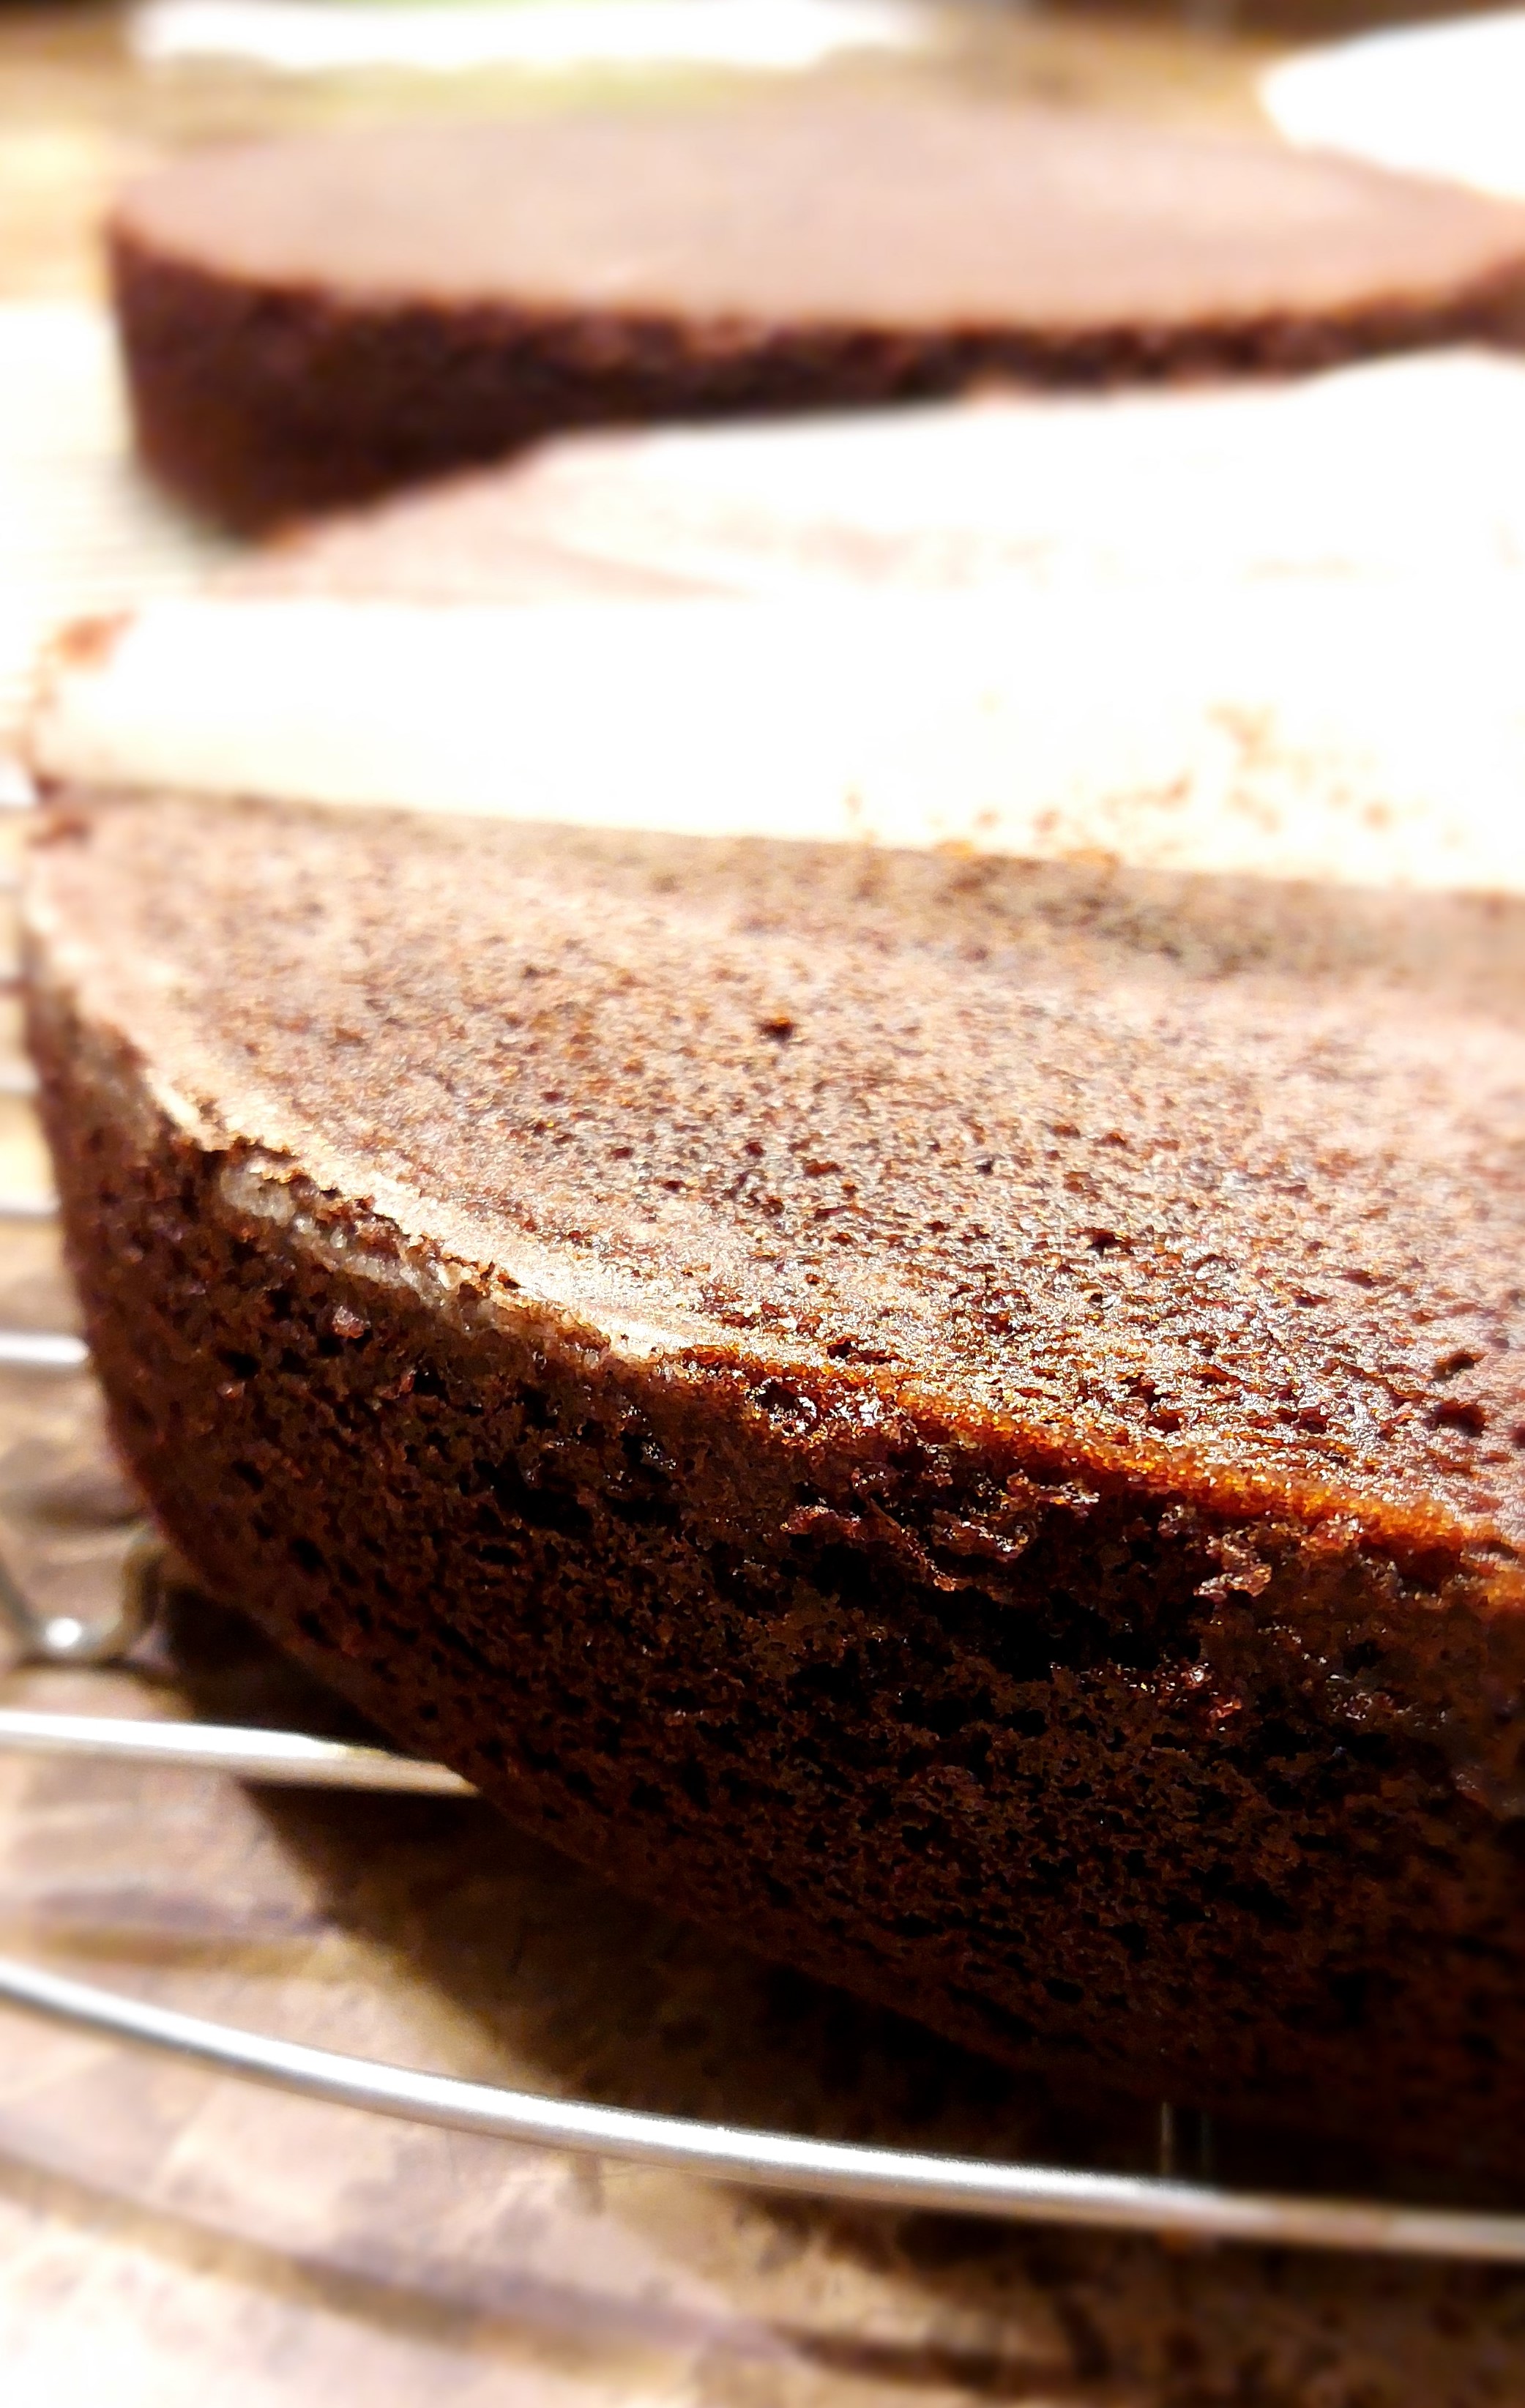

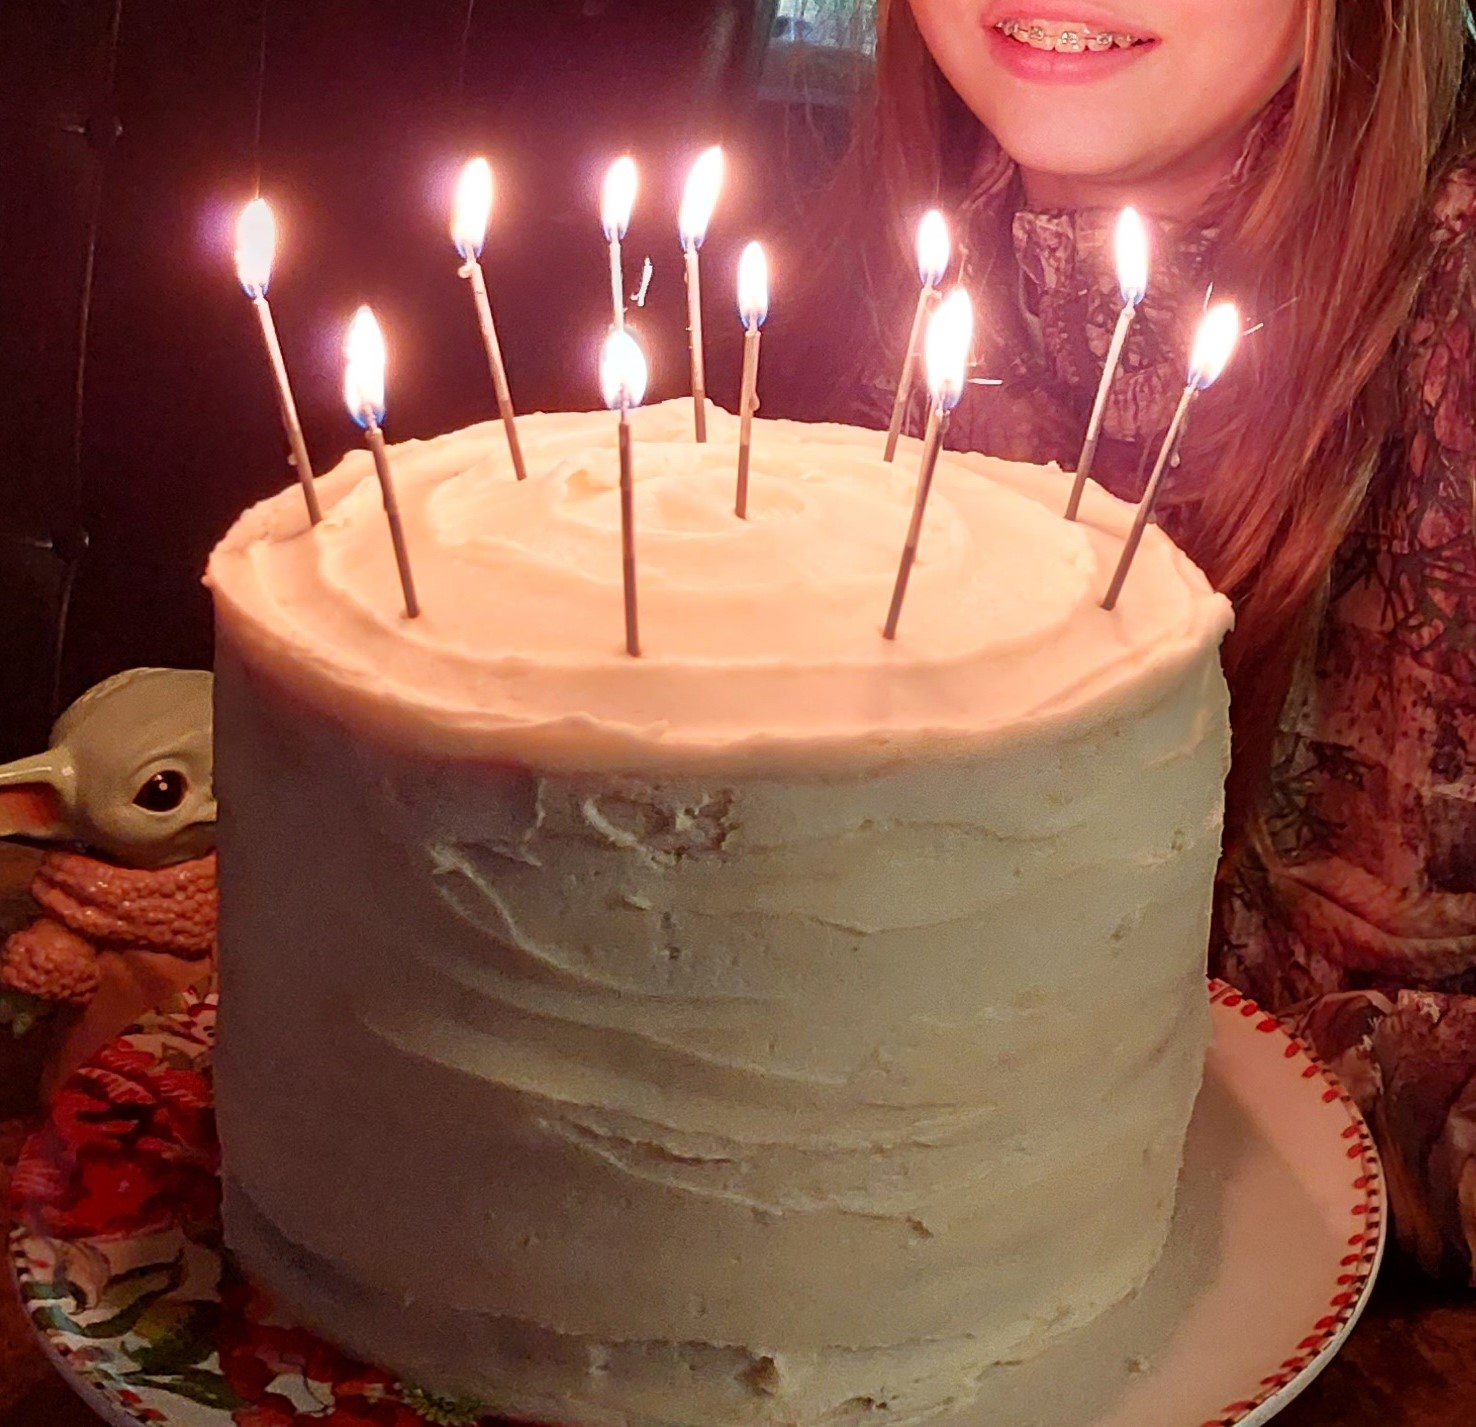

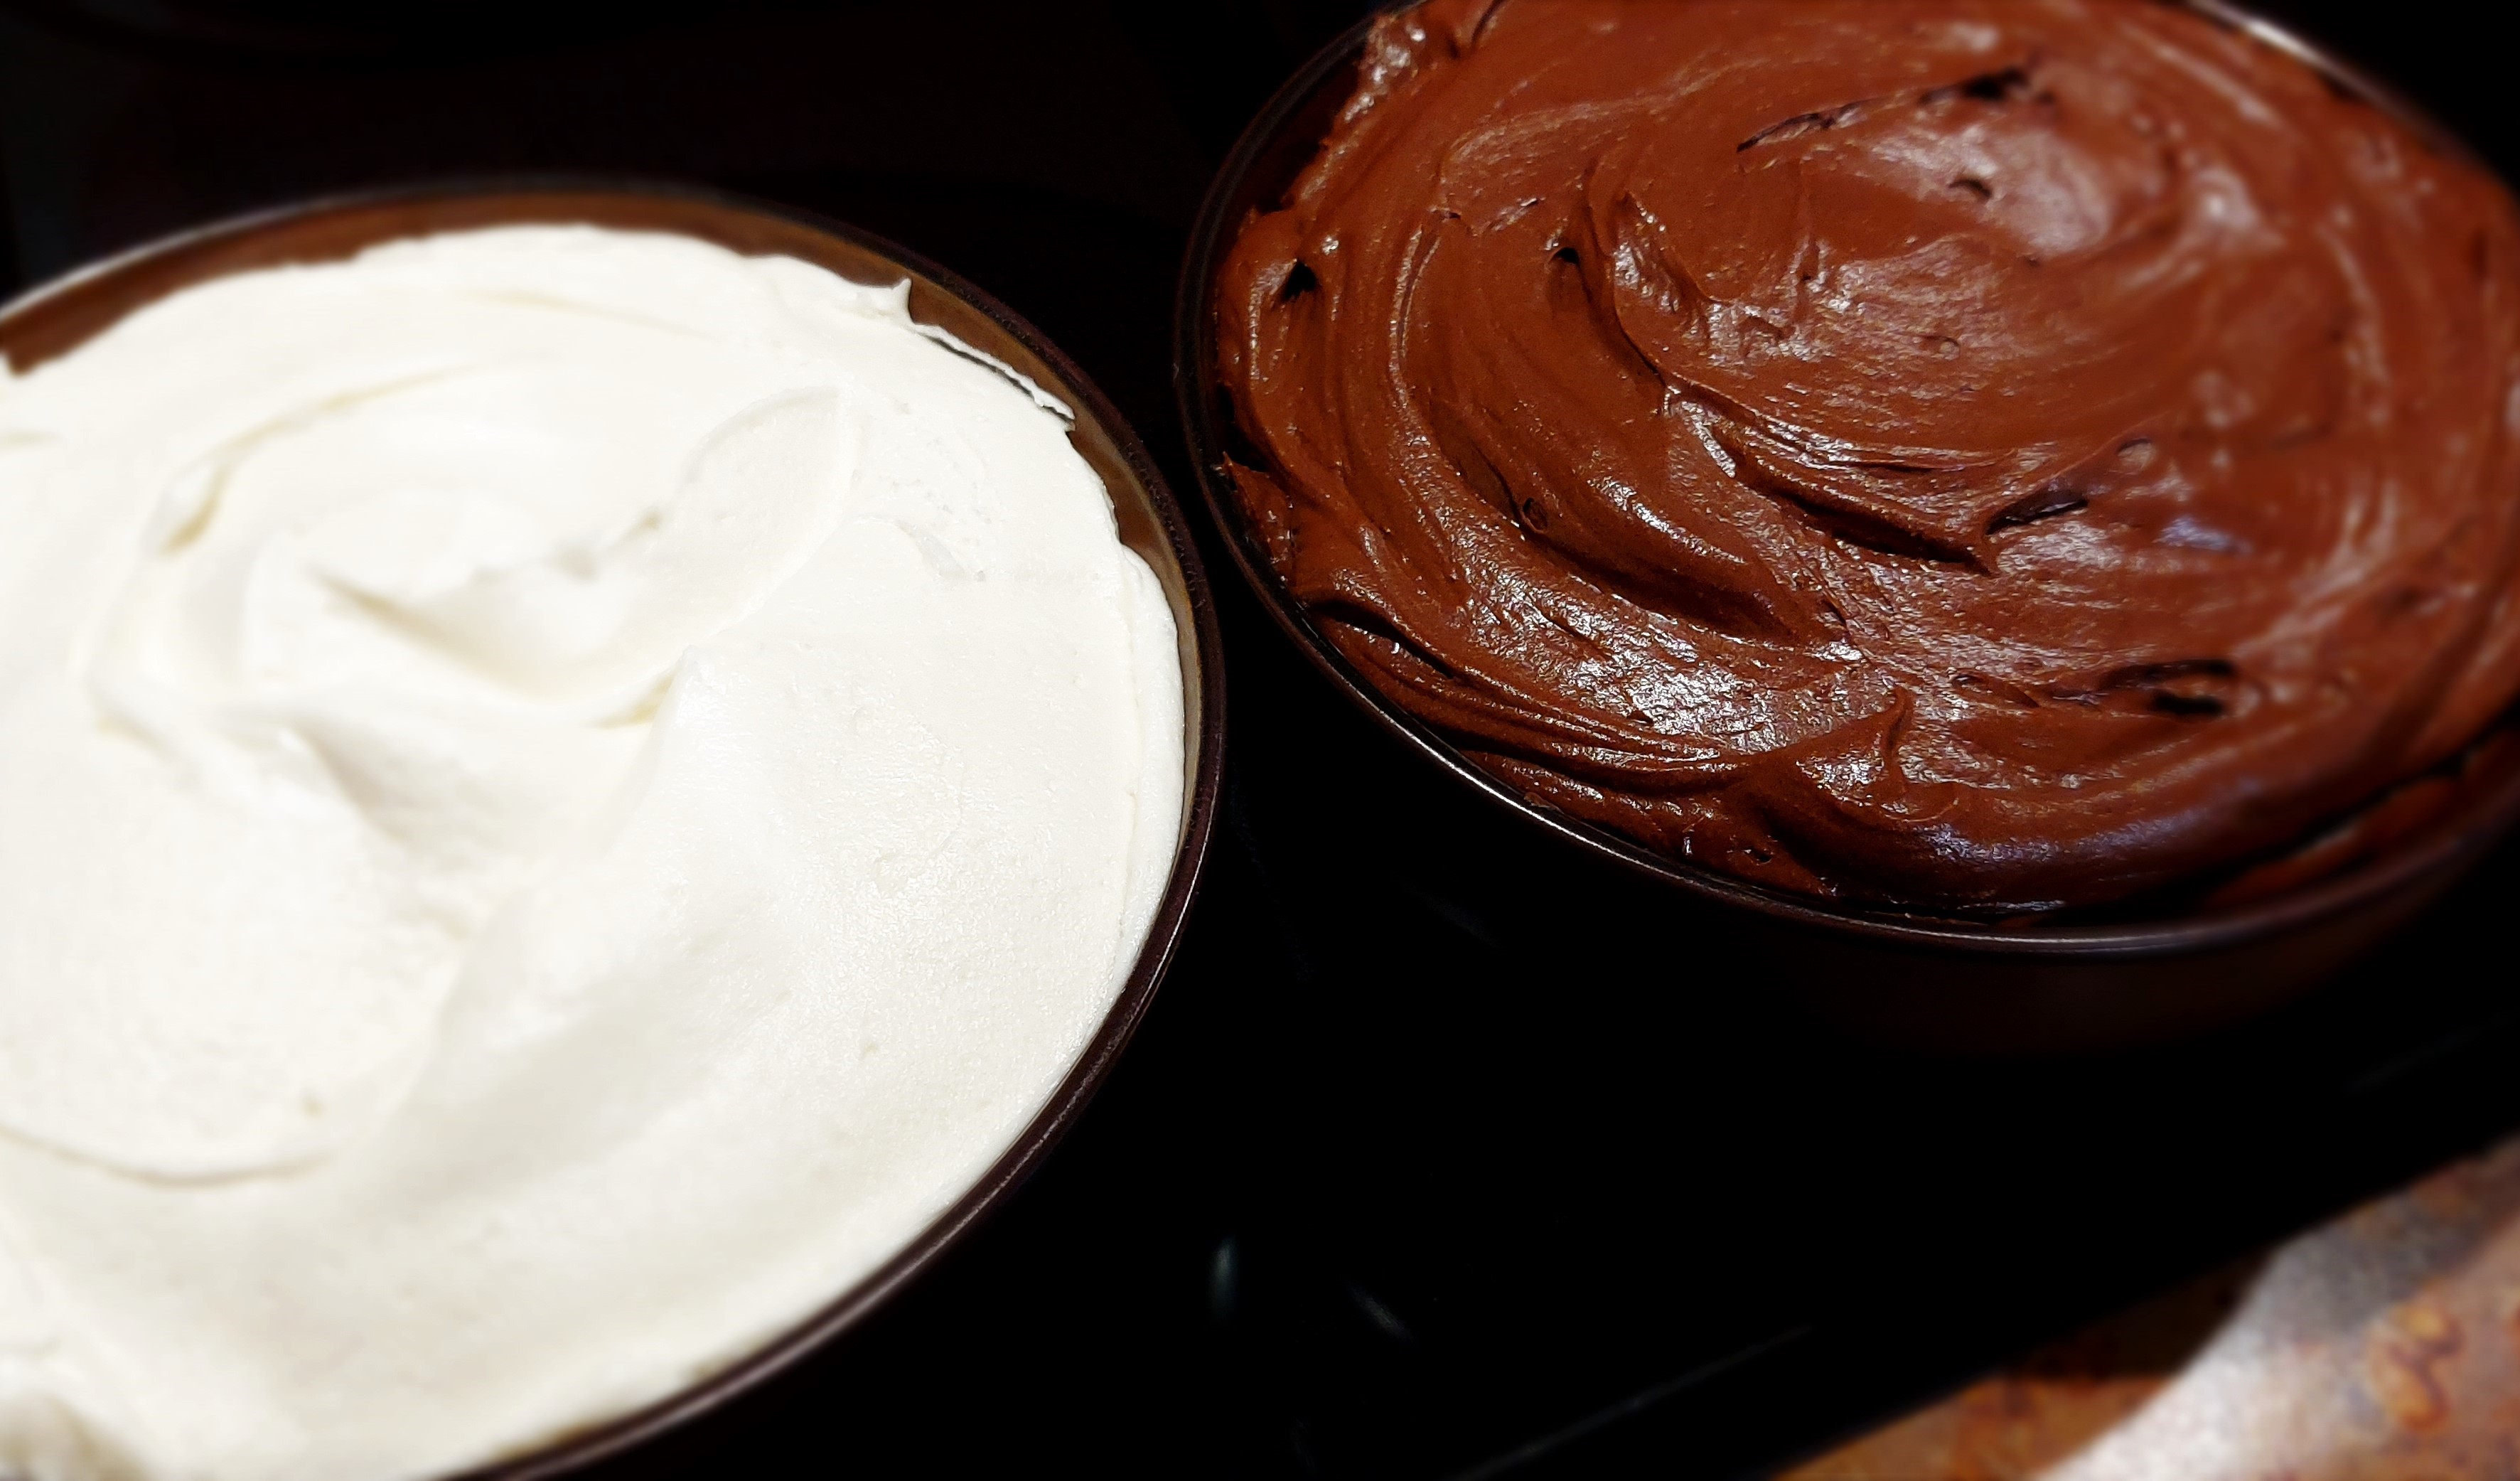
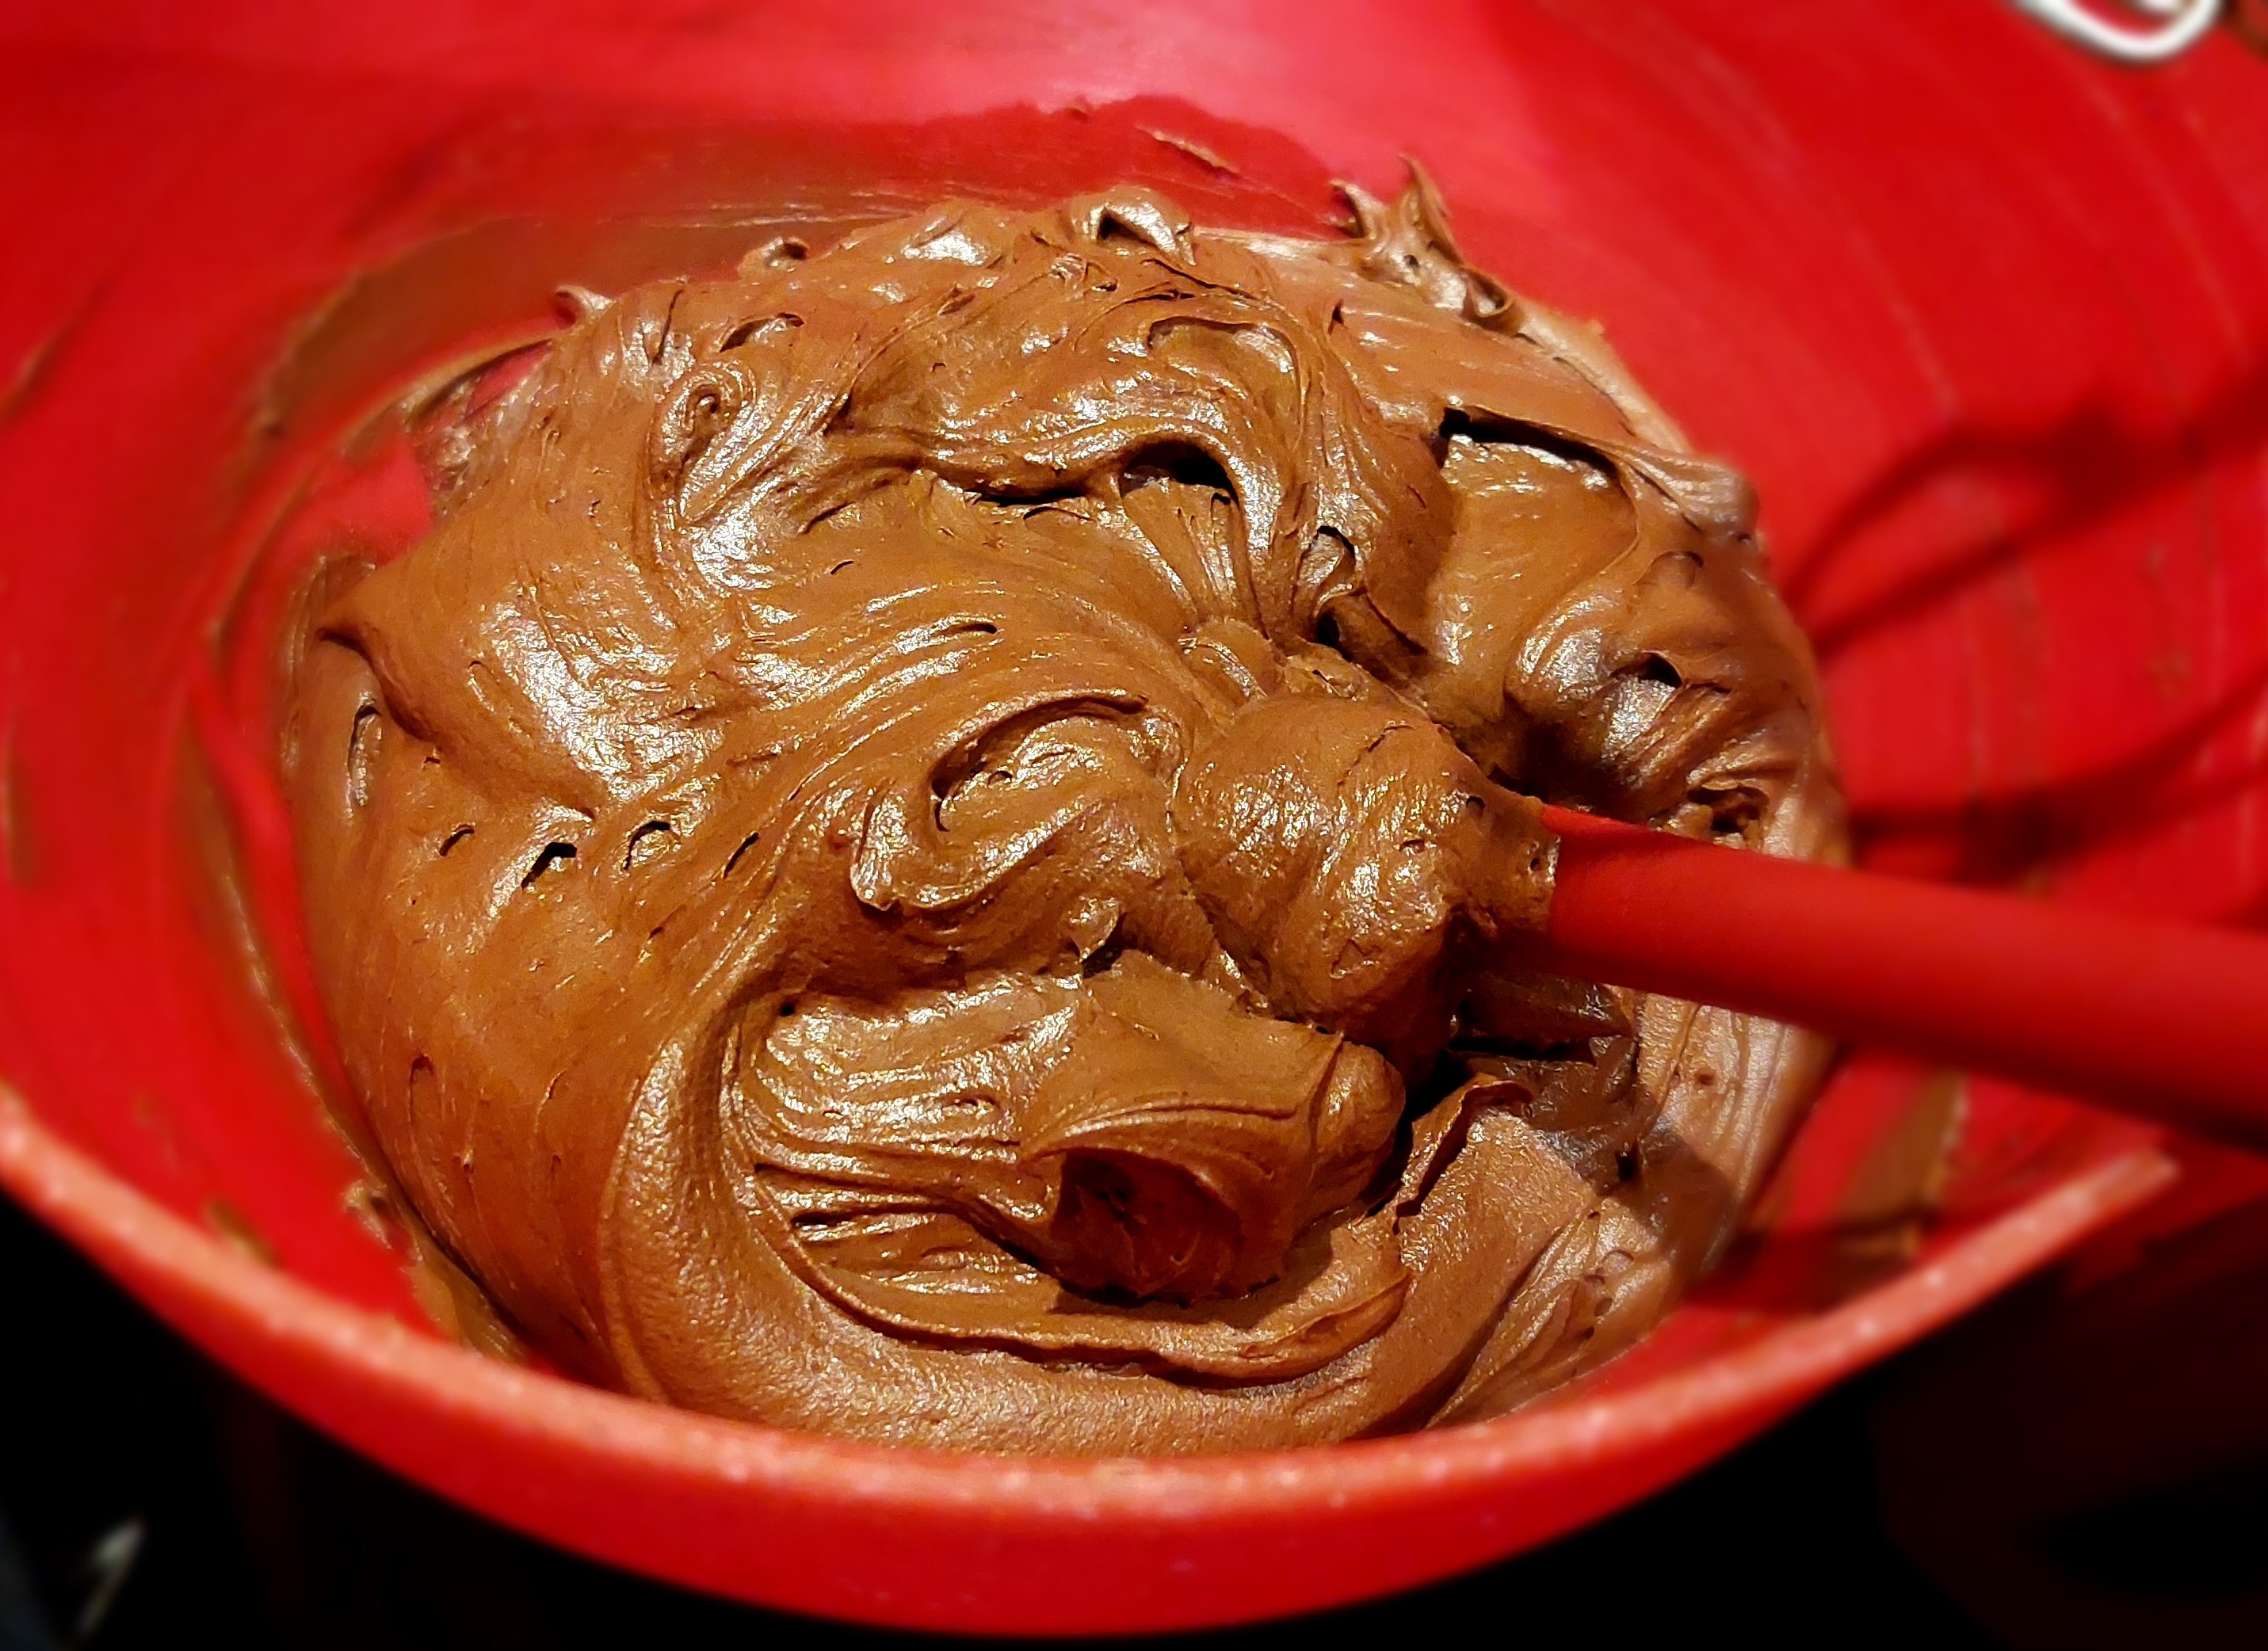
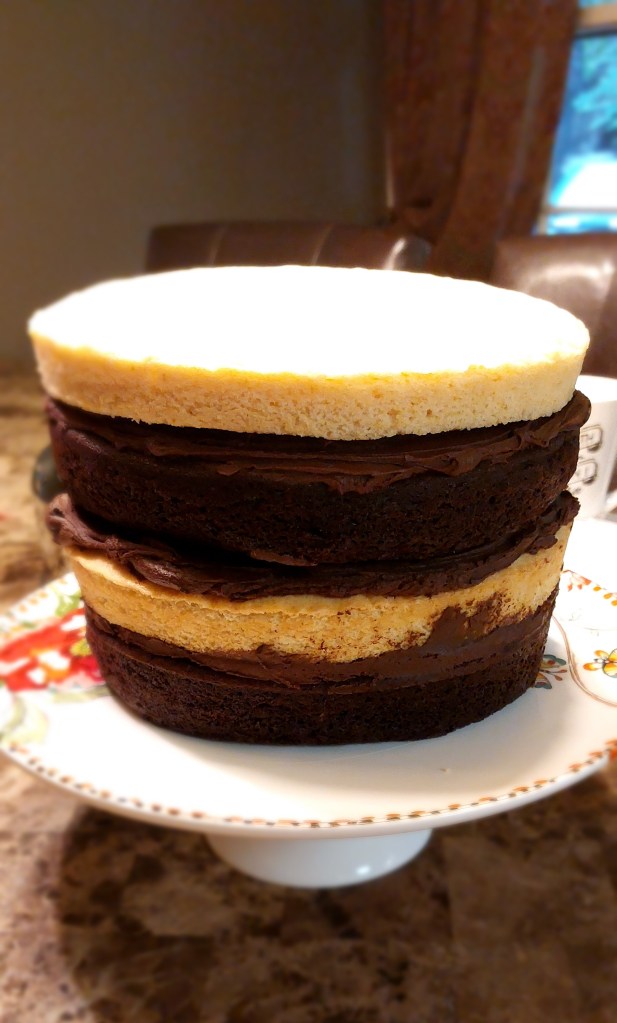


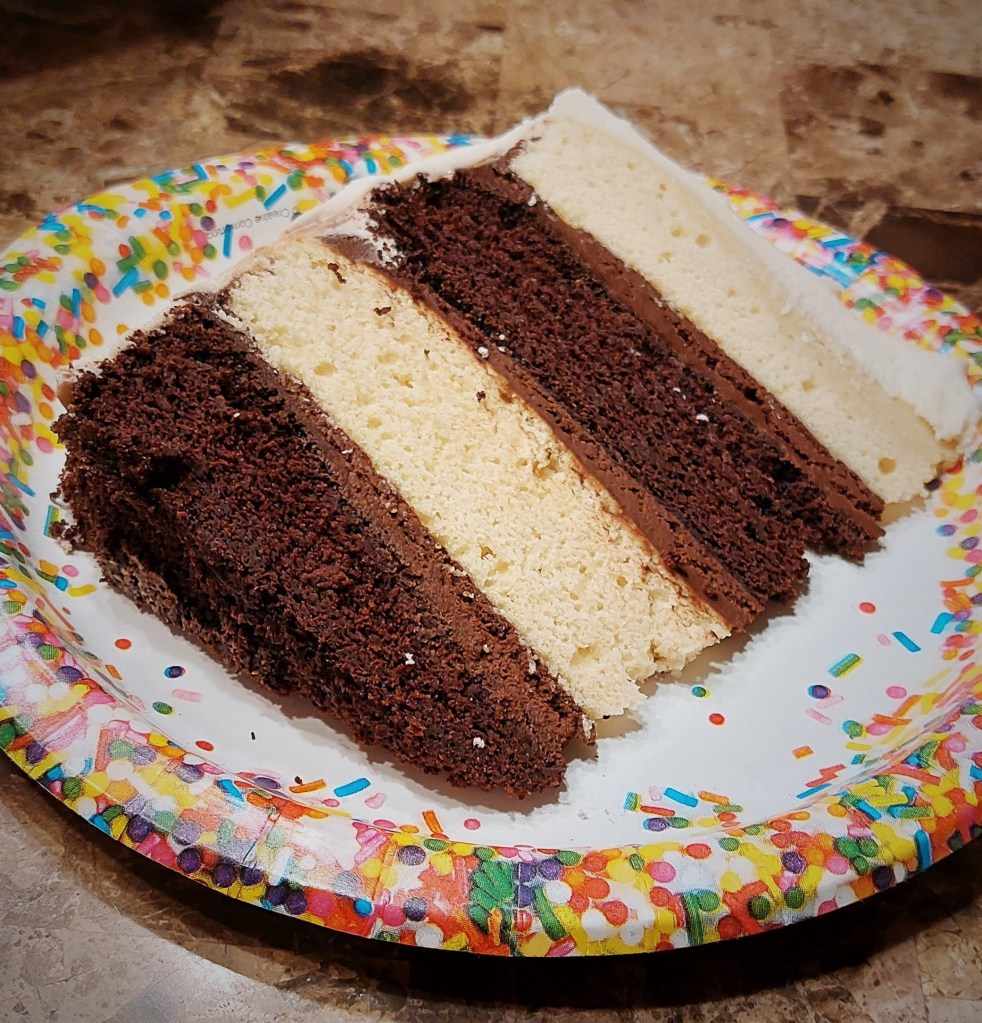

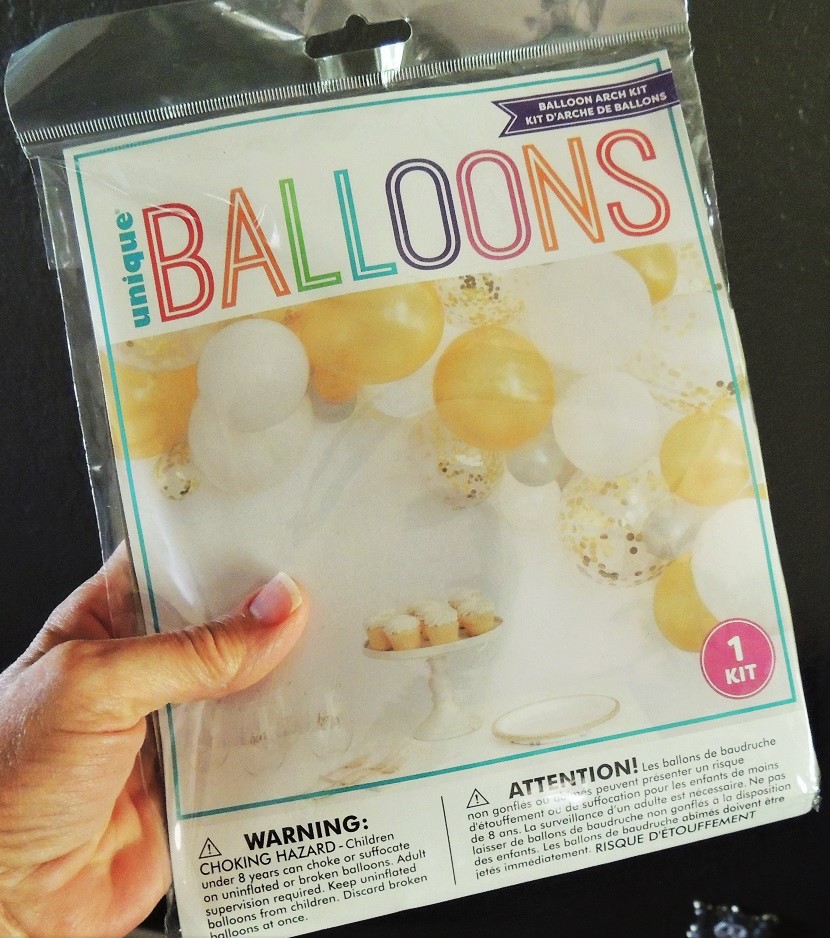


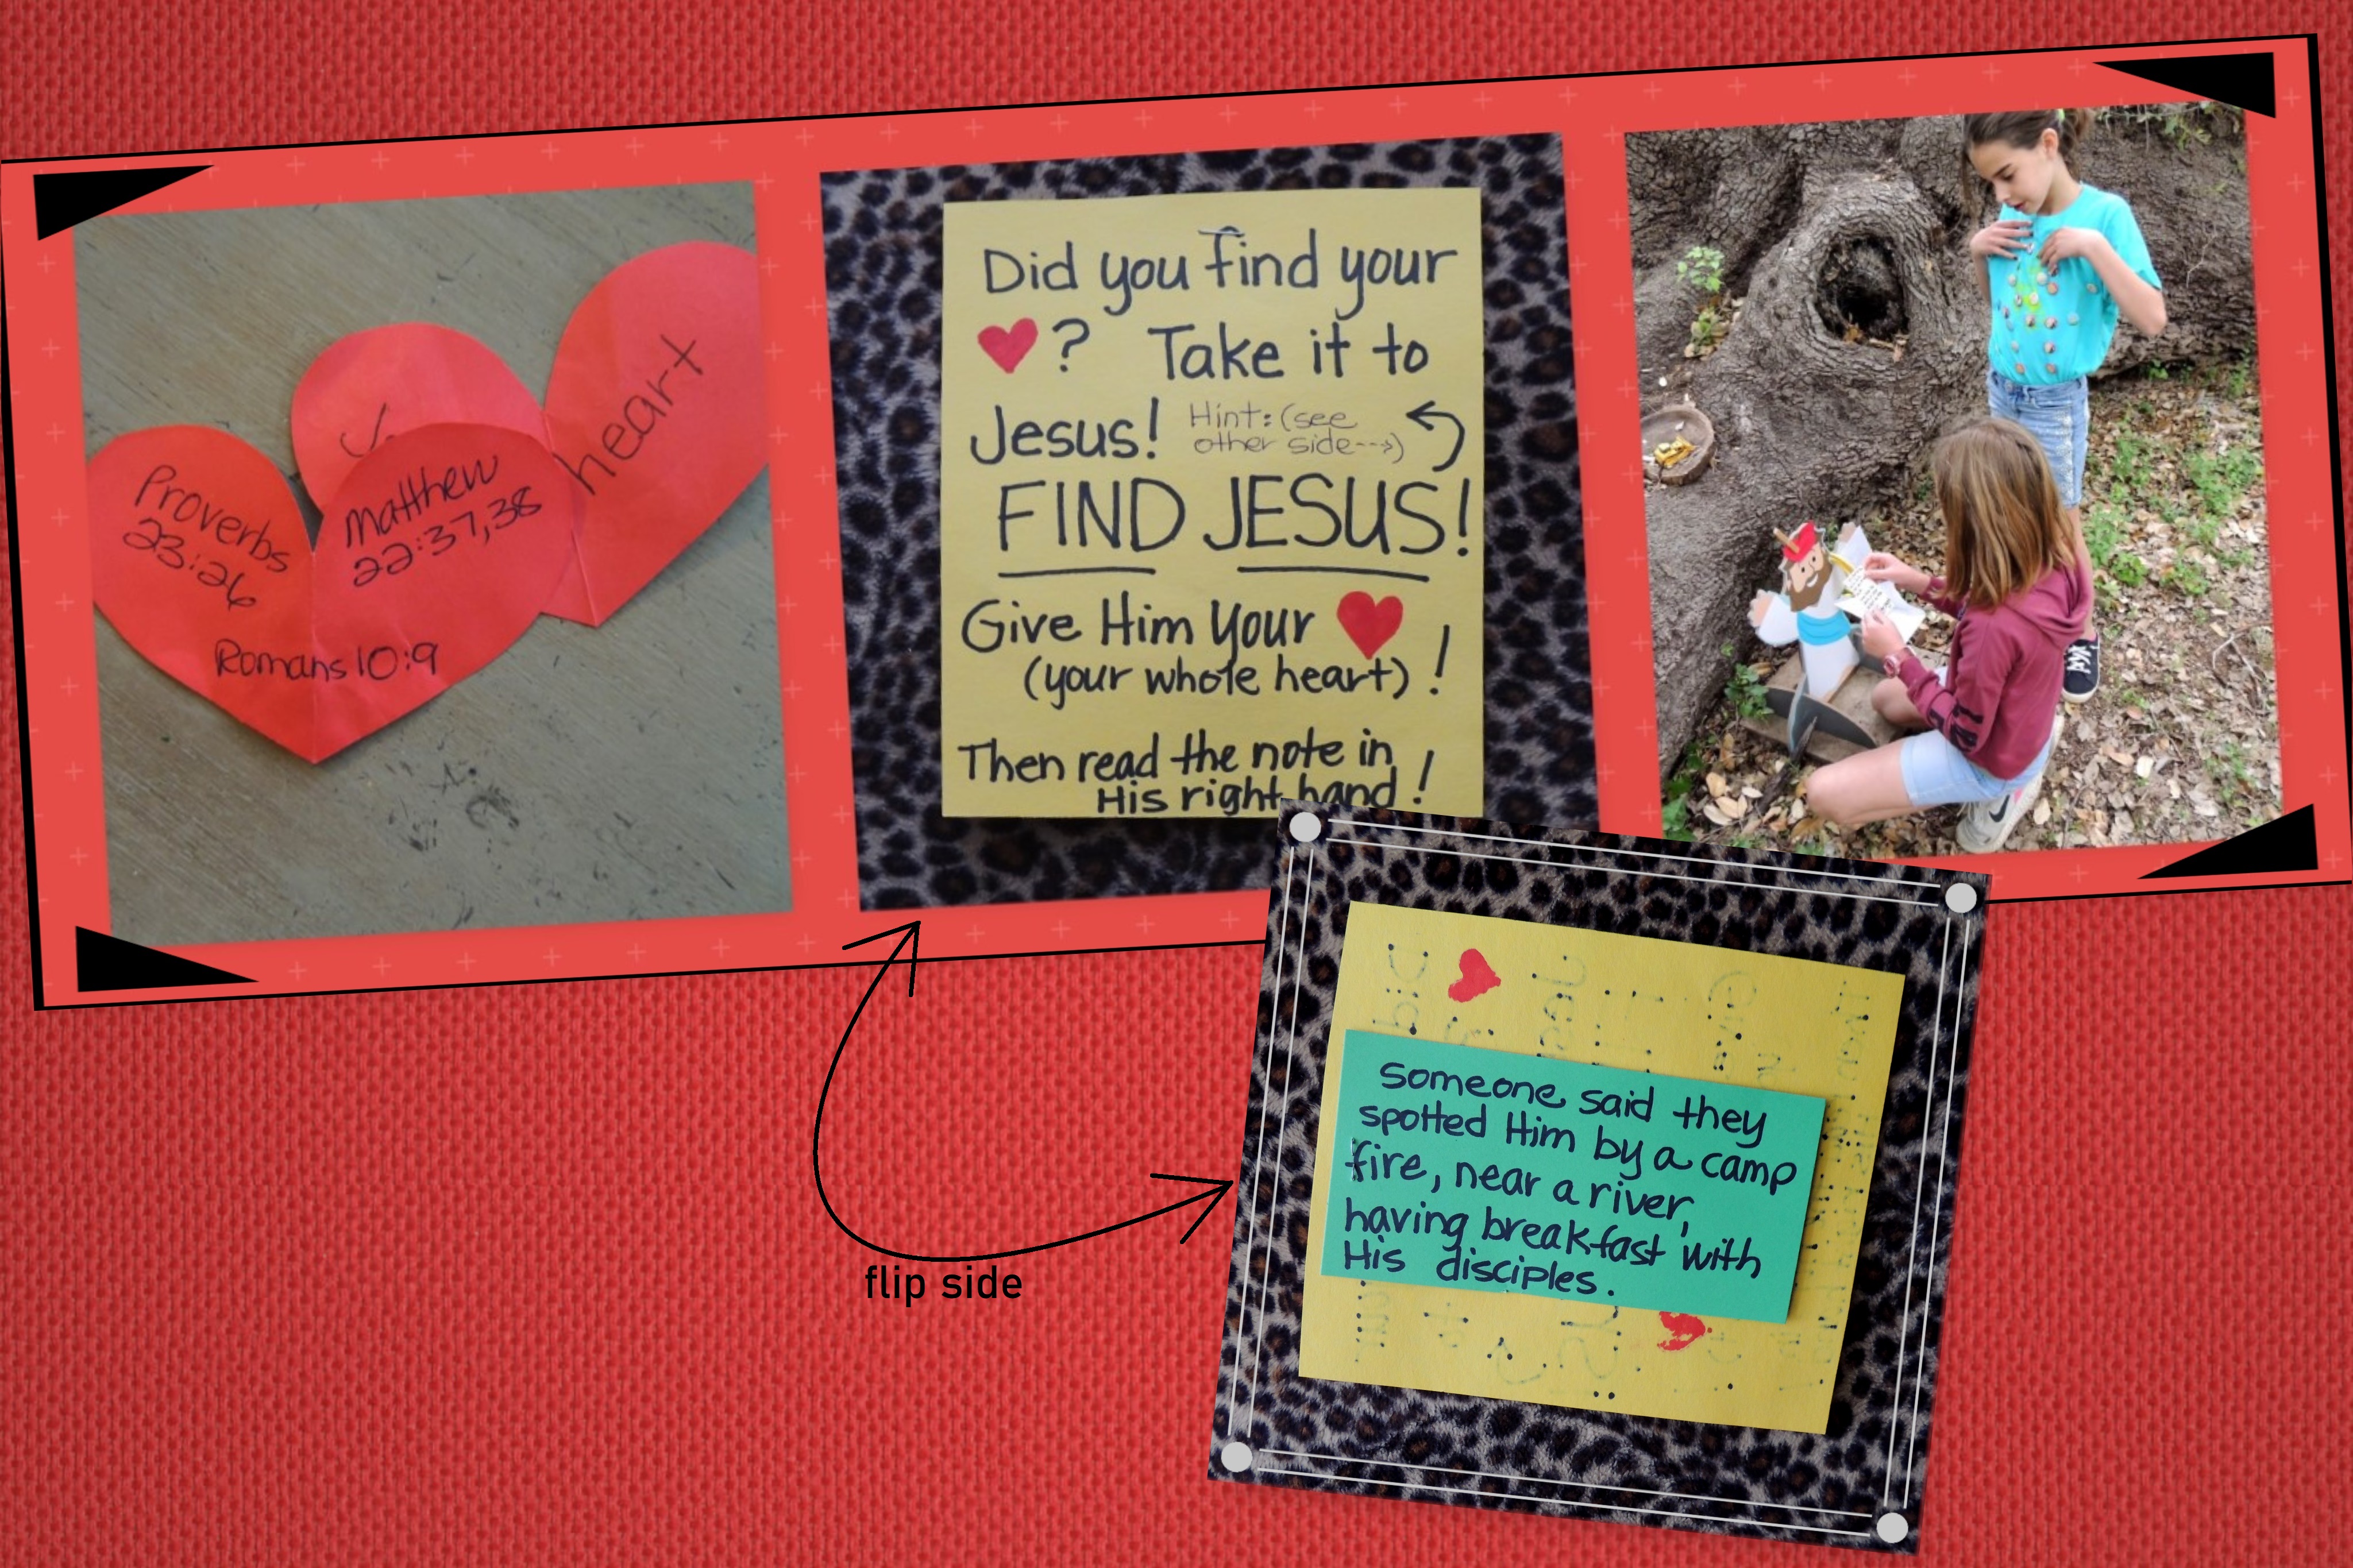
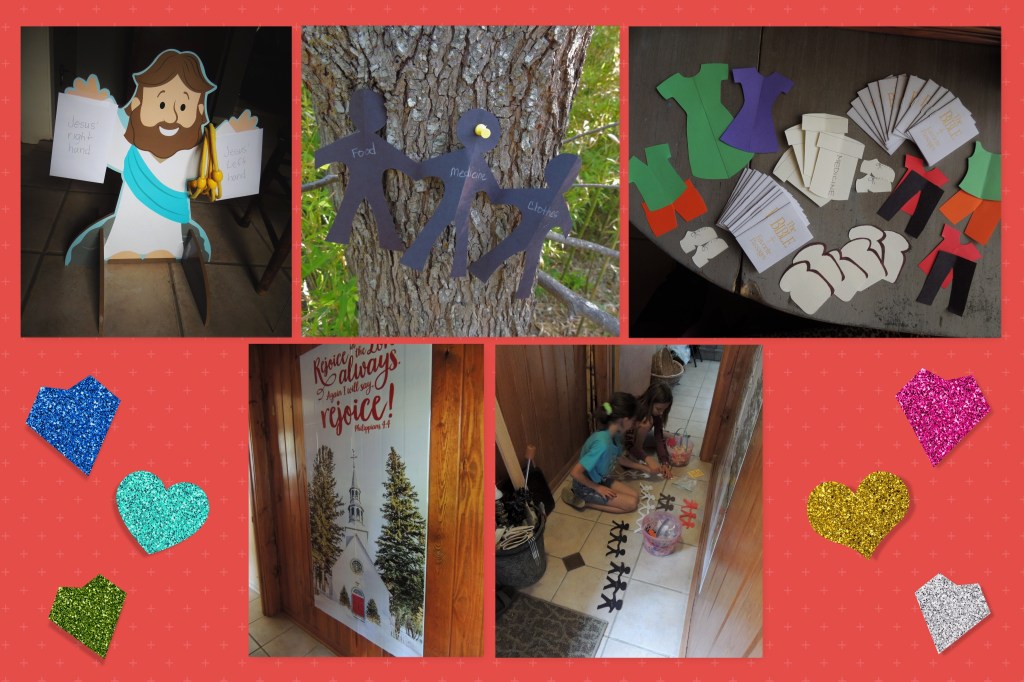

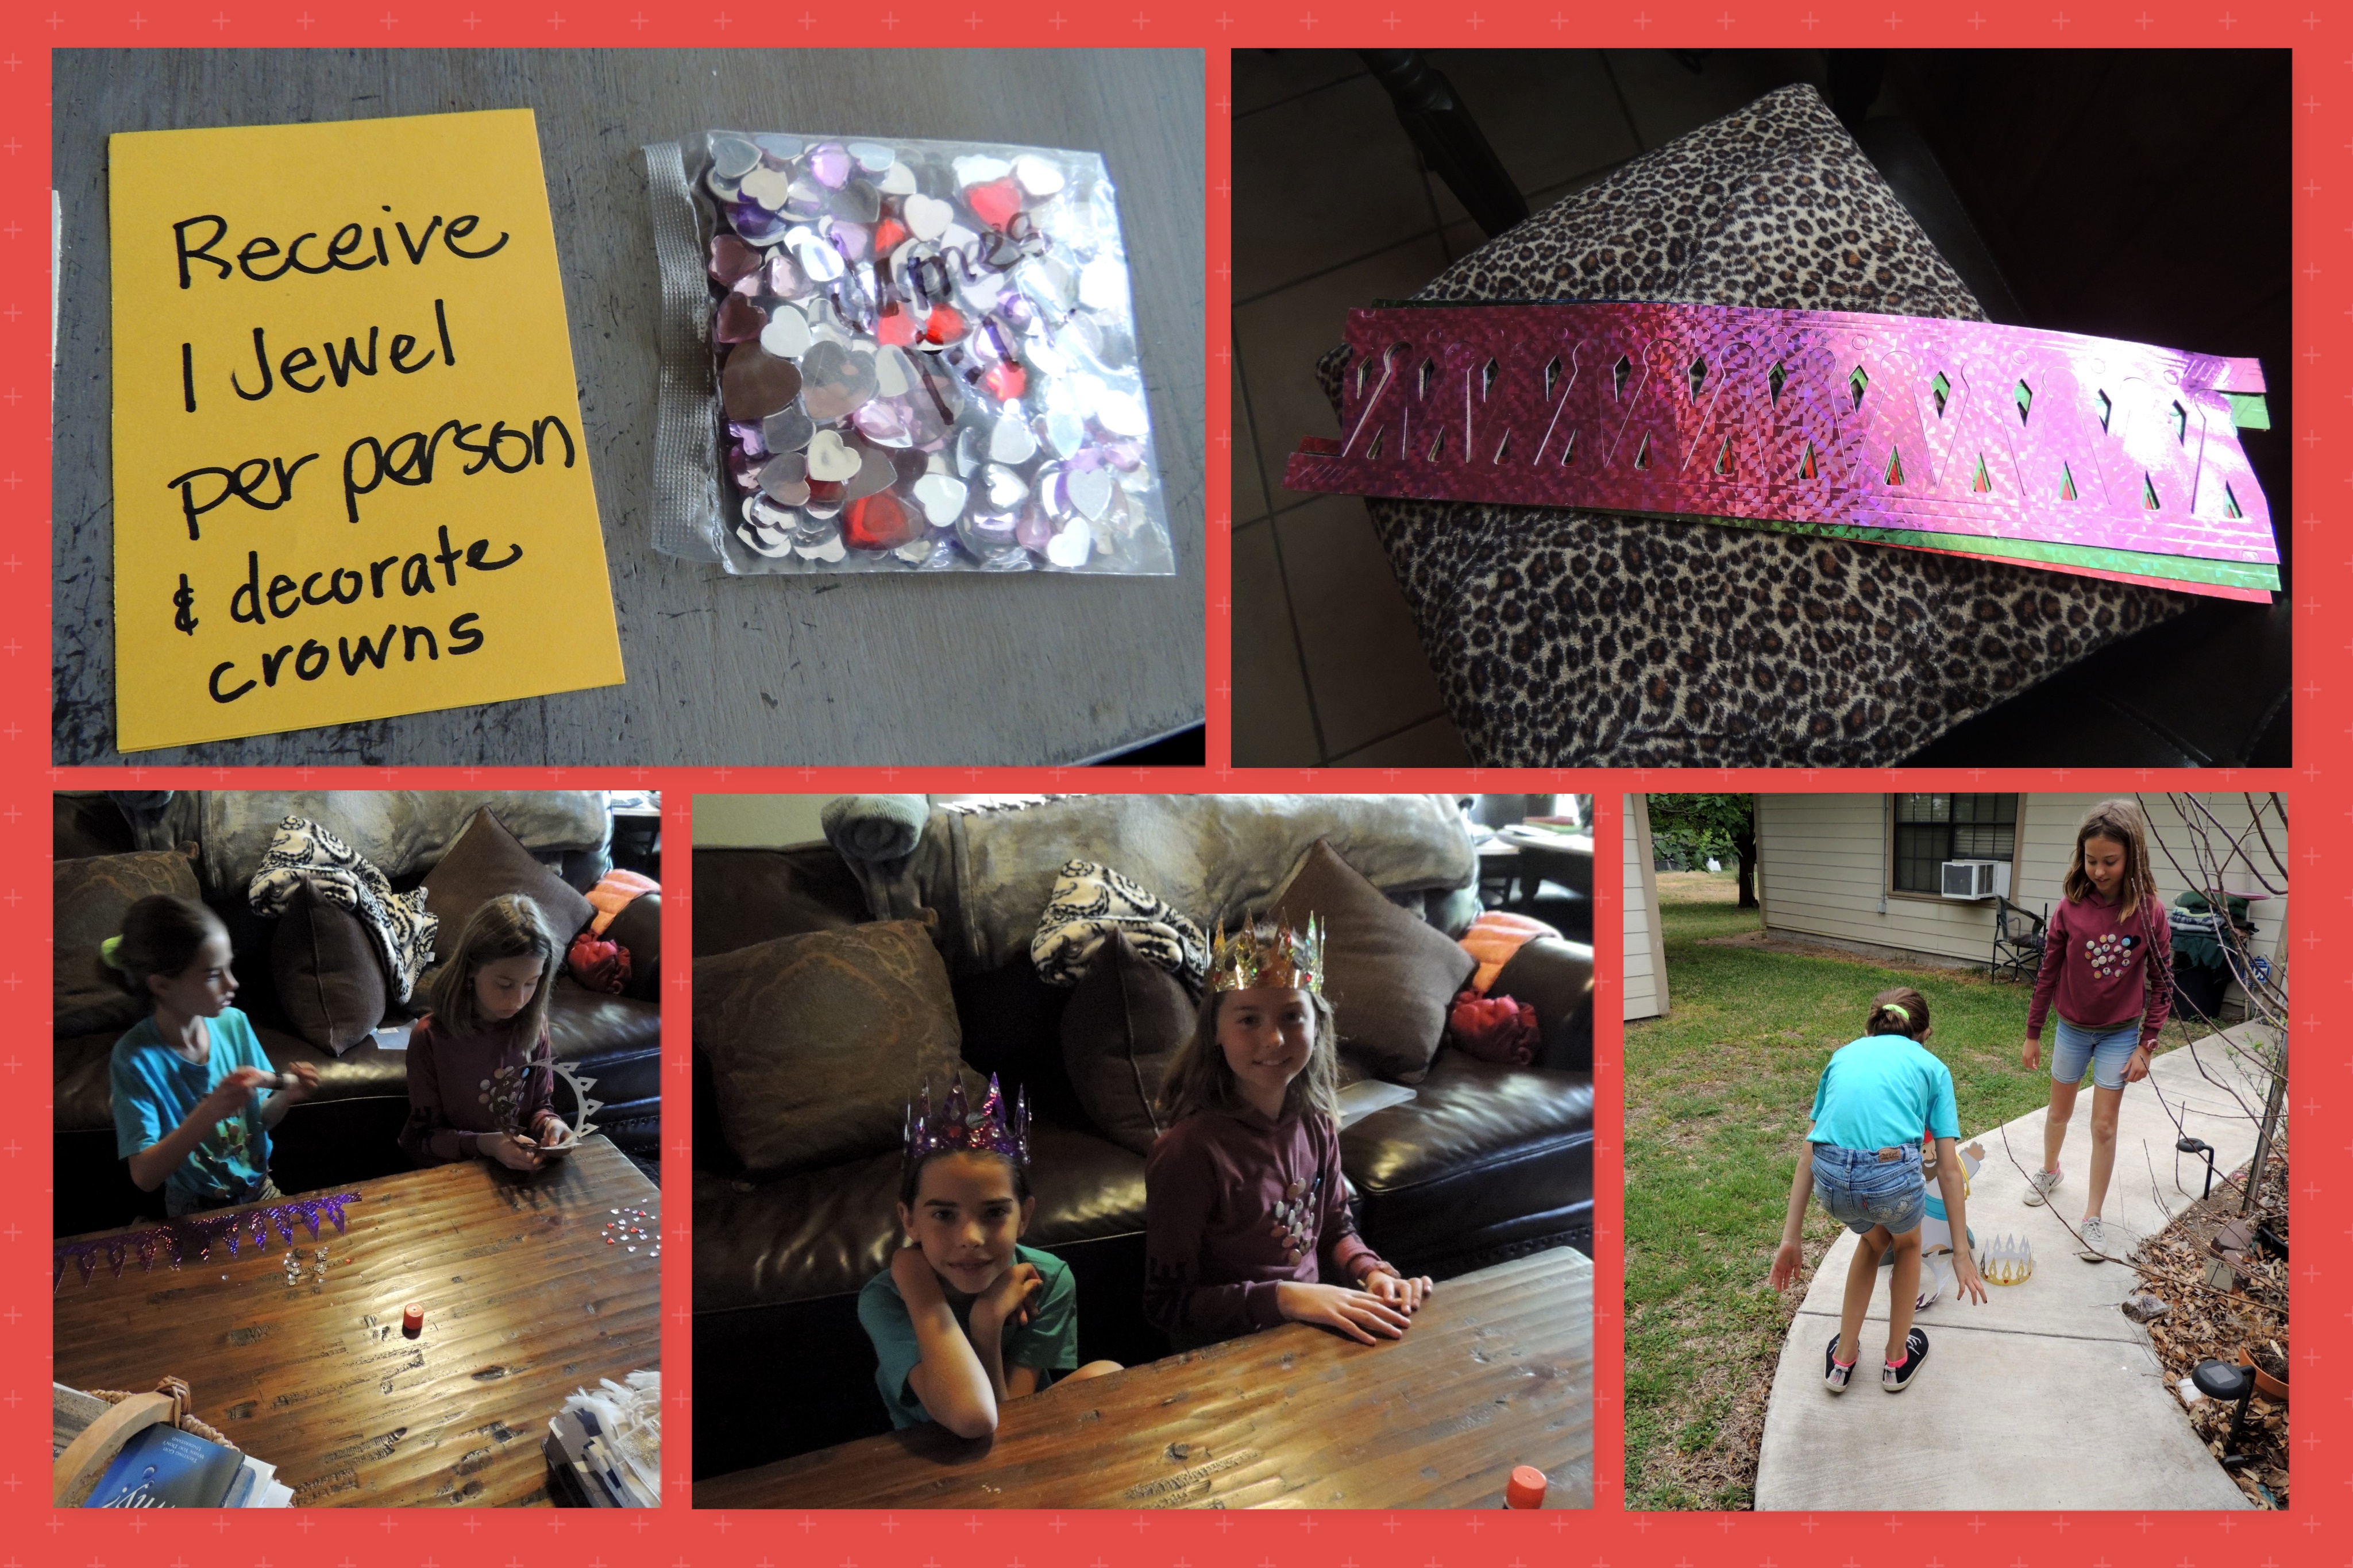


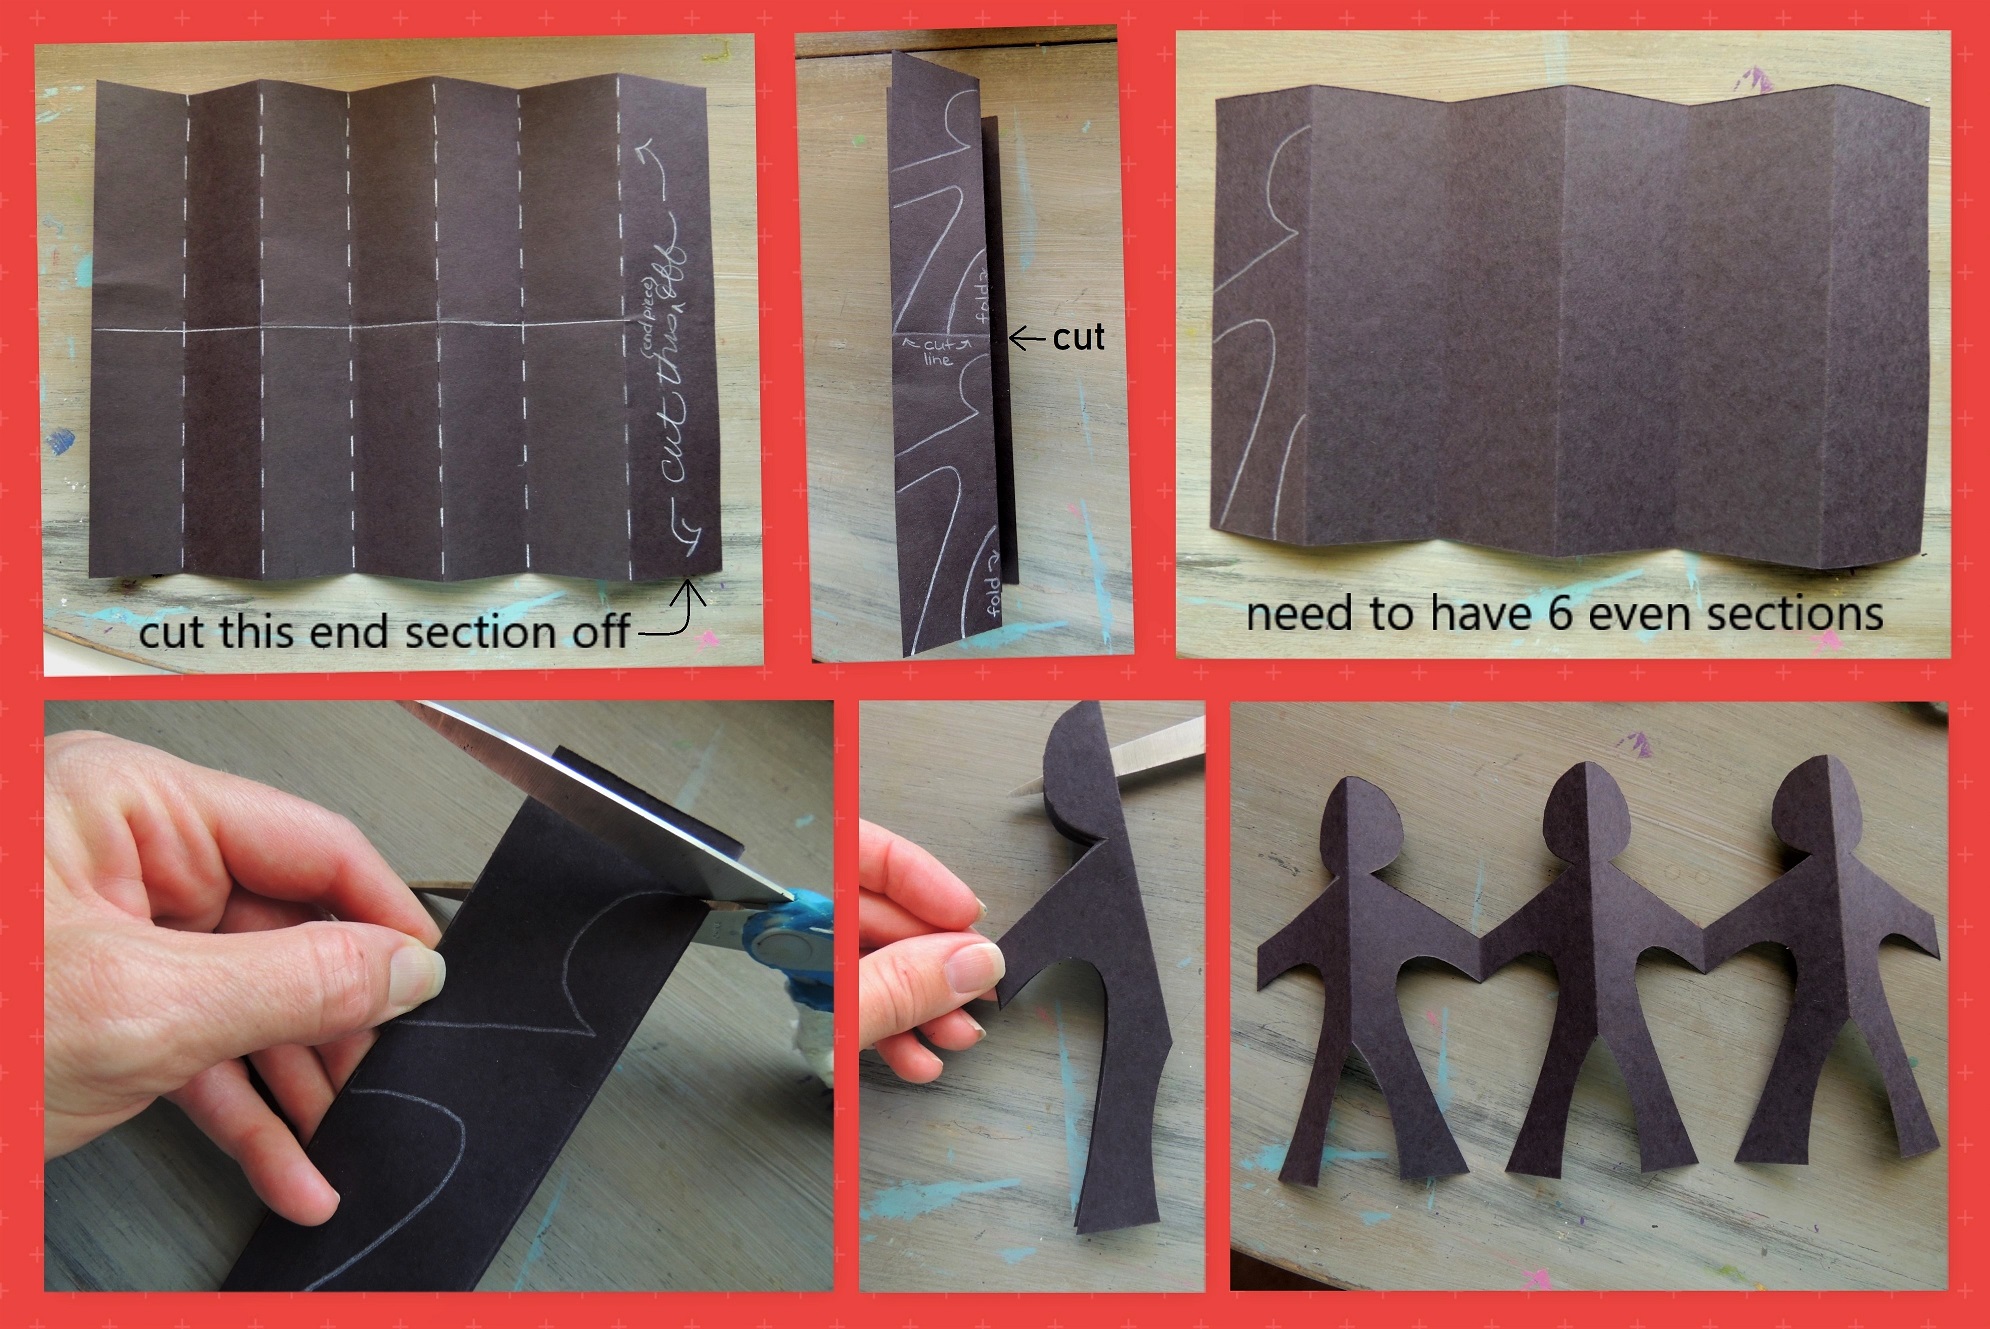
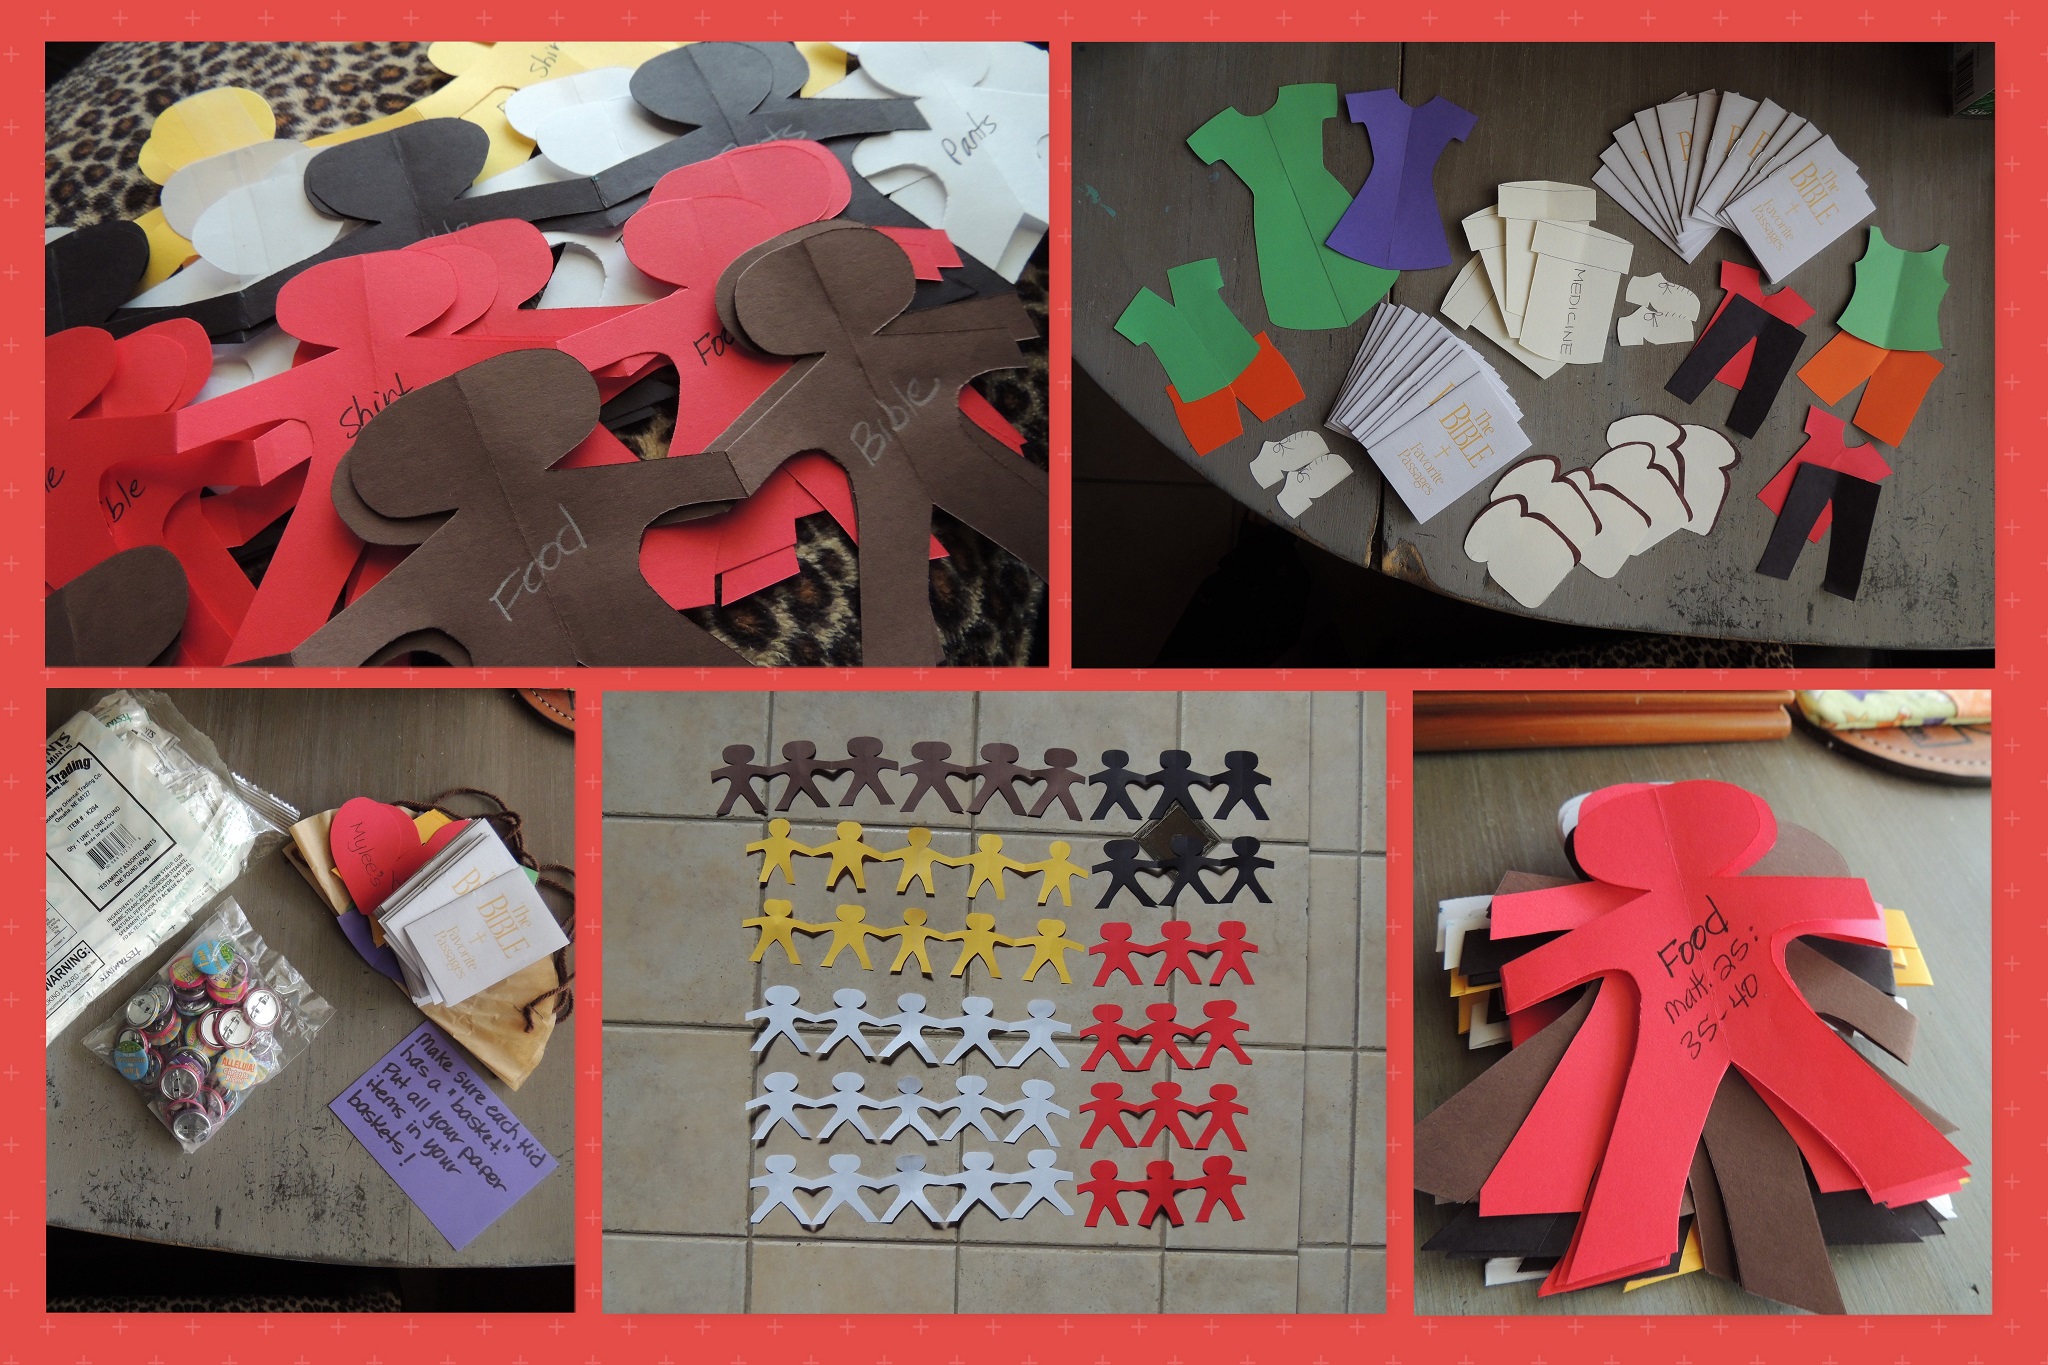

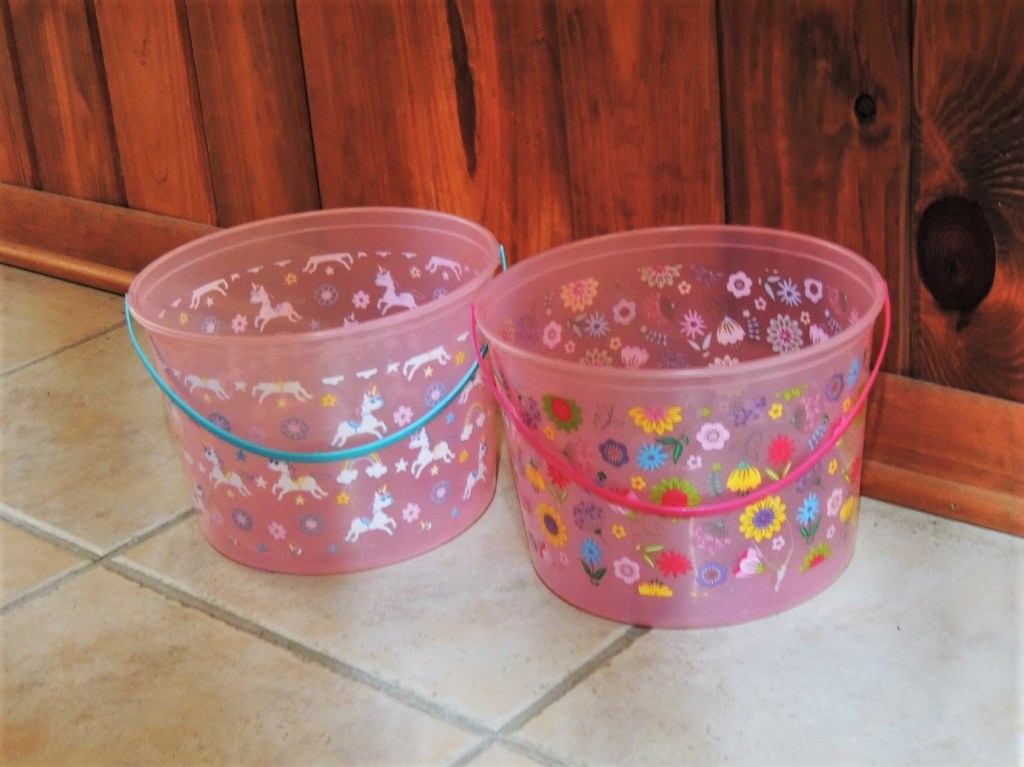
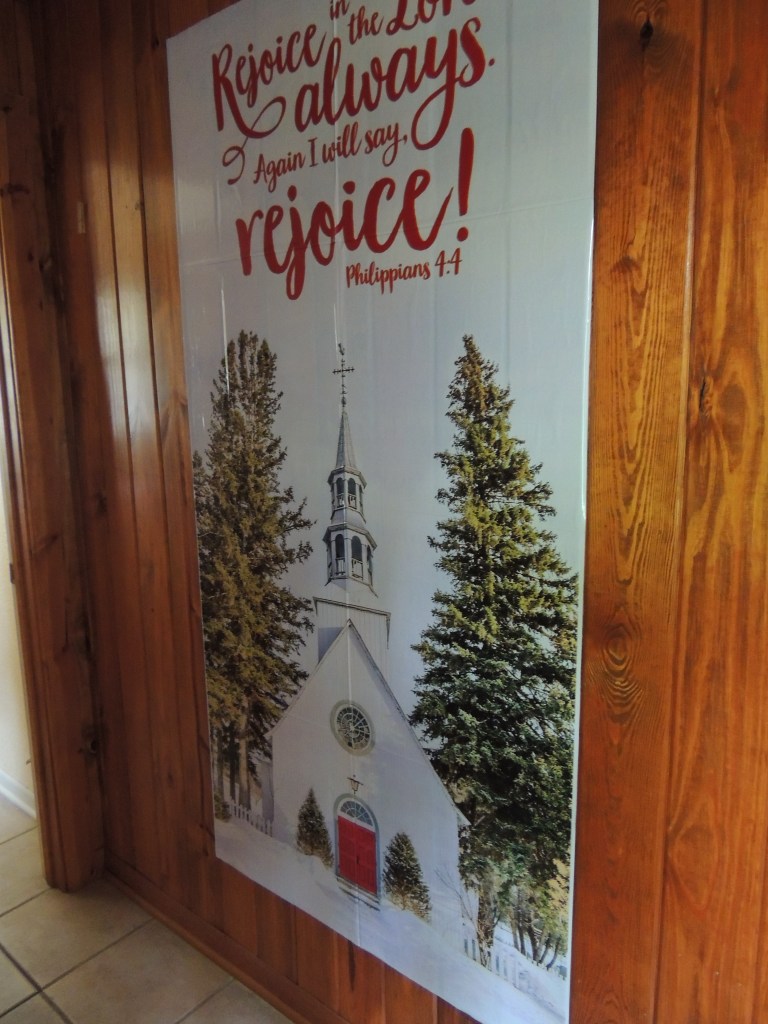

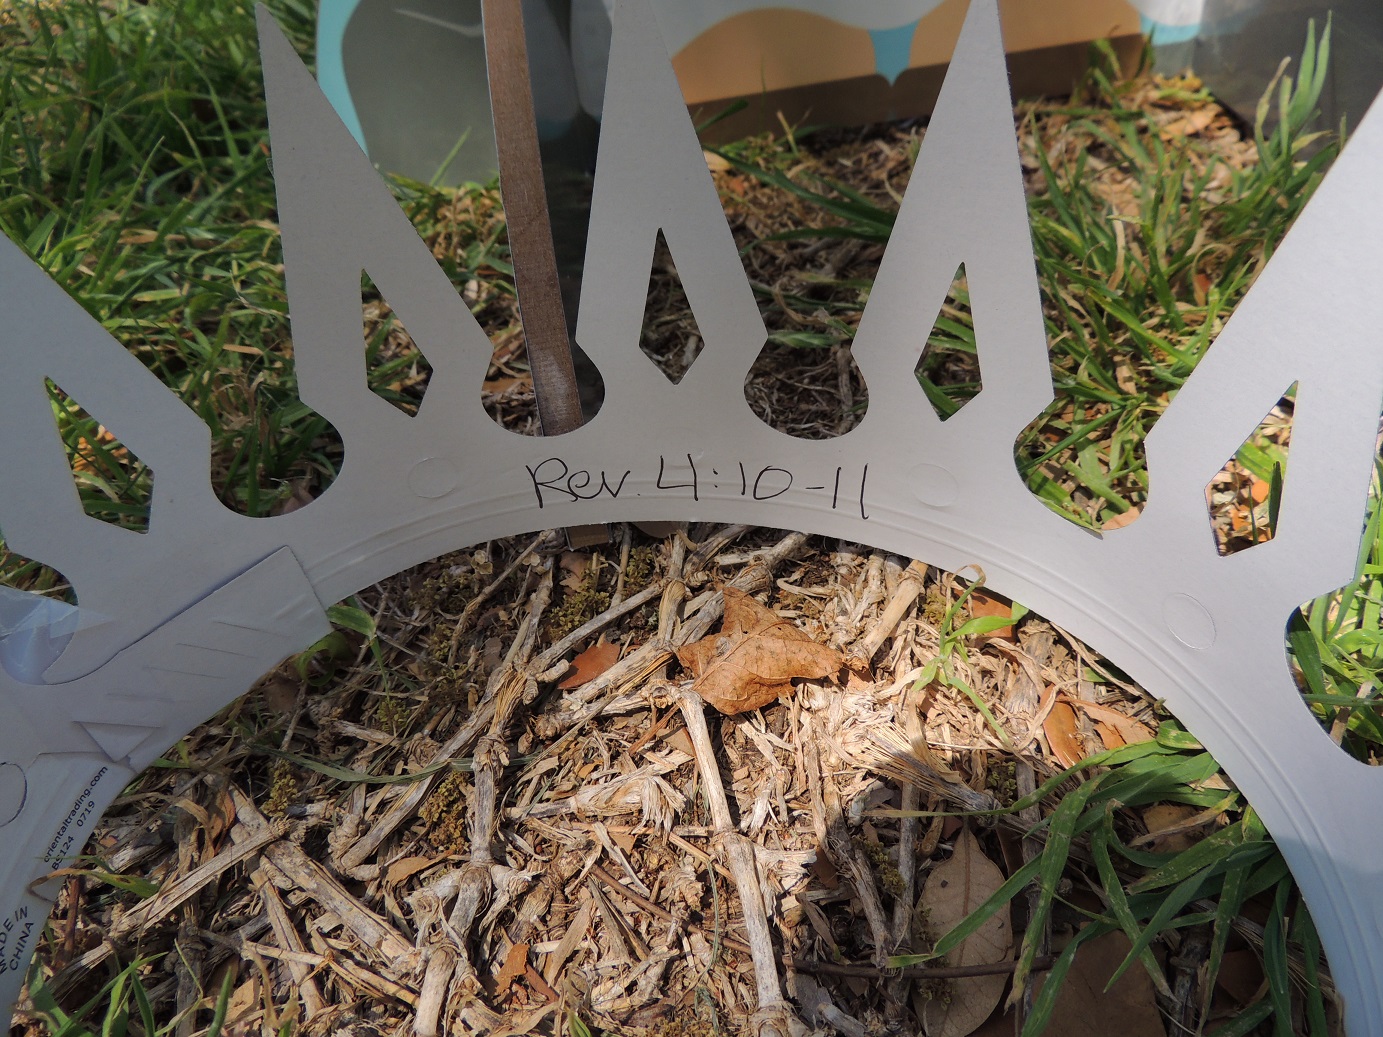


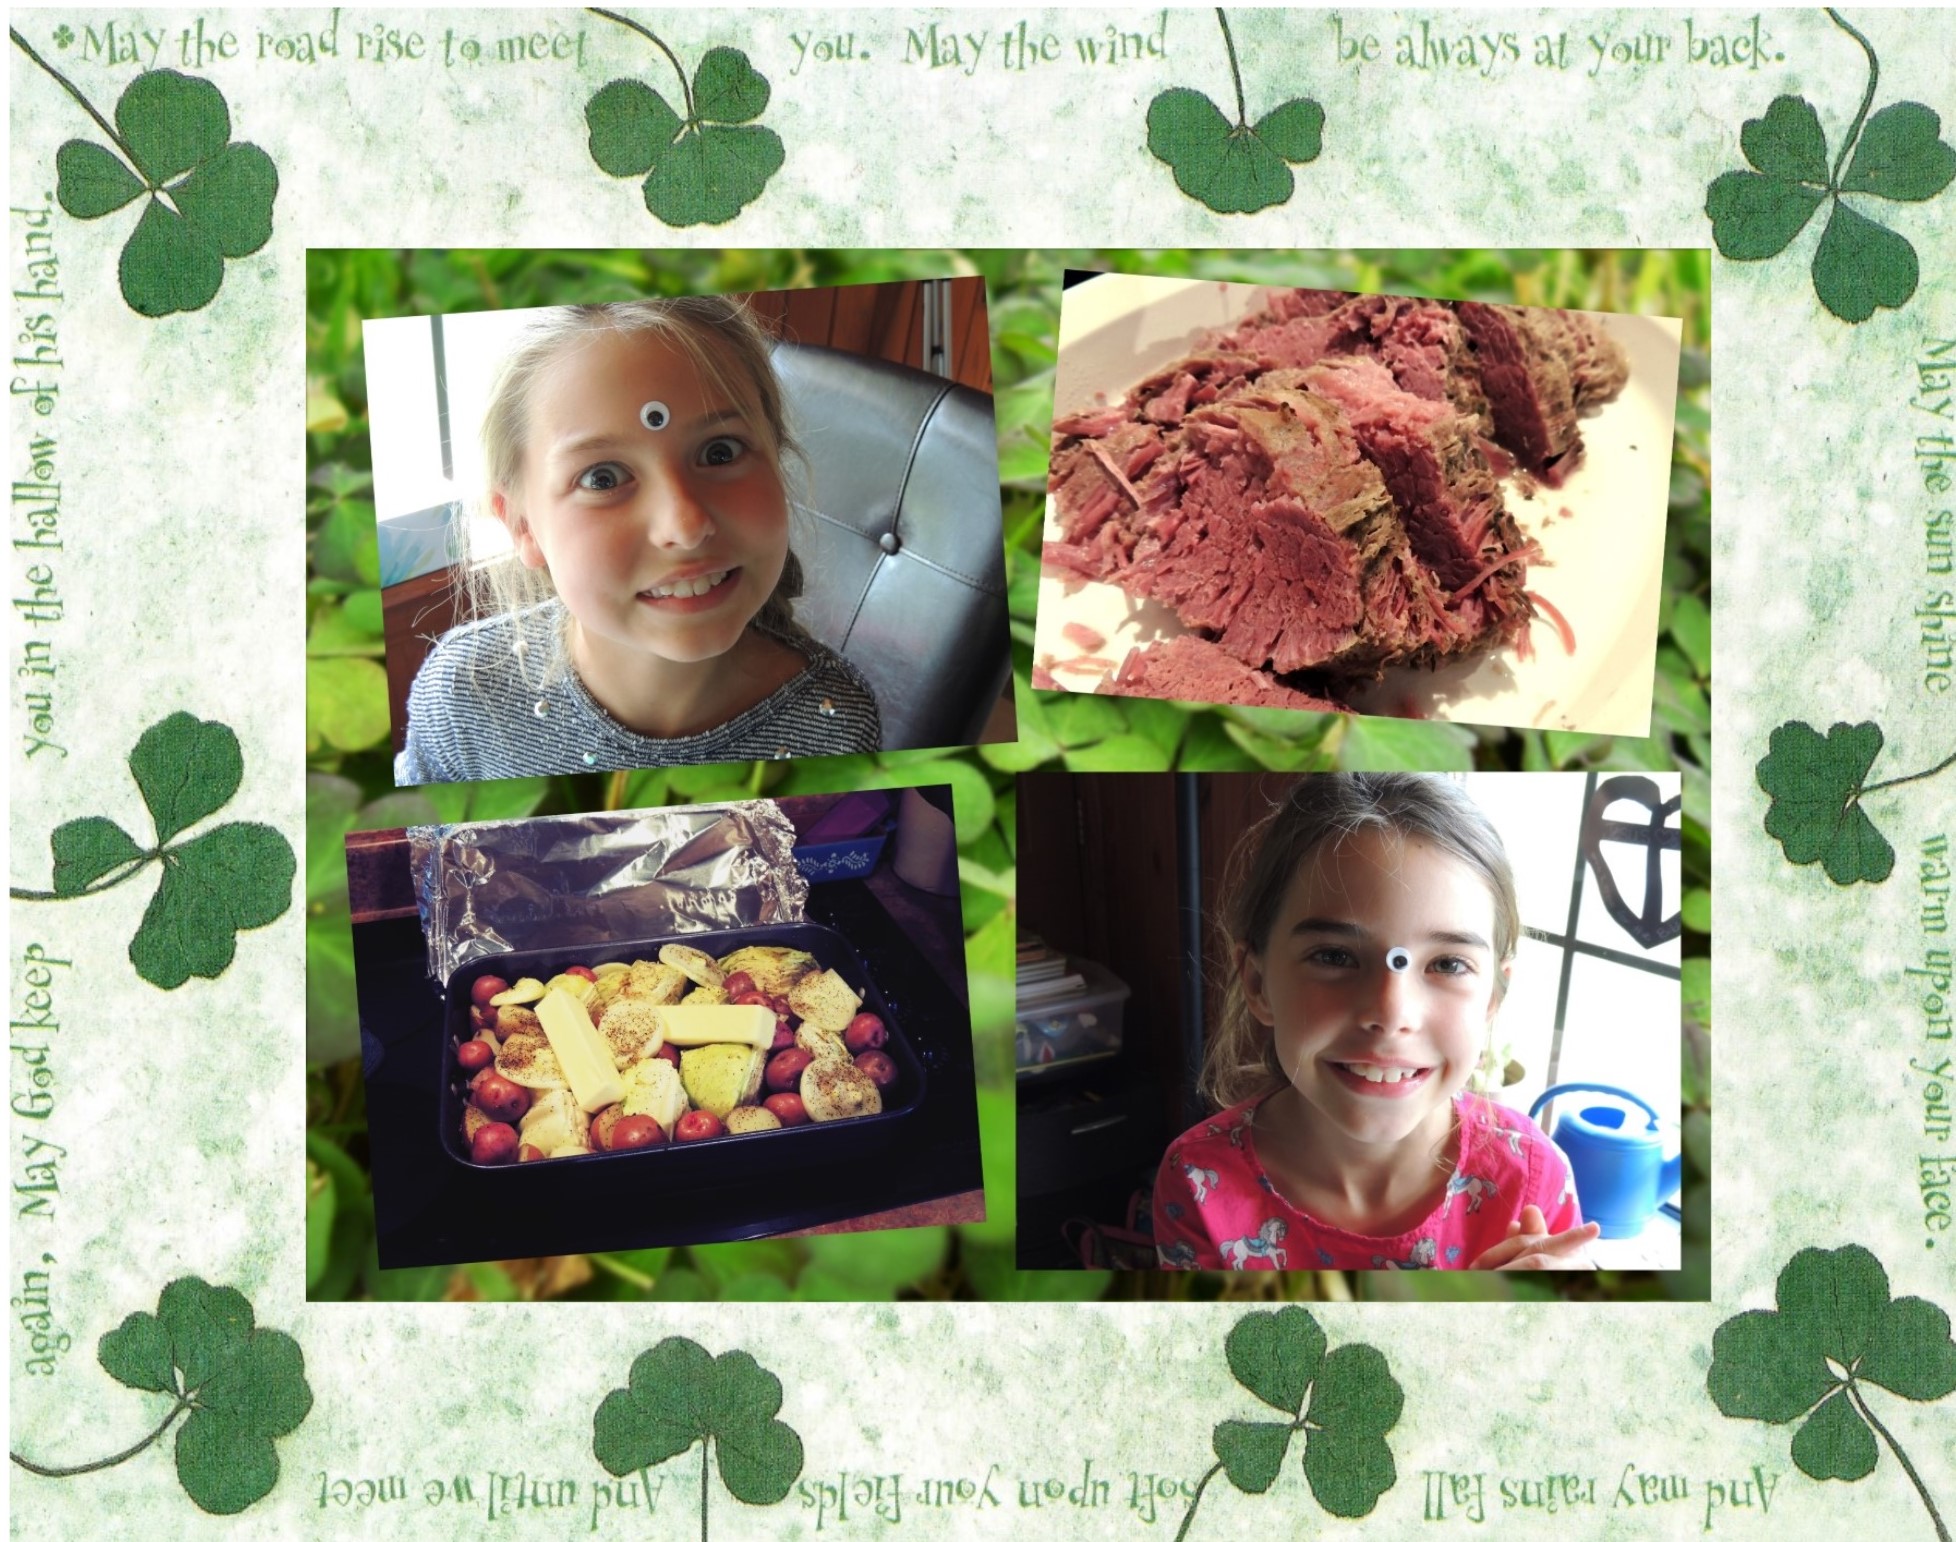

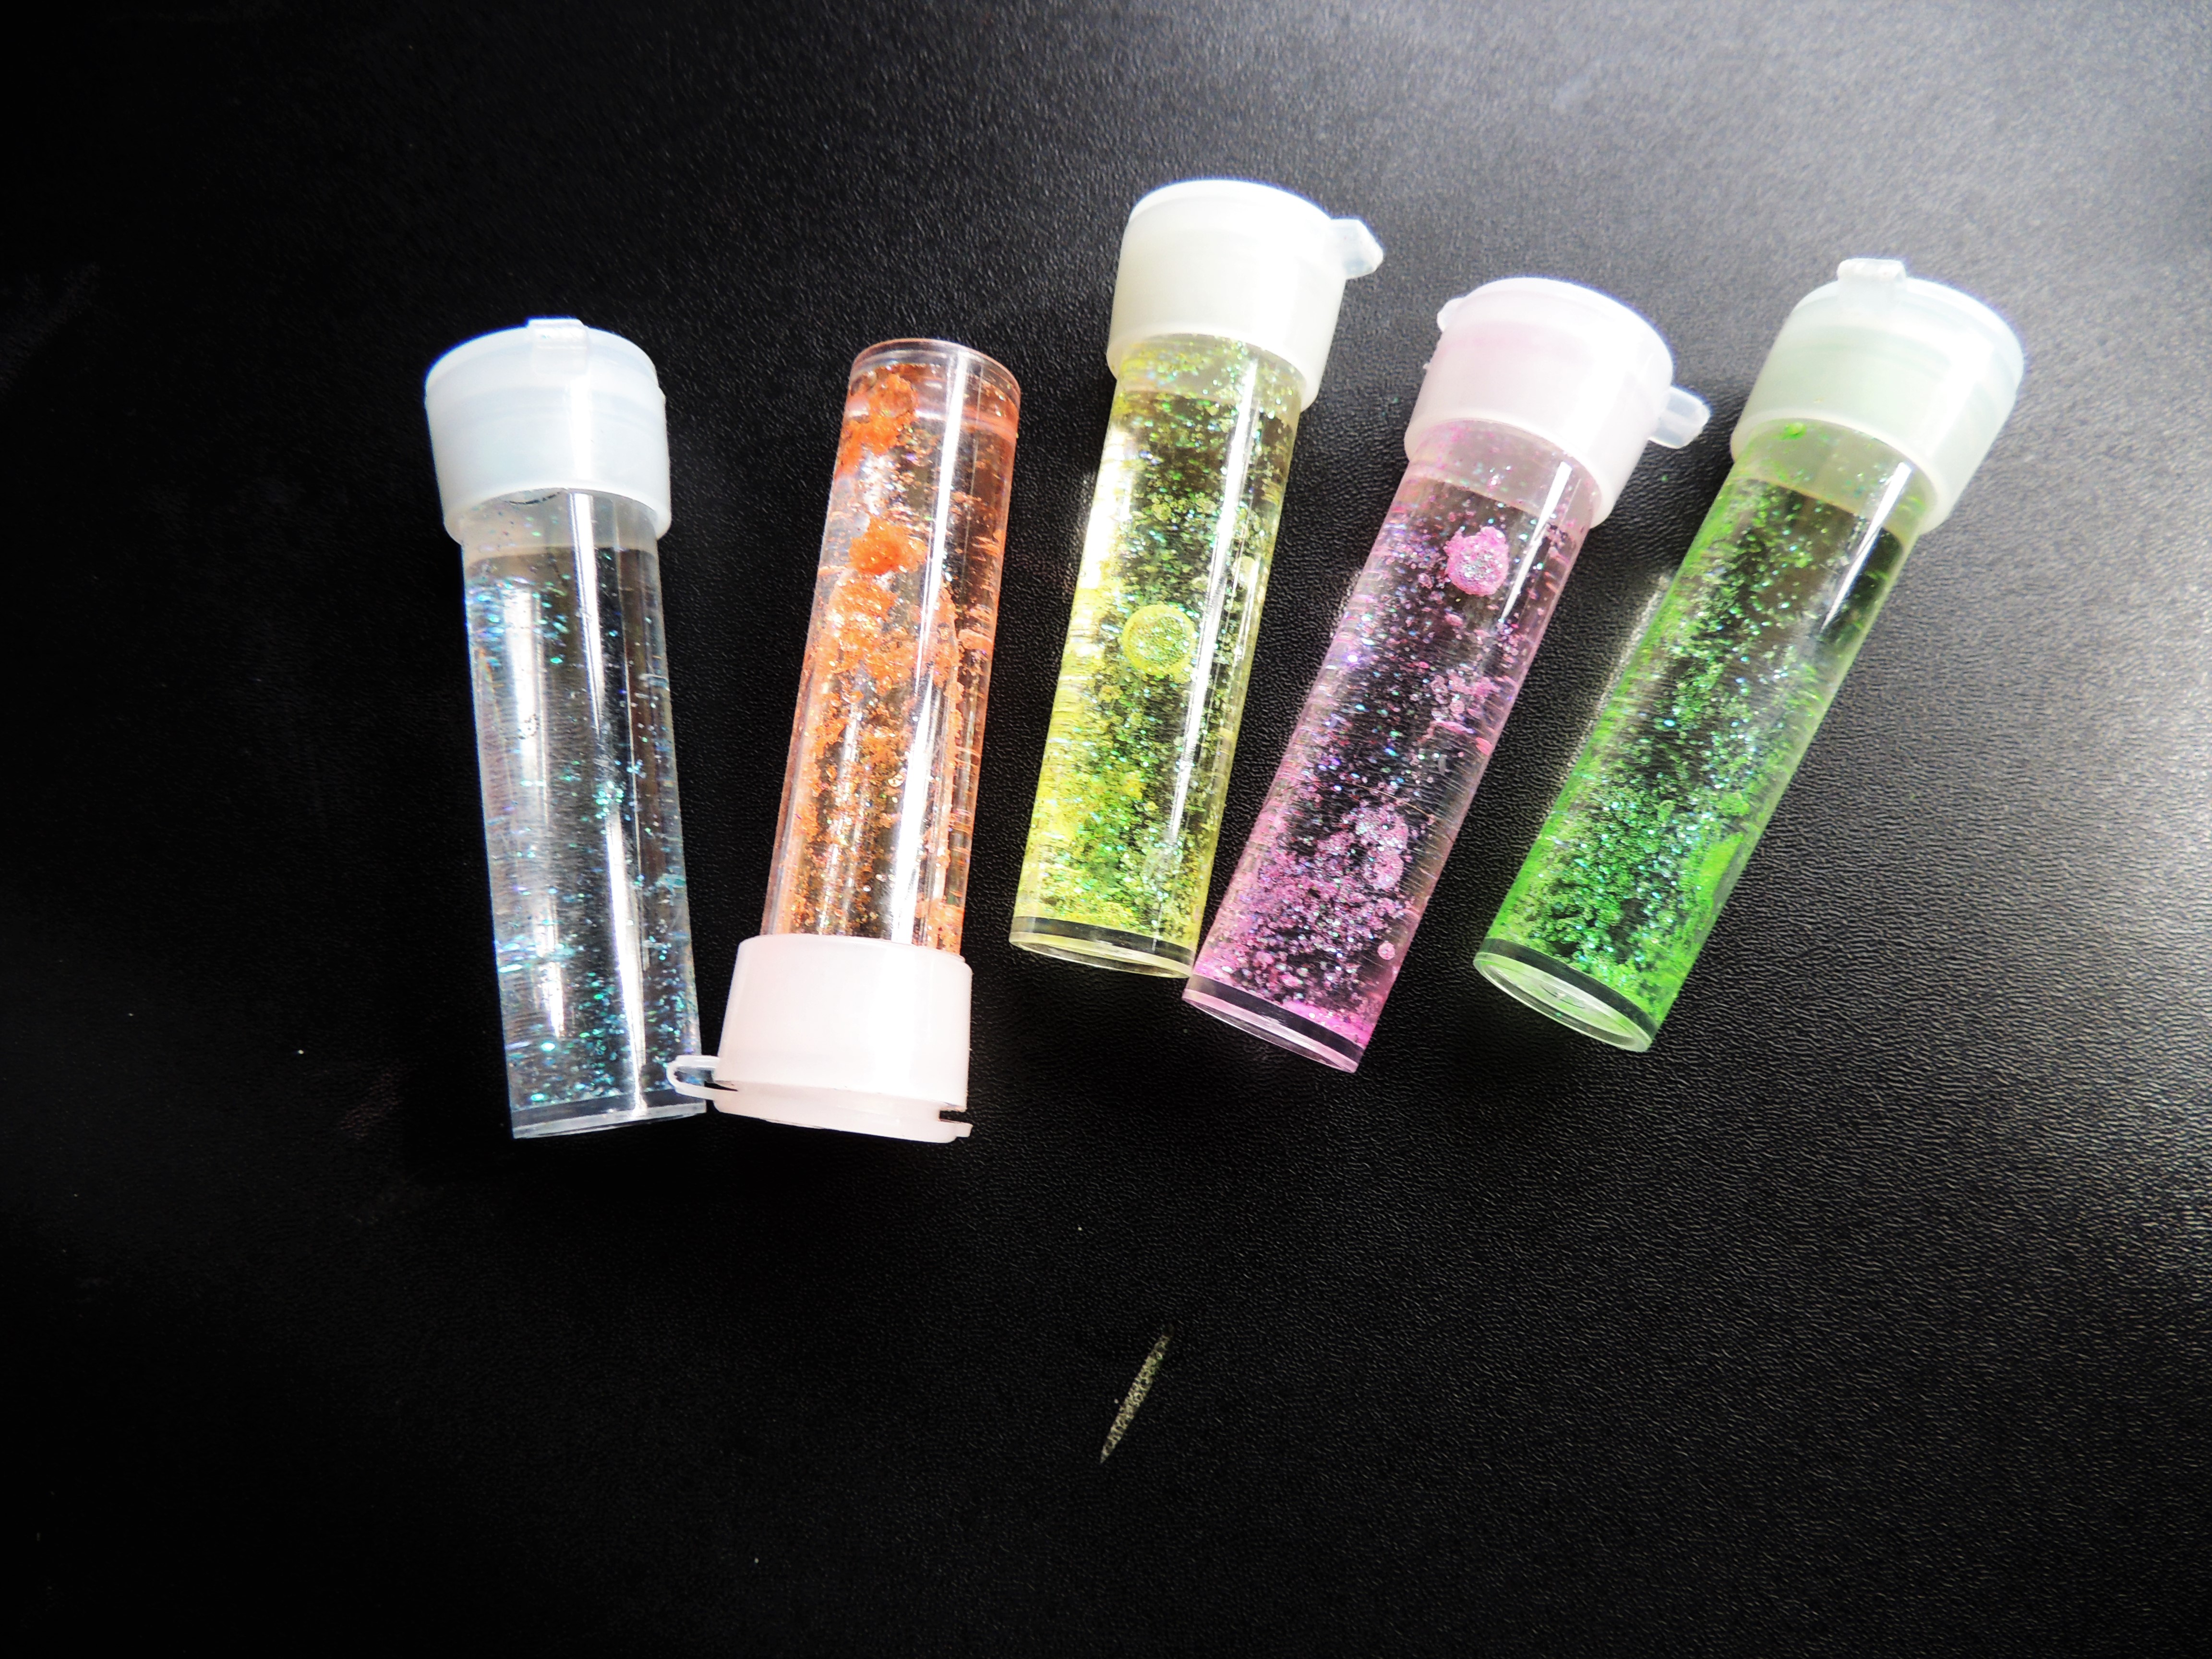
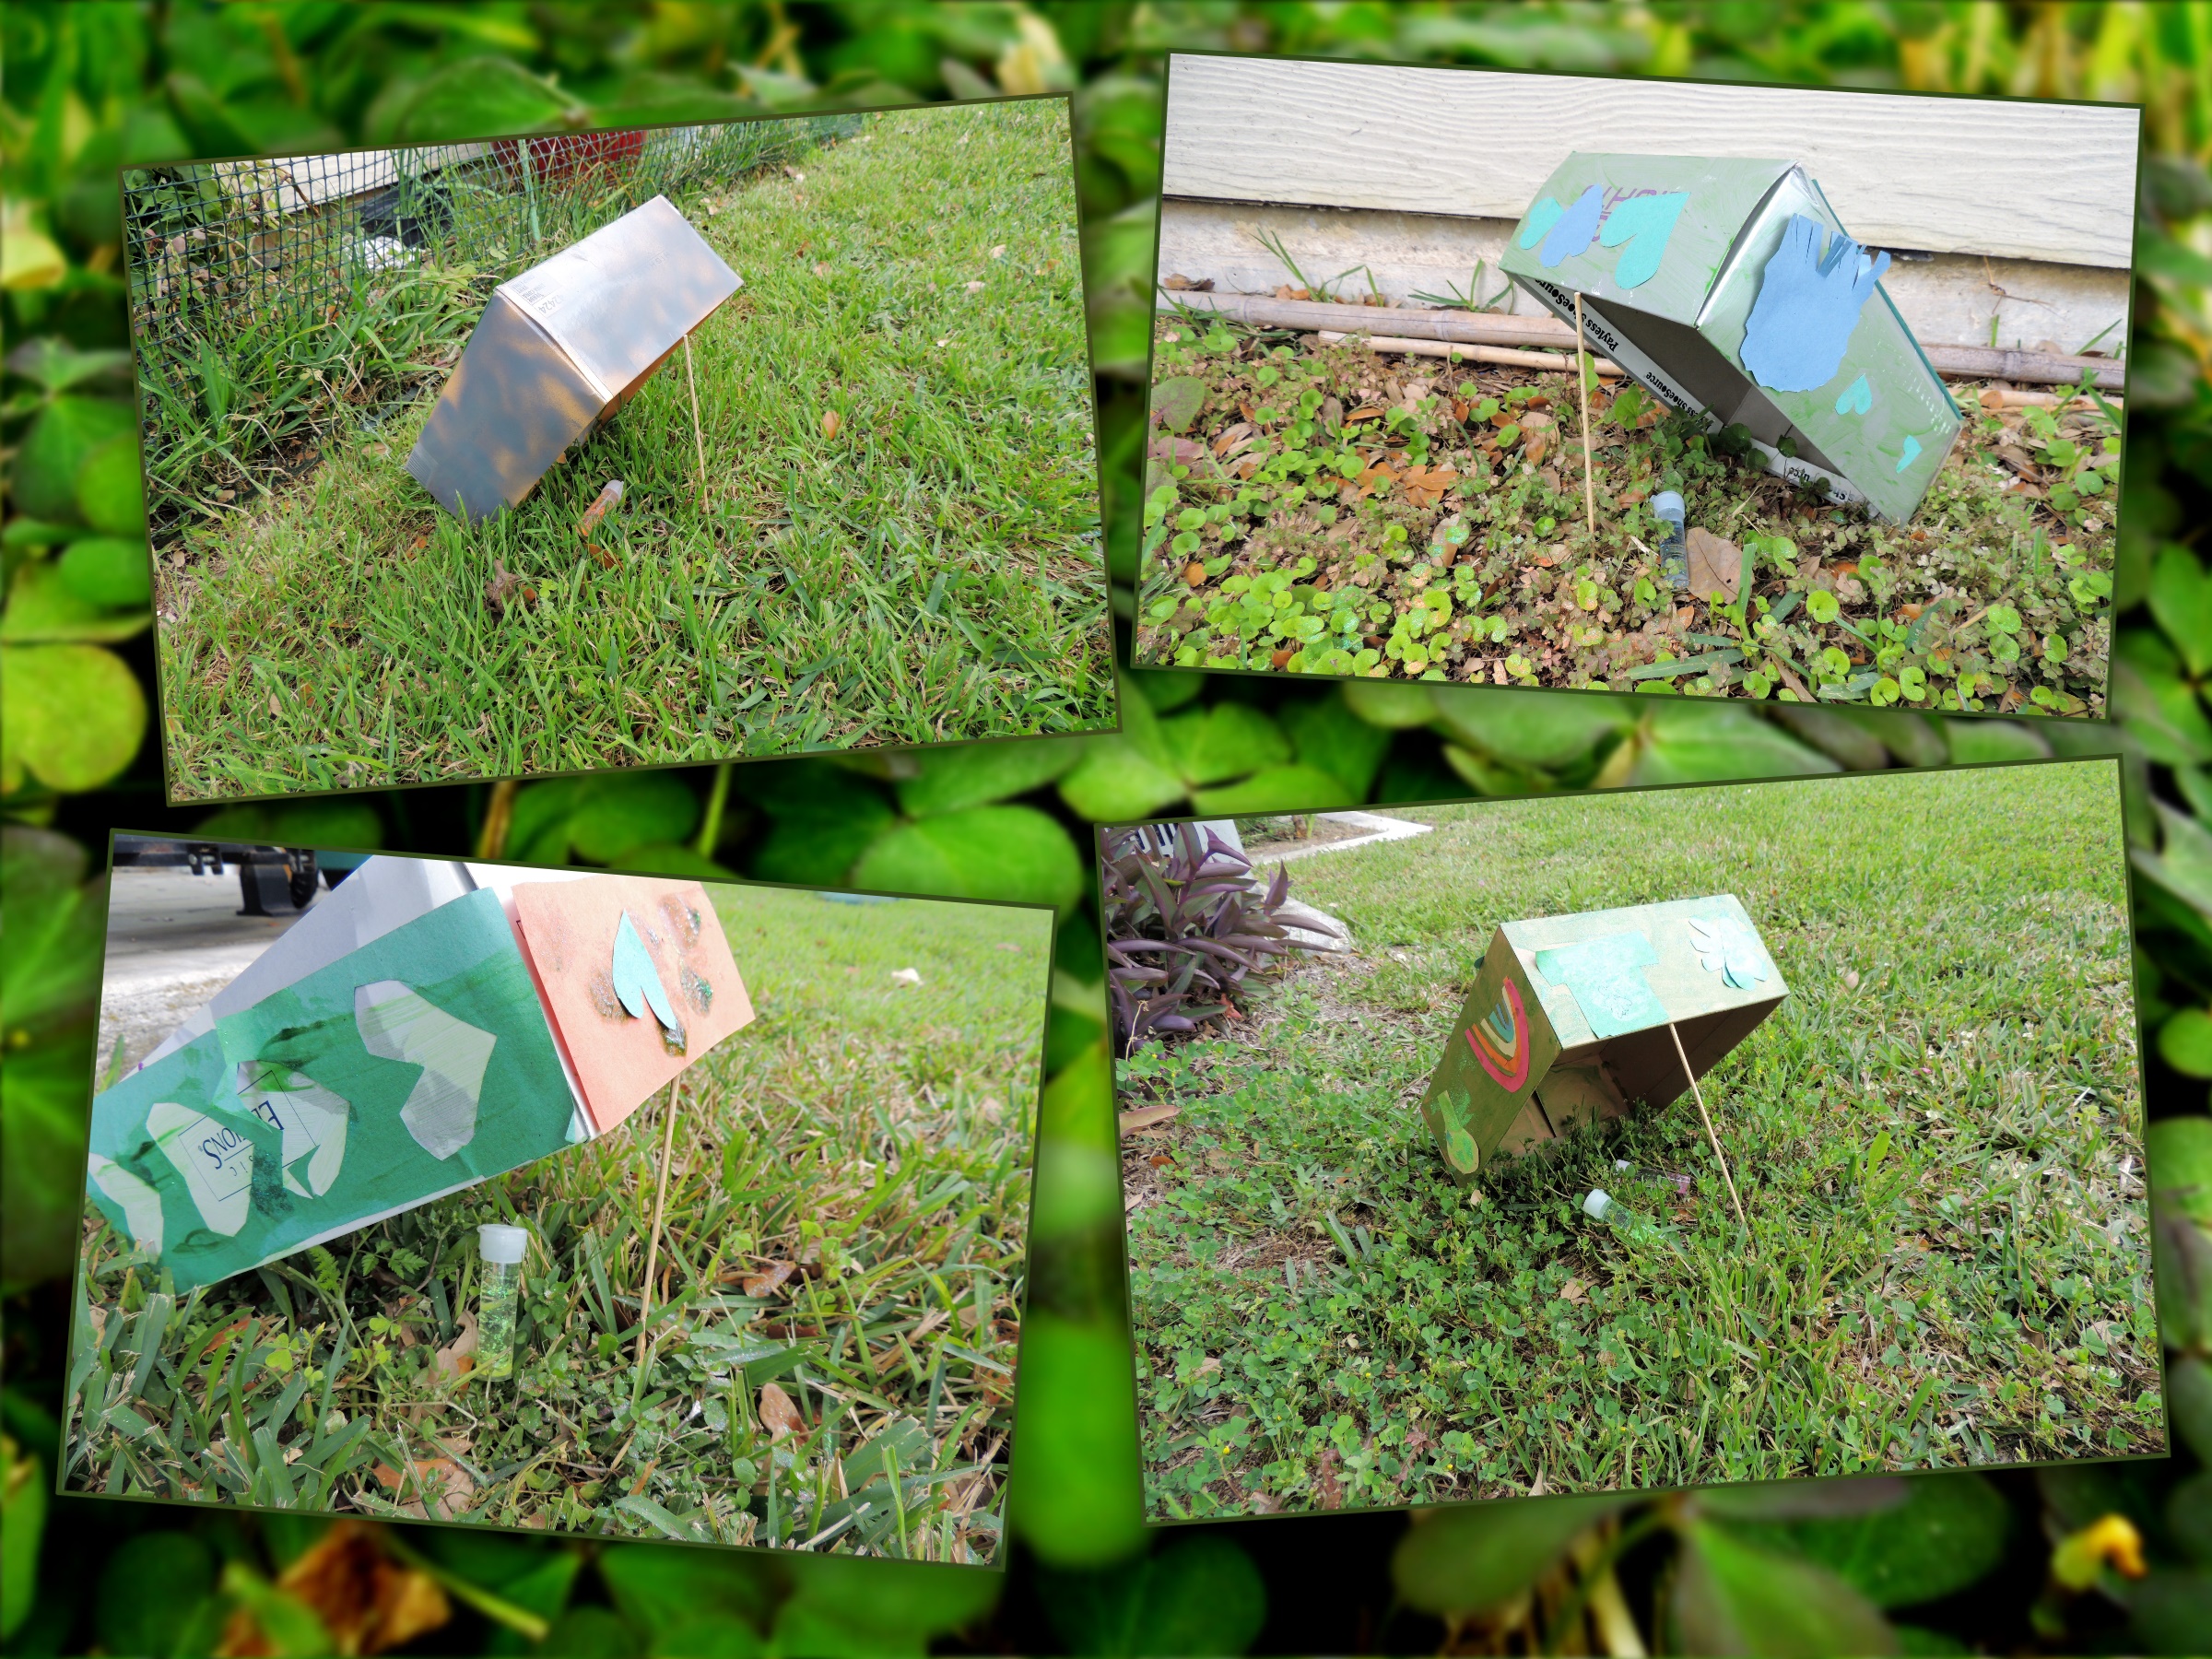


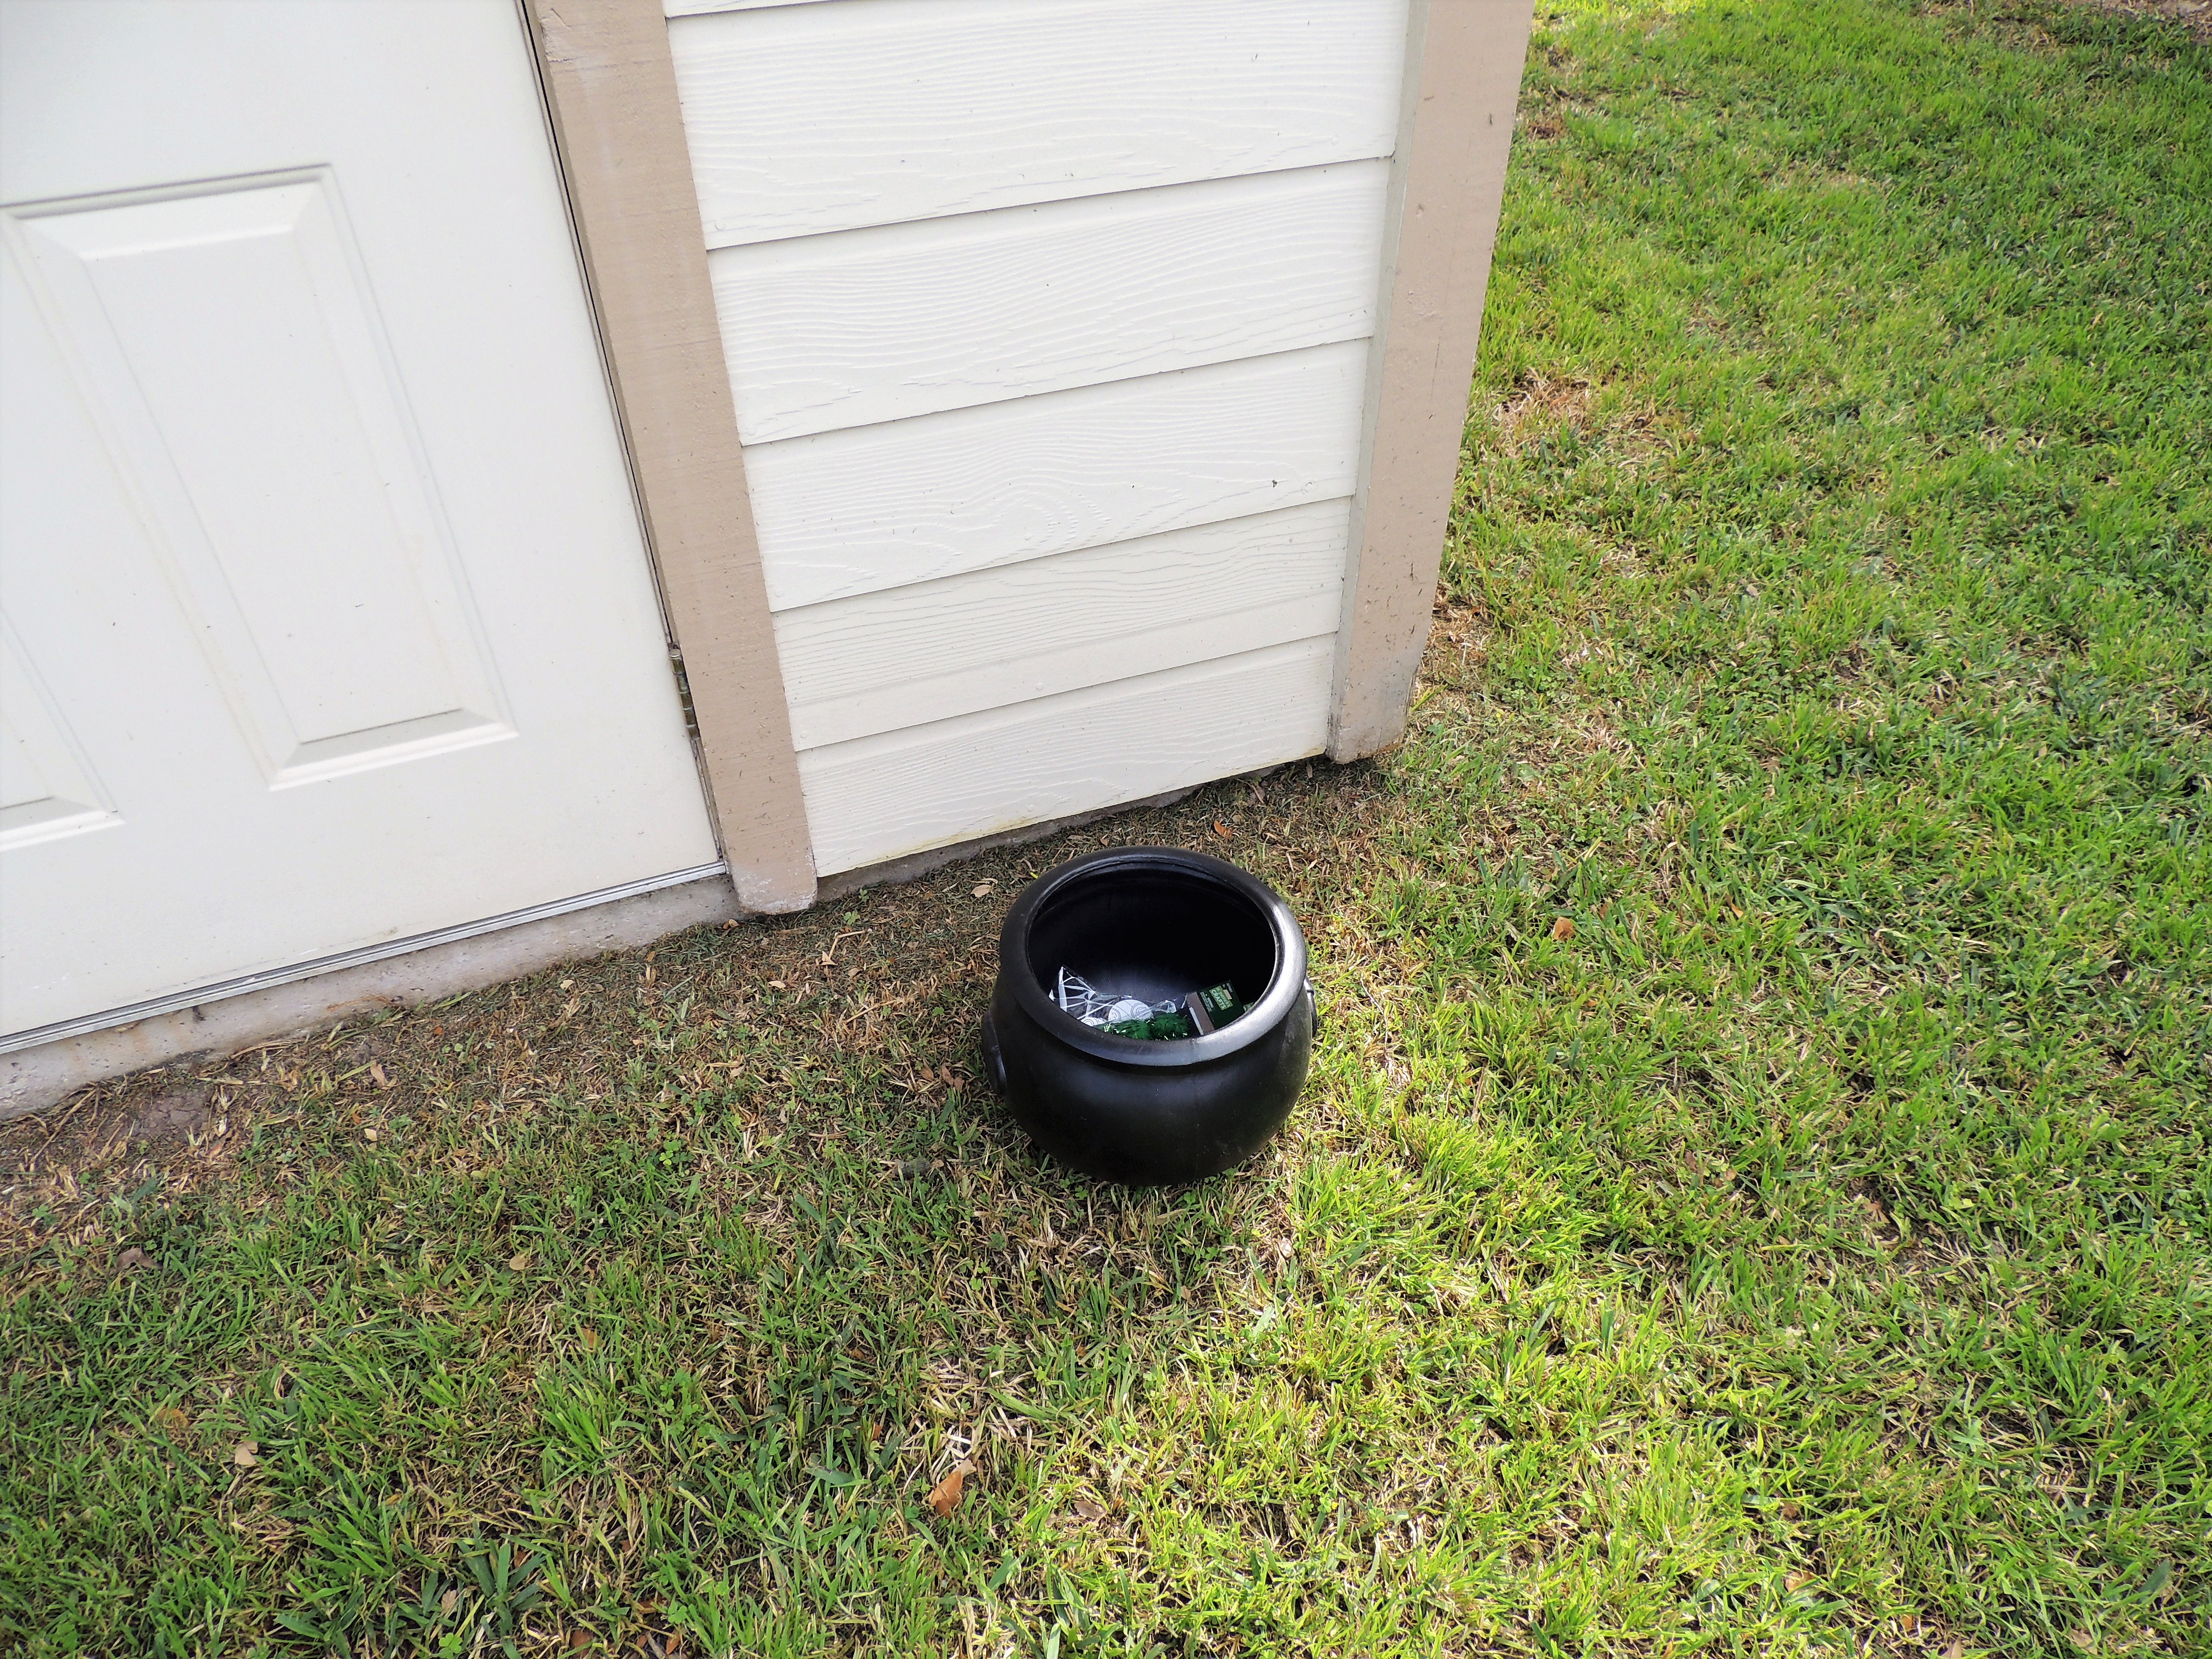

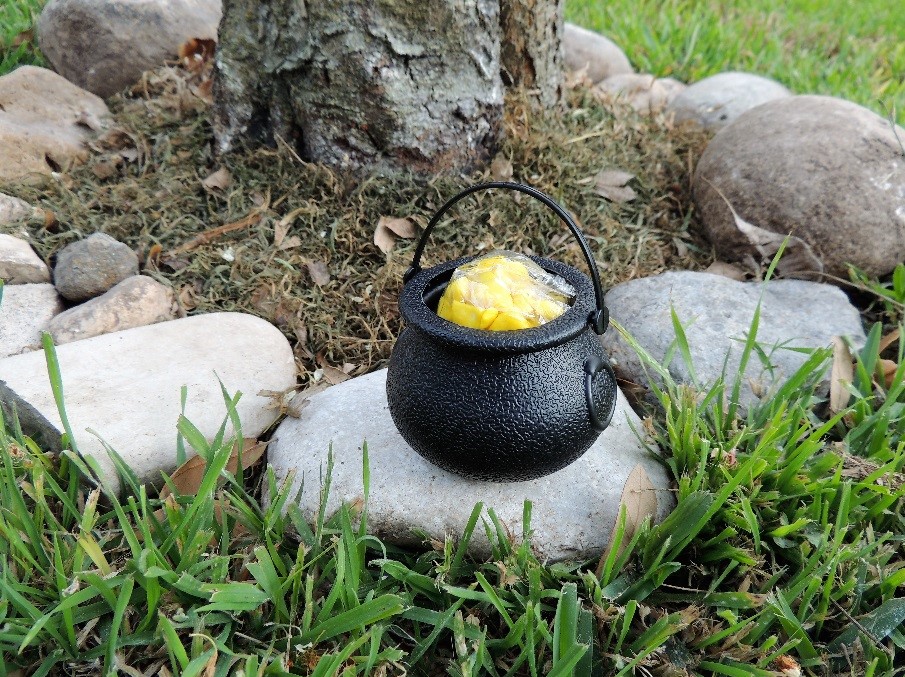


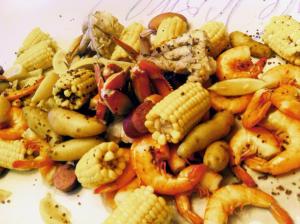


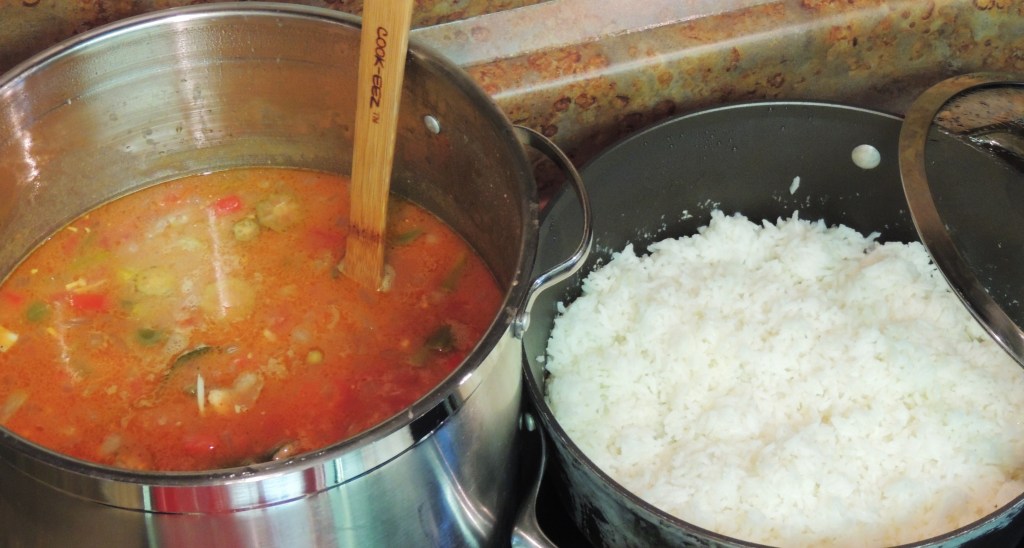 .
.
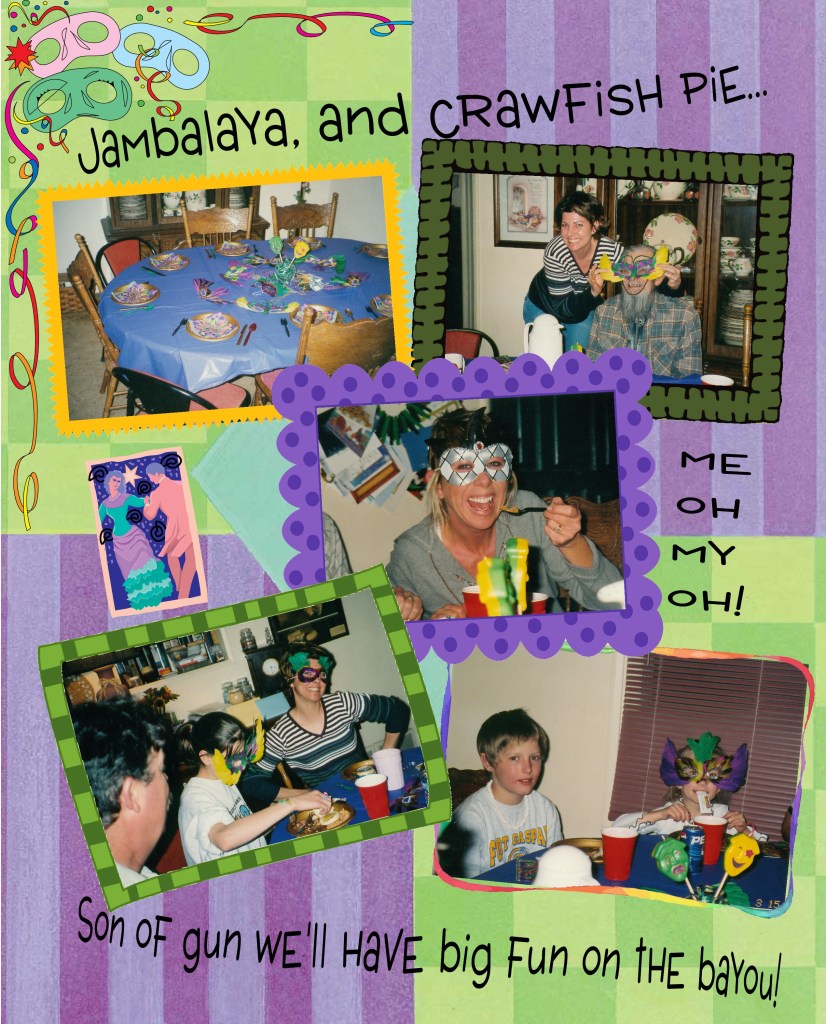

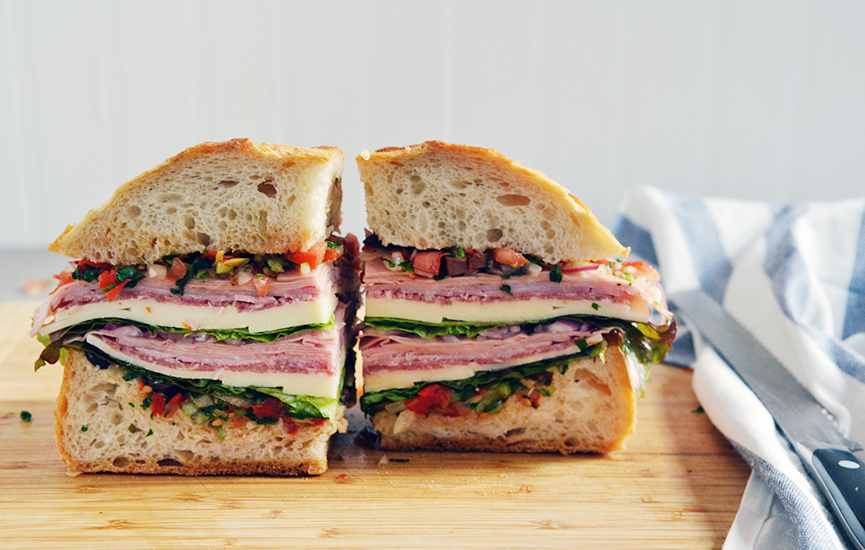

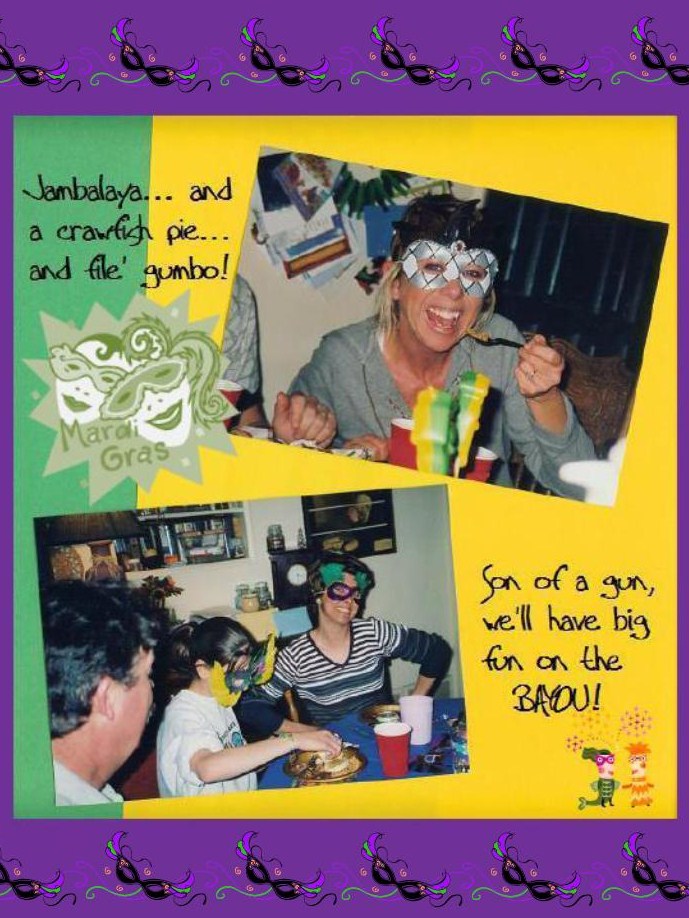
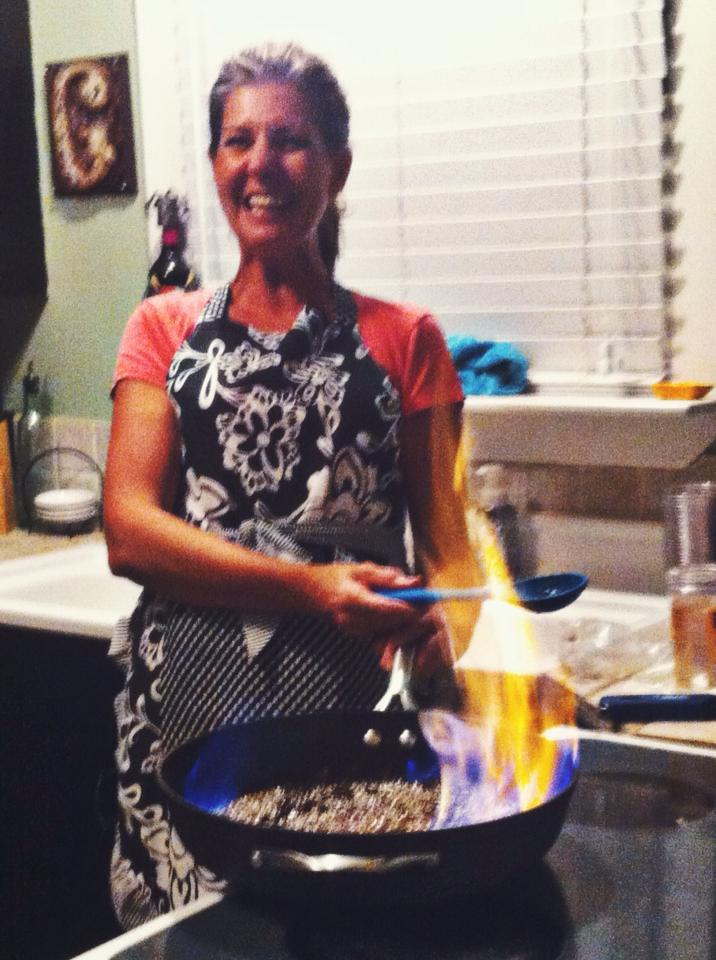


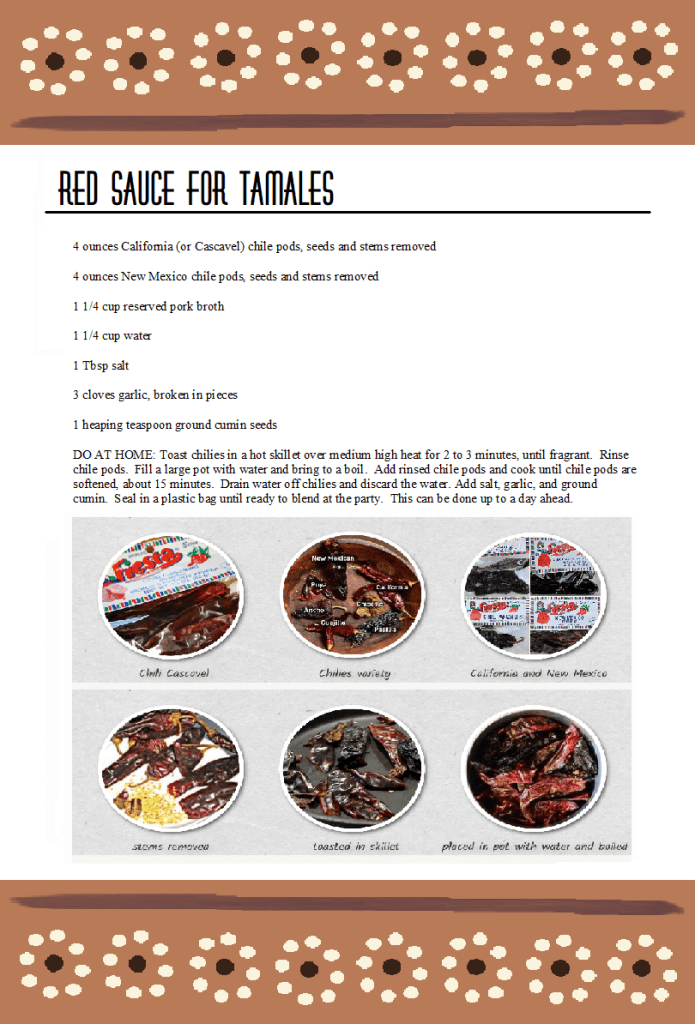
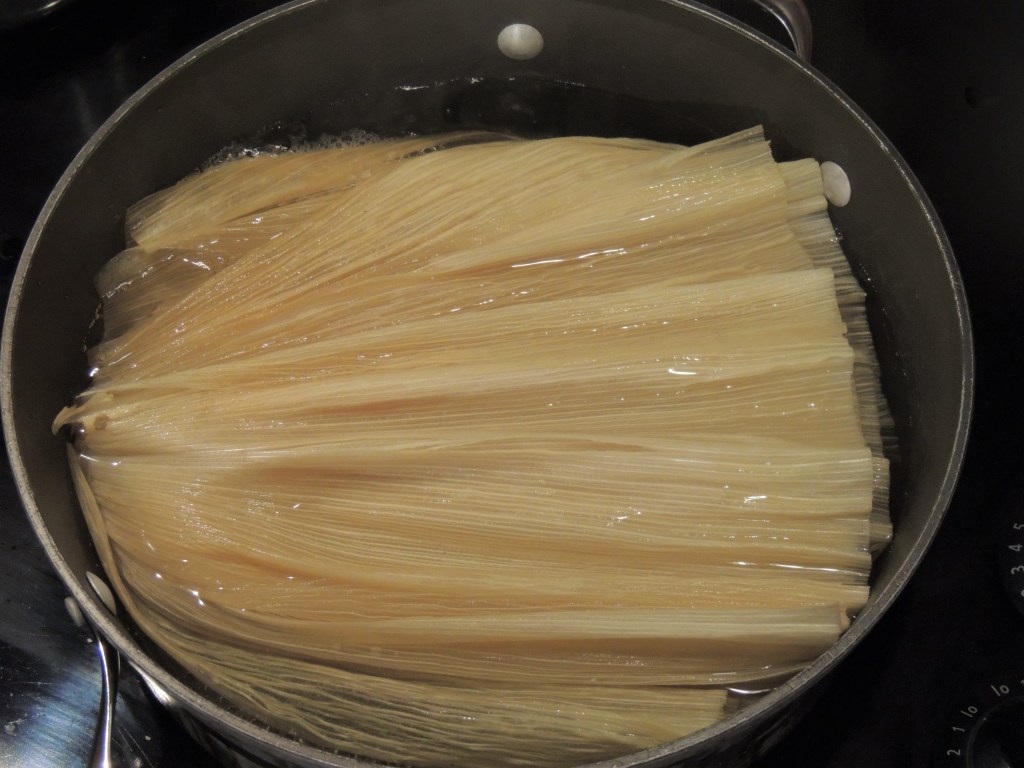
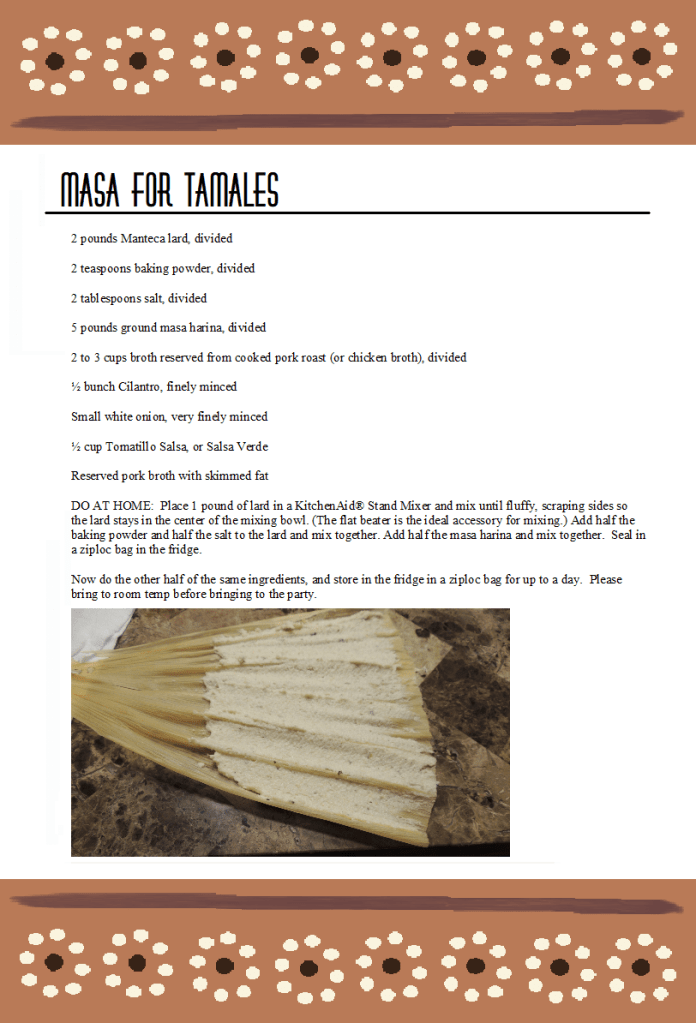

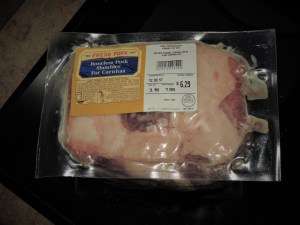

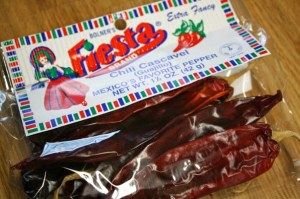


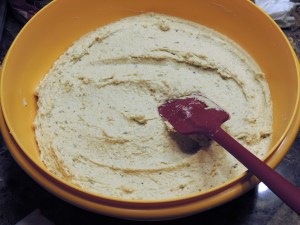


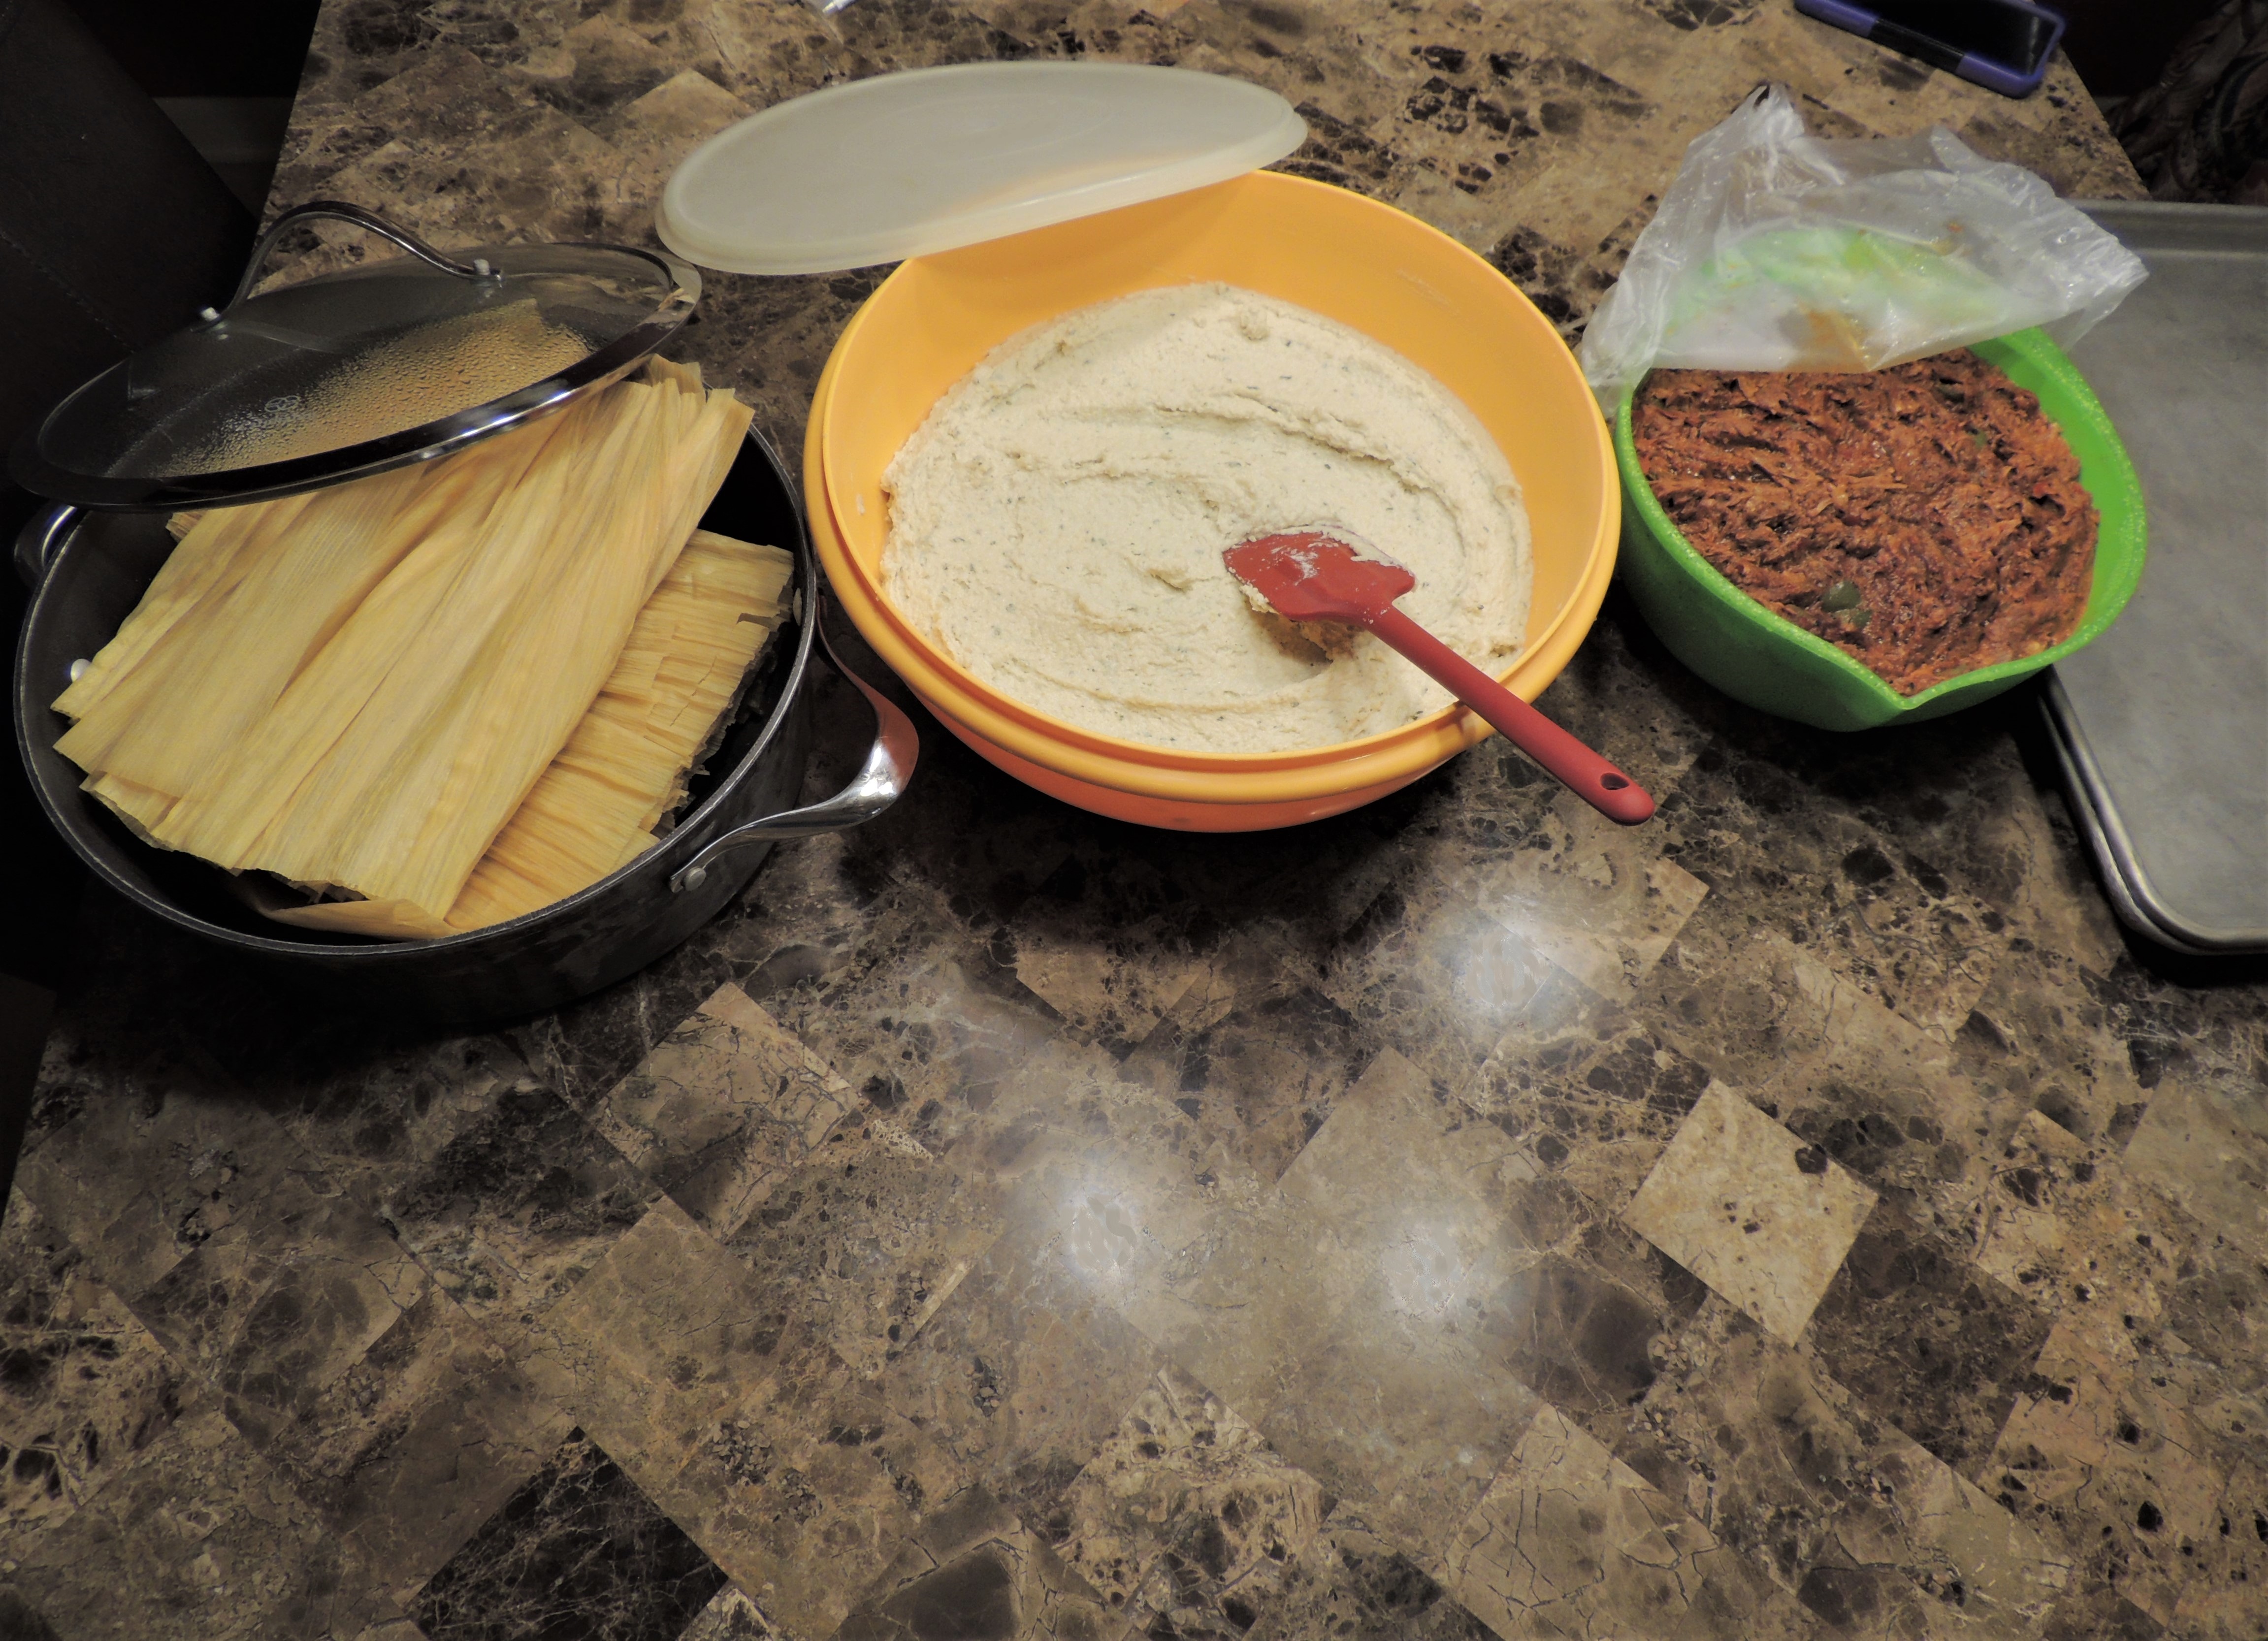
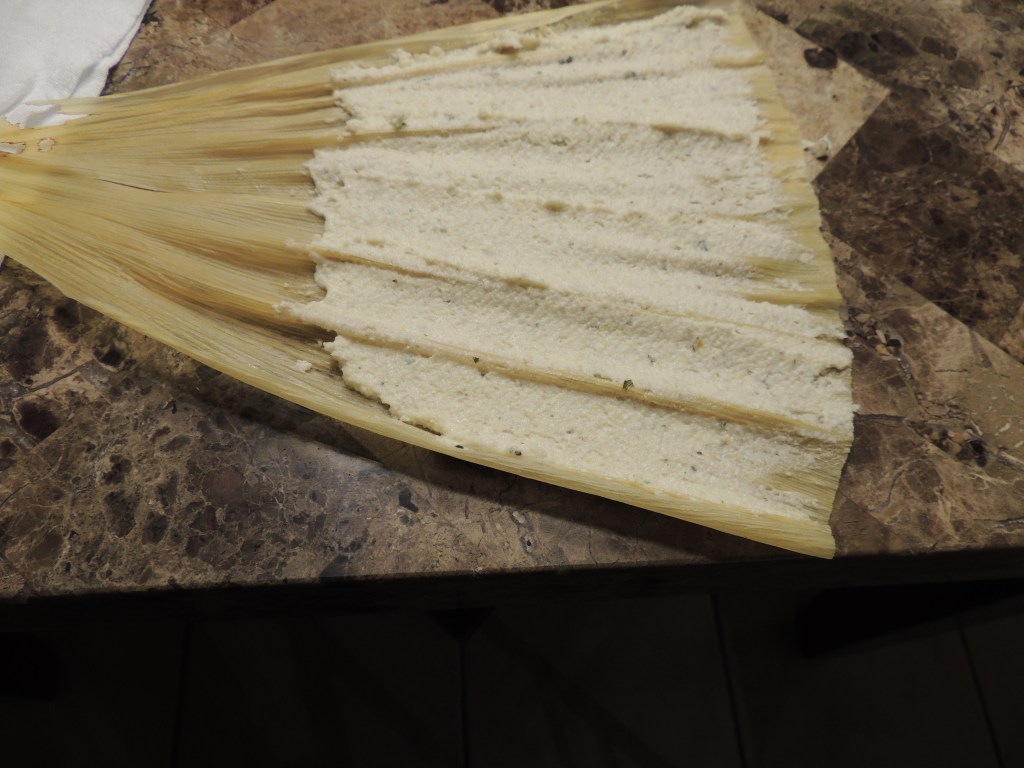
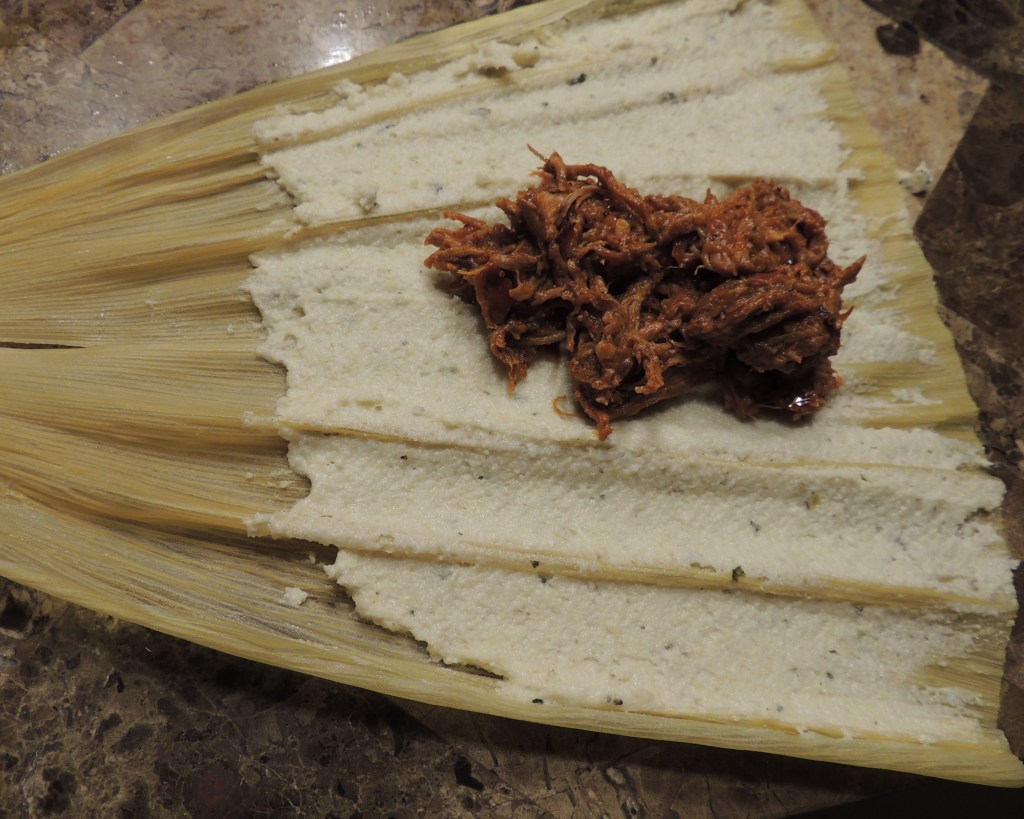
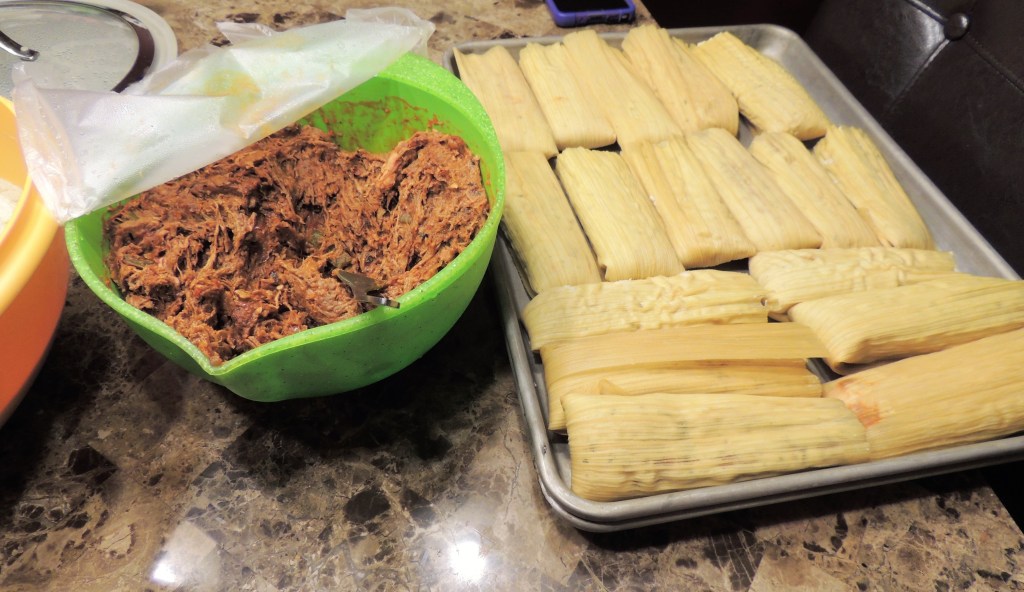


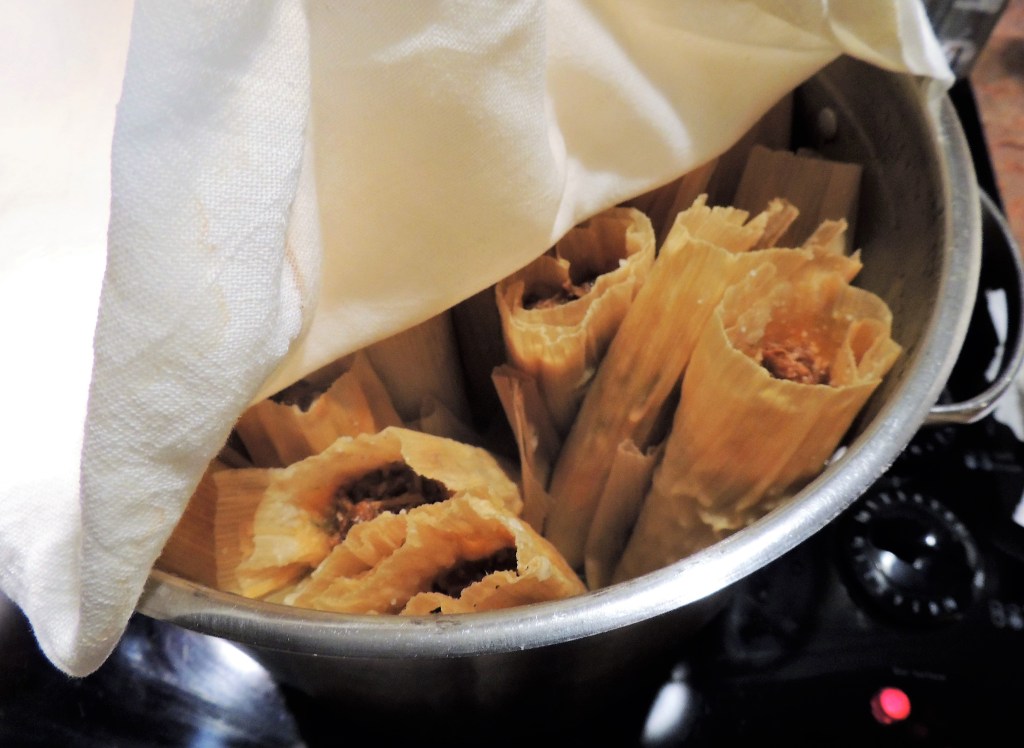
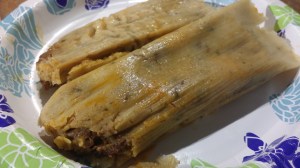
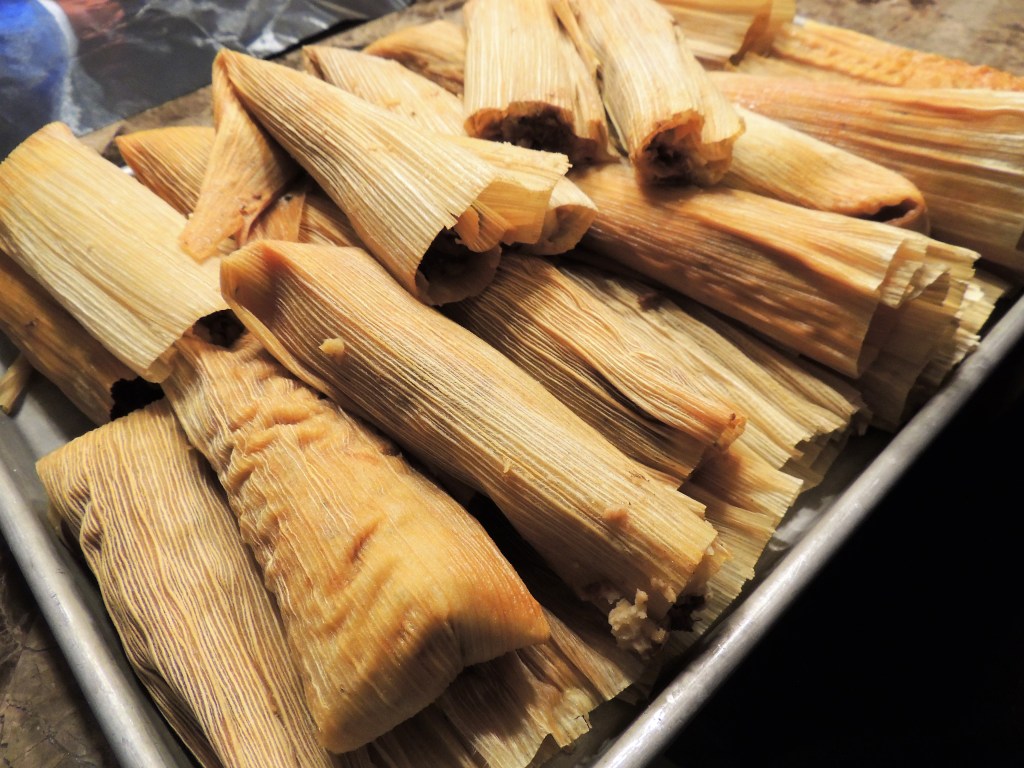


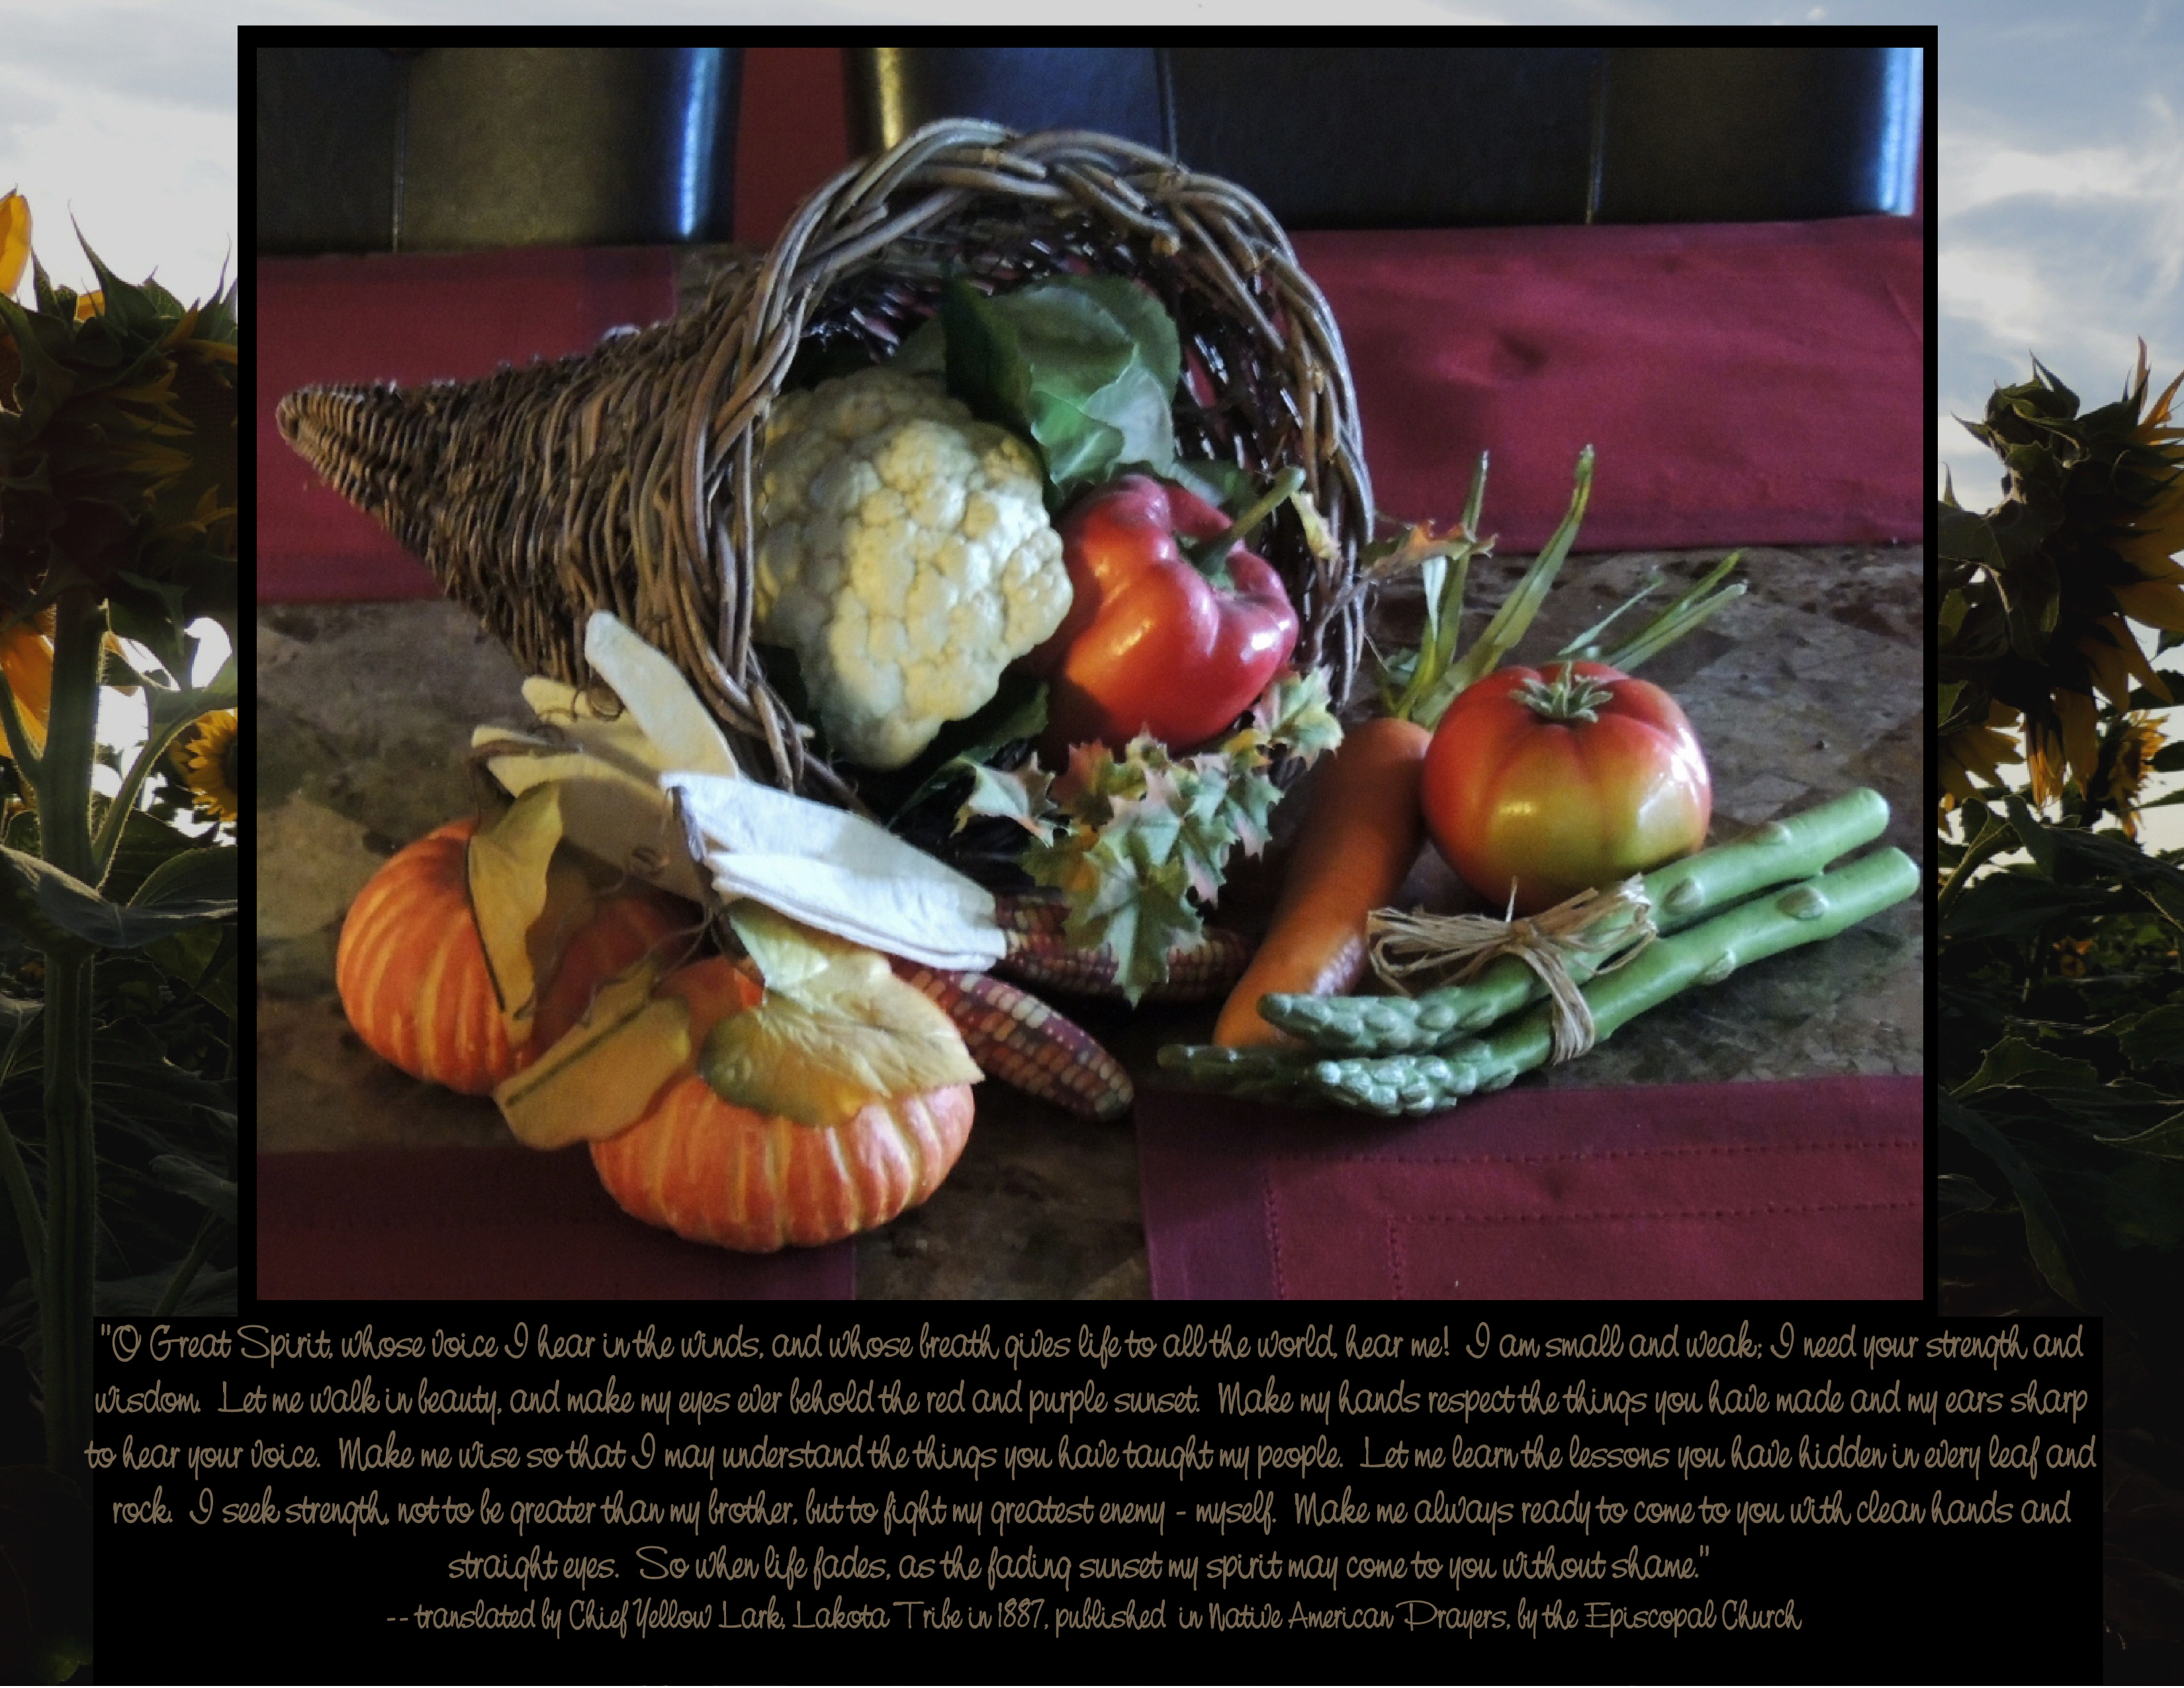
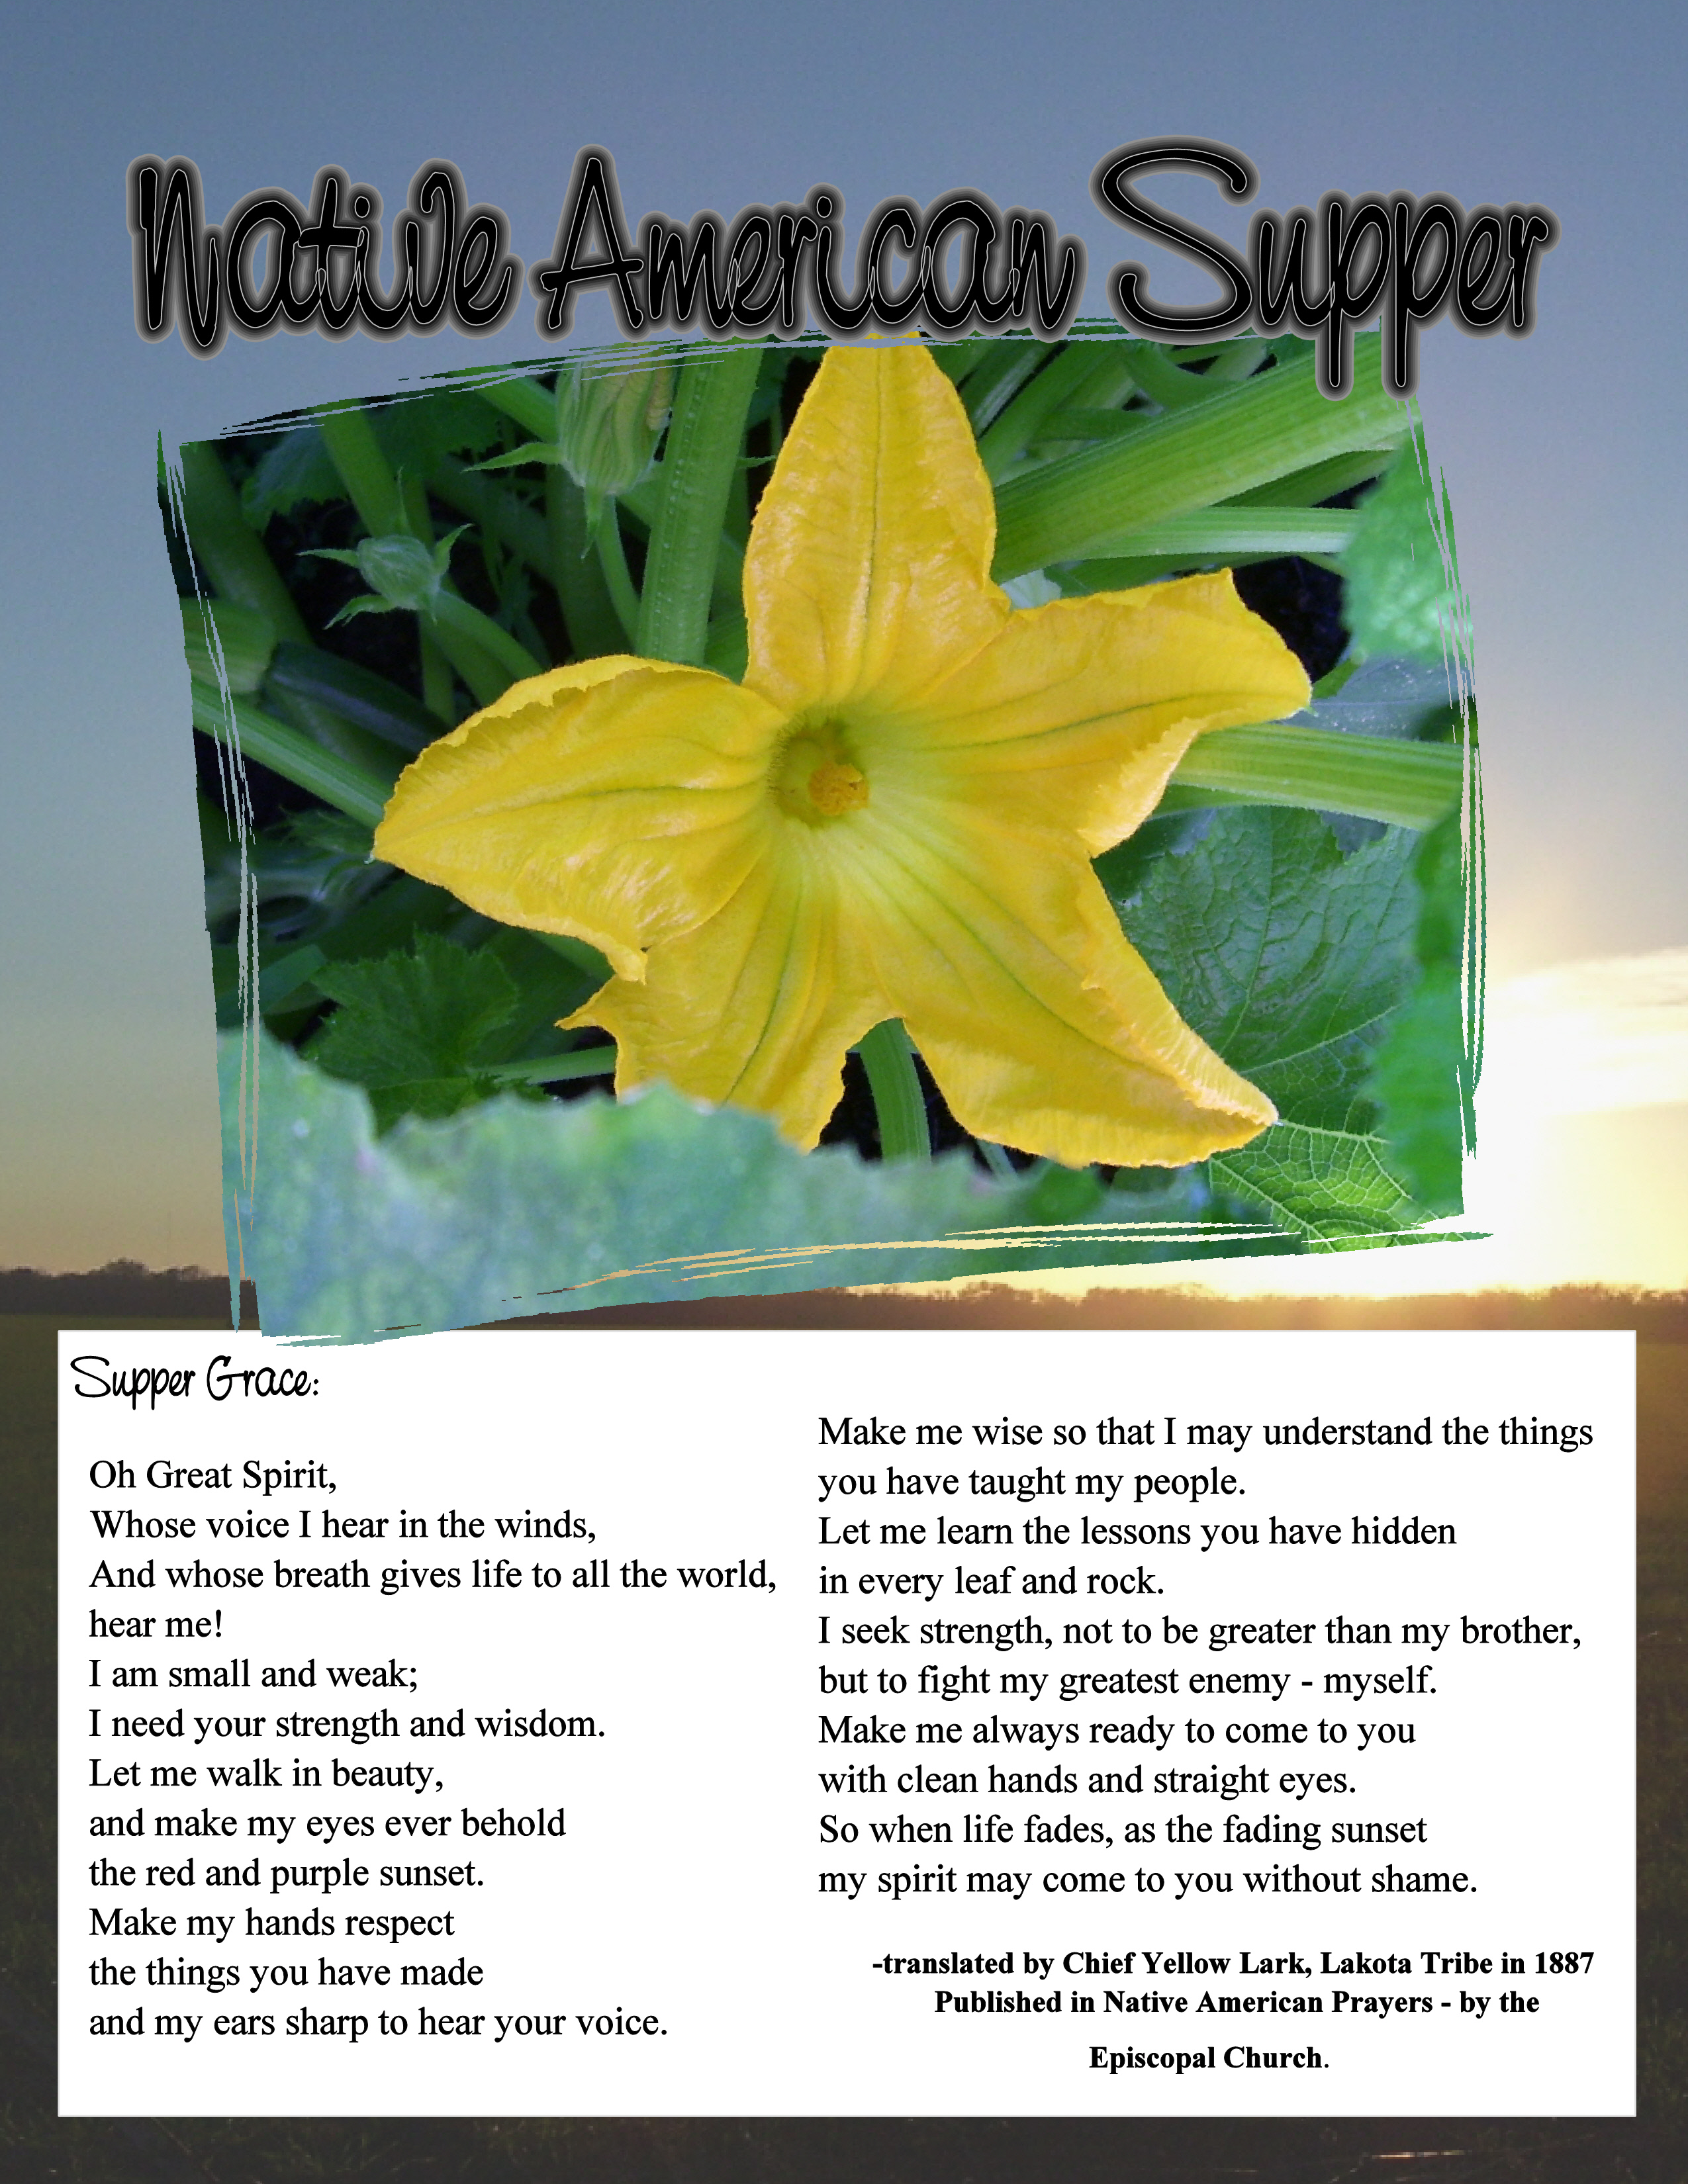
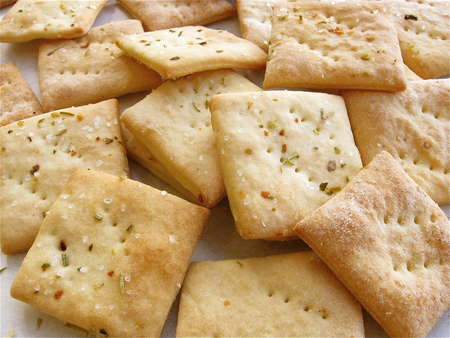


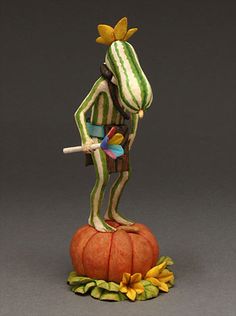 There is a Hopi Squash Kachina (Patung). He is Chief Kachina (wuya) for the Hopi Pumpkin Clan. He runs with men of a village in spring ceremonial dances to attract rain clouds.
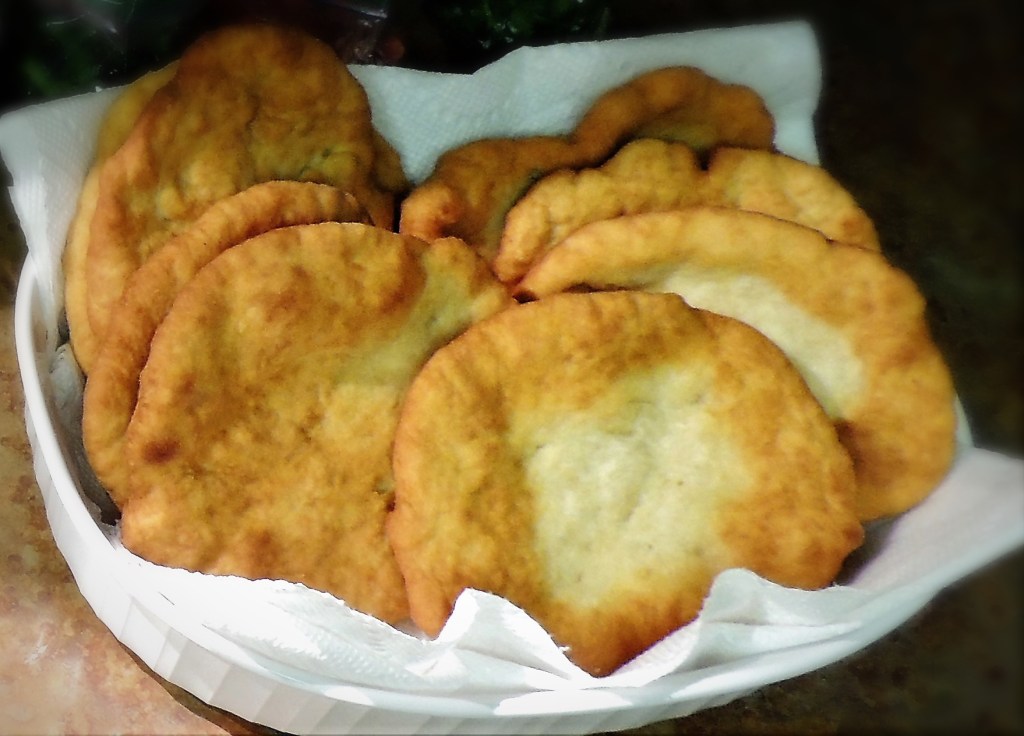


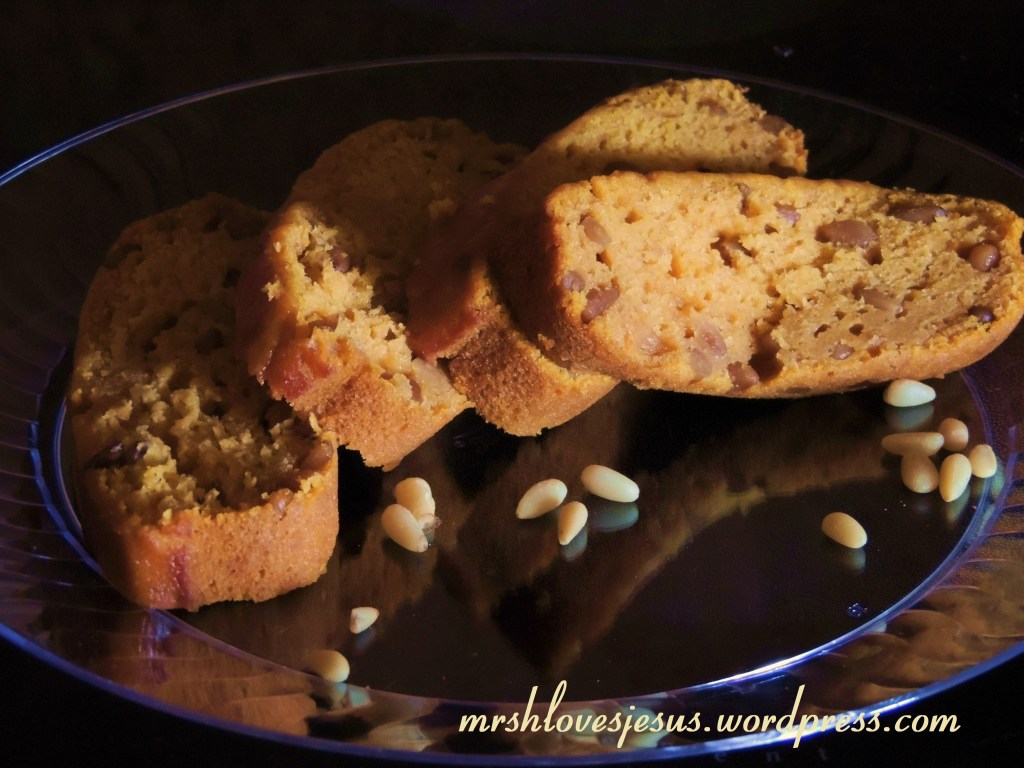

 .
.

 Hoop and Pole Game
 throw their pole as the hoop rolls in front of them. The score depends on how or if the pole falls on or through the hoop. Netted hoops are made by the Arapaho of Wyoming and other tribes.


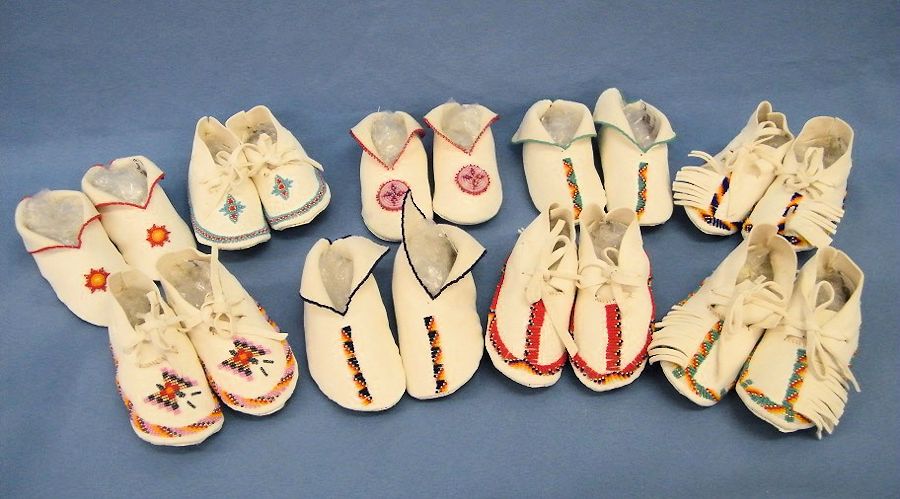

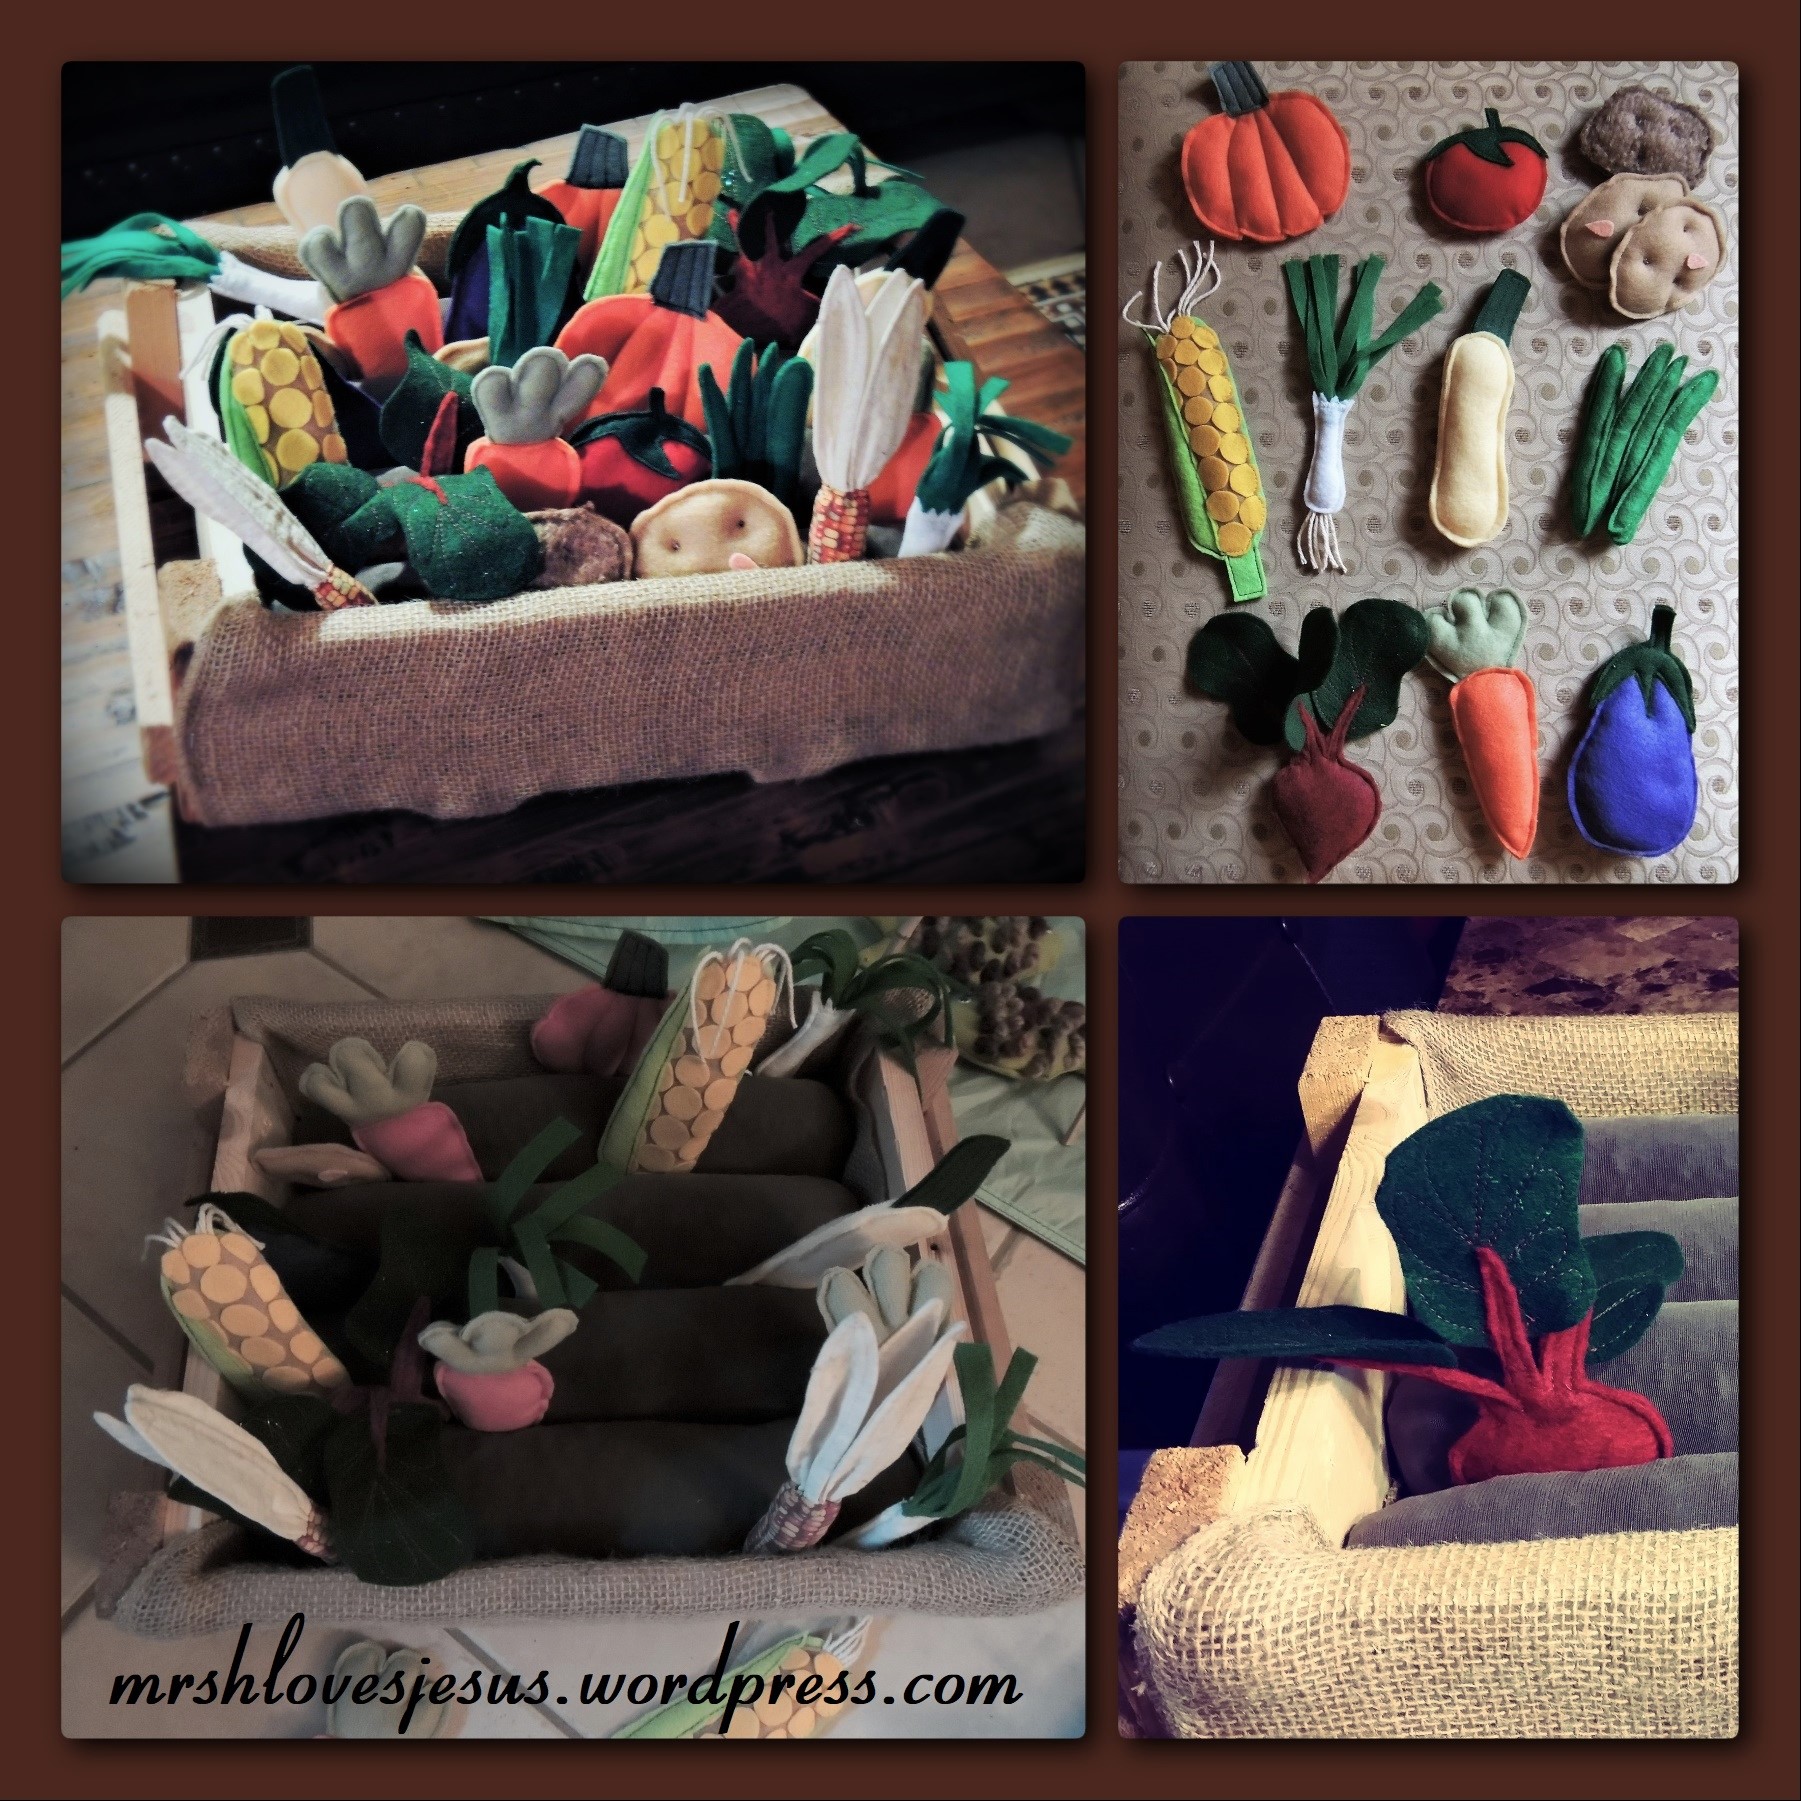

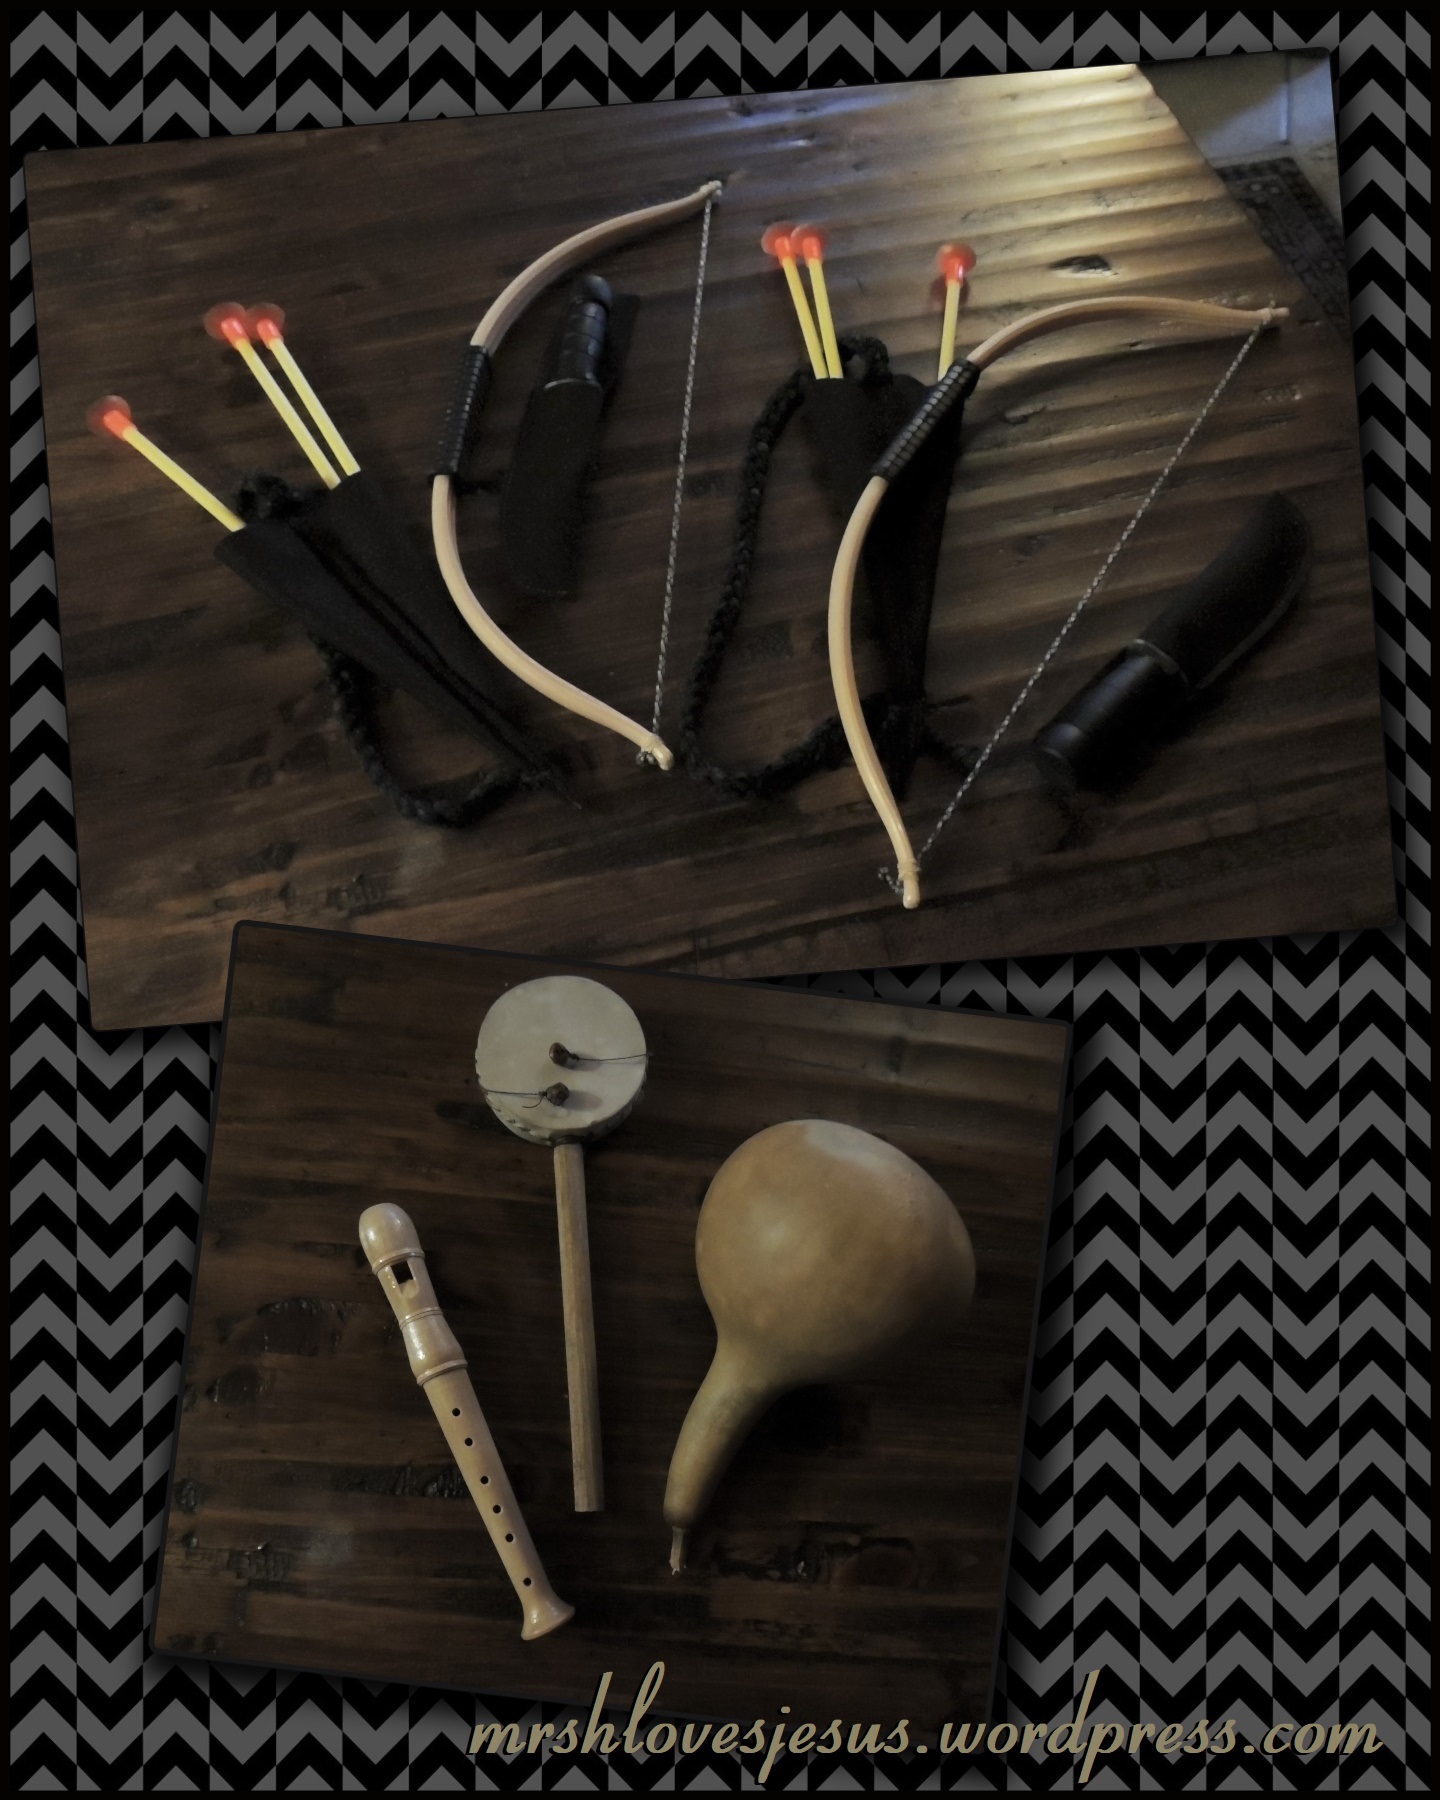
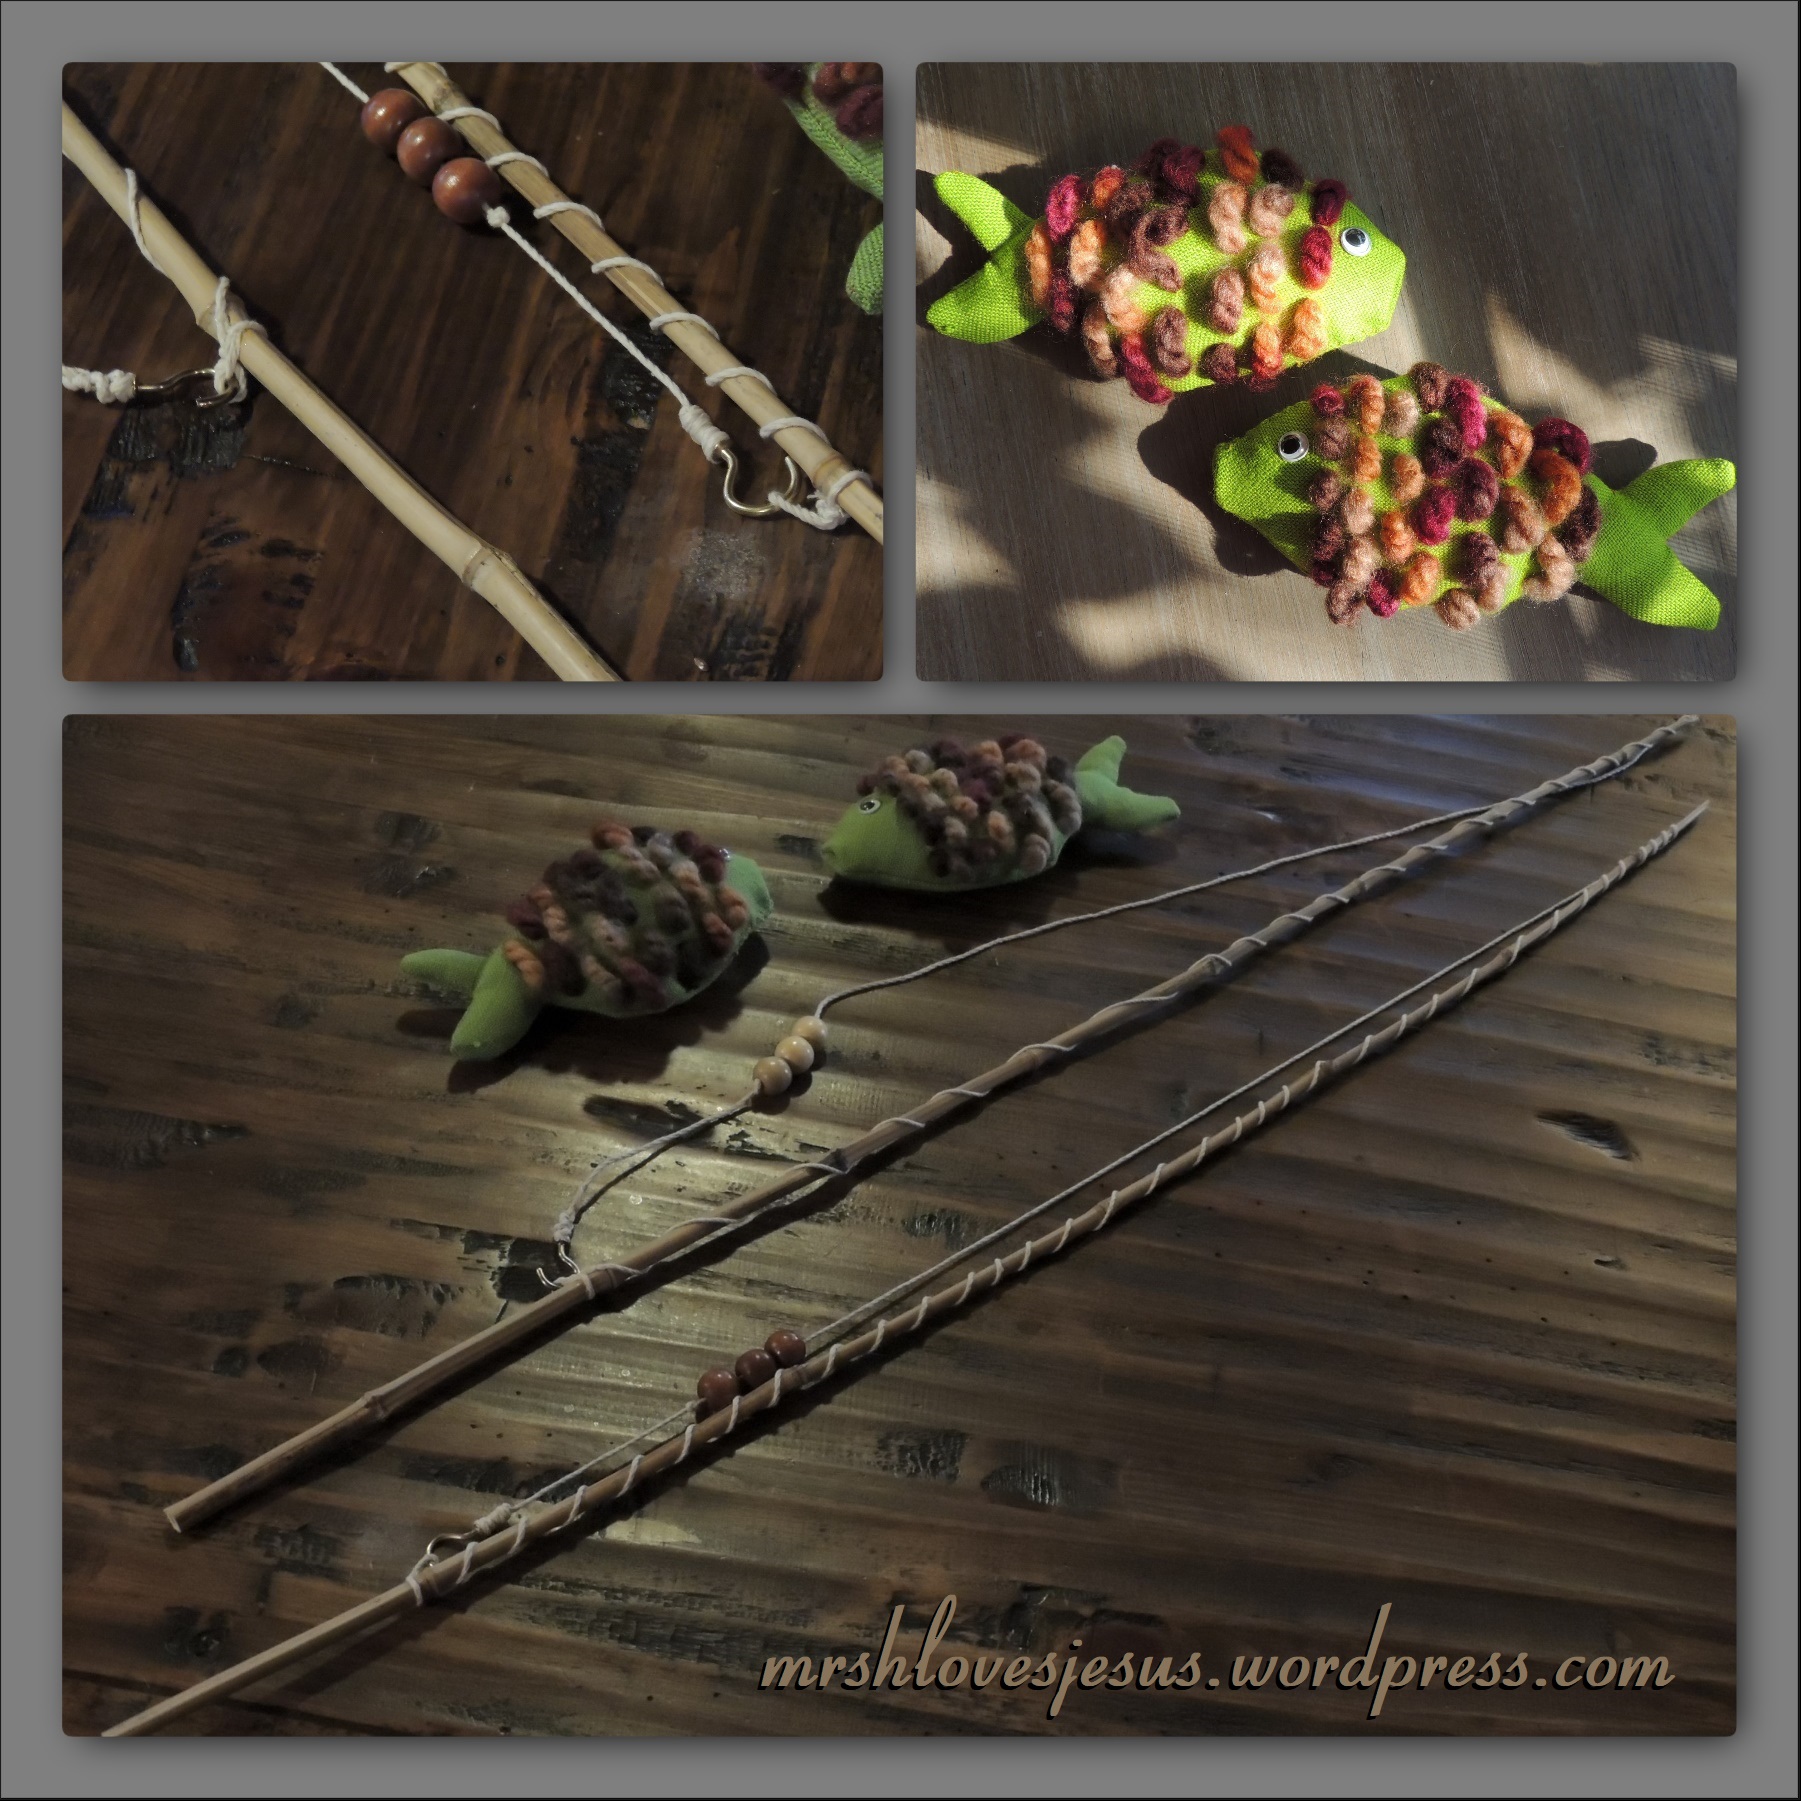

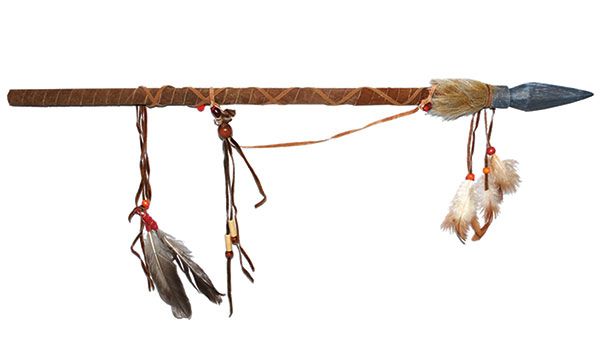


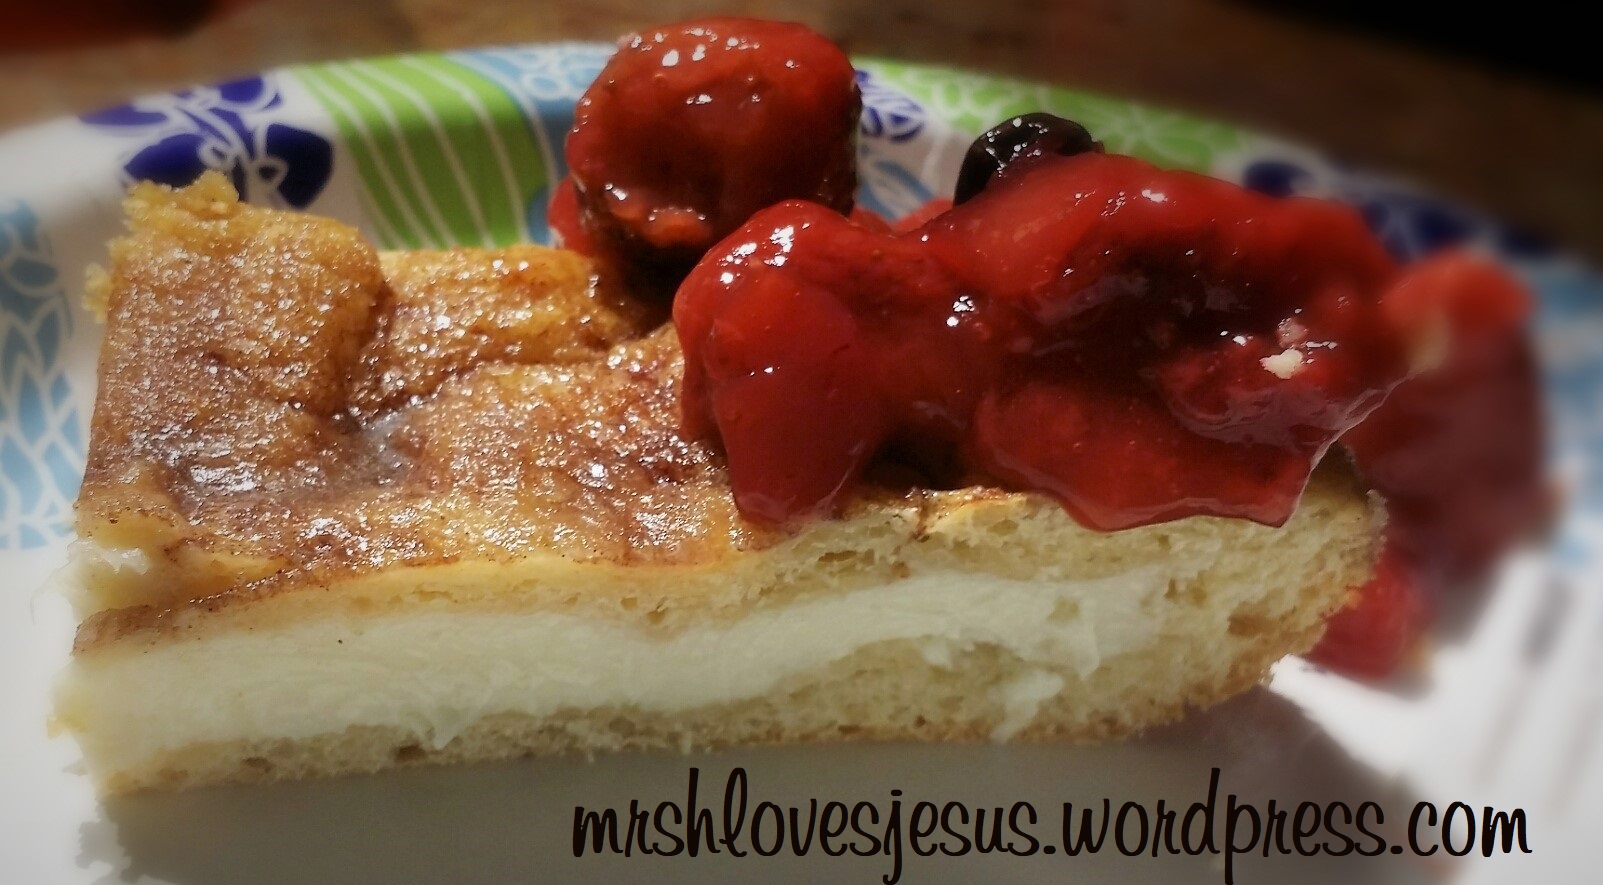


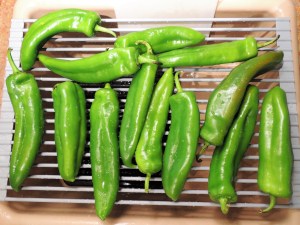
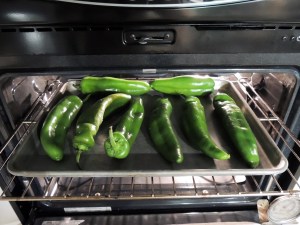
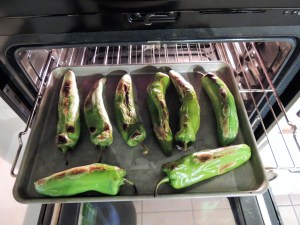

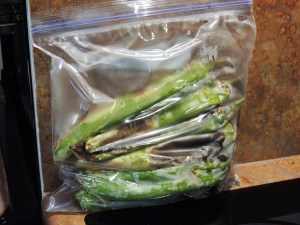


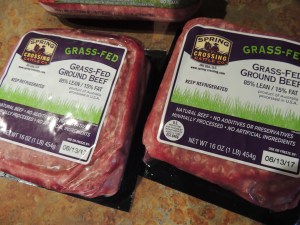


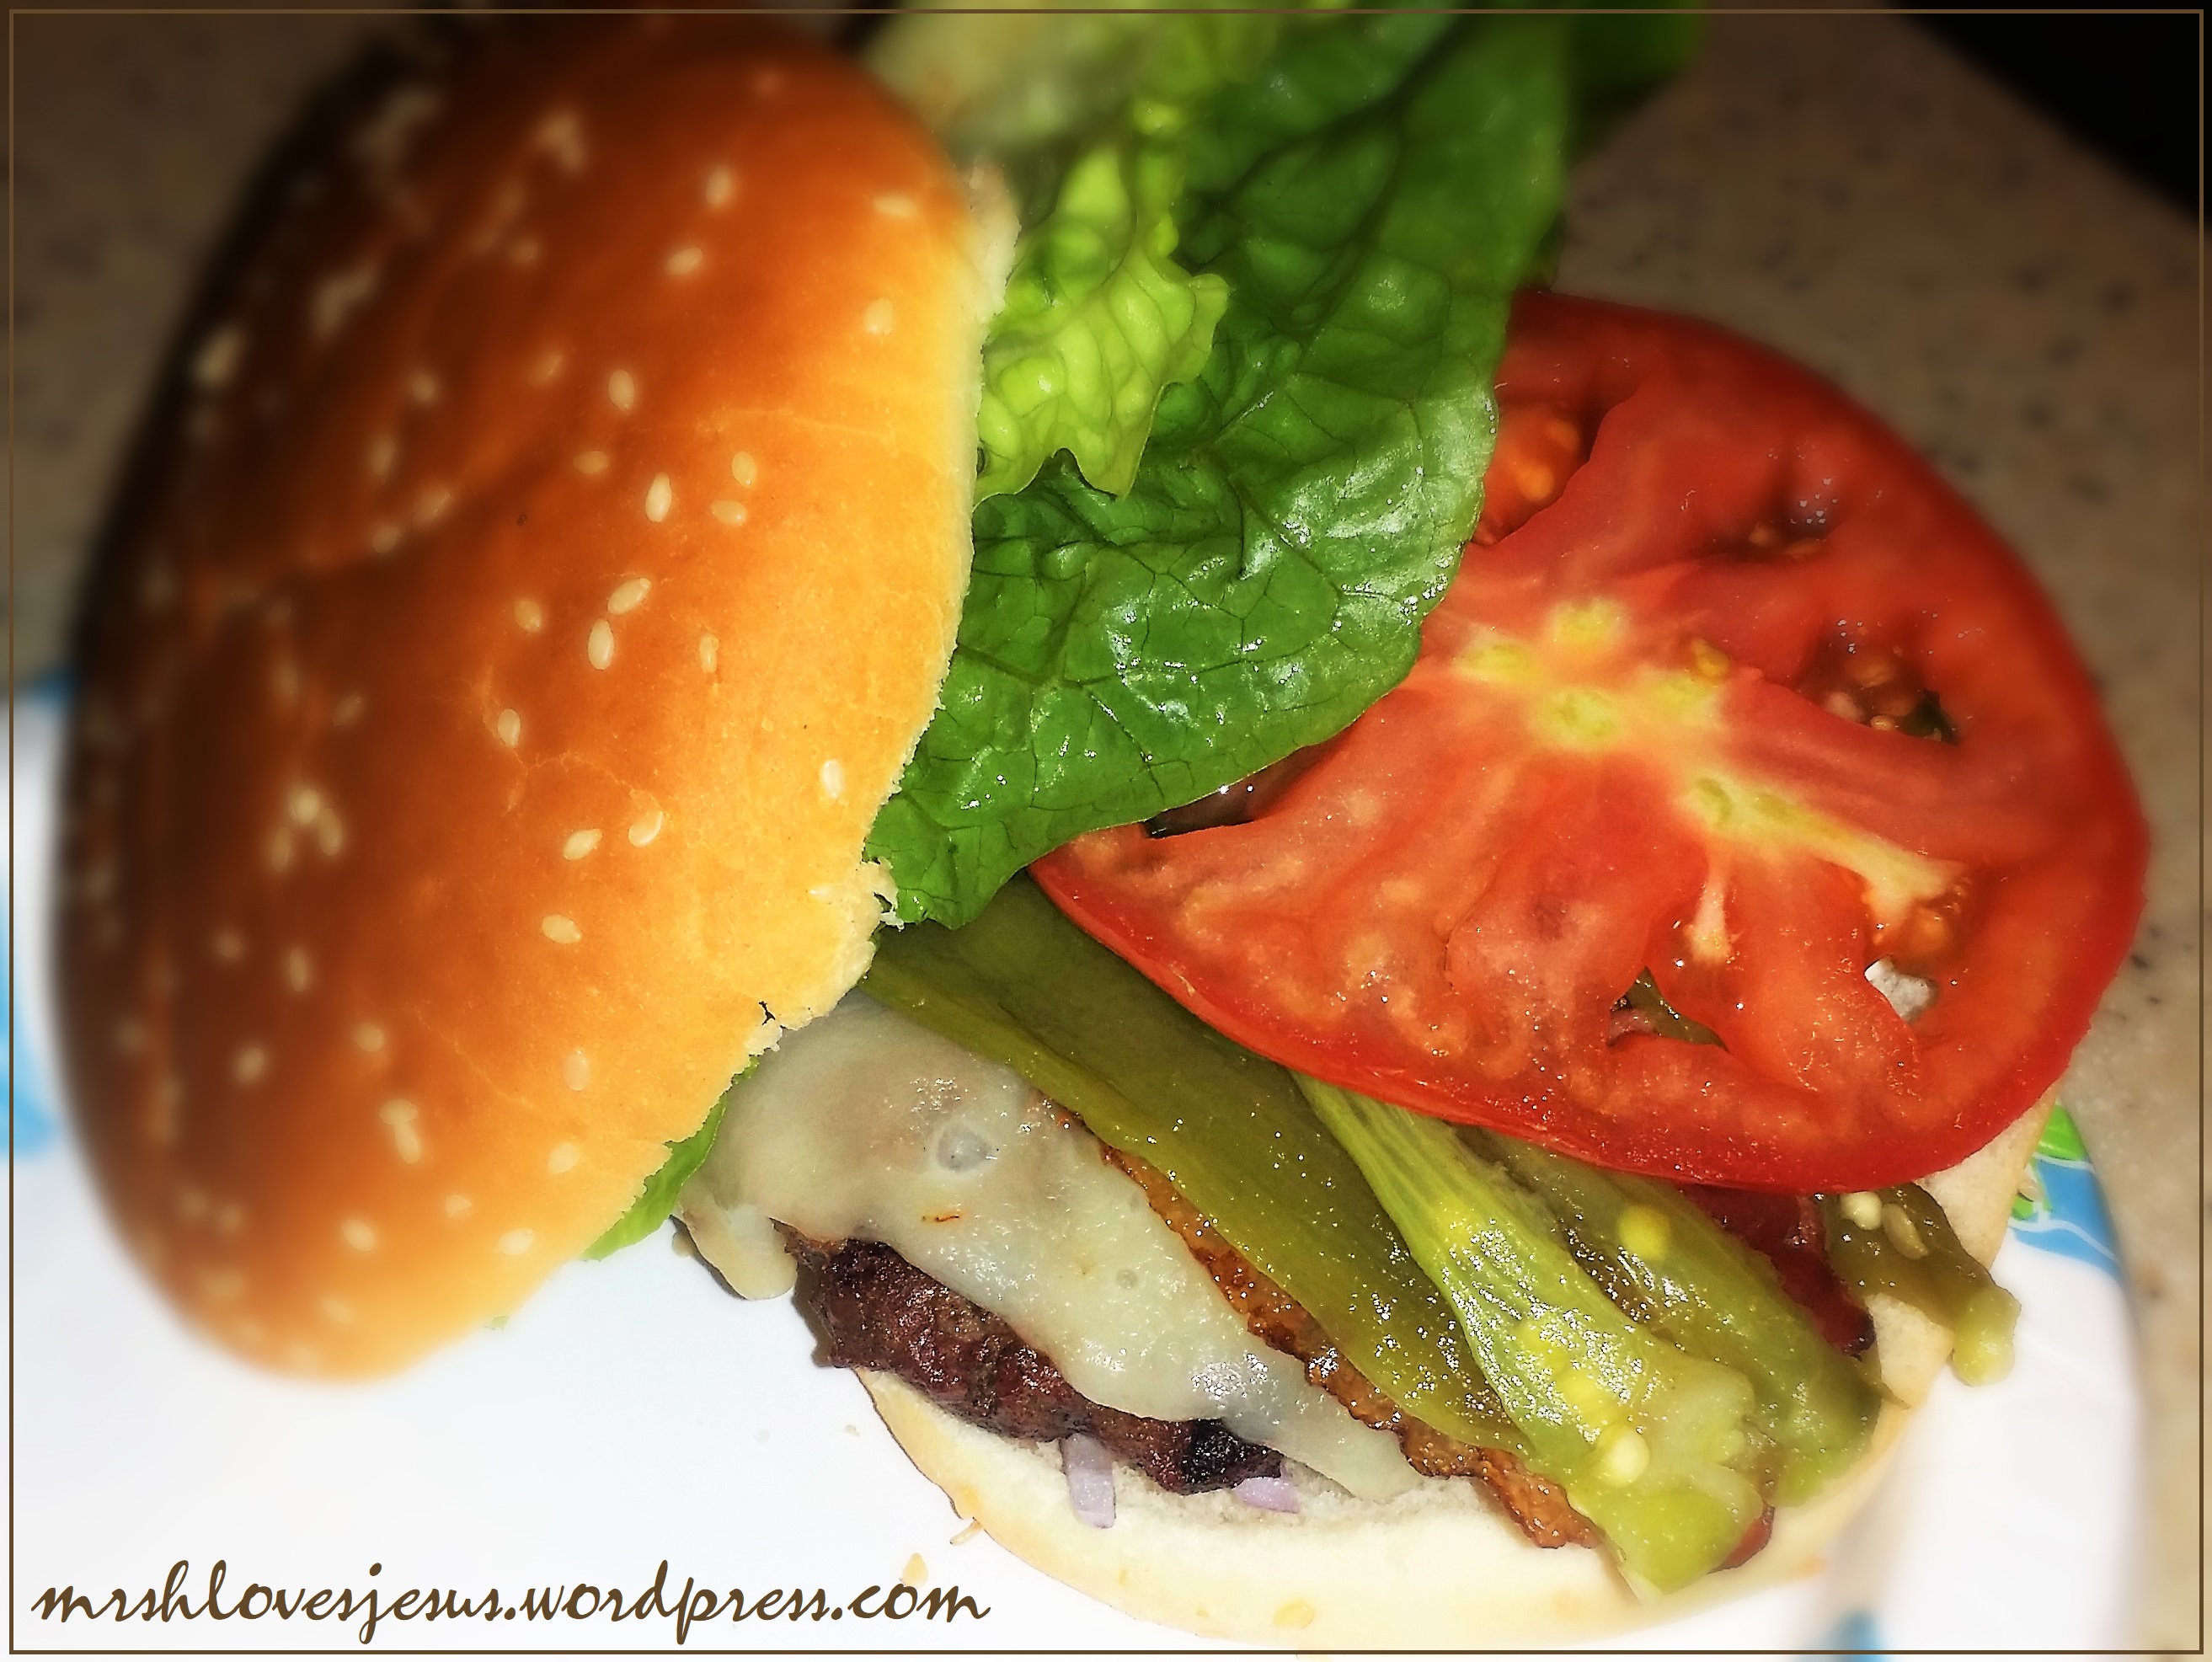


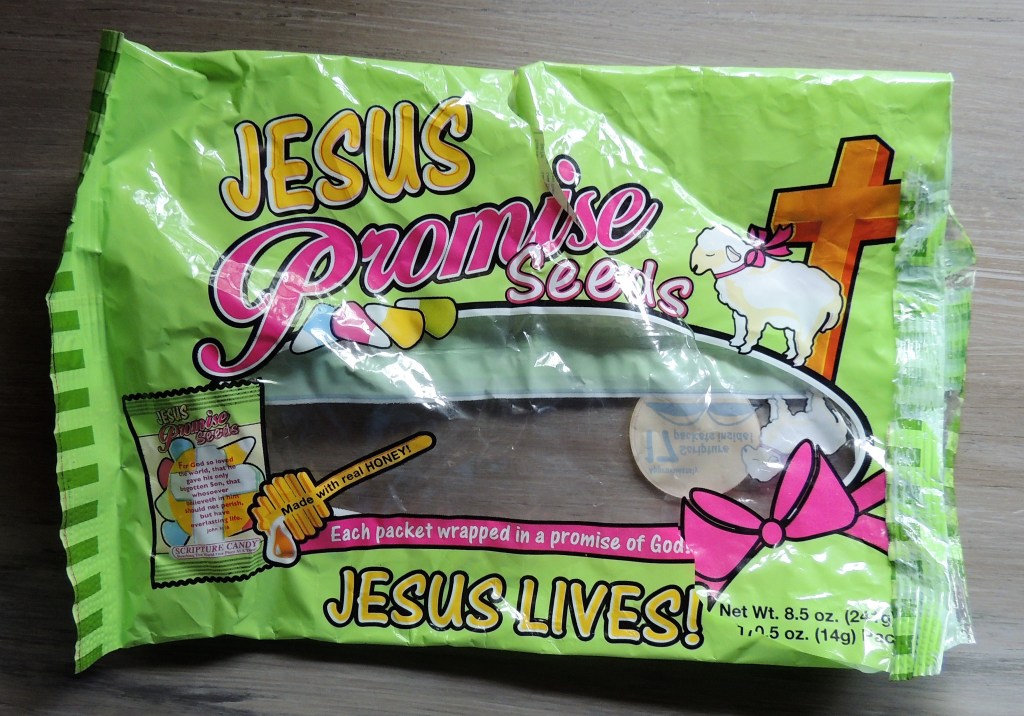

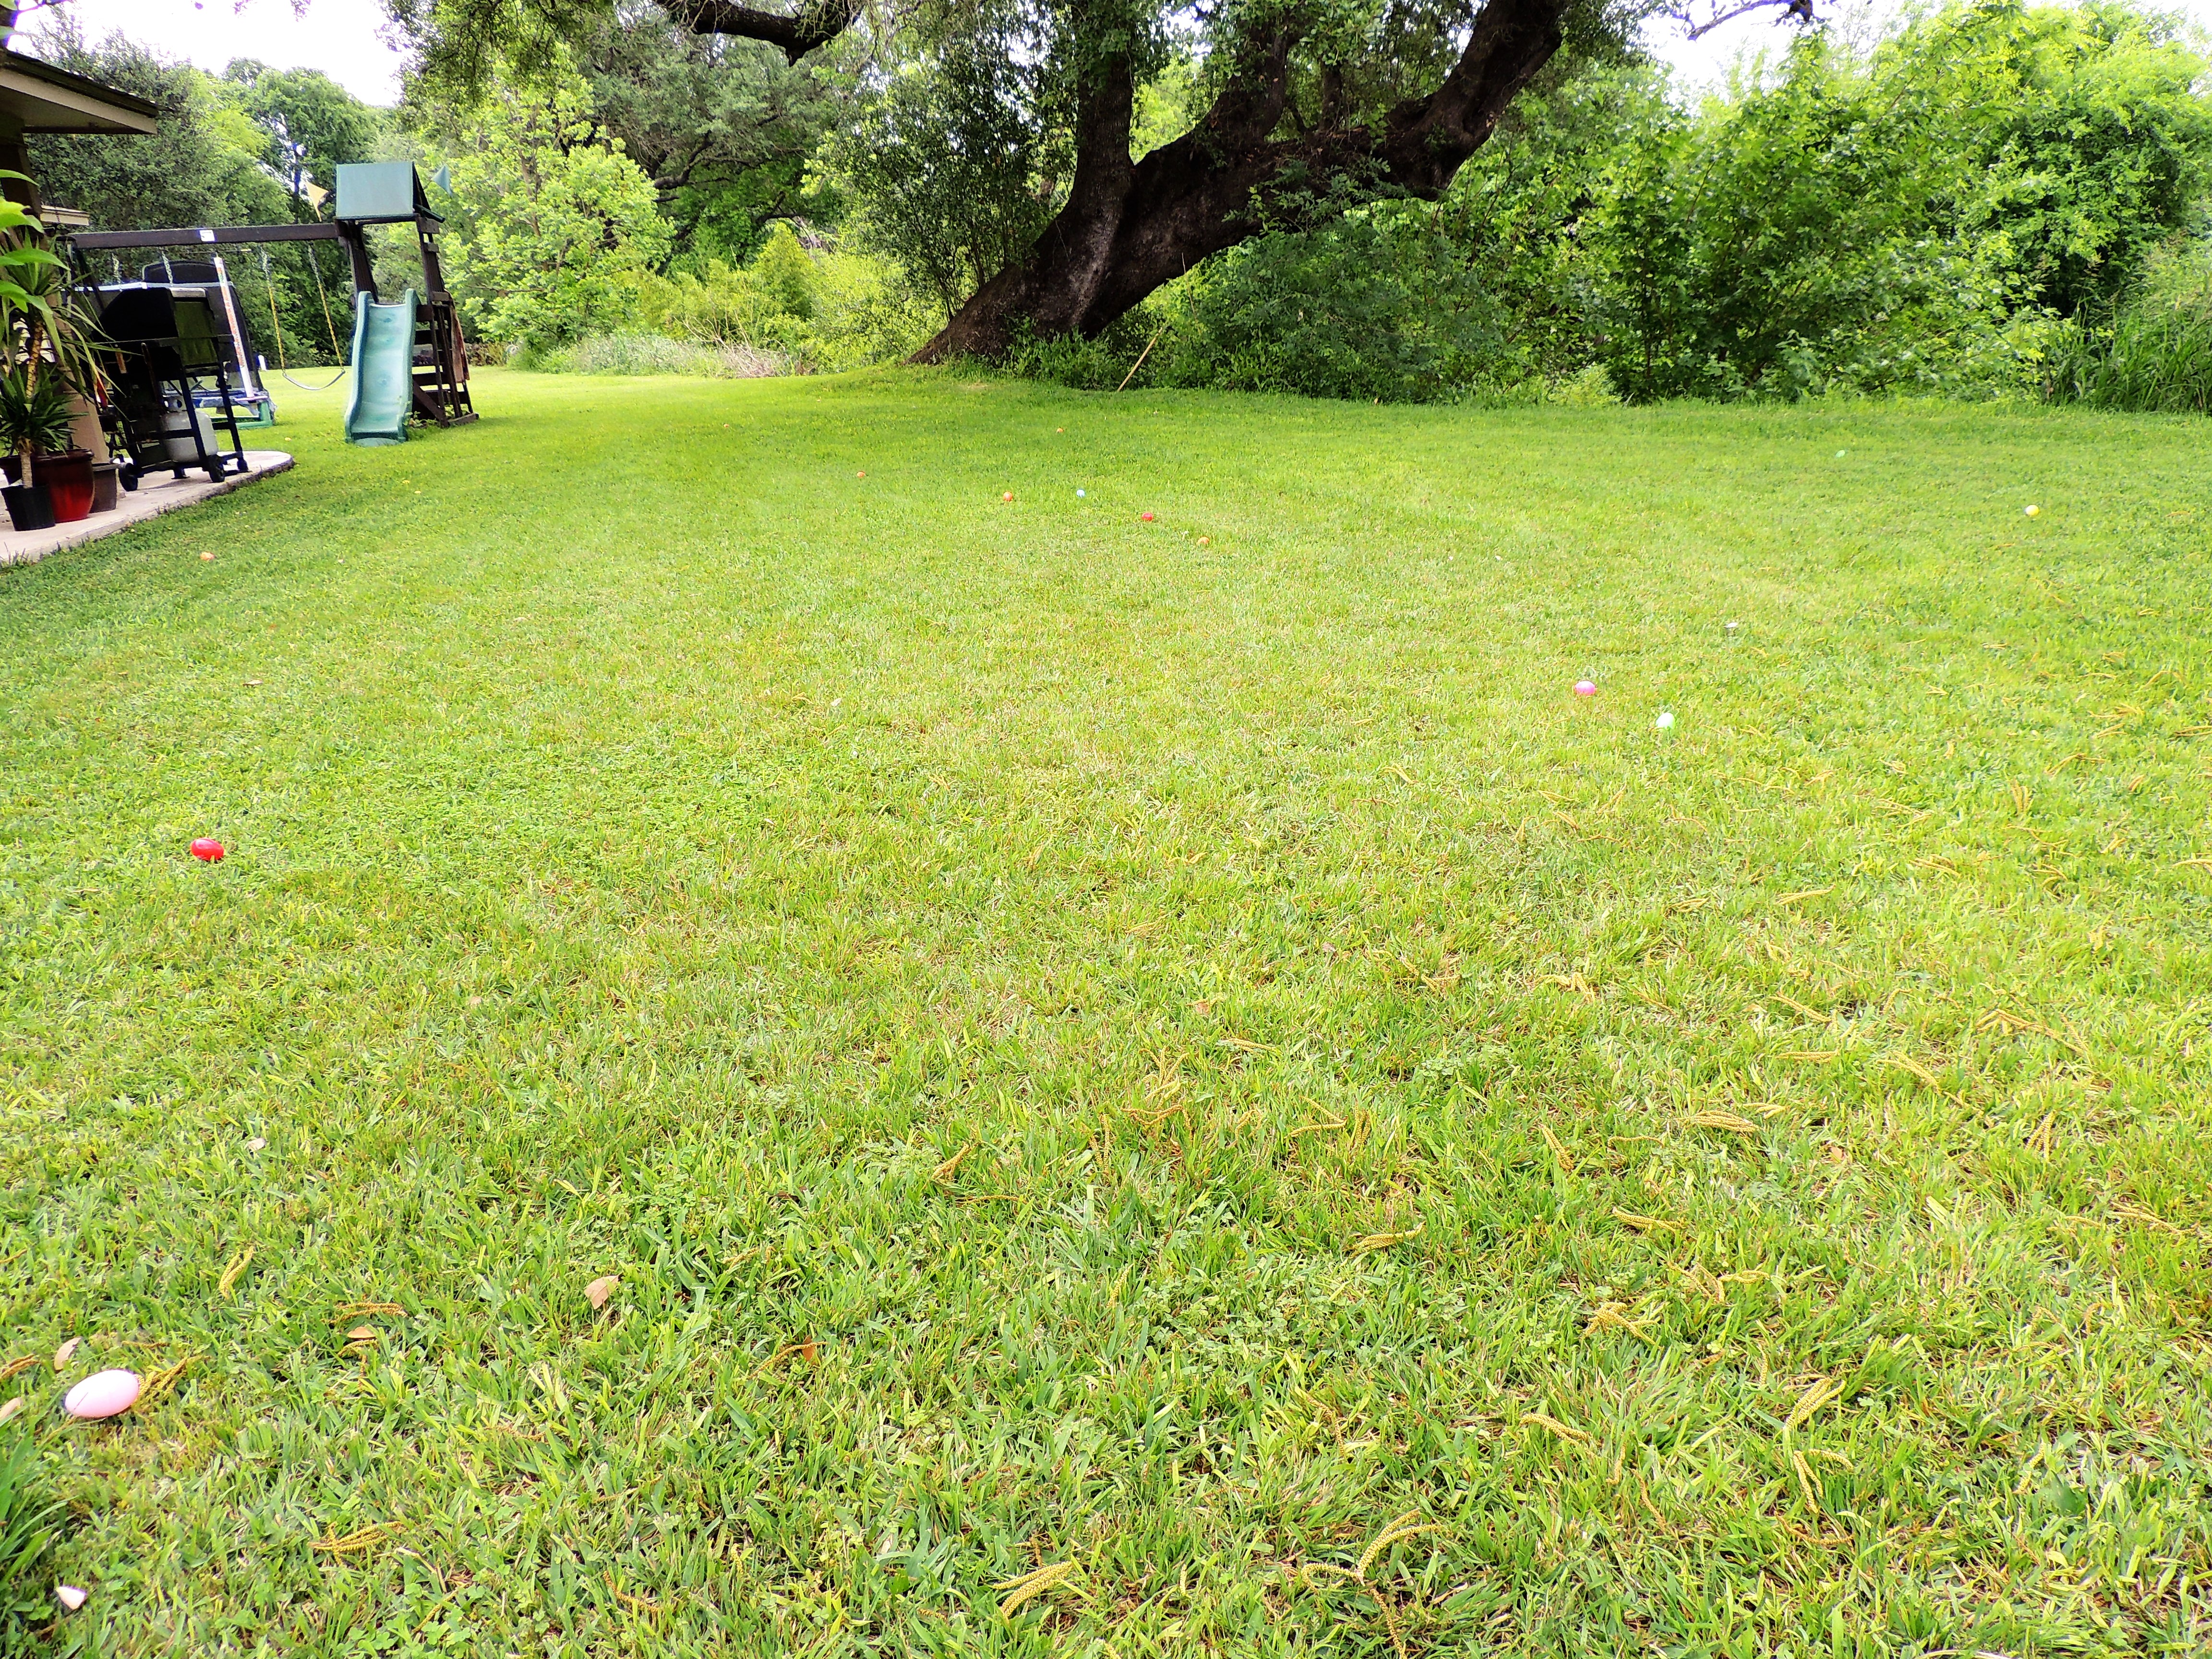
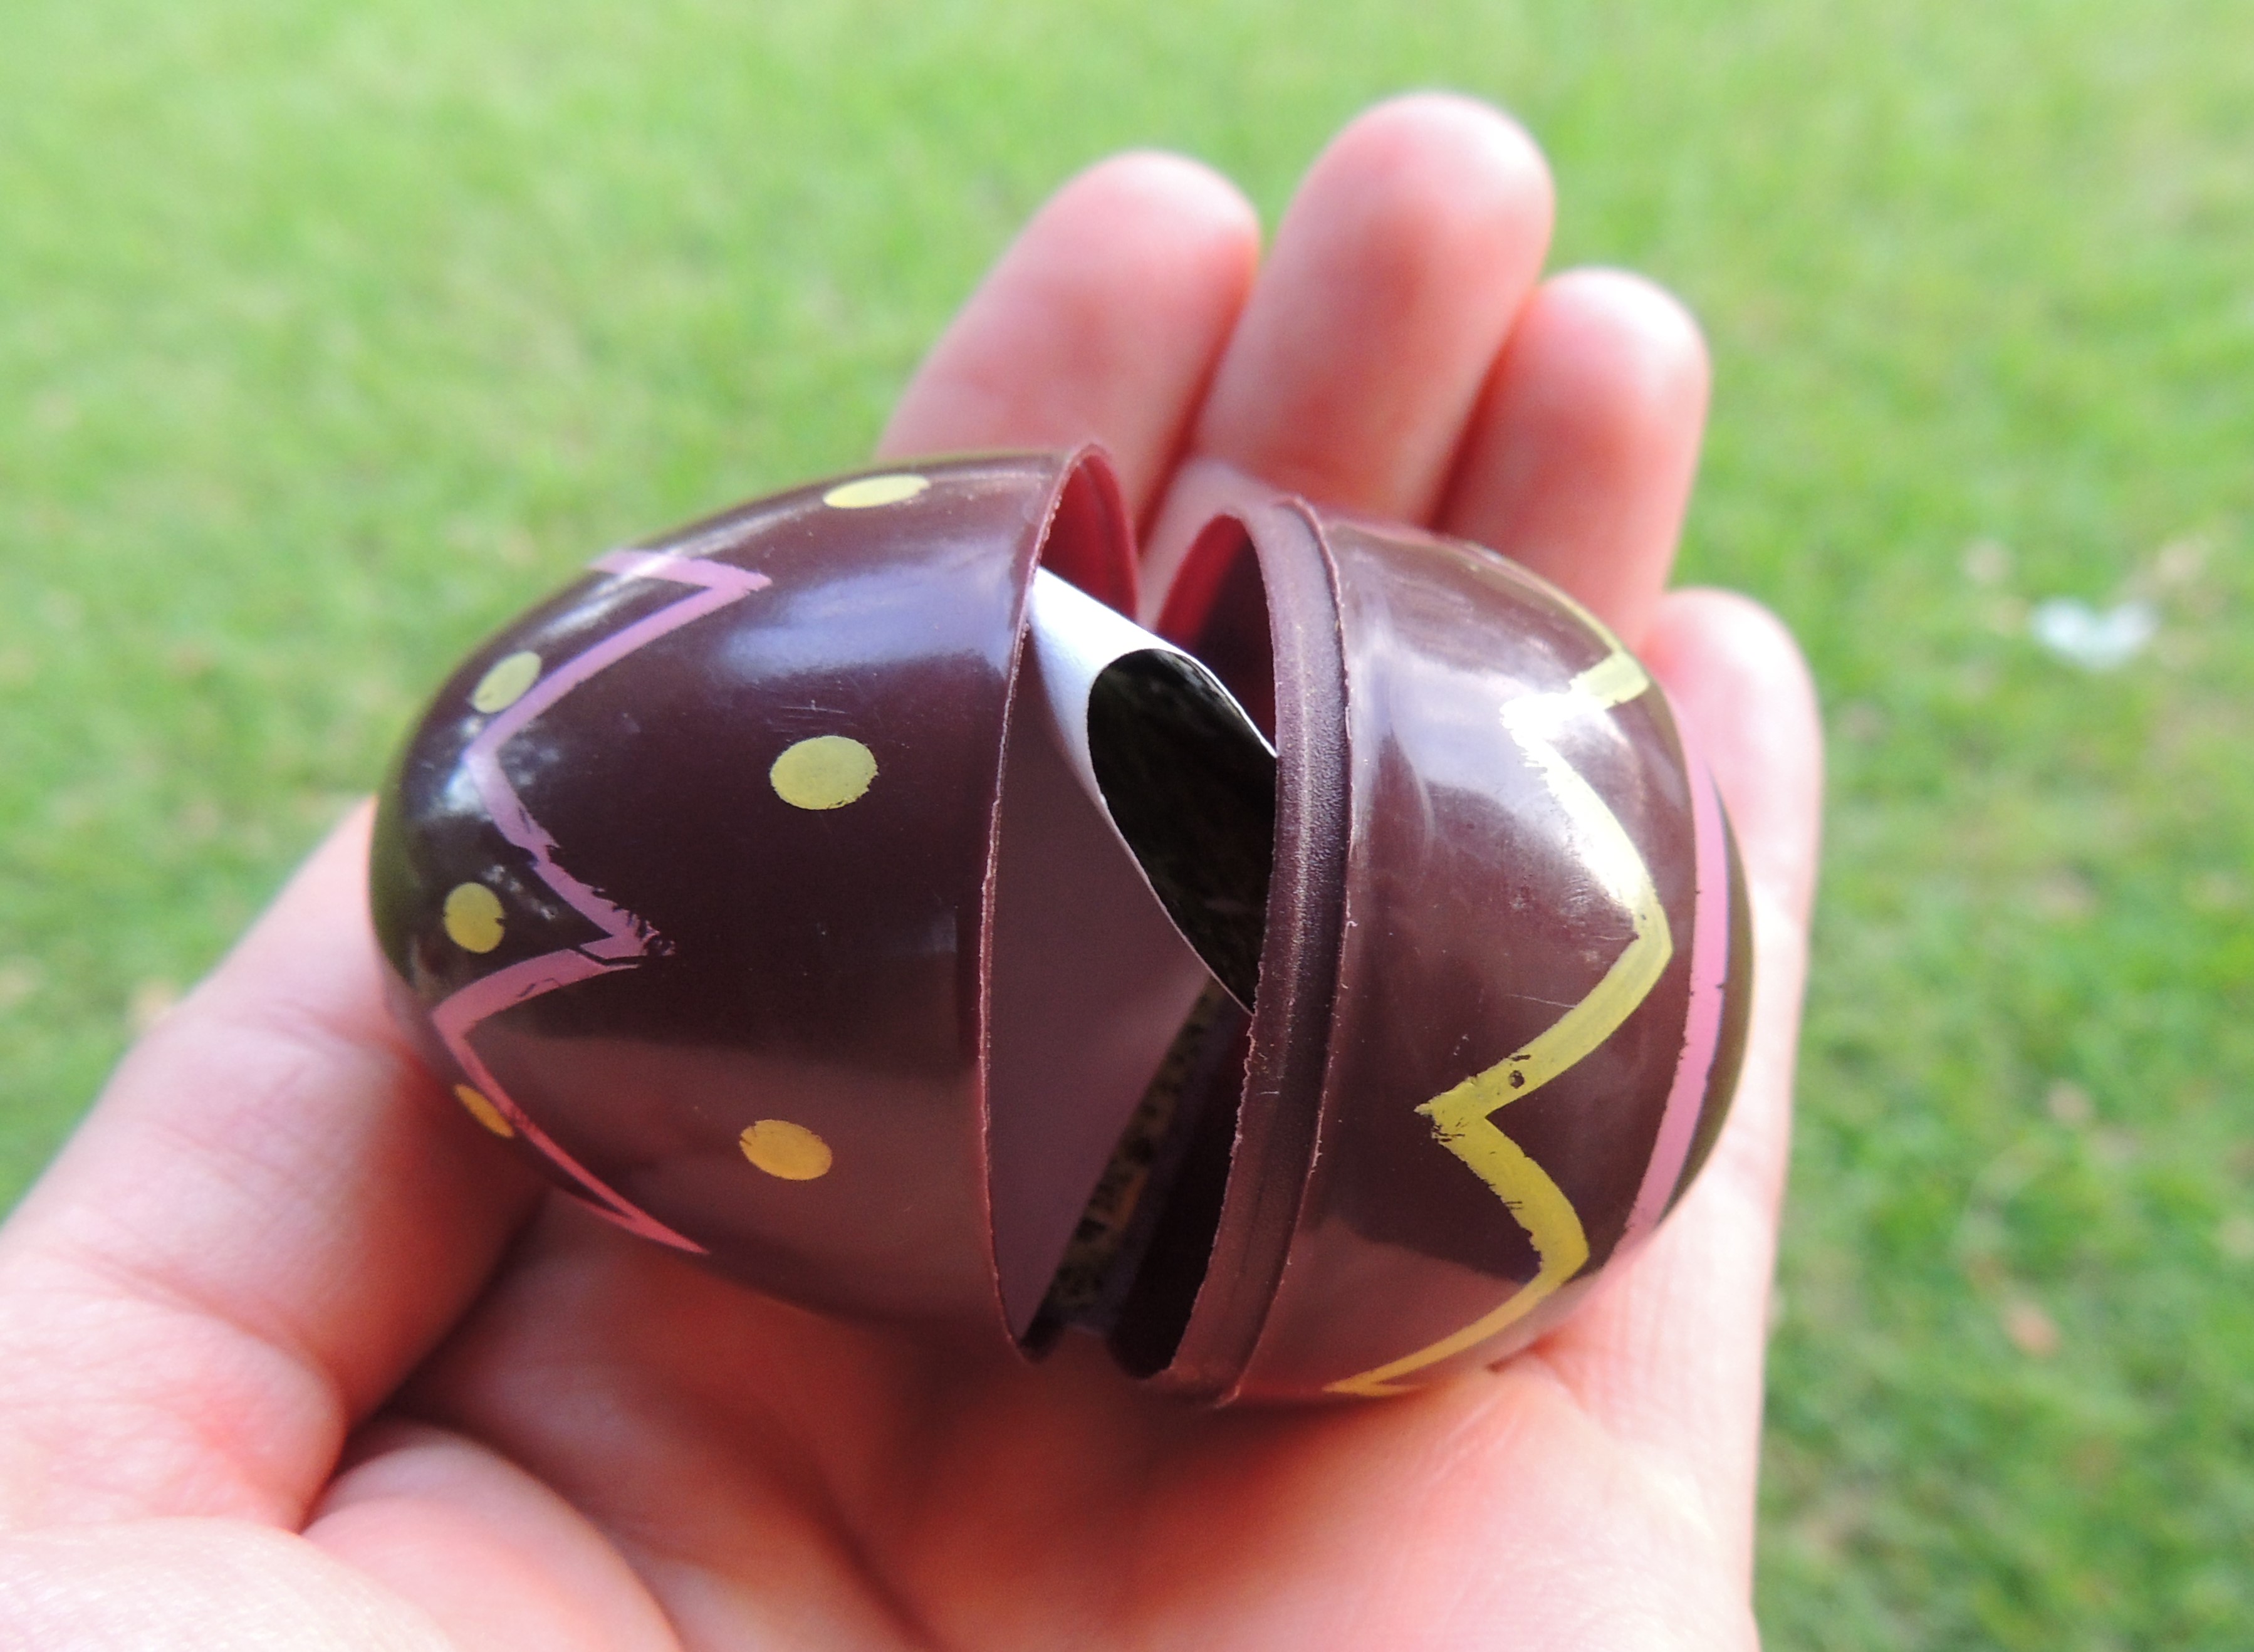


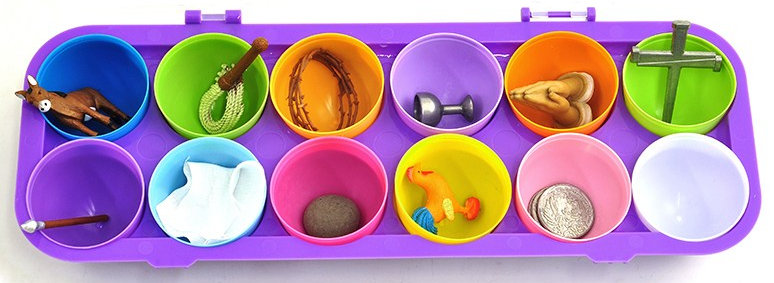


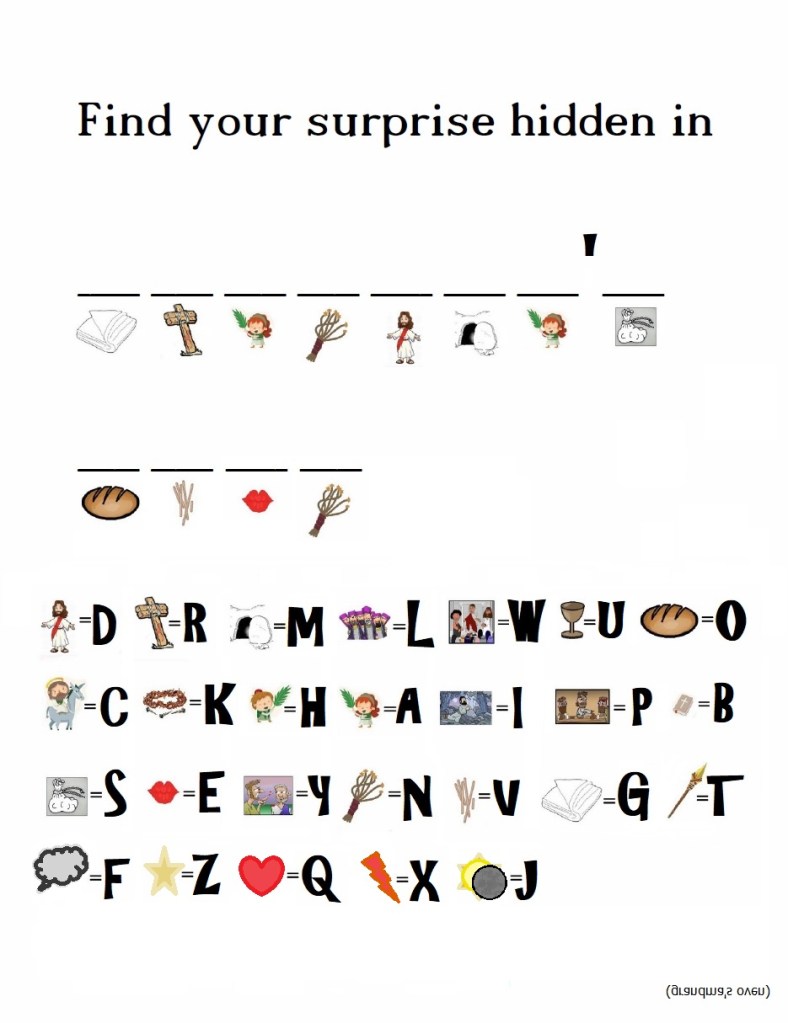
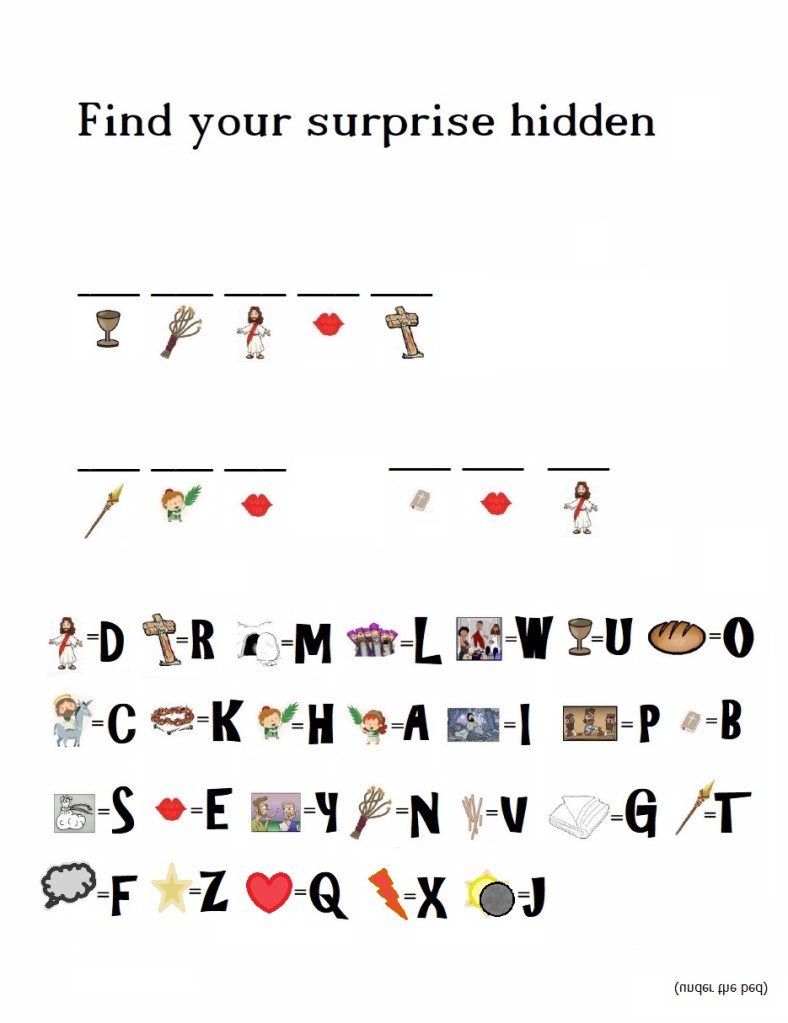
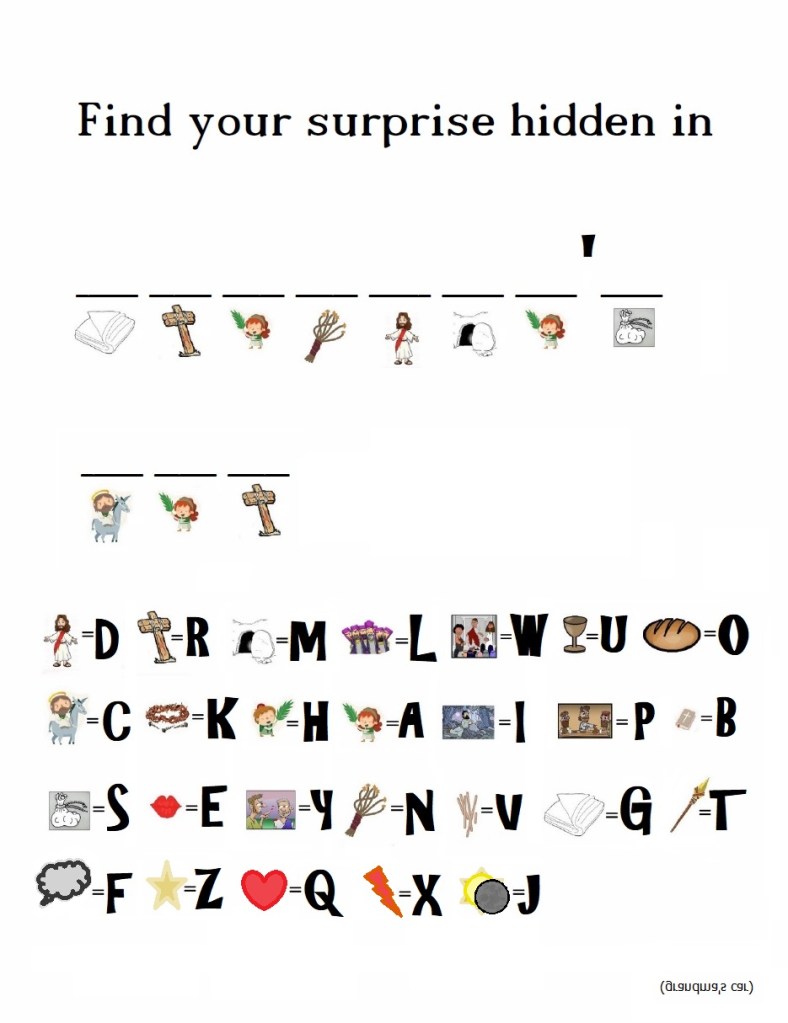
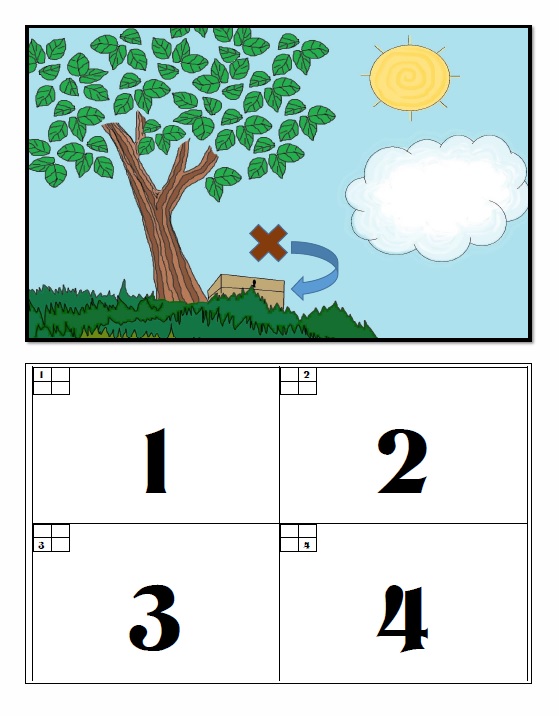
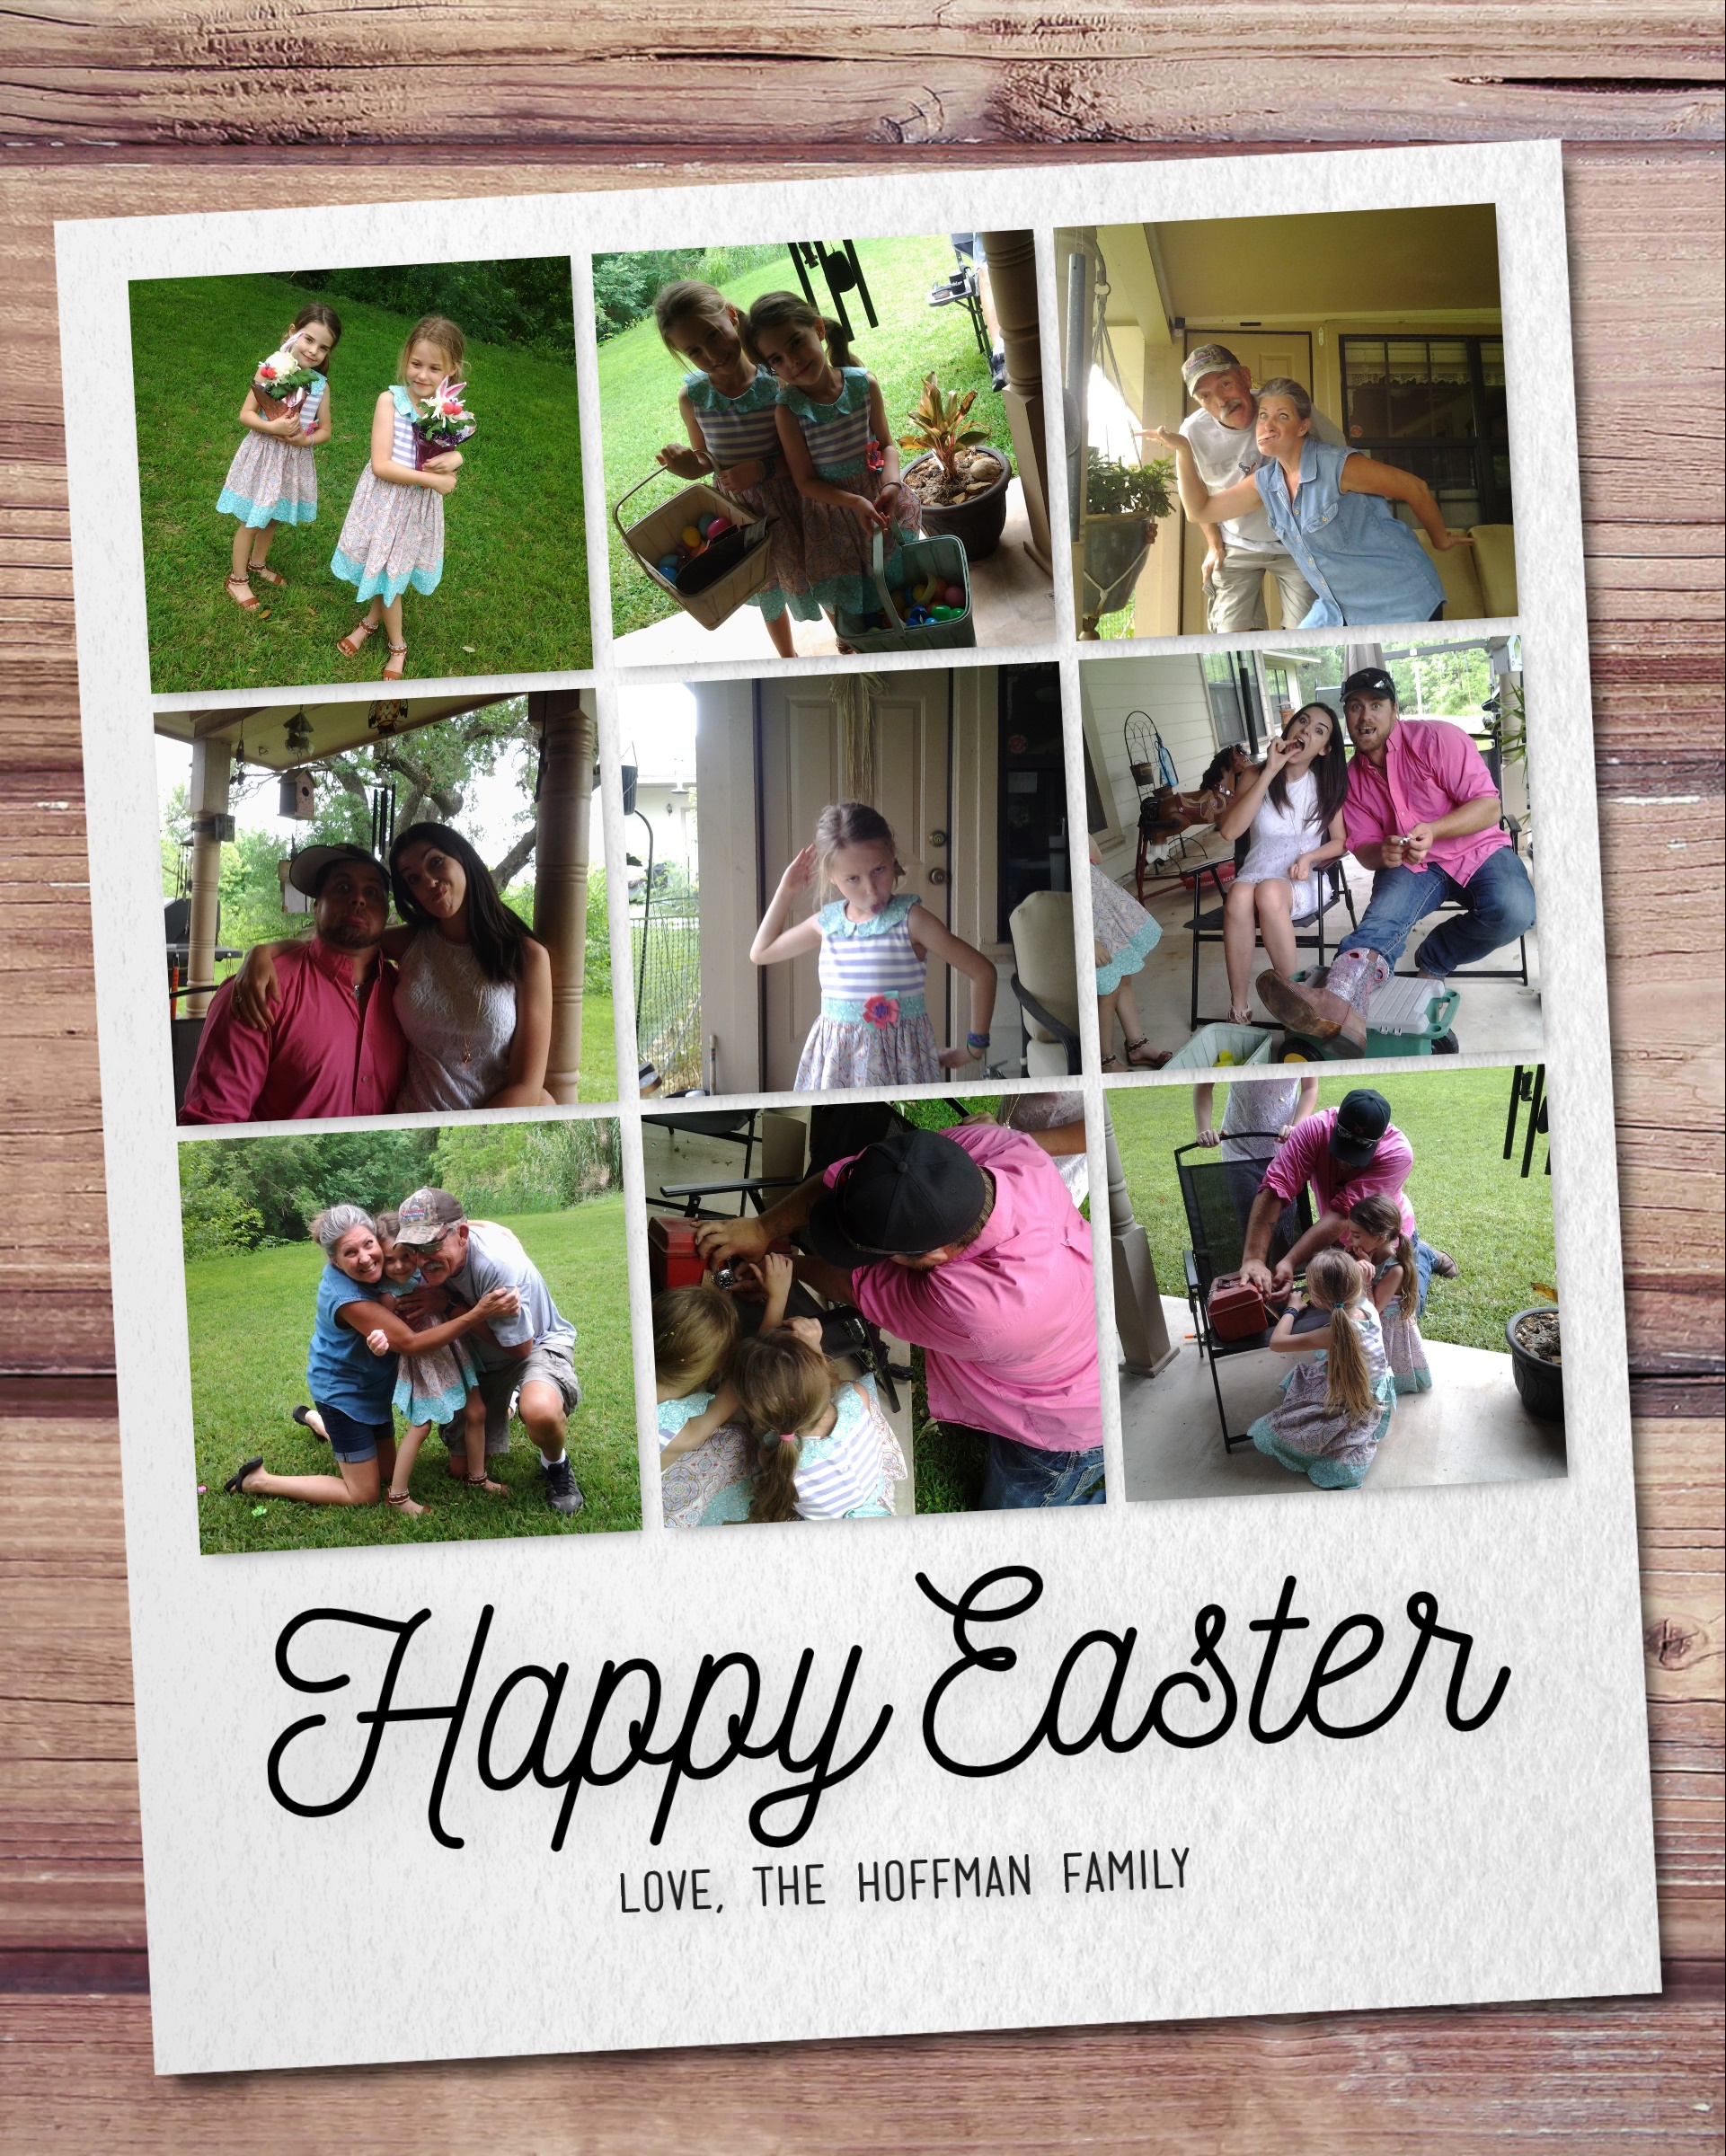


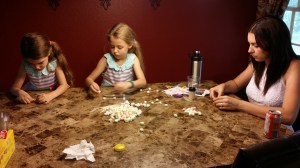


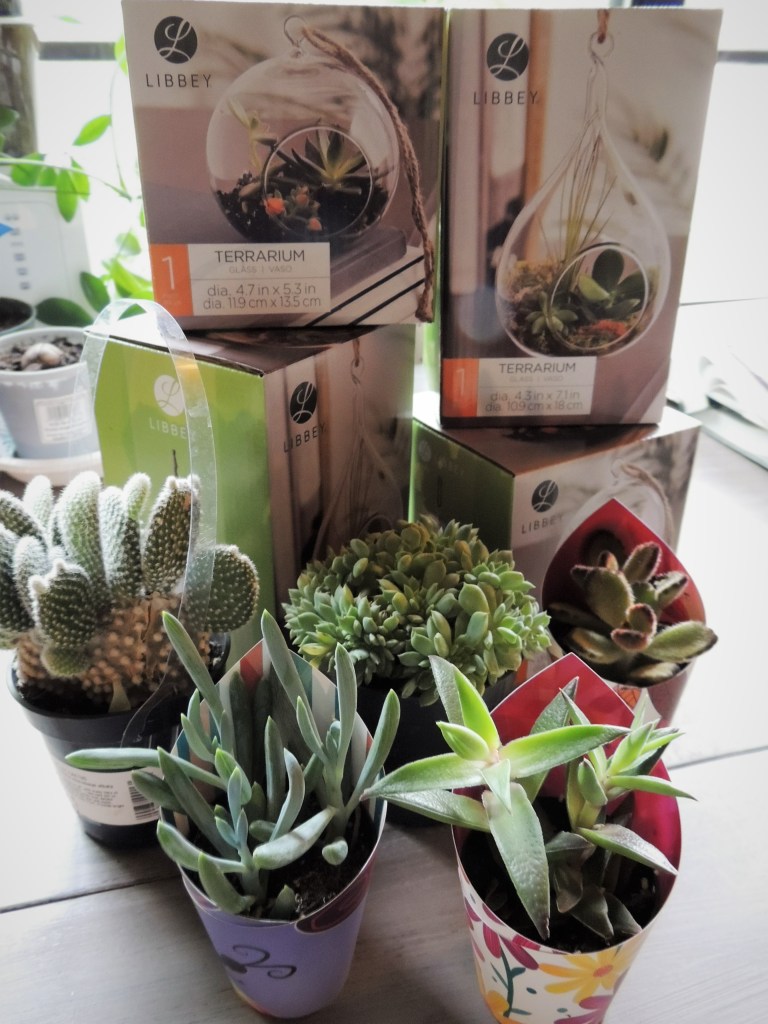


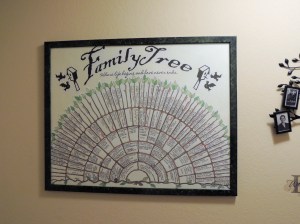
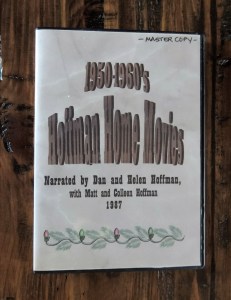 Something our family DOES have, and I can tell you is an enormous treasure, is a compilation of my husband’s folks old home movies that they took on an old 8mm recorder. They had the movies transferred to VHS when that was the most modern thing, and gave us a copy. But as hubby and I were watching these silent movies, we realized that much of those people and places were unknown to us. So the next time his parents visited us we asked them to sit down and watch it with us and tell us where all those places were and who the people are. I set up a cassette recorder to record their narration. Many years later I took the old silent VHS and the narration on the cassettes and put them together on DVD. Then I made several copies and gave them as Christmas gifts for our family. It was the very next Christmas after grandpa had died and you can’t image what a treasure it was to the whole
  family to get to hear grandpa’s voice again, and laugh at his sense of humor, especially since the family had no idea we’d ever gotten that sound tract.
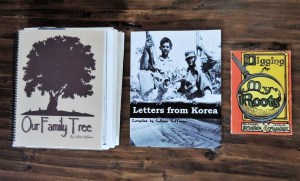 My husband’s dad served in Korea, and wrote letters home to his parents a couple times a week. We found the letters a while back, along with a bunch of pictures he took while in boot camp and on the front lines. We also were fortunate to get to inherit his army coat, a hat, and medals, maps, and various other personal objects from the war, along with the flag that was presented to the family at his funeral, and the bullet casings from the 21 gun salute. Altogether the letters and photos, and photos of the objects made a wonderful book that is and shall forever be a cherished keepsake for generations.
 get her recipe! Get ALL her recipes, and make them into a cookbook. My husband’s family actually collected recipes from everyone in the family one year and made a family cookbook for all of us. We all contributed, and we all paid for our own copies of the book, and it is very much a prized possession of mine to this day. Each person that contributed recipes also told a story to go with it, like if it was the first meal they made for their husband, or if it was their mother’s favorite thing that they made, etc.
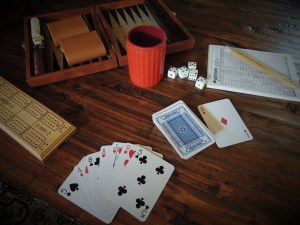 favorite game to play, and if he could beat her he felt like it was a real accomplishment. Grandma was apparently very good at Yatzee. My grandma liked to play cards, and her game of choice to play with us kids was Rummy. She also showed us how to play Solitaire and let us play at the table while she cooked and baked. I also remember making card houses in the living room, using the carpet to help hold the cards in place. My sisters and I made elaborate card houses, some more fragile than others. Does your grandma or grandpa have a favorite game they like to play. Ask if you can come play it with them one afternoon. Or, take them to play Bingo, or Pinochle or Bridge at the Senior Center, dominoes, Cribbage, or take them bowling, or to play miniature golf, or darts. You might find out they’re pretty darn good at it.


 I set up a CD player outside that had *lullaby music playing softly and continuously in the background during the party. (*I used the
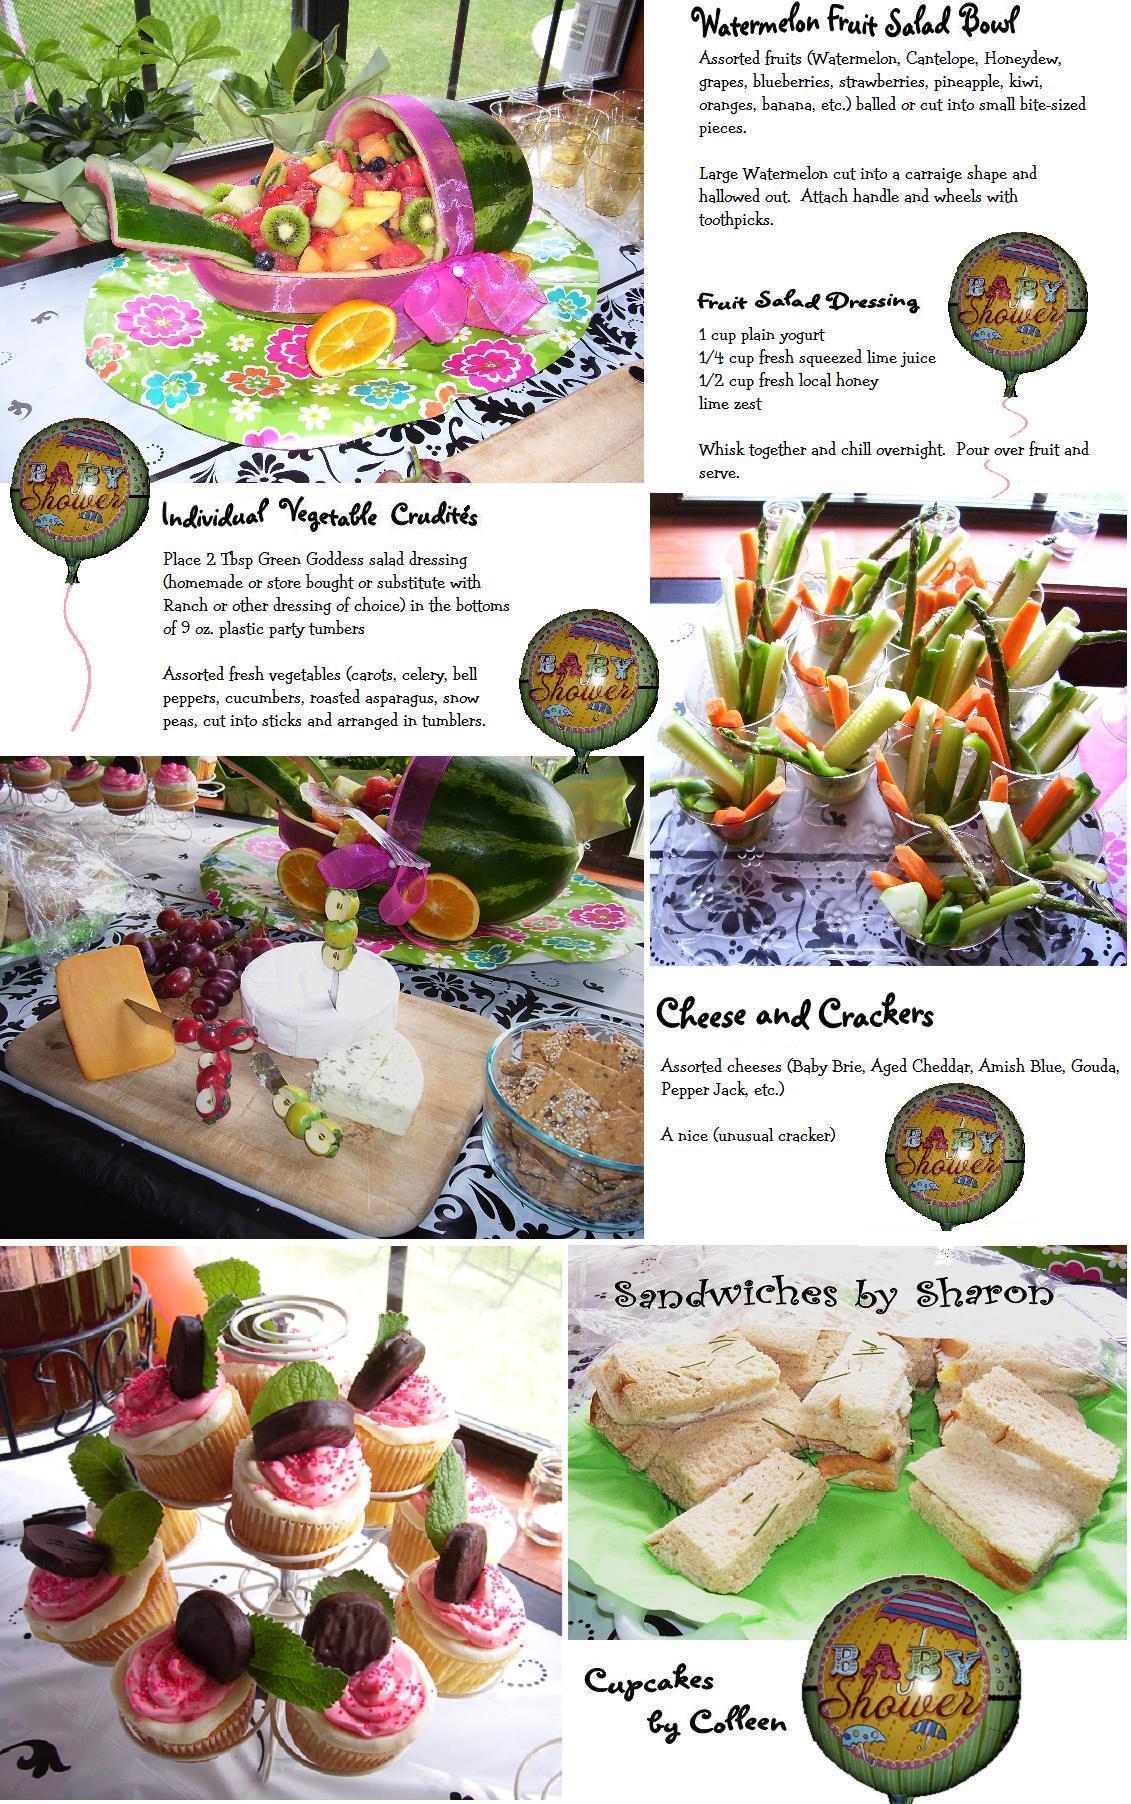
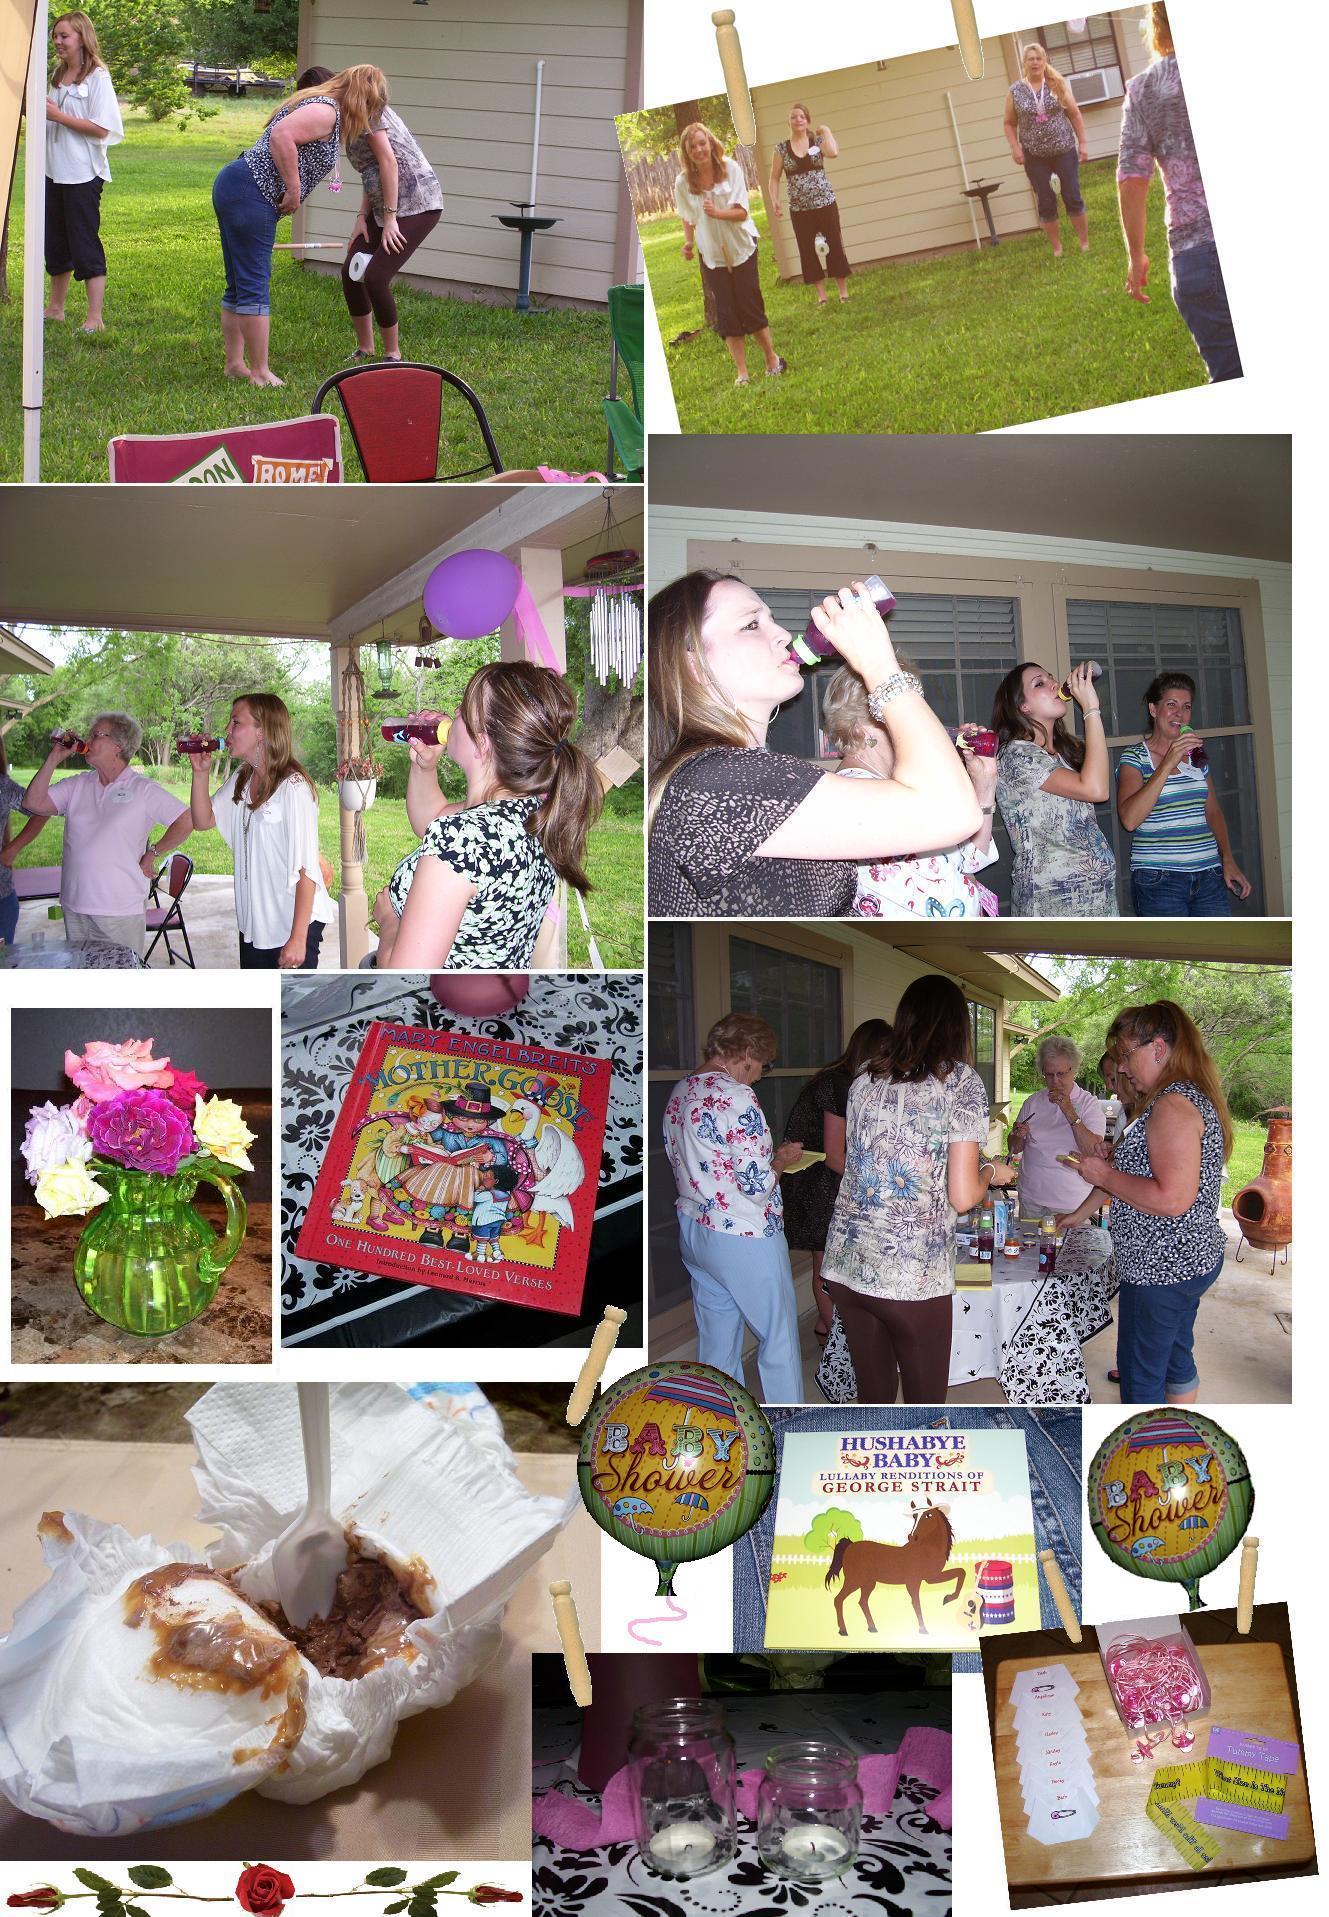


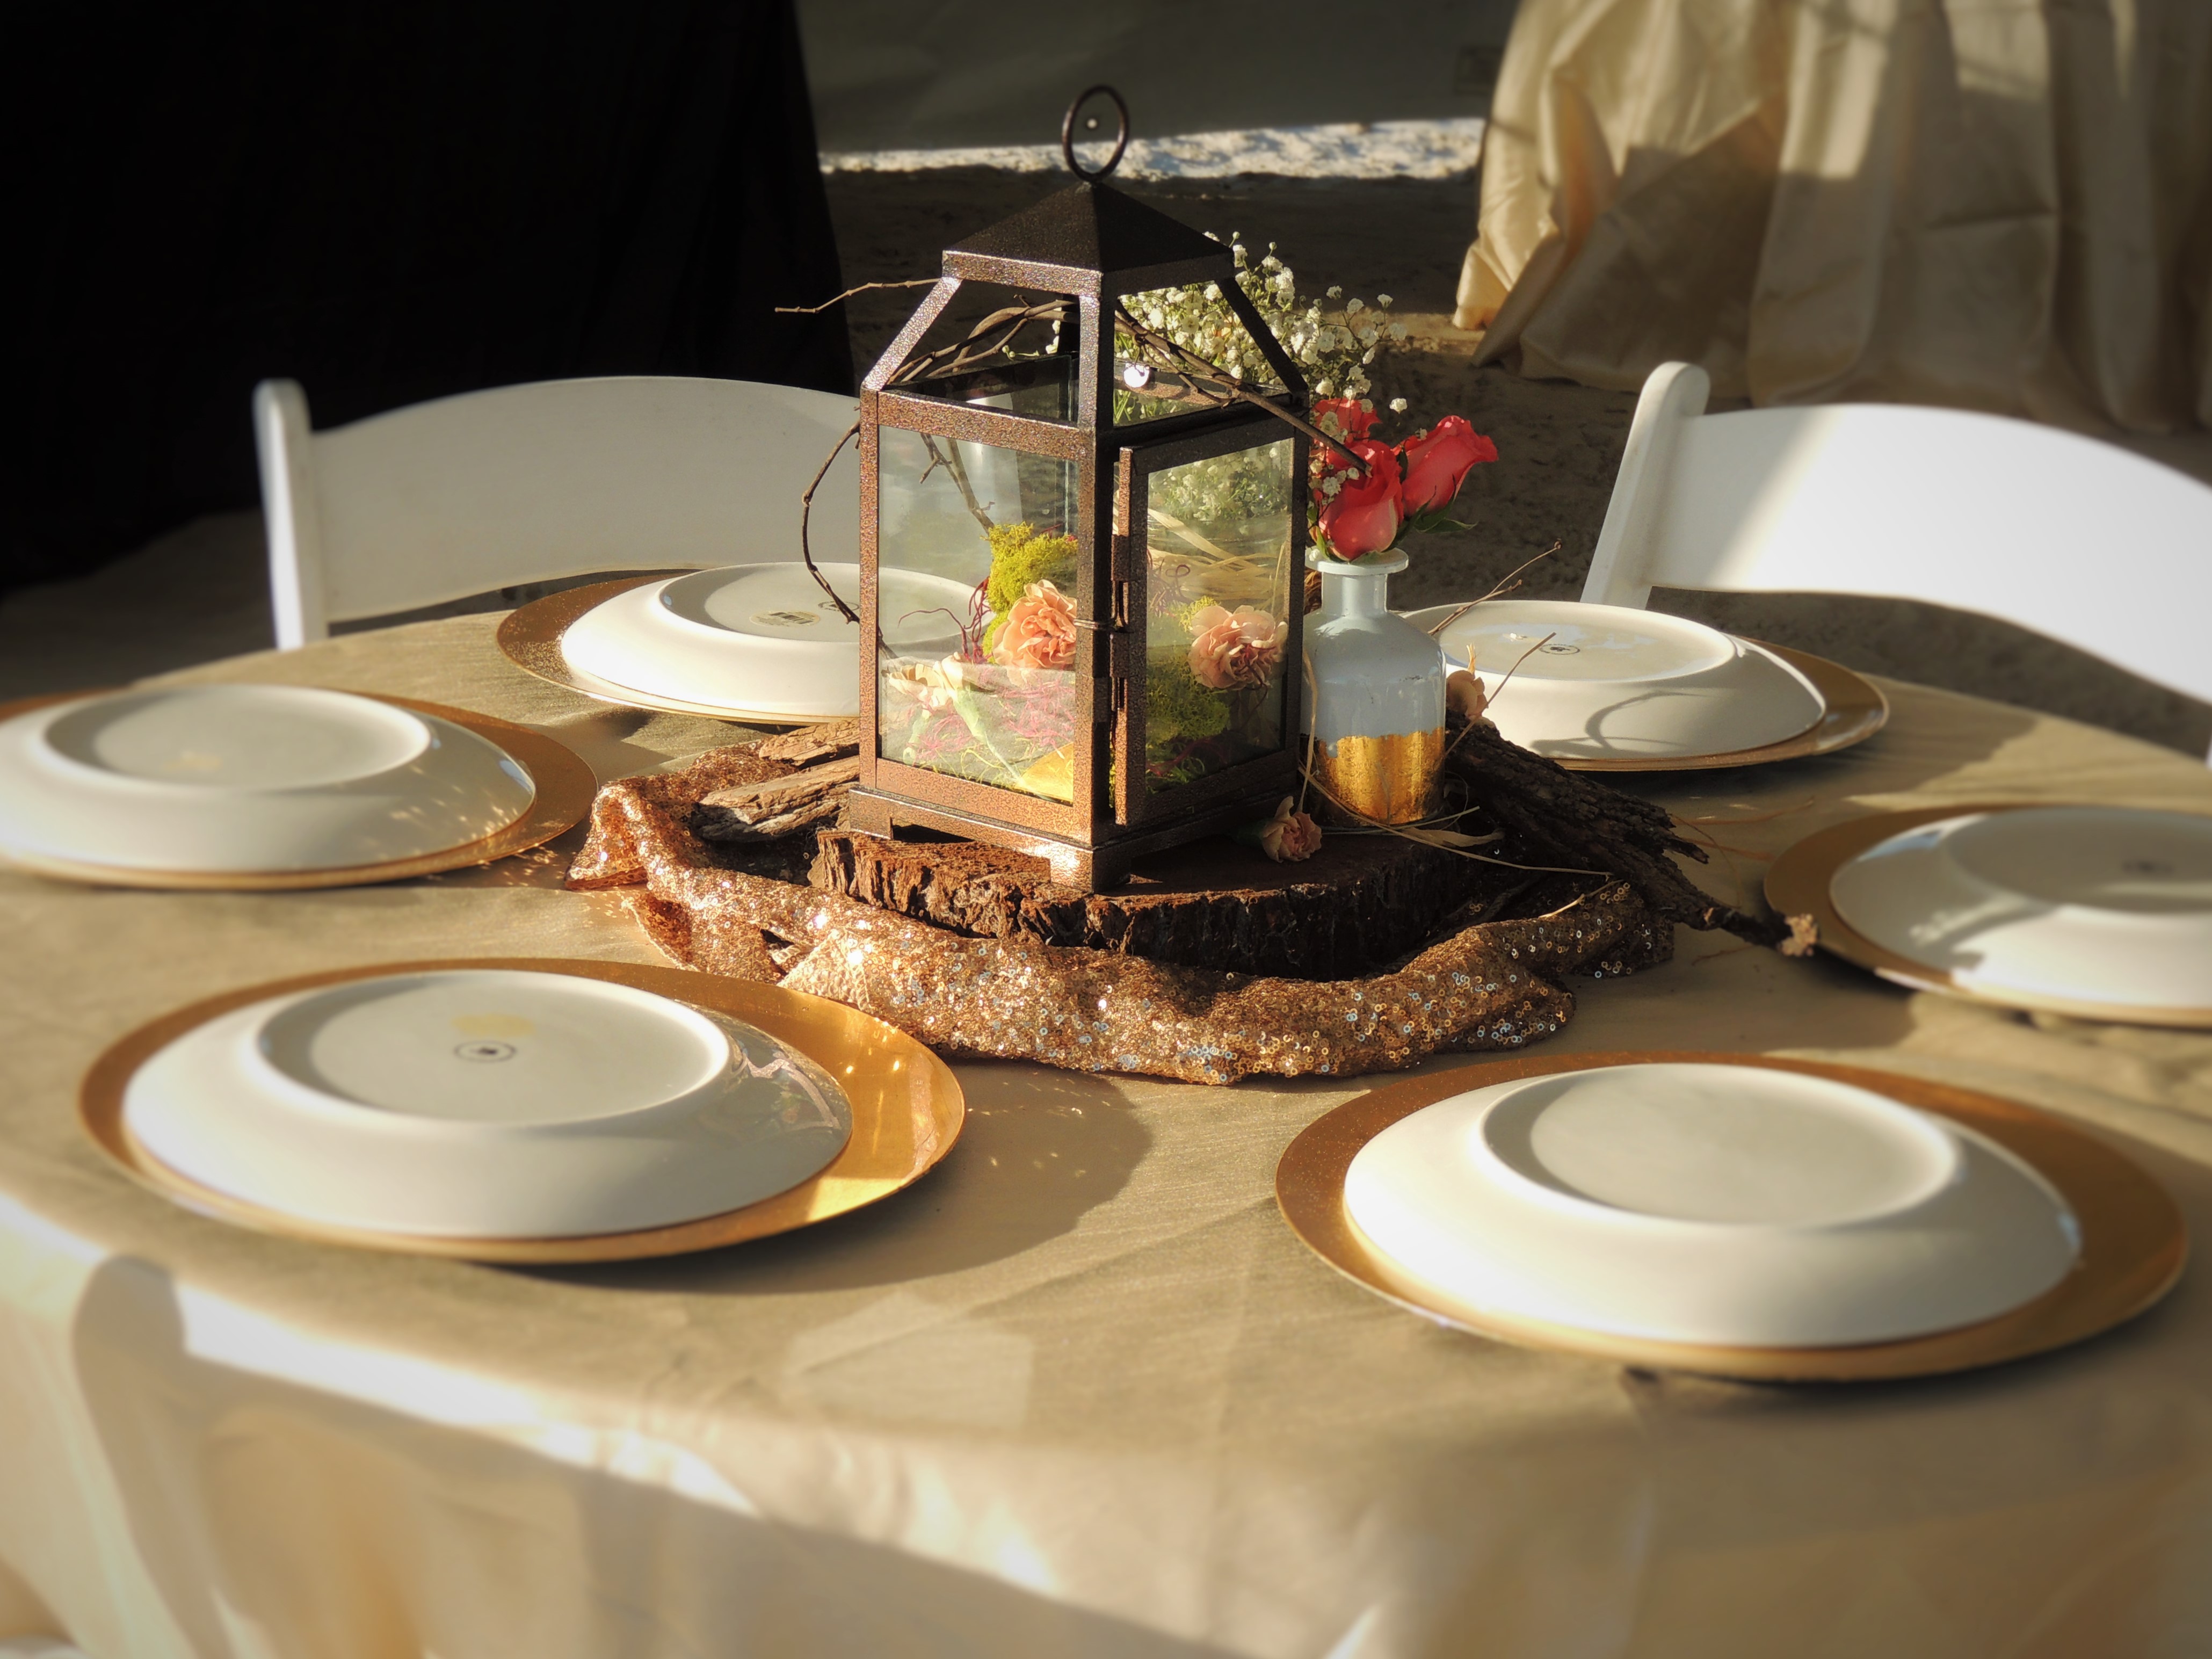


 And for this year’s garden party I planned a “kiddie pool pedicure party” where all my guests would sit in lawn chairs in a circle outside around our kiddie pool filled with hot sudsy water and perfumed bath salts and floating flower pedals. The sun would be shining and the birds would be chirping. We’d be wearing our capris and peddle-pushers. We would take off our shoes and soak our footies in the warm water while we nibbled on a modest buffet of brunch items. I thought it would bring back memories of when my sisters and I were young. In the summers our Grandma Gen’s would fill tubs with water and we’d all sit around in her yard and dangle our feet in the tubs. It is one of my fondest childhood memories.
 feet would be so pretty we would need some way to show them off, so I planned a CRAFT of decorating flip-flops. Our local Hobby Lobby store had everything I needed from the glue to the flip-flops and all the cutsie adornments to decorate them.
 I phoned last-minute and begged everyone to bring a foot tub. I had also asked in the invitations for everyone to bring their own pedicure kits, and a few bottles of nail polish to share.

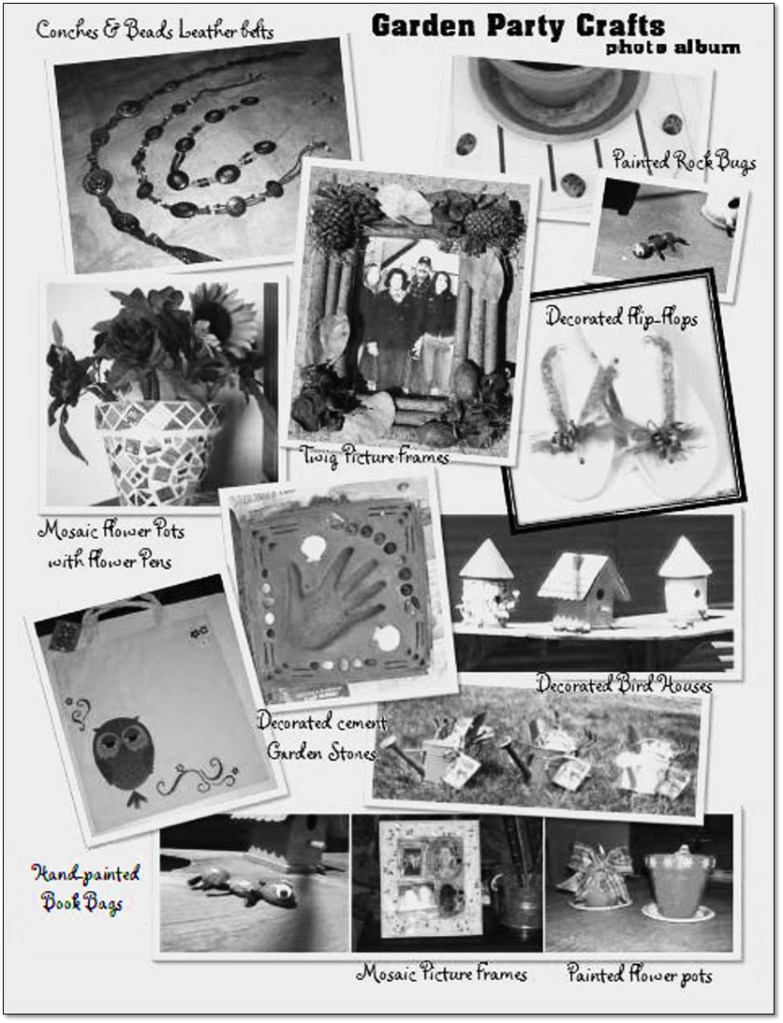
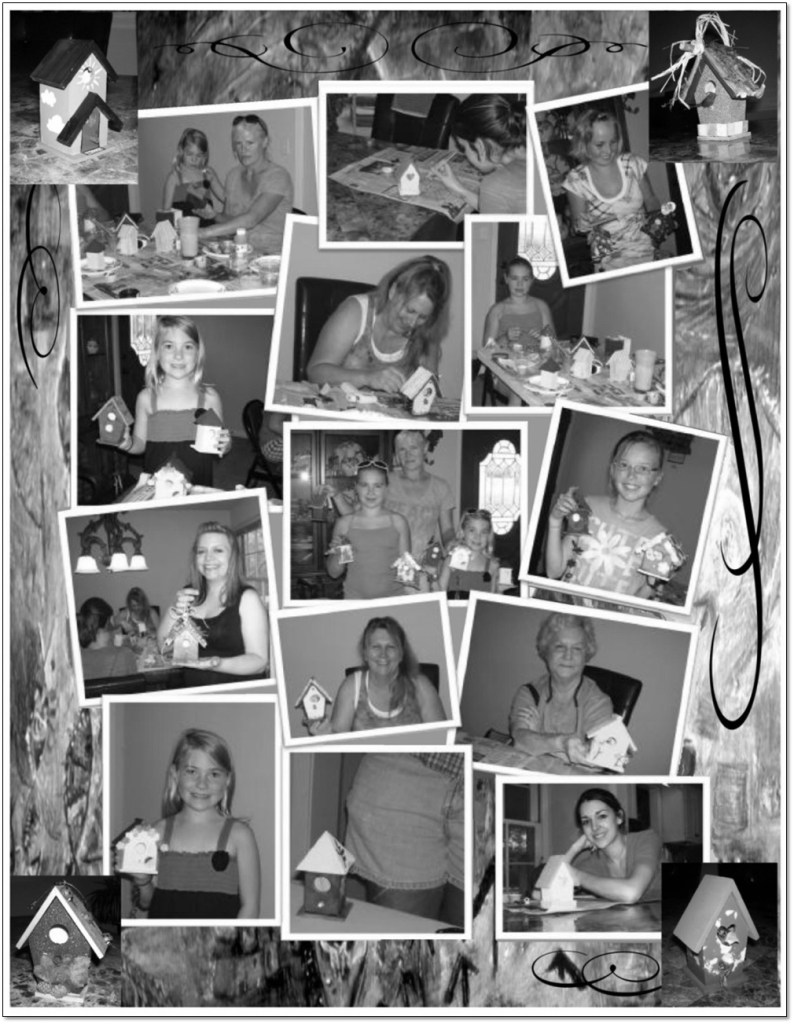

 EGG SALAD SANDWICHES
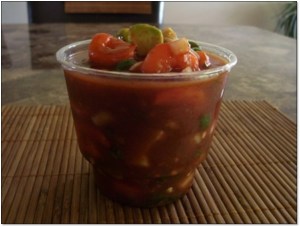
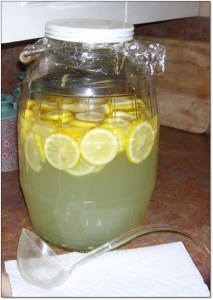
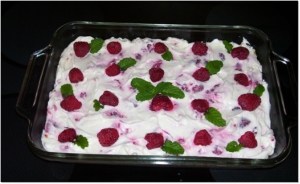


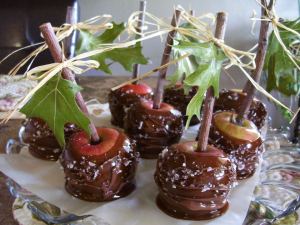


 (Photos from


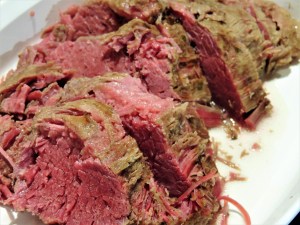 CORNED BEEF, CABBAGE, AND BABY NEW POTATOES
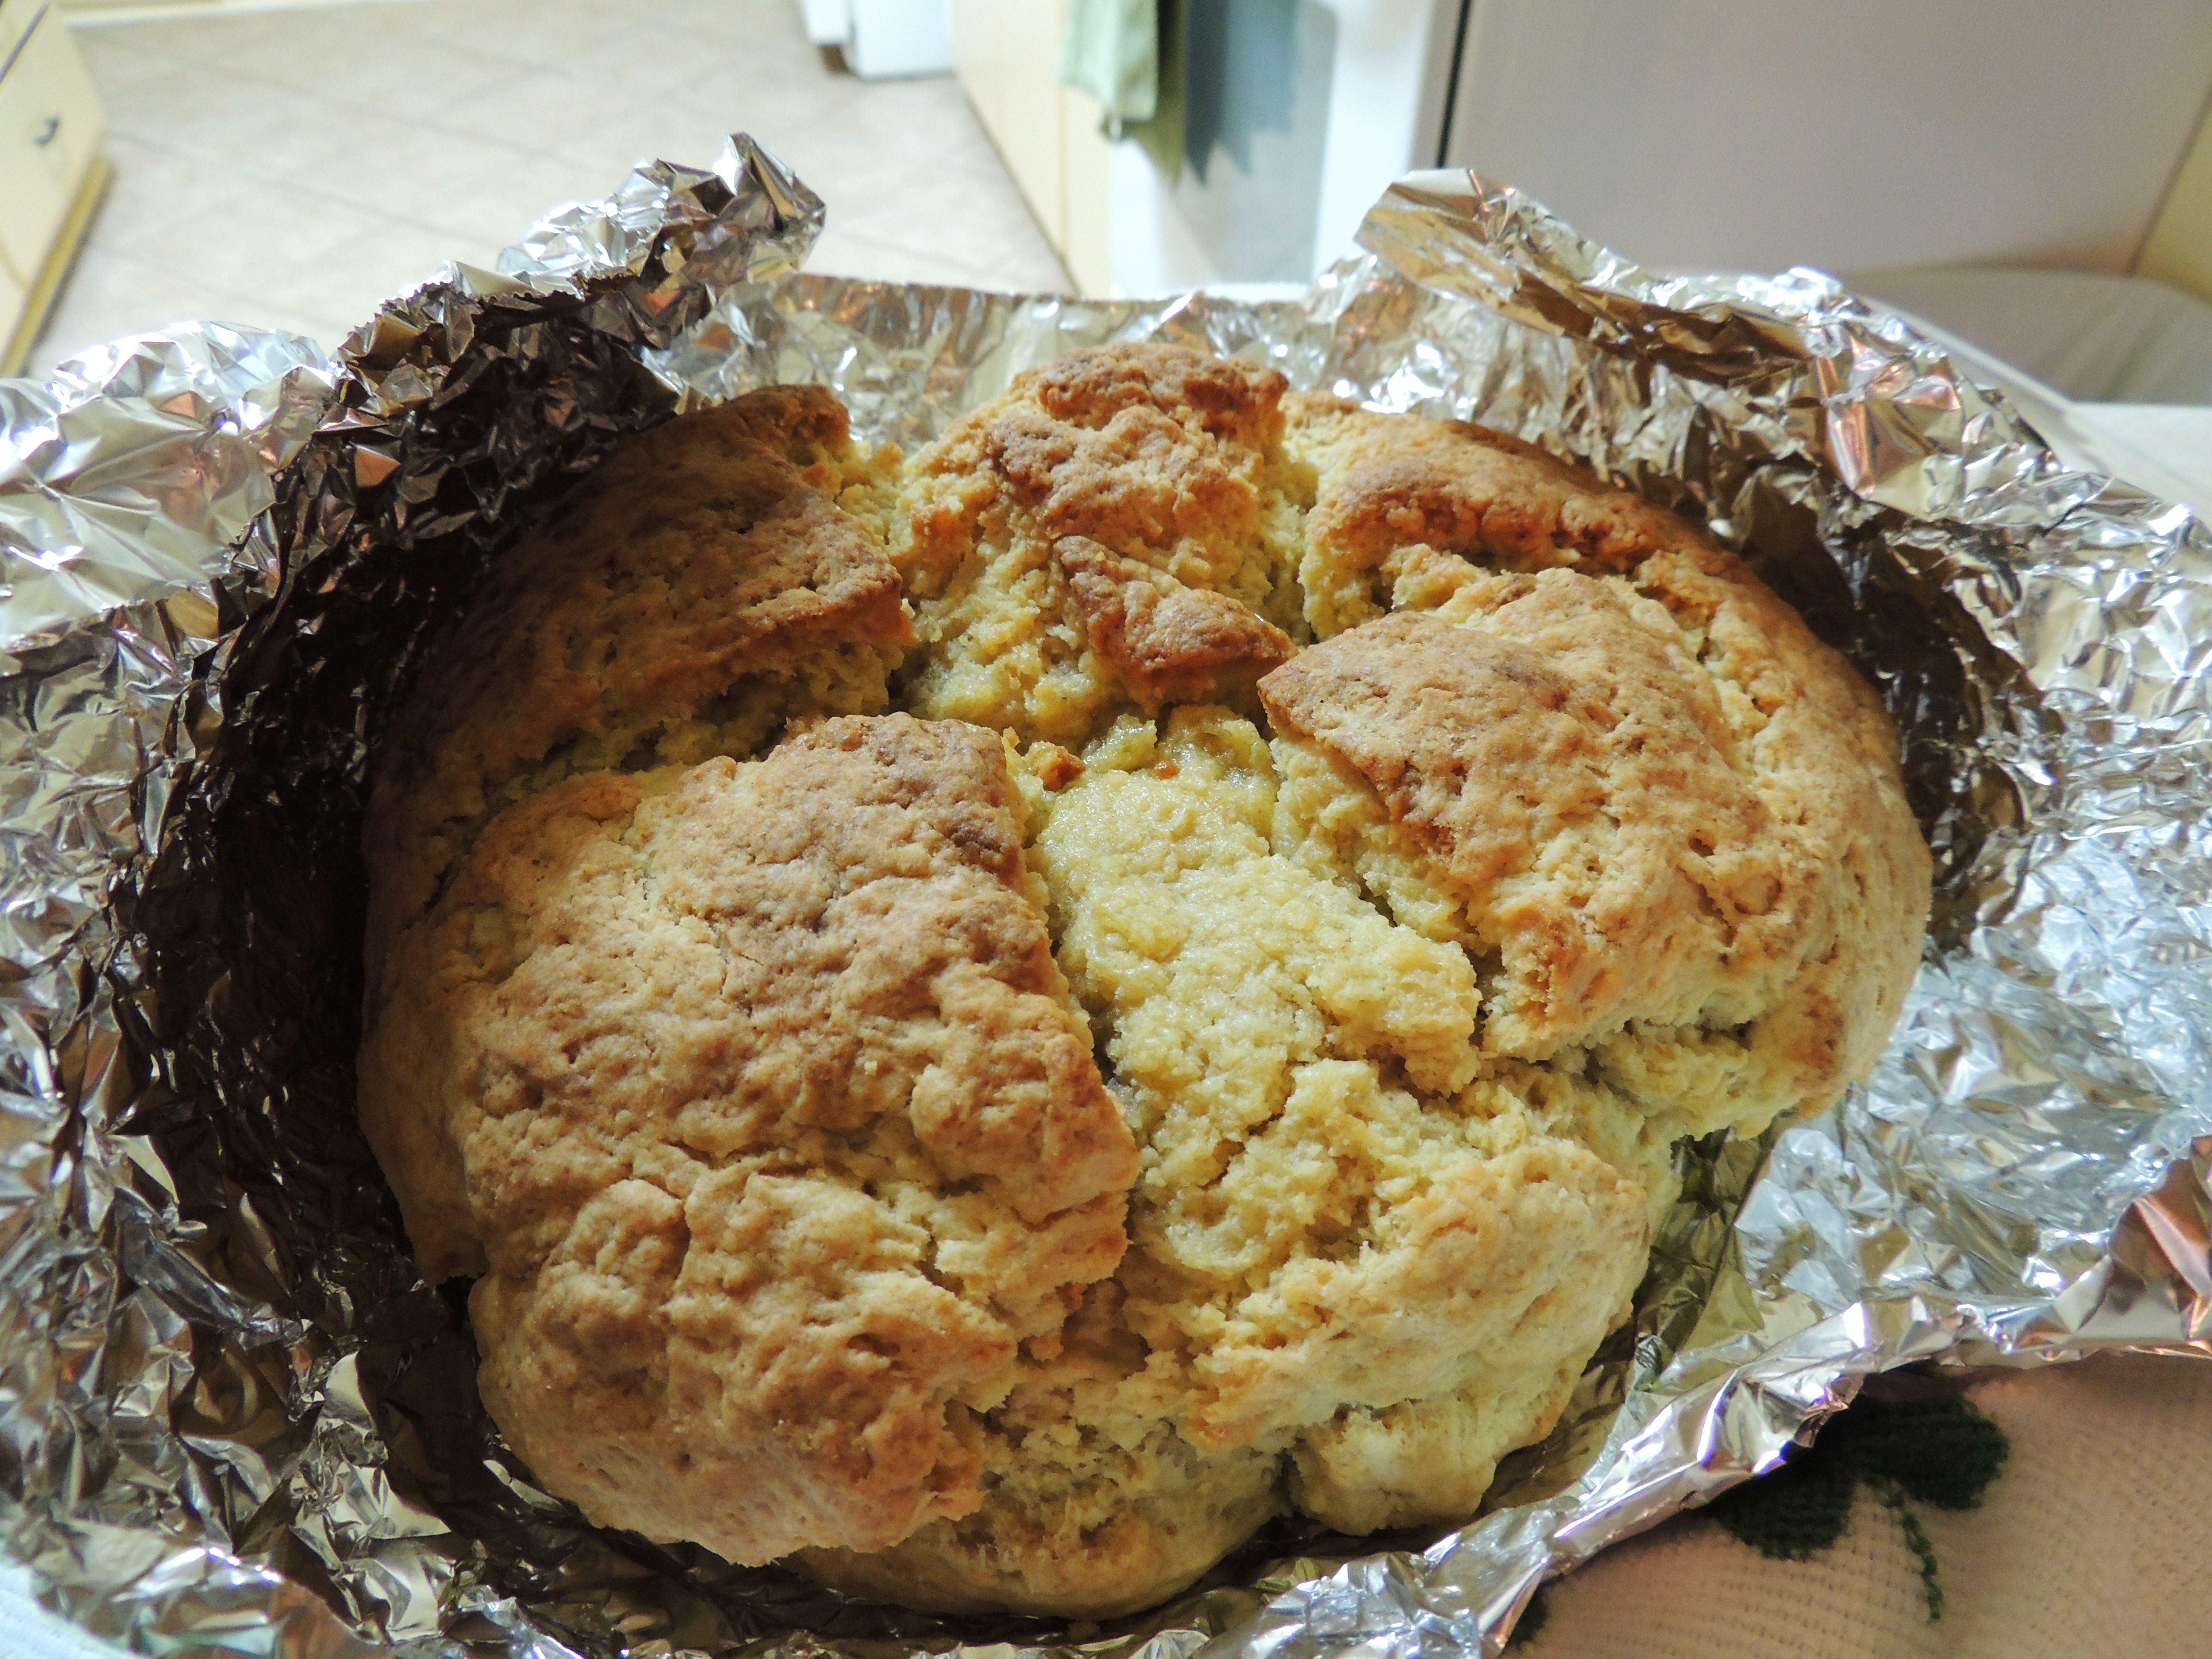
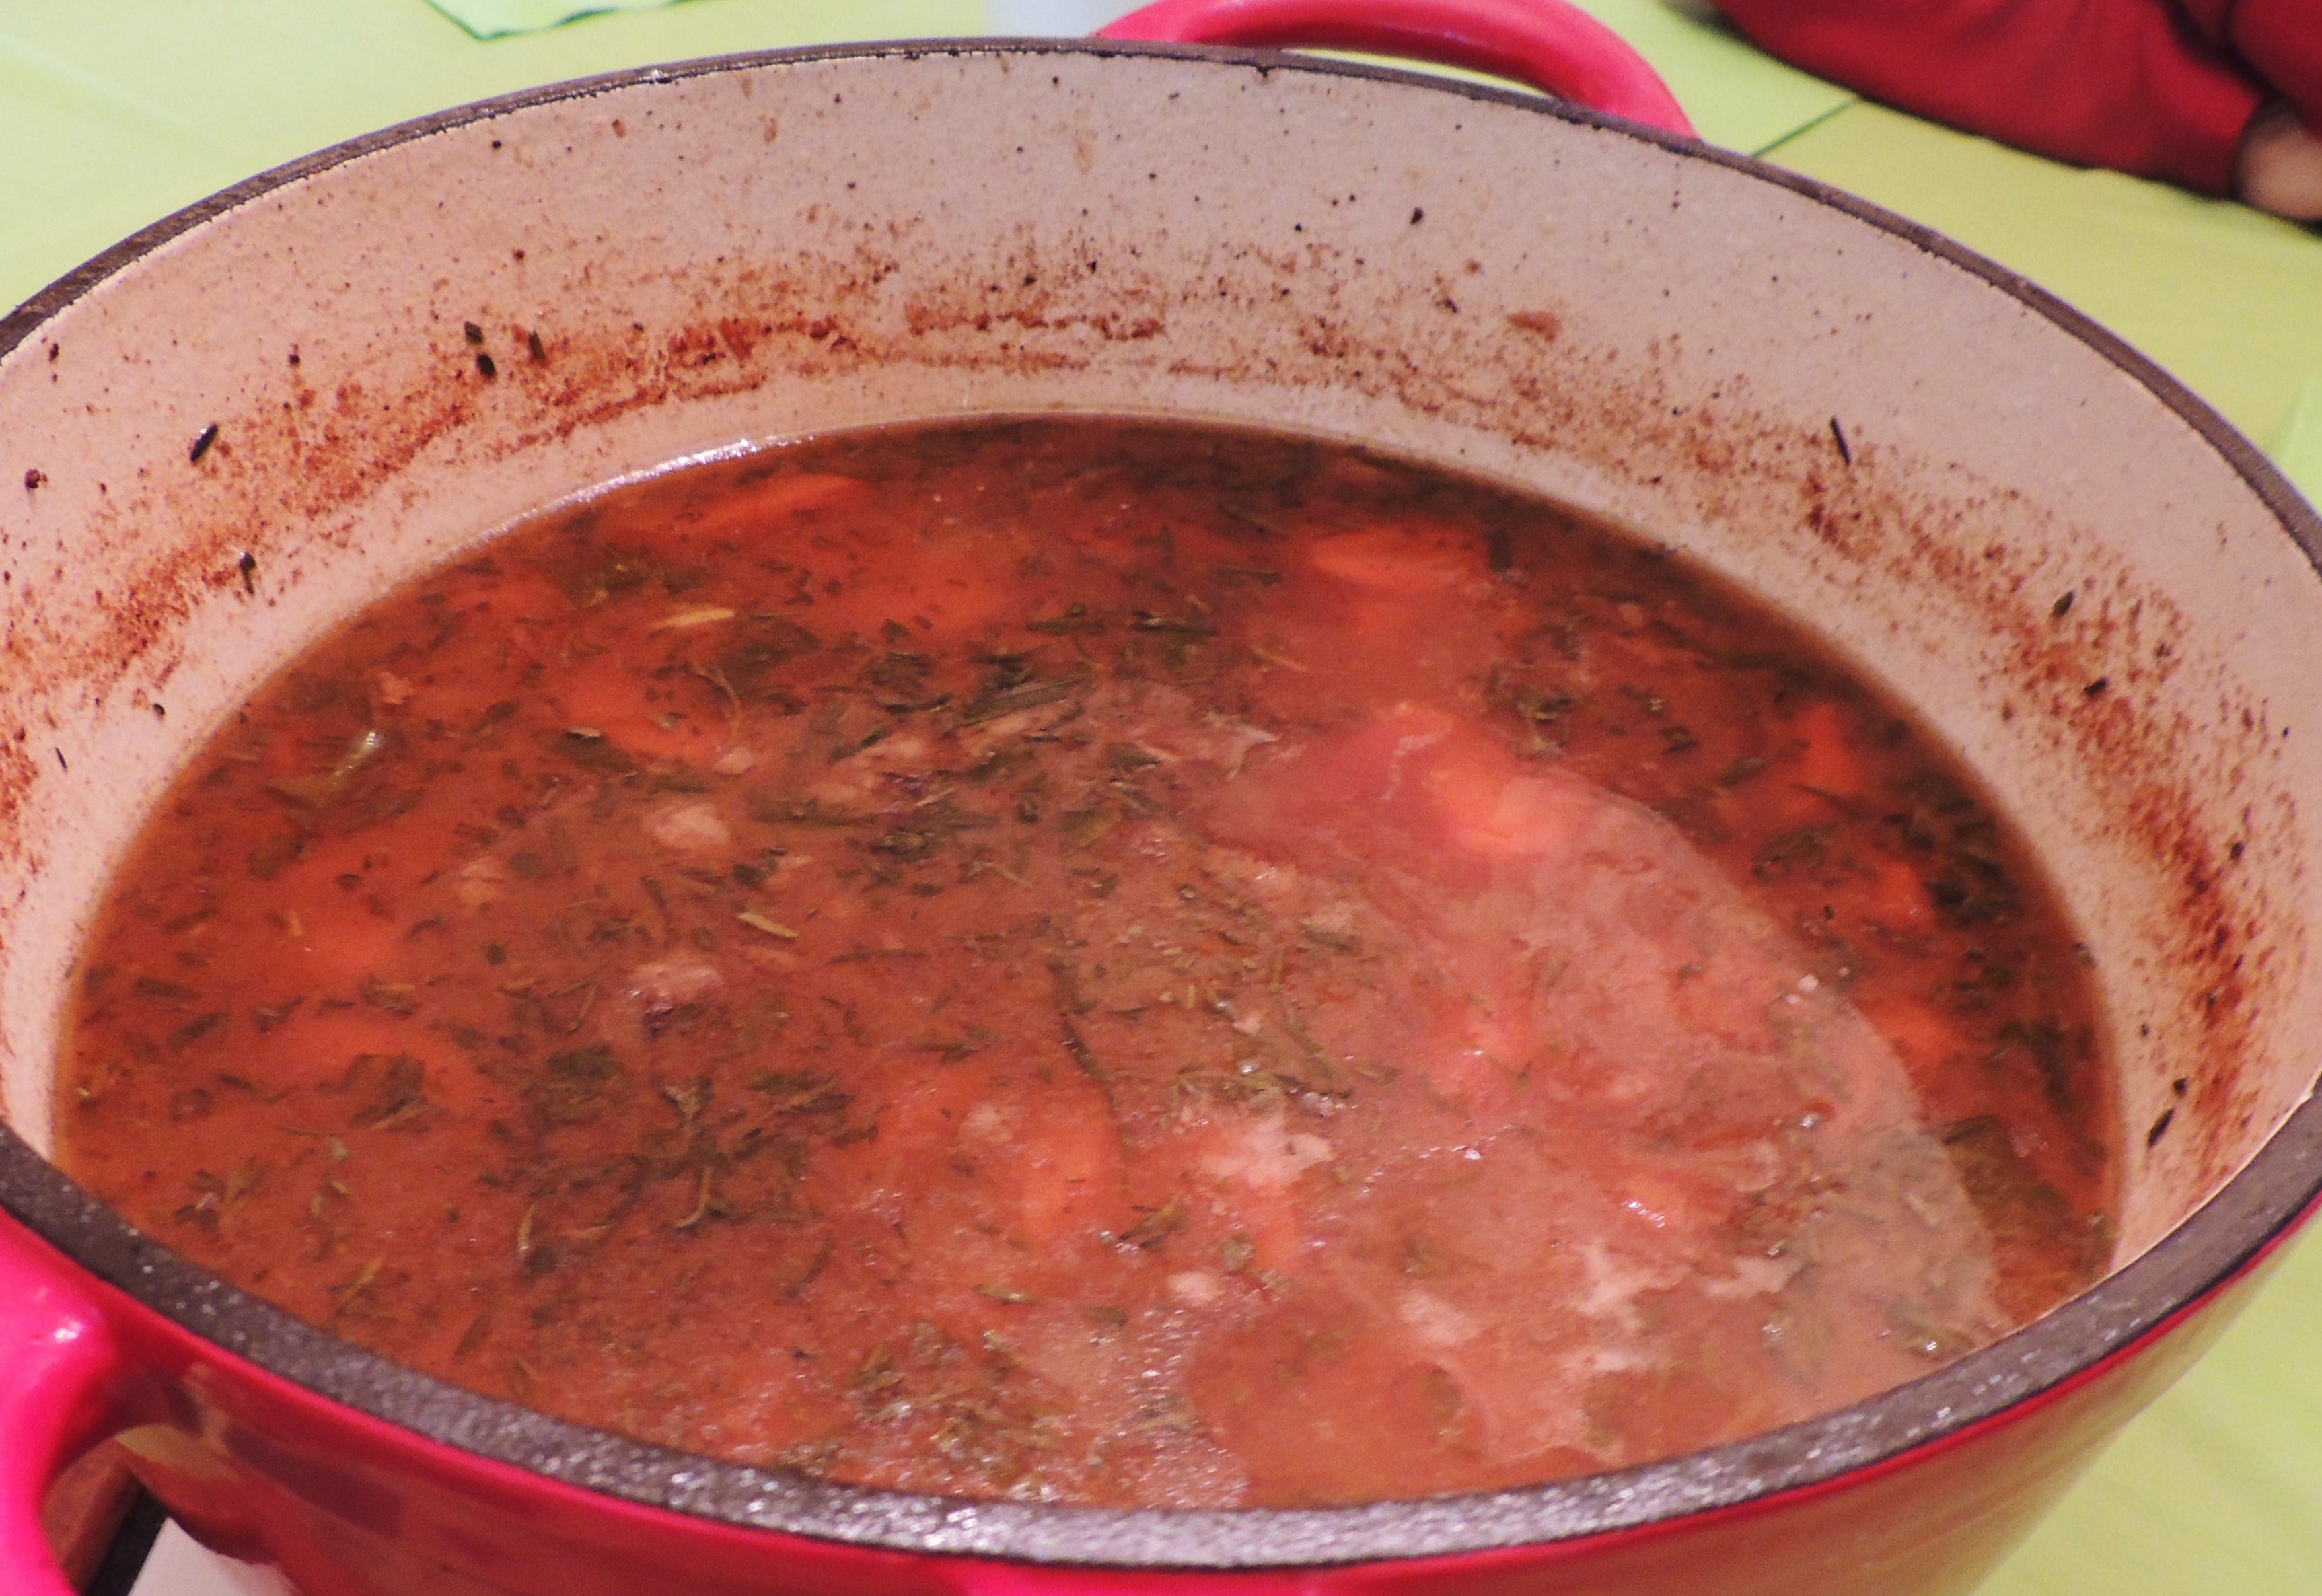

 cake. Continue until all glaze is used. Serve with fresh sliced strawberries and a dollop of whipped cream on top.
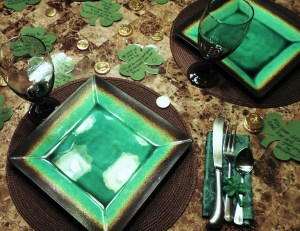 hat about the table?

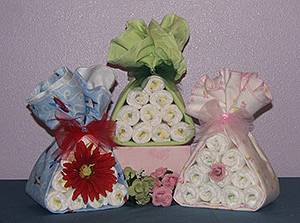