

I want to preface this post by saying if you live near one of these restaurants you absolutely MUST go and have the chocolate cake (and the margaritas, and the guacamole, and….), but if, like me, you live hours away, then I hope to help delight our tastebuds with my less-than-perfect take on their fantabulous desert!!! They serve their cake freshly warm from the oven with a ganache-like frosting oozing over the sides, a scoop of cinnamon ice cream and a dalop of whipped cream on the side, and the whole mess sprinkled with a dusting of cinnamon. Oh my gosh!!!! To die for!

INGREDIENTS
1 ¾ cup granulated sugar
1 ¾ cup all-purpose flour
¾ cup Dutch process, unsweetened cocoa powder
1 Tablespoon ground Saigon Cinnamon
1 ½ teaspoons baking powder
1 ½ teaspoons baking soda
1 tsp finely ground pink Himalayan salt
1 cup whole milk
1 ¾ sticks salted butter, softened
2 eggs
2 tsp Mexican vanilla (I always splash a little over the measurement)
¾ cup boiling water
INSTRUCTIONS
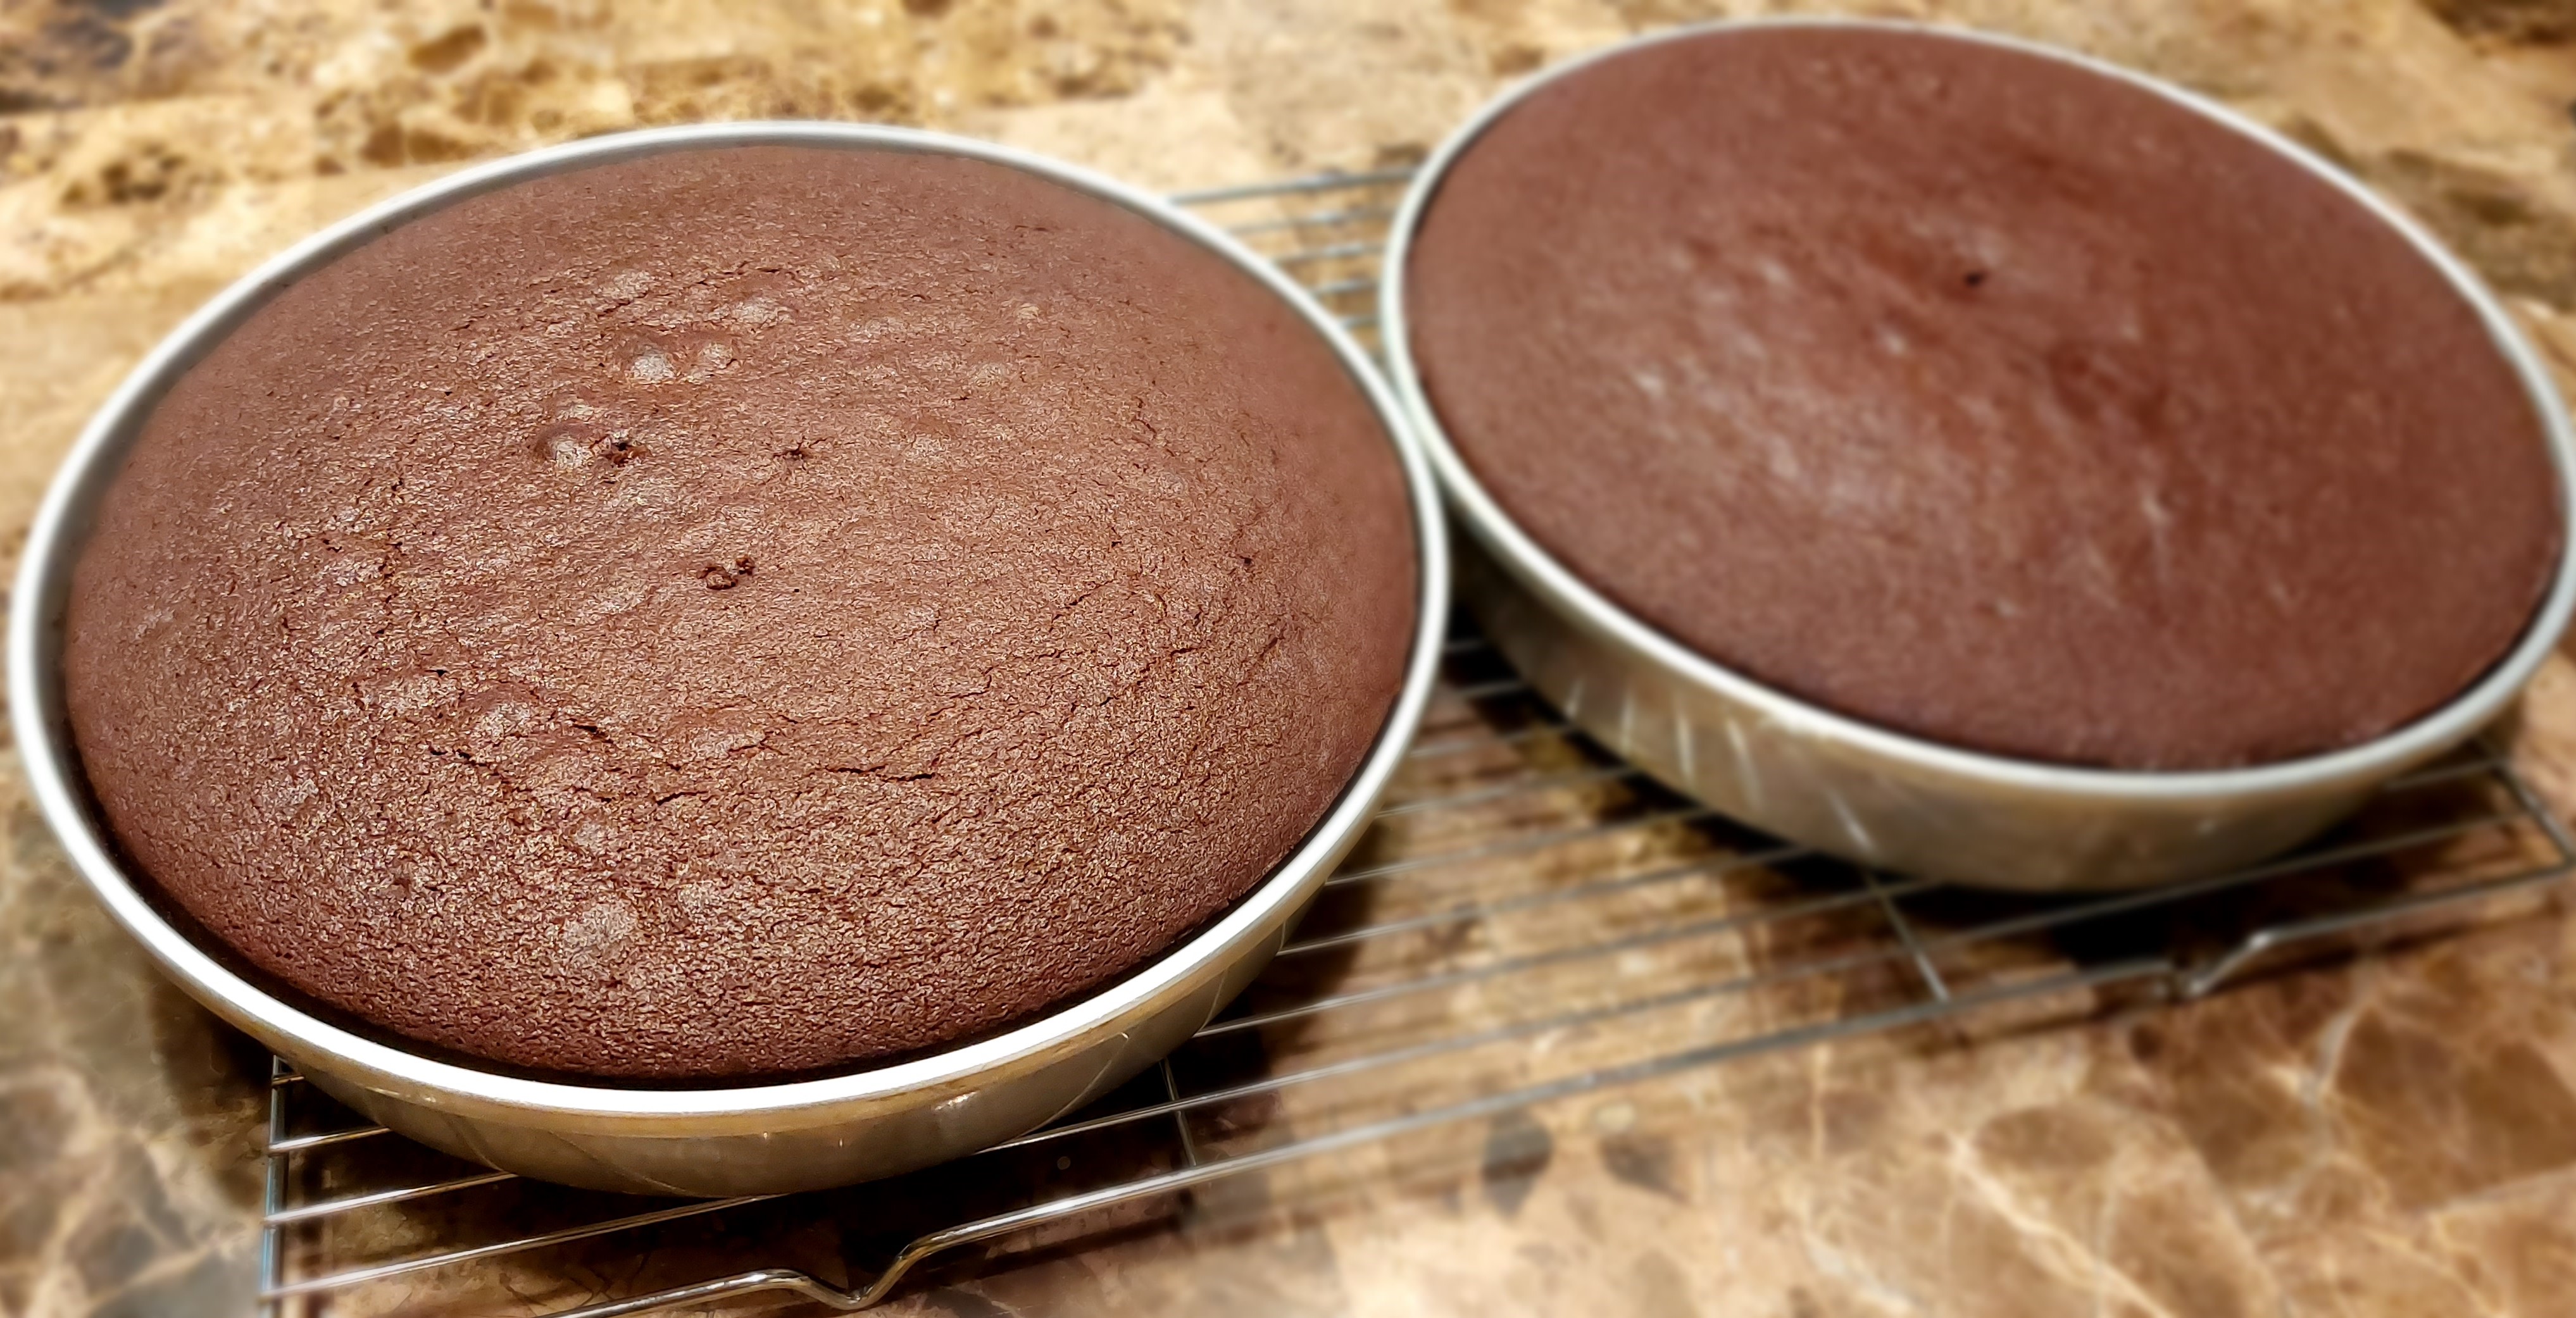
Preheat oven to 350*F. Grease the bottoms of two 8 or 9 inch round cake pans, and line with parchment paper. In a large mixing bowl, combine the dry ingredients. Add milk and butter. Beat on medium speed to 2 minutes. Add the eggs and vanilla. Mix until incorporated. Stir in boiling water.
Divide the batter evenly between two prepared pans. Bake for 30 to 45 minutes, or until the tester comes out clean when inserted into the cake’s center.
Cool on a wire rack for 10-15 minutes. Removed cakes from pans, discard the parchment paper, and transfer them to a wired rack to cool completely.

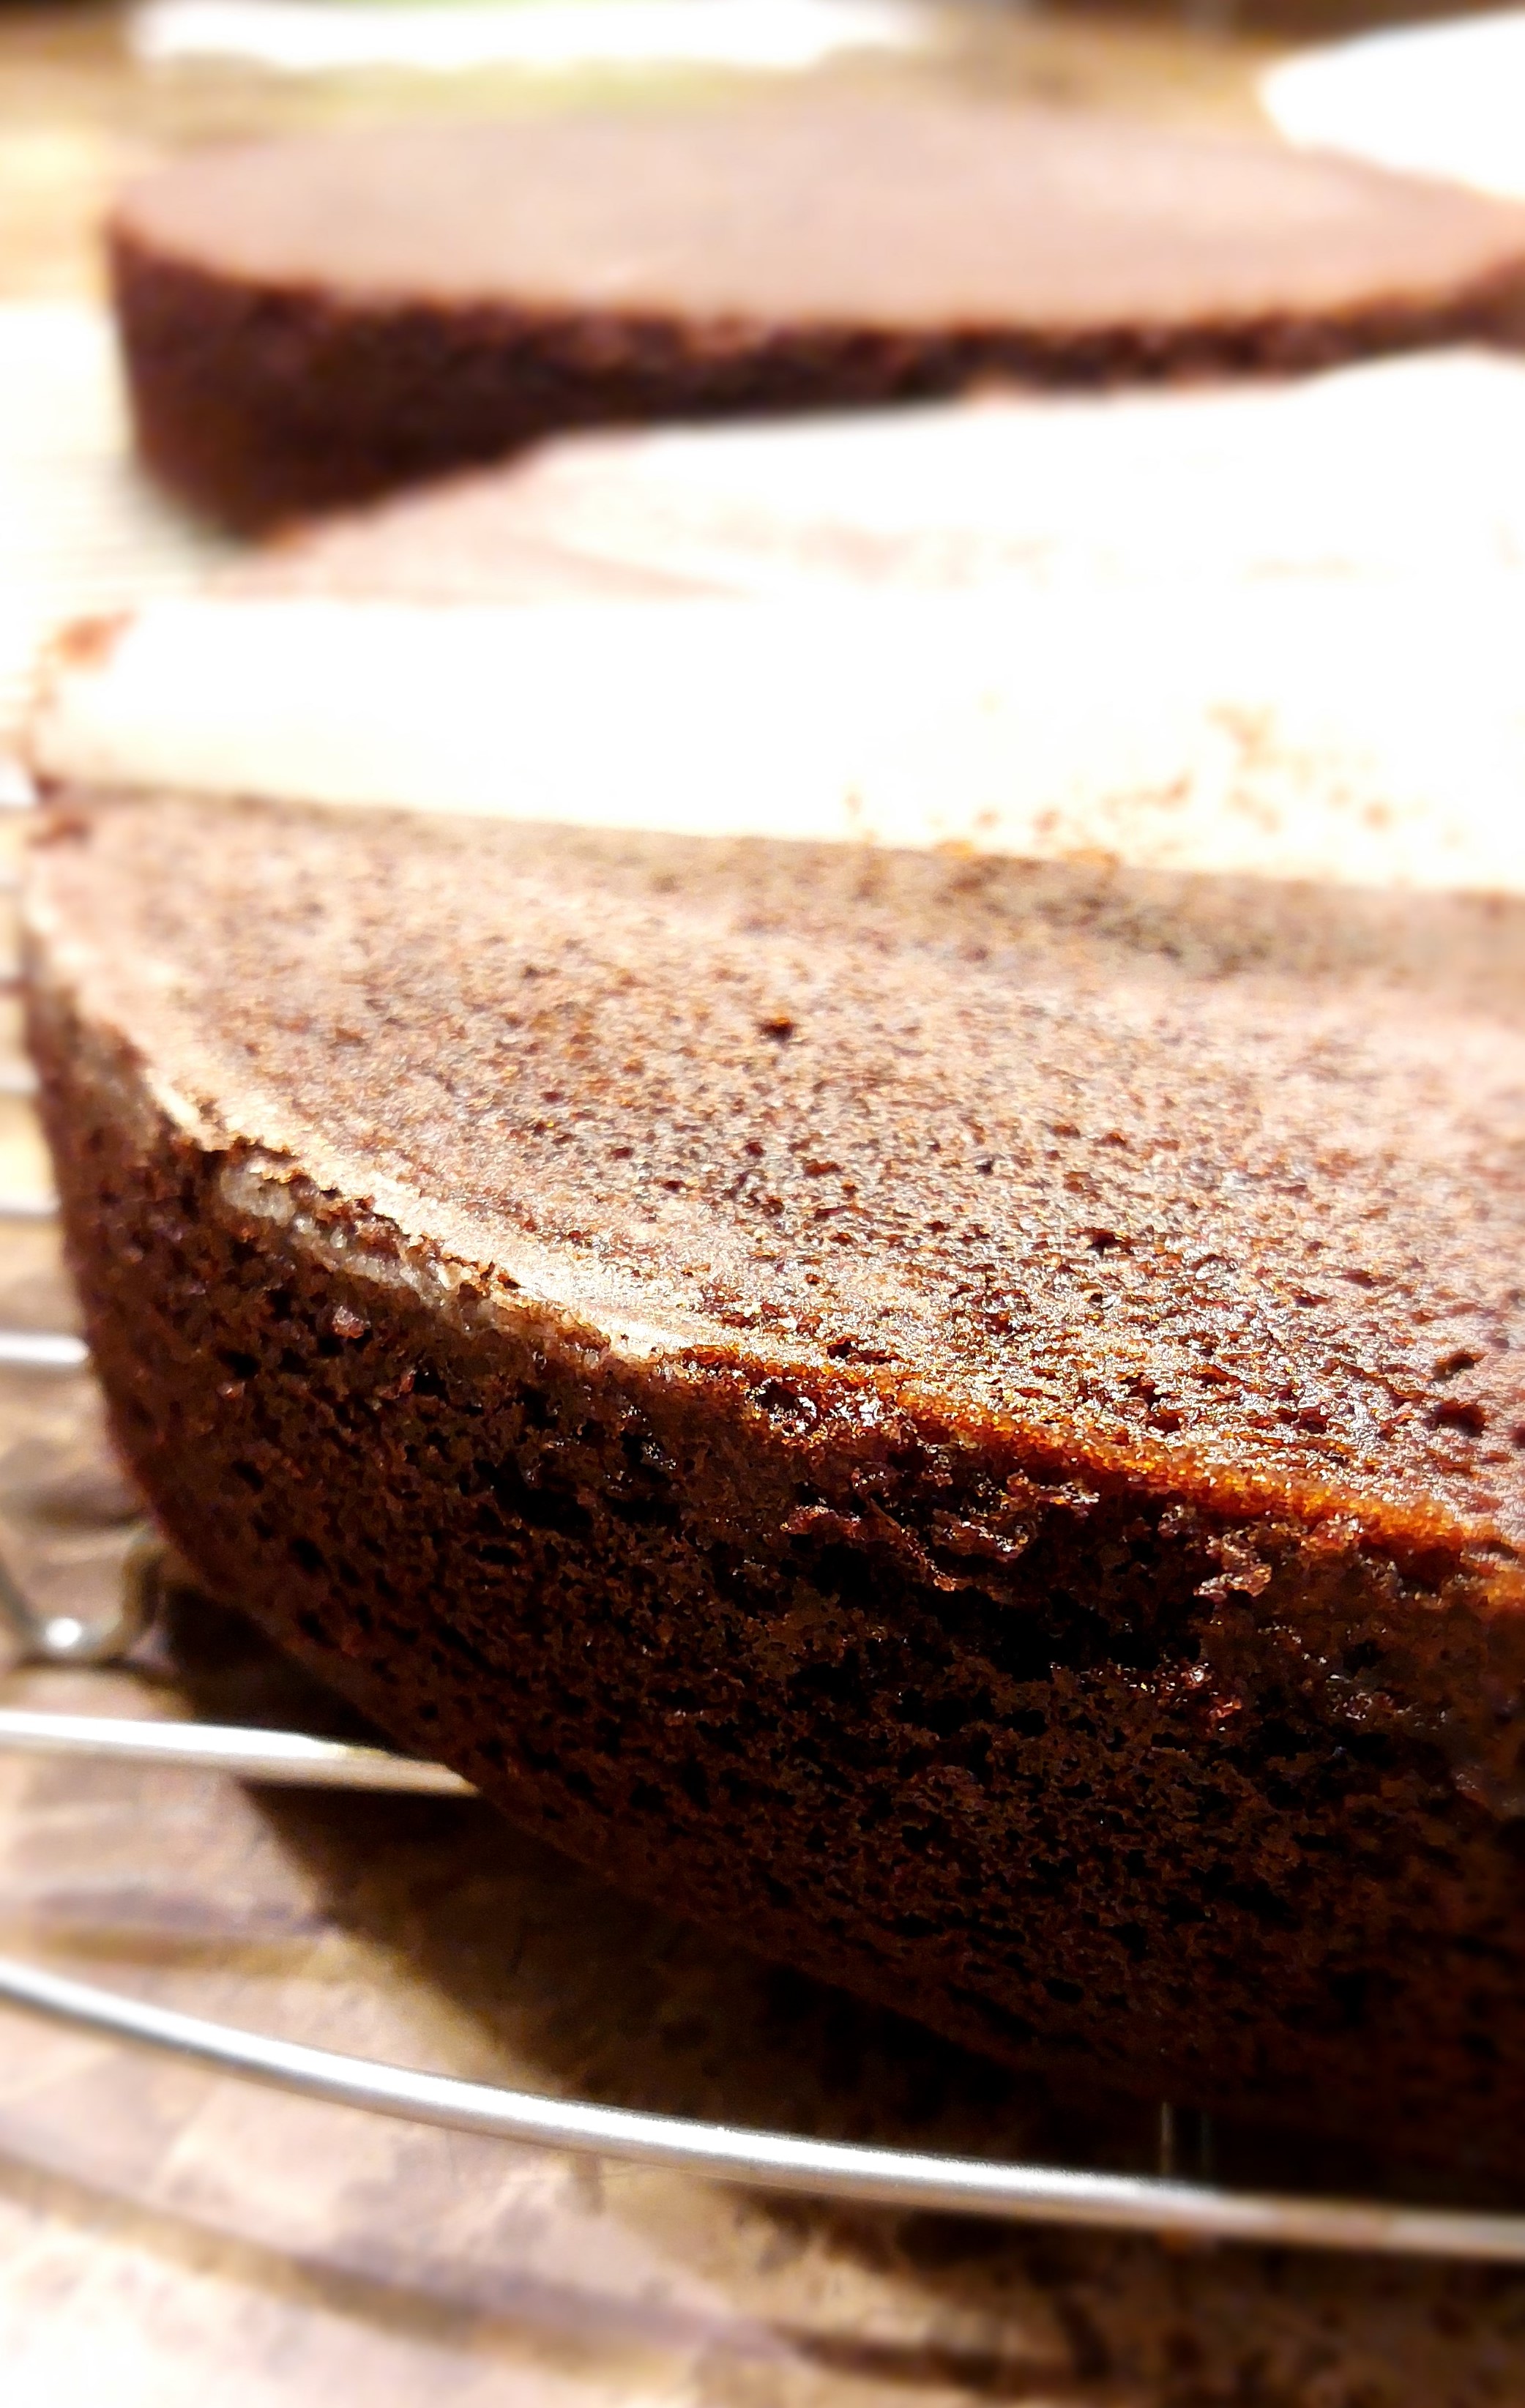
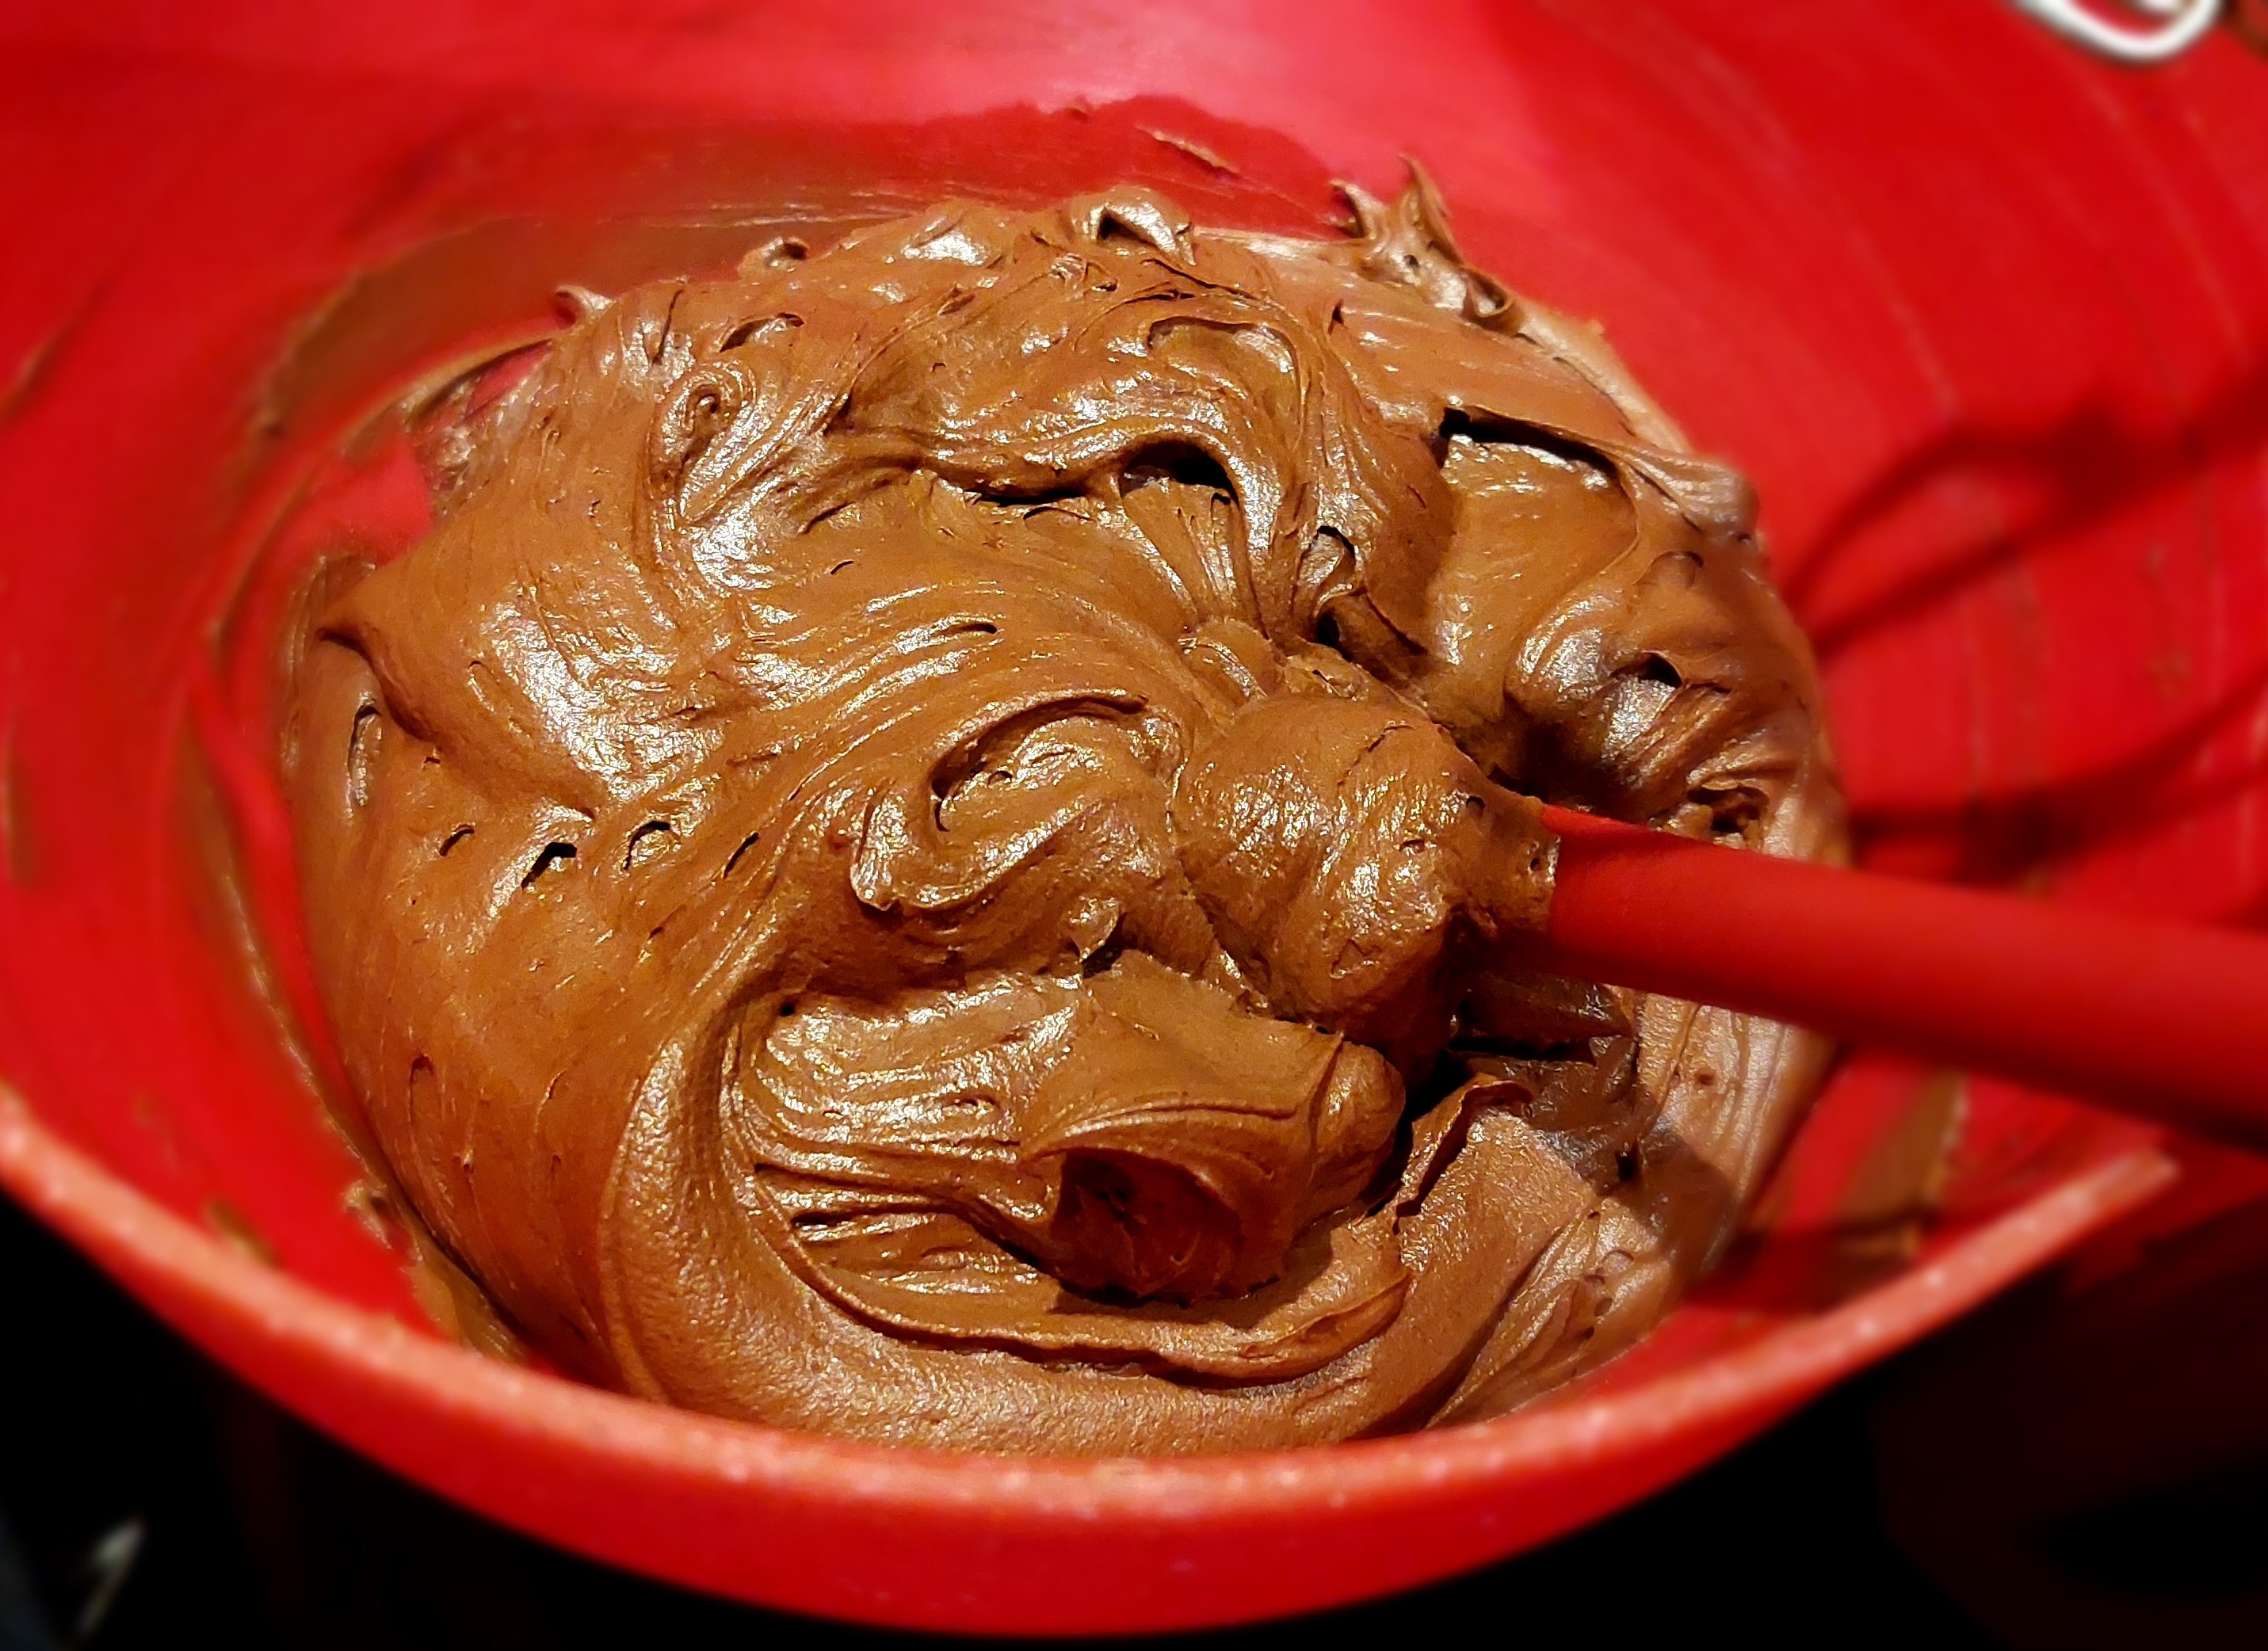
Now they are ready to be frosted. And this is my favorite ganache recipe. Make yours with bittersweet chocolate, add a teaspoon of cinnamon, and up your ratio of chocolate a little more to make your ganache thicker, since it will be spread on warm cake and you don’t want it to just soak in and disappear.
I know there really is no duplicating the deliciousness of Tiago’s original, but this is a dynamite stand-in for when you are just craving it like no other and live 2 hours (or more) away from the closest restaurant.

And now to the second part of this post… A HAPPY BIRTHDAY cake!!!!!
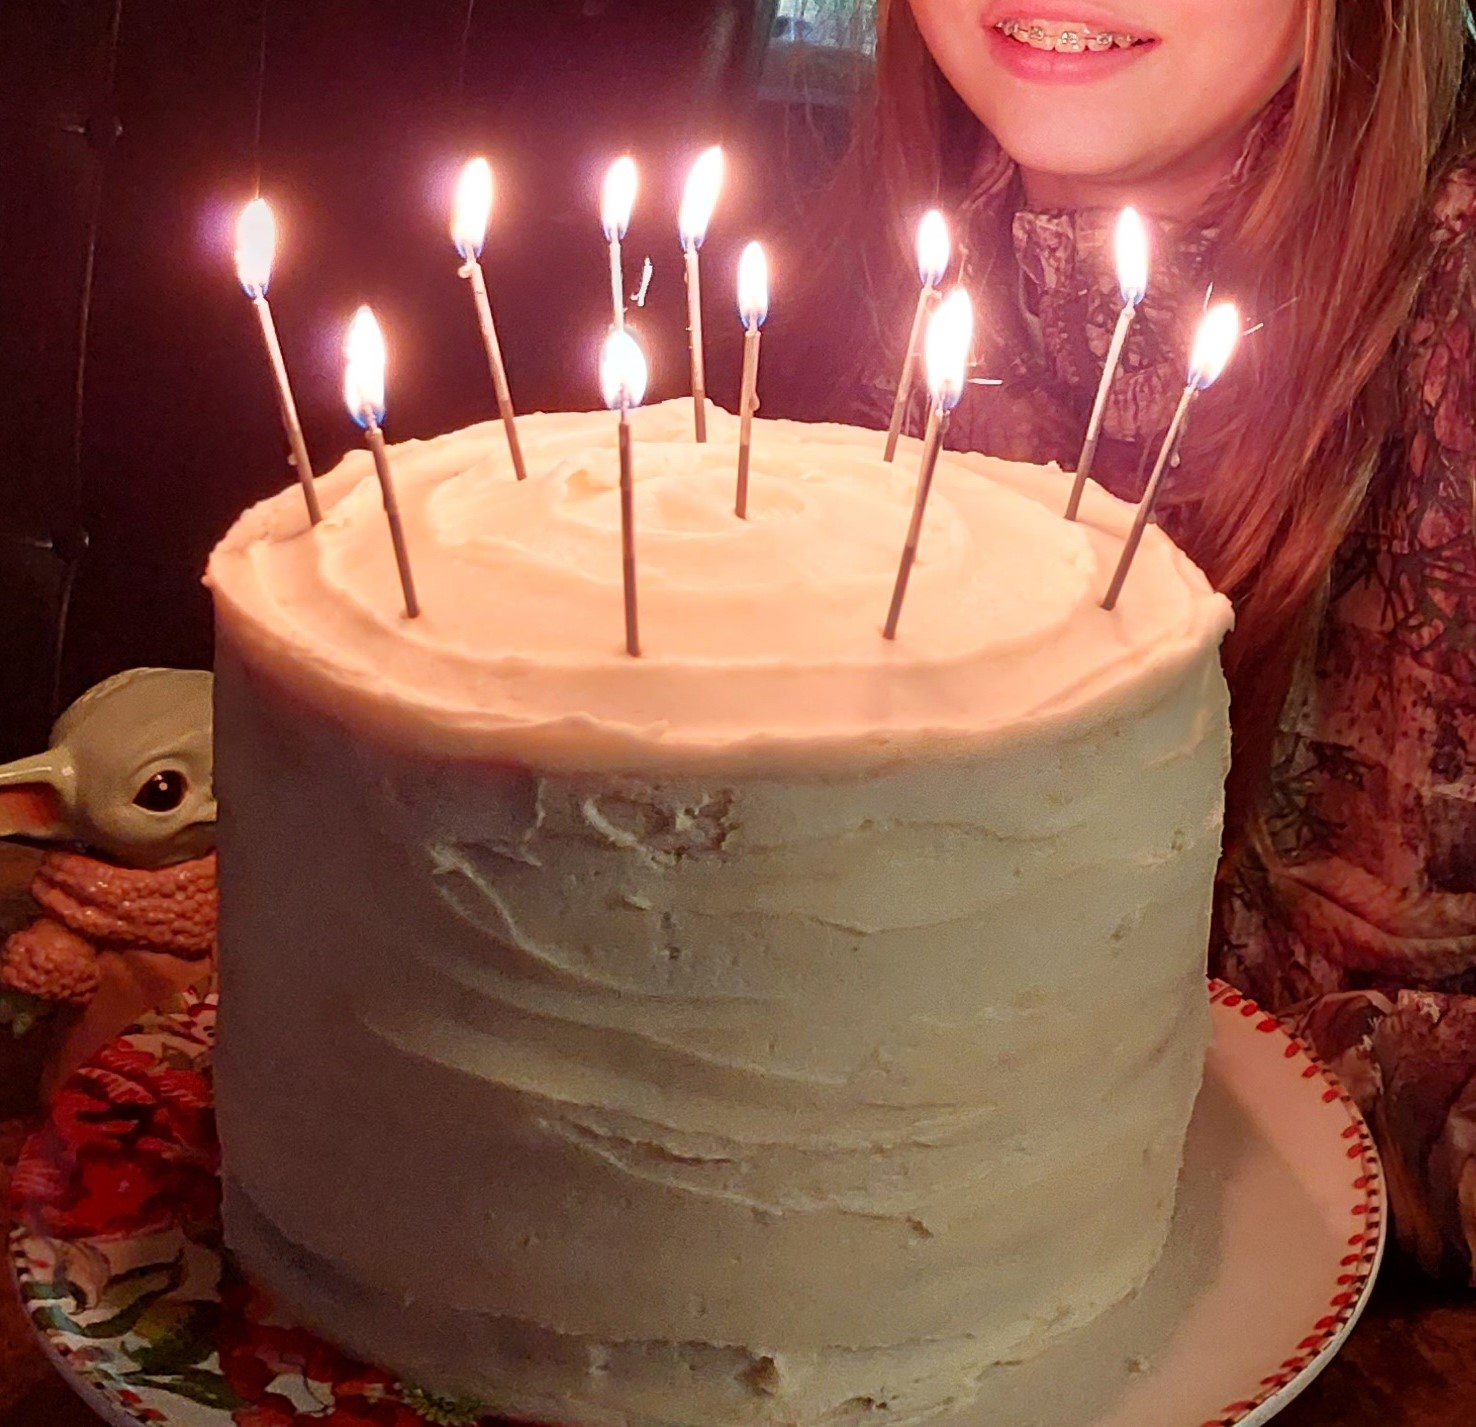
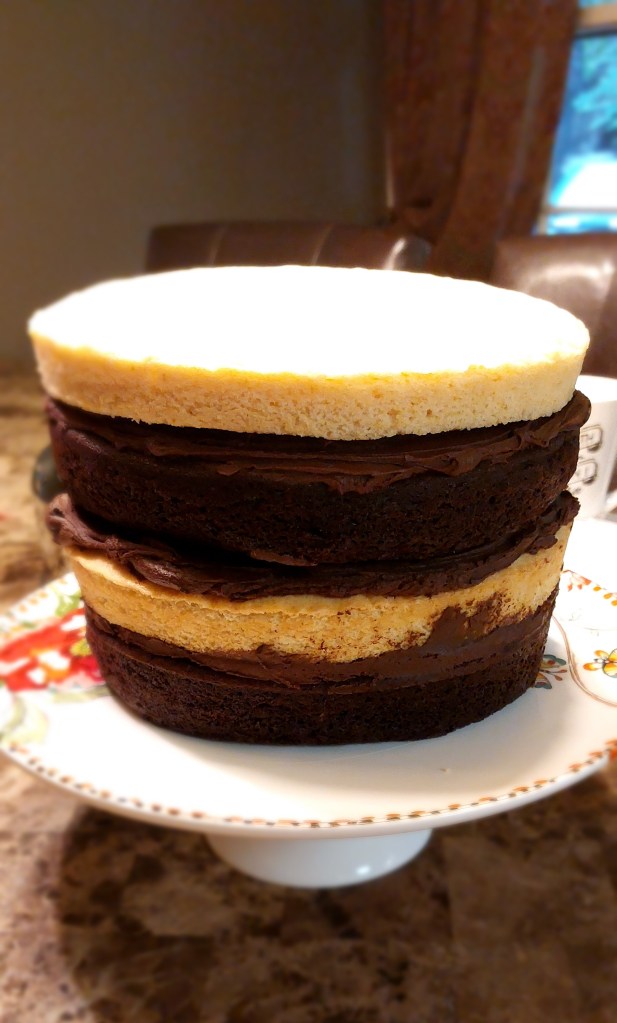
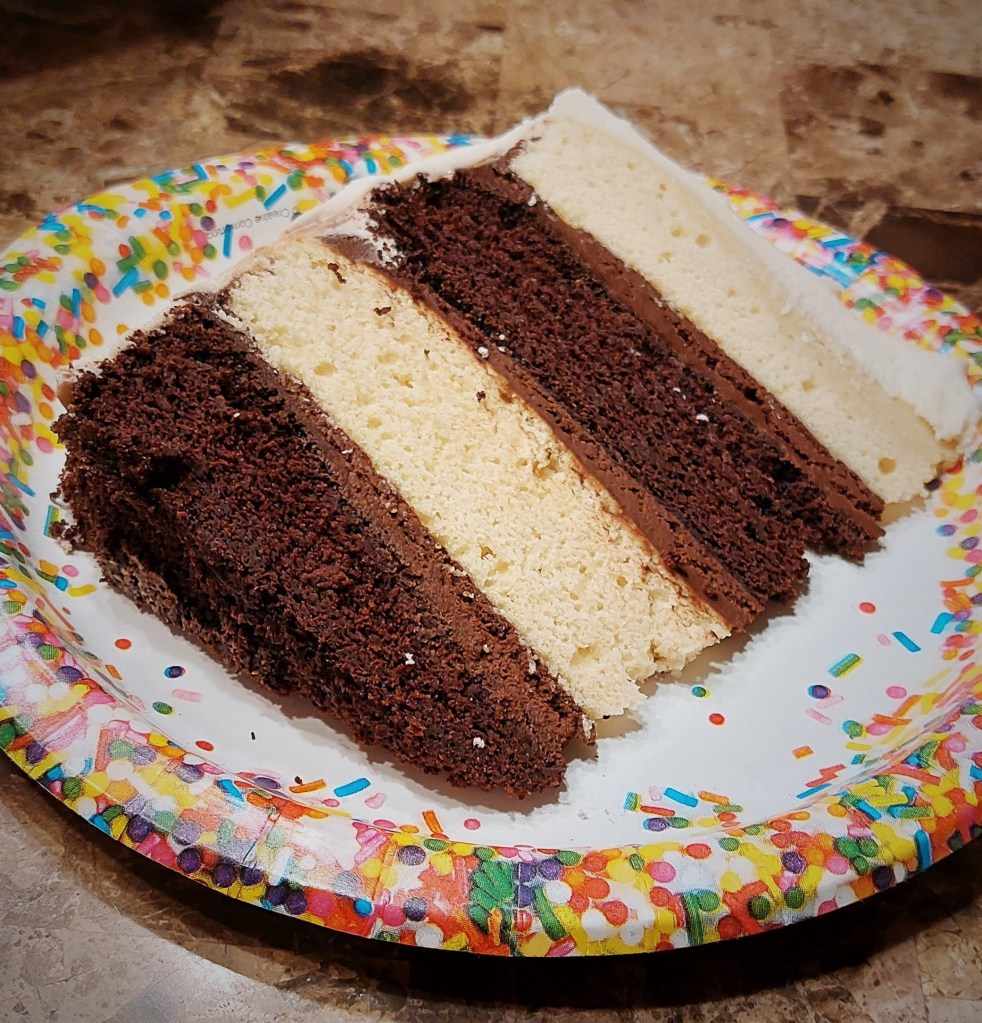
So… it’s August. It’s my granddaughter’s birthday, and her day fell on a school night this year. Her parents are both full time employed and I wanted to be a blessing, so I volunteered to make the birthday dinner and cake. I am a decent cook, I guess, or at least that’s what my family says, but I am NOT a baker, not by any stretch of the imagination, and so perhaps this is what inspired me to blog about this cake, because it is the ONE baking attempt I’ve made that actually turned out, miracle of miracles, and I figure this to be the greatest reason to save it for posterity, i.e. my grandchildren, if indeed we are all still around and we haven’t been raptured by the time they are grown bakers. (Come Lord Jesus). Anyway, the birthday girl wanted “grammie’s tacos” for supper and sooooo that’s what inspired me to go with the Tiago’s cake for her birthday cake. Her special request was for a 2-layer cake, one layer being chocolate, the other layer being vanilla, and she wanted it frosted with a vanilla frosting. Each cake recipe makes 2 rounds, so I ended up with 4 total rounds of cake, and decided her cake would just have to be a 4-layer cake instead. I didn’t think anyone would mind, unless of course it didn’t turn out, but it did, so yay! 😉
My Vanilla Cake recipe:
INGREDIENTS
2 cups granulated sugar (I use just a little less)
3 cups all-purpose flour
1 teaspoon baking powder
1/2 teaspoon salt
1/2 cup milk
1/2 cup water
3/4 cup (1 1/2 sticks) butter, softened
3 small eggs (or 2 large)
1 teaspoon vanilla (I always let it dribble a little over)
1 teaspoon cinnamon
INSTRUCTIONS
Preheat oven to 350*F. Grease the bottoms of two 8 or 9 inch round cake pans, and line with parchment paper. In a large mixing bowl, combine the dry ingredients. Add milk, water, and butter. Beat on medium speed to 2 minutes. Add the eggs, vanilla, and cinnamon. Mix until incorporated.

Once both of my cakes (chocolate and vanilla) were baked and completely cooled, I wrapped them tightly in two layers of cling wrap/plastic wrap and then tucked each individual layer in a gallon size zip-loc bag, pressing out all the air, and then put them all into the freezer overnight. Tip: Baking the cakes the day before makes for less work on the day of the party, plus the cakes are easier to frost when they are frozen, and they stay super moist and fresh for up to 3 months (so I was told by my cake decorating friends).
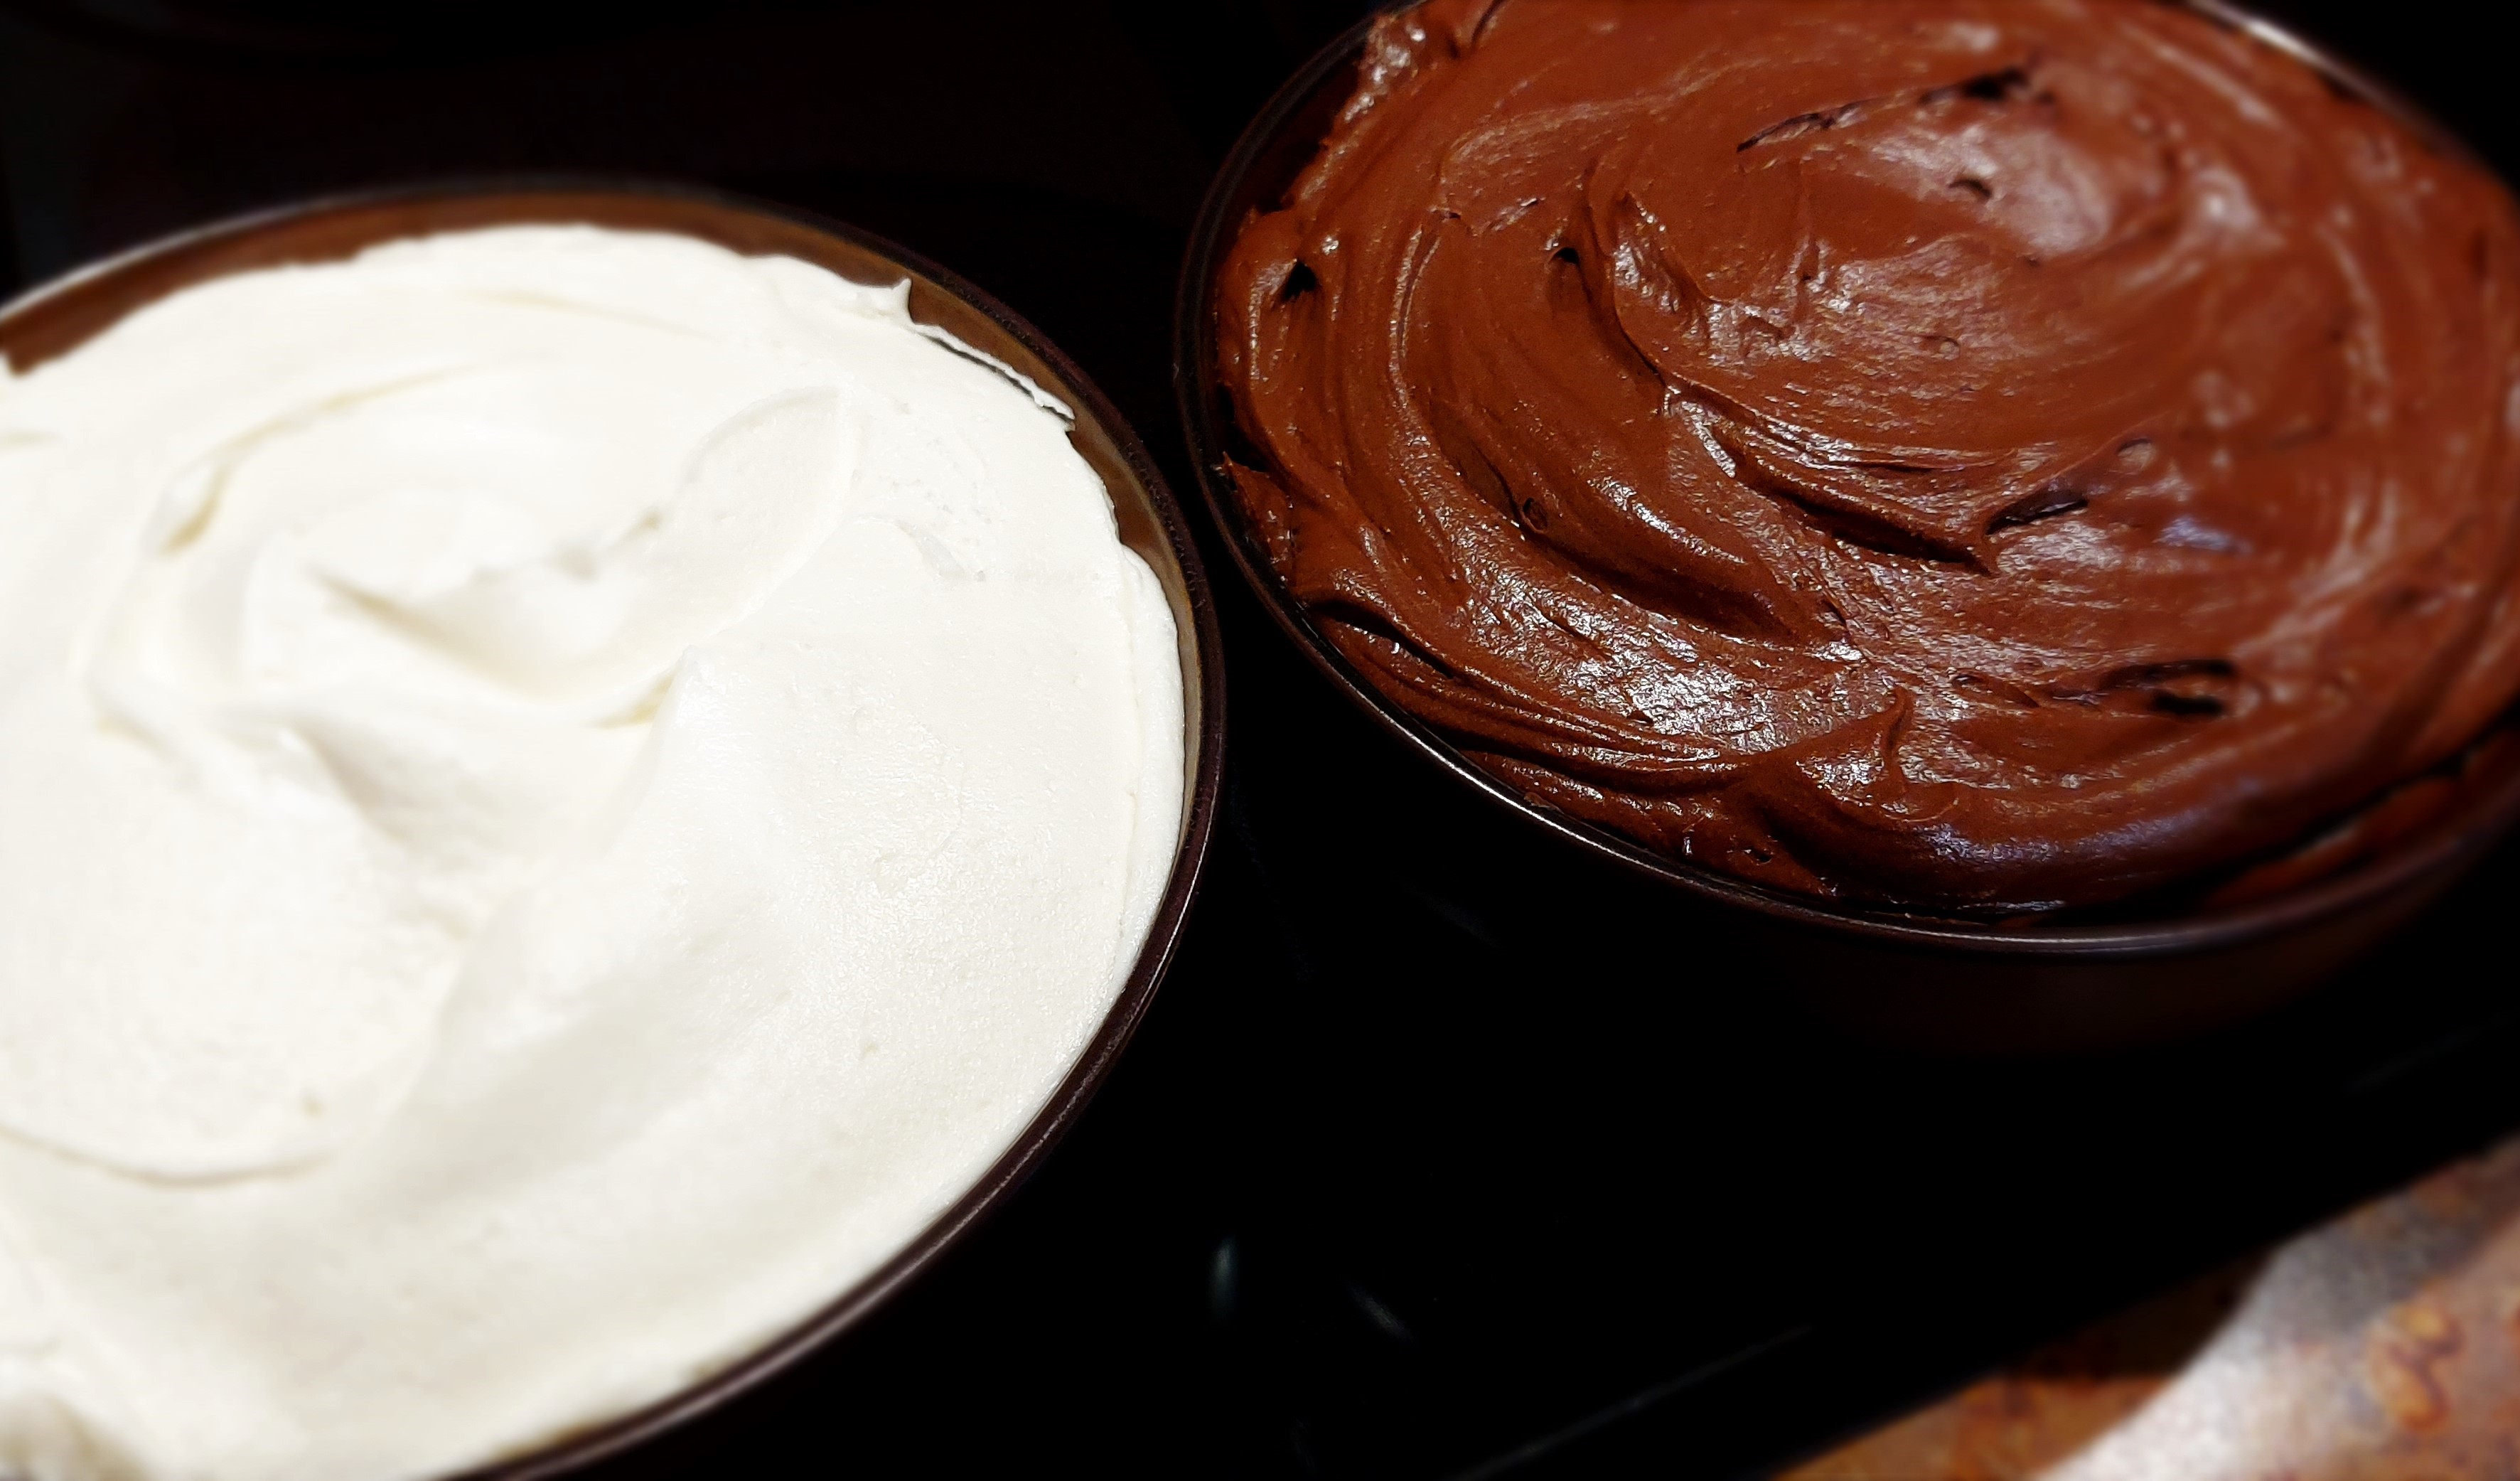
The next day I whipped up my frosting. I didn’t have enough cream cheese to make enough frosting to frost the whole 4 layers, so I whipped up a batch of chocolate buttercream as well as a batch of cream cheese frosting.
Chocolate Buttercream Frosting
INGREDIENTS
12 Tablespoons butter, softened
5 (and up to another 1/2) cup confectioner’s sugar (depending on how sweet you want it
1 cup Dutch process, unsweetened cocoa powder
1 teaspoon ground Saigon cinnamon
2/3 cup milk
1 teaspoon Mexican vanilla (I always splash a little over the measurement)
Pinch of salt
INSTRUCTIONS
In a bowl, beat butter until light and fluffy. In a separate bowl, mix confectioner’s sugar with cinnamon and cocoa. Blend sugar mixture with butter, alternating with milk, beating well after each addition. Beat until smooth. Blend in vanilla.
Cream Cheese Frosting
1 stick Butter, softened
8-oz. Cream Cheese, softened
1 (10-oz.) package Confectioners (powdered) sugar
2 teaspoons vanilla
splash of Half-and-Half
Combine butter and cream cheese in a bowl and beat until light. Add confectioner’s sugar and vanilla and beat until fluffy. Add milk only if needed for the desired consistency, beating until smooth. If you want to add a sprinkle of cinnamon also, do it!!!!
About two hours before the party I took the frozen cakes out of the freezer, unwrapped the first chocolate layer, placed it on my cake plate and slathered it with chocolate frosting on top. I unwrapped a white layer, carefully placed it on top of the chocolate one, and frosted it on top with chocolate frosting. Repeated with the last two layers, leaving the very top layer unfrosted on top. I spread my cream cheese frosting all around the sides of the cake first, and then I did the top last. As you can see I am NOT a skilled decorator either, and I won’t even play one on the Internet. But I am happy to report that the cake was delicious, and a hit with the grateful birthday girl.


This cake was so moist and delicious. I wanted to send it home with the birthday girl (no, I didn’t), but her mother wouldn’t let me (say it ain’t so), saying they already had a bunch of leftover cupcakes from the school party at their house (I’m crying on the inside), plus they are trying to eat healthier (and then there’s that). Oh my. Maybe the 4-layer cake wasn’t such a great idea after all. Soooo, in order to keep me from eating it for breakfast, lunch, dinner, and snacks, for the next two days, because I also am trying to eat healthy (I know, so boring right), I decided to wrap it up and tuck it back into the freezer for the next time the girlies come over for a sleepover. I’ll have to let you know if it stays good frozen with the frosting on it.
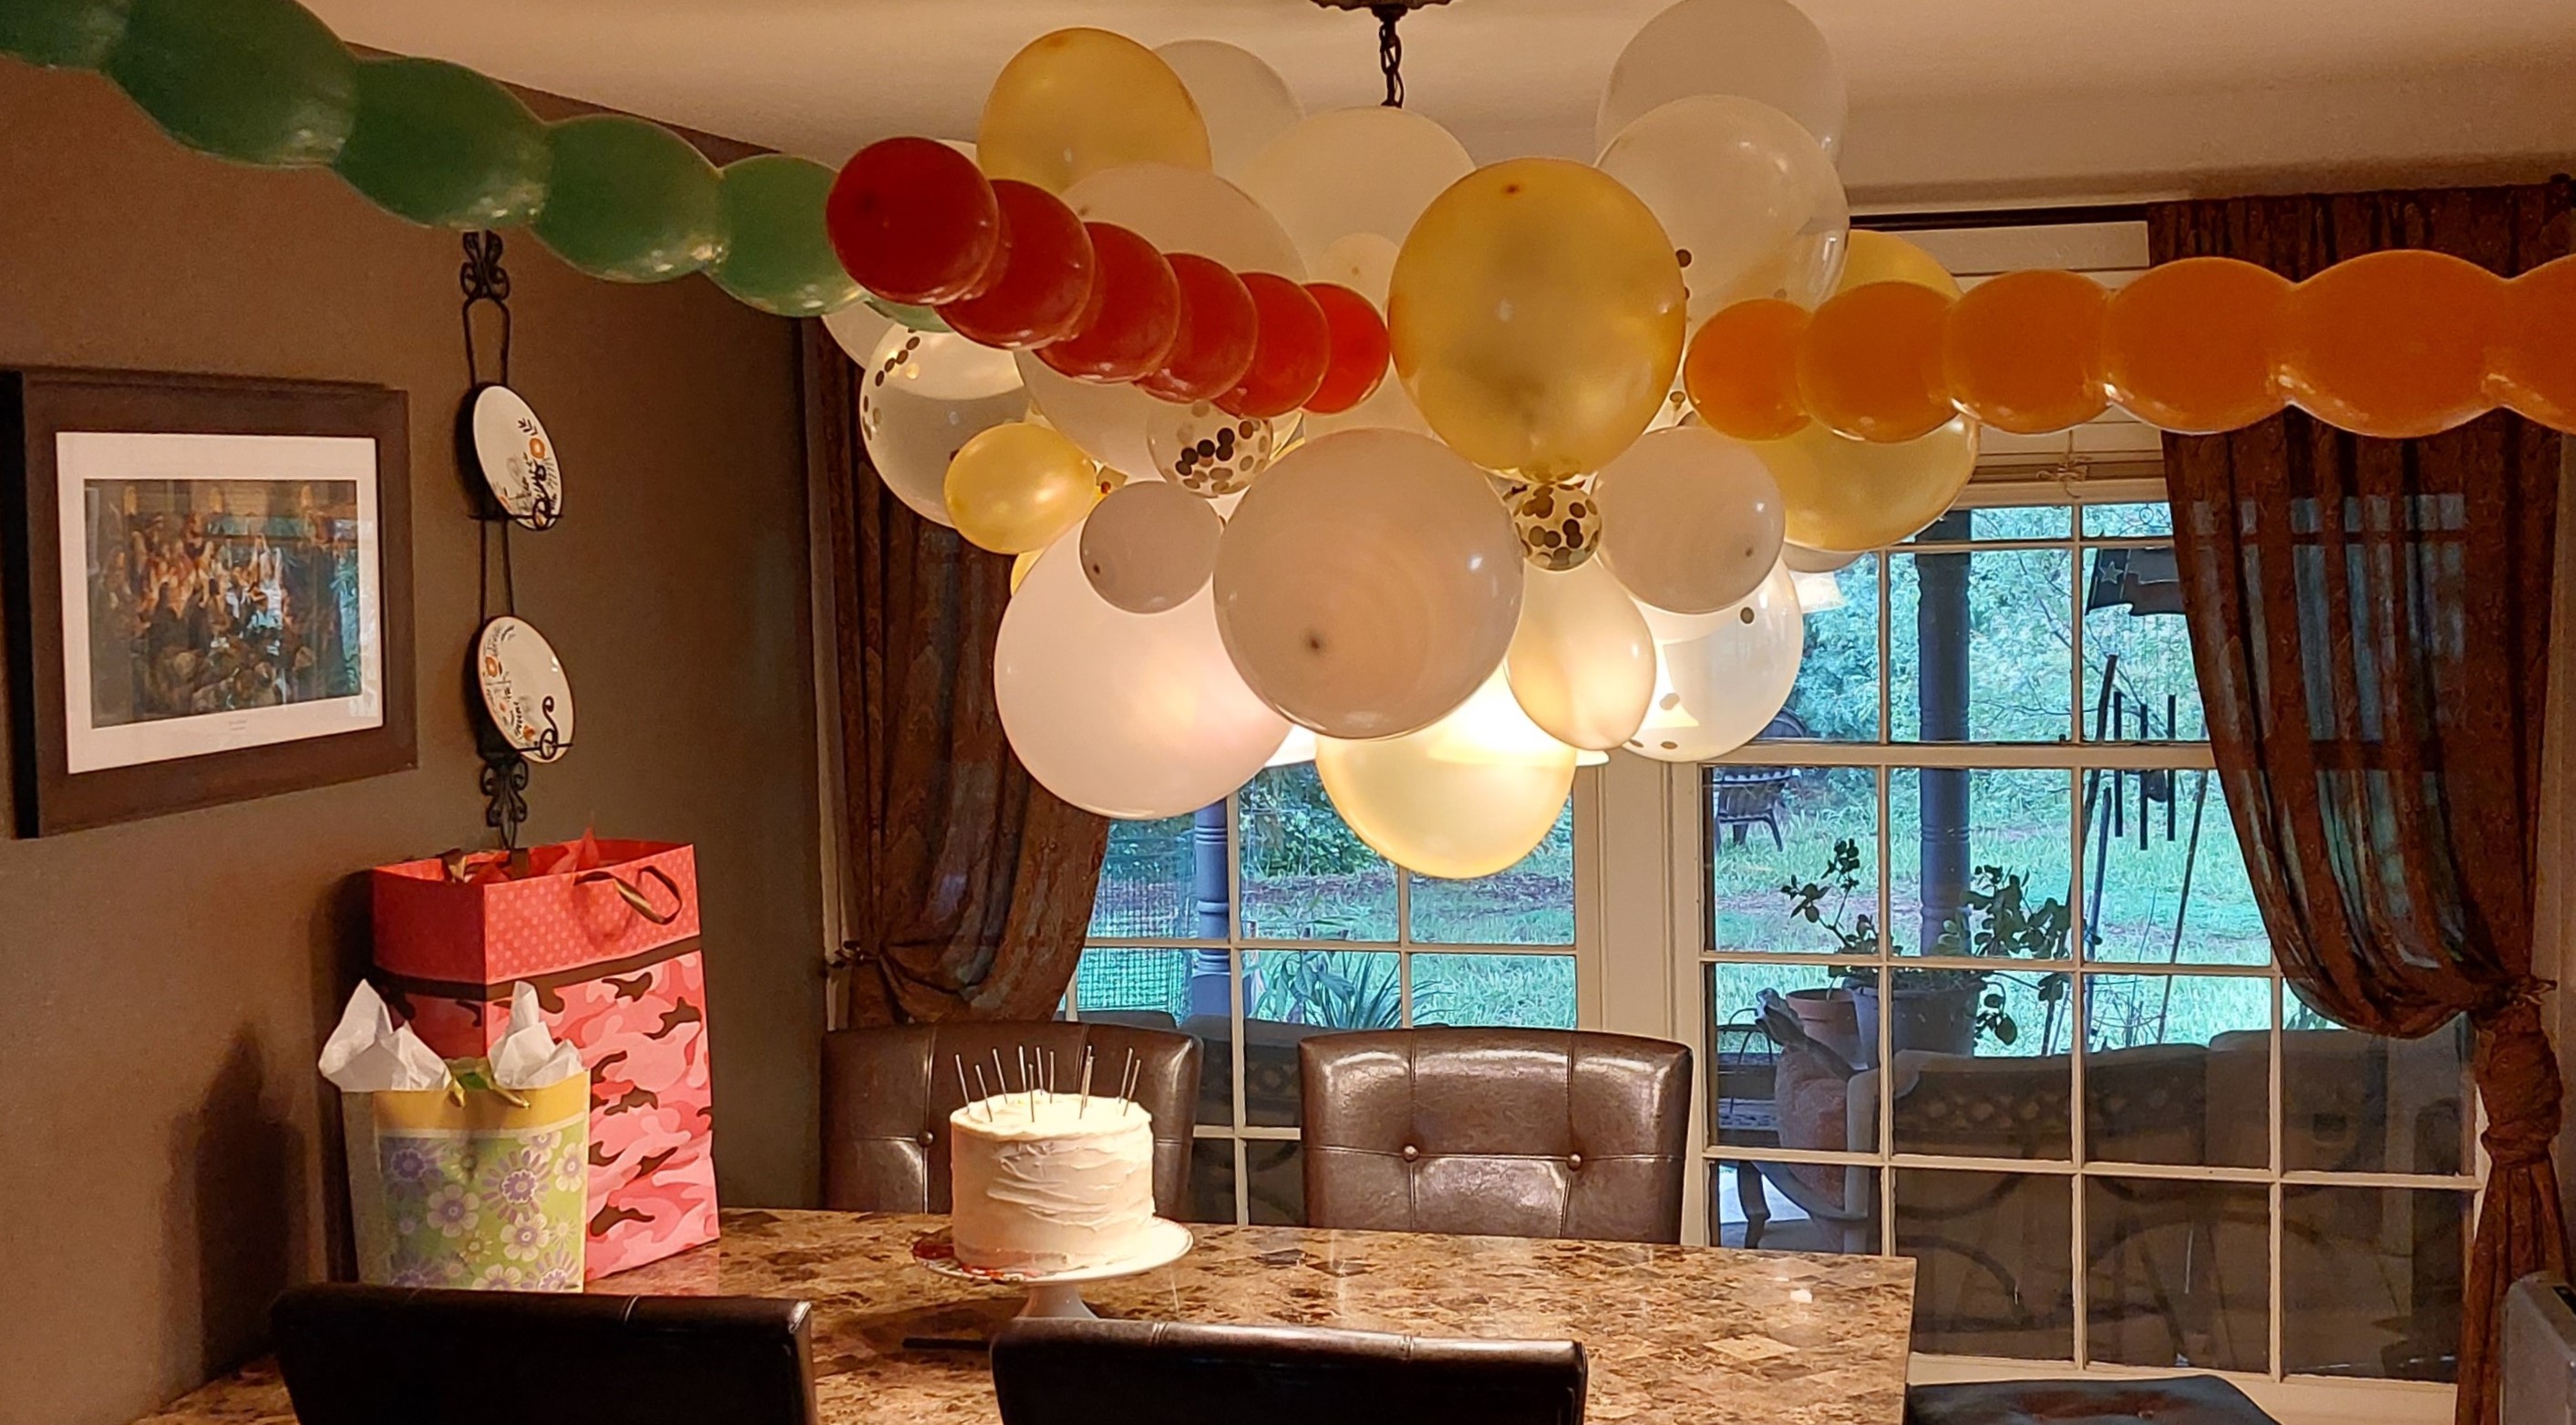
The balloons pictured were a Balloon Arch kit ($7 at the grocery store) that I put together and then wrapped around my hanging dining room light. I had a few of the long bubbly balloons leftover from a previous party (green, red, orange) that I tucked in for a party effect. I would have added more if I’d had them. These kits come with the various sized balloons, and the ribbon (with the holes in it) that is used for holding the balloons in place. I didn’t know how to do this so I spooled up a You Tube video which was very helpful. You basically put all the bigger balloons into the tape, and save the little ones to fill in the spaces afterward, using glue dots, or I used invisible scotch tape. Unfortunately one kit won’t make an arch. Mine only ended up to be about 4 feet long, so I decided to do this with it instead.
And you know what? I was just thinking… (yes, that’s what that awful noise was) …as far as freezing cakes go, if you are an empty-nester and only cooking for two now-a-days… if it is true that naked cake keeps for up to 3 months in the freezer wrapped up correctly, why not bake a couple of cakes and freeze them for those nights when you want dessert, but don’t want to go to a lot of fuss. Cut each cooled round into 4 pieces, wrapping and freezing as described above, then tuck the wrapped pieces into a gallon size zip-loc freezer bag and press all of the air that you can out of the bag. Finally, mark the outside of the bag with the expiration date (so you’ll know it’s still good when you find it 2 months from now and have long forgotten that you did this). Also make up a batch or two of frosting and portion it out into little snack size cups (with lids). Make sure to fill the cups completely so that the lid smashes down on the frosting when snapped on, so there is no air space. Place those cups in a zip-loc bag and into the freezer also, next to the cake. The next time you and hubs are craving something sweet after supper, all you have to do is pull out a piece of cake from the freezer, and a frosting cup, let them thaw on the countertop together. Maybe you’d rather whip up a small batch of ganache instead of the frosting? Cut the cake in half, pop it into the microwave for 30 seconds (if you want it warm), and slather each with thawed frosting or warm ganache. Can be served with a scoop of ice cream (cinnamon, if you can find it), a squirt of canned whipped cream, and a dusting of cinnamon on top, if desired. And there you go… Tiagos (almost) in an instant. Make some coffee to go with your cake and curl up in front of a good movie or go outside and sit by the firepit and enjoy a cool fall evening together.
“For I know that my Redeemer lives, and He shall stand at last on the earth; and after my skin is cast off, this I know, that in my flesh I shall see God. Whom I shall see for myself, and my eyes shall behold, and not another. How my heart yearns within me!” Job 19:25-27

