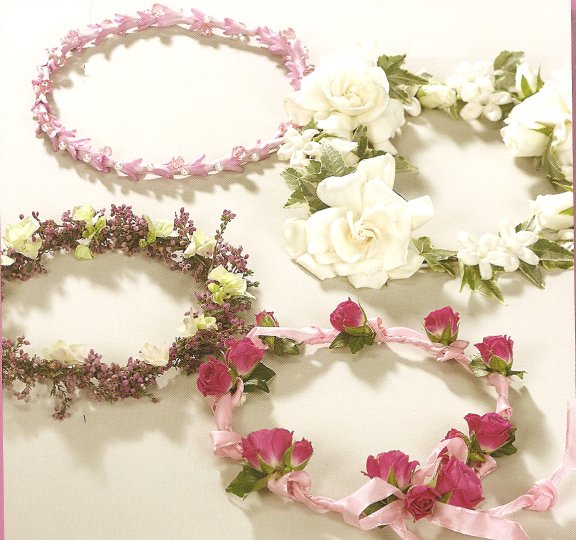
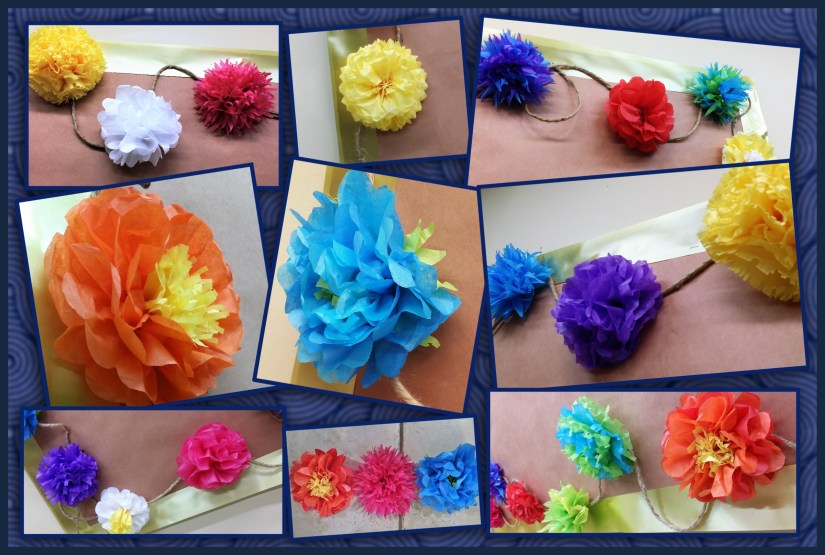
I was given the opportunity recently to make a bunch of tissue paper flowers for a school project. I had so much fun with it honestly, and thought, these sure would make a beautiful decoration, or they could be used for head garlands (as pictured here) which are pretty popular in Texas, or Homecoming Mums (another Texas thing), or to decorate Derby hats, or for a garden tea party, or luau, or FiEsTa (which happens to be going on in San Antonio at this very moment), which got me to thinking that somebody else out there might appreciate knowing how to make these. I also sure don’t want to ever forget how I made them, so… that’s as good a reason as any to blog about something, me thinks.
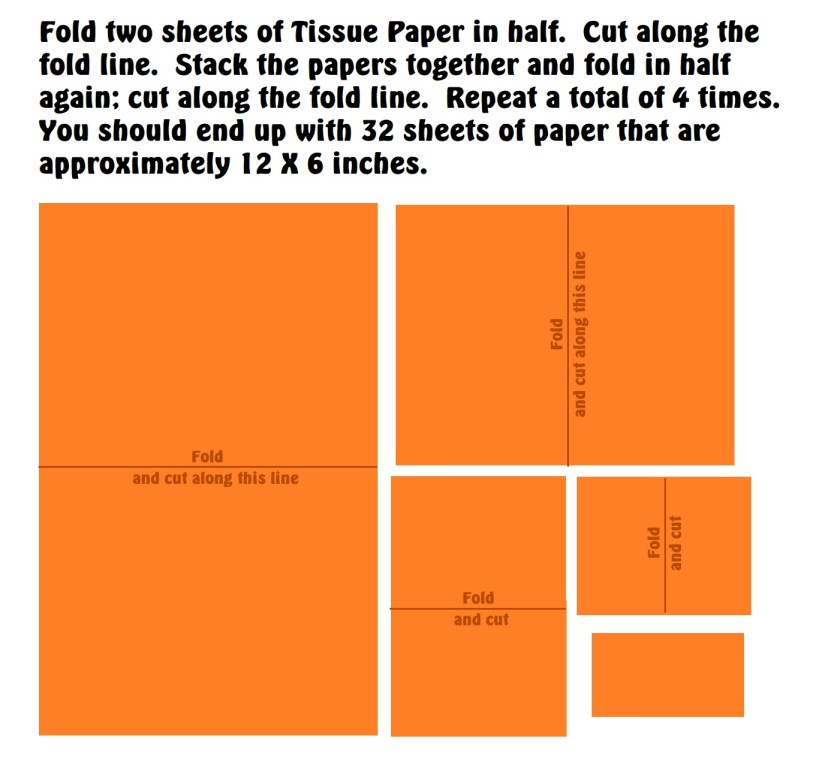
Materials needed: 1 package of multi-colored tissue paper, a good pair of sissors, a stapler, and string (optional).
A large package of multi-colored tissue paper is fairly inexpensive to buy at the big box stores ($10 for 100 sheets). And one of those packages will give you more than enough paper to make 100 flowers that are roughly the size of one of those mesh shower pouf thingies. (If you want to make giant flowers, you could probably squeeze 10 or so out of a package???)
So here is how you make them. First open the package of tissue paper and separate the colors. Straighten up the sheets so that they lay exactly on top of each other. Peel off two sheets of one color of the tissue paper.
Now, I’ve included visual instructions below that will hopefully be easy to follow, but I will also explain…
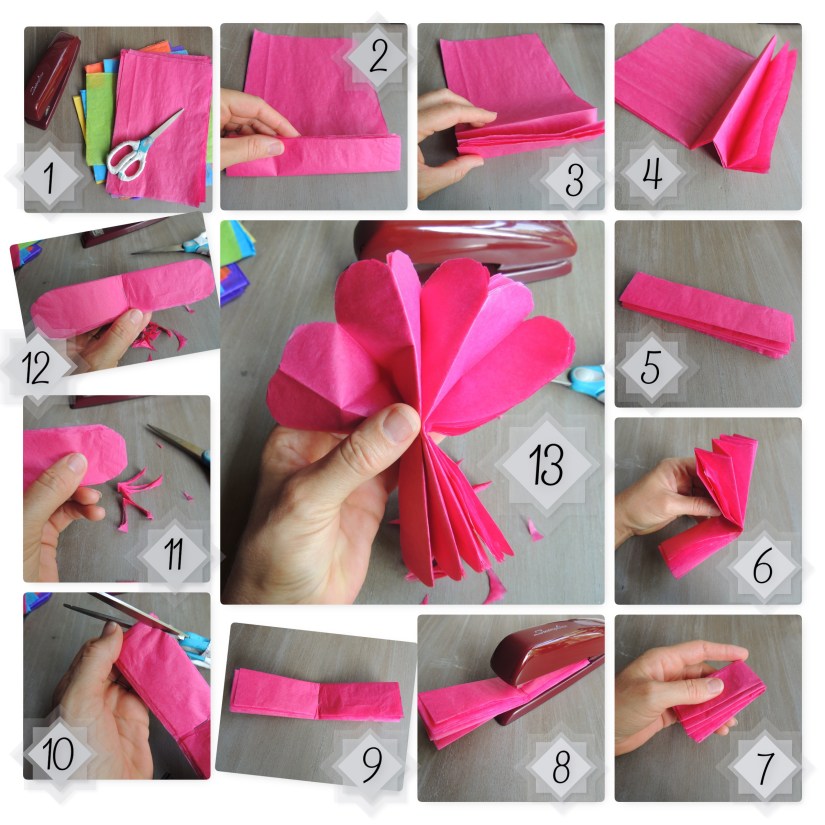
- Gather your materials. It will help to have a large table where you can spread out the tissue paper into individual color piles. (My poor sissors, you’ll notice, have issues, actually just one issue. I don’t know what happened, but they are Fiskers, and the handles have decomposed over the years since I first bought them. They are sticky now, and almost clay-like. The stuff was coming off on my hands and making my hands sticky, so I wrapped the handles in strips of paper towel. Has this happened to anyone else? Or is it just the humidity in the south that has made mine do this?)
- Peel off 5 sheets of tissue paper and stack them together neatly. Then starting at the bottom fold up about an inch width and press it flat.
- Flip the stack over and fold the other direction, and press flat.
- Continue folding in an accordion pattern until you reach the other end.
- Press the stack flat.
- Fold the stack in half to mark the center place.
- Press it flat to make a good crease.
- Open and place under the stapler, and place a staple on exactly that center crease line. Option: you can also tie a string around this center part so you will have something to tie the flower, to attach it to whatever you are decorating.
- (Photo just shows the staple being present)
- Now cut one end with whatever pattern you wish for the type of flower you wish to make (see diagram below)
- Cut the first end and discard the scraps
- Then cut the second end to match
- Fan out the ends to make it easy to separate the individual sheets
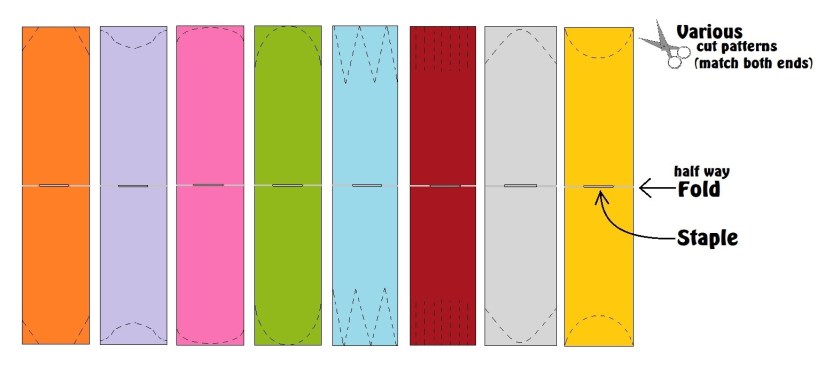
- Orange shows a gardenia type flower
- Purple shows a hydrangea type flower
- Pink shows a peony type flower
- Green shows a magnolia type flower
- Blue shows a Zinnia type flower
- Red shows a Carnation type flower
- Gray shows a Dahlia type flower
- Yellow shows a Chrysanthemum, or Mum type flower
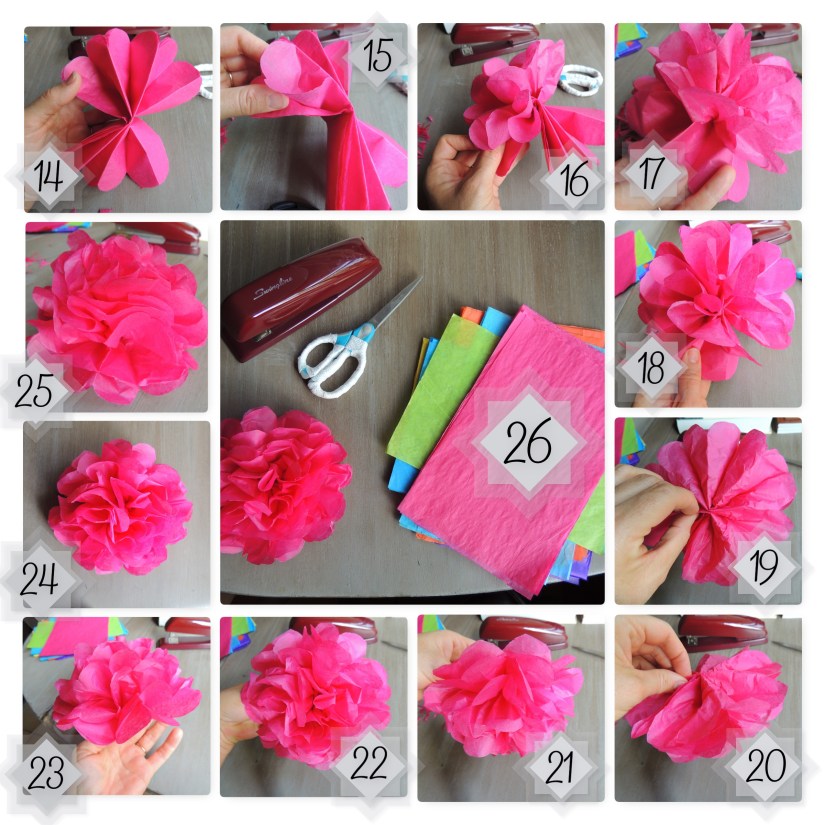
14. Fan out both ends
15. Carefully peel off the top sheet and pull it away from the others, up towards the center
16 – 18. Continue separating sheets and pulling them up towards the center on both ends, going around in a circle
19. Smooth out the last sheet to flatten out the bottom
20 – 23. Bring the flower around and fluff each peddle to make them all uniform and fill in any gaps.
24 – 26. Set your flower down and admire how pretty it is. Then pick another color and continue making flowers.
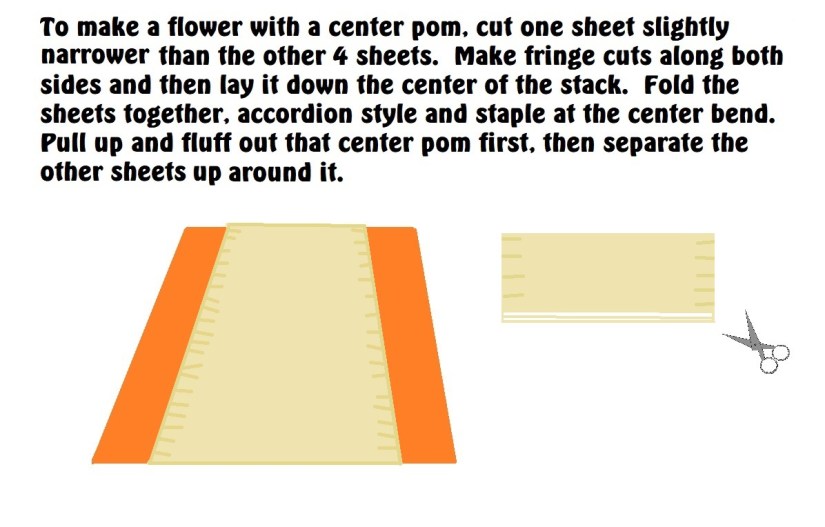 The center pom kind of makes a flower that looks like a cactus flower. You can do the same sort of thing with green tissue going out the bottom to look like the bud part of the bloom (just cut it with deep zig zags instead of the fringe). You can also experiment with various cuts, and you can also layer two colors of tissue together to make more interesting options. Here are some samples of the flowers I made. They turned out soooooo pretty?
“Listen, my son, to your father’s instruction
and do not forsake your mother’s teaching.
They are a garland to grace your head
and a chain to adorn your neck.”Proverbs 1:8-9 NIV