I was recently blessed with the task of throwing a book party for my granddaughter’s classroom, to celebrate their finishing reading the book, The Sign of the Beaver. It was a “Dinner and a Movie” party, in which I was asked to provide the food and decorations. The party took place over their lunch hour. I set the food up as a buffet, and arranged a few minimal decorations while the kids were in PE, which mostly consisted of stuffed animals and a river. After a brief explanation of all the foods, the kids were allowed to help themselves and eat while they watched the movie. And when the movie was over the teacher did a little activity with them to compare the movie to the book. The kids were so excited, and not only did they eat everything, they asked to take all the leftovers home with them. All that was left was a little bit of stew in the bottom of the crock pot, so I would say it was a success! What a great group of kids, always so grateful and always a ton of fun to spoil.
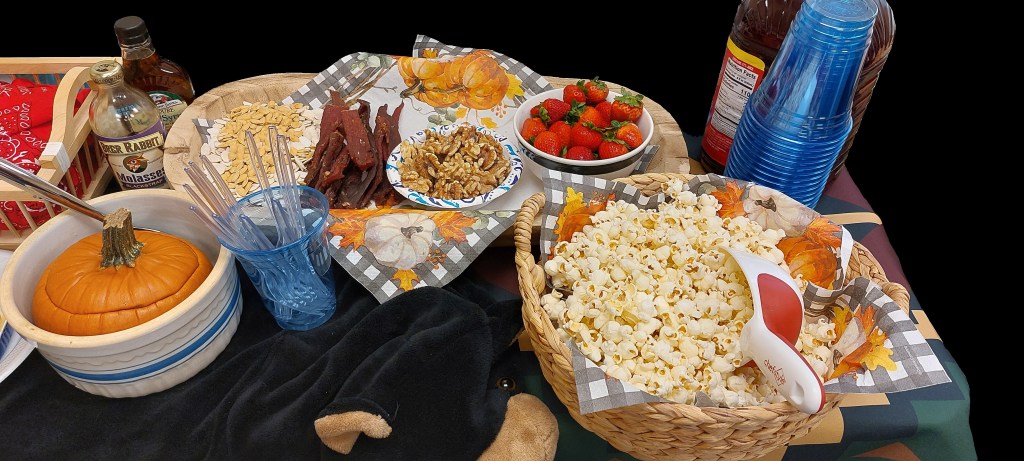
This has become, honestly, one of my very favorite volunteer activities in the whole wide world to do, even though it is a ton of work. It is a labor of love! In order to prepare, I read the book and made a list of all the foods mentioned, as well as took notes of some decorating ideas that I hoped would kind of bring the book to life for the kids. I had never read this book before, and shame on me, because it is a terrific little book. I am a huge fan of historical fiction and children’s novels are just my speed. I’m not much of a reader, for a plethora of reasons, but when it only takes about three hours to knock a book out, that’s in my wheelhouse. So, after reading it I set out doing some research to find authentic northeastern tribal recipes for the foods mentioned in the book. It couldn’t have been more perfect for this party to come during Thanksgiving/hunting season, and during the last harvests of our gardens. And for a beverage I brought two jugs of “Penobscot River water” and let the kids sweeten it with a bit of maple sugar.
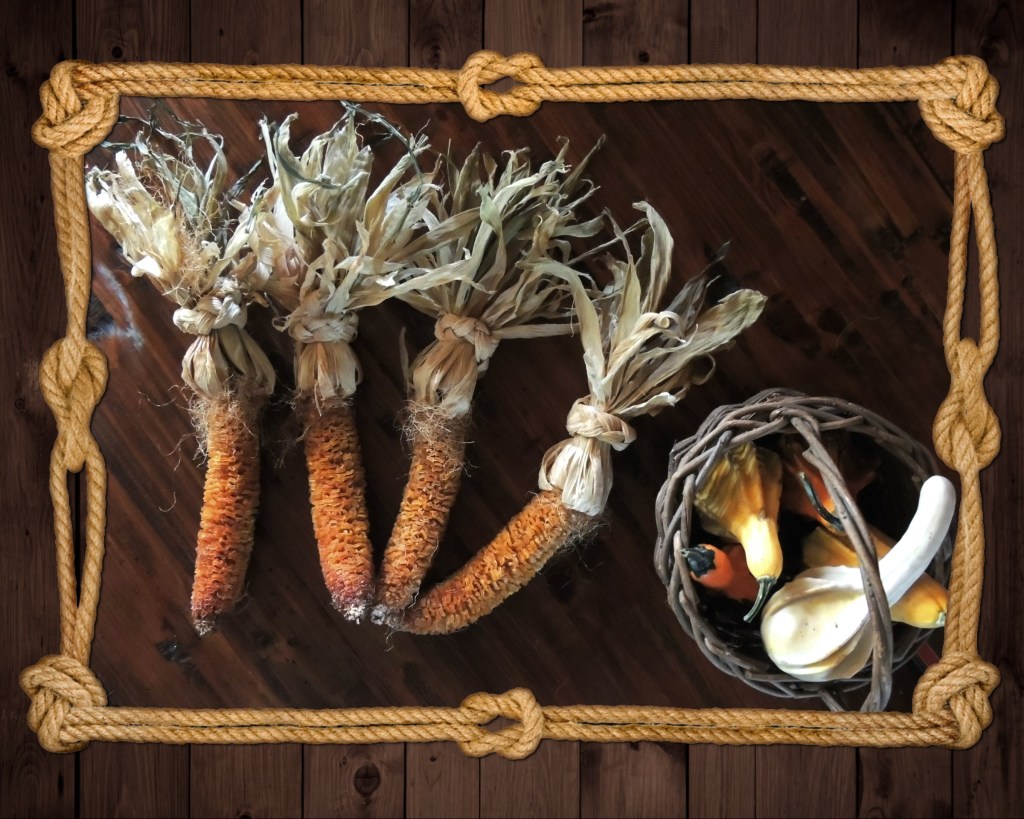
I decided to center the party around the idea of the Bear Feast that was celebrated in Attean’s village after Attean and Matt encountered and killed a bear in self-defense while they were out retrieving a rabbit from one of the snares they’d set up. I also wanted to incorporate some of the wild game, the maple sugar Attean gave to Matt, and some of the fruits and berries and native foods that would have been eaten back then.
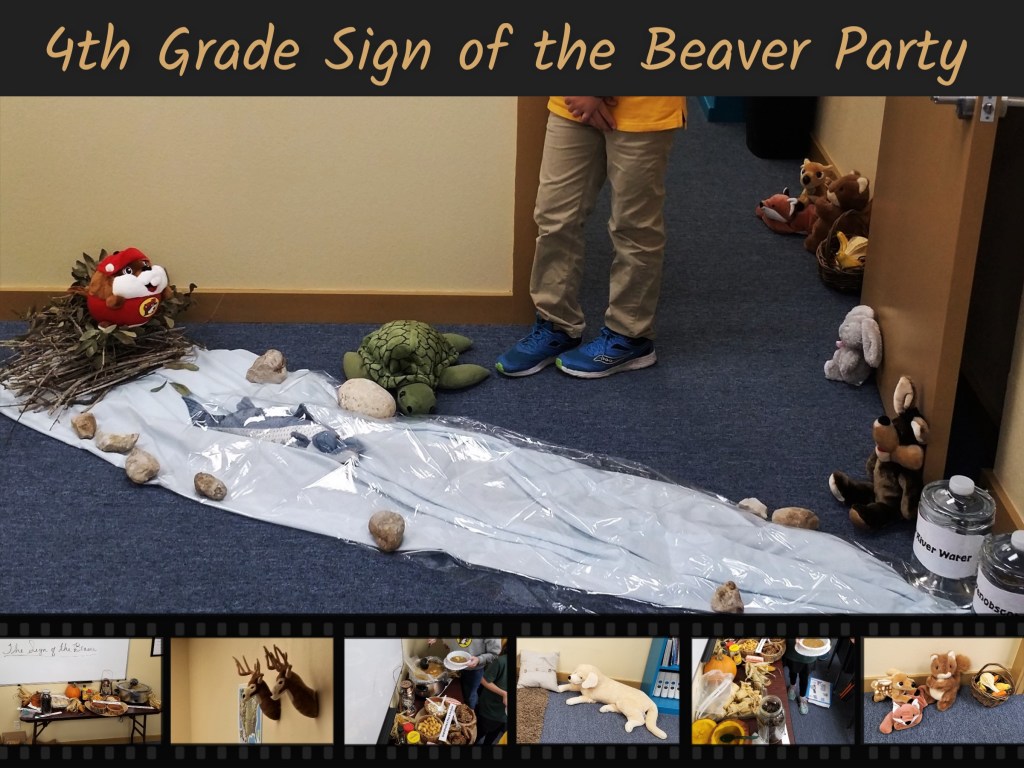
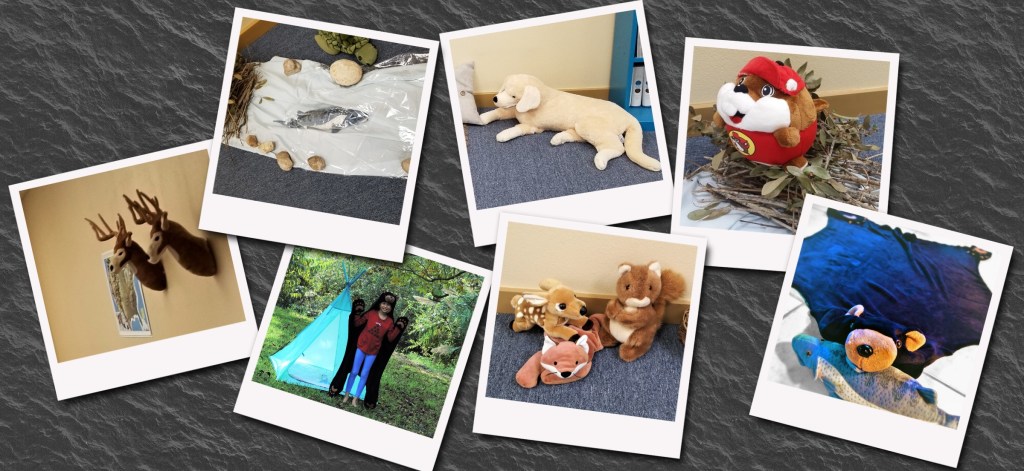
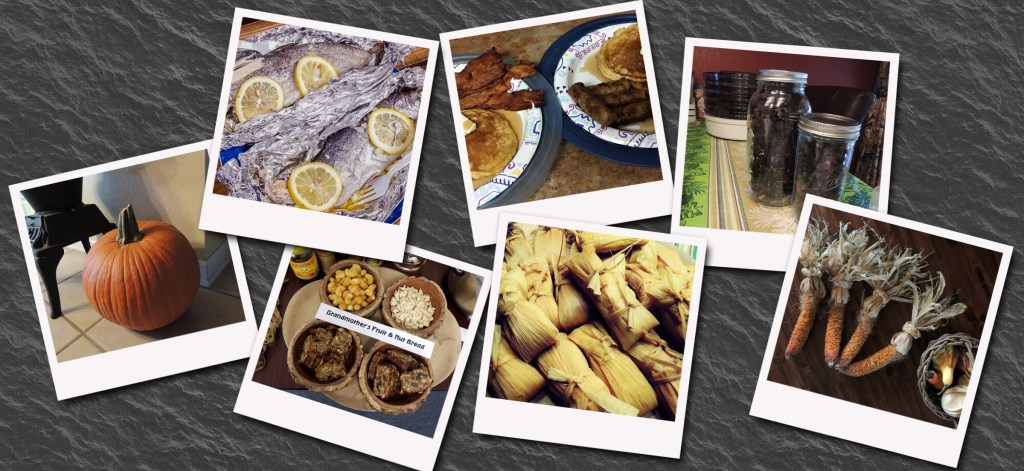
DECORATIONS: The book’s setting is in the late summer into early wintertime of the year, early/mid 1700’s Maine, and in the vicinity of the Penobscot River, where Matt and his dad cleared a tract of land, built a cabin, and planted a garden. Attean and his Indian tribe lived nearby. It was a wooded area teaming with wildlife, maple trees, and wild berry bushes. So for decorations I decided to gather up all the stuffed animals we had that would represent the animals in the forest: a bear rug/blanket, bunny rabbit, fox, deer, squirrel, fish, turtle, beaver, and Attean’s useless dog. I also gathered up a blue bedsheet that I used to make a river with the first time I threw this party (I used bulletin board paper the second time), a pile of sticks on one end to make a beaver dam, some rocks to line the river (and the second party I used the rocks to hold the tree upright), and because we’re in Texas, I used a Buc-ees Beaver the first time I threw this party to sit on top of the beaver’s sticks. I used some gorgeous, colorful, fall paper maple leaves to scatter around beside the river. I drug my little tree to the school to set beside the river and I used a Drimmel Tool to carve a beaver design into a tree stump, which I used as a decoration. The Teepee shown in the photo below was an afterthought, I wish I would have remembered to bring it to the party, but considering the northeastern Indians actually lived in wigwams, rather than teepees, t’was no biggy I guess.
In case you’re thinking of throwing this party and would like a great big bear rug to spread on the floor for your party, don’t go spend a fortune at an Outdoor store before you check your local thrift stores. I frequently find a giant teddy bear at Goodwill for $6, which would work marvelously as a rug with all the stuffin’s pulled out. I already had a bear blanket at home that I thought would work just dandy. BTW: Goodwill is a great budget friendly place to bargain shop for theme parties!
FOOD: Some of the foods mentioned in the book consisted of Johnny Cakes, which Matt’s dad made the last morning for breakfast, before he left his 12/13 year old son in Maine to care for the cabin and garden alone, while he went back to Massachusetts to retrieve Matt’s pregnant mother and sister. He left Matt with his good rifle to hunt with, and for self defense. Some of the animals they hunted were deer, rabbits, and fish with one precious fish hook.
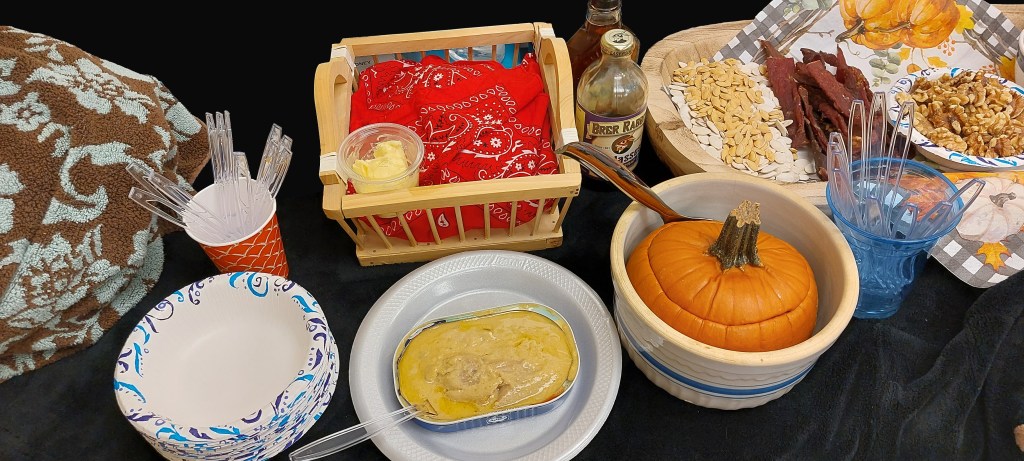
I made deer jerky out of a couple packages of deer cutlets gifted to me by one of the parents. My sister has the absolute best jerky recipe on the planet and so I used it, and only modified it slightly, so it wouldn’t be too spicy for the kids. This is my adaptation:
Sister Geraldeen’s Beef (or venison) Jerky
1 3-lb roast, fresh, raw (it is easiest to slice if placed in the freezer for about an hour)
16 oz. Soy Sauce
2.5 oz. liquid smoke
1 cup dark brown sugar
1 tsp Salt Lick dry rub, with garlic (equal parts cayenne powder, black pepper, and garlic powder)
Stir together in a large oblong glass baking dish until sugar is dissolved.
Using a sharp knife, slice lean meat into thin strips (1/4 to 1/8” thick and 1/2 to 1” wide). Slice across the grain for a tenderer product. Lay the slices down into the marinade until the meat takes up most of it. Cover with plastic wrap, pressing it down on top of the meat so the marinade covers the meat completely. Place in refrigerator overnight.
In the morning, drain off and discard all of the marinade. Then mix together these dry ingredients in a separate small bowl:
1 Tablespoon cracked Pepper
1 Teaspoon Crushed Red Pepper flakes
1 teaspoons of Chili powder
Sprinkle over drained meat strips and toss with hands to coat evenly (I use latex gloves). Preheat food dehydrator. Lay strips of meat on each rack leaving small spaces in between the pieces for good air circulation. Stack the racks in the dehydrator, cover, and allow to dehydrate undisturbed for about 8 hours. Check the meat for doneness, and let it dehydrate more if still wet or bendy when cooled. Depending upon your dehydrator, it could take up to 24 hours or more for the meat to fully dry. Meat is done when a piece removed and cooled will break in half easily and not bend or fold at all without breaking.
If you don’t have a dehydrator you can buy a package of disposable Aluminum Grill Liners (I use KT’s Clean BBQ brand available from Home Depot) or online, and completely cover the racks in your oven with them, then lay the strips of meat on those. Also lay a sheet of aluminum foil in the bottom of your oven to catch the drips. Adjust the racks to that they are placed in the center of your oven, and then set the oven temp to its lowest setting. Mine will only go as low as 170 degrees F. Prop the oven door open a little bit with a wooden spoon so the moisture can vent out as the meat dries. It won’t take as long to jerk your meat in the oven at that temp as it will in the dehydrator, so check it after about 4 hours, and then every half hour or so after that until the meat is dried as described above.
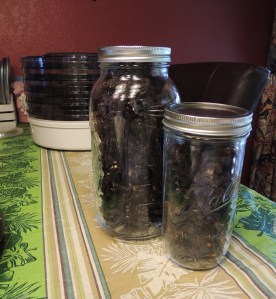
Place finished jerky in clean, sterilized mason jars, and use a Food Saver to remove all the air from the jars. Place jars in a cool, dry place for up to two weeks. For longer storage, place in refrigerator and eat within a month.

Johnny Cakes
I ran out of time to make these for the the first party (poor time management the morning of the party), but I did make them for the second party, and the kids loved them, especially with real butter and pure maple syrup on top. YUM!
Ingredients
1 cup flour
1 cup cornmeal
2 eggs
2 1/2 teaspoons baking powder
2 tablespoons sugar
1 teaspoon salt
3/4 cup milk
1/2 cup water
1/3 cup melted butter
1 teaspoons vanilla
1/2 teaspoon nutmeg
Butter or oil for frying
Instructions
1. In a large bowl, mix cornmeal, flour, sugar, baking powder, nutmeg, and salt. Make a well in the center, and pour in milk, water, egg, vanilla and melted butter. Thoroughly mix until pancake mixture is smooth.
2. Heat a lightly oiled cast iron or frying pan over medium high heat. Scoop about 2 tablespoons of the batter onto the pan.
3. Fry each Johnny cake until brown and crisp; turn with a spatula, and then brown the other side.
4. Remove and serve immediately with syrup and/or butter. These can be eaten hot for breakfast, or cold as a snack later in the day.

Three Sisters Harvest Stew (a.k.a. Bear Stew)
INGREDIENTS
1 pound beef stew meat
1 teaspoon ground cumin
Kosher salt, as needed
Black pepper, as needed
2 tablespoons neutral oil, such as canola
1 large yellow onion, diced
3 garlic cloves, minced
4 cups turkey, chicken, or beef stock, or combo (low sodium bone broth),
1 rib of celery
1 large carrot
8 small red or yellow potatoes, cut in half
1 medium yellow squash, diced
1/4 cabbage, chopped
1 (15-ounce) can kidney beans, drained
2 cups fresh or frozen cut green beans
1 (14 1/2-ounce) can chopped tomatoes
2 cups fresh or frozen corn kernels
1 (4-ounce) can roasted green chilies (1/2 cup)
Add 1 jalapeno, unless using spicy green chilies
½ bunch fresh cilantro, roughly chopped
PREPARATION (YIELD: 8 servings – TIME: 1 hour 40 minutes)
Season beef with cumin, salt and pepper. Heat oil in a Dutch oven or large heavy-bottomed saucepan over medium-high heat until it shimmers. Add beef, in batches if necessary, and cook, turning as needed, until lightly browned on all sides, 5 to 6 minutes. Transfer beef to a bowl and set aside.
Add onion to pan and sauté, stirring occasionally, until translucent, 5 to 7 minutes. Add garlic and sauté, stirring occasionally, until lightly colored, 2 to 3 minutes. Return beef to pan, along with stock and bring to a boil. Lower heat to medium simmer and cook meat until almost tender. Add carrots, celery, potatoes, and bring to a boil. Cook 20 minutes, then lower heat to medium.
Add beans, tomatoes, corn, chilies and squash, and cook, uncovered, over medium heat until stew has thickened, about 10 to 15 minutes. Reduce heat to medium-low and simmer, covered, for about 10 minutes. Add cilantro and season to taste with salt and pepper.
COOKING NOTES
Three sisters is so-called because Native Americans inter-planted corn, beans and squash in the same mound. The 3 thrive together because corn provides a natural pole for the beans to climb, the beans fix nitrogen in the soil, and the squash leaves shade the ground to prevent the growth of weeds, and also helps to hold soil moisture.
Recipe adapted from: https://cooking.nytimes.com/recipes/1016956-three-sisters-stew

Grandmother’s Indian Cornbread (Broadswords)
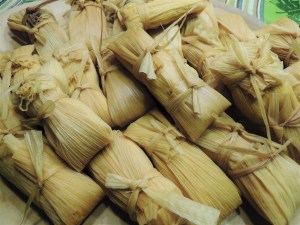
The Iroquois Indians made a wonderful boiled corn bread. They made flour by pounding corn into corn flour. To make bread, they mixed water with the corn flour. Sometimes cooked beans were added, or berries or nuts. The bread was kneaded and formed into small loaves. The loaves were dropped into boiling water and cooked until the bread floated. Boiled corn bread was served both hot and cold. They also used the same bread mix to bake bread by putting it on clay tablets in the fire. They used sunflower oil to fry bread. Below is a recipe for steamed corn bread with beans, wrapped in corn husks. It is remarkably similar to tamales. This was the kids’ FAVORITE food of the party. I would have bet against that. Good thing I made a big batch!
Ingredients
- 3 cups masa harina (corn flour used for tamales)
- ½ cup rendered bacon fat (many traditional Native American recipes use fat as a flavor element and source of vital nutrients)
- 2 teaspoons salt
- 2 teaspoons baking powder
- 1 cup cooked beans (really any type of bean will work but small brown beans are traditional. I used great northern beans)
- 2 cups hot cooking liquid from beans
- Dried corn husks
Directions
- Set up a steamer on your stove top using a steamer basket fitted over a pot with plenty of gently simmering water.
- Thoroughly rinse about 25 corn husks. Place corn husks in a large pan of boiling water. Place another smaller plate or bowl on top of the corn husks to keep them submerged. Set husks on low heat to soften while you prepare the dough.
- In a large mixing bowl, combine masa harina and bacon fat. Using your fingertips (I used latex gloves), work the lard into the flour until it is evenly distributed. Add salt, baking powder, beans, and the hot cooking liquid from the beans. Use a spoon to stir mixture until a thick, sticky dough comes together, it will be about the consistency of chocolate chip cookie dough.
- Use your hands to scoop ¼ cup-sized portions of dough, working quickly as dough will still be hot from the bean cooking liquid. Shape the dough into a ball and flatten slightly into a 1-inch thick oval, which is your “broadsword.” Wrap the broadsword in a corn husk, folding the husk around the dough on all sides to completely enclose it. Tear off small strips of corn husks to use as ties around the broadswords to hold them closed. Place the wrapped broadswords vertically in the steamer basket as you go. When all broadswords have been added to basket, lower it over boiling water, cover the steamer basket with a tight fitting lid, and allow broadswords to steam covered for 1 hour or more.
- After 1 hour, check the bean bread- if the corn husk pulls away easily, the broadswords are done cooking.
- Broadswords may be eaten hot, or stored in refrigerator to be eaten cold or rewarmed in oven or microwave.

Roasted Pumpkin
Members of the Chippewa tribe near Lake Superior have been enjoying this sweet and savory side dish for generations.
Ingredients:
1 small sugar pumpkin
1/4 cup maple syrup or maple sugar
1/4 cup melted butter
Instructions:
Cut the cap off of pumpkin and stab it about 4 times with a sharp knife. Scoop out membranes and seeds. (Wash seeds in a colander and discard all membranes. Place seeds in a bowl and add 1 tablespoon sea salt, toss and allow them to soak a bit while you prepare the pumpkin, then spread seeds on a very lightly oiled, or parchment lined cookie sheet and sprinkle with some extra salt. Place seeds in oven with pumpkin, but check and remove seeds once they have roasted – about 15 minutes or until you hear one or two pop. Check by removing a seed, let it cool, and then eat it. If it is crispy it is done). Add butter and syrup/sugar to the pumpkin. Replace cap on pumpkin and place whole in a large ovenproof bowl . Place pumpkin in a 350 °F oven for about 1 hr. and check for tenderness. Depending upon size, and variances with ovens, it may take up to 90 minutes for pumpkin to cook fully. You know it is getting close when the pumpkin looks like it has a tan and the sides are soft to the touch. Check tenderness by piercing side of pumpkin with a fork. If the fork punctures through the skin and into the flesh easily, it is done.

Dried Fruit & Nut Cake
I’m not much of a fruitcake person, but I think it is because I don’t care for the usual candied fruits that come in fruitcake, such as pineapple and green cherries, etc. Using dried fruits is so much better.
Ingredients
3 cups all-purpose flour, sifted
1 cup firmly packed dark brown sugar
1/3 cup Molasses
1 ½ sticks of Butter (3/4 cup), softened
3 teaspoons baking powder
1/2 teaspoon salt
3 large eggs
3 teaspoons pure vanilla extract
1 cup each rough chopped dried: apricots, plums, figs, pears, dates, golden raisins, blueberries
1 cup each: walnut halves, pecans, almonds, pistachios
Instructions
1. Position a rack in the lower third of the oven and preheat the oven to 320°F (150°C). Spray the loaf pans (either two 9-by-5-inch 8-cup loaf pans or 8 mini loaf pans) with vegetable oil spray and then line the bottom and sides with parchment paper.
2. In a large bowl, mix the first eight ingredients together using a mixer on low speed. Increase speed to medium and beat until batter is smooth, scraping the bowl often with a rubber spatula. Stir in the dried fruit and the nuts and mix thoroughly, with your fingers if necessary. Set aside.
3. Use an ice cream scoop or scrape batter into the prepared pans.
4. Bake until the top is deep golden brown and the batter clinging to the fruit seems set, about 30 minutes for smaller loaves, 10 to 15 minutes longer for a large loaf. Insert toothpick to check for doneness. Toothpick should come out clean. Don’t let cake overbake or it will be dry. Tent loosely with foil if the cake appears to be browning too much. Cool completely in the pans on a rack.
5. When completely cool, remove the cake from the pans. The cake keeps, wrapped airtight in foil or plastic wrap, for several weeks at room temperature or at least 3 months in the refrigerator. It can also be frozen for at least 6 months.
6. To serve, cut into thin slices with a sharp heavy knife.
Dried Fruit and Nut Cake Recipe adapted from © 2007 Alice Medrich. All rights reserved. All materials used with permission. Alice used dates, dried Angelino plums, and dried pears.


Fire Roasted Fish
I didn’t make the fish for the first party, although I was given some trout for the party and had a wild daydream about having the kids following me outside to the park just a block from the school, where my husband could be tending a fire next the creek that runs through it, and on the way having them mark their trail just like Attean showed Matt to do in the book, so they could find their way back to class, but reality check – there really wasn’t enough time for that kind of shenanigans, and besides that, the only way to eat trout is freshly caught and properly cleaned, otherwise I think it would have been a waste of time to try and fix it for the kids. I’m sure they would all have turned up their noses and shied away from having even one tiny bite of the stinky fish, plus the teacher was surely not going to appreciate her room smelling of stinky fish for days either. For the second party I cracked open a can of Herring fillets, and to my surprise the kids ate the whole can.
This however, is an outstanding recipe for any fish. Give it a try with walleye, snapper, perch, bass, cod, redfish, tilapia, etc. If using fillets, lay all the ingredients on the fish and wrap with bacon rather than placing the bacon inside.
Ingredients
Salt and Pepper
1 Big Fish (Salmon, Trout, Perch)
Butter
Lemon Slices
Onion slices
Green Bell Pepper slices (or Jalapeno strips)
Several strips of thin sliced precooked (but not crispy) bacon
Directions
- Set up an outdoor kitchen: a hot fire with glowing coals surrounded by large flat rocks; a big jug of fresh clean water for rinsing the fish, plus the knife, and your hands.
- Carefully kill, gut and scale each fish immediately upon catching it, and rinse well in clean water.
- Sprinkle inside of fish with salt and pepper. Place pats of butter, lemon, onion, and bell pepper slices inside the fish and lay a strip of precooked bacon down on top of them in the cavity of the fish. Tie wet string around the fish to hold the stuffings in and to hold it together while it grills.
- Or, rub fish with butter on both sides and wrap tightly in a big piece of tinfoil and crimp the edges closed. Wrap again in a second piece of tinfoil.
- Bake on a smooth flat rock really close to the fire (but not in it!), or if you have a grate, lay the fish on the grate above the fire. Or, fry in butter in a heavy cast iron pan over the fire.
- Use a long handled spatula to carefully turn the fish about half way through cooking and also to remove it from the fire.
- Note: The amount of time it takes to cook varies depending on the size of fish and how close it is to the fire. Just keep checking it, it will be done when the flesh flakes easily with a fork. May take from 15 to 20 minutes if on a grate over the fire, or to up to an hour if laying on a hot rock next to the fire.
Recipe adapted from one found by Lauren McArdle …who learned this from her Mohawk Grandmother in Saskatchewan.


“Remember Your congregation, which You have purchased of old, the tribe of Your inheritance, which You have redeemed…” Psalm 74:2