Ooooooo I love the salads of summer!!!!! This is one of my favs. My neighbor, Don Kinion used to make it every summer from the abundance of his garden, and lucky us, we got a gift of a nice big jar full every few weeks during the late harvest season, when he had tomatoes and cucumbers coming out his ears. I have never been able to duplicate his perfect recipe, but this comes pretty close. Hats off to you neighbor. Hope you are doing well!!!!
Ingredients
1 burpless cucumber (the long, skinny, plastic wrapped ones, if you are buying from the store, or any variety grown in the garden)
2 packages of the sweetest cherry tomatoes in the produce department, (or a small bowl full of freshly harvested Sweet One Hundreds Cherry Tomatoes, from the garden)
1 Red Onion (they grow these where I live and so I get the luxury of fresh from the fields, in fact, they often fall off the harvesting trucks right in front of my house. Ditch food!!!! Love it!)
1/2 cup good quality Olive Oil
1 cup Red Wine Vinegar
1/2 cup sugar
Salt and Pepper to taste
Directions
Mix up the dressing ingredients first (olive oil, vinegar, sugar, salt & pepper), place in a large mason jar, and park in the fridge until ready to mix with veggies. Give it a shake every once in a while.
Peel some of the skins from the cucumbers. If you are using the long, skinny store bought ones, the skin if find to leave on. It is very tender. But some garden cucs have tough, bitter skins. I like to leave some of the skin on anyway. But taste the cucumbers to make sure they aren’t bitter.
Chop the cherry tomatoes in half.
Slice the onion into thin slices, and then give them a rough chop. Mix all the veggies together in a large glass bowl and pour the dressing over. Toss to coat and then chill for a few hours in the fridge. Give them a stir every once in a while (couple hours) until ready to serve.
.
Serve this alongside any BBQ meat… (or eat it all by itself!!!!! 🙂)
.
“Now accept the one who is weak in faith, but not for the purpose of passing judgment on his opinions. The one who eats is not to regard with contempt the one who does not eat, and the one who does not eat is not to judge the one who eats, for God has accepted him. Who are you to judge the servant of another? To his own master he stands or falls; and he will stand, for the Lord is able to make him stand.” Romans 14:1-4
This salad makes a terrific side for any BBQ meal, but honestly, I could eat the whole bowl of this all by itself for dinner. Hey, and small tip (take it or leave it)… when I am taking this for a church pot luck or another big get-together I keep the dressing and the slaw separate from each other until the last-minute before serving. I prefer my slaw crunchy not wilted, and creamy rather than runny.
1 small can crushed pineapple, drained (juice discarded, or saved for something else)
7 cups shredded and chopped green cabbage
½ cup thinly sliced and diced Fuji apple (skin on, core and stem removed) – if not serving right away toss in a baggie with some lemon juice to prevent browning.
¼ cup white raisins (must be white, no icky dark raisins)
½ cup chopped green bell pepper
¼ cup slivered, toasted almonds
Directions
In small bowl, mix Mayo, True Lemon powder, sugar, and crushed pineapple together, cover and refrigerate until ready to serve. (The reason I use True Lemon powder instead of juice is just to create the creamiest texture).
In large bowl toss cabbage, apple, raisins, and bell pepper. Cover and keep in fridge until ready to serve.
Just before serving toss dressing with cabbage and then toss in almonds. Serve immediately.
This slaw makes a great side dish for smoked or grilled meats, such as…. (pictured below top to bottom, L to R are BBQ Brisket, grilled Chicken Bombs, Bistecca or Chimichurri Steak, Chopped Pepper Steak with Blue Cheese Garlic Butter, grilled Texas Redfish, PiriPiri Chicken, Pork Loin, grilled Kielbasa, and Korean Style Ribs).
Have a blessed meal, my friend!❤
“Better is a dish of vegetables where love is than a fattened ox served with hatred.” Proverbs 15:17
Where were you when you first experienced fish tacos? Can you remember the day, the place, and the time? Did the world stop spinning for just a moment as your tongue delighted in their savory goodness? Were yours as life changing for you as mine were for me? LOL!
Well, I first experienced FISH TACOS when we visited our daughter in Seattle. She took us to the Experience Music Project, and during our tour there we decided to eat lunch in the little restaurant downstairs of that massive building. It was a foodie little haven with a modest but eclectic menu.
I was a little sceptical about “fish tacos” when I first heard of them, having only an image of beef tacos in my head – with taco seasonings, lettuce, and cheese, but everyone I knew simply raved about them. So, I decided to put my mommy money where my mommy mouth was and actually taste them before I judged them. Best decision ever!!!! They were out of this world, my new favorite food, and I’ve been just a little bit obsessed about them ever since.
They are easy to make from scratch, but now that I am cooking for two I often make them from doggie-bag catfish from our favorite local restaurant.
Ingredients
For the Fish
Fish, just about any mild white fish works (Cod, Barramundi, Red Fish, Tilapia, etc.) about 1 nice sized piece per taco, so about 12 to 15 pieces (and at 3 tacos apiece, this recipe will feed about 4 or 5 people)
Seasoned Flour (to 1 1/2 cups flour add about 1/2 tsp of each: garlic powder, paprika, ground oregano, onion powder, ground cumin, salt, sugar, and cayenne powder) (or you can cheat and use a preseasoned fish fry coating, or a cajun spice in place of the individual seasonings)
Beer or Dry White Wine (or water will also work in a pinch)
Hot oil to fry the fish in
For the Slaw
1/2 of a red cabbage
1/2 of a green cabbage
1/2 of a large white onion
3 red radishes
1/2 cup cilantro
Juice of 1 or 2 limes (2 if they are small)
For the Sauce
2/3 cup sour cream
1/4 cup Mayo
2 ripe avocados
1/2 cup cilantro, very finely minced
1 clove garlic, minced
1 lime
1 jalapeno (or serrano), very finely minced
Dash of Sriracha, to taste
Pinch of Kosher salt, to taste
Also need about 12 to 15 white corn tortillas and a little oil to soften them in
Directions
As a time saver, you can make the slaw and the sauce ahead of time – early in the day, and keep them in the fridge until ready to assemble.
Shred the cabbages into thin strips and then give them a rough chop, cut the onion into the same size thin strips, slice the radishes into slices and then cut them into thin strips, and chop the cilantro. Toss all together in a bowl and squeeze lime juice over. Toss again to coat. Cover with plastic wrap and keep in fridge.
For the sauce, mash the avacados with a fork until smooth. Add to sour cream and mayo. Stir in cilantro, garlic, and as much of the jalapeno or serrano as you prefer. Squeeze lime juice in and stir. Add Sriracha and salt to taste. To make it really smooth you can whirl it in a food processor for a few moments. Cover with plastic wrap and keep in fridge until ready to assemble.
Add a little vegetable oil to a skillet and place on medium high heat. Add one tortilla at a time and soften by frying it briefly on each side and then removing to a paper towel lined plate. Add oil to the pan as needed after several tortillas have been fried. Cover tortillas with foil and place in a warm place until ready to assemble.
Now, you can prepare the fish however you prefer. If you like it grilled, you can season the pieces with a mixture of the same spices that are listed for the flour, and then just grill each piece a few moments on each side on an outdoor grill or indoor grill until it flakes easily.
If you like it fried, you can rinse the pieces off with cold water and then toss them in the seasoned flour to coat, and then fry them in hot oil (the same frying pan that you used for the tortillas) for a few minutes on each side until when tested they flake easily.
Or, if you like them batter fried (my fav), place peanut oil in a dutch oven or deep fryer enough so that the fish pieces will be completely covered, but make sure your pot is large enough that it won’t boil over when the fish are added a few pieces at a time. Heat and keep the oil temp between 350 to 375 degrees F. You can add beer or white wine to the seasoned flour (about an equal portion 1 to 1) and stir. Add more liquid until it is about the consistency of a thin pancake batter, then dip your rinsed and patted dry pieces of fish in the batter and drop in hot oil and fry until when tested it flakes easily.
Or, if you have a mess of catfish that have been cornmeal battered and fried, the leftovers make excellent tacos. I actually do this quite often.
To Assemble
BTW: I have some nifty taco plates that are awesome for taco assembly:
Lay one (or two small) piece(s) of fish in the center of each tortilla, and then add a small mound of slaw, and finally top with a nice dallop of sauce. Fold in half and enjoy. Mmmmmm! Just let your eyes roll back into your head while your tongue finds its happy place. Wipe mouth and repeat, repeat, repeat.
.
“Then Jesus said to them, “Children, have you any food?” They answered Him, “No.”
And He said to them, “Cast the net on the right side of the boat, and you will find some.” So they cast, and now they were not able to draw it in because of the multitude of fish.”John 21:5-6 (NKJV)
I love theme dinners! And Polynesian is one of those themes that has tons to offer… tons of great foods… lots of great music… and a motherlode of great activities. That’s probably why luau parties are so popular. They are great for a crowd (family reunions, company picnics, neighborhood get-togethers, graduation parties, youth group events, and so on).
That’s all well and good, but I had in mind something a little more intimate. In my younger life, I had the idea to have monthly theme dinners just for family – just to make memories for my kids. January’s theme was Chinese New Year, where we dressed up, ate Chinese foods, listened to Asian music, played some sort of Chinese games after dinner, and totally immersed ourselves in Asian culture for a night. February was Cajun foods, music, and culture. March was Irish. April was Polish or Italian. May was Mexican or Caribbean. June was Polynesian or African. July was American (which encompasses everything from BBQ to Burgers, to Hot Dogs in every variety). August was South American or Australian. September was Russian or French. October was German. November was American Indian. And December was Indian or Mediterranean. That was my plan. It was so much my plan that I wrote a whole book about it, but then I kind of lost my focus. <Sheepish shrug> Well, thankfully God has given me grandchildren, and a whole renewed interest in introducing them to the cultures and foods, and sounds, and pastimes of the world. And the great thing is … SUMMER IS COMING!!!! Which makes it a great time to introduce the kids to something fun and interesting and chase away those summer doldrums, not to mention it’s all kind of educational as well.
JUNE – Polynesian
Knickknacks, tanning mats, give a dog a fish bone. The dollar store is a great place to look for decorations. You can keep it simple (lay a bamboo tanning mat down on the table, set a tropical plant as a centerpiece, and lay out luau plates, cups, and silverware from the party store), or go hog-wild (outdoor party with mumus and sarongs, tiki lanterns, grass skirts, a limbo stick, kalua pig roasting on a spit, cold drinks in pineapples or coconuts, and a nice array of Makahiki games, Hawaiian crafts, and games). Gotta have some Island music too (may I suggest Don Ho?), and maybe even get the kids ukuleles, and teach them to play an easy song.
After dinner, you can break out the limbo stick and challenge the kids to a contest, or try some hula hooping. Then set the TV outside and gather the lawn chairs around for an outdoor movie night. How about a marathon of old Gilligan’s Island reruns? Or, for a real submersion into Hawaiian culture, make leis, learn to hula, set your back yard up with some of the Makahiki Games listed below, and watch a mesmerizing “Ha: Breath of Life” show on DVD.
Traditionally, a Hawaiian party would have deep pit roasted Kalua Pig, long rice (which is basically the same thing as Pad Thai rice noodles), some dish of sweet potatoes (purple), and Poi, or even Spam Musubi. If it is your goal to introduce your family to Hawaiian culture, go with tradition. I found some wonderful recipes HERE that I plan to try.
.
Recipes
.
COCONUT SHRIMP
Batter:
1 cup all-purpose flour
1 cup dry white wine
– – – –
1 lb large tail-on shrimp, peeled and deveined, and patted dry on paper towels
1 7-oz pkg shredded coconut
Instructions: Place peanut oil in deep fryer and set temperature to 375 degrees. Mix flour with wine until smooth. When oil has reached temperature, dip about 5 of the shrimp, one at a time in batter and then roll in coconut. Drop into deep fryer and cook for about 2 to 3 minutes or until golden and curled. Drain on paper towels. Continue until all shrimp are cooked.
Melted jalapeno jelly makes a wonderful dipping sauce (remove lid from jar, warm in microwave about 1 min., stir and divide into little sauce cups). Or see the sauce recipe later down on this page. Serves 4
.
SPICY POLYNESIAN WRAPS
Ingredients
2 pounds skinless, boneless chicken breast halves – cut into 1 inch strips
1 (14 ounce) can coconut milk
1 cup uncooked long grain white rice
2 cups water
1 1/2 cups all-purpose flour
1 1/2 Tablespoons curry powder (hot or mild as you wish)
Place the chicken and coconut milk in a bowl, and marinate in the refrigerator 1 hour.
In a pot, bring the rice and water to a boil. Cover, reduce heat to low, and simmer 20 minutes.
In a small bowl, mix the flour, curry powder, and garlic salt. Drain the chicken, and discard marinade. Dredge chicken in the flour mixture to coat.
Heat the oil in a skillet over medium heat, and cook the coated chicken strips 5 minutes per side, or until golden brown and juices run clear. Squeeze lime juice over chicken, and discard limes.
On each tortilla, place equal amounts of rice, chicken, coconut, and green onions, and sprinkle desired amount of Serrano chilies. Wrap burrito style.
.
POLYNESIAN DIPPING SAUCE (for shrimp, or wraps)
Ingredients
13 ounces coconut milk
2 teaspoons green curry paste
1 tablespoon grated gingerroot
1 tablespoon grated lime rind
1 tablespoon granulated sugar
1 tablespoon chopped fresh mint
1 tablespoon chopped fresh cilantro
2 tablespoons lime juice
Directions:
Place coconut milk in a skillet and bring to boil. Reduce heat to low and simmer for 10 minutes until reduced by a quarter – it should be the consistency of heavy cream. Stir in the green curry paste, ginger, lime rind, and sugar. Cook another 5 to 6 minutes or until sauce is thickened and fragrant. Stir in mint, cilantro, and lime juice. Cool and refrigerate until ready to serve.
.
SPAM MUSUBI
3 cups cooked Sushi rice
4 sheets Spring Roll Wrappers (this is a MrsH modification: I’m not a fan of Nori)
1 12-oz can Spam
6 Tbsp Soy Sauce
6 Tbsp Hawaiian BBQ sauce
Furikake
I cut the end off of my Spam can with sissors to use to make my Musubi, and I used a wooden meat mallet to press the rice down. After making my musubi I have decided Nori is just too healthy tasting for my taste, so after making it with Nori, I peeled the Nori off to eat it, and next time I’m going to try making it with rice paper (Spring Roll Wrappers) instead. I also didn’t care for the Furikake (rice seasoning) because of the seaweed that was in it. The one I used was Wasabi Fumi Furikake. It had a good flavor that really does need to be there, but just warning you not to go hog wild with it if you aren’t a seaweed fan. I do like wasabi and sesame. And I added chopped green onion. Maybe there is a variety of Furikake without seaweed???
Prepare the Rice as per package instructions. Allow to cool. Meanwhile, cut the Spam into eight equal slices. Fry the Spam in a frying pan until very crispy on both sides. Mix soy sauce with BBQ sauce and pour over Spam. Stir around and flip until sauce is carmelized onto the Spam. Remove from heat.
This is the process for making the musubi: (shown using Nori seaweed)
Cut each sheet of Nori in half. Lay half a sheet down on a clean paper towel. Place Musubi press (Spam can) in the center. Add about a heaping tablespoon of rice and press down. Add a sprinkle of Furikake. Place a slice of Spam on top. Sprinkle with more Furikake and add another heaping tablespoon of rice. Press it all down firmly and hold down while lifting can off. Wrap Nori around. Cut each finished roll on the diagonal and serve. *Below is what Musubi looks like without the seaweed wrapper. I wrapped my musubi up in plastic and refrigerated them overnight. The next day I removed from fridge, peeled off the Nori, and cut them into bite-size slices. Much better!
.
HAWAIIAN SWEET POTATO CASSEROLE
5 medium Sweet Potatoes, baked in 350*F oven for 1 hour, until soft
2 green bananas, diced
1 cup diced and crushed fresh pineapple
1/2 cup brown sugar
2 Tbsp butter, melted
1 tsp cinnamon
2 tsp salt
Juice of 1 lime (also the zest)
2 Tbsp Cocunut syrup (may substitute honey)
1 cup shredded coconut
1/2 cup crushed macadamia nuts
After potatoes have cooled, peel the skins off and discard skins. Slice the potatoes into inch thick slices and lay in a single layer in a buttered oblong baking dish. Sprinkle with brown sugar, cinnamon, salt, and drizzle with melted butter. Add a layer of pineapple and bananas. Press down with a spatula to mash the potatoes slightly. Mix lime juice with coconut syrup and pour over potatoes evenly. Sprinkle with coconut and macadamia nuts in an even layer. Cover and bake in a 300*F oven for about 30 minutes. Uncover and bake another 15 mintues until toasted on top. You can also broil the dish for a few minutes to toast the top if you wish.
HAWAIIAN LONG RICE (MrsH’s super easy version)
Cook a box of Pad Thai rice noodles as directed on package. Drain off most of the water, but leave the noodles a little soupy. Add a can of Campbells Creamy Chicken soup to the noodles and stir to mix. Serve with chopped green onion for garnish.
GRILLED PINEAPPLE
.
Dessert
.
ISLANDER’S COCONUT CREAM PIE
1 prepared pie crust, baked as directed for cream pies
1 package of vanilla pudding, the kind that cooks, not instant
1 package coconut flakes
1 container of Cool Whip with 1 tsp. rum mixed in
Broken, slivered almonds
Cook pudding as package directs using 1/2 cup less liquid. Add 1 cup of the flaked coconut to the pudding and stir to mix. Pour into prepared crust and spread to fill evenly. Chill until set. Spread Cool Whip over pudding in piecrust. Sprinkle 1/4 cup of flaked coconut and then almonds over the top. Chill to set.
.
HAWAIIAN PINEAPPLE UPSIDE DOWN CAKE
Ingredients
1 8-oz can Dole pineapple slices, drained (reserve juice for serving)
1 stick butter
2/3 cup packed brown sugar
6 maraschino cherries, halved
In an large oblong cake pan melt butter and stir in brown sugar. Arrange pineapple slices next to each other in three rows of four. Place a half of a cherry in the center of each pineapple.
Cake Ingredients
2 ½ cups All-Purpose flour
3 tsp. Baking powder
1 tsp salt
1 stick butter, softened
2 cups sugar
2 tsp Vanilla
2 eggs
1 ½ cups milk (or substitute Coconut Milk)
Combine dry ingredients and set aside. Beat softened butter with sugar and vanilla. Add eggs one at a time beating after each. Stir in dry ingredients and milk. Beat with a mixer until thick and creamy. Pour over pineapple slices in large baking pan. Bake at 375 degrees F for 35 to 40 minutes. Cool 5 minutes, then invert onto a serving plate. Serve warm. If you desire your cake a little more moist, drizzle with reserved pineapple juice.
.
Beverages
.
Iced Thai Tea, my latest addiction!!!!!
THAI TEA
1 pkg Thai Black Tea bags (available at World Market)
Water
Sweetener (sugar, agave nectar, honey, Stevia, as you prefer)
Half & Half
Place 8 teabags and 8 cups of water in a saucepot and bring just to the steaming point on high heat on the stovetop, and then remove from heat. Cover and let steep for 15 minutes. The tea will become dark orange colored. Add whatever choice of sweetener to taste, I like this tea a little on the sweet side. When the tea has cooled, pour it into a pitcher and chill in the refrigerator for several hours or overnight.
To serve: Pour tea over ice in a tall glass. Gently add Half & Half by the Tablespoonfuls until the top 1/4 of the glass is filled. Add a straw and serve. Let guests stir the cream into the tea before drinking.
.
TROPICAL SMOOTHIES
Ingredients
1/2 ripe mango (peeled and seeded)
1/2 ripe papaya (peeled and seeded)
1 ripe banana
1/4 cup freshly squeezed orange juice
1/2 cup Cream of Coconut
1/4 cup plain or vanilla yogurt
1 tsp. honey
2 cups ice
Directions
In a blender, mix mango, papaya, banana, orange juice, coconut cream, yogurt, honey, and ice. Blend until velvety. Serve in martini glasses and garnish with mini skewers of pineapple chunks.
.
Other Adult Beverage options:
Fire Rock Pale Ale (beer) or Spearhead Pale Ale
.
Cocktails
FROZEN MAI TAI
1 cup of ice
1 oz. light rum
1/2 oz. dark rum
1/2 oz. Apricot Brandy
1/2 cup fresh or canned pineapple
Splash of sour mix & Splash of orange juice
Blend all ingredients in a blender for 4 seconds on low speed. Garnish with lime and orange slices, and a little paper umbrella. I f you want to make it non-alcoholic just use 1/2 tsp of brandy flavoring and 1 1/2 tsp of rum flavoring in a half a cup of soda water with the other ingredients.
.
CAPTAIN MORGAN’S Piña COLADA
1/2 cup ice
2 oz. light rum
2 Tablespoons Cream of Coconut
1/2 fresh or canned pineapple
1 Tablespoon vanilla ice cream
Pineapple chunks, cherries, umbrellas for garnish
In blender blend until smooth. If too thick add fruit or juice. If too thin add ice or ice cream. Garnish with Pineapple and Cherry, and a little paper umbrella. You can use a mix to make these if you would rather… and you can make them non-alcoholic by substituting rum flavoring and soda water.
.
Traditional Island games
Walk on Hot Coals
Dig a shallow pit about three feet wide by six feet long and fill it with charcoals. Add starter fluid to get the charcoals burning. Cover them completely with medium-sized smooth rocks and let the rocks get hot. Any guests who are brave or foolish enough may hop across the rocks with their bare feet.
‘O‘O Ihe(Spear Throwing)
Spear throwing contests were held to display strength and skill for fighting and food gathering. A target, sometimes the stalk of a banana plant, is set up and contestants stand some 15 feet away and attempt to stick a lightweight wooden spear in it. Watch the video below, which features spear throwing and other traditional games.
A great alternative for the littler ones would be the inflatable Fish Spearing Game at Party America.com or Party City.com, if they still carry it as of the time of this writing. If not, this is what it looks like and you can make your own version out of a an old toilet seat (padded and decorated) and a bamboo stick. Hang it in a tree in the corner of the yard.
‘Ulu Maika’ (Rolling Stones)
Based on ancient Hawaiian Makahiki games, this game is played similar to horseshoes. Stones somewhat resembling modern hockey pucks were rolled between stakes on specially prepared courses to test a player’s skills, or rolled down long courses to show strength. One of the best of the remaining ‘ulu maika courses, approximately 500 feet long, is located on the island of Moloka’i.
Moa Pahe‘e (Dart Sliding)
Using a wooden dart, which resembles a very small bat without the little grip stop on the end (maybe 8” long) with the skinny end and the fat end, you grasp the skinny end and toss the dart like a bowling ball between two stakes.
Conch Blowing
Blowing a conch shell takes skill: you have to know how to purse your lips, where to place them for the best sound, and how hard to blow. (The sounds made by a novice are hilarious!)
Foot Races
Ancient Hawaiians used to hold foot races to see which warrior was the fastest. You can hold single person races, three legged races, and backwards running races. Watch the first video above, under spear throwing, for an example.
“Haka Moa”
Type of Hawaiian Luau fighting. The contestants do not use their hands, and can only stand on one foot, and try to knock their opponent out of the ring.
Tug O’ War
To play this game you will need a 20’ length of rope, a 6’ length of rope, and a bandana.
Divide your guests into two equal teams. Choose a large grassy or sandy area to play. Place the 6’ rope on the ground in the middle of the chosen area. This marks the centerline. Have teams line up in single file on either side of the centerline, arms length apart. Tie the bandana in the center of the 20’ rope and place over the centerline. Each player grabs the tugging rope and at the signal tries to pull the first member of the other team over the centerline.
.
Card Games
HIGO BANA
This is a card game played with special Hana Fuda cards. I was introduced to it by a friend whose mother was Japanese. She gave me a set of these cards many, many years ago. I’ve even forgotten how to play it has been so long. So I went online to see if I could find the rules. How thrilling to find that this game is played by native Hawaiians under a different name. The cards do not have numbers on them, only beautiful pictures, but they have point values. Along with the rules I found some vendors who sell the cards.
There are only 13 letters in the Hawaiian alphabet: A, E, H, I K, L, M, N, O, P, U and W. The consonants H, K, L, M, N, P, and W are pronounced exactly as in English. If a name ends in a consonant, add a vowel. Always place a vowel between consonants. The following conversion table can be helpful in translating names:
Add some true Island spice to your dinner with genuine Island customs:
Placing a lei over someone’s head is the customary way to welcome or congratulate them. If the person is close in relationship to you, you would give them a honihoni (kiss) also. Leis are usually made of flowers, but can also be made of candies or other decorative items. And when your lei starts to fade and die, don’t toss it in the trash. It is bad luck to throw a lei away. A lei is love and you would never throw love away. Rather cut the string and cast the flowers into the sea or hang the lei outside until it is gone.
I love that it is the custom in Hawaii for young ones to refer to older people as “auntie” or “uncle” when they are old family friends or neighbors of the parents. That is how we raised our kids to do. In Hawaii it is appropriate even to address a stranger as “auntie” or “uncle.” It is friendly yet respectful.
You would never walk into someone’s home in the islands with shoes on. And it is good manners to bring a small gift with you, possibly a dessert, when visiting someone’s home. There is a pidgin phrase, “Make Plate” or “Take Plate” that also shows good guest manners. When you have been invited to share a meal at someone’s home it is customary that you make a plate of food of the leftovers to take home, even if you don’t intend to eat it. By doing this you are being a good guest and not leaving the mess for the host to clean up and put away. Many times all the leftovers are packaged up and taken to the homeless.
Unless you are at a sporting event, it is considered rude to talk loudly, or to act like you are entitled to special treatment. Politeness and reserve are considered a show of good breeding.
Dress is casual, aloha shirts and slacks are worn in place of suits and ties in business, and it is considered rude to stare or look someone in the eye for too long in public places. And when you go away on a trip it is considered thoughtful to bring back gifts “makana” from your journey. Most prized are special foods that are unavailable at home.
.
I’m so happy you stopped by, and I pray your family supper night is such a huge hit that it becomes a favorite monthly tradition. God bless!
.
.
“Let love be without hypocrisy…be kindly affectionate to one another with brotherly love, in honor giving preference to one another…distributing to the needs of the saints, given to hospitality.” Romans 12:9-13
Get ready for TACO TUESDAY!!!!!! This might be one of the more coveted recipes in my collection. I am often asked how I make my tacos. It is also a frequent request for Family Supper night by daughter, son-in-law, and the grandkids. It’s one of my husband’s favorite dinners, and really one of my favorites too!!!! Quick and easy!!!!
Let’s start with the meat…
I use 2 lb. of quality ground beef (to feed 4 adults and 2 kids) – a good organic, grass fed, angus beef. I break it apart in a frying pan and toss while cooking over medium high heat until browned. Drain off and discard the fat . I then sprinkle 2 packets of Lawry’s Taco Seasoning Mix over the meat, and then I fill the empty packets with water and pour the water over the seasoning and stir it well into the meat, with the heat turned down to medium low. To this I add about a half cup of salsa (fresh or canned) and stir that altogether. I then let the meat simmer on low heat until the tacos are ready to assemble.
The meat will become drier the longer it simmers. I personally like it dry so that it doesn’t make the bottom of my tacos soggy. I don’t like when they fall apart and all the stuffing falls out.
Pico de gallo
I use about 1 1/2 cup of chopped sweet cherry tomatoes, 1/2 cup chopped fresh jalapenos, and 1 cup chopped green onions (or a small sweet white onion if I don’t have green onions on hand), then add about 1/2 cup chopped fresh cilantro, 2 cloves of garlic minced, the juice of two limes, and a sprinkle of salt to taste. If the jalapenos are really mild, I sometimes add a pinch of cayenne for some kick.
Toppings
I chop one whole bunch of Romaine lettuce into small shreds.
I like to shred my own cheese (pepper jack) when I’m feeling ambitious, but often use a Mexican cheese blend that is pre-shredded already.
Taco Shells
I buy the small Old El Paso brand taco shells (2 pkgs to feed my family of 4 adults and 2 kids because the men will easily eat 6 tacos apiece or more).
I preheat my oven to 360*F, and set the shells in a baking pan. When the oven is ready I pop the pan of shells in for about 6 minutes, or whatever time is recommended on the package. This is an important step because it makes the shells nice and crispy!!!
Taco Sauce
I actually use a variety of sauces. I like to try new ones. The green tomatillo Herdez or La Costena hot sauces (medium) are both really good standbys. I like the Taco Bell hot sauce (Diablo), and the DelPrimo sauces are all good. But my favorite of recent is El Gallo flame roasted Jalapeno. It comes in a bag with a little screw top spout (medium).
To assemble the tacos I remove the shells from the oven and quickly fill them with meat, dispersing it evenly among the shells. I sprinkle cheese over the meat in each shell, and then add the lettuce. They each then get a spoonful of my fresh Pico and a generous pour of tomatillo taco sauce. That’s it! Mmmmmm…. let’s eat!!!!!!
Now some people might like to add chopped black olives, maybe some sour cream, possibly some sliced avacado, and that’s all good, but personally, I can’t bear to mess with perfection.
If you’d like to add a couple of sides, I love charros or refries and Mexican Rice. And you can never go wrong with Sopapilla Cheesecake for dessert!!!!! Hubby washes his meal down with a good Modelo cerveza! I just like iced tea. Gracee will take a Margarita, if I make her one, and the kids like horchata.
Hey, while we are enjoying our Family Supper, may I share with you from the book One Year of Dinner Table Devotions & Discussion starters by Nancy Guthrie (published by Tyndale)?
In case you missed this recipe, featured recently in A Native Thanksgiving, here’s a re-run of it all by itself, because it is just too delicious to miss.
There are several ways to make the fry bread. My grandmother used her homemade yeast bread recipe and then divided it into dinner roll size pieces. She pulled those into little robe shapes and gave them a little twist before frying. She called it “Squaw Bread” and I could have honestly eaten the whole stinking batch every time she made it. Nothing better than hot fried bread, unless of course it is hot fried bread rolled in cinnamon and sugar, which she also sometimes did.
You can save yourself a lot of work by just using Rhodes Yeast Rolls that come frozen in the grocery store. Thaw them and then fry them. It’s that easy!
The Native way is also very easy and delicious. This is the recipe:
FRYBREAD
This recipe makes 7-8 small ones
Ingredients
2 cups flour
3 tsp baking powder
1 tsp salt
1 cup milk
Deep hot fat in fry pan or fryer
Directions:
Sift dry ingredients. Stir in milk. Kneed and work the dough on a floured board with floured hands until smooth. Divide the dough into eight pieces and shape into flat disk shapes, with a depression in the center. Fry in deep fat (about 375°) until golden and done on both sides, about 5 minutes. Drain on absorbent paper.
INDIAN FRYBREAD TACOS
6 servings
Frybread tacos are very much like the Elephant Ear tacos that we used to get at the carnival when the rodeo was in town. Very easy and one of my favorite things to eat. If I have leftover homemade chili I use it in place of the meat recipe here. And when I can’t find Anasazi beans, and I’m in a hurry, I just substitute canned pintos.
Ingredients
6 pieces Indian Frybread — about 6” in diameter
For Chili:
1 lb hamburger
1 big can tomatoes (I used Rotel)
2 Tbsp homemade chile powder (or your favorite packet of Chili seasoning)
salt, pepper to taste
Fry hamburger broken up loose until cooked, then drain fat. Sprinkle some salt and chile powder over it (or use a Chili seasoning packet). Add tomatoes and their juice — break up tomatoes and stir it around. Simmer till meat tender and sauce is thick, 30 – 40 minutes.
Toppings:
1/2 lb cheese grated coarse (Colby/Jack)
1 1/2 c Dried anasazi beans, cooked
1 1/2 c Mache or arugula, washed & stemmed (I substitute Cilantro, chopped)
1 pkg sweet cherry tomatoes, sliced
2 ea Ripe avocados, halved & sliced
1 sm red onion, thinly sliced and diced
1 bunch red radishes, sliced
1 container Golden yellow cherry tomatoes diced
3 ea Green Anaheim (New Mexico) chiles, prepared (I’ve sometimes substituted Poblanos when Anaheims are out of season or unavailable)
1 lg Red bell pepper
Directions:
To prepare the anasazi beans, soak overnight in water to cover. The next day, drain the beans and place them in a saucepan with fresh water to cover. Bring to a boil, reduce the heat, and let the beans simmer until the skins break, about 3 hours. It may be necessary to add water as the beans cook to prevent them from burning and sticking. After the beans are cooked, remove from the heat and set aside. You should have about 3 cups cooked beans.
While the beans are cooking, roast, seed, and de-vein the chiles and the bell pepper, and chop each of the veggies. I usually do this early in the day, place each in a ziploc sandwich baggie, and store together in the fridge until I’m ready to serve.
Prepare the Native recipe fry bread while the meat (chili) is cooking.
To Assemble the tacos, place 1/2 cup cooked beans on each piece of frybread, then a layer of meat mixture, then your choice of the vegetables (I like all of them). Finish with a little Mexican Crema (sour cream), some bottled hot sauce (salsa) on top, and finally a little sprinkle of cheese.
You’ll need a fork and knife to eat this marvelous creation!
It’s funny, the seasons of life, how things have a way of making it around full circle to the exact same place where they started. For instance, we start off life as little pudgy babies, unable to talk, unable to walk, getting shots, getting sick, wearing diapers, being told what to do, and existing on a mostly liquid diet; and for all the progress we make in our lifetime, we end up right back where we started, in diapers, drinking Ensure, eating mushy stuff, taking meds, being told what to do, and wheeled around wherever we have to go.
It’s similar in a marriage. First I learned to cook for two, and then to prepare meals for a whole family, and now here we are back at just two again. I’m finding it a bit of a challenge to learn to scale things back so I don’t waste food, or blow the budget, trying to keep it healthy, but still tasting good! I don’t want to feed us Lean Cuisines, or fast food, or frozen pizza every meal, but at the same time, I don’t have the energy or ambition to stand on my feet for hours chopping, measuring, peeling, blanching, boiling, broiling, and then washing, wiping, scouring, scrubbing, and putting back together a totally destroyed kitchen…everyday….for just the two of us. <sigh>
So I find myself making things like quesadillas out of leftover fill-in-the-blank meat, cheese, and hot peppers; or fish tacos from doggie bag catfish gotten at a local restaurant the night before and some sort of cabbage slaw; or crispy fried SPAM-L-T’s (because I usually have Spam in the pantry and I don’t always have bacon) with a side of raw veggies (because that is healthier than chips, but a lot of times, honestly, it is chips); or this wonderful biscuits and gravy meal I recently came up with. It’s super easy if you roast your chilies one day, toss them in a bag and into the fridge, and then peel and seed them the next day.
I’m sharing it because Husband said this is the best gravy he’s ever had, and at 61 I guess that’s saying something. However, it could be that he has just totally forgotten what the best gravy was he had before this. Which is kind of a perk, the memory loss thing, it can really work to an old lady’s advantage sometimes! Ha! But I did also feed it to my daughter, the sweet young thing with a chipper young mind, and she concurred, so there you go, for what that’s worth.
Anyway, this gravy isn’t just good on biscuits. It would be fantastic on Chicken Fried Steak, pepper steak, mashed potatoes, as a dip for Waffle Fries, Chicken strips, or even just toast, if that’s all you have. I fried up some bacon (in the oven) and chopped up a couple dozen fresh okra from my garden, along with a cold, leftover baked potato, coated the pieces in cornmeal and then fried them in oil, as sides to our supper. Perhaps this sounds like “jail food” to you? Well, wait until you’re my age honey. You’ll be a LOT less picky. Hubby and I thought it was GOOD EATS!!!!
Creamy Poblano Gravy
¾ of a stick of butter
2 TBSP bacon drippings
¾ cup flour
¼ tsp Salt Lick dry rub seasoning (which is basically cayenne powder and black pepper)
Melt butter in frying pan, add bacon fat, flour, and seasoning. Stir to combine, then cook, stirring continuously, over medium high heat for a few minutes. To this rue add:
1 tsp. chopped jalapeno or serrano (or both if you like it spicy)
2 roasted, peeled, and seeded Poblano Peppers, chopped
4 cups of whole milk, or Half-and-Half
Water (as desired)
Stir until thick and bubbly. Add water to thin the gravy to your desired thickness. Salt and pepper to taste.
Originally featured in my book, Come for Supper, the memoirs of a reluctant hostess, this is one of my very favorite meals. Not because it is top shelf gourmet, for in fact it is probably closer to just being sustenance on that scale; mostly made with government commodities, or what can be scavenged in the wild, using few and extremely inexpensive ingredients. Not to say these aren’t all very yummy dishes though, don’t be scared, just probably not cheffy food, if that’s what you were looking for. The beauty of this meal for me is in savoring the foods of another people. Cultural differences can sometimes separate us, but I am enchanted by the brotherhood of the table and the fellowship of food. Eating modest foods also makes me very thankful for the things that I have, and the extravagant meals I have been blessed to enjoy. In a world where some have the luxury of living-to-eat, this is a great reminder that many many people on this planet eat-to-live, and even with the little that they have, are incredibly generous.
I am drawn to and have a deep affection for the American Indians. I think we all do. Most of us played cowboys and Indians when we were kids. Many of our grandparents told tall tales about having native blood in our lineage. It is the raw deal, and unfair treatment of our native people by our government, that gives us (me, at least) a huge mistrust of the federal government. And although they’ve been tucked away, they have never been forgotten. We admire their courage and bravery, so much so that many of our sports teams have been given names like, “Chiefs” “Braves” “Redskins” and “Indians.” Many towns (and counties) in my native state have Indian names: Sundance, Shoshoni, Meeteetse, Ten Sleep, Crowheart, Chugwater, Arapahoe, Wapiti, Cheyenne, Osage, etc. Movies like Dances With Wolves, Son of the Morning, and Windtalkers reinforce the love affair. Even so, how many of us truly know our native brethren? Or, know anything about what their life is like today (myself included)? Most likely the closest we ever come is visiting a local gambling casino, or reading about some misfortune in the newspaper. By bringing us to a table to celebrate some of their best dishes, I hope to change that a little. This is an interesting articlethat I really wanted to save for myself, and share with you, as we consider honoring these interesting people with a Native fall feast for our family and friends.
1 lb Commodity flour (about 3 cups of all-purpose flour)
Powdered milk and water to equal about 2/3 cup liquid
1 Tbsp Vegetable shortening
1 tsp Baking soda
1 tsp Salt
Directions:
Mix all ingredients except powdered milk together. Add milk to other ingredients to form a dough and beat it up. If the dough is too sticky to roll out, add a little more flour. Roll it very thin on a flour dusted cutting surface, cut it into pieces with a pizza cutter, lay the pieces on a parchment lined cookie sheet, prick each piece with a fork, and bake it quickly in a 350 degree oven until toasted golden. Try these crackers the traditional way first, but the next time you make them you might wish to substitute fresh whole milk for the powdered milk, 2 Tbsp butter for the shortening and a splash of olive oil, and perhaps sprinkle the dough with a mixture of seeds, or some parmesan cheese, or some finely chopped italian herbs before cutting and baking. These are also nice served with an assortment of cheeses.
.
THREE SISTERS SOUP (the 3 sisters are beans, corn, and squash)
Ingredients
1 lb beef stew meat
8 cups water
3 spring onions with tops
1 tsp minced garlic
1 can kidney beans and liquid
Half gallon size bag of fresh green beans, sliced (may substitute frozen or canned)
3 ears fresh corn (may substitute frozen or canned)
3 summer squash, cubed
½ tsp oregano (or 3 mint leaves)
2 tsp salt
5 lg squash blossoms
Black Pepper
Directions:
Cook the stew meat in water until tender. Cut corn from cob, chop spring onions, and add all vegetables to water and simmer until tender. Add seasonings, and squash blossoms; simmer 15 minutes. (For vegetarian version omit meat).
This is a mostly authentic recipe, and doesn’t have much flavor, especially if canned vegetables are used, which are most likely. The next time you make it you will want to use beef broth in place of the water, and leftover beef roast, pulled apart. I always prefer fresh vegetables. I also added 1 packet of beef gravy mix and 1 packet of Lipton Onion Soup Mix to my pot. I also added a small can of Rotel Tomatoes, 1 large potato diced, 1 large carrot chopped, a handful of frozen peas, 2 tsp. minced garlic, to the other vegetables, and about a ¼ tsp. of Cayenne powder. Salt and pepper to taste. Delish!
.
WILD GREENS AND FLOWERS SALAD
Serves 4 to 6
Salads were much liked in the spring when new, tender greens appeared. A great variety of mixtures was used. Since salt was uncommon or not used at all, salads were flavored by herbs, oil pressed from seeds, and especially with vinegar made from fermented, evaporated, uncooked maple sap (which we can’t make or get). So this is an approximation of the spring tonic salads beloved by all woodland people after the long winters.
Ingredients
1 cup watercress leaves and (only) tender stems
1 cup lamb’s ears, quarter new leaves (or use small spinach leaves)
1 cup arugula lettuce torn (not cut) to bite-size pieces;
can also use Bibb or less expensive leafy (not iceberg) lettuces
1 cup Dandelion leaves
1/2 cup tender nasturtium and violet leaves torn up
1/2 cup nasturtium and violet flowers (in season)
1 Tbsp honey
1/4 cup cider vinegar
1/3 cup salad oil
As much tender mint leaves as you like in the salad
2 tsp fresh mint chopped fine and bruised
2 tsp chopped tarragon (fresh) or 1 tsp dried if necessary
optional: salt and pepper to taste
Directions:
Combine honey and vinegar, whisk in oil and crushed mint. Season to taste with small amount of salt. Pour over greens and flowers in large bowl, and toss for about 3 minutes to coat everything with dressing. Serve immediately.
If you cannot find the greens and flowers listed, you can use a “spring mix” salad from the produce department and add to that whatever edible flowers and greens that you can find, perhaps look at your local garden center, nursery, or fresh herb store.
.
SQUASH OR PUMPKIN BLOSSOM FRITTERS (Pueblo style)
serves 4 – 6
Ingredients
2 dozen large squash blossoms
(4 dozen of the smaller pumpkin blossoms)
4 eggs
1/2 cup milk
1 tsp chili powder
1 tsp salt
1/4 tsp cumin powder
2 – 3 cups finely ground cornmeal (masa harina)
Oil for deep frying
Directions:
If you’re a gardener or truck farmer, you can make this dish easy; otherwise you’ll need to visit with a farmer at a Farmer’s Market about getting some blossoms. During the growing season farmers thin the blossoms of their vines, because the vine can’t support but only a couple of pumpkins or a few squash. At season’s end there will be an abundance of flowers, as the fruit will not have time to finish before winter.
Rinse and pat blossoms dry. In a shallow bowl, beat eggs with milk, chili, salt, and cumin. Dip blossoms in egg mix, and then roll gentle in cornmeal. Refrigerate for at least 10 minutes to set coating. Heat 2 inches of oil in a deep saucepan to about 375°, hot but not smoking. Fry blossoms a few at a time until golden, drain on paper towels. Keep warm in 250° oven until ready to serve.
Only in the southwest are the blossoms of squash and pumpkin important as a religious symbol, as well as food. They appear as sacred symbols in many Pueblo ceremonies, and gave rise to a popular design worked in silver.
There is a Hopi Squash Kachina (Patung). He is Chief Kachina (wuya) for the Hopi Pumpkin Clan. He runs with men of a village in spring ceremonial dances to attract rain clouds.
The Hopis and Pueblo farmers gather large quantities of squash and pumpkin flowers at the end of the growing season, when these flowers cannot make fruit; that’s the time white farmers harvest their curcurbitae and pull up or plow under the still-flowering vines.
OR, you may like to try this stuffed blossom recipe….
.
STUFFED SQUASH BLOSSOMS
Ingredients
2 doz. squash blossoms
Filling:
8 oz. block cream cheese
1 cup shredded Monterey Jack Cheese
1 Tbsp chopped green onion
Batter:
1½ c. flour
½ tsp salt
¾ to 1 cup dry white wine
cooking oil for frying
Directions:
The authentic way is not to stuff the blossoms, but simply to batter and fry them, or just fry them naked in melted shortening. This is a recipe I stumbled across recently and enjoyed. Pick large squash blossoms in early morning just before they open. (I used my garden zucchini blossoms that had opened already and they turned out okay). Heat 1-2” oil in heavy Dutch oven. Meanwhile, stuff blossoms with a tablespoon of filling. Smooth peddles over filling, and make batter. When oil is ready (pops and crackles when a drop of water is added), drop each blossom into batter, turning to coat evenly, and then immediately into hot oil. Turn while frying to cook evenly on all sides, and remove with a slotted spoon when they have turned golden-brown. Drain on paper towels, and serve hot as an accompaniment for soup. Or, they also make a great appetizer with a spicy marinara sauce to dip them in.
FRYBREAD
This recipe makes 8-10 small ones or 5 big flat ones
Ingredients
2 cups flour
3 tsp baking powder
1 tsp salt
1 cup milk
Deep hot fat in fry pan or fryer
Directions:
Sift dry ingredients. Lightly stir in milk. Add more flour as necessary to make a dough you can handle. Kneed and work the dough on a floured board with floured hands until smooth. Pinch off fist-sized lumps and shape into slightly twisted ropes — everyone has their own characteristic shapes.(Shape affects the taste, by the way because of how it fries). For Indian tacos, shape dough into a rather flat disk shape, with a depression — almost a hole — in the center of both sides. Make it that way if the fry bread is going to have some sauce over it. Smaller, round ones are made to put on a plate. Fry in deep fat (about 375°) until golden and done on both sides, about 5 minutes. Drain on absorbent paper. (My grandmother made what she called, “Squaw Bread” at least once a month when I was growing up. Her’s was made from regular yeast dough. It was one of my favorite things on earth!!!!)
MODERN WOJAPE
Wojape (Wo-zha-pee), a pudding, a dessert. Wojape is traditional to the Sioux and other Northern Plains Nations and predates most of us living now. This is a berry pudding to eat with fry bread. It was made with fresh wild berries collected during that season and also dried berries, preserved for use through the winter. The berries were mixed with sugar when it became available, and also flour for thickener. Today is a different time and Wojape, like many other things, has adapted to the easy access of ingredients. However, it is just as delicious. It can be eaten after a meal as a dessert or as many “out there” know, as a main course maybe with a hot cup of coffee. She calls it modern because of using any kind of frozen berries, “We moderns often use government commodities gallon cans.” This recipe makes enough for about 20-30 people who have 1-2 fry breads.
Many thanks for this recipe go to: Ms. Stacy Winter of Crow Creek, Rapid City, South Dakota.
Ingredients
1 Bag (5 lb) frozen berries (blueberry, raspberry, cherry or a mix)
8 cup Water
2 cup Sugar
Cornstarch or Arrowroot
Directions:
To a 5 quart pot (enamel or stainless steel) add all the berries and smash them with a potato masher. (If you are fortunate enough to have a food processor this would work fine also. However, stop just short of puree, you want fine pieces throughout.) To the smashed berries add the water and sugar. Boil (lightly) this mixture (Approximately 15 to 20 minutes) until everything is cooked. Thicken to desired thickness with cornstarch that has been dissolved in cold water. Serve warm and eat with Indian Fry Bread. Dip the bread into the Wojape and eat in this manner.
Wojape is also outstanding on French Toast, Pancakes, plain Cheesecake, over ice cream, and is excellent served over Angel Food Cake with a dallop of whipped cream.
INDIAN FRYBREAD TACOS
6 servings
Frybread tacos are very much like the Elephant Ear tacos that we used to get at the carnival when the rodeo was in town. Very easy and one of my favorite things to eat. If I have leftover homemade chili I use it in place of the meat recipe here. And when I can’t find Anasazi beans, and I’m in a hurry, I just substitute canned pintos.
Ingredients
6 pieces Indian Frybread — about 6” in diameter
1 lb hamburger
1 large onion minced
2 small cans tomato paste
1 big can tomatoes
1/2 tsp oregano
1 Tbsp chile powder
salt, pepper to taste
Fry onion and hamburger broken up loose. Sprinkle some salt and chile powder over it. Add tomato paste and 4 cans of water and the canned tomatoes and their juice — break up tomatoes and stir it around. Add basil and oregano. Taste for seasoning. If you want, you can use a taco seasoning packet in place of seasonings, and a mild tomato salsa in place of tomato paste and tomatoes. Simmer till meat and onions are done and sauce is thick, 30 – 40 minutes.
Toppings:
1/2 lb cheese grated coarse
1 1/2 c Dried anasazi beans, cooked
1 1/2 c Mache or arugula, washed & stemmed (I’ve often substituted Cilantro, chopped)
1 lg Red ripe tomato, sliced
2 ea Ripe avocados, halved & sliced
1 ea Red onion, thinly sliced
1 ea Bunch red radishes, sliced
24 ea Golden yellow plum tomatoes halved
6 ea Green Anaheim (New Mexico) chiles, prepared (I’ve sometimes substituted Poblanos when Anaheims are out of season or unavailable)
1 lg Red bell pepper
Directions:
To prepare the anasazi beans, soak overnight in water to cover. The next day, drain the beans and place them in a saucepan with fresh water to cover. Bring to a boil, reduce the heat, and let the beans simmer until the skins break, about 3 hours. It may be necessary to add water as the beans cook to prevent them from burning and sticking. After the beans are cooked, remove from the heat and set aside. You should have about 3 cups cooked beans. While the beans are cooking, roast, seed, and de-vein the chiles and the bell pepper. Leave chiles whole; slice pepper lengthwise into six strips.
To Assemble the tacos, place a layer of meat mixture, cheese, and 1/2 cup cooked beans on each piece of frybread. Add 1/4 cup greens per taco, followed by a red tomato slice. Add slices avocado and 1 thin slice red onion, separated into rings. Follow with radishes and 4 golden yellow plum tomatoes per taco, and top with 1 roasted green chile and 2 slices roasted red pepper. You can vary the toppings and the order in which the taco is built, and for a vegetarian version omit the meat sauce and cheese.
You may also wish to offer Sour Cream (I like the Mexican Crema) and salsa (favorite jarred, or refrigerated varieties).
NAPOLIAS (Cactus)
Ingredients
1 servings
1 lb Pork
2 Cloves garlic, minced
1 lg Onion, diced
3 c Water
2 can (8 oz) tomato sauce
1 can (6 oz) tomato paste
1 lg can stewed tomatoes
1 lb Green cactus, peeled & diced
Salt
Pepper
1/4 t. Cumin
Seasoning salt
Directions:
Cube the pork; fry in a skillet with onion and garlic. In a large Dutch oven, add all ingredients, salt and pepper to taste and 1/4 tsp. cumin and seasoned salt. Cook until meat is tender. You might like to season this with an assortment of dried ground up chili peppers, like New Mexico red chilies, green chilies, chipotle chilies, and little chili pequine, to make it like a Chili Colorado. Very good with corn cakes, or the pinion squash bread featured below!
Cactus (fresh, small, thick pads): Remove spines with knife and peel, or purchase at market in a jar, diced and packed in its own juices. You can usually find it at Mexican markets; the cactus referred to is generally prickly-pear cactus. The juice from the prickly pear cactus is also useful in Native American craftwork, specifically painting with earth paints.
.
PUEBLO PUMPKIN/SQUASH PIÑON NUT SWEETBREAD
Makes One loaf, serves 6 – 8
Rio Grande Pueblo peoples traditionally served a variant of this sweetbread to parties of nut-pickers in September when piñon nuts were being picked from the mountain slope trees. Families would (and some still do) camp for many weeks in traditional areas reserved to clans. In the recipe you can use either cooking-type pumpkin (these have necks and thick, meaty bodies, not like jack o’ lantern pumpkins) or a sweet bright orange squash, like butternut.
Ingredients
1 1/2 cups unbleached flour
1 cup finely mashed or pureed pumpkin/squash
3/4 cup brown sugar
1/2 cup melted butter (1 stick)
2 eggs beaten foamy
1 tsp baking powder
1 tsp cinnamon
1 tsp grated nutmeg
1/2 tsp salt
3/4 cup pine nuts
Directions:
Preheat oven to 350. In a mixing bowl, combine flour, salt, baking powder, sugar, spices. Stir in pumpkin, eggs, butter. Stir pine nuts into thick batter. Scrape into a greased 6 x 9 loaf pan. Bake for 1 hour or until knife inserted in bread comes out clean.
This sweetish, spicy bread goes well with soups, stews, and can also be a dessert, especially if you cut it apart and put yogurt or applesauce over it.
.
OR, this is a sweeter, less cinnamony version that lets the pumpkin shine through…
PUMPKIN PINE-NUT BREAD
Makes 2 loaves
Ingredients
2 c Flour
1/2 c Oil
3 Eggs, beaten
1 1/2 c Sugar
1 teaspoons Baking soda
1 teaspoons Vanilla
3/4 c Milk
2 c Cooked pumpkin
1/2 tsp Salt
1 1/2 c Pine nuts, roasted
Directions:
Heat oven to 350 degrees. Mix dry ingredients in a large bowl. In a medium size bowl, mix eggs, milk, oil and vanilla. Mix well, then add pumpkin. Mix well and folk into dry ingredients. Add pine nuts. Pour batter into 2 greased 5×9-inch loaf pans and bake for 45 minutes.
The pine nuts generally taste better if, before they’re added to the mix, you put them on an ungreased cookie sheet in the oven for about 10 minutes at about 350-400 degrees. It roasts them a little. But watch them carefully to make sure they don’t burn.
,
MAPLE-PUMPKIN CHEESECAKE
Ingredients
1 Graham cracker crust in 8″ spring form pie pan
1 lb low-fat cottage cheese
1/2 cup plain low-fat yogurt
3/4 cup pumpkin puree (or 1 can)
1/4 cup flour
3 eggs
1 tsp vanilla
1/4 cup maple syrup
1/2 tsp pumpkin pie spice
Directions:
Preheat oven to 325°. Put all ingredients into blender, a little at a time, alternating wet and dry. Process until smooth, then pour into crust and spread evenly. Bake for about 50 minutes. Let cool before serving. May be topped with yogurt, flavored with 2 Tbsp maple syrup. Take it up a notch drizzled over with caramel sauce, and sprinkled with chopped pecans.
.
.
A TASTE OF CULTURE…
If you have kiddos, you can make this supper a lot of fun for them. This is also a great get-together for church, or a Senior Center, or a classroom if you are a teacher, or homeschooler? Below are the cornucopia of ideas I’ve collected over the years for either a dinner party, or you can use them as activities during a weekend or weeklong festival.
Background Music: Tribal Winds, Music from Native American Flutes; also cd Good Medicine by John Two-Hawks – American Indian Lakota flute player & musician. I actually have several CD’s that I love, shown below. (Not shown: Gathering of Shamen – Native Flute Ensemble, Medicine Man – Pete “Wyoming” Bender, The Stories of Red Feather Woman – also featuring the music of Andrew Vasquez, with special guest Rodney Grant – Windriver).
Host a Pow-Wow: American Indians, at least those I am familiar with (Northern Arapaho, Eastern Shoshoni, Lakota Sioux, and Utah Navajo ) have an annual party called a Pow-Wow. They set up teepees, do dances, trade and sell craft items, share food, pray, play games, pass the peace pipe, and tell stories. Thermopolis Wyoming is home to the annual Pow-wow of the Windriver tribes, the Gift of the Waters Pageant, and they tell the history/stories of the giving of the healing waters (see clip on Facebook).
Here’s a fun idea: ask your guests to bring “trade items” (things they have outgrown, don’t use, or don’t want any more) to trade with each other. All unwanted items can be donated to a local charity thrift store after the get-together.
Hoop and Pole Game
Natives of different groups have their own special ways to play the Hoop and Pole game, but in all the games a person tosses a long dart of some kind at a circular hoop. In this version of the game the hoop is rolled along the ground, set into motion by a third player, while the two other players throw their pole as the hoop rolls in front of them. The score depends on how or if the pole falls on or through the hoop. Netted hoops are made by the Arapaho of Wyoming and other tribes.
Navajo tribes play a stick and dice game, and also a shoe game. Google them to see how they are played.
.
The Sun Dance, usually conducted once a year, is a custom of the Arapaho people. The Sun Dance is a sort of prayer ceremony. See more about it here.
.
Navajo Blanket (given to me by my father-in-law) collage
.
PEACE PIPE
As the sun sets, gather everyone around to sit “Indian style” in a circle in the center of the yard around a fire pit. Pass around a “peace pipe” with imaginary tobacco in it and let everyone take a puff. This ritual in Arapaho belief is supposed to bond friendships. Encourage the oldest men of the group to pass on some of their wisdom to the younger by telling interesting stories of their boyhood, what games they played, things they did with their parents, faith experiences, etc. Some can share lessons they learned from mistakes they made. Maybe dad or grandpa or Uncle Jerry has a “vision” for the family (or church, or group) or a weird dream that they had that they would like to share.
CRAFTS
Make Bead ChokersMake a loom and weave pot holdersMake Beaded MoccasinsMake a Dream Catcher
The following are items I made for my granddaughter’s teacher to use for a center in her Kindergarten classroom this year.
Make a “Pretend Garden” using an old wooden box covered in burlap, pantyhose filled with black beans for the rows of soil, and hand-stitched felt veggies. Let the littles enjoy hours of play planting and replanting veggies.
Dollar Store bows, with homemade quivers for the arrows, plastic Bowie knives in homemade sheaths, and and assortment of primative instruments – they look cooler with feathers tied to them! Set up deer silhouettes and various parts of the yard and let the littles go hunting for food. Also let them make music for dancing.Homemade Bamboo “Cane Poles” with string and child-safe hooks, and little fishes that they can catch with them. Make a “pretend pond” and let the littles catch fish for supper.
When you were born, you cried
and the world rejoiced.
Live your life
so that when you die,
the world cries and you rejoice. — White Elk
We do not want schools…. they will teach us to have churches. We do not want churches…. they will teach us to quarrel about God. We do not want to learn that. We may quarrel with men sometimes about things on this earth, but we never quarrel about God. We do not want to learn that.
Sopapilla Cheesecake is my go-to, super-fast-and-easy dessert after any Mexican dishes that I serve for supper (like “Taco Tuesday,” Taco Salad, Tamales, Chicken/Cheese/Beef Enchiladas, Chili Rellenos, Asada Street Tacos, Carnitas, Loaded Nachos, Quesadillas, etc.). This year I decided it would be a perfect Red, White, and Blue sweet ending to our Independence Day meal, because of the colors, and because I had all the ingredients in my fridge!
Preheat oven to 350 degrees F
2 (8-oz) pkgs Cream Cheese, softened (room temp)
1 cup sugar
½ tsp Mexican Vanilla (or, if you want to be fancy, you can scrape the seeds from a vanilla bean pod)
Mix together all three ingredients until smooth and thoroughly incorporated. Set aside.
2 (8-oz) tubes Pillsbury Crescent Rolls (or, you can make your own croissant dough)
¾ cup sugar
1 tsp. Cinnamon
½ cup butter, softened (room temp)
¼ cup honey (warm in microwave for about 20 seconds, after baking cheesecake)
Lightly grease a large baking pan (or small high-sided cookie sheet) with a tablespoon of the softened butter. Unroll one tube of crescent rolls and roll out to fit in the bottom of the greased baking pan/sheet, pinching the perforations together. Spread the cream cheese mixture over the dough, leaving a small edge of the dough all the way around uncovered (like a pizza). Unroll the second tube of dough and roll out to fit over the cream cheese layer. Press down slightly around the edges. Mix the sugar, cinnamon, and remaining softened butter together into a paste. Spread over the top layer of dough.
Bake in a preheated 350 degree (F) oven for about 30 minutes, until puffed and golden. Remove from oven and drizzle the entire top of the cheesecake with warmed honey.
Strawberry Blueberry Compote
(This is what gives the dessert the RED and BLUE on WHITE treatment)
¼ cup of cold water
Juice and zest of one lemon
½ cup sugar
2 Tbsp Cornstarch
1 pkg frozen strawberries
½ pkg frozen blueberries
Place water, lemon juice and zest, sugar, and cornstarch in a sauce pot on the stove. Stir to mix the ingredients and then turn heat on medium high. Add strawberries and bring to a boil, stirring until mixture is thick. Remove from heat and add blueberries. Set aside until ready to serve.
Cheesecake may be served warm or cold. My son-in-law loves it warm and gooey. I think it is delish the next morning after being refrigerated overnight, with a hot, creamy cup of coffee – like a cheese danish. Mmmmmmm…don’t you?
“The generous soul will be made rich, And he who waters will also be watered himself.“
Proverbs 11:25 NKJV
“It was for freedom that Christ set us free; therefore keep standing firm and do not be subject again to a yoke of slavery”
The title is kind of a guffaw, actually, and the reason I grin-and-bare that is that when hubby and I first moved to south Texas, and specifically the little town that we’re in, there wasn’t a chili relleno to be had on a single menu; not in a single restaurant in our town. And when I asked for “green chili” on an omelet for the first time I was met with a puzzled look and a question, “Do you mean Tomatillo sauce?” Um, no.
Needless to say, we were terribly disappointed, and bewildered. How could this be? Is it that green chilies only migrated north and west from New Mexico and not east? Maybe they aren’t a Mexican food at all? Perhaps it was my ignorance that green chilies and Tex-Mex were synonymous? 😞
I’m happy to report that just a couple of years later Hatch green chilies started making an appearance in these parts, and when they did, they made a big appearance. There are still no Chili Rellenos on the menus in our town, but at least this girl can get the ingredients in our local grocery to make them now, and that’s really all that matters.
And in all fairness, not all of South Texas is a dry Rellenos area; we’ve had them in a few San Antonio restaurants, even though they only barely resemble the authentic Rellenos that first stole my heart.
And, please pardon if I don’t make mine like you do. This is the way I personally like them. I’m sure I would love yours, unless you make them with ground beef filling, and then I’ll have to reserve my judgement until I’ve tasted them. Husband likes the beef filled rellenos, but I dream about cheese filled rellenos and am content to eat those for the rest of my days.
I got my Ranchera Sauce recipe from a gal I stopped in the middle of HEB not long back. She works in a local restaurant, so I knew she would steer me straight, at least as much of it as I could remember as she rattled her recipe off to me in the midst of my gathering ingredients. Ha! I hope I’m making it right. It’s sure tasty, so I’m sticking with it. 😆
First we start with the Ranchera Sauce
Place a stick of butter into a heavy pan and on medium high heat begin melting. As soon as it is melted add one whole large chopped onion (white or yellow). Saute the onion until it is translucent, turn heat down to medium and continue sautéing until the onions are caramelized. This will take quite a while.
Chop 2 jalapenos (stems discarded), and about 6 large plum tomatoes into chunks. Add them to the caramelized onions and let them cook until softened. Add a 14-oz can of tomato sauce to the mixture, stir, place a lid, reduce heat to simmer, and let cook until you are ready to batter and fry the rellenos. I have had the Ranchera sauce served to me chunky several times, so I presume that is the authentic way, but I use a Braun Wand blender tool to whirl the Ranchera into a smooth sauce with no large chunks.
Now, the preparation of the green chilies…
Pick the largest, firmest ones you can find at your grocery. Bring them home and wash them, and then dry them. I like the spicy ones. You might prefer the milder ones.
I have a propane flame torch which works pretty darn slick for roasting chilies. I lay my chilies out on the rack of my outdoor patio firepit, light my torch, and run the flame up and down each chile until they are blistered and black, then I flip the chilies over with tongs and roast the other sides. Once they are all well blistered on all sides I gather them into a plastic zip bag, seal it, and let the chilies steam inside for about half an hour or so.
If you don’t have one of these nifty little propane gadgets, the oven will work just fine. Move an oven rack up to the highest level of your oven. Preheat your oven broiler. Place your washed chilies on a cookie sheet and slide them onto that top rack in the oven.
Close the oven door (I prop my door open slightly with a wooden spoon – I like to hear my chilies popping and crackling).
Let the chilies broil on one side long enough for them to become charred and blistered.
Use tongs to roll them a quarter turn and return to broiler. Check them often for doneness. Continue turning and broiling until the chilies skins are blistered and charred all the way around.
Quickly remove them from the cookie sheet and place them into a large Ziploc freezer bag, and seal it.
Allow chilies to steam inside the bag for about half an hour, while you prepare the rest of the meal.
NOTE: I like to serve my Rellenos with homemade refried beans and a cheesy green chili rice. See those recipes below. Hint: this would be a great time to start making them now. This is also a good time to blend your Ranchera sauce and make is smooth. Keep it simmering on a back burner until ready to serve.
Start about 2 inches of oil getting hot in a deep sided frying pan (…just hot enough that a droplet of water makes it pop and fizzle. Not hot enough to be smoking. If you are seeing streaks/waves in your oil, it may be too hot. Either drop your heat, or add a little more oil to cool it down a bit before adding your chilies). The pan you use should be large enough that two chilies will fit without touching the sides or each other.
As soon as the green chilies have cooled enough to handle take them to the sink and begin removing the skins. They should slide right off easily. If not, be careful not to tear the chili, as it will be hard to keep the filling inside while you are battering it.
Once the chilies are skinned, make a slight slit along the side near the top stem of each.
Only make it big enough to slide the pieces of cheese inside. If you wish to remove some of the seeds you may do that also. I push the seeds out through the slit. I don’t mind a few seeds in my rellenos though. I use Pepper-Jack Cheese. For 8 to 10 chilies you will need about 1 1/2 8-oz blocks, which I cut into quarter-inch slices and then into quarter inch strips.
Begin stuffing your chilies with strips of cheese, about 5 or so strips per chili. Dust the outsides with flour and lay them on a paper towel as you prepare them. Once all the chilies have been stuffed and floured, you are ready to make your batter.
I beat two eggs and add about a cup of water to them…
…and then I whisk in some seasoned beer batter mix (part of one bag) until the consistency is about that of thin pancake batter. The batter should stick to your chilies, but just leave a fairly thin film. Hold the chili by the stem and dip it into the batter. Use a fork to sweep batter over the top of the chili and then gently lift the chili out of the batter, with the fork. Slide it into the hot oil and let it begin frying. Add another chili and let the two fry together.
Allow the chilies to fry for a few minutes and then use tongs to turn. The batter should turn a golden color. Scoop the chilies out of the oil and place on paper towels for a moment to absorb the oil. Quickly plate them and cover them with simmering Ranchera Sauce.
Oh my how I love them!!!!! Now if I could figure out how to feed a crowd all at the same time I’d be in business. I only know how to make Rellenos for one person at a time. Hot and fresh.
Mama’s Refried Beans
If you’ve made a pot of pinto beans and have leftovers, by all means use them for this. If not, look for these varieties at your local grocery store. I used 2 cans of Charro and 1 can of Barracho (which means drunken – notice that they use Shiner beer for this).
First I drained my beans of all the liquid (don’t rinse them). I melted about 2 Tablespoons of rendered pork fat (you can use lard, or if you have leftover bacon grease that’s actually preferred) in a sauce pan on the stove, and then I added my beans. I let them just bubble and cook on medium low heat until I was almost ready to serve my meal. Moments before I was ready to serve I took a potato masher and mashed the beans until they were the desired consistence. They may be served with a sprinkle of cheddar cheese and some chopped green onion if you like.
NOTE: This also makes a wonderful bean dip, served with tortilla chips for a snack.
Cheesy Green Chili Rice
First I sautéed my rice (1 cup) in about 1/2 a stick of butter in a small sauce pot, on high heat. After about a minute of continuous stirring, I added 2 cups of hot chicken broth (water and boullion cubes work fine), 1 can of diced green chilies, and a grind of sea salt (you might hold off on this if using boullion). When the liquid boils, place a lid on the pot and turn the heat down to low. Simmer for about 20 minutes. Remove from heat. Lift the lid and lay several thin slices of pepper jack cheese (about 1/3 cup shredded) or cream cheese on top of the rice. Replace the lid and leave covered about 10 minutes or until cheese is melted. Lift lid and fluff rice with a fork, incorporating the cheese throughout. If you like it just a little creamier, you may add a splash of Crema, heavy cream, or sour cream, and a sprinkle of cayenne.
“And day by day, attending the temple together and breaking bread in their homes, they received their food with glad and generous hearts.” Acts 2:46
My husband and I discovered a little burger joint soon after moving to south Texas. It’s not a fancy place. In fact it’s kind of grimey looking on the outside. A regular person might even drive right past it and not think twice about it. It’s just a little dive of a place really, along the side of the road in Hondo, TX, but one day the old man and I cowboyed up and gave it a try … and I tell you … we absolutely fell in love with the Santa Fe burger that we ordered that first day. We love it so much it’s all we can ever think about when we drive by. We stop in regularly, on our way through town, just to indulge in its deliciousness. We love it so much we haven’t even ever tried anything else on the menu. You ever find a restaurant like that? They are real sweet about adding a few extra things to our burgers, which is what puts the Santa Fe right over the top. The next thing we know we’ve got it dripping down our arms, not saying a word, chewing as fast as we can to make our nagging tongues happy.
So, because of the couple of little extras I always ask for, I feel like its okay to give you my take on Billy Bobs lovely little sandwich of deliciousness. My version by no means replaces theirs, but it’s a nice little appetizer between trips. I’ll warn you up front that It’s a little bit of work to make, but baby it’s worth it!!!! At least in my book.
Prepare the Green Chilies
For this recipe you’ll need about two green chilies per person, so about eight should do. I pick out the biggest and most firm Anaheim (Hatch, Fresno, New Mexico) green chilies available at the market (I also grow them in my garden).
Wash them and dry them off, and then lay them out on a cookie sheet.
Raise one of the oven racks to its highest position in the oven and turn the oven on to BROIL. Allow the oven to warm up, and then put the cookie sheet of chilies in, just under the top heating element.
I usually prop a wooden spoon in the door to hold it open a tad, so I can hear the chilies popping and crackling.
I keep an eye on them, as it doesn’t take long. When I see that they are pretty popped and blistered, and burned on that top side, I open the oven, slide the rack out, and use tongs to turn the chilies a quarter of a turn, and then put them back under the heat. I continue broiling and turning until the chilies are popped and blistered, and charred on all sides.
Quickly remove the chilies from the oven with tongs and immediately place them into a plastic Ziploc freezer back. As soon as all the chilies are inside the bag, zip it up, and then let them sit and steam for several minutes, while you work on the rest of your meal.
.
Back in Wyoming there was a certain time in the summer when the green chile trucks would show up in parking lots around town with heaping baskets full of green chilies and a barrel-type roaster that rotated over an open fire. We could buy the amount of chilies we wanted and they would roast them, and then package them up for us to take home. I often bought large amounts of those chilies, took them home and repackaged them (about six chilies to a bag) into plastic zip bags, with their blistered skins left on, but all the air squeezed out, and put them straight into my freezer. Whenever I wanted to make something with green chilies I’d grab a bag and let it thaw for a little bit on the kitchen counter, peel the skins off in the sink, and sometimes remove the seeds and stems (depending upon what I was making), and either use them whole or chop them into pieces for whatever recipe I was doing. SOooooo many ways to use green chilies!!!!
Its unfortunate, but we don’t get those trucks in the little Texas town where I live now, and perhaps not where you live either. The BBQ grill works, but I’m not a fan of standing over a hot grill to babysit chilies on a hot south Texas day. But, in this instance, you’ll be grilling burgers out there anyways, so you may prefer just to do it all on the grill. And maybe you have a hubby who is all about the grill and happy to do them for you! Knuckle bump!!!!
.
UPDATE: Since first posting this blog I got myself a neat little propane weed burner torch for burning those dadgum, infernal sticker burr weeds that grow up in the lawn down here in south Texas around labor day and Valentine’s Day, and I tell you what, it works pretty darn good for that, but it works slicker than snot for roasting chilies outside on the patio firepit on a gorgeous fall afternoon.
The Beef Patties
1 (1-pound) pkg of high quality ground beef plus 1 (1-pound) pkg of ground bison
1 jalapeno, stem removed, seeds and flesh chopped finely
1/2 of a small red onion, chopped finely
1 tsp Salt Lick dry rub seasoning (this is mostly just cayenne and ground black pepper)
Sliced Pepper Jack cheese – to be placed on burgers at the end of grilling
Hamburger buns of choice (Sometimes all I can find are the regular, sesame seed buns, but when I can find a good, soft, ciabatta-type bun, I use that).
Mix together gently and form into four or five good-sized patties. Set aside while you prepare the following ingredients, and then grill the burgers over hot coals on the BBQ. Add the cheese during the last minute or so of grilling.
.
Toppings
Bacon (2 slices per burger), the best is the thicker sliced applewood bacon, fried crispy…
(but if I’m in a hurry and don’t have leftover bacon from breakfast, I’ll use the precooked bacon available at the grocery store and go with 3 or 4 slices per burger)
Peel the skins off the green chilies, and remove seeds and stems, but leave whole
Sliced jalapeno
Sliced red onion
Sliced heirloom tomatoes
Romaine lettuce leaves, washed and dried
Dill pickle slices
Garlic Mayonaise (mash 1 clove of garlic and mix into 2/3 cup of mayo, I often add a sprinkle of chili powder and a squeeze of lime, and sometimes some minced cilantro)
Dijon mustard
.
To Assemble the Burger
Some like their buns toasted
Spread some mayo over the bun halves
Squirt on some mustard
Lay a whole slice of red onion down
Place a few slices of jalapeno on top of the onion
Then a freshly cooked beef pattie with melted cheese
Layer on two Green Chilies, two slices of cooked bacon, a slice of tomato, a folded leaf of lettuce, (and a couple slices of dill pickle if desired)
Place the top of bun in place
Mash down so you can fit it in your mouth and ENJOY!!!!!
.
For this Memorial Day,
… I made these burgers and served them with my Jalapeno Potato Salad (from Cowboy Backyard BBQ), plus my latest favorite food: Mexican Street Corn, and sliced watermelon for dessert.
.
Mama’s POTATO SALAD
Ingredients
6 large red potatoes cooked until tender and cubed, skins on or off as preferred
4 hard boiled eggs, cooled and chopped
1/2 large red onion diced
3 stalks of celery chopped
2 Tbsp sweet pickle relish
1 small sprig of dill weed, chopped
1 bunch of green onions chopped
1 or 2 large jalapenos, seeds and stems removed, diced
Sauce Ingredients:
1 cups Mayonnaise (plus more or less, as you like it)
3 Tbsp red wine vinegar
1 tsp Sea Salt (plus more as desired)
2 Tbsp sugar
1 tsp ground pepper
Directions:
Put first eight ingredients in a very large bowl. Mix up sauce ingredients and pour over the ingredients in the bowl. Toss to coat. Cover and refrigerate until ready to serve.
Optional additions:
Add a half-cup of blue cheese crumbles and a quarter cup of crispy crumbled bacon as a garnish on top of potato salad.
.
Colleen’s Mexican Street Corn
8 ears fresh sweet corn (leave the husks and stems on)
1/2 cup mayonnaise
1 Tbsp Mexican crema (my grocer carries two types, a sweet cream type,which tastes like heavy whipping cream, and a sour cream kind. Both have a slightly thicker consistency than whipping cream)
1/2 cup finely crumbled cotija or Queso Fresco cheese
1/2 teaspoon chili powder (I make my own blend, see recipe below)
1 medium clove garlic, mashed and finely minced
1/4 cup finely chopped fresh cilantro leaves
4 or 5 limes, cut into wedges
I grilled my corn in the husks on the grill, turning about every 5 minutes until charred on all sides, and then I pulled the husks down over the stems (using oven mitt to protect my hands from burning) and returned the corn to the grill for a short time (about 3 minutes) to give the kernels that charred effect. What works even better though is that nifty little propane torch I told you about above. I left the husks attached for a decorative effect, but now as I look at these photos I’m thinking they might have been even cuter if I had tied something around each husk, like a piece of raffia or something, to bundle them together and anchor them to the stems, turning them into decorative “handles.” NOTE: The corn can also be shucked and “grilled” in the oven at 425 degrees F, turning about every 7 minutes or so until cooked all the way around. Once it is cooked on all sides and has some charred spots it’s time to dress it up.
While the corn is grilling, mix together the mayo (please don’t use the fat-free stuff. I know it may be healthier for you, but really, you must live a little!!! At this just this one meal in your lifetime!), crema, garlic, and add about 1/4 tsp of the chili powder. Juice and zest a couple of the limes and then add the juice and zest to the mayo mixture. Toss in about half of the crumbled cotija (Queso Fresco). Mix well and keep in fridge until ready to use. Cut the remaining limes into wedges and save for serving.
As soon as the corn is grilled, spread each cob with a generous amount of the mayo mix on all sides. Don’t be chincy. Follow with a sprinkling all around of chili powder, and then cheese crumbles. Sprinkle some cilantro on top, and a few extra sprinkles of the cheese. Serve immediately with a wedge of lime for each cob!
You’ve died and gone to heaven, right? I’m there with ya!!!!!!
Colleen’s Homemade Chili Powder
3 Ancho Chiles (dried), stemmed, seeded, and sliced
3 Cascabel/Guajillo chiles (dried), stemmed, seeded, and sliced
4 Arbol/Cayenne chiles (dried), stemmed, seeded, and sliced
2 Pasilla chiles (dried), stemmed, seeded, and sliced
2 New Mexico Red chiles (dried), stemmed, seeded, and sliced
1 Tablespoon Cumin seeds
1 Tablespoon dried Mexican Oregano
1 Tablespoon hot Paprika
Chili Pequin to taste (I sometimes crush these little guys separately and only add it to single portions, as it really brings the heat)
Place the chiles and cumin seeds in a saute pan or cast iron skillet and toast over medium heat about 3 minutes. Remove from heat and place in a glass bowl to cool completely. Once cool, place in a blender, along with the other ingredients and process until a fine powder. Allow the powder to settle for several minutes before lifting the lid. Store in an airtight container for up to 6 months. Use for making chili, to season corn, or in BBQ sauces and dry rubs.
.
“Prepare the table, watch in the watchtower, eat, drink: arise, ye princes, [and] anoint the shield…” Isaiah 21:5
When’s the last time you had Haystacks for supper? Why not invite the family over and serve up some fun! This recipe serves four, and is easily doubled.
You’ll need:
Taco-Chili Meat:
1 lb ground beef
1 packet Taco Seasoning
1 15-oz can Rotel Tomatoes
Fry hamburger in a deep sided frying pan on the stove top on medium high heat until cooked through. Drain off fat. Add Taco seasoning and tomatoes, plus ½ can of water. Stir, bring to a bubble and then simmer until ready to serve.
Charro Beans:
If I don’t have left-overs, I cheat and use ready made out of a can.
*If you would like to make homemade chili in place of the meat and beans, see my recipe HERE(it’s the second recipe down in the series on that page).
Rice:
1 cup rice
2 Tablespoons butter
2 cups boiling water
In a small sauce pot on high heat on the stove top, Saute rice in butter for a minute or so. Add water. Bring to a boil, turn heat down to low, cover with a tight fitting lid, and set timer for 20 minutes. I love Green Chili Rice for a change of pace! Just make rice as directed, substituting chicken broth for the water, plus a small can of green chilis.
Plus…
1 regular size bag Fritos (regular or spicy)
Shredded Mexican blend cheese
Chopped Romaine lettuce
Sliced grape tomatoes
Diced green onion
Chopped jumbo black olives
Sliced avocado (or guacamole)
Chopped Cilantro
Make a dressing of equal parts salsa and sour cream
1 jar jalapeno slices
To serve:
Place a handful of Fritos on each person’s plate
Top Fritos with Taco-Chili meat
Ladle on some warmed charro beans
Add a spoonful of rice
And then the cheese, lettuce, tomatoes, onion, black olives, avacado, cilantro, and finish with the dressing.
Garnish with jalapenos, as desired
Summer Haystacks Supper
ENJOY!!!!
.
1 (11-oz) pkg Butterscotch baking chips
1/4 cup crunchy peanut butter
1/4 cup dry roasted peanuts
1 (12-oz) pkg La Choy chow mein noodles
Melt butterscotch chips in the top pot of a double boiler (bottom pot should have a few inches of water and be brought to boiling), stirring constantly.
Once chips have melted, remove pan from heat and stir in peanut butter and peanuts. Add chow mein noodles and toss gently to coat them all over completely. Drop by spoonfuls onto a foil lined cookie sheet. Allow to cool and set up before serving. May be refrigerated to hasten the cooling/setting up process in warm climates.
“Now if any man build upon this foundation gold, silver, precious stones, wood, hay, stubble; Every man’s work shall be made manifest: for the day shall declare it, because it shall be revealed by fire; and the fire shall try every man’s work of what sort it is.”
1 Corinthians 3:12-13 (KJV)
FUN and GAMES
A fun after-supper game for the kids… Make a giant straw haystack in the back yard and hide it full of plastic Easter eggs. One Easter Egg can have a slip of paper inside with a picture of a needle on it. Whoever finds “the needle in the haystack” will win a special prize. All the other eggs can have candy, or trinkets, or even puzzles to solve – or that will lead them on a treasure hunt, or dares for the finder to act out in them. The kids will have so much fun finding the needle in the haystack, solving puzzles, searching for treasure, and acting out the dares!!! And when they are done, they’ll have a blast piling the hay back into a heap and pouncing into it over and over again. Great activity for when you want to have guests with kids over. The grown ups can gather around a fire while the kids are over yonder playing in the hay!
“It is easier for a camel to go through the eye of a needle, than for a rich man to enter into the kingdom of God.” Mark 10:25
If you’ve never had it, you are about to meet your new favorite food. You’ll be dreaming of it. In fact, as soon as fresh corn-on-the-cob starts showing up in your grocery store, I’m going to go out on a limb here and say you will probably eat corn three times a week for the first month. I’ll almost bet you’ll never want corn-on-the-cob any other way!!!!!!! I’m ruined too!!!!
8 ears fresh sweet corn (leave the husks and stems on)
1/2 cup mayonnaise
1 Tbsp Mexican crema (my grocer carries two types, a sweet cream type,which tastes like heavy whipping cream, and a sour cream kind. Both have a slightly thicker consistency than whipping cream)
1/2 cup finely crumbled cotija or Queso Fresco cheese
1/2 teaspoon chili powder (I make my own blend, see recipe below)
1 medium clove garlic, mashed and finely minced
1/4 cup finely chopped fresh cilantro leaves
4 or 5 limes, cut into wedges
I grilled my corn in the husks on the hot grill, turning about every 7 minutes until charred on all sides.
Then I pulled the husks down over the stems (using oven mitt to protect my hands from burning). I left the husks attached for a decorative effect, but now as I look at these photos I’m thinking they might have been even cuter if I had tied something around each husk, like a piece of raffia or something, to bundle them together and anchor them to the stems, turning them into decorative “handles.” NOTE: The corn can also be shucked and “grilled” in the oven at 425 degrees F, turning about every 7 minutes or so until cooked all the way around. Once it is cooked on all sides and has some charred spots it’s time to dress it up.
While the corn is grilling, mix together the mayo (please don’t use the fat-free stuff. I know it may be healthier for you, but really, you must live a little!!!), crema, garlic, and add about 1/4 tsp of the chili powder. Juice and zest a couple of the limes and then add the juice and zest to the mayo mixture. Toss in about half of the crumbled cotija (Queso Fresco). Mix well and keep in fridge until ready to use. Cut the remaining limes into wedges and save for serving.
As soon as the corn is grilled, spread each cob with a generous amount of the mayo mix on all sides. Don’t be chincy. Follow with a sprinkling all around of chili powder, and then cheese crumbles. Sprinkle some cilantro on top, and a few extra sprinkles of the cheese. Serve immediately with a wedge of lime for each cob!
You’ve died and gone to heaven, right? I’m right there with ya!!!!!!
NOTE: I’ve also mixed up the mayo sauce with all the ingredients and let my guests spread it on their corn themselves. It’s not as pretty this way, but it tastes the same. You can even cut the corn off the cobs (about 8 large ones) and mix the sauce with it to make Corn-in-a-Cup, another favorite street food of south Texas. I used about a cup of mayo, a little less than a tablespoon of homemade chili powder, the juice of two limes, a clove of garlic minced, 1/3 cup minced cilantro, 1/2 cup crumbled cojita cheese, and half a teaspoon of salt. If you’d like it a little creamier, add some Crema. To make it pretty, garnish the corn cups with a little more crumbled cojita cheese on top and sprinkle with some minced cilantro. Sooooooo good!!!
.
.
Colleen’s Homemade Chili Powder
3 Ancho Chiles (dried), stemmed, seeded, and sliced
3 Cascabel/Guajillo chiles (dried), stemmed, seeded, and sliced
4 Arbol/Cayenne chiles (dried), stemmed, seeded, and sliced
2 Pasilla chiles (dried), stemmed, seeded, and sliced
2 New Mexico Red chiles (dried), stemmed, seeded, and sliced
1 Tablespoon Cumin seeds
1 Tablespoon dried Mexican Oregano
1 Tablespoon hot Paprika
Place the chiles and cumin seeds in a saute pan or cast iron skillet and toast over medium heat about 3 minutes. Remove from heat and place in a glass bowl to cool completely. Once cool, place in a blender, along with the other ingredients and process until a fine powder. Allow the powder to settle for several minutes before lifting the lid. Store in an airtight container for up to 6 months. Use for making chili, to season corn, or in BBQ sauces and dry rubs.
“And it came to pass on a second solemn Sabbath, that He went through the corn fields, and His disciples plucked the ears of corn, and did eat, and rubbed them in their hands.” Luke 6:1 (Geneva Bible)
6 chicken breasts, organic skinless and boneless (or 2 fully cooked deli rotisserie chickens, skinned and deboned)
1 cup diced celery
½ red bell pepper, diced
1 large jalapeno, diced (seeds and stems removed)
1 small white onion, minced (or half of a larger size white onion)
2 green table onions, washed and chopped
1 ½ cups quartered red grapes
1 20-oz can crushed pineapple, drained
2 small gala apples, very thinly sliced
2/3 cup chopped pecans
Salt and Pepper to taste
Mayonnaise
Romaine lettuce leaves, washed and dried
Raisin bread, sliced, OR … fresh deli croissants
Place chicken breasts in a large pot, cover with water, season to taste with salt & pepper (I sometimes toss in a lemon and an orange if I have them, cut in half), and bring to a boil on the stove. Boil for 15 to 20 minutes, or until the chicken is cooked through. Test by removing the largest piece and cutting it in half.
Meanwhile chop the celery, bell pepper, jalapeno, onions, grapes, and apples and set aside.
When the chicken has cooked and cooled, cut it into very small chunks and place in a large mixing bowl. Add the chopped ingredients (minus the apple), the crushed pineapple, pecans, and season with a little salt and pepper. Add enough mayo to moisten as desired and toss with chicken until all ingredients are incorporated. I usually start with a cup of mayo, and then add more as I mix until it has the creamy texture I want. Taste it to make sure it is yummy. Add more salt and pepper if desired. Cover with plastic wrap and chill in the refrigerator for a couple of hours.
To assemble sandwiches, slice raisin bread to desired thickness, toast if desired. Or, if using croissants, slice them in half. Spread a thin layer of mayo over both top and bottom slices. Next, lay a leaf of lettuce on the bottom slices. Arrange a few apple slices on top of the lettuce, and then top the apples with a heaping serving spoon of chicken salad and press it down to spread it to the edges of the bread. Carefully lay the top slice of bread on top. Slice each sandwich in half, if desired.
Serve with a raw veggie medley (carrot, celery, cucumber slices), or seasoned cottage cheese, or an assortment of cheeses, or your favorite chips (personally I am a Sun Chips kind of gal)…plus a nice iced Chai latte to wash it all down with! Mmm..mmm..mmm!!
“For every creature of God is good, and nothing is to be refused, if it be received with thanksgiving; For it is sanctified by the word of God and prayer.”
It’s that time of year when a bowl of steaming hot soup with a side of hot, fresh baked, heavily buttered, crusty bread not only warms the body, but the heart and soul as well. I have been asked soooo many times for these soup recipes that I decided to make a place for them here.
My husband says it is impossible for me to make a small batch of anything. Tis true I suppose. So, if you find yourself with more soup than you can eat, please wrap some up and take it to a neighbor, or share it with friends in the office, or bring a bowl to your child’s teacher, for lunch on a blustery winter day!
.
Mom’s Green Chili
…First we have to make the roast!…
1 8-lb Boston Butt Pork Roast, patted dry and rubbed all over with this dry rub:
1 heaping Tablespoon Chili Powder
1 heaping Tablespoon dried Cumin
1 heaping Tablespoon smoked hot Paprika (Pimenton Picante)
1 teaspoon cinnamon
3 Tablespoons brown sugar
1 teaspoon Kosher or sea salt
1 teaspoon freshly ground pepper mélange
Place roast on grate in roasting pan, cover with foil, and put into a preheated 350°F oven for about an hour. After an hour, turn the oven temp down to 225°F leave roast in oven to finish baking until meat is falling off the bone, approximately 3 to 6 hours. I actually leave mine in all day (6 to 8 hours) tightly covered.
I usually always make my green chili from this leftover roast. After the roast has cooled I pull it apart into large chunks (this is a very fatty roast, and I discard all the fat and bone), wrap the meat up in a freezer zip-bag and either put it in the fridge for the next day, or in the freezer, to make my next batch of Green Chili (recipe follows).
.
.
.
Mom’s Spicy Red Chili
3 lbs ground beef (I sometimes switch out one pound with ground bison, or you could use venison)
1 large onion, chopped
3 (14-oz) cans diced fire roasted tomatoes (reduced or NO sodium)
3 (14-oz) cans of low-sodium chicken broth (I use the empty tomatoes can to measure my broth from a larger carton)
3 (14-oz) cans of low-sodium beef stock (again, I use my empty tomatoes can to measure my stock from a larger carton)
9 Tbsp of chili powder (added at different intervals) (I make my own; it’s sooooo much better than anything you can buy at the market – see recipe below)
3 Tbsp of yellow corn meal or fine masa flour (used to make tamales)
2 large cloves of garlic, mashed and minced
In a large, high-sided frying pan, or dutch oven, fry burger meat on medium high heat until cooked through. Remove from heat. Drain off excess fat. Return dutch oven to medium high heat and add onion to the ground meat. Stir and cook together a few minutes. Dump in the tomatoes, chicken and beef stocks, garlic, 6 spoonsful of the chili powder, and then the corn meal. Bring to a boil, then lower heat to a simmer. Cover and let cook for 1 hour.
Remove lid, stir, and add 2-3 more spoonsful of chili powder. Taste for seasoning. If a soupier chili is desired, add a tomato can full of water. If you want a thicker chili, stir in a tablespoon or two more of masa. Stir, replace lid and let cook another 30 minutes. Taste to make sure it is yummy before serving. Add a can or two of drained rinsed beans if desired. I like to add 1 (14-oz) can of pintos and 1 (14-oz) can of red beans.
Serve with crackers (I have to spread real butter on mine) or cornbread (I usually always make a Mexican style cornbread – I use a honey cornbread mix and add shredded cheese, diced onion, and diced jalapeno to the mix). Chili may be served with any of the following toppings: crushed tortilla chips, shredded cheddar or pepper jack cheese, chopped red or green onions, diced jalapenos, a dallop of sour cream, etc. This recipe makes a lot, but you can use the leftovers to make Frito Pies, Chili-cheese Dogs, and Hay Stacks.
Colleen’s Homemade Chili Powder
3 Ancho Chiles (dried), stemmed, seeded, and torn into small pieces
3 Cascabel/Guajillo chiles (dried), stemmed, seeded, and torn
4 Arbol/Cayenne chiles (dried), stemmed, seeded, and torn
2 Pasilla chiles (dried), stemmed, seeded, and torn
2 New Mexico Red chiles (dried), stemmed, seeded, and torn
1 Tablespoon Cumin seeds
1 Tablespoon dried Mexican Oregano
1 Tablespoon hot Paprika
Chili Pequin (I crush about 10 of these little guys seperately and only add it when I can really bring the heat – and otherwise it can be added to individual bowls)
Place the chiles and cumin seeds in a saute pan or cast iron skillet and toast over medium heat about 3 minutes. Remove from heat and place in a glass bowl to cool completely. Once cool, place in a blender (my Bullet is perfect), along with the other ingredients and process until a fine powder. Allow the powder to settle for several minutes before lifting the lid. Store in an airtight container for up to 6 months. Use for making chili, to season Mexican Street Corn, or as an ingredient in BBQ sauces and dry rubs.
.
.
Mom’s Chicken Tortilla Soup (mildly spicy)
.
.
.
Mom’s Creamy Poblano Soup (spicy)
Let me start with my prep work on this one. First, I grow my own Poblano Chilies in my garden, and in the fall/early winter when the weather calls for frost I harvest everything and hurry and preserve it, either by drying or freezing.
After (1) picking my Poblanos and (2) washing them, I (3) roast them in the oven until the skins are charred and bubbled all the way around, then I (4) seal them in plastic bags and let them sit until I am done with all my roasting. Finally I (5) put on a pair of latex gloves and begin sliding the skins off, pulling the stems out, and wiping all the seeds from the insides.
Then I fold each chili in half and tuck them inside a freezer zip-bag, about 15 chilies to a bag, squeeze all the air out, zip the bags closed, fold the bags over, and tuck about three bags of the chilies into another zip-bag. Then I stash these bags in my freezer for soup all winter long (or until they run out).
Recipe:
8 cups Chicken Broth (I’m kind of an organic girl, so if I can’t find organic broth I usually make my own)
2 large Yukon gold potatoes, diced
2 large onions, diced
Kernels from 6 cobs of sweet corn
1 tsp. salt, plus more to taste
1 stick of butter
4 cloves of garlic
¼ cup fresh parsley
Bring broth to a boil and add all the ingredients after that. Cook until tender. Add:
15 processed Poblano Chilies (as described above)
Whirl contents of the soup pot in a blender until smooth, then return to the soup pot and add:
6 cups Heavy Cream (or 3 cups heavy cream and 3 cups Half-and-half)
Let this simmer on the stove until ready to serve. When ready to serve, ladle soup into bowls and garnish with shredded Pepper Jack cheese.
.
.
.
Mom’s Creamy Farmhouse Potato Soup, with Bacon and Jalapenos
12 medium potatoes (I actually prefer russets for this soup, plus they keep better so I usually have them on hand), peeled and cut into bite-size chunks
1 large white onion, chopped
2 cloves garlic, minced
4 ribs of celery, chopped
2 to 3 Jalapenos, finely minced (if your jalapenos are mild, use more, if spicy use less, to taste)
1 large (48-oz) container of chicken broth
2 small or 1 large can of Cream of Chicken soup (I prefer Campbells)
1 stick of butter
2 cups of whole milk
1 8-oz package Cream Cheese, at room temp
Salt & Pepper to taste
Fry bacon either while soup cooks, or before starting the soup. Lay on paper towels, and set aside. Place potatoes, onion, garlic, celery, and jalapenos in a large soup pot. Add the chicken broth and enough water to cover the potatoes about one inch over. Cover and bring to a boil. Turn heat down to a simmer and cook until potatoes are tender, about 10 minutes depending on the size of the chunks. Add all of the remaining ingredients and stir until blended and cream cheese is melted and fully incorporated. Taste, and add salt and pepper to taste. Bring to a steaming simmer, stirring occasionally so the bottom of the soup doesn’t stick and burn. Ladle into bowls and garnish just before serving! Make the garnish pretty by first adding a dollop of sour cream to the center, then sprinkle with crumbled bacon, shredded cheese, and chopped green onion (and pass the diced jalapeno for those who want a little more heat). Bon appetite!
Garnishes:
Sour cream
½ lb crispy fried bacon
Shredded Cheddar Cheese
1 bunch green onions, chopped
Fresh chopped Parsley
2 large jalapenos, minced
.
.
.
Mom’s Spicy White Bean, Andouille, and Kale Soup
This is one of those soups that I make for my daughter. She and I LOVE this soup, especially on a cold winter day (when we can lounge in our jammies and eat and watch a marathon of something on TV). My crazy husband is not a fan of Kale, or really anything green-leafy and floating in his soup, so this is a special treat for when he is out-of-town and the girls and I can have a girl’s night!
1 pkg Andouille sausage (if you can find the semi-hard Chorizo, that works too, or even a jalapeno smoked sausage), cut into bite-size pieces
2 large Yukon Gold potatoes, cut into small chunks
½ white onion, chopped
5 garlic cloves, minced
1 finely minced Poblano chile
4 cups Chicken broth
1 14.5-oz can fire-roasted tomatoes
1 bunch of kale (fresh, raw, and washed well, stems chopped off and discarded), torn roughly into bite-size pieces – I love Kale, so for me moooore is better!!!!
1 14-oz can Cannellini beans, drained and washed (Garbanzo’s will also work)
Salt and Pepper to taste
Fry the sausage in a heavy soup pot until crispy on the edges. Toss in the potatoes, onions, garlic, and poblano. Saute for a few moments and then add the chicken broth and tomatoes. Simmer for about 20 minutes, and then add the kale. Taste it and add salt to taste. Grind some pepper also to taste. Simmer another 20 minutes and add the beans. Allow them to heat through. When steaming hot, serve with warm, crusty bread slathered in fresh, creamery butter. Oh Lord, I’ve died and gone to heaven!!!!
.
.
.
Mom’s Zuppa Tuscano (spicy)
I found this recipe online, published by Big Oven, and tweaked it to make it my own.
1 lb Italian sausage (my grocery meat dept. has parmesan and something else Italian meatballs that I brown and chop up, plus the Italian sausage in casings – which I remove from the casings, brown and break up)
1 tsp red pepper flakes; (I grow all sorts of hot peppers in my garden– Hungarian paprika, cayenne, poblano, serrano, jalapeno, thai hots, habanero, etc. – and dry them and grind them into powder. This is what I use in my soup.)
3 large russet potatoes, cut into chunks
1 large onion, diced
1 lb. bacon, chopped (I cook mine crispy the day before, wrap it in paper towel, and place in a plastic bag in the fridge. Unlike Big Oven, I don’t add it to the soup until after I’ve added the kale and cream)
4 garlic cloves; minced (I use the biggest outside ones)
3 cups kale, chopped (I’m sorry, I really never measure this, I just add until it looks good, probably more than 3 cups because I LOVE Kale). Remove the tough ribs and tear the leaves roughly. Rinse really well.
2 boxes (32 oz ea) chicken broth
2 cups water
1 1/2 cups heavy whipping cream
Liberal sprinkling of white pepper
(I add about a ¼ tsp of my *special chili pequin and pepper mélange seasoning also)
Original recipe makes 10 Servings. Cook Bacon ahead of time and have ready. Sauté Italian sausage and crushed red pepper in a pot. Drain excess fat, remove sausage and set aside. In the same pan, sauté onions and garlic (I cooked mine in a little butter). Sauté for approximately 5 mins. or until the onions are soft. Add the chicken stock and water. Bring to a boil. Add potatoes and cook until soft, about 15-20 minutes. Add kale during the last 5 minutes. Add heavy cream and the cooked sausage and cook until heated through. Add white pepper to taste.
If you want the soup a little thicker, you can make a blonde roux in a separate pan and incorporate it into the soup. I make my own *spice mixture of ground pepper mélange, ground chili pequin, and kosher salt and I sprinkle my portion with it just before serving. I also add some to the soup, but careful not to overload, it in case some folks were sensitive to the spice. The soup is especially good when served with warm, buttered crusty bread!
.
.
.
Mom’s Spicy Nacho Cheese Soup
1 gallon can of Nacho (or Cheddar) Cheese
2 cups Chicken broth
4 cups water
1 Poblano chili, diced
6 ribs of celery, diced
2 cups of ham, diced
1 small white onion, minced
Place all ingredients in a large crockpot, cover and cook on high for 2 to 3 hours, or until celery and onion are tender and soup is piping hot. Great served with Panini sandwiches!
Serving Suggestion:
Thin sliced Italian Bread, brushed with olive oil on one side
Fillings:
Mozzarella
Provolone
Heirloom Tomatoes
Prosciutto
Pepperoni
Fresh basil
Roasted red peppers
Portabella mushrooms
Spinach
Arugula
And whatever else makes your tongue dance
Put your sandwiches together, olive oiled sides out, and then grill in a Panini press. I don’t personally own a Panini press, but the George Foreman grill works pretty well if you clamp it down.
.
.
.
Colleen’s Clam Chowder
Colleen’s Clam Chowder, served in a fresh sour dough bread boule from the bakery! Toast the lid and drizzle it with garlic butter for an added treat!
.
.
May our soup bowls be deep and our friends plentious!!!!
.
.
“And one day Jacob was cooking some soup when Esau came in from the fields in great need of food” Genesis 25:29


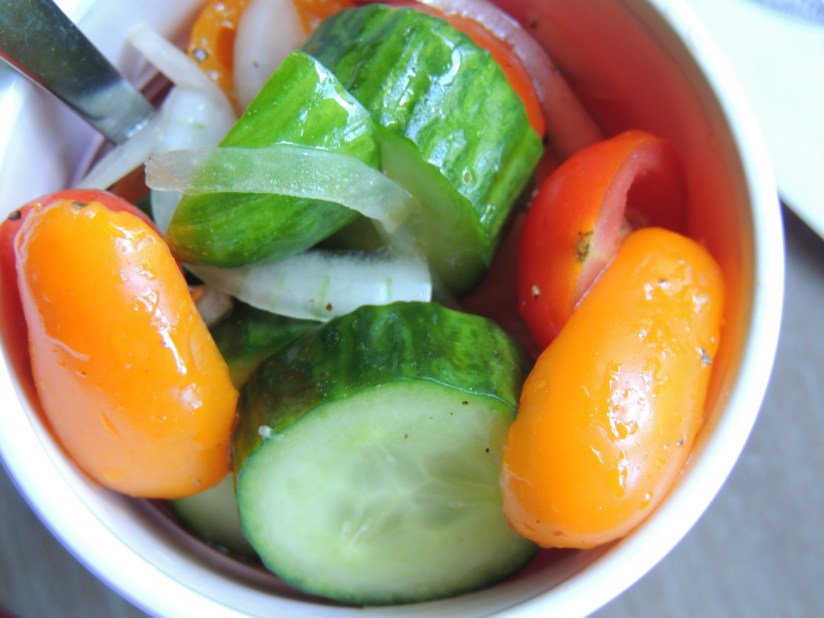
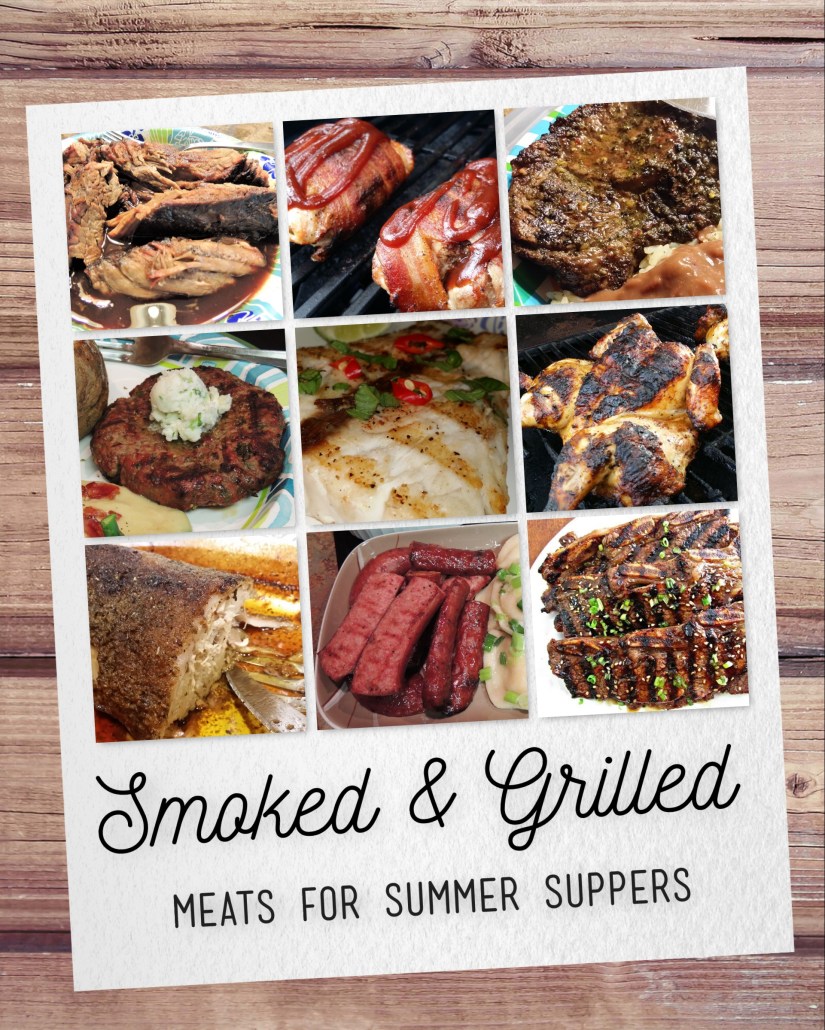


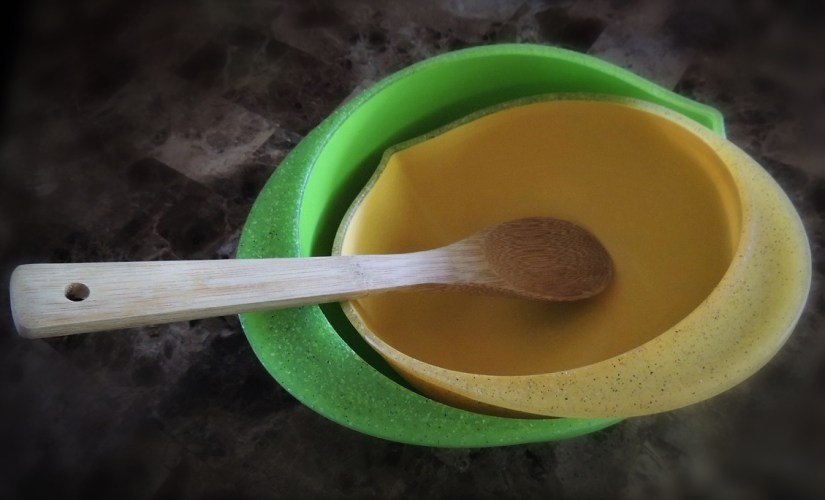
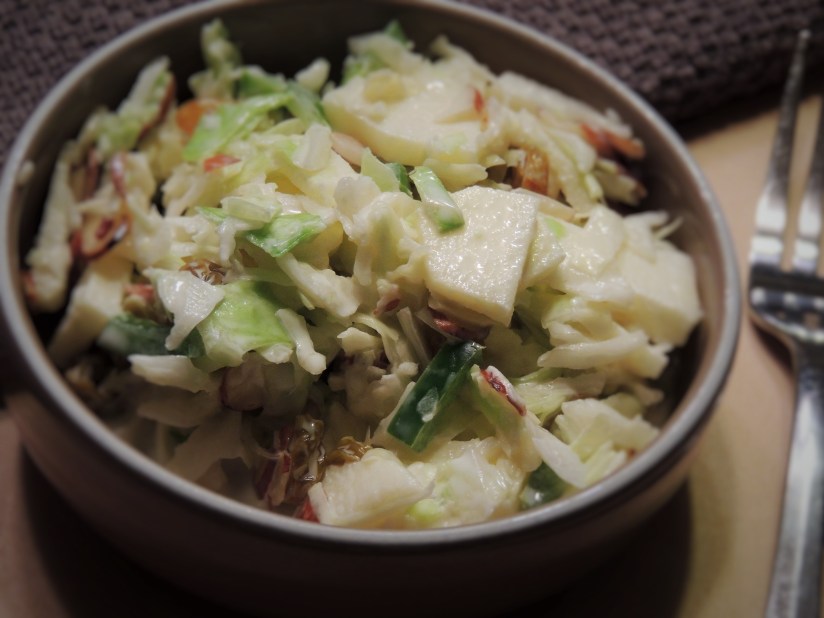


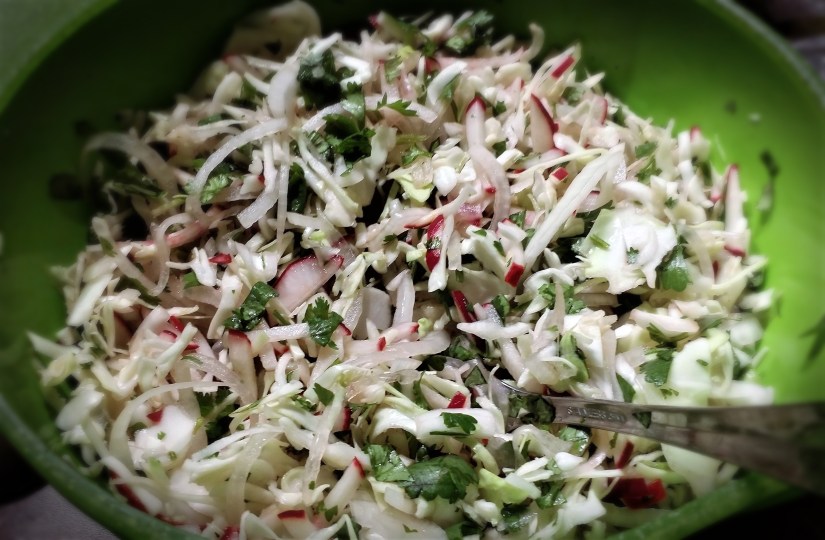
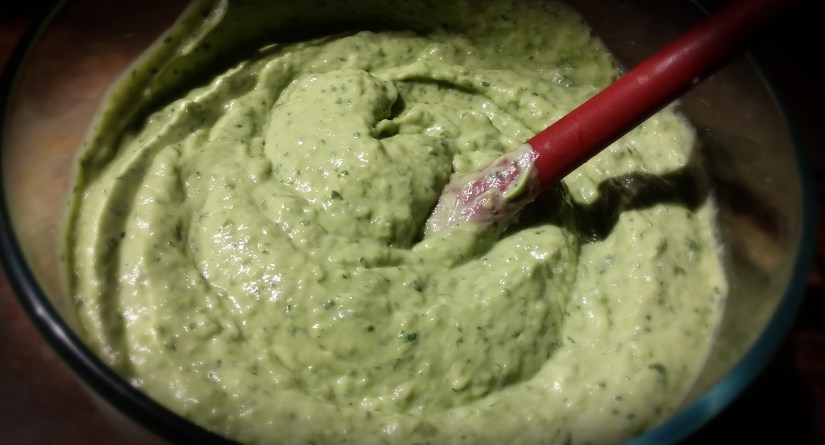
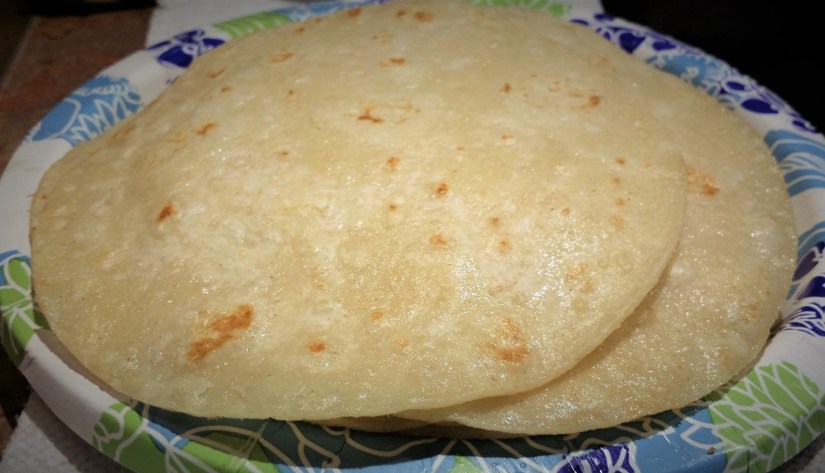
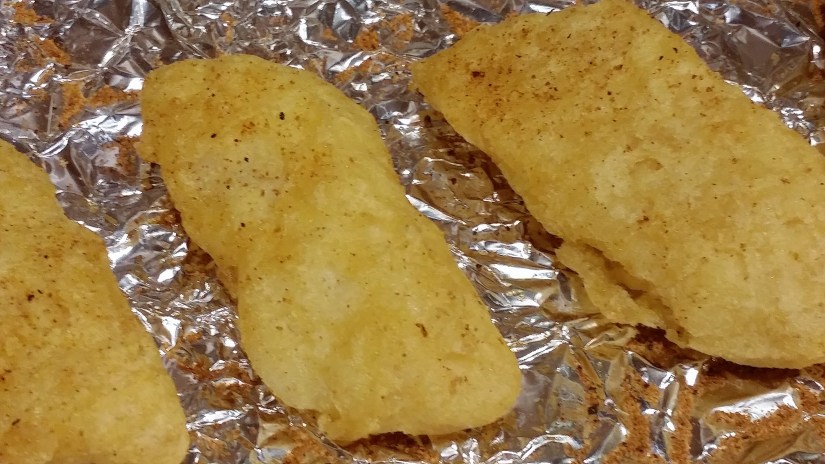


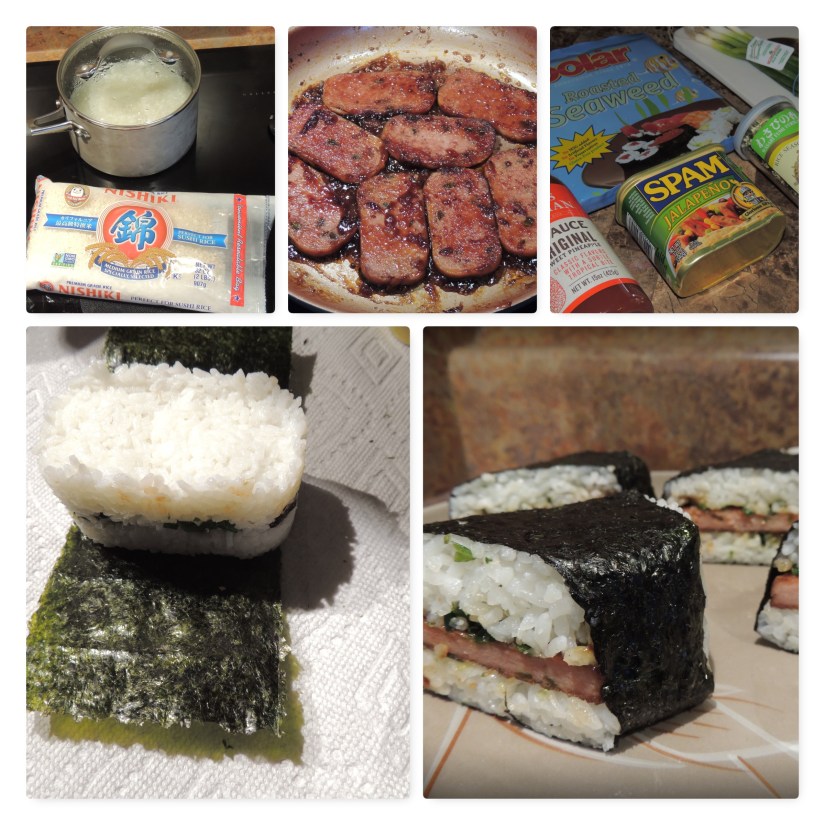
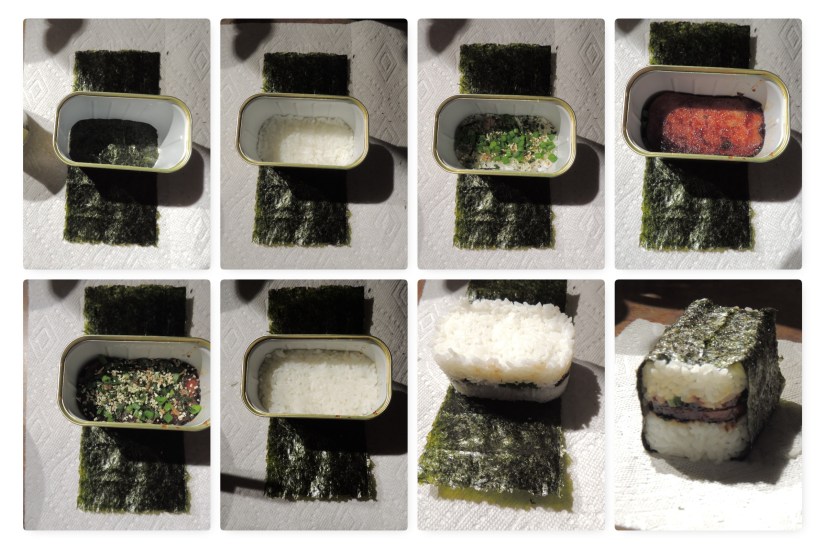
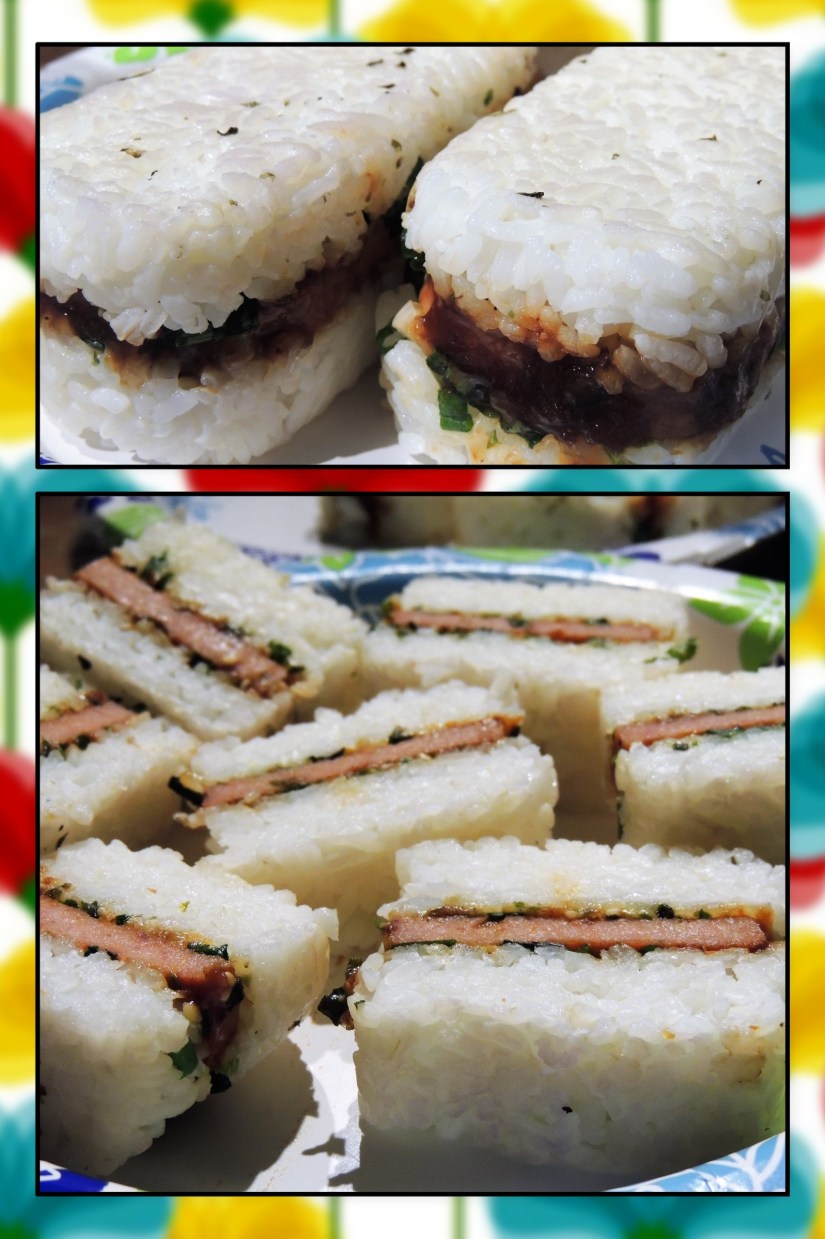
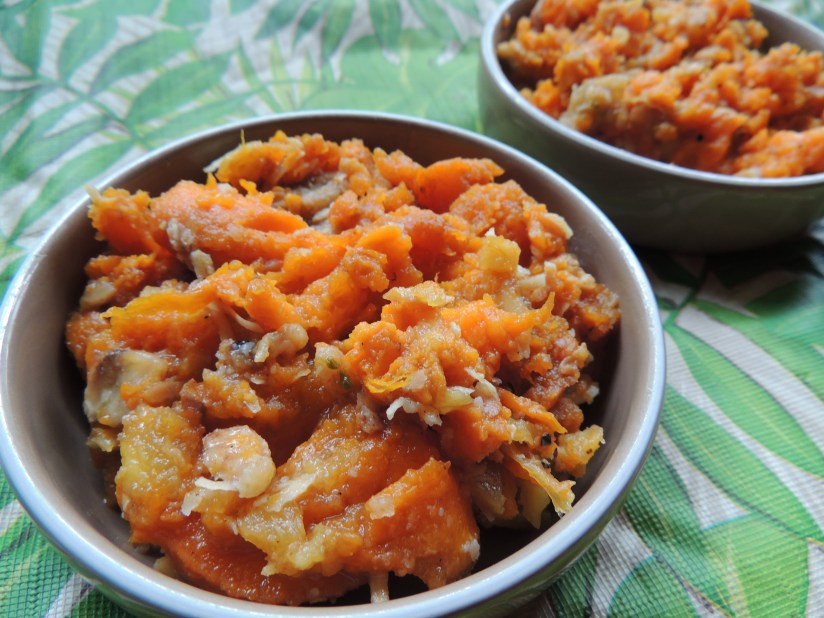
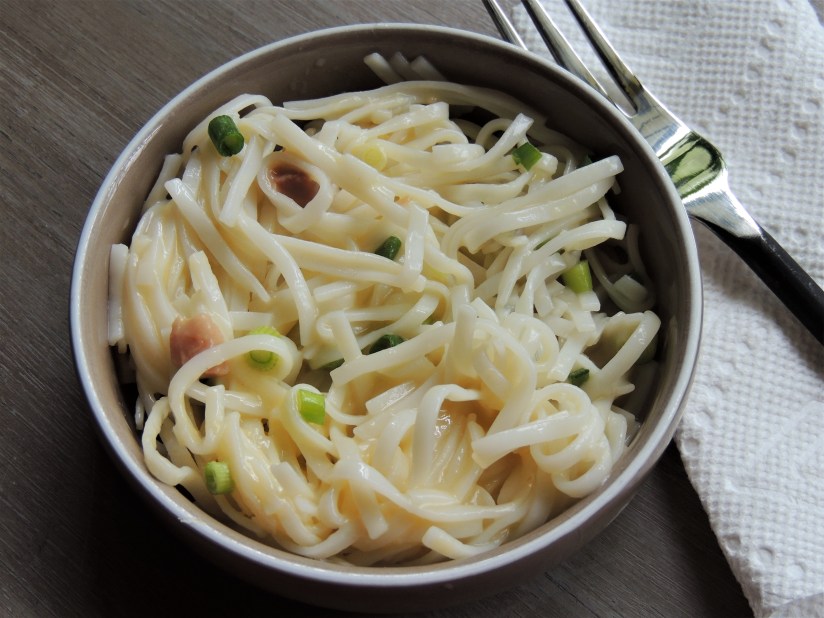
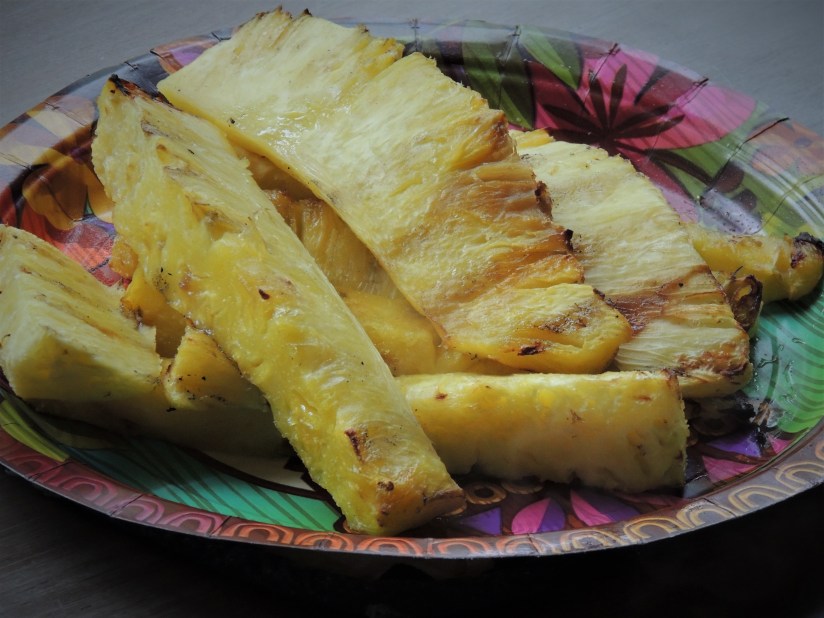


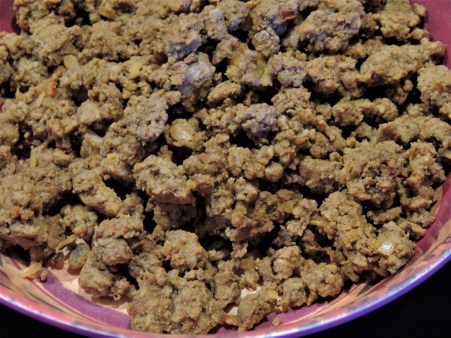
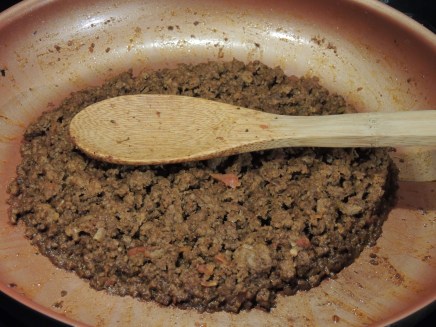
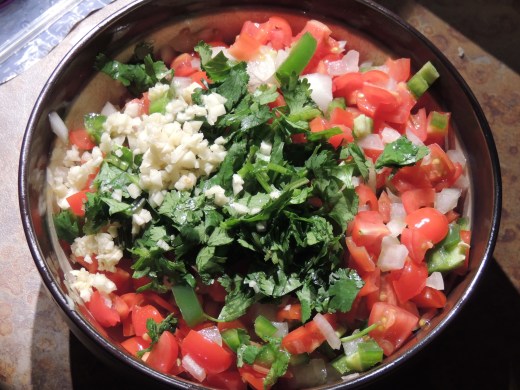
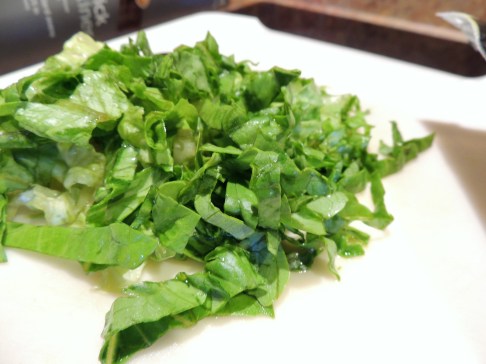
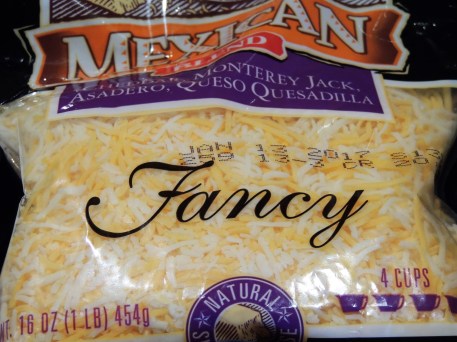
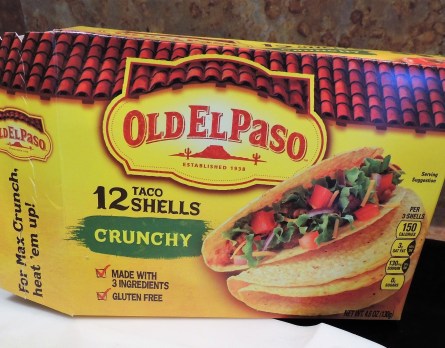
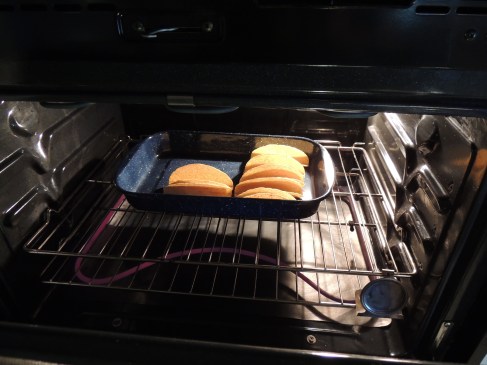


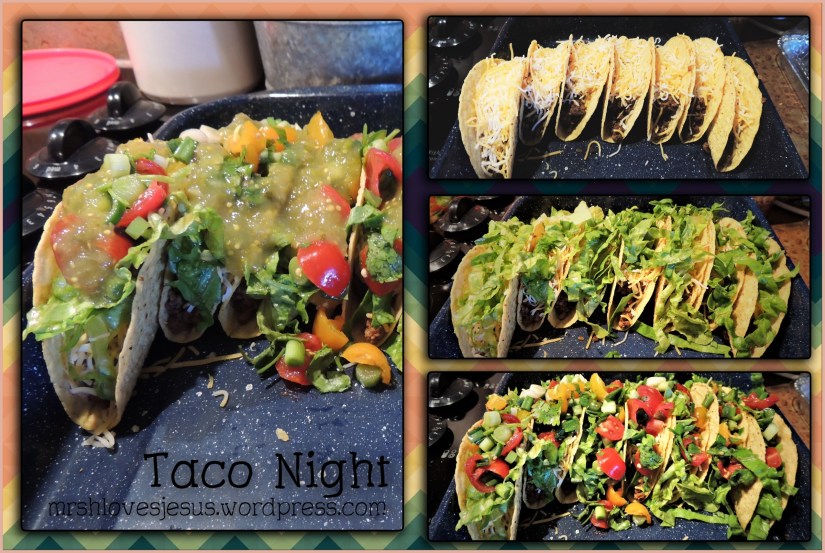
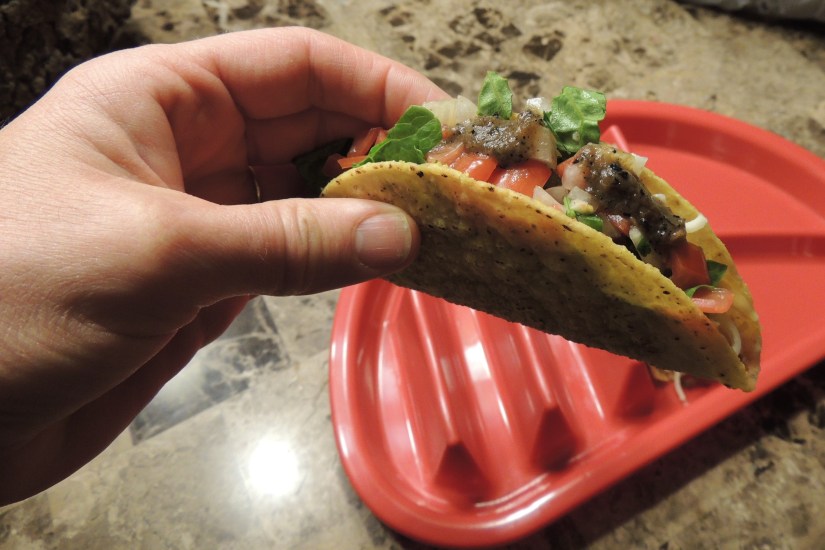
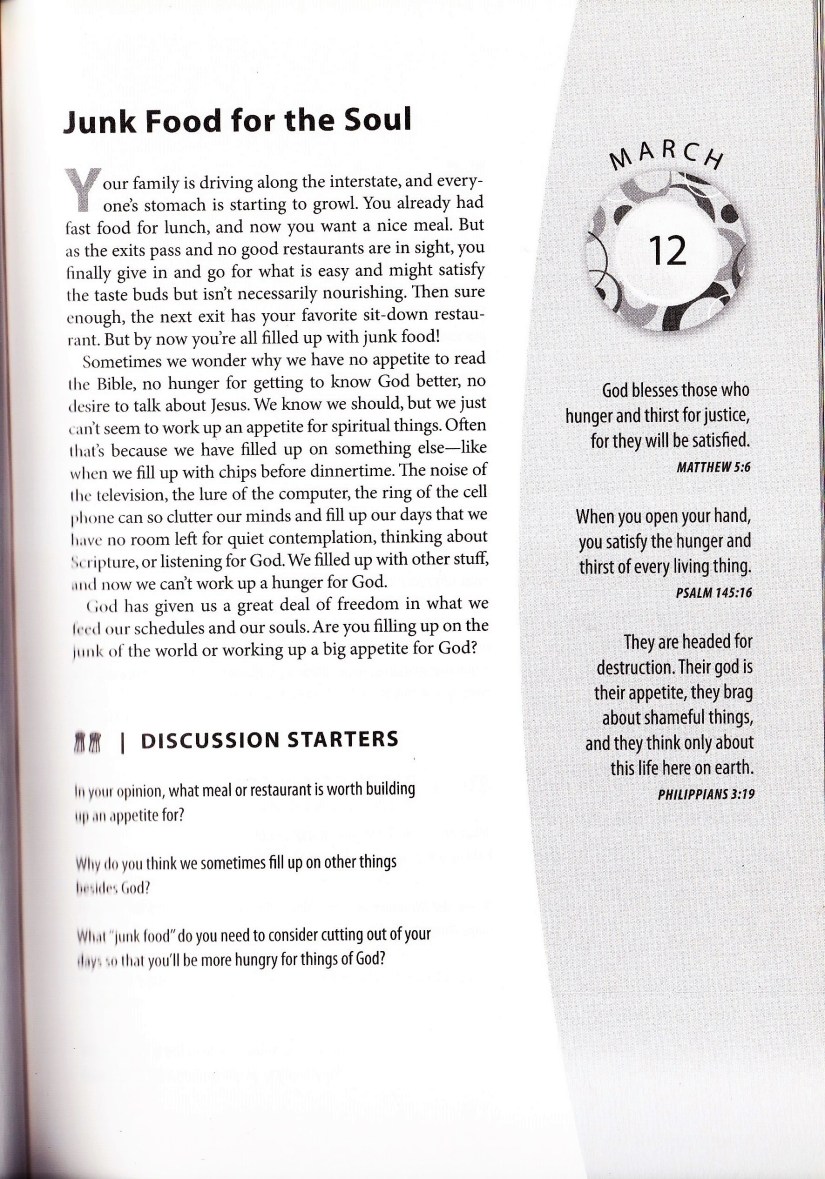


 To prepare the anasazi beans, soak overnight in water to cover. The next day, drain the beans and place them in a saucepan with fresh water to cover. Bring to a boil, reduce the heat, and let the beans simmer until the skins break, about 3 hours. It may be necessary to add water as the beans cook to prevent them from burning and sticking. After the beans are cooked, remove from the heat and set aside. You should have about 3 cups cooked beans.
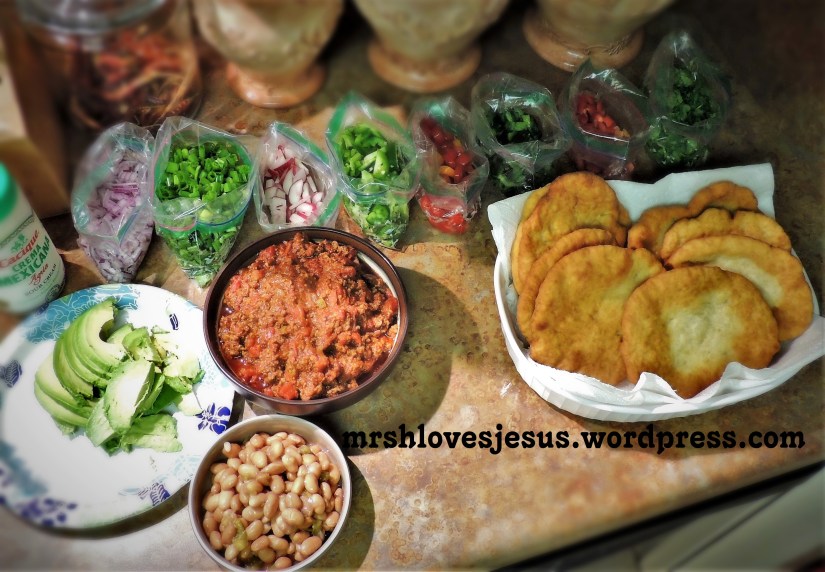


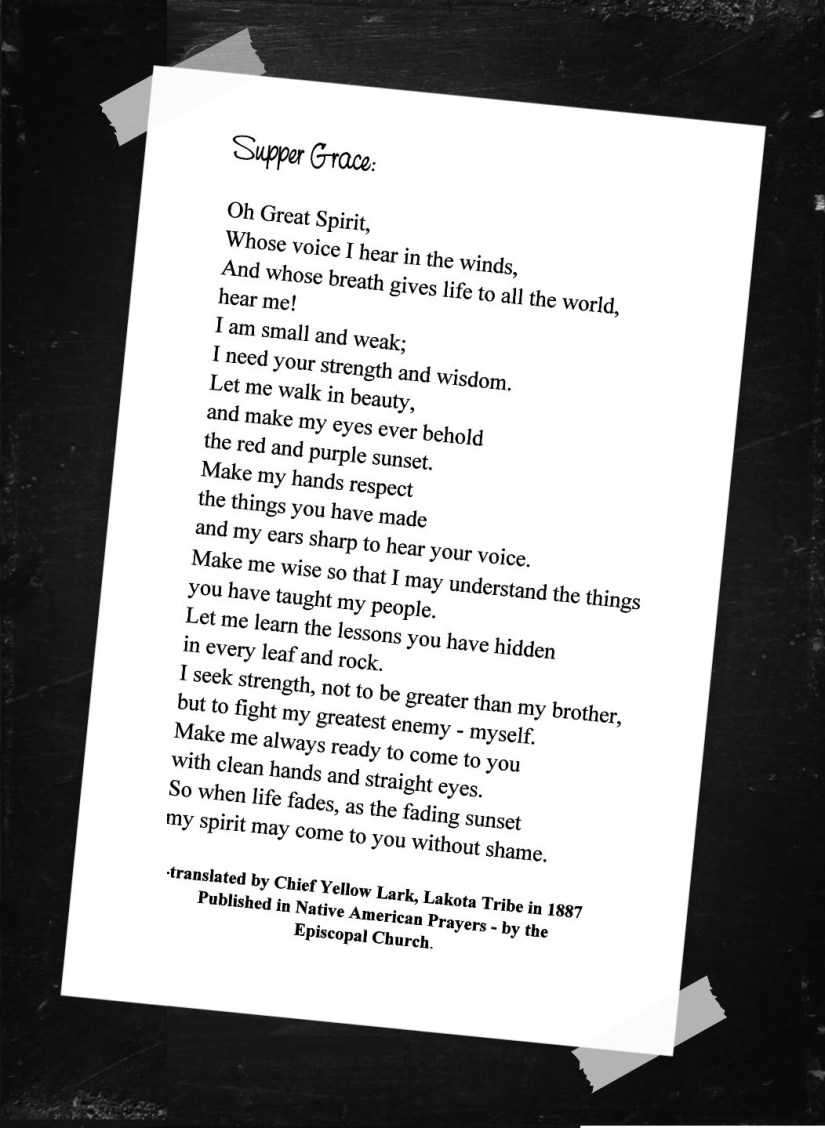


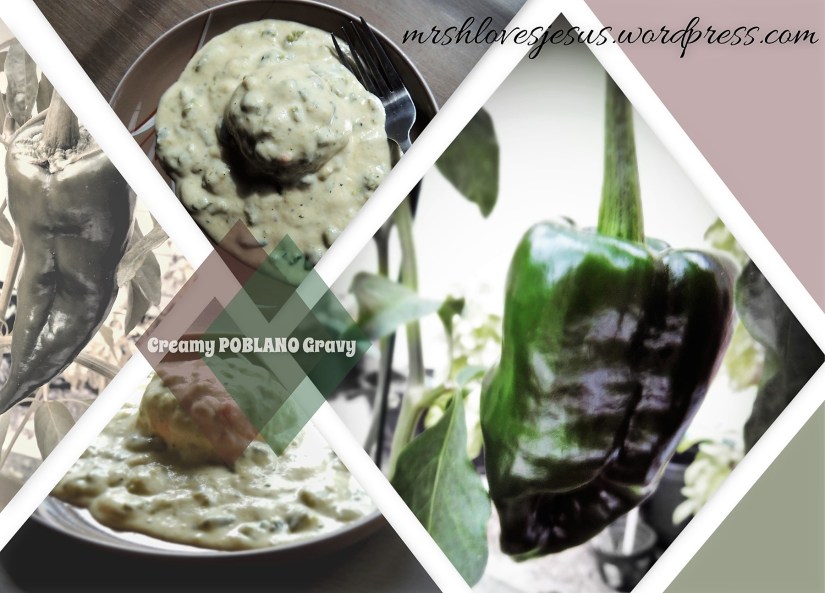


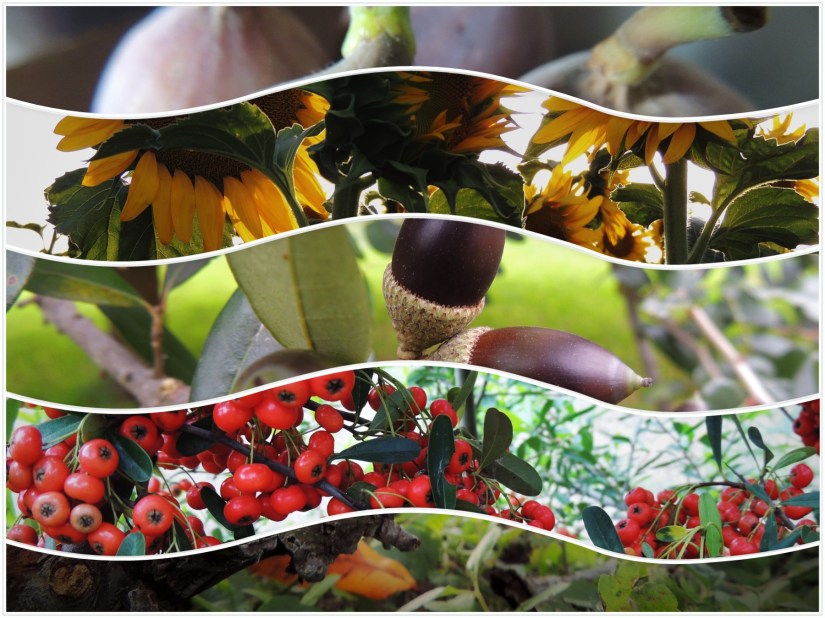
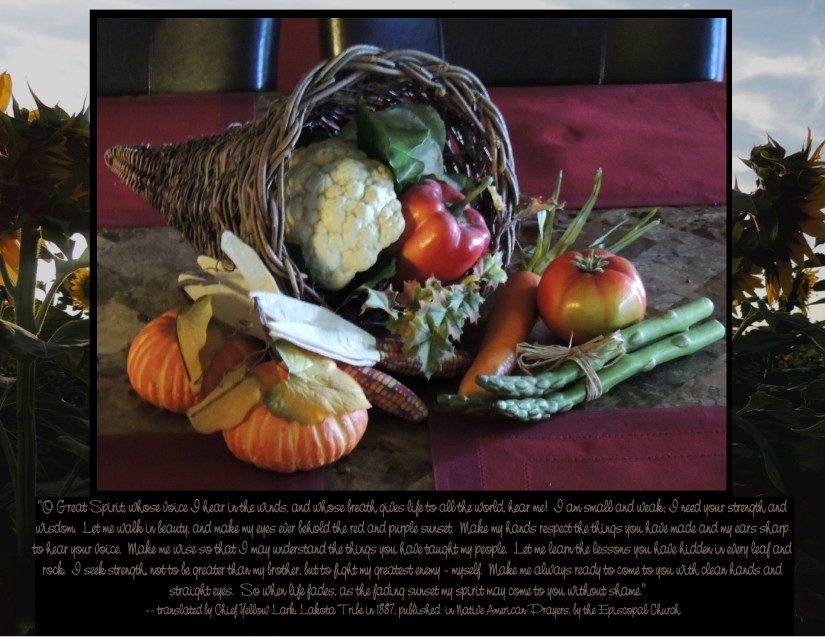
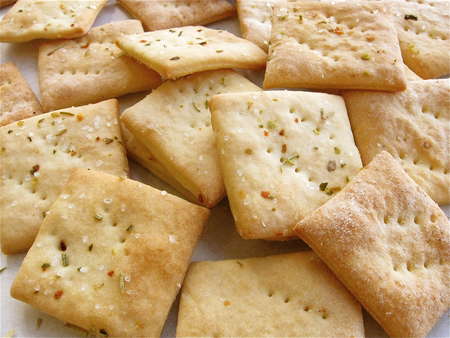


 There is a Hopi Squash Kachina (Patung). He is Chief Kachina (wuya) for the Hopi Pumpkin Clan. He runs with men of a village in spring ceremonial dances to attract rain clouds.
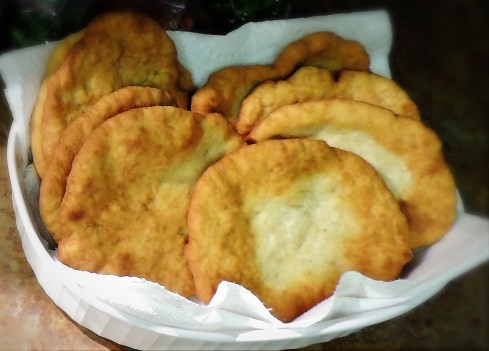

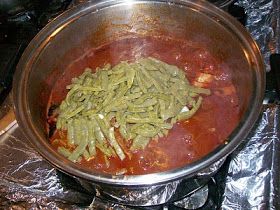
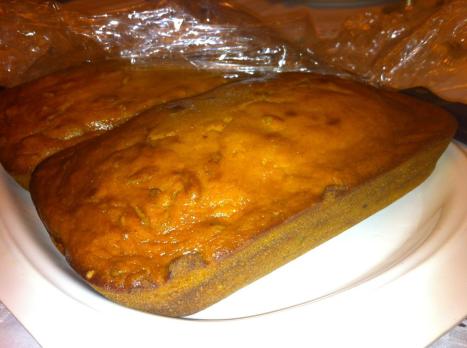
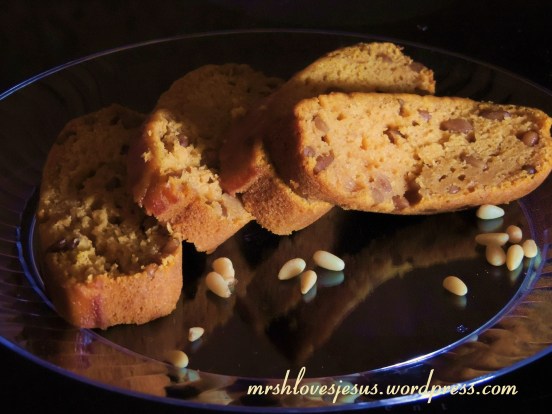

 .
.
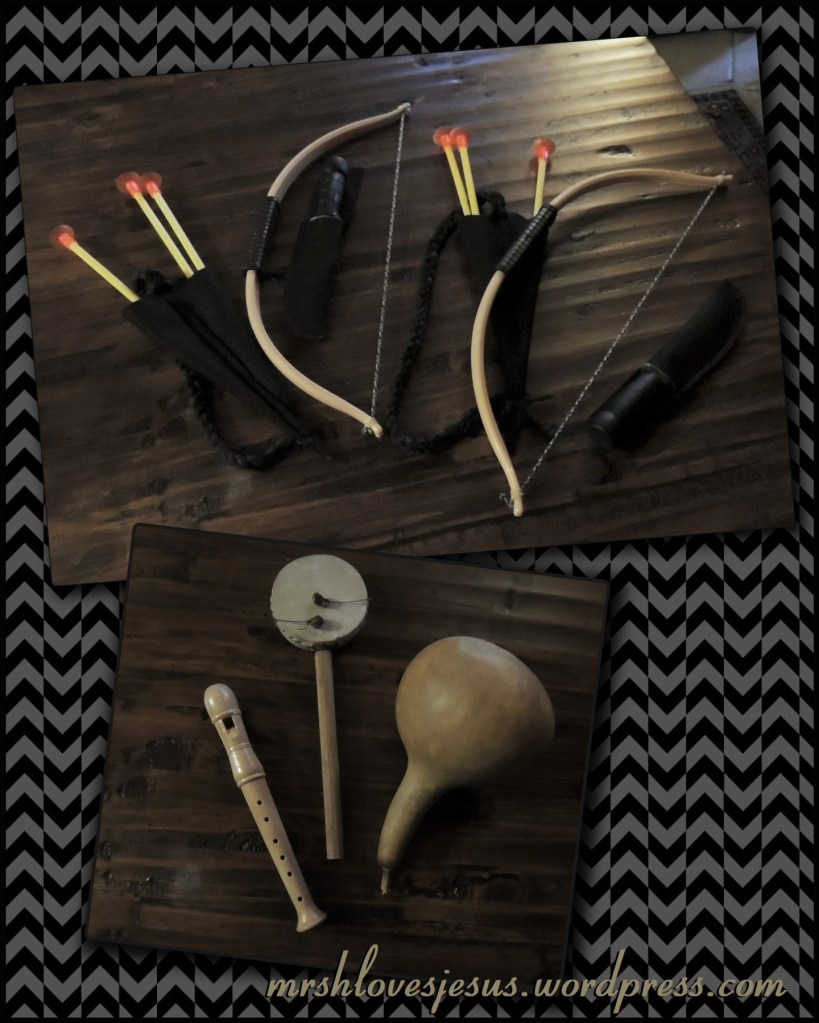
 Hoop and Pole Game
 throw their pole as the hoop rolls in front of them. The score depends on how or if the pole falls on or through the hoop. Netted hoops are made by the Arapaho of Wyoming and other tribes.


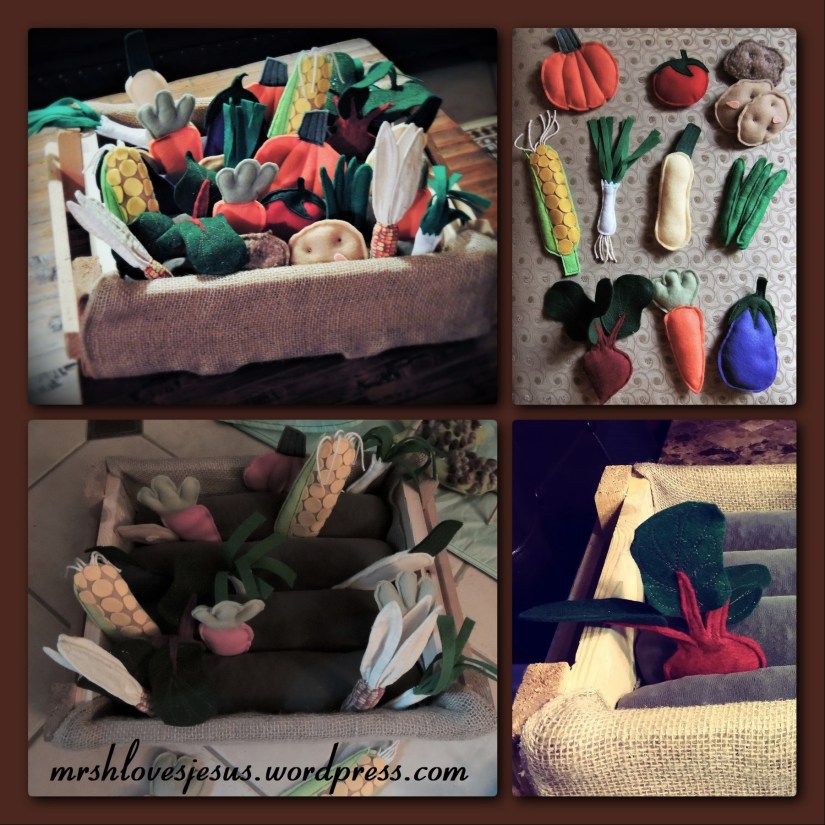
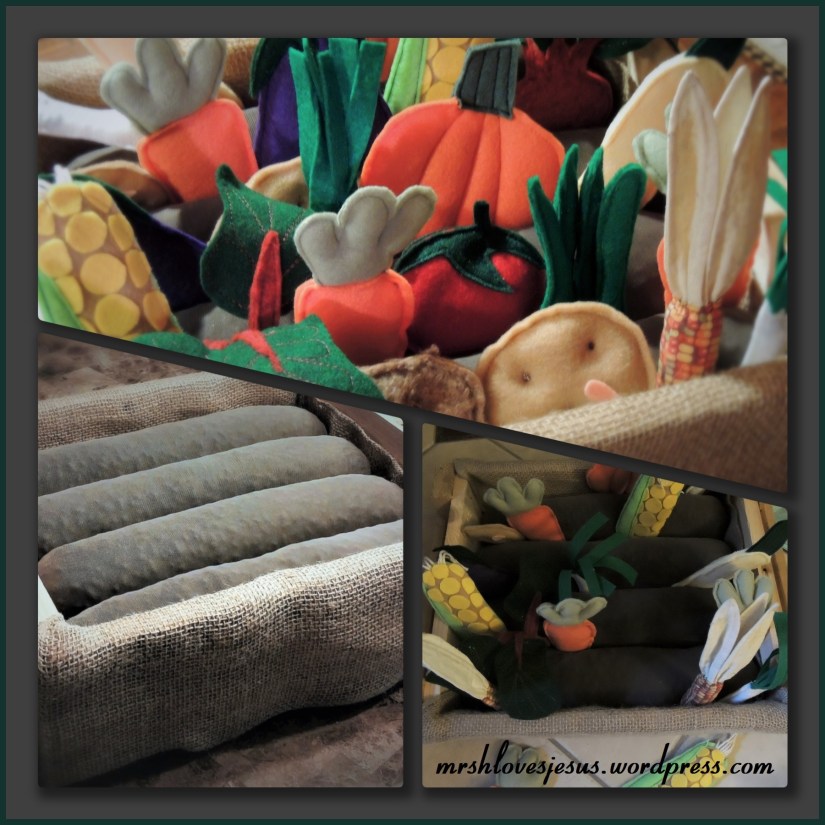

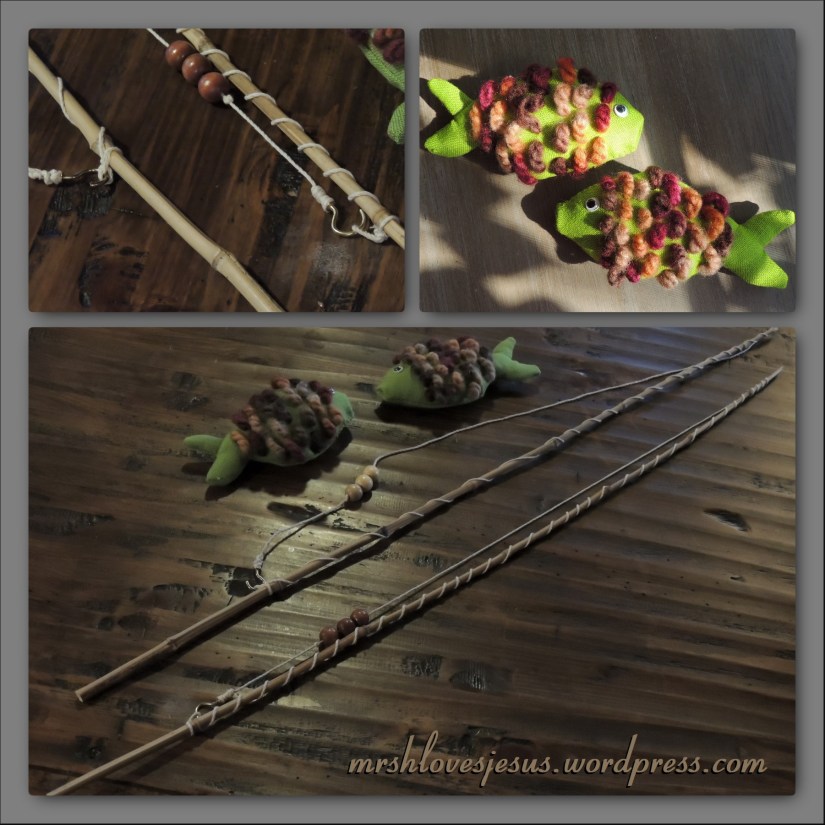


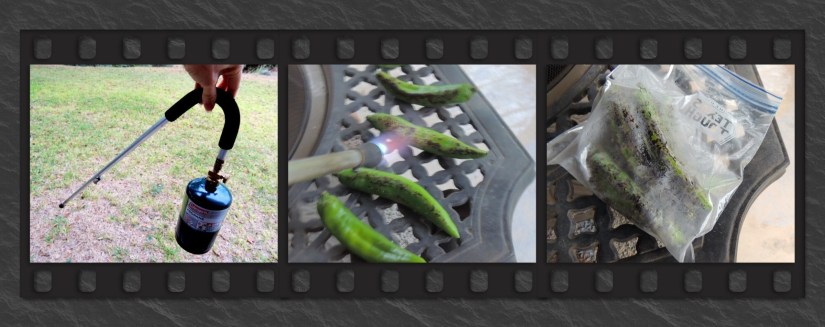
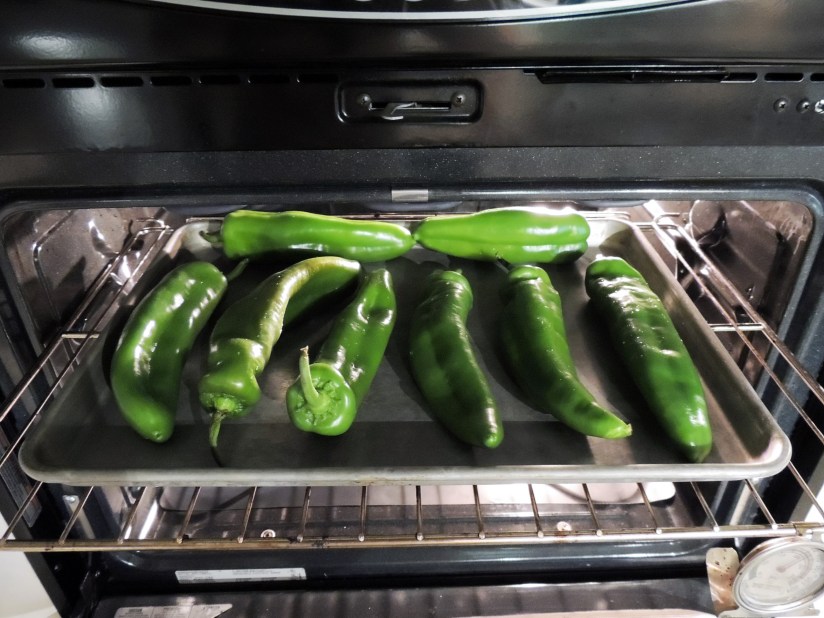

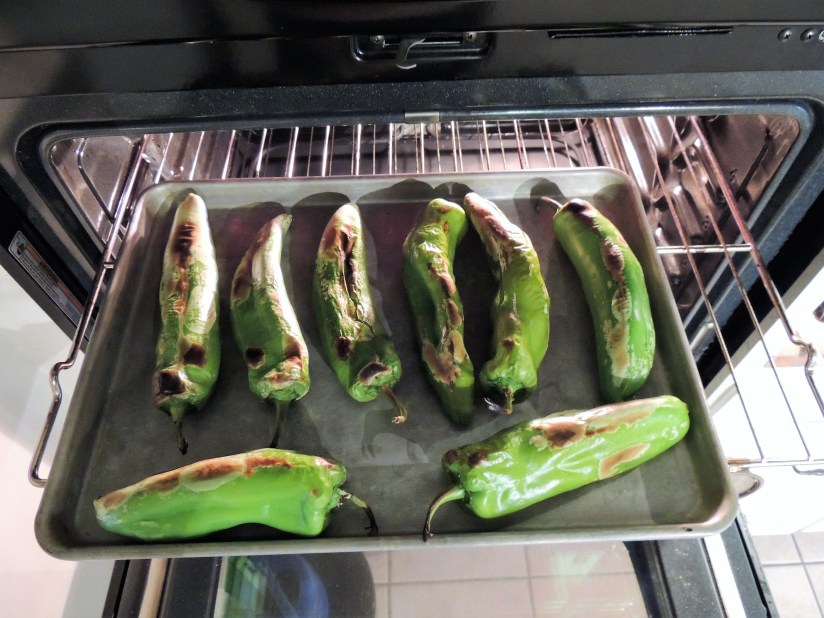
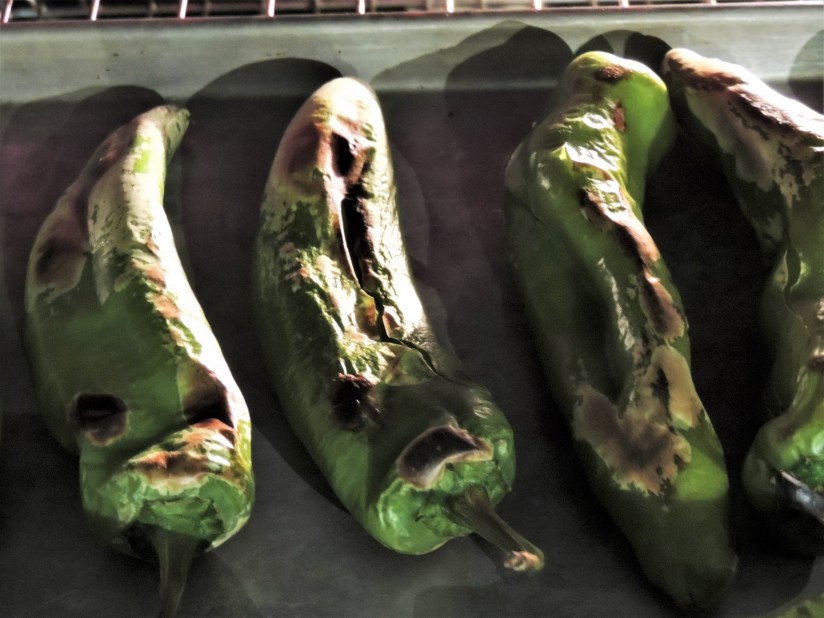
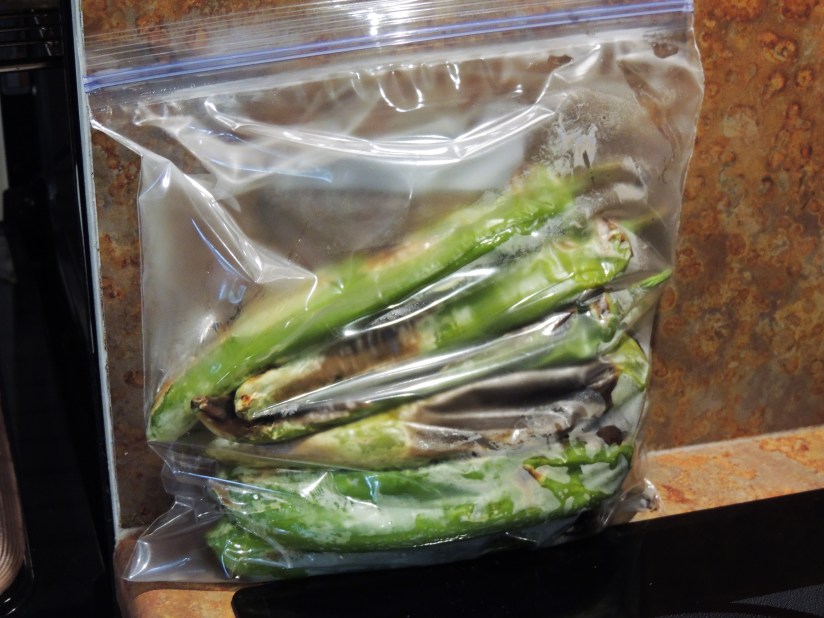
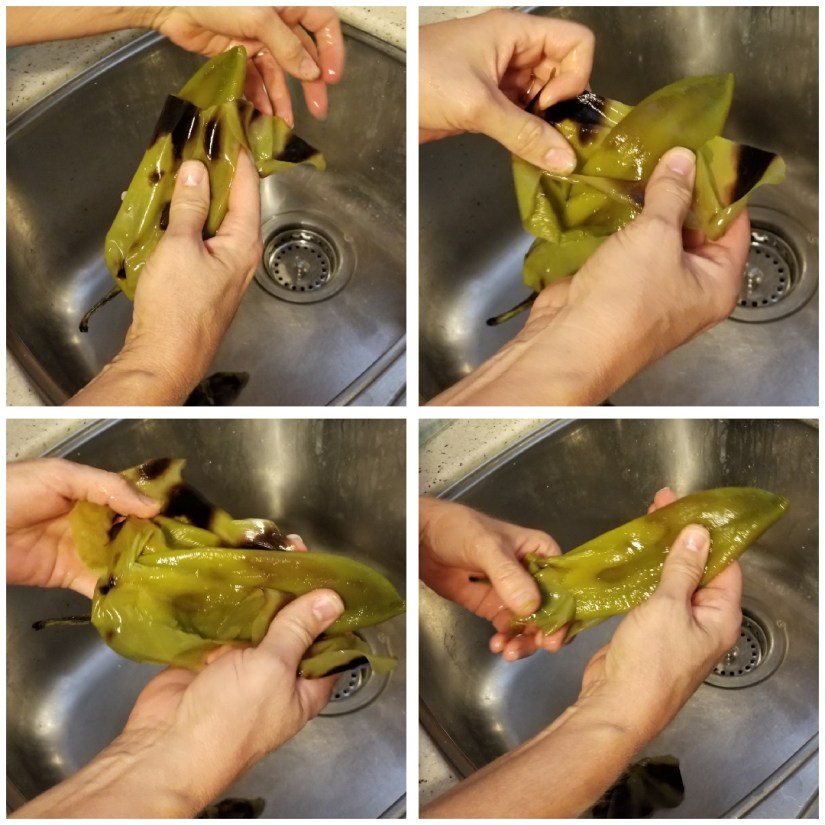
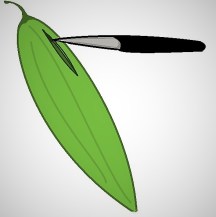


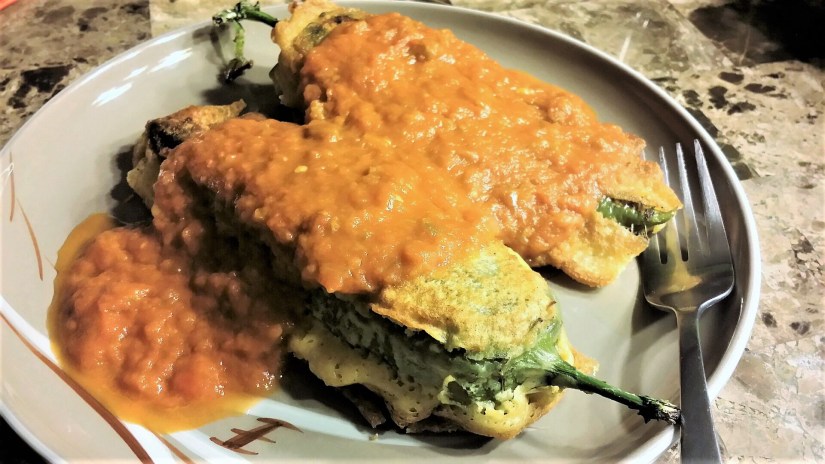
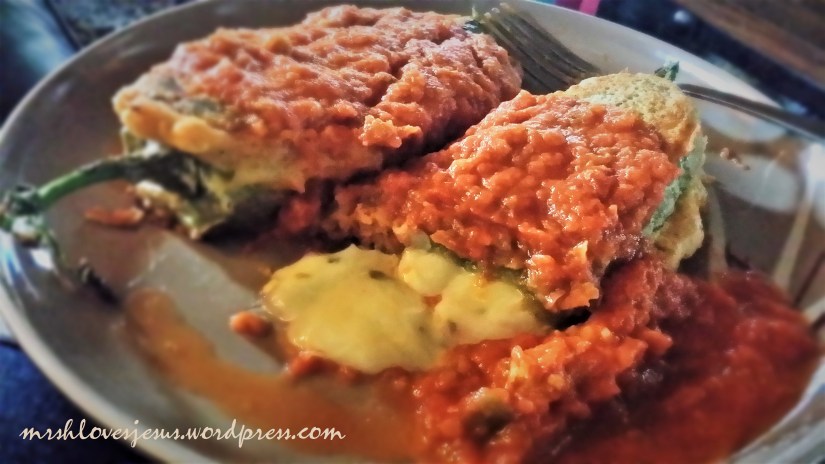
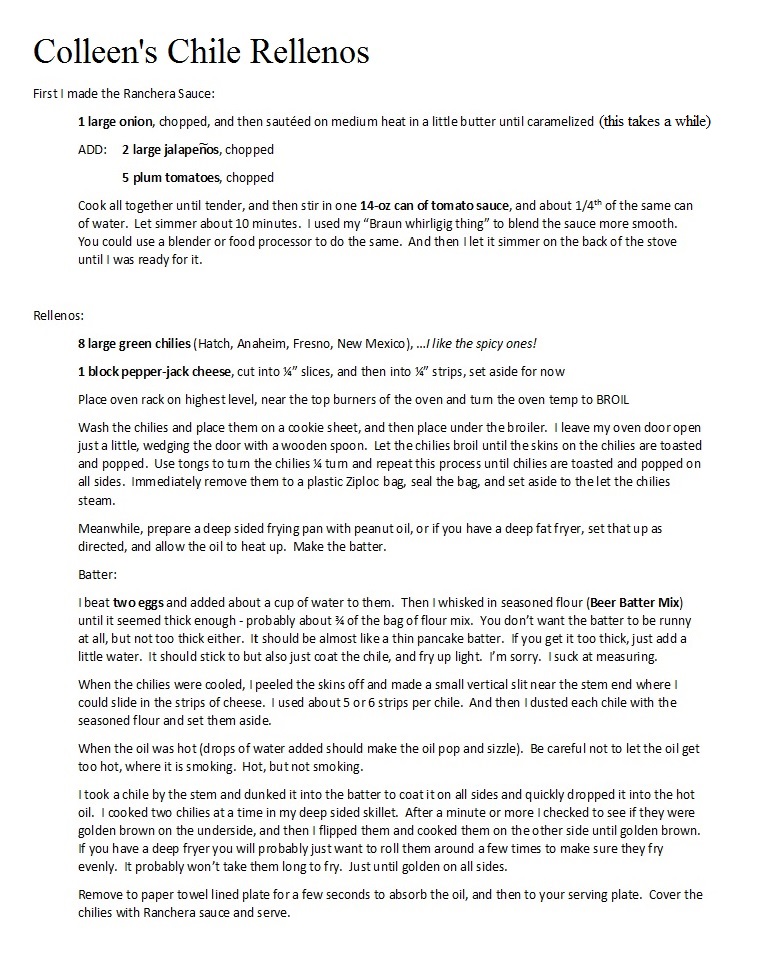

 Cheesy Green Chili Rice

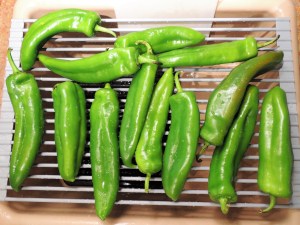


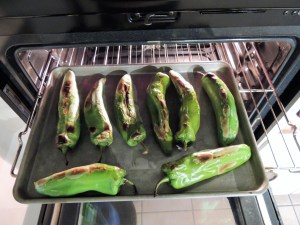


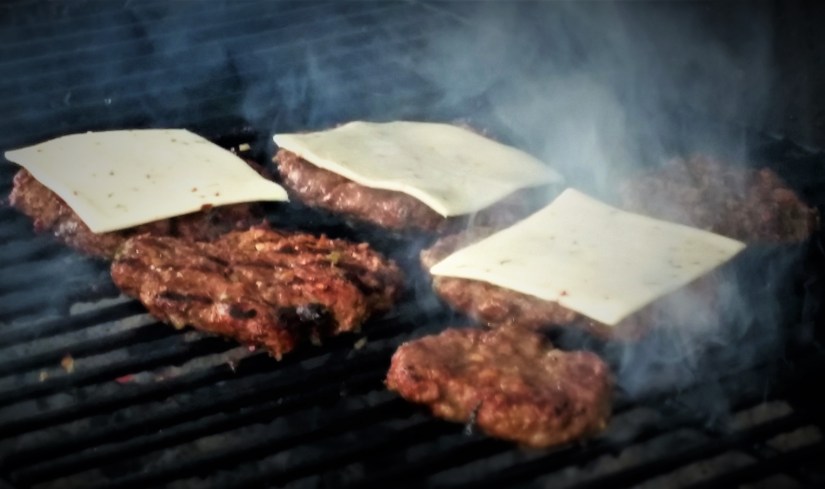


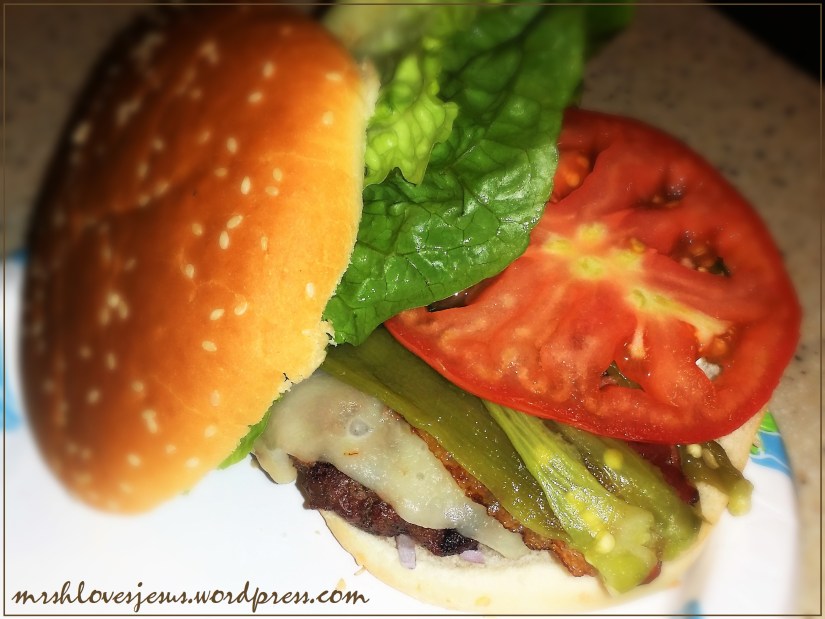
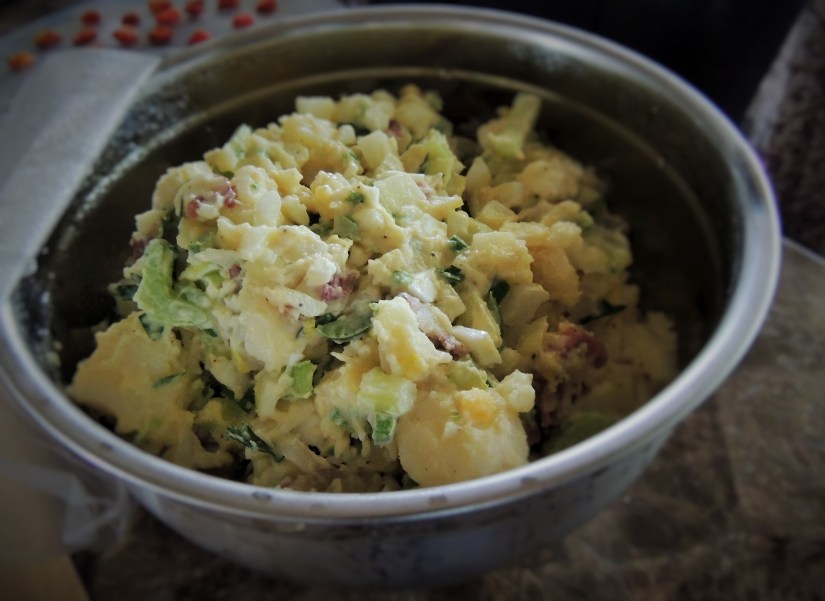

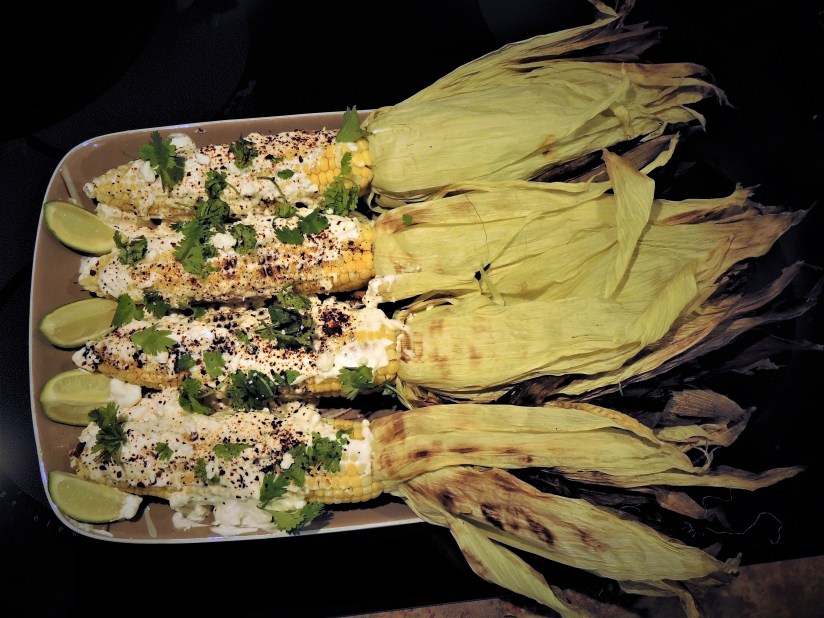


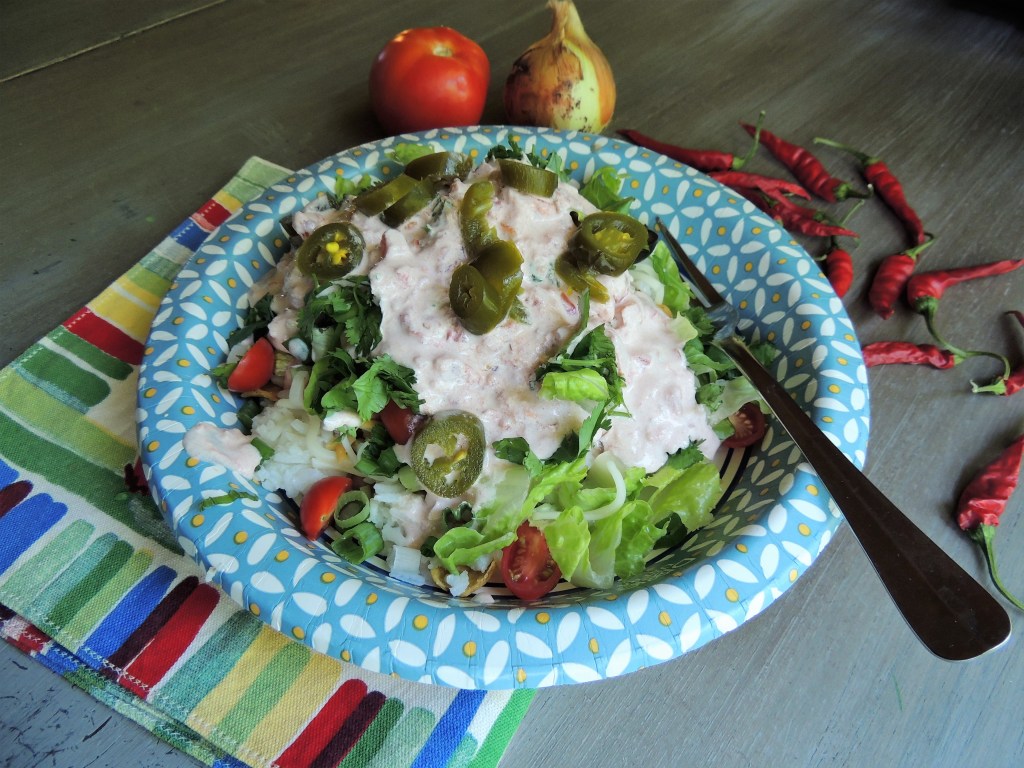
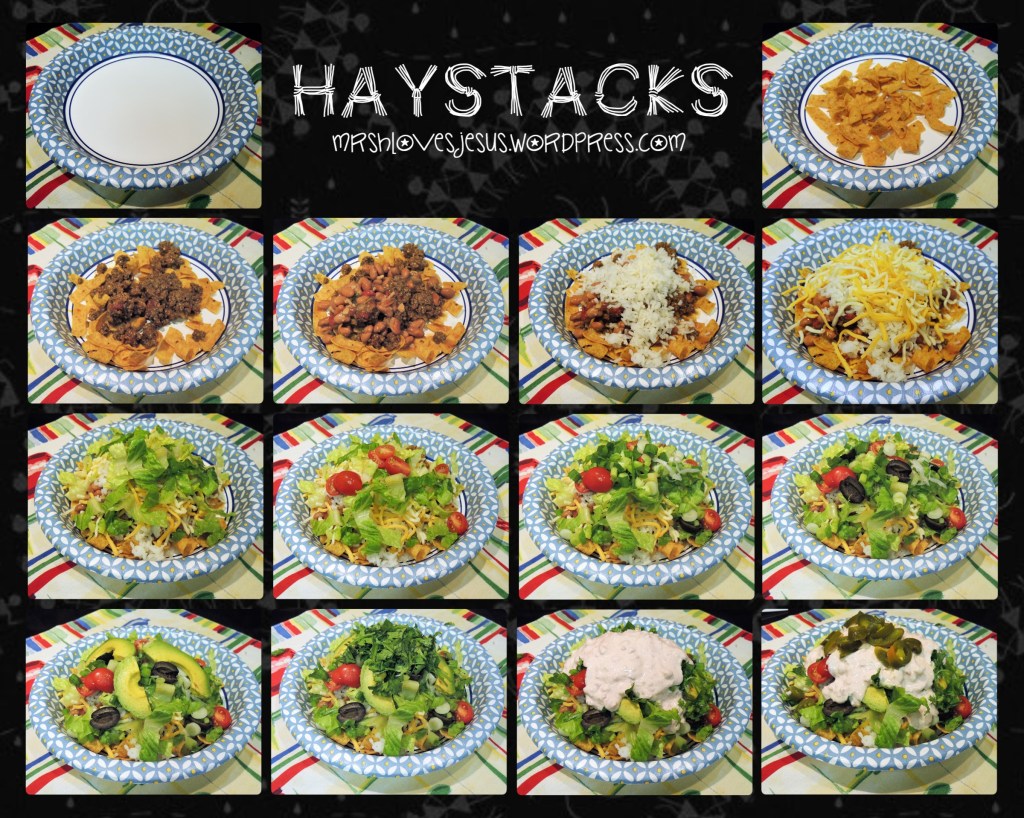


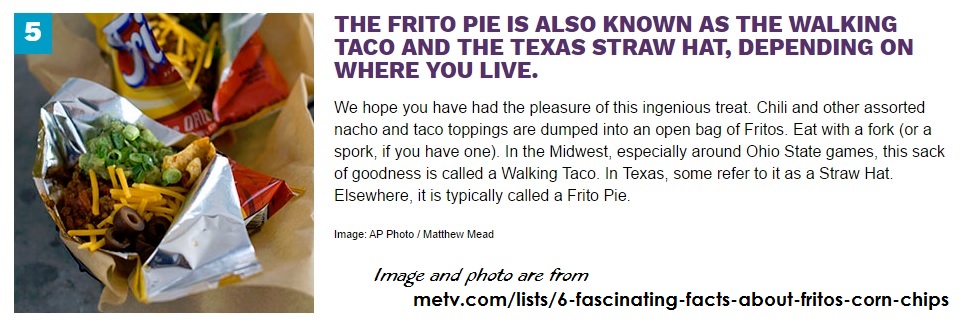


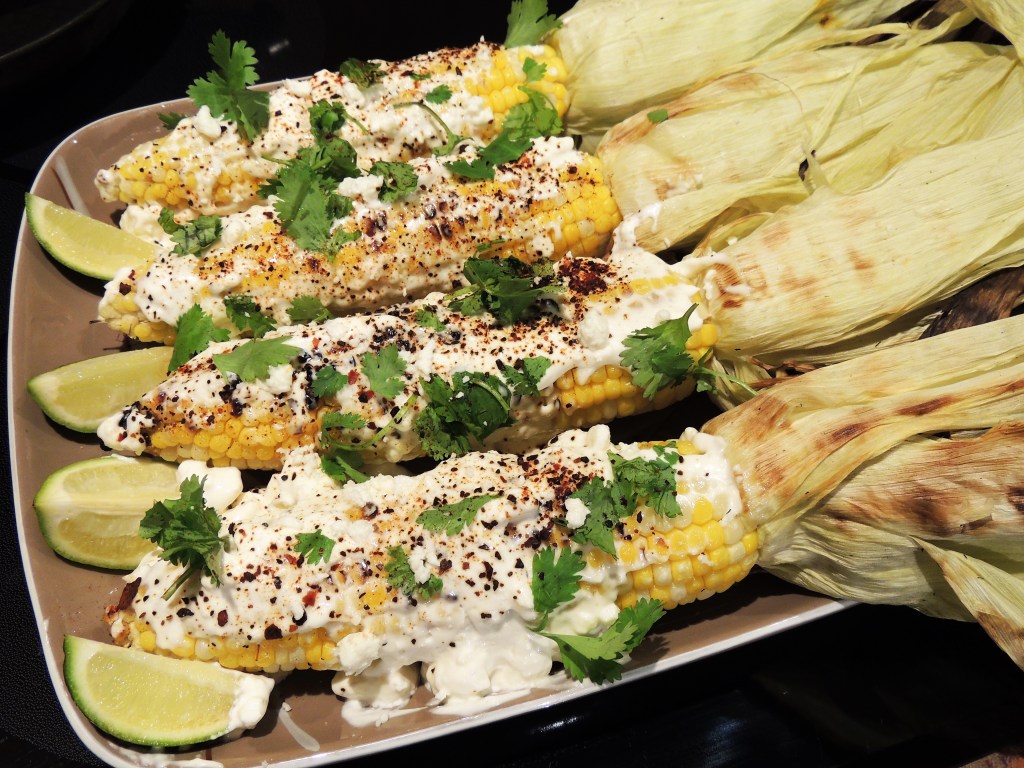
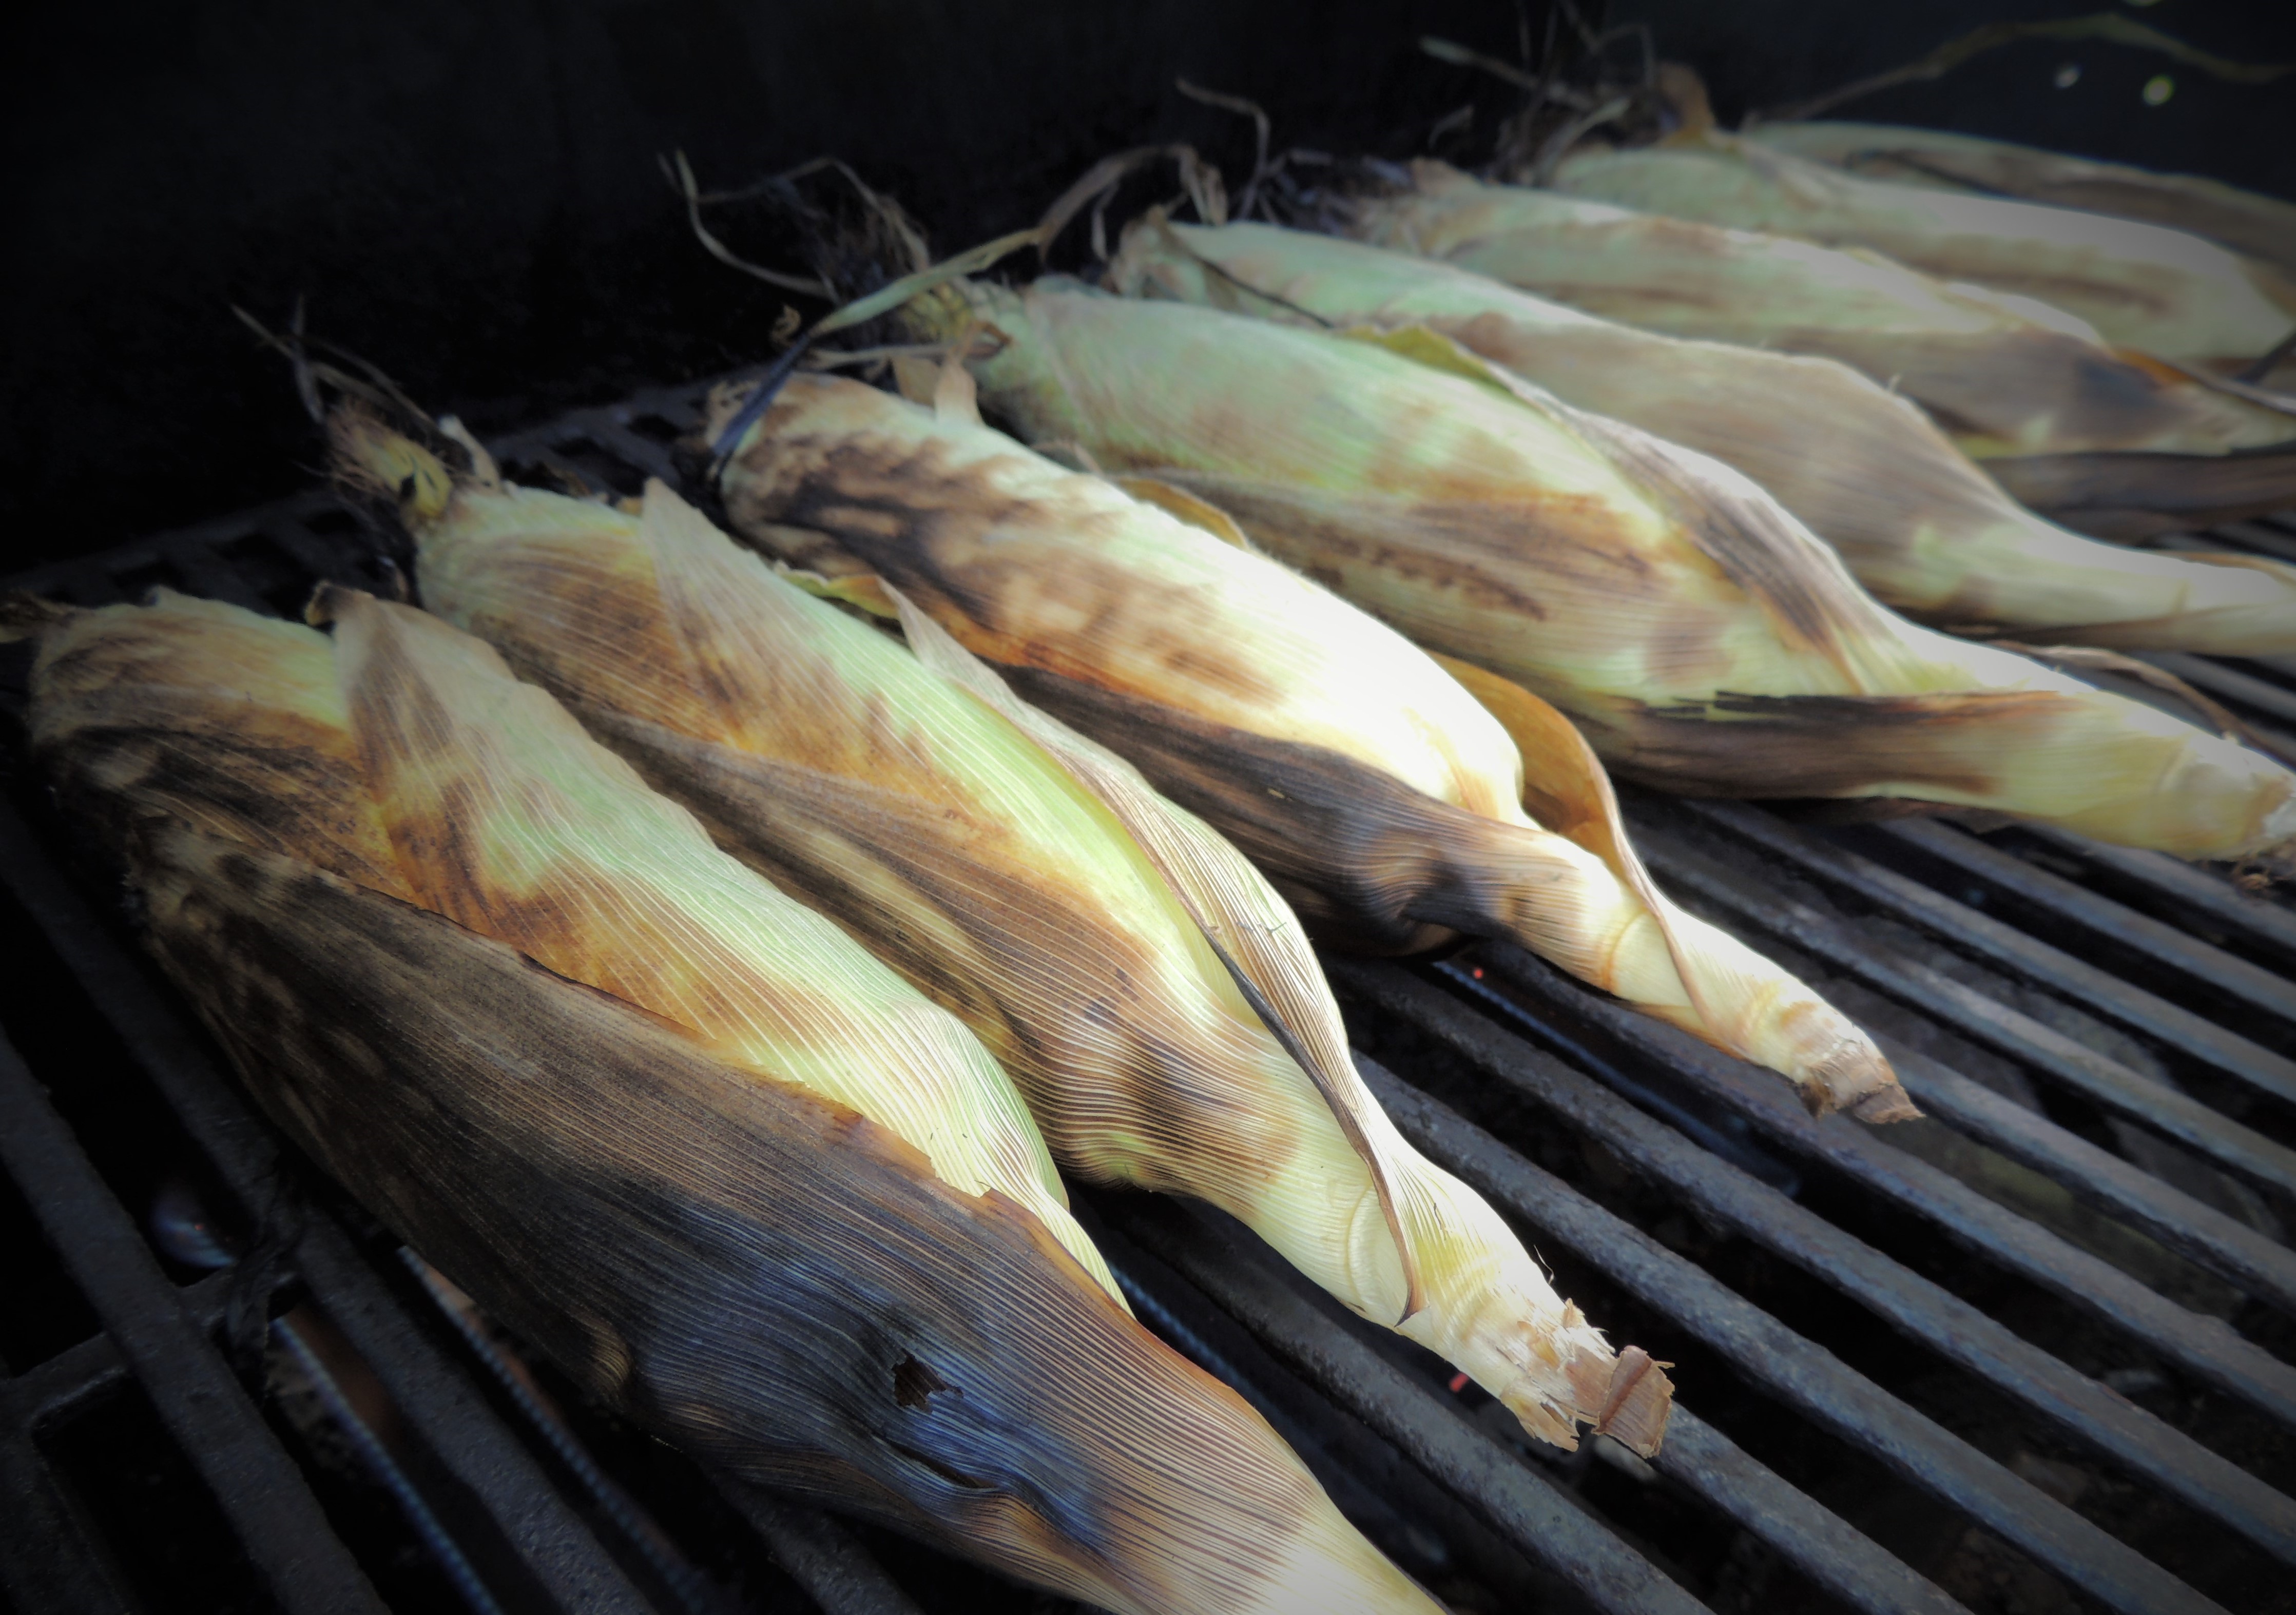

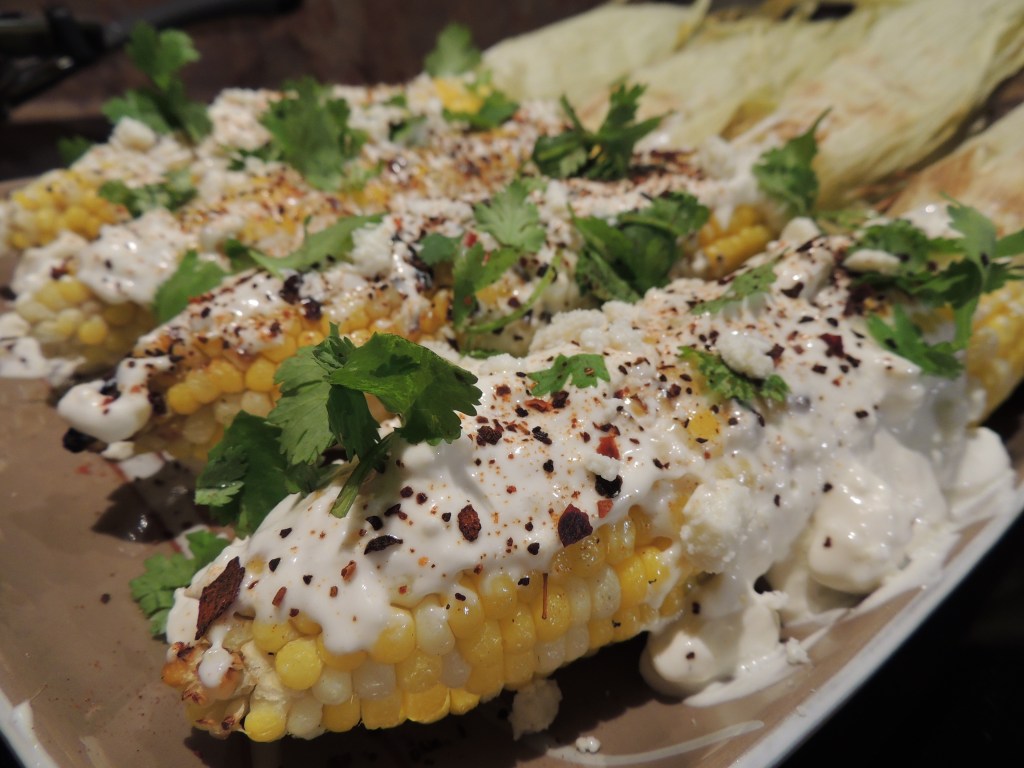
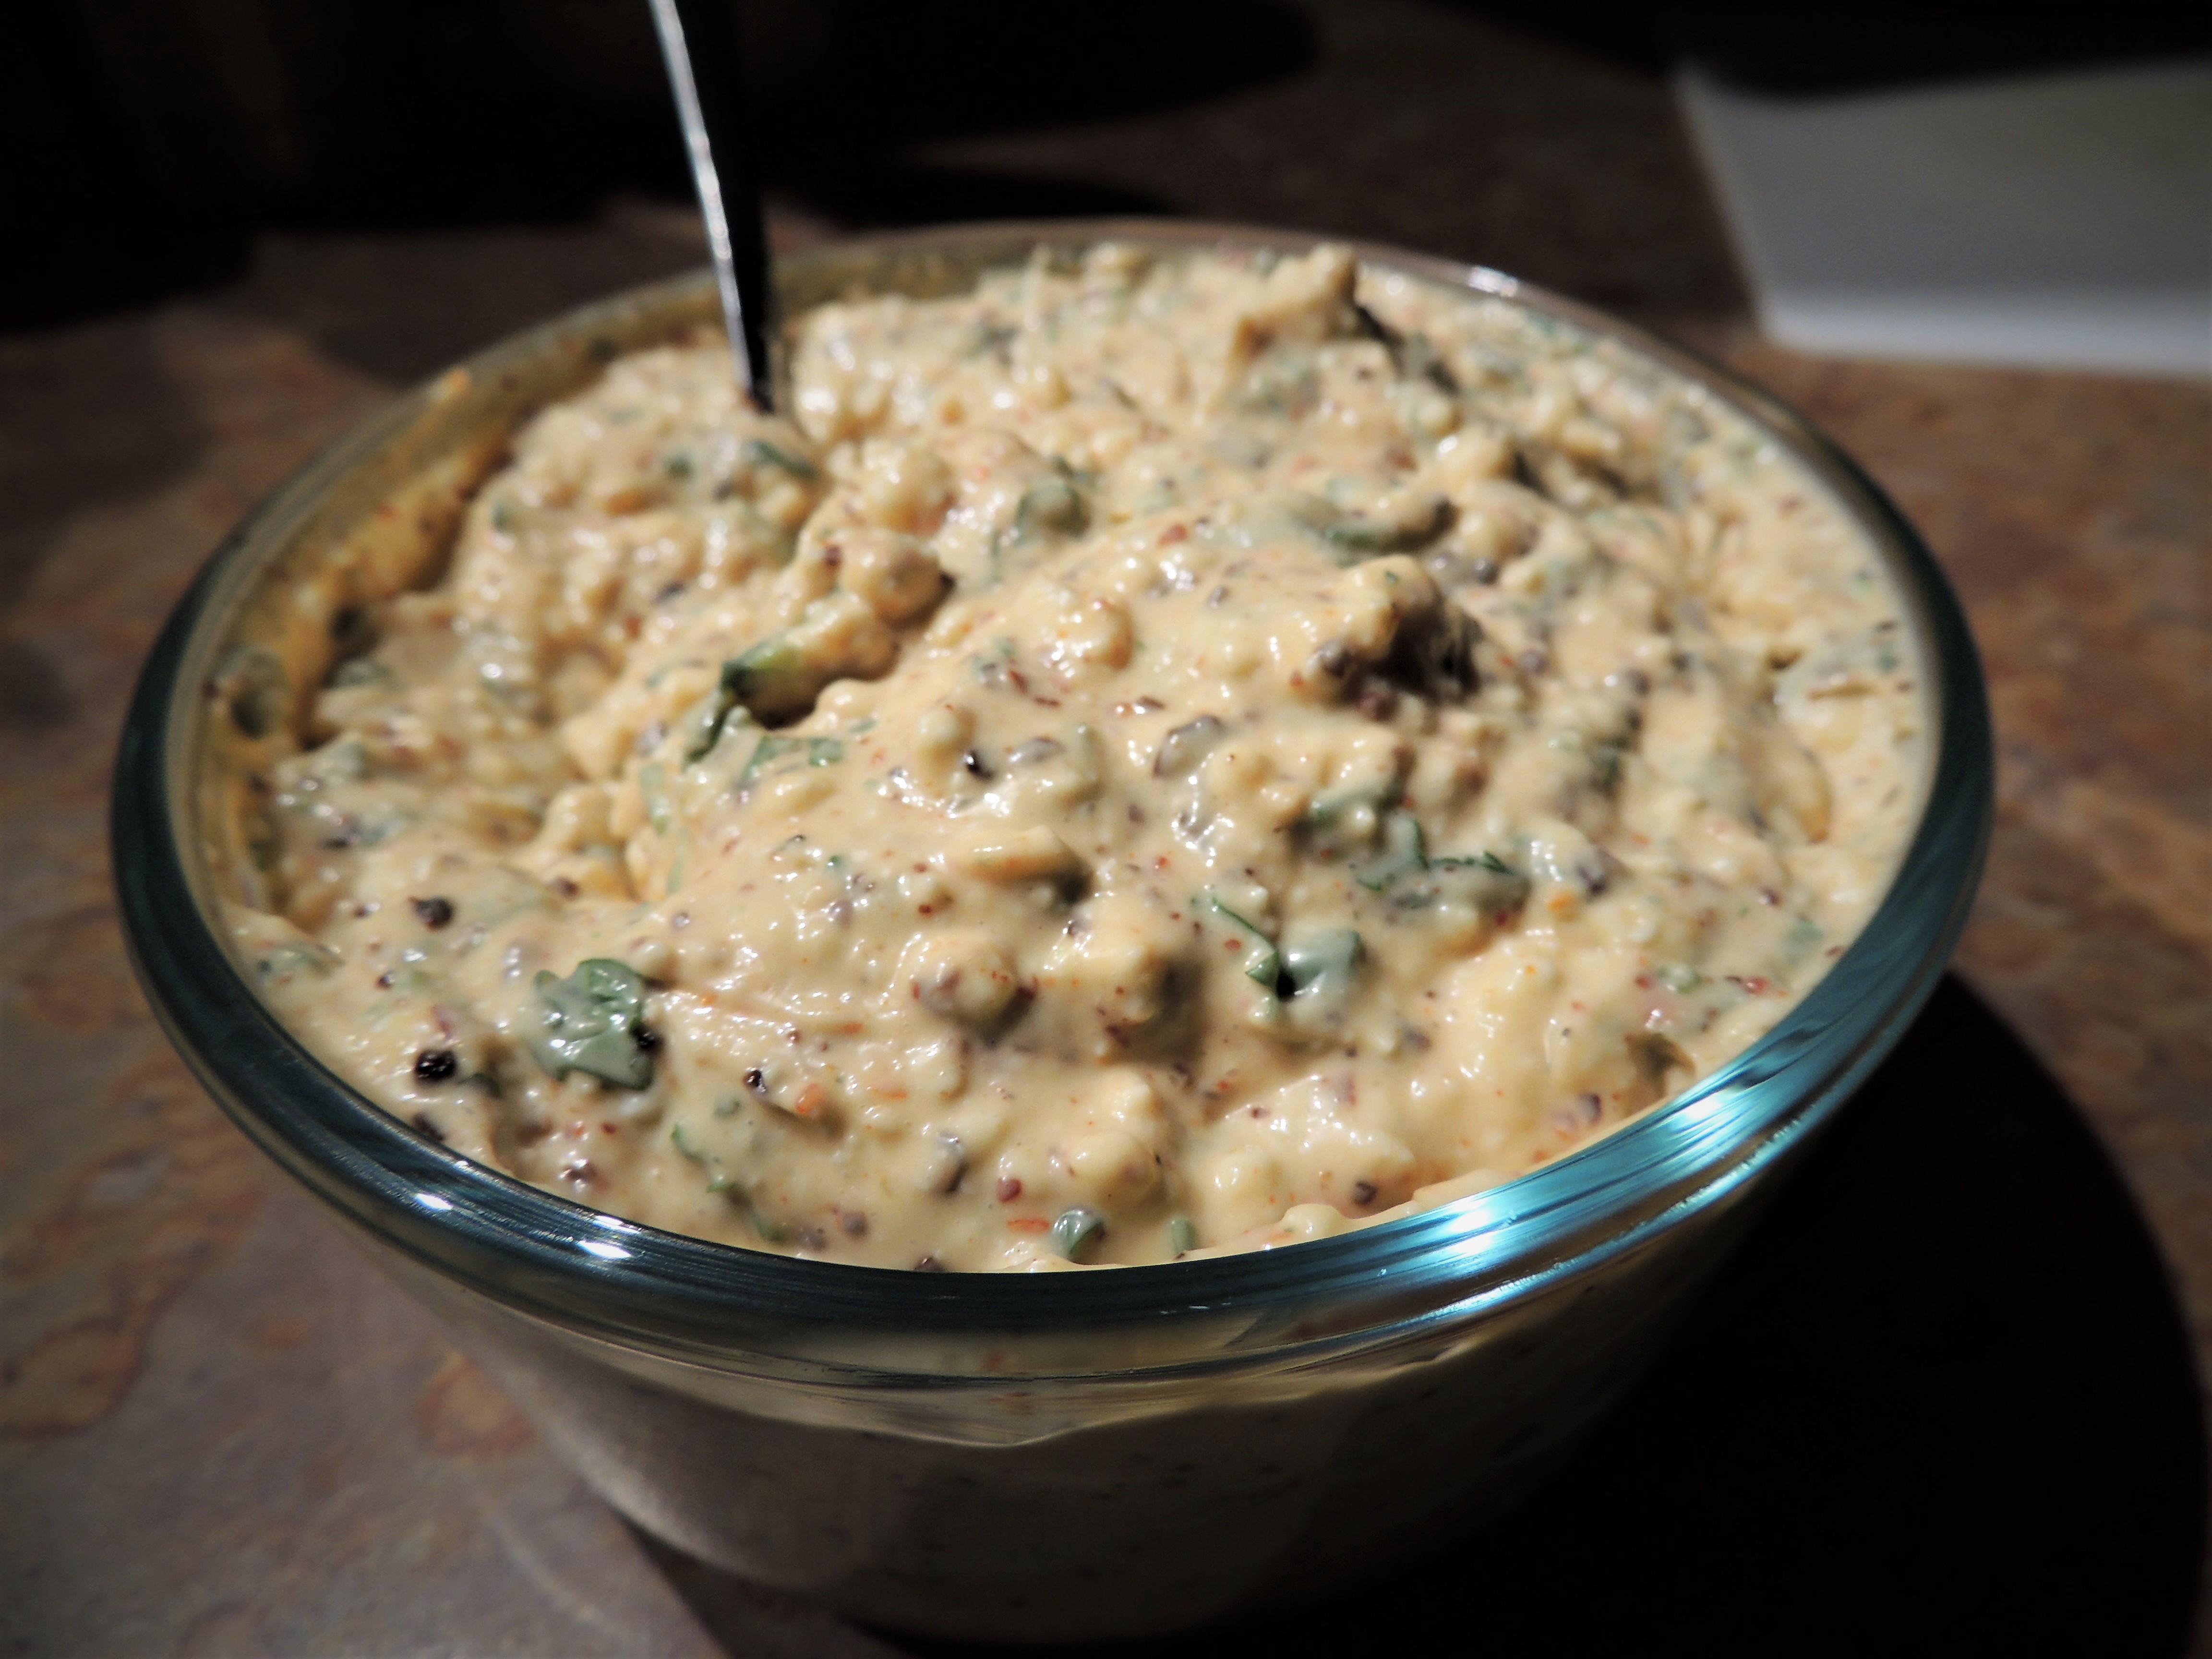
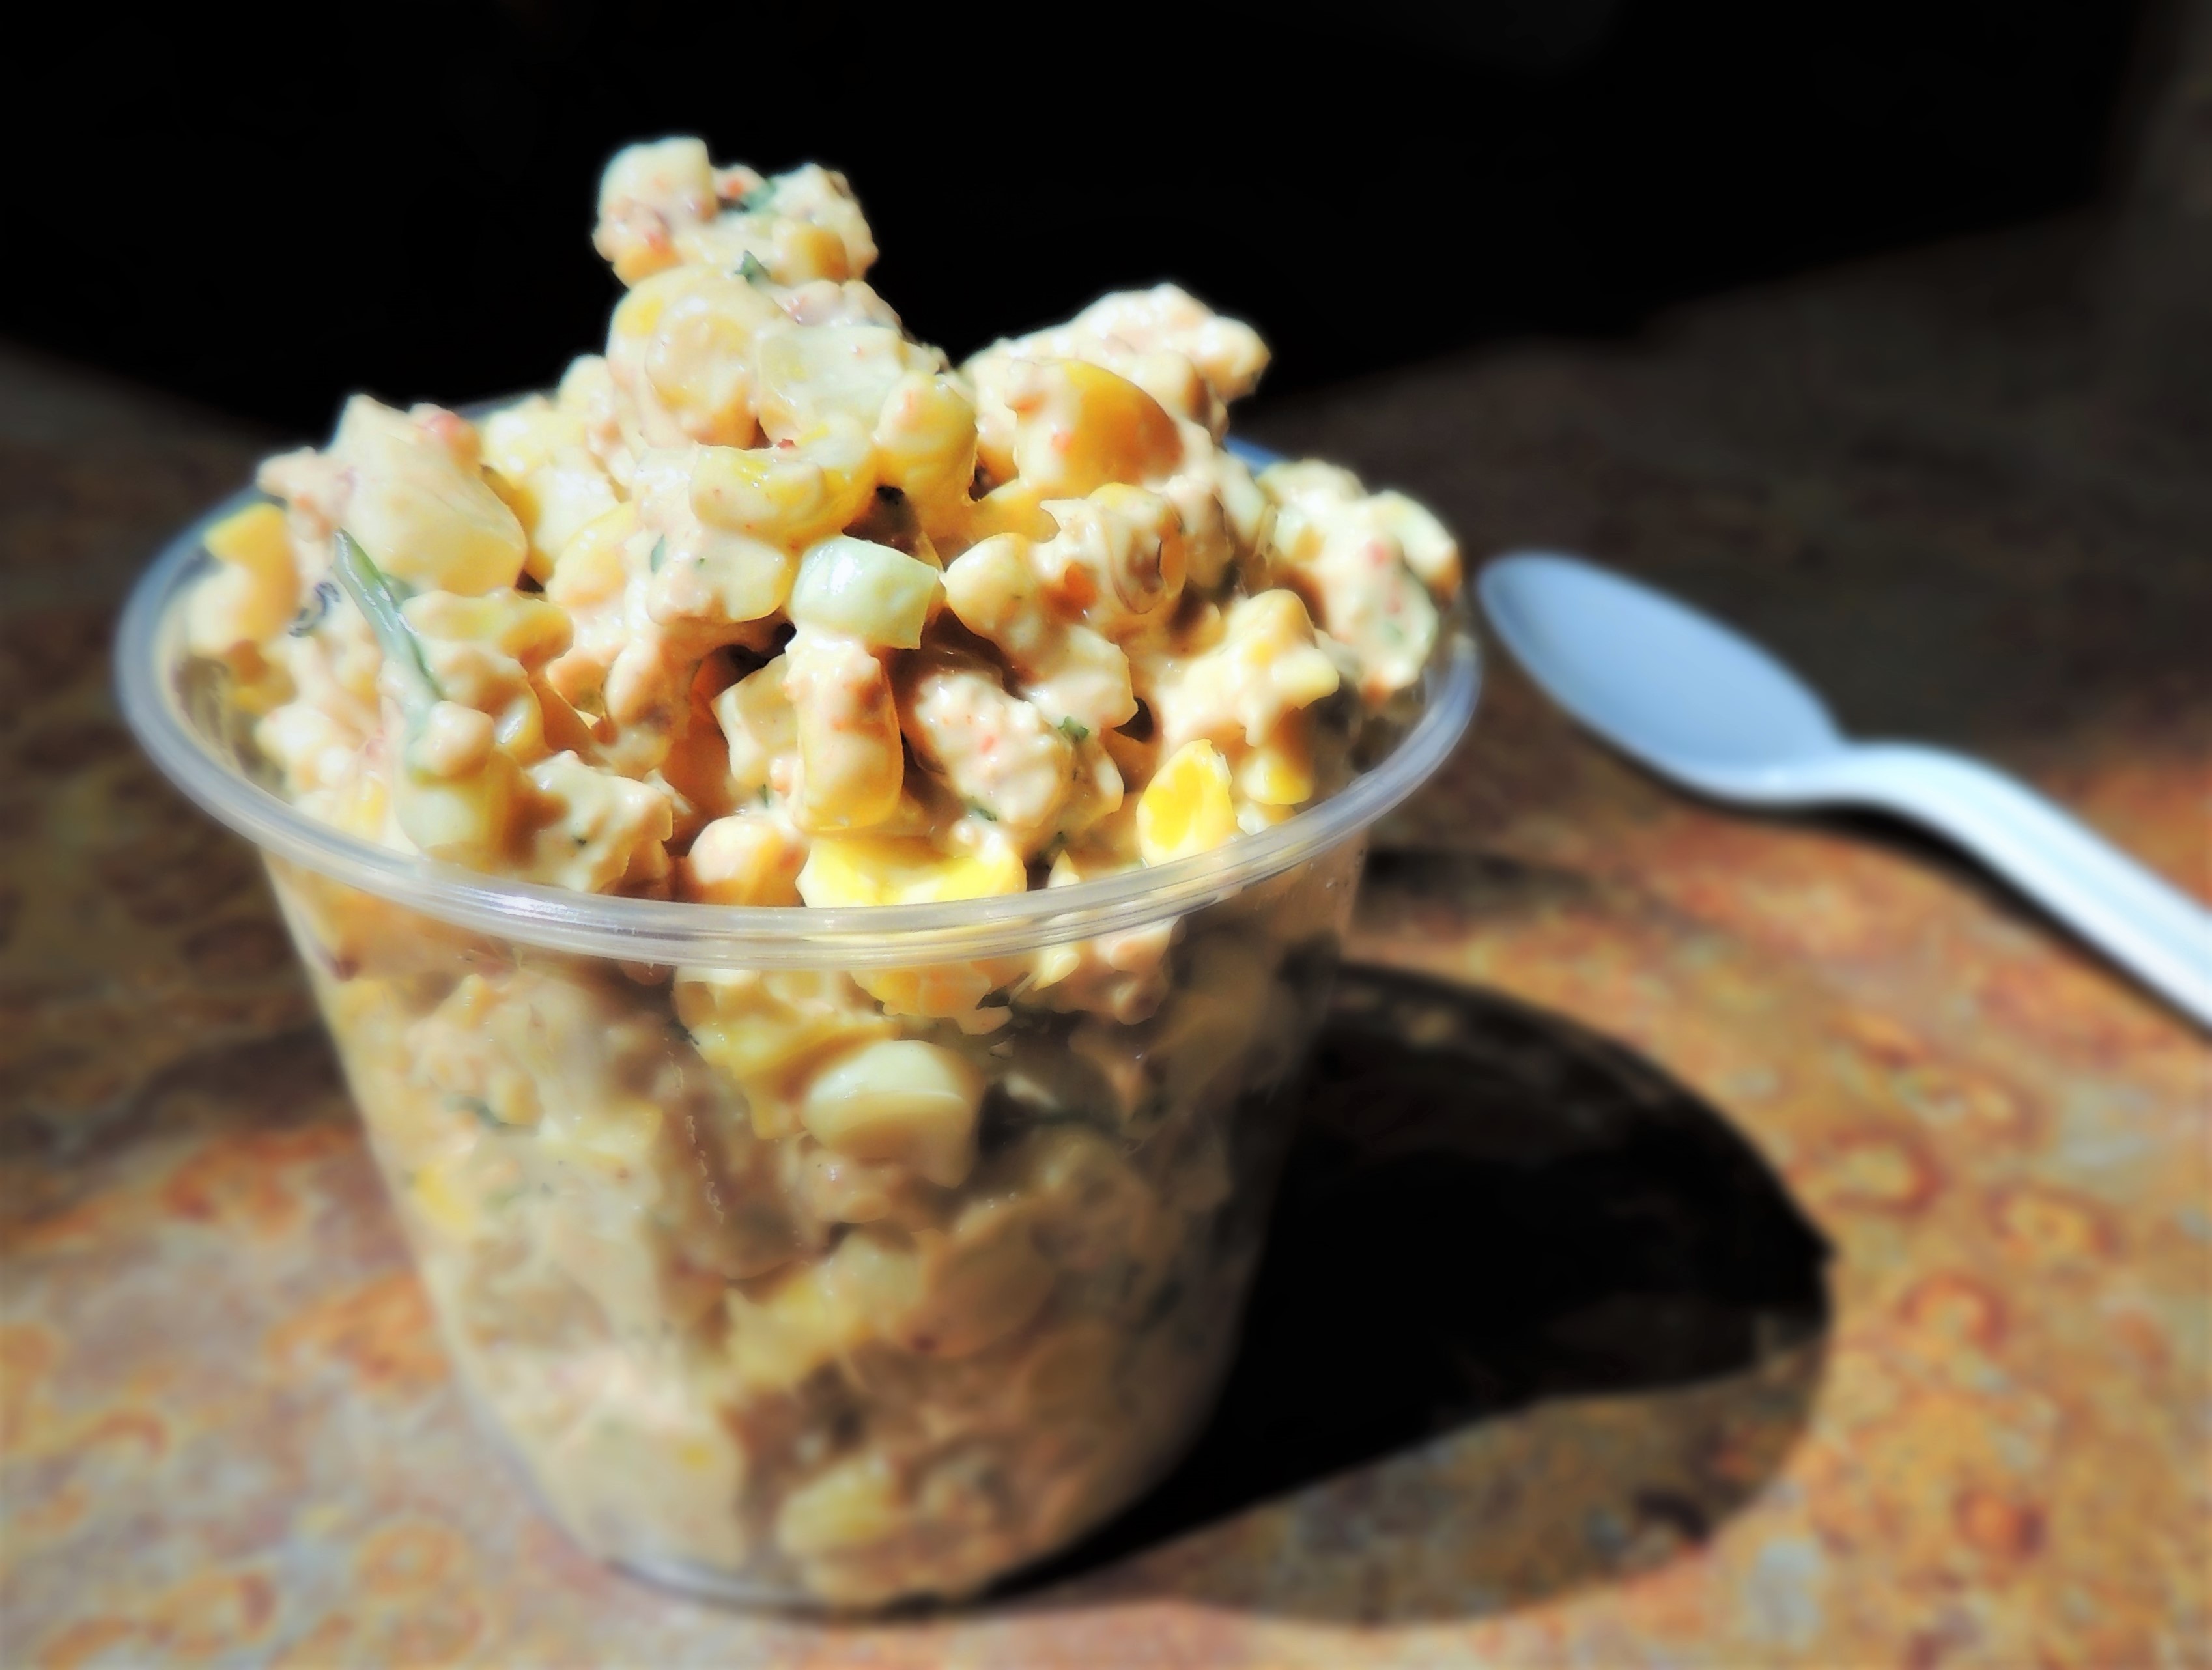


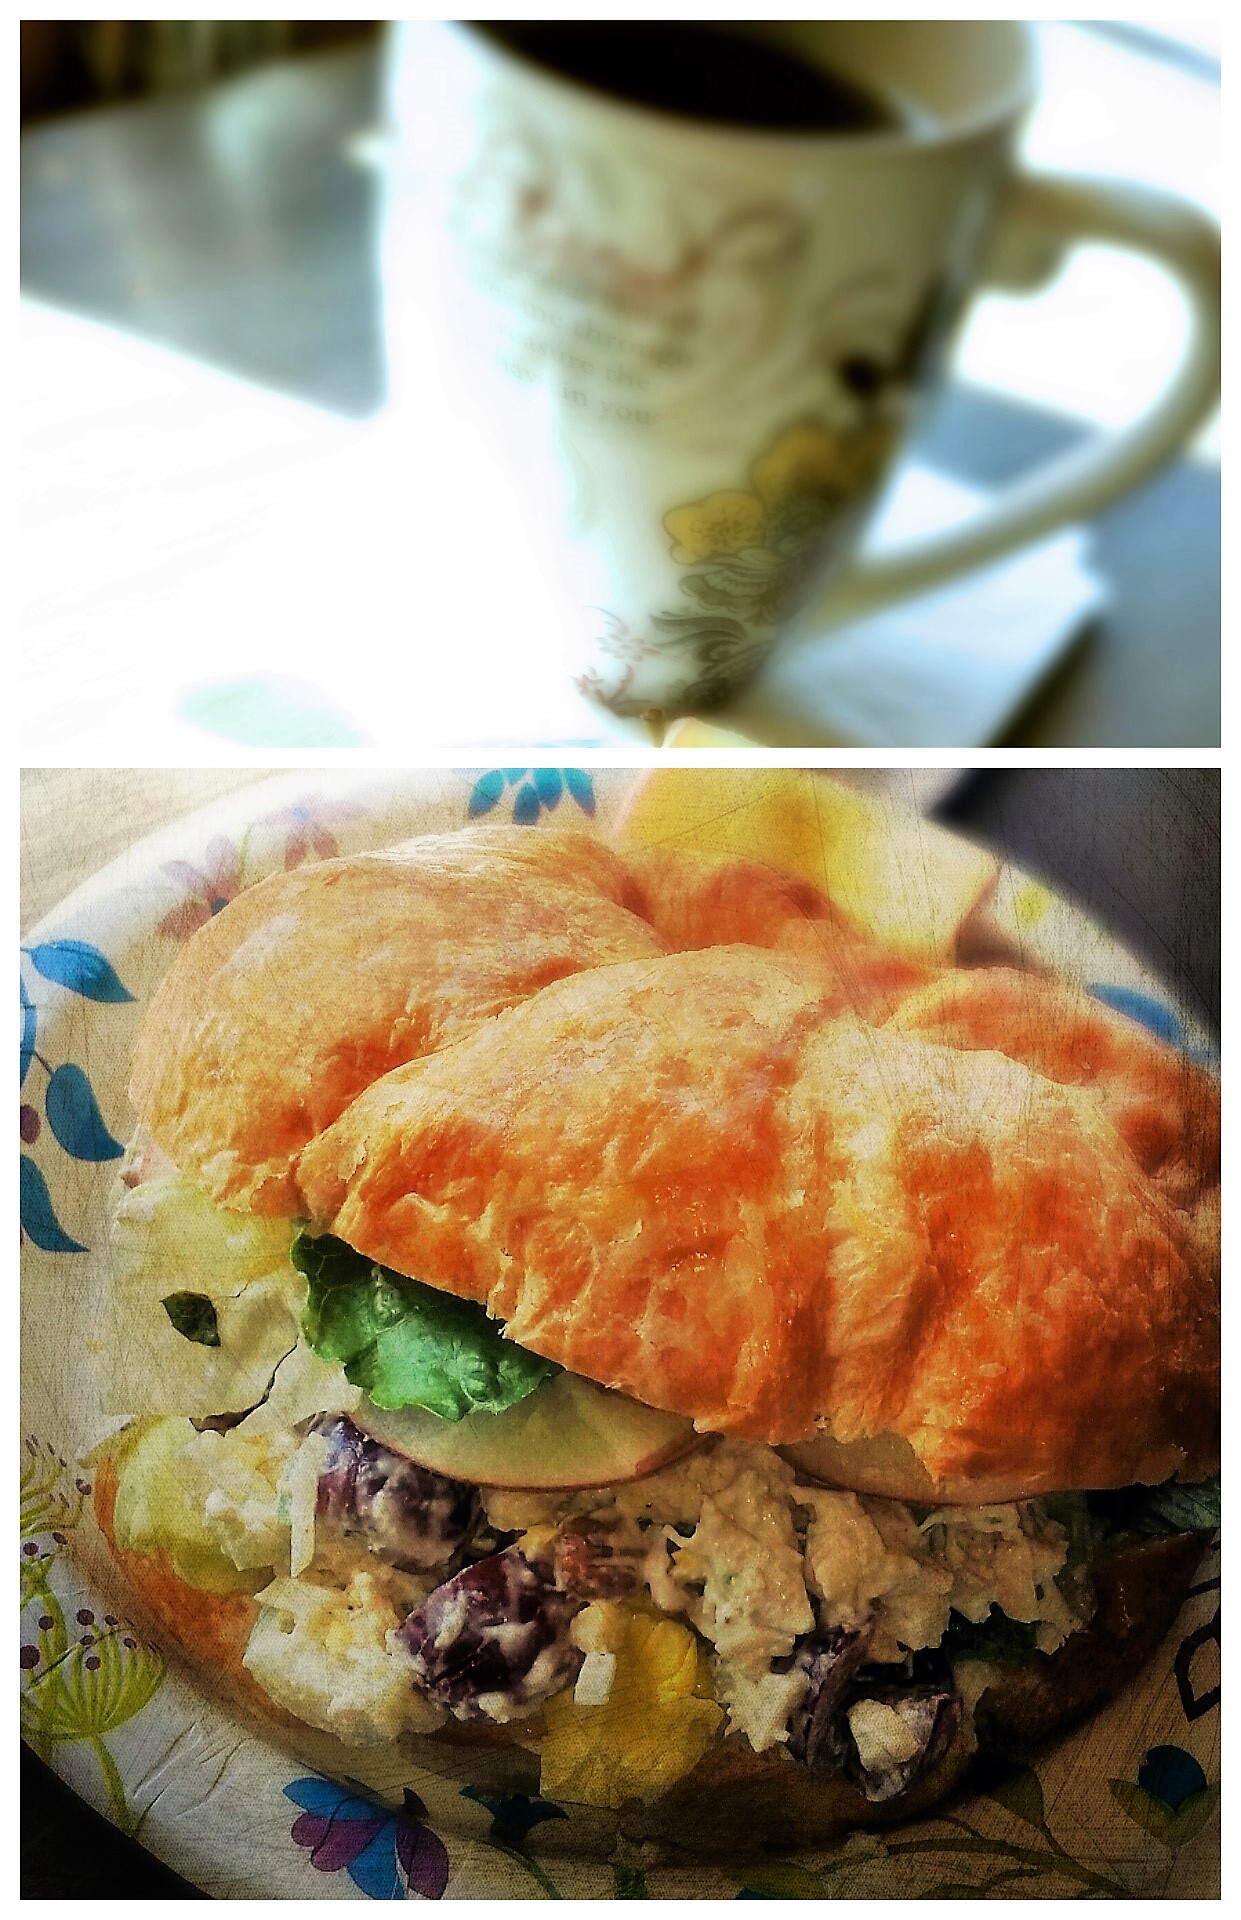


 Mom’s Spicy Red Chili
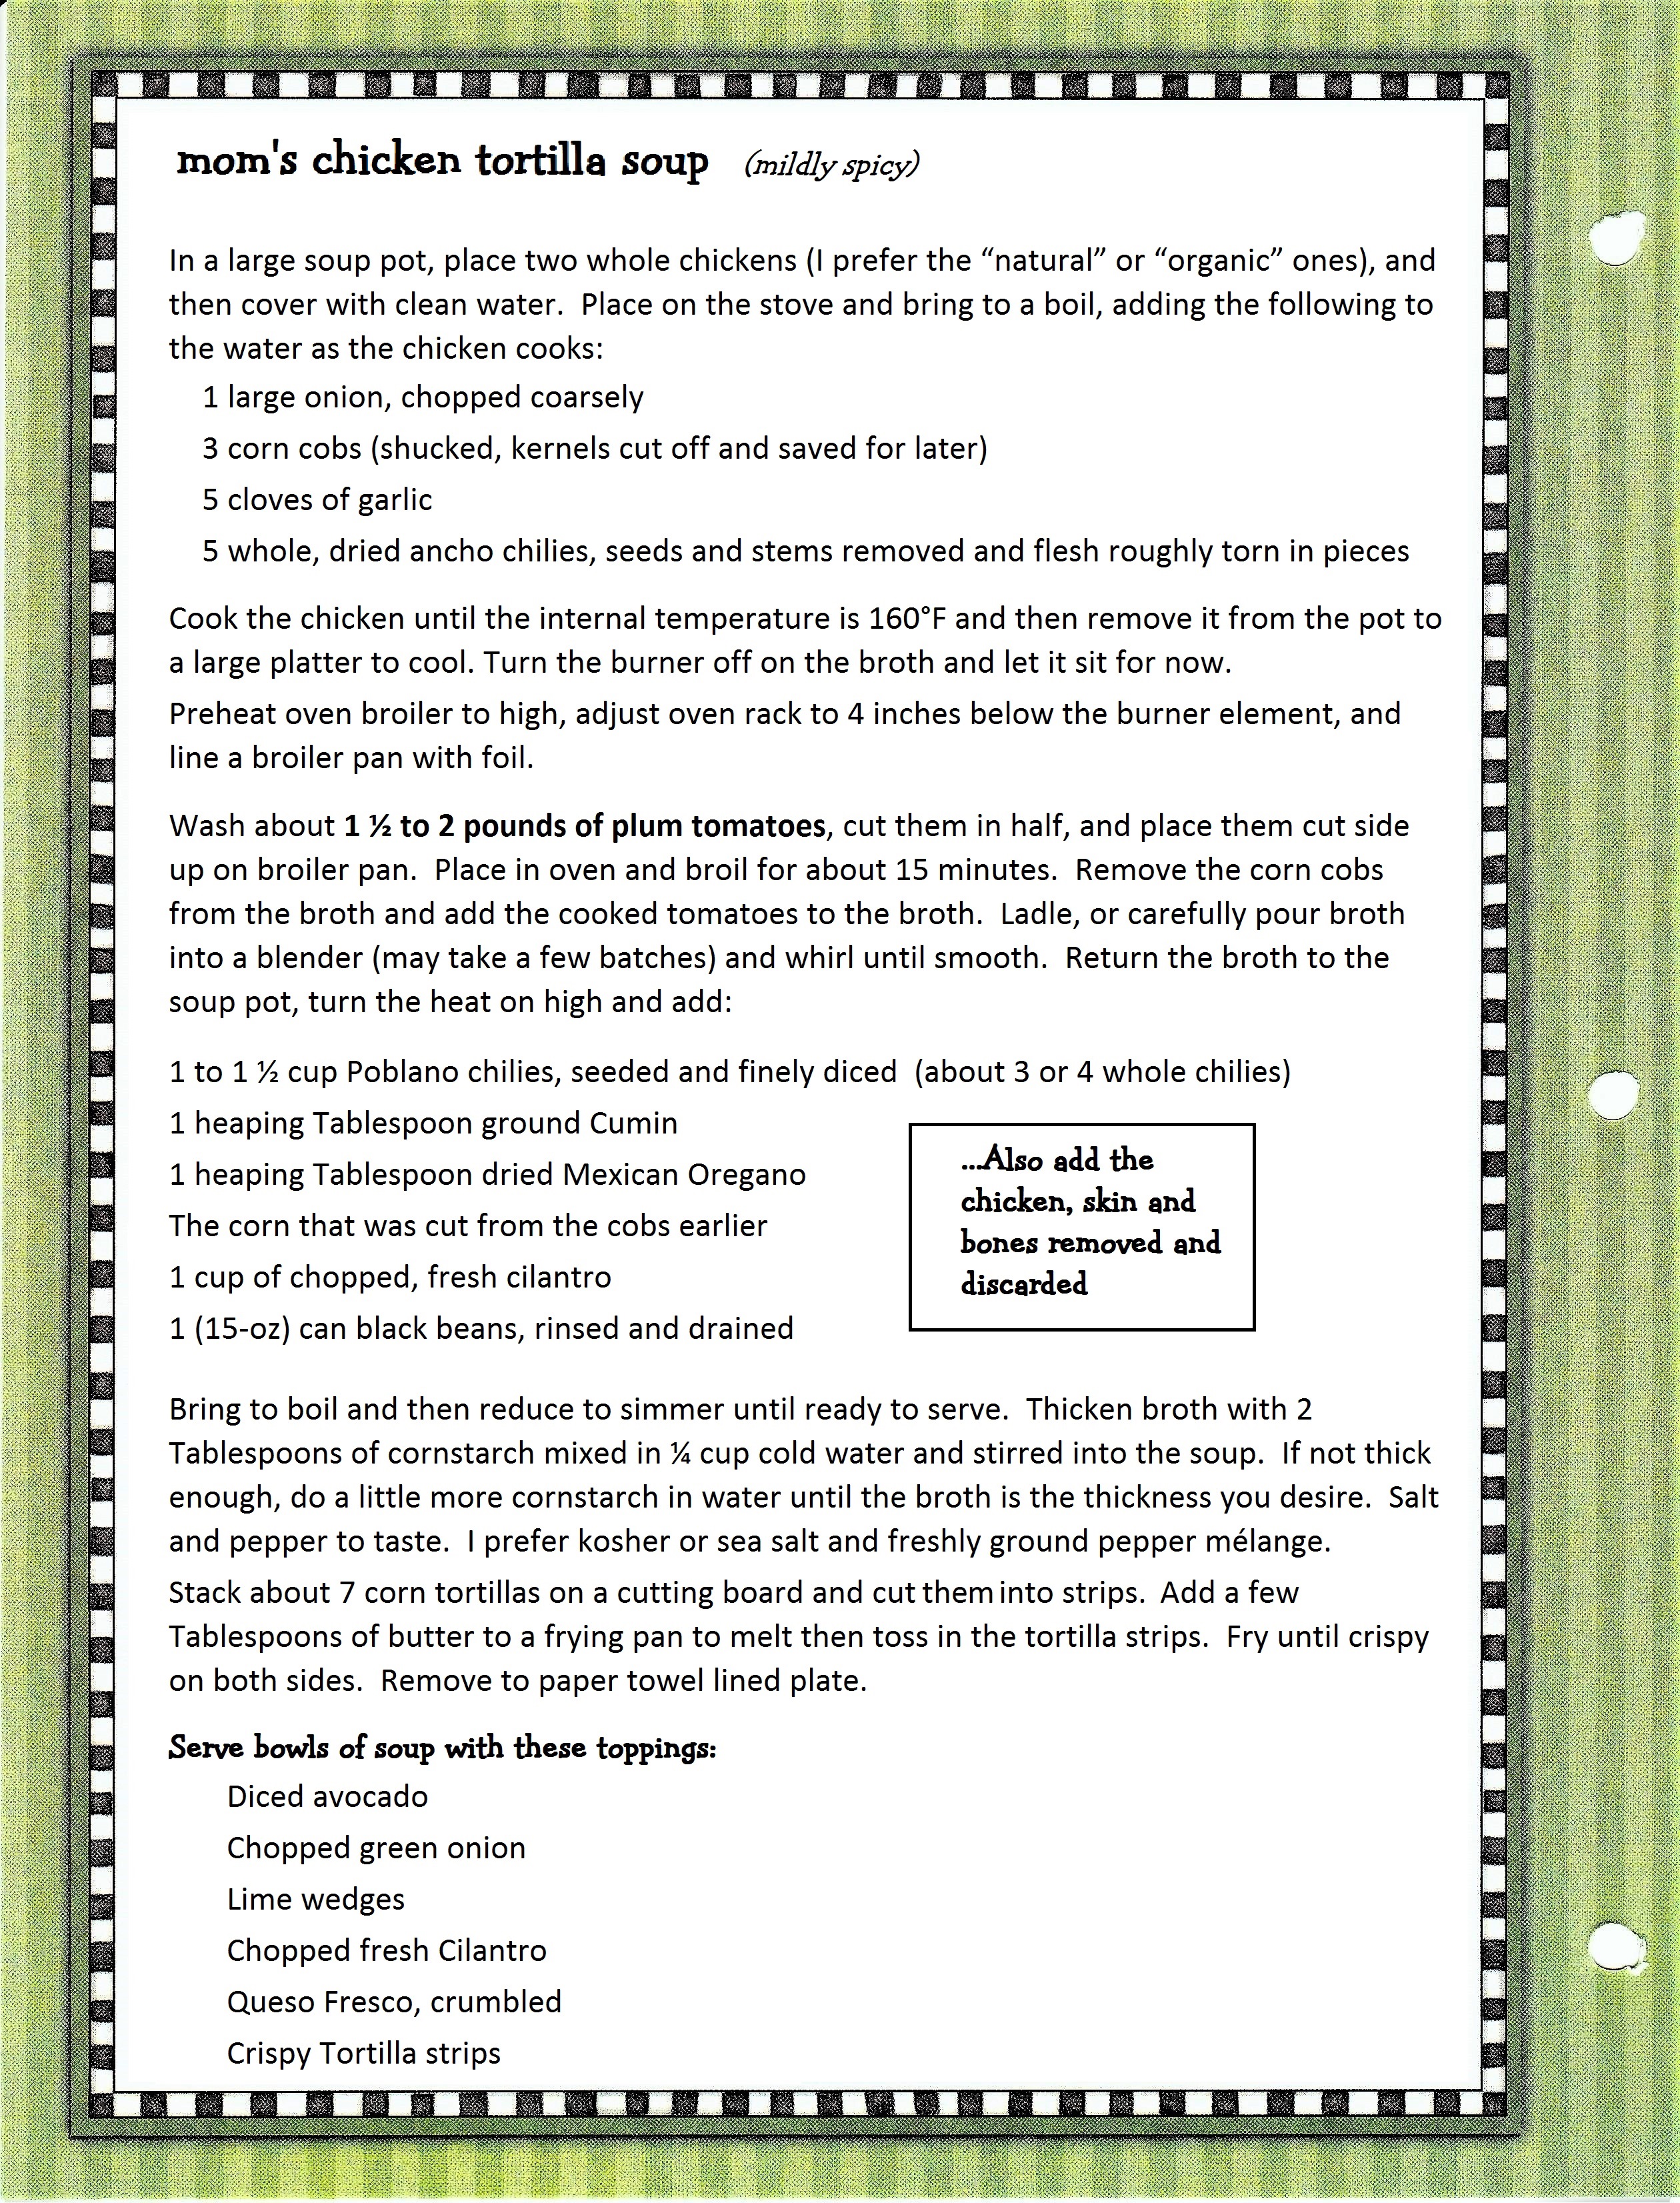
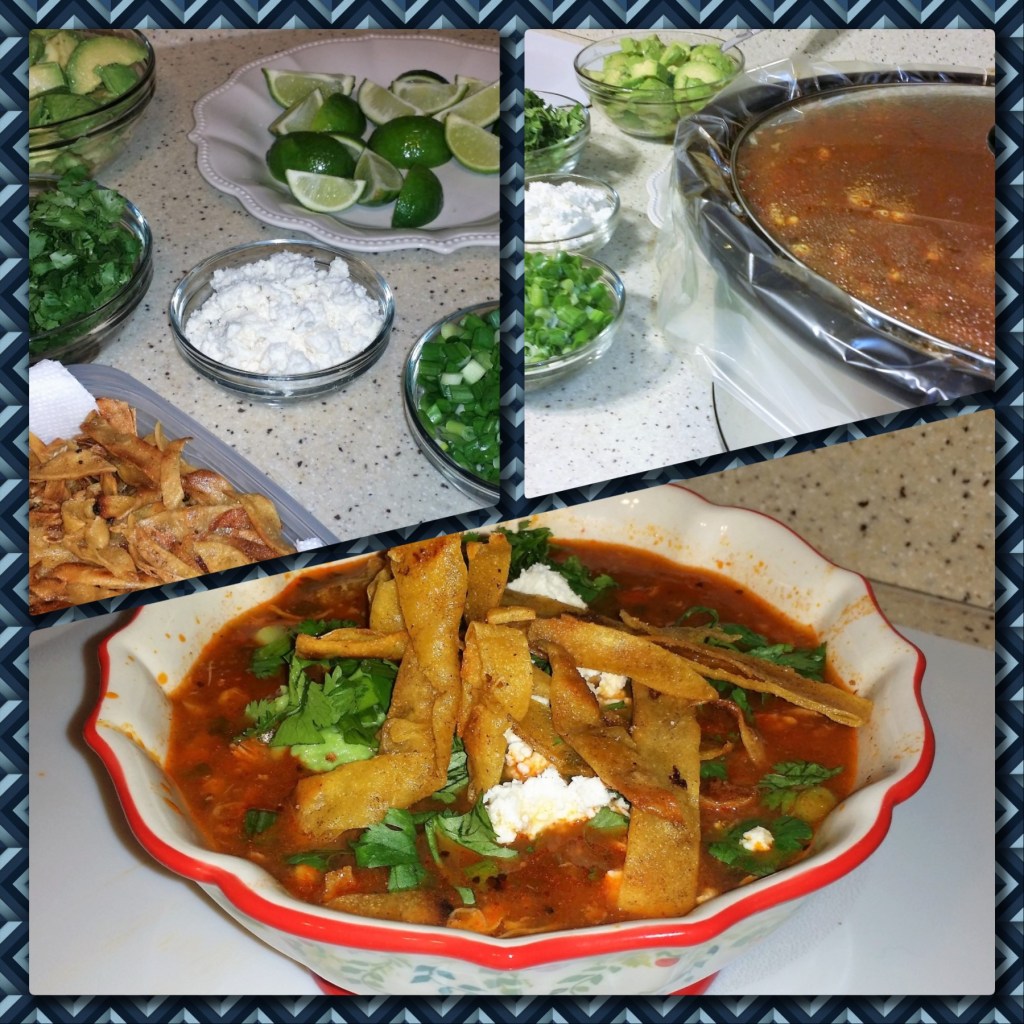
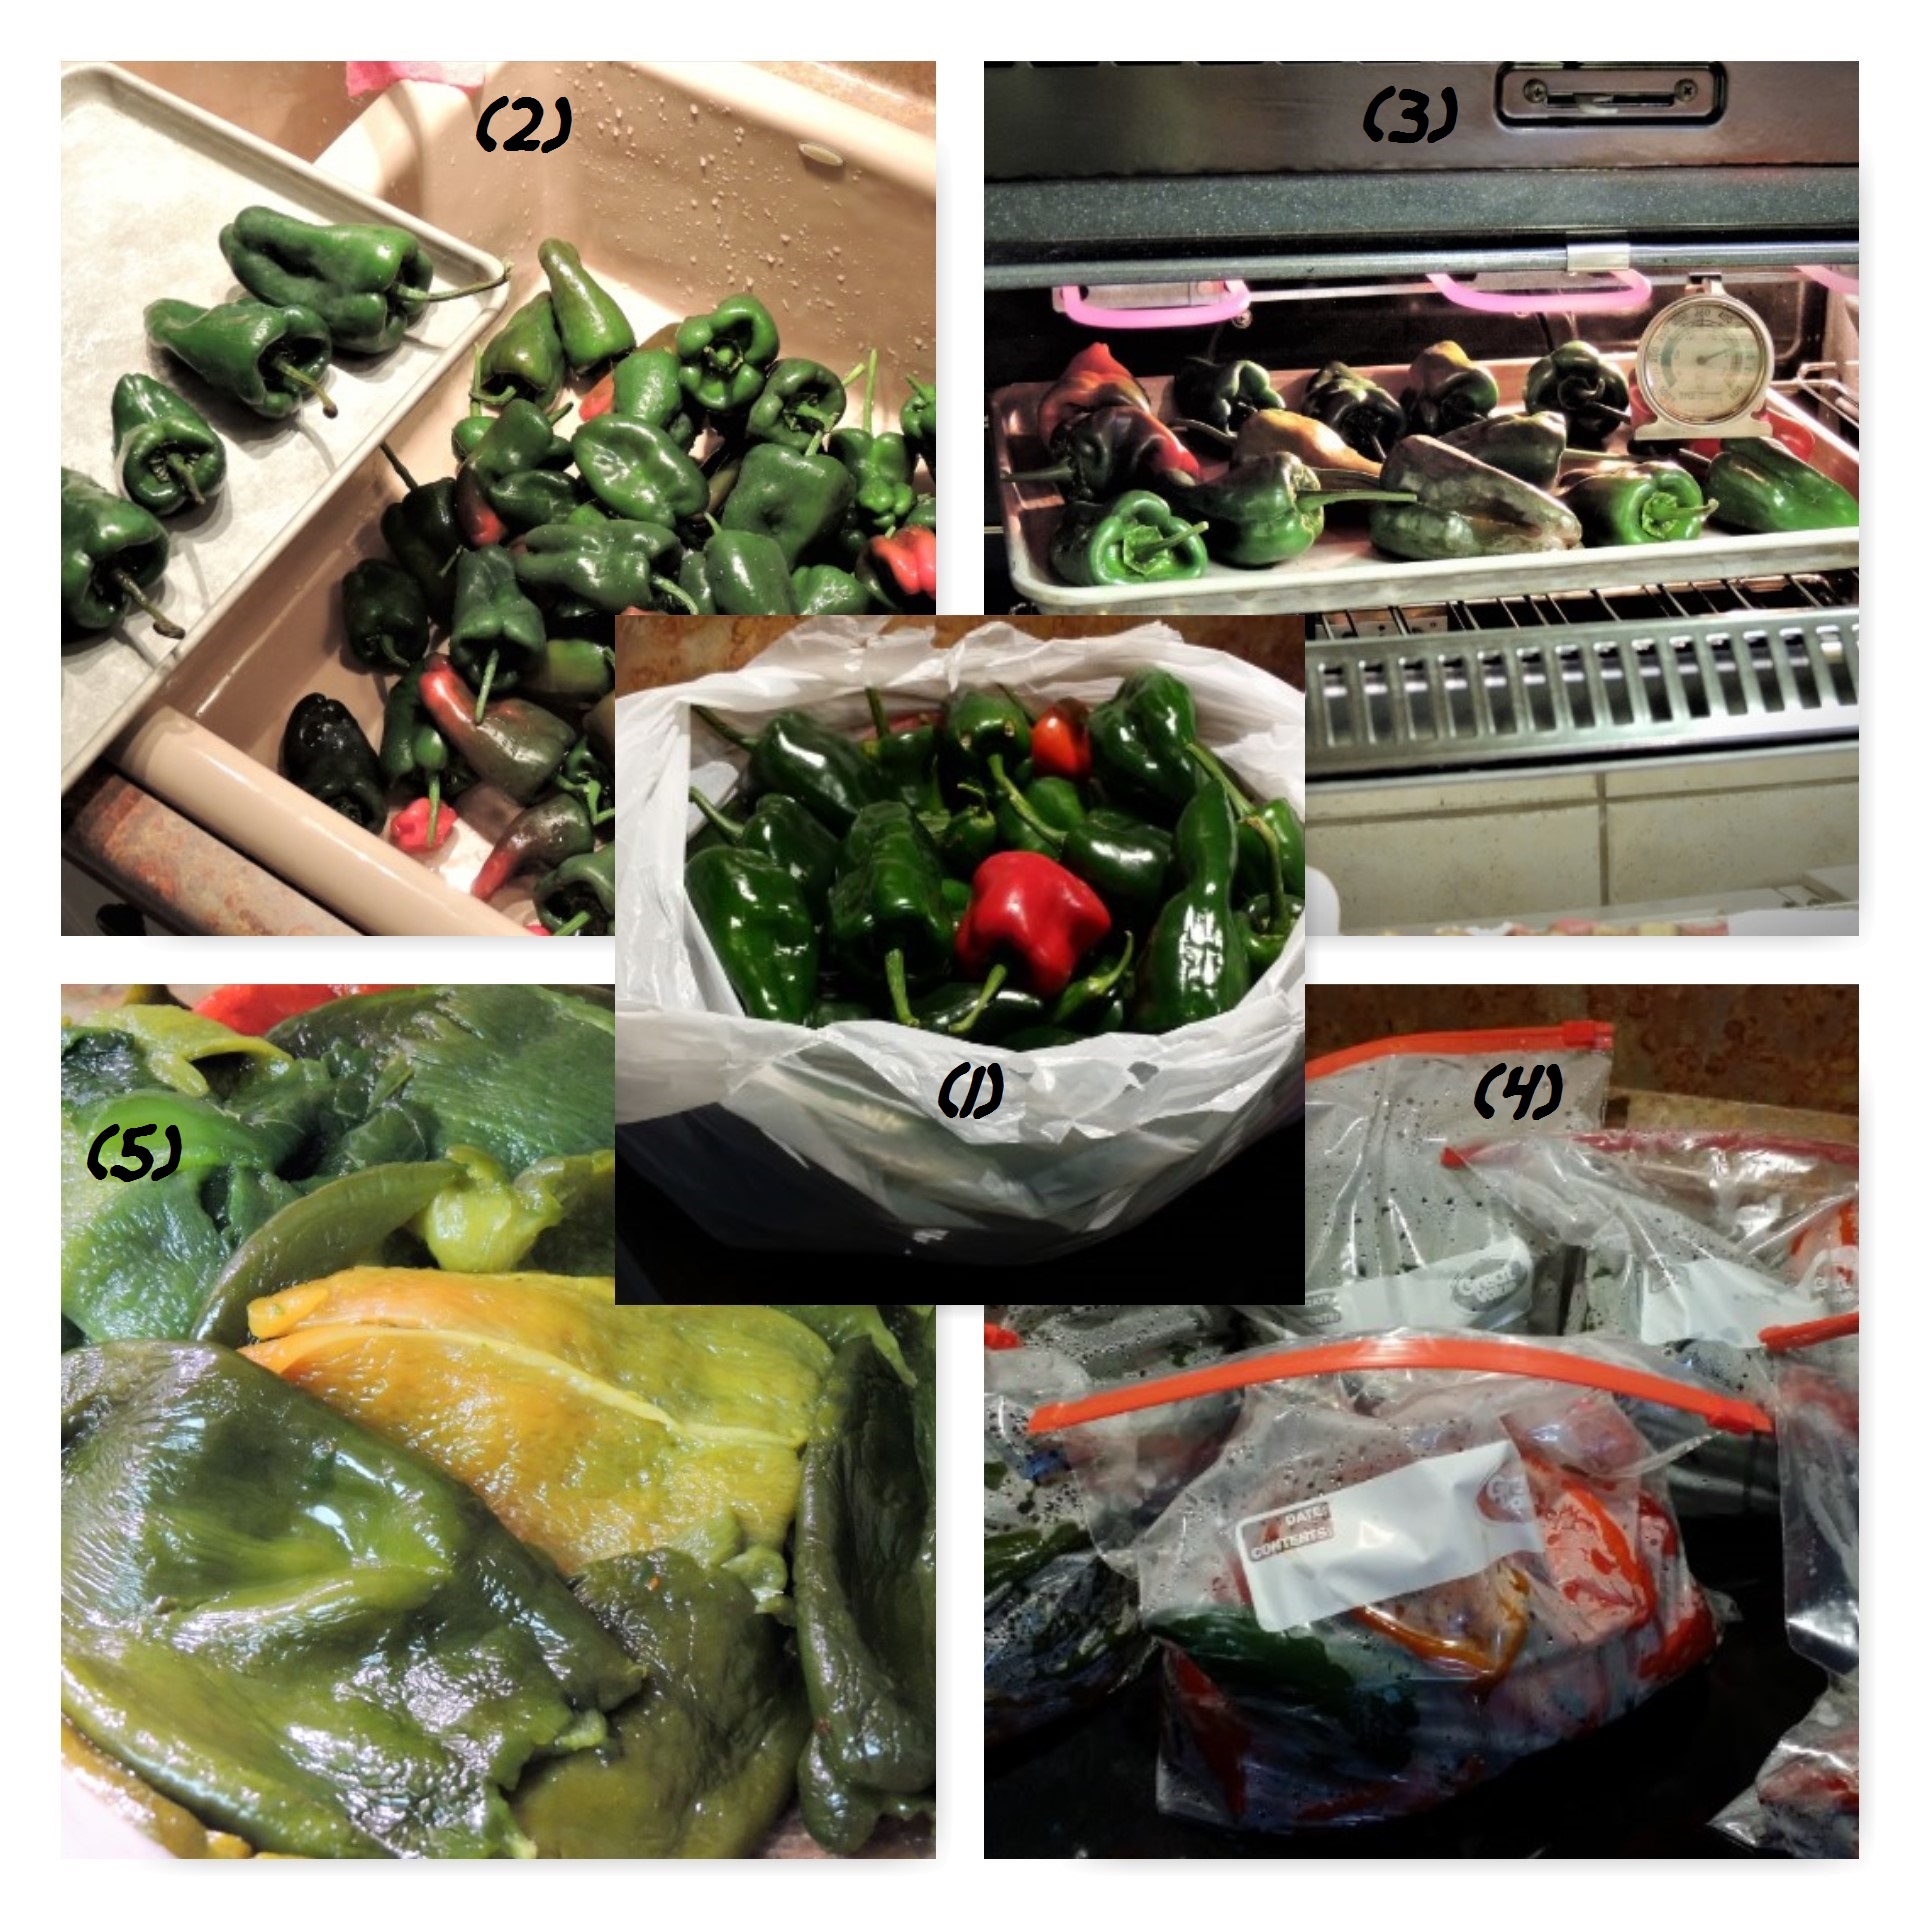
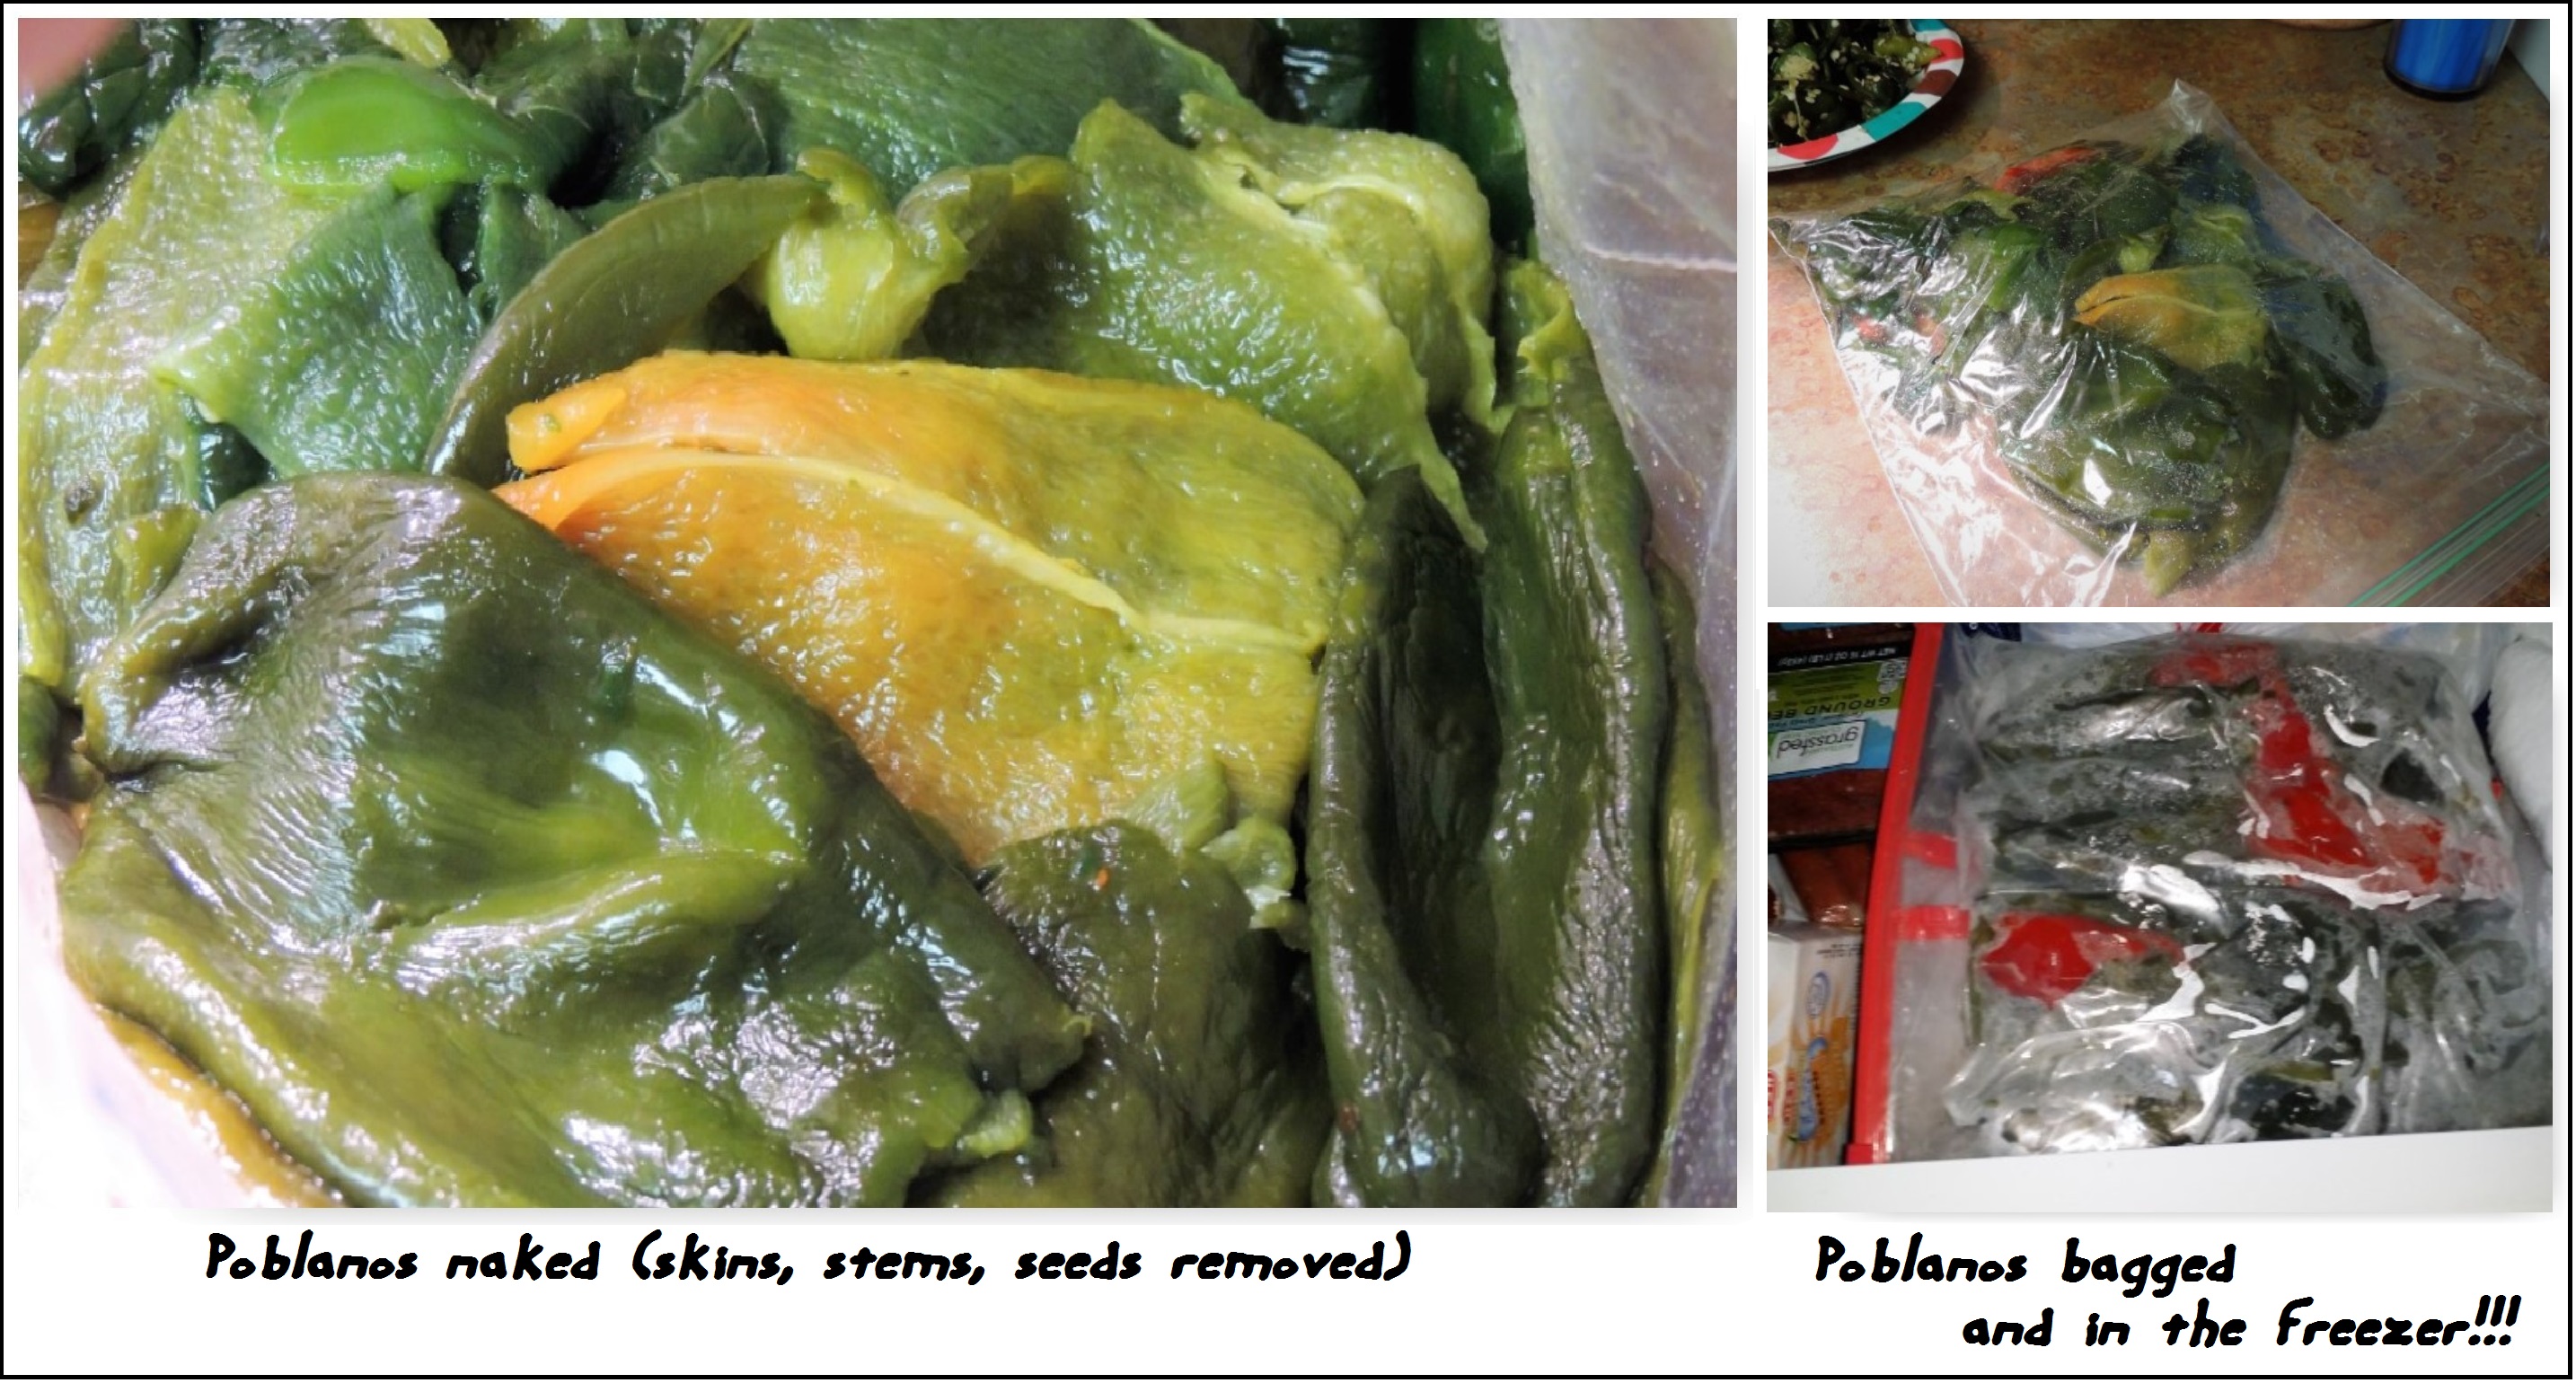

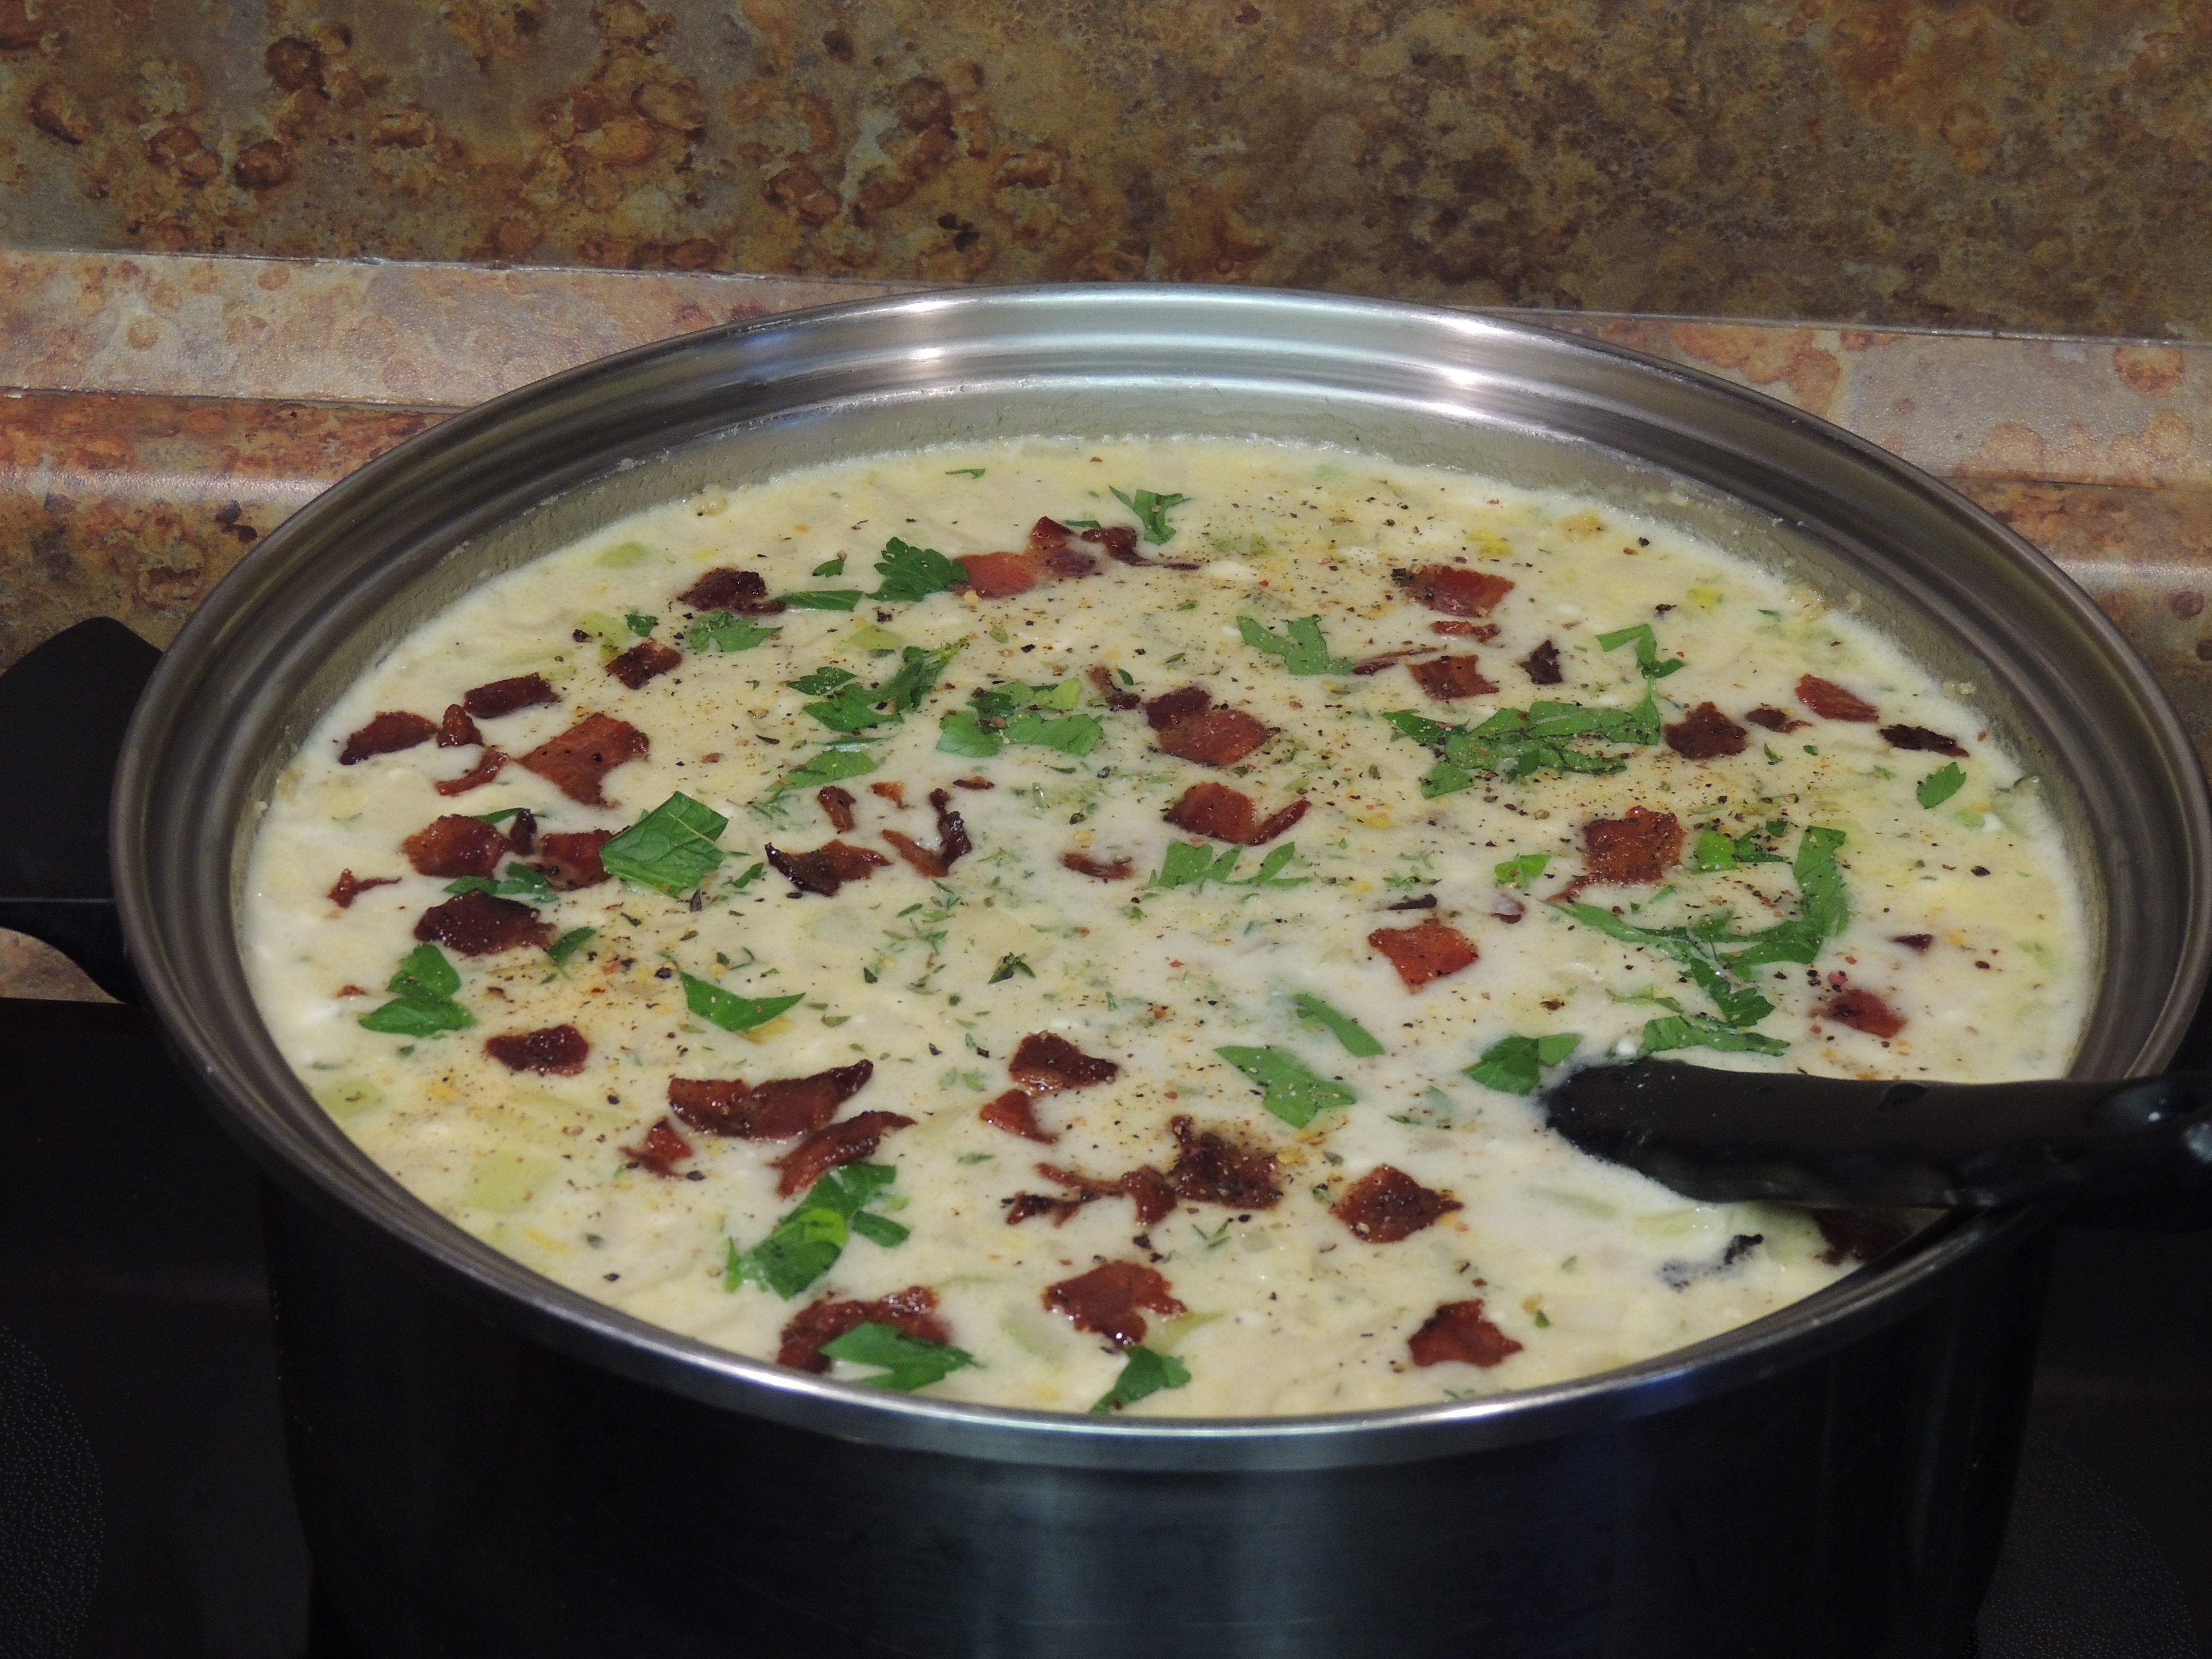
 Mom’s Spicy White Bean, Andouille, and Kale Soup