I grew up in a small town where there wasn’t a lot for kids to do but just be kids and play in the great outdoors. That was plenty enough though, believe me. My sisters and I made dirt houses lined with pebbles, floors swept down to the hard dirt, rocks and logs for furniture, and we served each other our fancy mud pie concoctions. We played secret maze games between the sheets hanging on the line until we got hollered at to get away with our unclean hands. We climbed Tank Hill just for something to do, and then tried to RUN down it without stumbling. Sometimes we took a picnic lunch up there and ate it overlooking the town where we could watch all the goings on. One time I climbed the tank – which was a mistake. I guess I’m a little afraid of heights I found out. My grandpa had to come and rescue me, and right after he called a welder to cut off the ladder so it couldn’t ever be climbed up by a kid again. Oh dear!
We had bikes and rode them all over a whole vast network of oilfield roads, to secret places – under bridges, the old electric plant, and to the pond to catch frogs and salamanders and horny toads by the dozens, but hopefully not see any snakes – ’causeewwww, girls don’t like snakes! We all played ball or watched the games, and we all sat on the fences at the ranch rodeos and watched the cowboys do their stuff. Sometimes they even let us run the hot-shot on the steers in the shoots, and open the shoot gates for the ropers.
Our little oilfield community had the first lighted baseball field, and the first lighted football field in the whole state. We had a bowling alley, and a swimming pool, and in the winter we had a frozen pond to ice skate on. They say we even had a golf course, but it wasn’t like any golf course you’ve ever seen – just dirt and rocks and prairie, with flags stuck in holes here and there. The clubhouse was just a corregated tin outbuilding, but it was something to do for those that are into that stuff!
If there was nothing else to do it was always fun to watch dad tinker with something in his shop, or tag along with him to his work. I got to tag along once to the Blue Creek Ranch out by Kaycee, and they let me ride an old nag of horse all day long while dad fixed whatever it was they needed him to fix. And my grandpa could be found in his massive garden most all summer. It was fun to pick and eat peas while he watered and weeded. I sometimes took my matchbook cars and made trails along the rows of corn. I accidentally sat in an ant pile once though, and that wasn’t so much fun! My grandma was always in the kitchen sowing or cooking. And when me and my sisters stayed at her house, it was fun to play secretary with pens and notebooks in the garage. Sometimes we’d nap with grandpa in the afternoons on the bed they kept out there, where the cool breezes blew through.
There was always a lady in town that taught piano lessons, and occasionally someone would travel through with gymnastics or dance classes, and our families all went camping and to the lake as often as we could. My folks had a motorcycle and a scooter and we went for rides as a family, sometimes be gone all day! And everyone in town met at the sand rocks to shoot off fireworks on the 4th of July – all of the families, and we shared our snacks and our fireworks with each other. Sounds magical, doesn’t it? It was!
We had a Girl Scouts troop and a Boy Scouts troop, and even a Boy Scouts camp on the Pine Ridge. What in the world else does a kid need? It was a wonderful life!
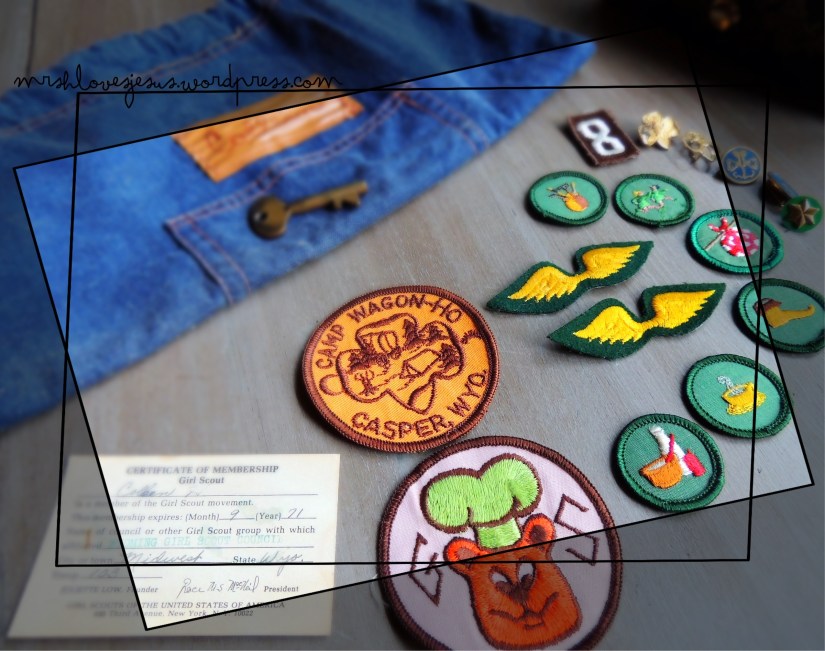
Girl Scouts was one of my fondest childhood memories. I remember getting to go to summer camp (Camp Sacajawea) on Casper Mountain one year. I got to ride on a bus up the mountain with a whole bunch of really nice bigger girls, singing old hippy songs all the way, and coolest of all, it was an over-nighter. We made ditty bags out of bandanas and tied them to a stick (I’ve still got one of the nicer ditty bags we were given – shown in the photo below). We filled them with snacks and water, and one of the days we used the ditty bag sticks as walking sticks and hiked to a really cool waterfall that flowed over a rock that we could walk behind (just like in the movie The Last of the Mohicans). That’s the way I remember it anyway! 🙂 I remember doing crafts and selling cookies. I remember one year being really ambitious to sell those cookies! I ❤ed Girl Scouts!
This is a throw back meal from when I was a Girl Scout at Camp Sacajawea. Very easy to make and I think it is delicious! Of course we made S’mores for dessert – I’m pretty sure that was another Girl Scouts invention too! 😉
This recipe feeds 4 to 6 people.
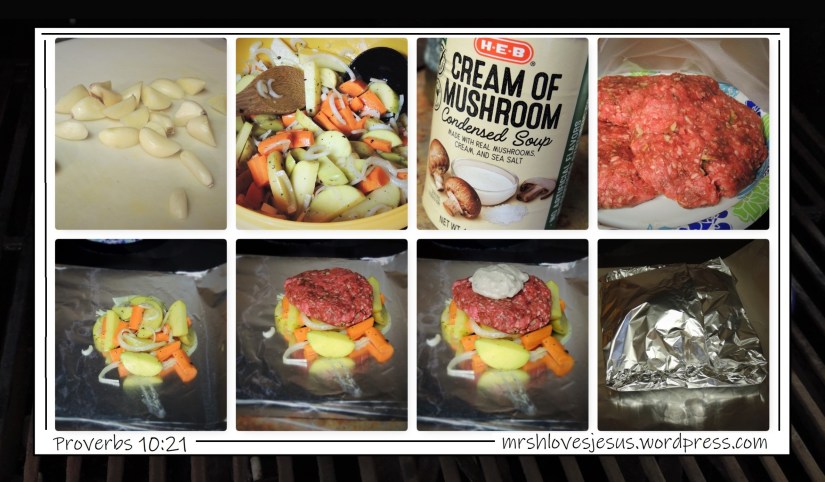
Peel and chop several cloves of garlic. I did a whole bulb’s worth.
Wash a small bag of yellow potatoes, and a small bag of carrots, peel the carrots and then slice both into bite-size pieces (figure on about 2 small potatoes and 1 whole large carrot per person)
Peel a yellow onion, cut in half, and slice it into quarter inch slices
Place all veggies in a bowl. Salt and pepper to taste, and then drizzle generously with olive oil, toss to coat evenly, set aside
Mix 2 lbs of hamburger with 2 packages of dry onion soup mix, and a small minced jalapeno, a little salt and pepper, and mix well, then form into patties
Place a heaping ladle full of veggies into the center of a generous sheet of heavy duty aluminum foil
Lay a hamburger patty on top of veggies
Top with a spoonful of mushroom soup
Bring both ends of foil up and fold together to seal well on top, and then do the same on both sides. Repeat making foil packets until all veggies and burger patties are used up.
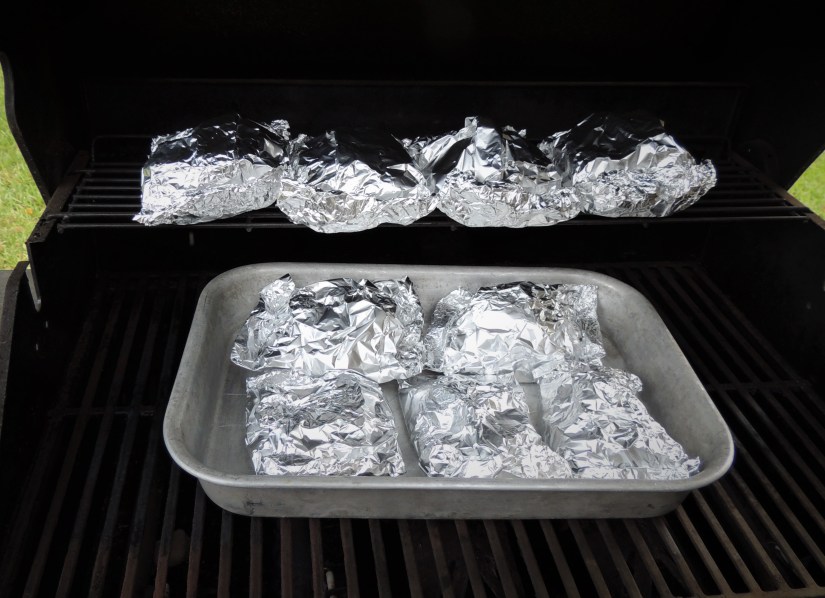
Preheat BBQ grill, or campfire (or 350 *F oven), and when coals are hot and gray lay the packets on a grate about 6 to 8 inches above them
Let packets cook for 15 to 20 minutes and then carefully and gently flip and rearrange the packets so they can cook evenly on the other side for another 15 to 20 minutes.
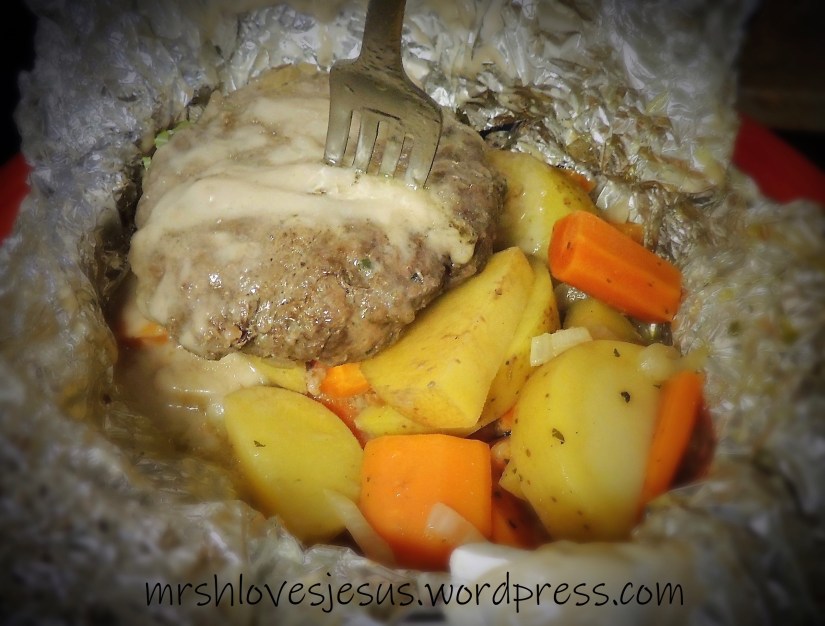
Open one packet and test the veggies for doneness
When done, remove the packets and serve one packet per person.
Enjoy!!!!!!
“Rejoice, O young man, in your youth, and let your heart cheer you in the days of your youth; Walk in the way of your heart, and in the sight of your eyes; But know that for all these God will bring you into judgement. Therefore remove sorrow from your heart, and put away evil from your flesh, for childhood and youth are vanity.”
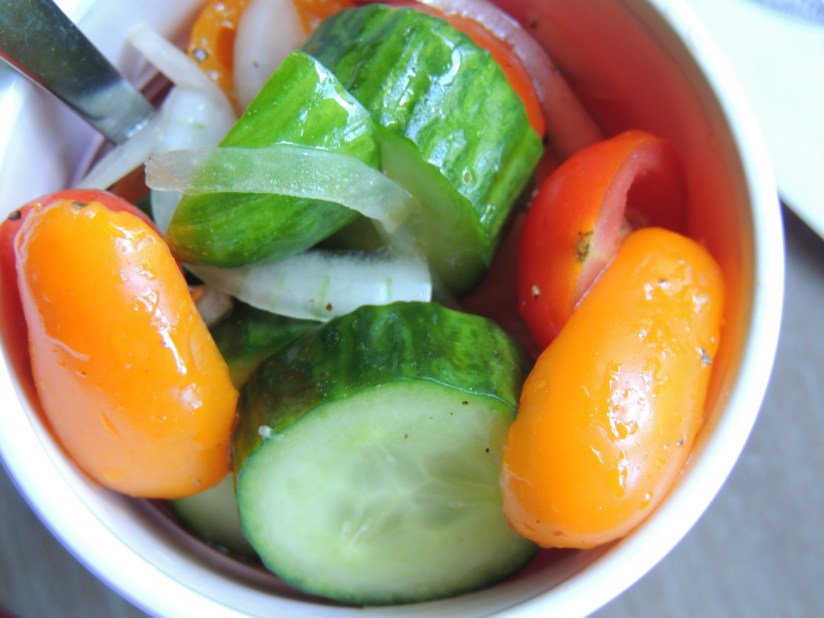
Ooooooo I love the salads of summer!!!!! This is one of my favs. My neighbor, Don Kinion used to make it every summer from the abundance of his garden, and lucky us, we got a gift of a nice big jar full every few weeks during the late harvest season, when he had tomatoes and cucumbers coming out his ears. I have never been able to duplicate his perfect recipe, but this comes pretty close. Hats off to you neighbor. Hope you are doing well!!!!
Ingredients
1 burpless cucumber (the long, skinny, plastic wrapped ones, if you are buying from the store, or any variety grown in the garden)
2 packages of the sweetest cherry tomatoes in the produce department, (or a small bowl full of freshly harvested Sweet One Hundreds Cherry Tomatoes, from the garden)
1 Red Onion (they grow these where I live and so I get the luxury of fresh from the fields, in fact, they often fall off the harvesting trucks right in front of my house. Ditch food!!!! Love it!)
1/2 cup good quality Olive Oil
1 cup Red Wine Vinegar
1/2 cup sugar
Salt and Pepper to taste
Directions
Mix up the dressing ingredients first (olive oil, vinegar, sugar, salt & pepper), place in a large mason jar, and park in the fridge until ready to mix with veggies. Give it a shake every once in a while.
Peel some of the skins from the cucumbers. If you are using the long, skinny store bought ones, the skin if find to leave on. It is very tender. But some garden cucs have tough, bitter skins. I like to leave some of the skin on anyway. But taste the cucumbers to make sure they aren’t bitter.
Chop the cherry tomatoes in half.
Slice the onion into thin slices, and then give them a rough chop. Mix all the veggies together in a large glass bowl and pour the dressing over. Toss to coat and then chill for a few hours in the fridge. Give them a stir every once in a while (couple hours) until ready to serve.
.
Serve this alongside any BBQ meat… (or eat it all by itself!!!!! 🙂)
.
“Now accept the one who is weak in faith, but not for the purpose of passing judgment on his opinions. The one who eats is not to regard with contempt the one who does not eat, and the one who does not eat is not to judge the one who eats, for God has accepted him. Who are you to judge the servant of another? To his own master he stands or falls; and he will stand, for the Lord is able to make him stand.” Romans 14:1-4
I love theme dinners! And Polynesian is one of those themes that has tons to offer… tons of great foods… lots of great music… and a motherlode of great activities. That’s probably why luau parties are so popular. They are great for a crowd (family reunions, company picnics, neighborhood get-togethers, graduation parties, youth group events, and so on).
That’s all well and good, but I had in mind something a little more intimate. In my younger life, I had the idea to have monthly theme dinners just for family – just to make memories for my kids. January’s theme was Chinese New Year, where we dressed up, ate Chinese foods, listened to Asian music, played some sort of Chinese games after dinner, and totally immersed ourselves in Asian culture for a night. February was Cajun foods, music, and culture. March was Irish. April was Polish or Italian. May was Mexican or Caribbean. June was Polynesian or African. July was American (which encompasses everything from BBQ to Burgers, to Hot Dogs in every variety). August was South American or Australian. September was Russian or French. October was German. November was American Indian. And December was Indian or Mediterranean. That was my plan. It was so much my plan that I wrote a whole book about it, but then I kind of lost my focus. <Sheepish shrug> Well, thankfully God has given me grandchildren, and a whole renewed interest in introducing them to the cultures and foods, and sounds, and pastimes of the world. And the great thing is … SUMMER IS COMING!!!! Which makes it a great time to introduce the kids to something fun and interesting and chase away those summer doldrums, not to mention it’s all kind of educational as well.
JUNE – Polynesian
Knickknacks, tanning mats, give a dog a fish bone. The dollar store is a great place to look for decorations. You can keep it simple (lay a bamboo tanning mat down on the table, set a tropical plant as a centerpiece, and lay out luau plates, cups, and silverware from the party store), or go hog-wild (outdoor party with mumus and sarongs, tiki lanterns, grass skirts, a limbo stick, kalua pig roasting on a spit, cold drinks in pineapples or coconuts, and a nice array of Makahiki games, Hawaiian crafts, and games). Gotta have some Island music too (may I suggest Don Ho?), and maybe even get the kids ukuleles, and teach them to play an easy song.
After dinner, you can break out the limbo stick and challenge the kids to a contest, or try some hula hooping. Then set the TV outside and gather the lawn chairs around for an outdoor movie night. How about a marathon of old Gilligan’s Island reruns? Or, for a real submersion into Hawaiian culture, make leis, learn to hula, set your back yard up with some of the Makahiki Games listed below, and watch a mesmerizing “Ha: Breath of Life” show on DVD.
Traditionally, a Hawaiian party would have deep pit roasted Kalua Pig, long rice (which is basically the same thing as Pad Thai rice noodles), some dish of sweet potatoes (purple), and Poi, or even Spam Musubi. If it is your goal to introduce your family to Hawaiian culture, go with tradition. I found some wonderful recipes HERE that I plan to try.
.
Recipes
.
COCONUT SHRIMP
Batter:
1 cup all-purpose flour
1 cup dry white wine
– – – –
1 lb large tail-on shrimp, peeled and deveined, and patted dry on paper towels
1 7-oz pkg shredded coconut
Instructions: Place peanut oil in deep fryer and set temperature to 375 degrees. Mix flour with wine until smooth. When oil has reached temperature, dip about 5 of the shrimp, one at a time in batter and then roll in coconut. Drop into deep fryer and cook for about 2 to 3 minutes or until golden and curled. Drain on paper towels. Continue until all shrimp are cooked.
Melted jalapeno jelly makes a wonderful dipping sauce (remove lid from jar, warm in microwave about 1 min., stir and divide into little sauce cups). Or see the sauce recipe later down on this page. Serves 4
.
SPICY POLYNESIAN WRAPS
Ingredients
2 pounds skinless, boneless chicken breast halves – cut into 1 inch strips
1 (14 ounce) can coconut milk
1 cup uncooked long grain white rice
2 cups water
1 1/2 cups all-purpose flour
1 1/2 Tablespoons curry powder (hot or mild as you wish)
Place the chicken and coconut milk in a bowl, and marinate in the refrigerator 1 hour.
In a pot, bring the rice and water to a boil. Cover, reduce heat to low, and simmer 20 minutes.
In a small bowl, mix the flour, curry powder, and garlic salt. Drain the chicken, and discard marinade. Dredge chicken in the flour mixture to coat.
Heat the oil in a skillet over medium heat, and cook the coated chicken strips 5 minutes per side, or until golden brown and juices run clear. Squeeze lime juice over chicken, and discard limes.
On each tortilla, place equal amounts of rice, chicken, coconut, and green onions, and sprinkle desired amount of Serrano chilies. Wrap burrito style.
.
POLYNESIAN DIPPING SAUCE (for shrimp, or wraps)
Ingredients
13 ounces coconut milk
2 teaspoons green curry paste
1 tablespoon grated gingerroot
1 tablespoon grated lime rind
1 tablespoon granulated sugar
1 tablespoon chopped fresh mint
1 tablespoon chopped fresh cilantro
2 tablespoons lime juice
Directions:
Place coconut milk in a skillet and bring to boil. Reduce heat to low and simmer for 10 minutes until reduced by a quarter – it should be the consistency of heavy cream. Stir in the green curry paste, ginger, lime rind, and sugar. Cook another 5 to 6 minutes or until sauce is thickened and fragrant. Stir in mint, cilantro, and lime juice. Cool and refrigerate until ready to serve.
.
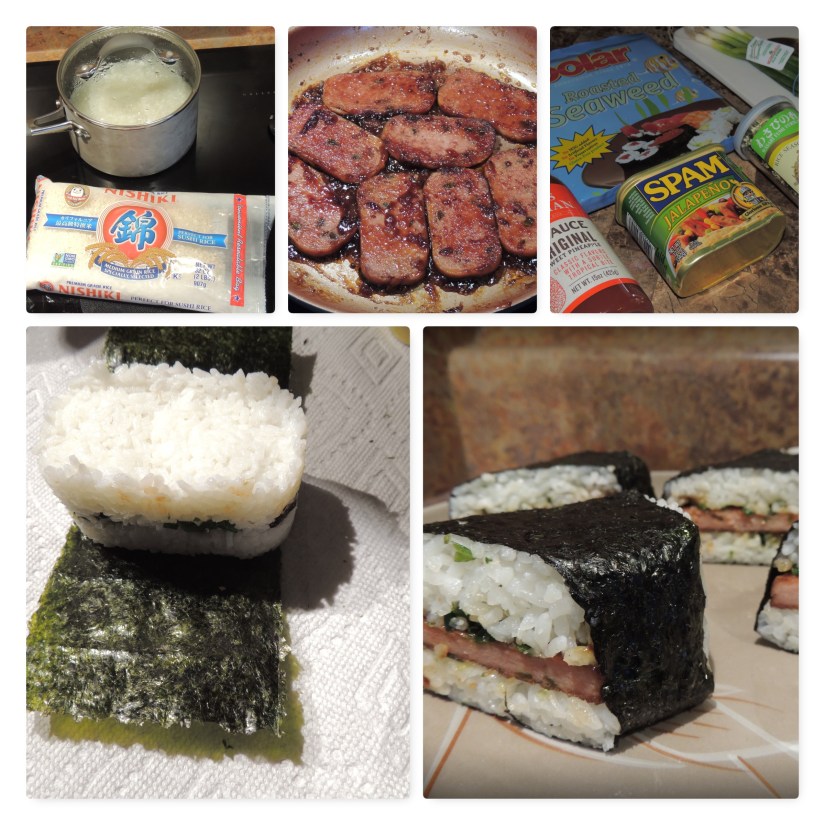
SPAM MUSUBI
3 cups cooked Sushi rice
4 sheets Spring Roll Wrappers (this is a MrsH modification: I’m not a fan of Nori)
1 12-oz can Spam
6 Tbsp Soy Sauce
6 Tbsp Hawaiian BBQ sauce
Furikake
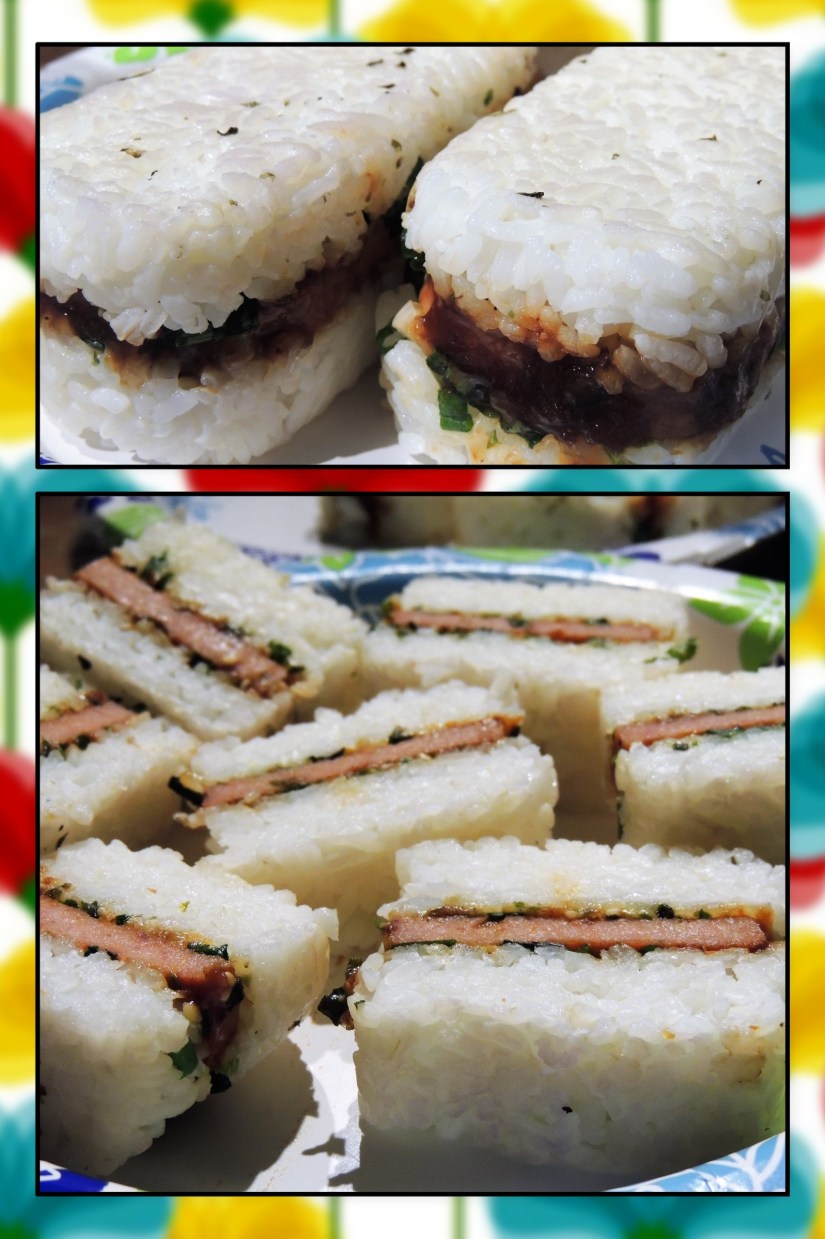
I cut the end off of my Spam can with sissors to use to make my Musubi, and I used a wooden meat mallet to press the rice down. After making my musubi I have decided Nori is just too healthy tasting for my taste, so after making it with Nori, I peeled the Nori off to eat it, and next time I’m going to try making it with rice paper (Spring Roll Wrappers) instead. I also didn’t care for the Furikake (rice seasoning) because of the seaweed that was in it. The one I used was Wasabi Fumi Furikake. It had a good flavor that really does need to be there, but just warning you not to go hog wild with it if you aren’t a seaweed fan. I do like wasabi and sesame. And I added chopped green onion. Maybe there is a variety of Furikake without seaweed???
Prepare the Rice as per package instructions. Allow to cool. Meanwhile, cut the Spam into eight equal slices. Fry the Spam in a frying pan until very crispy on both sides. Mix soy sauce with BBQ sauce and pour over Spam. Stir around and flip until sauce is carmelized onto the Spam. Remove from heat.
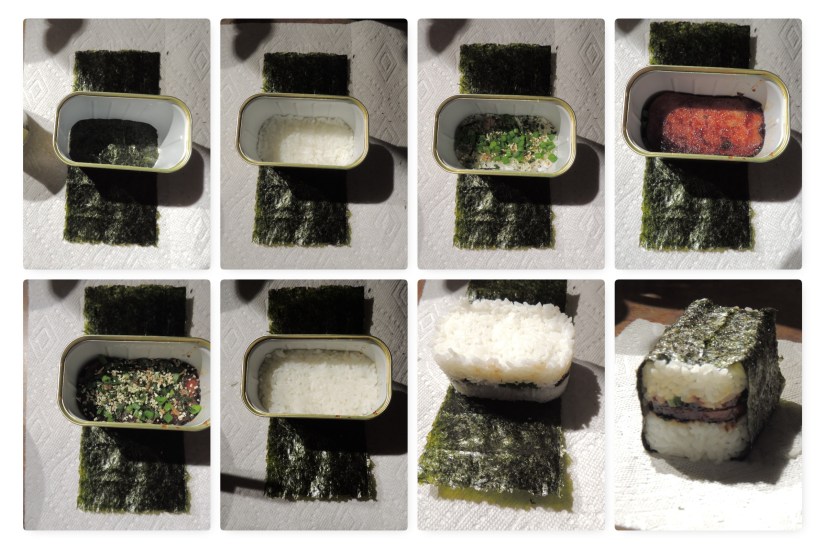
This is the process for making the musubi: (shown using Nori seaweed)
Cut each sheet of Nori in half. Lay half a sheet down on a clean paper towel. Place Musubi press (Spam can) in the center. Add about a heaping tablespoon of rice and press down. Add a sprinkle of Furikake. Place a slice of Spam on top. Sprinkle with more Furikake and add another heaping tablespoon of rice. Press it all down firmly and hold down while lifting can off. Wrap Nori around. Cut each finished roll on the diagonal and serve. *Below is what Musubi looks like without the seaweed wrapper. I wrapped my musubi up in plastic and refrigerated them overnight. The next day I removed from fridge, peeled off the Nori, and cut them into bite-size slices. Much better!
.
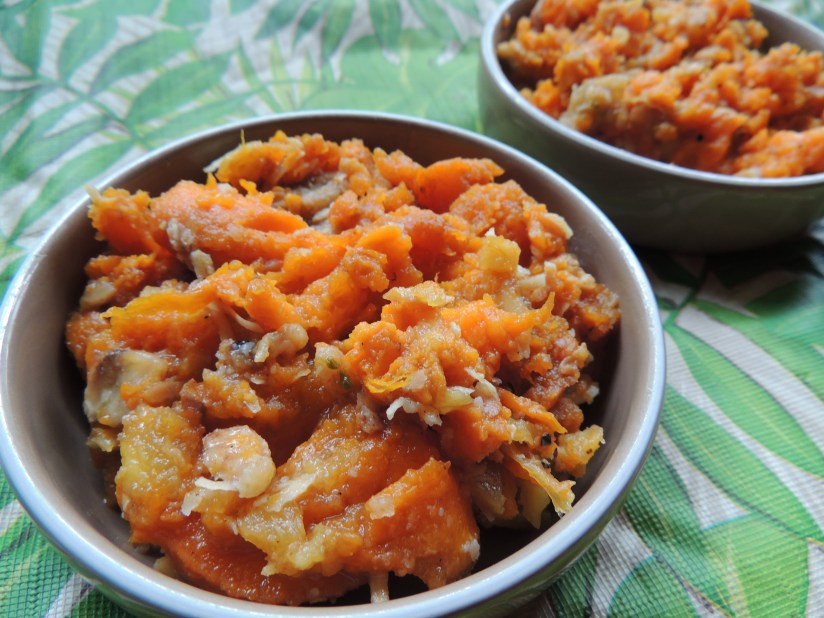
HAWAIIAN SWEET POTATO CASSEROLE
5 medium Sweet Potatoes, baked in 350*F oven for 1 hour, until soft
2 green bananas, diced
1 cup diced and crushed fresh pineapple
1/2 cup brown sugar
2 Tbsp butter, melted
1 tsp cinnamon
2 tsp salt
Juice of 1 lime (also the zest)
2 Tbsp Cocunut syrup (may substitute honey)
1 cup shredded coconut
1/2 cup crushed macadamia nuts
After potatoes have cooled, peel the skins off and discard skins. Slice the potatoes into inch thick slices and lay in a single layer in a buttered oblong baking dish. Sprinkle with brown sugar, cinnamon, salt, and drizzle with melted butter. Add a layer of pineapple and bananas. Press down with a spatula to mash the potatoes slightly. Mix lime juice with coconut syrup and pour over potatoes evenly. Sprinkle with coconut and macadamia nuts in an even layer. Cover and bake in a 300*F oven for about 30 minutes. Uncover and bake another 15 mintues until toasted on top. You can also broil the dish for a few minutes to toast the top if you wish.
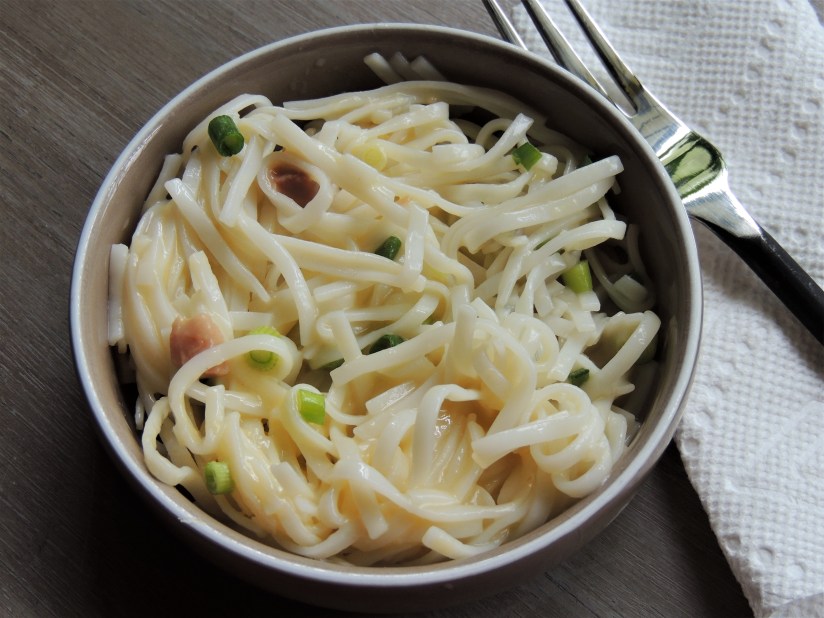
HAWAIIAN LONG RICE (MrsH’s super easy version)
Cook a box of Pad Thai rice noodles as directed on package. Drain off most of the water, but leave the noodles a little soupy. Add a can of Campbells Creamy Chicken soup to the noodles and stir to mix. Serve with chopped green onion for garnish.
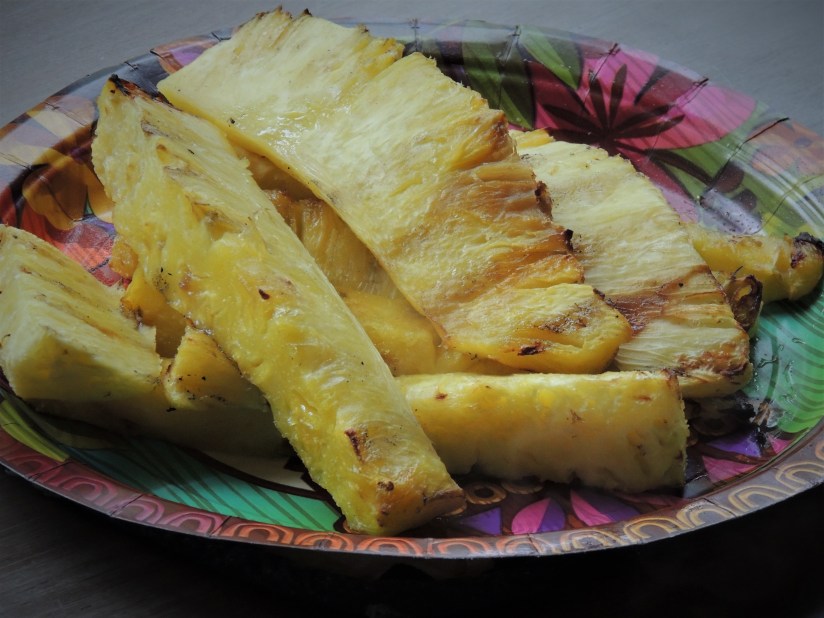
GRILLED PINEAPPLE
.
Dessert
.
ISLANDER’S COCONUT CREAM PIE
1 prepared pie crust, baked as directed for cream pies
1 package of vanilla pudding, the kind that cooks, not instant
1 package coconut flakes
1 container of Cool Whip with 1 tsp. rum mixed in
Broken, slivered almonds
Cook pudding as package directs using 1/2 cup less liquid. Add 1 cup of the flaked coconut to the pudding and stir to mix. Pour into prepared crust and spread to fill evenly. Chill until set. Spread Cool Whip over pudding in piecrust. Sprinkle 1/4 cup of flaked coconut and then almonds over the top. Chill to set.
.
HAWAIIAN PINEAPPLE UPSIDE DOWN CAKE
Ingredients
1 8-oz can Dole pineapple slices, drained (reserve juice for serving)
1 stick butter
2/3 cup packed brown sugar
6 maraschino cherries, halved
In an large oblong cake pan melt butter and stir in brown sugar. Arrange pineapple slices next to each other in three rows of four. Place a half of a cherry in the center of each pineapple.
Cake Ingredients
2 ½ cups All-Purpose flour
3 tsp. Baking powder
1 tsp salt
1 stick butter, softened
2 cups sugar
2 tsp Vanilla
2 eggs
1 ½ cups milk (or substitute Coconut Milk)
Combine dry ingredients and set aside. Beat softened butter with sugar and vanilla. Add eggs one at a time beating after each. Stir in dry ingredients and milk. Beat with a mixer until thick and creamy. Pour over pineapple slices in large baking pan. Bake at 375 degrees F for 35 to 40 minutes. Cool 5 minutes, then invert onto a serving plate. Serve warm. If you desire your cake a little more moist, drizzle with reserved pineapple juice.
.
Beverages
.
Iced Thai Tea, my latest addiction!!!!!
THAI TEA
1 pkg Thai Black Tea bags (available at World Market)
Water
Sweetener (sugar, agave nectar, honey, Stevia, as you prefer)
Half & Half
Place 8 teabags and 8 cups of water in a saucepot and bring just to the steaming point on high heat on the stovetop, and then remove from heat. Cover and let steep for 15 minutes. The tea will become dark orange colored. Add whatever choice of sweetener to taste, I like this tea a little on the sweet side. When the tea has cooled, pour it into a pitcher and chill in the refrigerator for several hours or overnight.
To serve: Pour tea over ice in a tall glass. Gently add Half & Half by the Tablespoonfuls until the top 1/4 of the glass is filled. Add a straw and serve. Let guests stir the cream into the tea before drinking.
.
TROPICAL SMOOTHIES
Ingredients
1/2 ripe mango (peeled and seeded)
1/2 ripe papaya (peeled and seeded)
1 ripe banana
1/4 cup freshly squeezed orange juice
1/2 cup Cream of Coconut
1/4 cup plain or vanilla yogurt
1 tsp. honey
2 cups ice
Directions
In a blender, mix mango, papaya, banana, orange juice, coconut cream, yogurt, honey, and ice. Blend until velvety. Serve in martini glasses and garnish with mini skewers of pineapple chunks.
.
Other Adult Beverage options:
Fire Rock Pale Ale (beer) or Spearhead Pale Ale
.
Cocktails
FROZEN MAI TAI
1 cup of ice
1 oz. light rum
1/2 oz. dark rum
1/2 oz. Apricot Brandy
1/2 cup fresh or canned pineapple
Splash of sour mix & Splash of orange juice
Blend all ingredients in a blender for 4 seconds on low speed. Garnish with lime and orange slices, and a little paper umbrella. I f you want to make it non-alcoholic just use 1/2 tsp of brandy flavoring and 1 1/2 tsp of rum flavoring in a half a cup of soda water with the other ingredients.
.
CAPTAIN MORGAN’S Piña COLADA
1/2 cup ice
2 oz. light rum
2 Tablespoons Cream of Coconut
1/2 fresh or canned pineapple
1 Tablespoon vanilla ice cream
Pineapple chunks, cherries, umbrellas for garnish
In blender blend until smooth. If too thick add fruit or juice. If too thin add ice or ice cream. Garnish with Pineapple and Cherry, and a little paper umbrella. You can use a mix to make these if you would rather… and you can make them non-alcoholic by substituting rum flavoring and soda water.
.
Traditional Island games
Walk on Hot Coals
Dig a shallow pit about three feet wide by six feet long and fill it with charcoals. Add starter fluid to get the charcoals burning. Cover them completely with medium-sized smooth rocks and let the rocks get hot. Any guests who are brave or foolish enough may hop across the rocks with their bare feet.
‘O‘O Ihe(Spear Throwing)
Spear throwing contests were held to display strength and skill for fighting and food gathering. A target, sometimes the stalk of a banana plant, is set up and contestants stand some 15 feet away and attempt to stick a lightweight wooden spear in it. Watch the video below, which features spear throwing and other traditional games.
A great alternative for the littler ones would be the inflatable Fish Spearing Game at Party America.com or Party City.com, if they still carry it as of the time of this writing. If not, this is what it looks like and you can make your own version out of a an old toilet seat (padded and decorated) and a bamboo stick. Hang it in a tree in the corner of the yard.
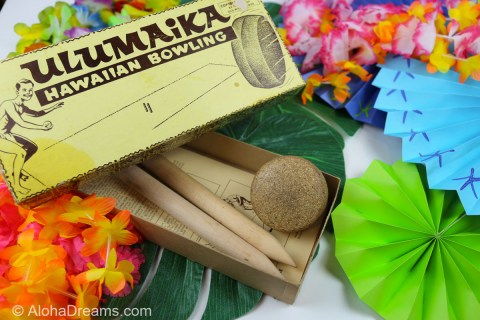
‘Ulu Maika’ (Rolling Stones)
Based on ancient Hawaiian Makahiki games, this game is played similar to horseshoes. Stones somewhat resembling modern hockey pucks were rolled between stakes on specially prepared courses to test a player’s skills, or rolled down long courses to show strength. One of the best of the remaining ‘ulu maika courses, approximately 500 feet long, is located on the island of Moloka’i.
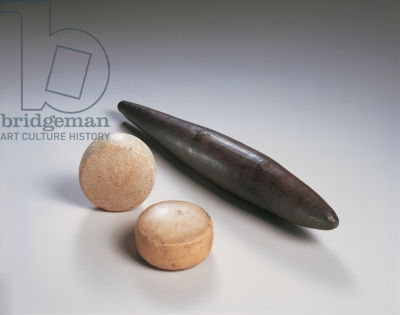
Moa Pahe‘e (Dart Sliding)
Using a wooden dart, which resembles a very small bat without the little grip stop on the end (maybe 8” long) with the skinny end and the fat end, you grasp the skinny end and toss the dart like a bowling ball between two stakes.
Conch Blowing
Blowing a conch shell takes skill: you have to know how to purse your lips, where to place them for the best sound, and how hard to blow. (The sounds made by a novice are hilarious!)
Foot Races
Ancient Hawaiians used to hold foot races to see which warrior was the fastest. You can hold single person races, three legged races, and backwards running races. Watch the first video above, under spear throwing, for an example.
“Haka Moa”
Type of Hawaiian Luau fighting. The contestants do not use their hands, and can only stand on one foot, and try to knock their opponent out of the ring.
Tug O’ War
To play this game you will need a 20’ length of rope, a 6’ length of rope, and a bandana.
Divide your guests into two equal teams. Choose a large grassy or sandy area to play. Place the 6’ rope on the ground in the middle of the chosen area. This marks the centerline. Have teams line up in single file on either side of the centerline, arms length apart. Tie the bandana in the center of the 20’ rope and place over the centerline. Each player grabs the tugging rope and at the signal tries to pull the first member of the other team over the centerline.
.
Card Games
HIGO BANA
This is a card game played with special Hana Fuda cards. I was introduced to it by a friend whose mother was Japanese. She gave me a set of these cards many, many years ago. I’ve even forgotten how to play it has been so long. So I went online to see if I could find the rules. How thrilling to find that this game is played by native Hawaiians under a different name. The cards do not have numbers on them, only beautiful pictures, but they have point values. Along with the rules I found some vendors who sell the cards.
There are only 13 letters in the Hawaiian alphabet: A, E, H, I K, L, M, N, O, P, U and W. The consonants H, K, L, M, N, P, and W are pronounced exactly as in English. If a name ends in a consonant, add a vowel. Always place a vowel between consonants. The following conversion table can be helpful in translating names:
Add some true Island spice to your dinner with genuine Island customs:
Placing a lei over someone’s head is the customary way to welcome or congratulate them. If the person is close in relationship to you, you would give them a honihoni (kiss) also. Leis are usually made of flowers, but can also be made of candies or other decorative items. And when your lei starts to fade and die, don’t toss it in the trash. It is bad luck to throw a lei away. A lei is love and you would never throw love away. Rather cut the string and cast the flowers into the sea or hang the lei outside until it is gone.
I love that it is the custom in Hawaii for young ones to refer to older people as “auntie” or “uncle” when they are old family friends or neighbors of the parents. That is how we raised our kids to do. In Hawaii it is appropriate even to address a stranger as “auntie” or “uncle.” It is friendly yet respectful.
You would never walk into someone’s home in the islands with shoes on. And it is good manners to bring a small gift with you, possibly a dessert, when visiting someone’s home. There is a pidgin phrase, “Make Plate” or “Take Plate” that also shows good guest manners. When you have been invited to share a meal at someone’s home it is customary that you make a plate of food of the leftovers to take home, even if you don’t intend to eat it. By doing this you are being a good guest and not leaving the mess for the host to clean up and put away. Many times all the leftovers are packaged up and taken to the homeless.
Unless you are at a sporting event, it is considered rude to talk loudly, or to act like you are entitled to special treatment. Politeness and reserve are considered a show of good breeding.
Dress is casual, aloha shirts and slacks are worn in place of suits and ties in business, and it is considered rude to stare or look someone in the eye for too long in public places. And when you go away on a trip it is considered thoughtful to bring back gifts “makana” from your journey. Most prized are special foods that are unavailable at home.
.
I’m so happy you stopped by, and I pray your family supper night is such a huge hit that it becomes a favorite monthly tradition. God bless!
.
.
“Let love be without hypocrisy…be kindly affectionate to one another with brotherly love, in honor giving preference to one another…distributing to the needs of the saints, given to hospitality.” Romans 12:9-13
My husband and I discovered a little burger joint soon after moving to south Texas. It’s not a fancy place. In fact it’s kind of grimey looking on the outside. A regular person might even drive right past it and not think twice about it. It’s just a little dive of a place really, along the side of the road in Hondo, TX, but one day the old man and I cowboyed up and gave it a try … and I tell you … we absolutely fell in love with the Santa Fe burger that we ordered that first day. We love it so much it’s all we can ever think about when we drive by. We stop in regularly, on our way through town, just to indulge in its deliciousness. We love it so much we haven’t even ever tried anything else on the menu. You ever find a restaurant like that? They are real sweet about adding a few extra things to our burgers, which is what puts the Santa Fe right over the top. The next thing we know we’ve got it dripping down our arms, not saying a word, chewing as fast as we can to make our nagging tongues happy.
So, because of the couple of little extras I always ask for, I feel like its okay to give you my take on Billy Bobs lovely little sandwich of deliciousness. My version by no means replaces theirs, but it’s a nice little appetizer between trips. I’ll warn you up front that It’s a little bit of work to make, but baby it’s worth it!!!! At least in my book.
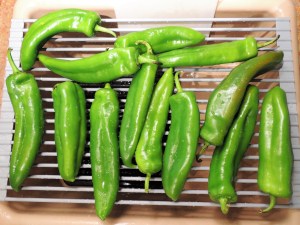
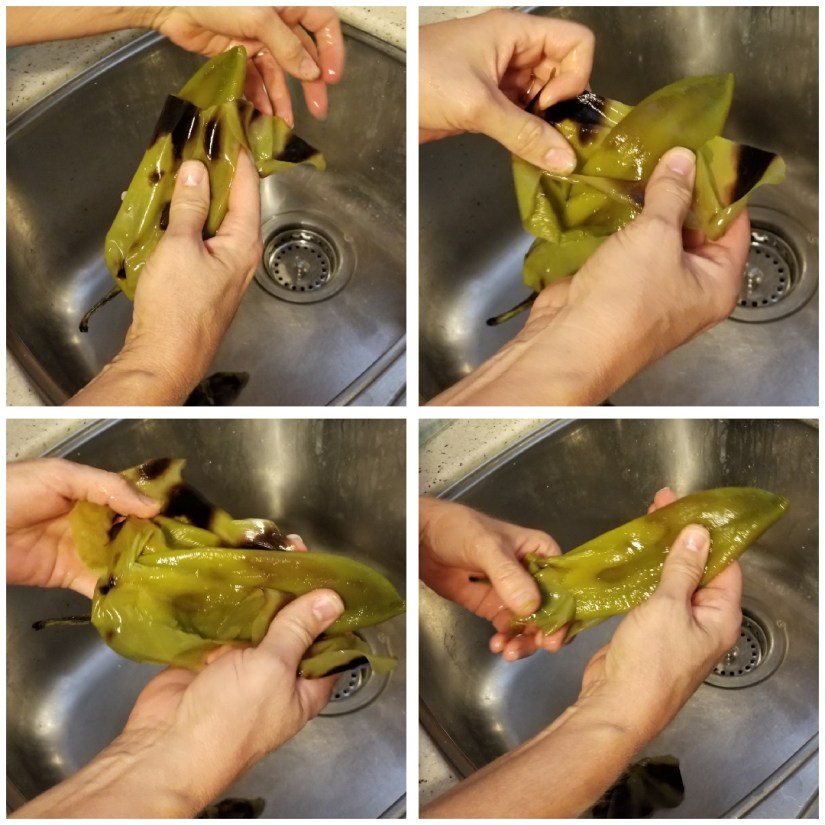
Prepare the Green Chilies
For this recipe you’ll need about two green chilies per person, so about eight should do. I pick out the biggest and most firm Anaheim (Hatch, Fresno, New Mexico) green chilies available at the market (I also grow them in my garden).
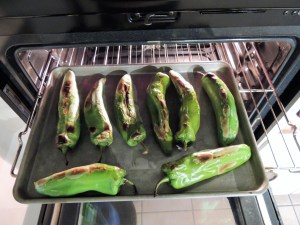
Wash them and dry them off, and then lay them out on a cookie sheet.
Raise one of the oven racks to its highest position in the oven and turn the oven on to BROIL. Allow the oven to warm up, and then put the cookie sheet of chilies in, just under the top heating element.
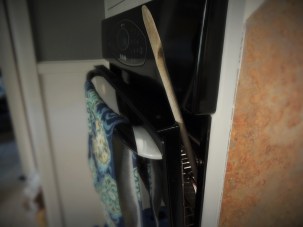
I usually prop a wooden spoon in the door to hold it open a tad, so I can hear the chilies popping and crackling.
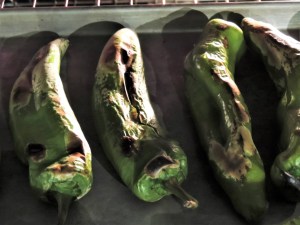
I keep an eye on them, as it doesn’t take long. When I see that they are pretty popped and blistered, and burned on that top side, I open the oven, slide the rack out, and use tongs to turn the chilies a quarter of a turn, and then put them back under the heat. I continue broiling and turning until the chilies are popped and blistered, and charred on all sides.
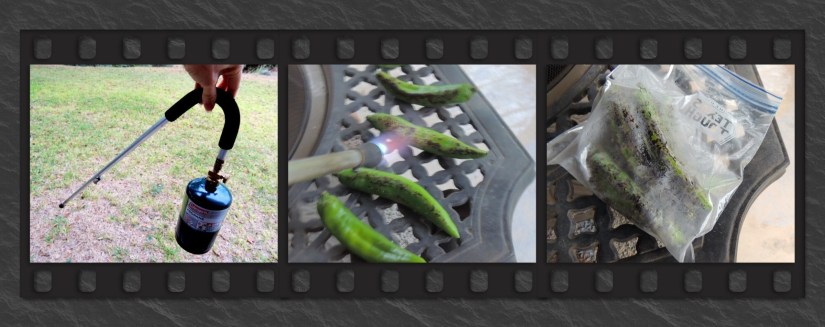
Quickly remove the chilies from the oven with tongs and immediately place them into a plastic Ziploc freezer back. As soon as all the chilies are inside the bag, zip it up, and then let them sit and steam for several minutes, while you work on the rest of your meal.
.
Back in Wyoming there was a certain time in the summer when the green chile trucks would show up in parking lots around town with heaping baskets full of green chilies and a barrel-type roaster that rotated over an open fire. We could buy the amount of chilies we wanted and they would roast them, and then package them up for us to take home. I often bought large amounts of those chilies, took them home and repackaged them (about six chilies to a bag) into plastic zip bags, with their blistered skins left on, but all the air squeezed out, and put them straight into my freezer. Whenever I wanted to make something with green chilies I’d grab a bag and let it thaw for a little bit on the kitchen counter, peel the skins off in the sink, and sometimes remove the seeds and stems (depending upon what I was making), and either use them whole or chop them into pieces for whatever recipe I was doing. SOooooo many ways to use green chilies!!!!
Its unfortunate, but we don’t get those trucks in the little Texas town where I live now, and perhaps not where you live either. The BBQ grill works, but I’m not a fan of standing over a hot grill to babysit chilies on a hot south Texas day. But, in this instance, you’ll be grilling burgers out there anyways, so you may prefer just to do it all on the grill. And maybe you have a hubby who is all about the grill and happy to do them for you! Knuckle bump!!!!
.
UPDATE: Since first posting this blog I got myself a neat little propane weed burner torch for burning those dadgum, infernal sticker burr weeds that grow up in the lawn down here in south Texas around labor day and Valentine’s Day, and I tell you what, it works pretty darn good for that, but it works slicker than snot for roasting chilies outside on the patio firepit on a gorgeous fall afternoon.
The Beef Patties
1 (1-pound) pkg of high quality ground beef plus 1 (1-pound) pkg of ground bison
1 jalapeno, stem removed, seeds and flesh chopped finely
1/2 of a small red onion, chopped finely
1 tsp Salt Lick dry rub seasoning (this is mostly just cayenne and ground black pepper)
Sliced Pepper Jack cheese – to be placed on burgers at the end of grilling
Hamburger buns of choice (Sometimes all I can find are the regular, sesame seed buns, but when I can find a good, soft, ciabatta-type bun, I use that).
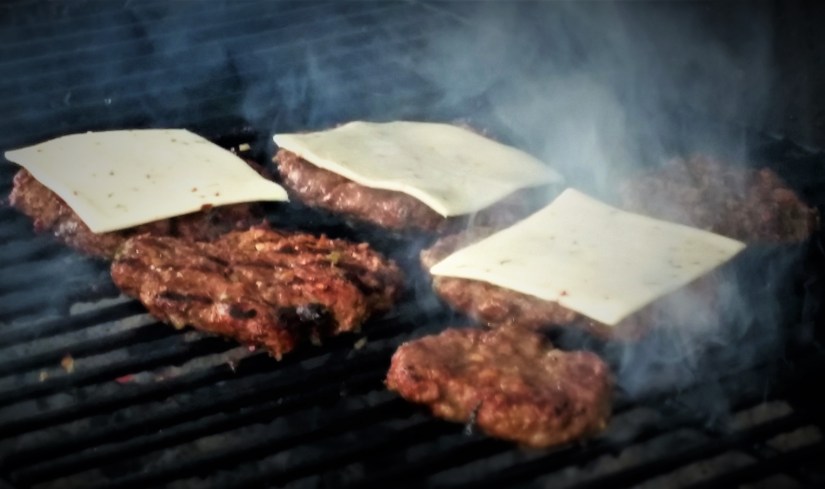
Mix together gently and form into four or five good-sized patties. Set aside while you prepare the following ingredients, and then grill the burgers over hot coals on the BBQ. Add the cheese during the last minute or so of grilling.
.
Toppings
Bacon (2 slices per burger), the best is the thicker sliced applewood bacon, fried crispy…
(but if I’m in a hurry and don’t have leftover bacon from breakfast, I’ll use the precooked bacon available at the grocery store and go with 3 or 4 slices per burger)
Peel the skins off the green chilies, and remove seeds and stems, but leave whole
Sliced jalapeno
Sliced red onion
Sliced heirloom tomatoes
Romaine lettuce leaves, washed and dried
Dill pickle slices
Garlic Mayonaise (mash 1 clove of garlic and mix into 2/3 cup of mayo, I often add a sprinkle of chili powder and a squeeze of lime, and sometimes some minced cilantro)
Dijon mustard
.
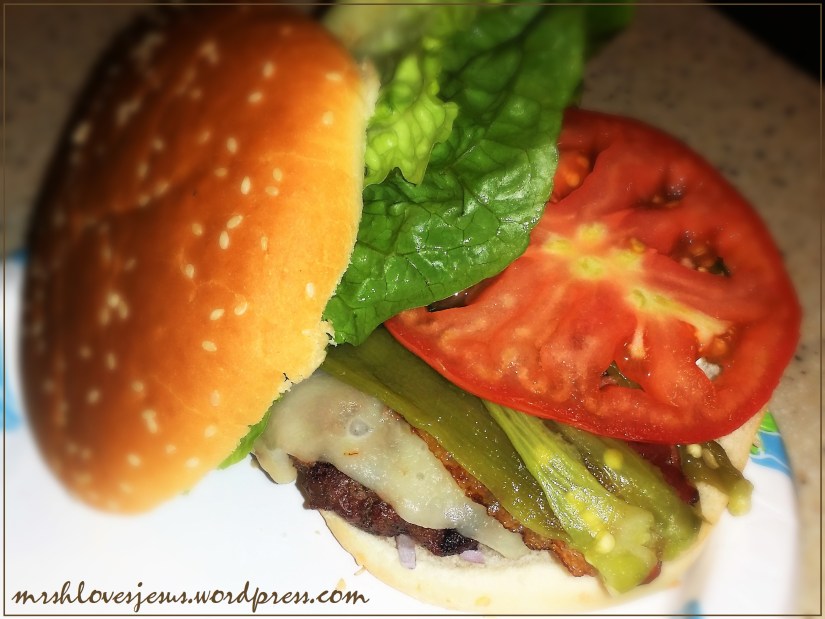
To Assemble the Burger
Some like their buns toasted
Spread some mayo over the bun halves
Squirt on some mustard
Lay a whole slice of red onion down
Place a few slices of jalapeno on top of the onion
Then a freshly cooked beef pattie with melted cheese
Layer on two Green Chilies, two slices of cooked bacon, a slice of tomato, a folded leaf of lettuce, (and a couple slices of dill pickle if desired)
Place the top of bun in place
Mash down so you can fit it in your mouth and ENJOY!!!!!
.
For this Memorial Day,
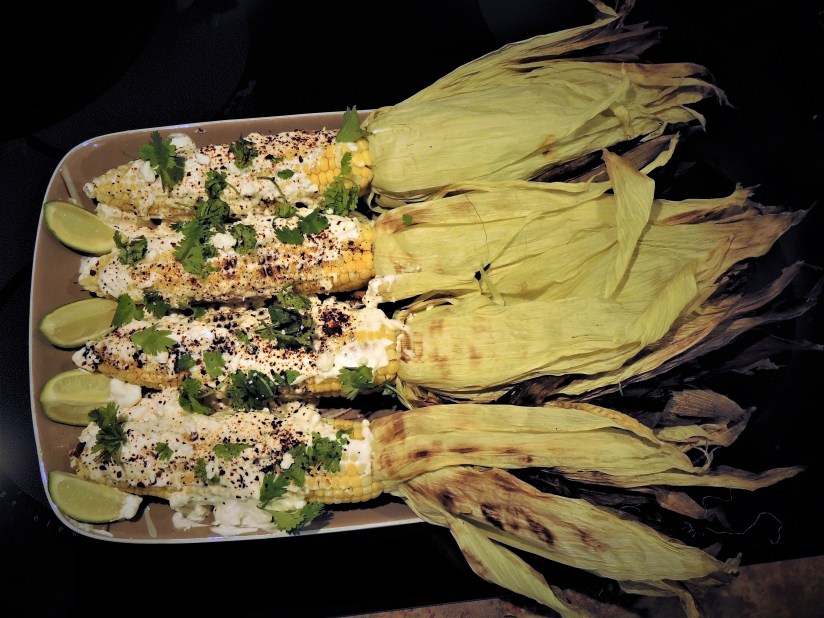
… I made these burgers and served them with my Jalapeno Potato Salad (from Cowboy Backyard BBQ), plus my latest favorite food: Mexican Street Corn, and sliced watermelon for dessert.
.
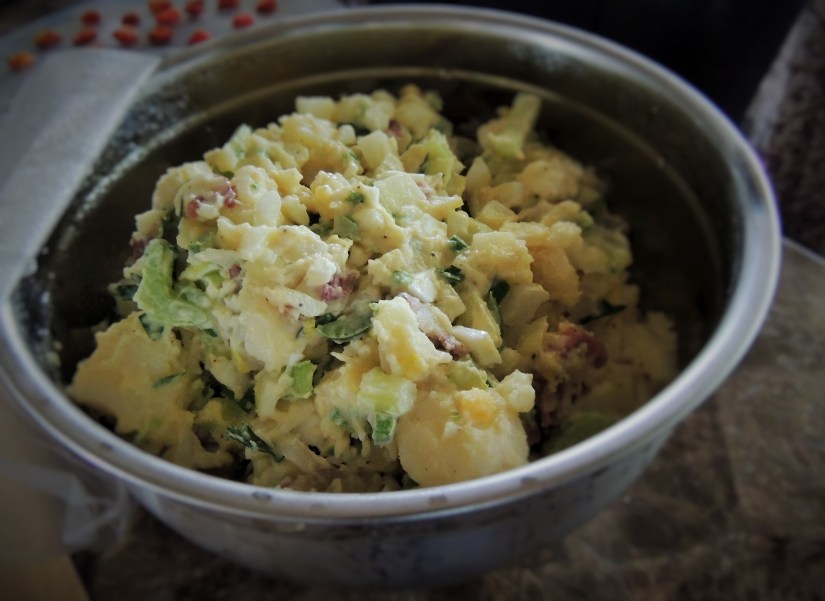
Mama’s POTATO SALAD
Ingredients
6 large red potatoes cooked until tender and cubed, skins on or off as preferred
4 hard boiled eggs, cooled and chopped
1/2 large red onion diced
3 stalks of celery chopped
2 Tbsp sweet pickle relish
1 small sprig of dill weed, chopped
1 bunch of green onions chopped
1 or 2 large jalapenos, seeds and stems removed, diced
Sauce Ingredients:
1 cups Mayonnaise (plus more or less, as you like it)
3 Tbsp red wine vinegar
1 tsp Sea Salt (plus more as desired)
2 Tbsp sugar
1 tsp ground pepper
Directions:
Put first eight ingredients in a very large bowl. Mix up sauce ingredients and pour over the ingredients in the bowl. Toss to coat. Cover and refrigerate until ready to serve.
Optional additions:
Add a half-cup of blue cheese crumbles and a quarter cup of crispy crumbled bacon as a garnish on top of potato salad.
.
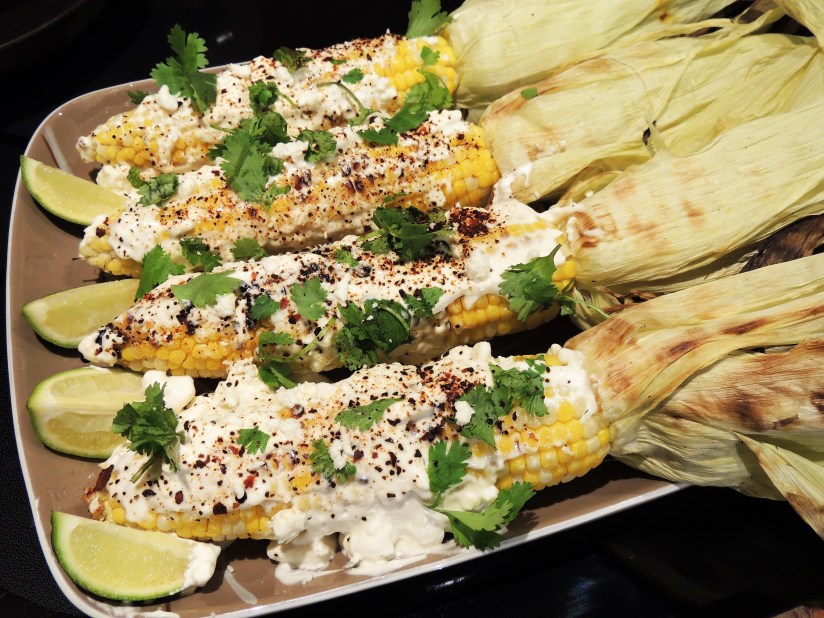
Colleen’s Mexican Street Corn
8 ears fresh sweet corn (leave the husks and stems on)
1/2 cup mayonnaise
1 Tbsp Mexican crema (my grocer carries two types, a sweet cream type,which tastes like heavy whipping cream, and a sour cream kind. Both have a slightly thicker consistency than whipping cream)
1/2 cup finely crumbled cotija or Queso Fresco cheese
1/2 teaspoon chili powder (I make my own blend, see recipe below)
1 medium clove garlic, mashed and finely minced
1/4 cup finely chopped fresh cilantro leaves
4 or 5 limes, cut into wedges
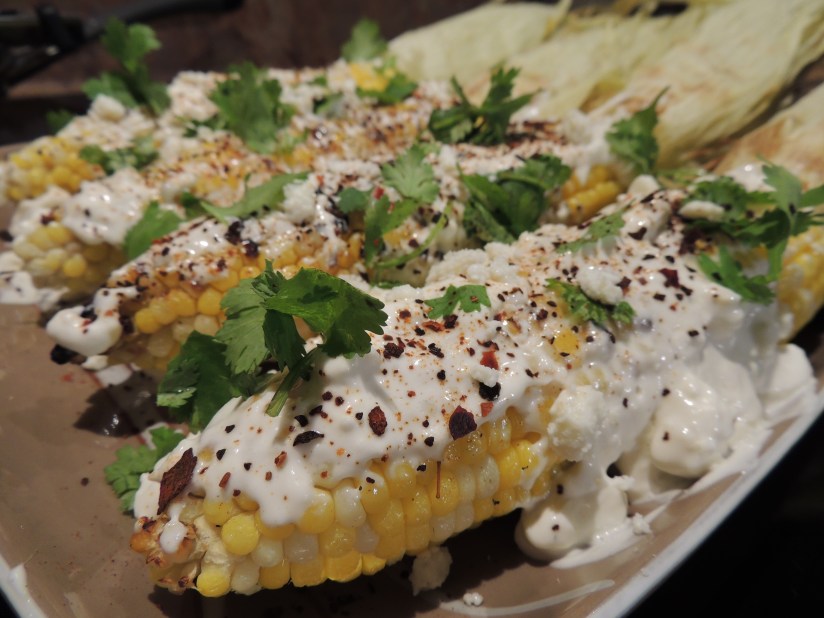
I grilled my corn in the husks on the grill, turning about every 5 minutes until charred on all sides, and then I pulled the husks down over the stems (using oven mitt to protect my hands from burning) and returned the corn to the grill for a short time (about 3 minutes) to give the kernels that charred effect. What works even better though is that nifty little propane torch I told you about above. I left the husks attached for a decorative effect, but now as I look at these photos I’m thinking they might have been even cuter if I had tied something around each husk, like a piece of raffia or something, to bundle them together and anchor them to the stems, turning them into decorative “handles.” NOTE: The corn can also be shucked and “grilled” in the oven at 425 degrees F, turning about every 7 minutes or so until cooked all the way around. Once it is cooked on all sides and has some charred spots it’s time to dress it up.
While the corn is grilling, mix together the mayo (please don’t use the fat-free stuff. I know it may be healthier for you, but really, you must live a little!!! At this just this one meal in your lifetime!), crema, garlic, and add about 1/4 tsp of the chili powder. Juice and zest a couple of the limes and then add the juice and zest to the mayo mixture. Toss in about half of the crumbled cotija (Queso Fresco). Mix well and keep in fridge until ready to use. Cut the remaining limes into wedges and save for serving.
As soon as the corn is grilled, spread each cob with a generous amount of the mayo mix on all sides. Don’t be chincy. Follow with a sprinkling all around of chili powder, and then cheese crumbles. Sprinkle some cilantro on top, and a few extra sprinkles of the cheese. Serve immediately with a wedge of lime for each cob!
You’ve died and gone to heaven, right? I’m there with ya!!!!!!
Colleen’s Homemade Chili Powder
3 Ancho Chiles (dried), stemmed, seeded, and sliced
3 Cascabel/Guajillo chiles (dried), stemmed, seeded, and sliced
4 Arbol/Cayenne chiles (dried), stemmed, seeded, and sliced
2 Pasilla chiles (dried), stemmed, seeded, and sliced
2 New Mexico Red chiles (dried), stemmed, seeded, and sliced
1 Tablespoon Cumin seeds
1 Tablespoon dried Mexican Oregano
1 Tablespoon hot Paprika
Chili Pequin to taste (I sometimes crush these little guys separately and only add it to single portions, as it really brings the heat)
Place the chiles and cumin seeds in a saute pan or cast iron skillet and toast over medium heat about 3 minutes. Remove from heat and place in a glass bowl to cool completely. Once cool, place in a blender, along with the other ingredients and process until a fine powder. Allow the powder to settle for several minutes before lifting the lid. Store in an airtight container for up to 6 months. Use for making chili, to season corn, or in BBQ sauces and dry rubs.
.
“Prepare the table, watch in the watchtower, eat, drink: arise, ye princes, [and] anoint the shield…” Isaiah 21:5